Barely Legal: Building LEGO with Dubious Connections
/Best of BrickNerd — Article originally published January 8, 2021.

No one seems to have a set definition of what is and what isn’t an allowed LEGO building technique. These collective norms in the fan community are called “legal” or “illegal” techniques based on a now-infamous presentation by LEGO designer Jamie Berard. Rules are routinely stretched, and everyone has a long and convoluted personal definition of what is considered purist—and what is not. In this article, I am going to take you through some “barely legal” yet purist connection points used in my model of North Vancouver Streetcar 153. But be forewarned, these techniques could open a pathway to many abilities some consider to be... unnaturally awesome!
While these techniques are certainly not new discoveries, I’m positive that there is a likely audience that might find these connection points intriguing.
Flextube

Very cool and very legal!
Flextube is the primary LEGO element I use to create unorthodox connections. It’s malleable and most importantly, according to official LEGO instructions like those from the Space Needle Architecture set, you are allowed to cut it. The same goes for pneumatic tubing. The combination of the malleability and cutability of this element allows for many angles and connection points to be achieved in MOCs that cannot normally be achieved otherwise.
ThE FLEXTUBE HIGHLIGHTED IN BLUE is used to clip the front cab to the body of the car.
For example, this cross-section of the streetcar shows many dubious connection points and techniques. Looking toward the bottom area highlighted in blue, you can see flextube connected to minifigure hands to achieve a slight angle for the side paneling. It is also used as a connection point to clip on the front of the cab to the body of the car.
Flextube-Pneumatic Studs
Have you ever needed a plate with studs on both the top and bottom? Well, now you can make your own! You can actually combine flextube and pneumatic tubing to create your own studs, as a way to fit two plates together bottom side-down.
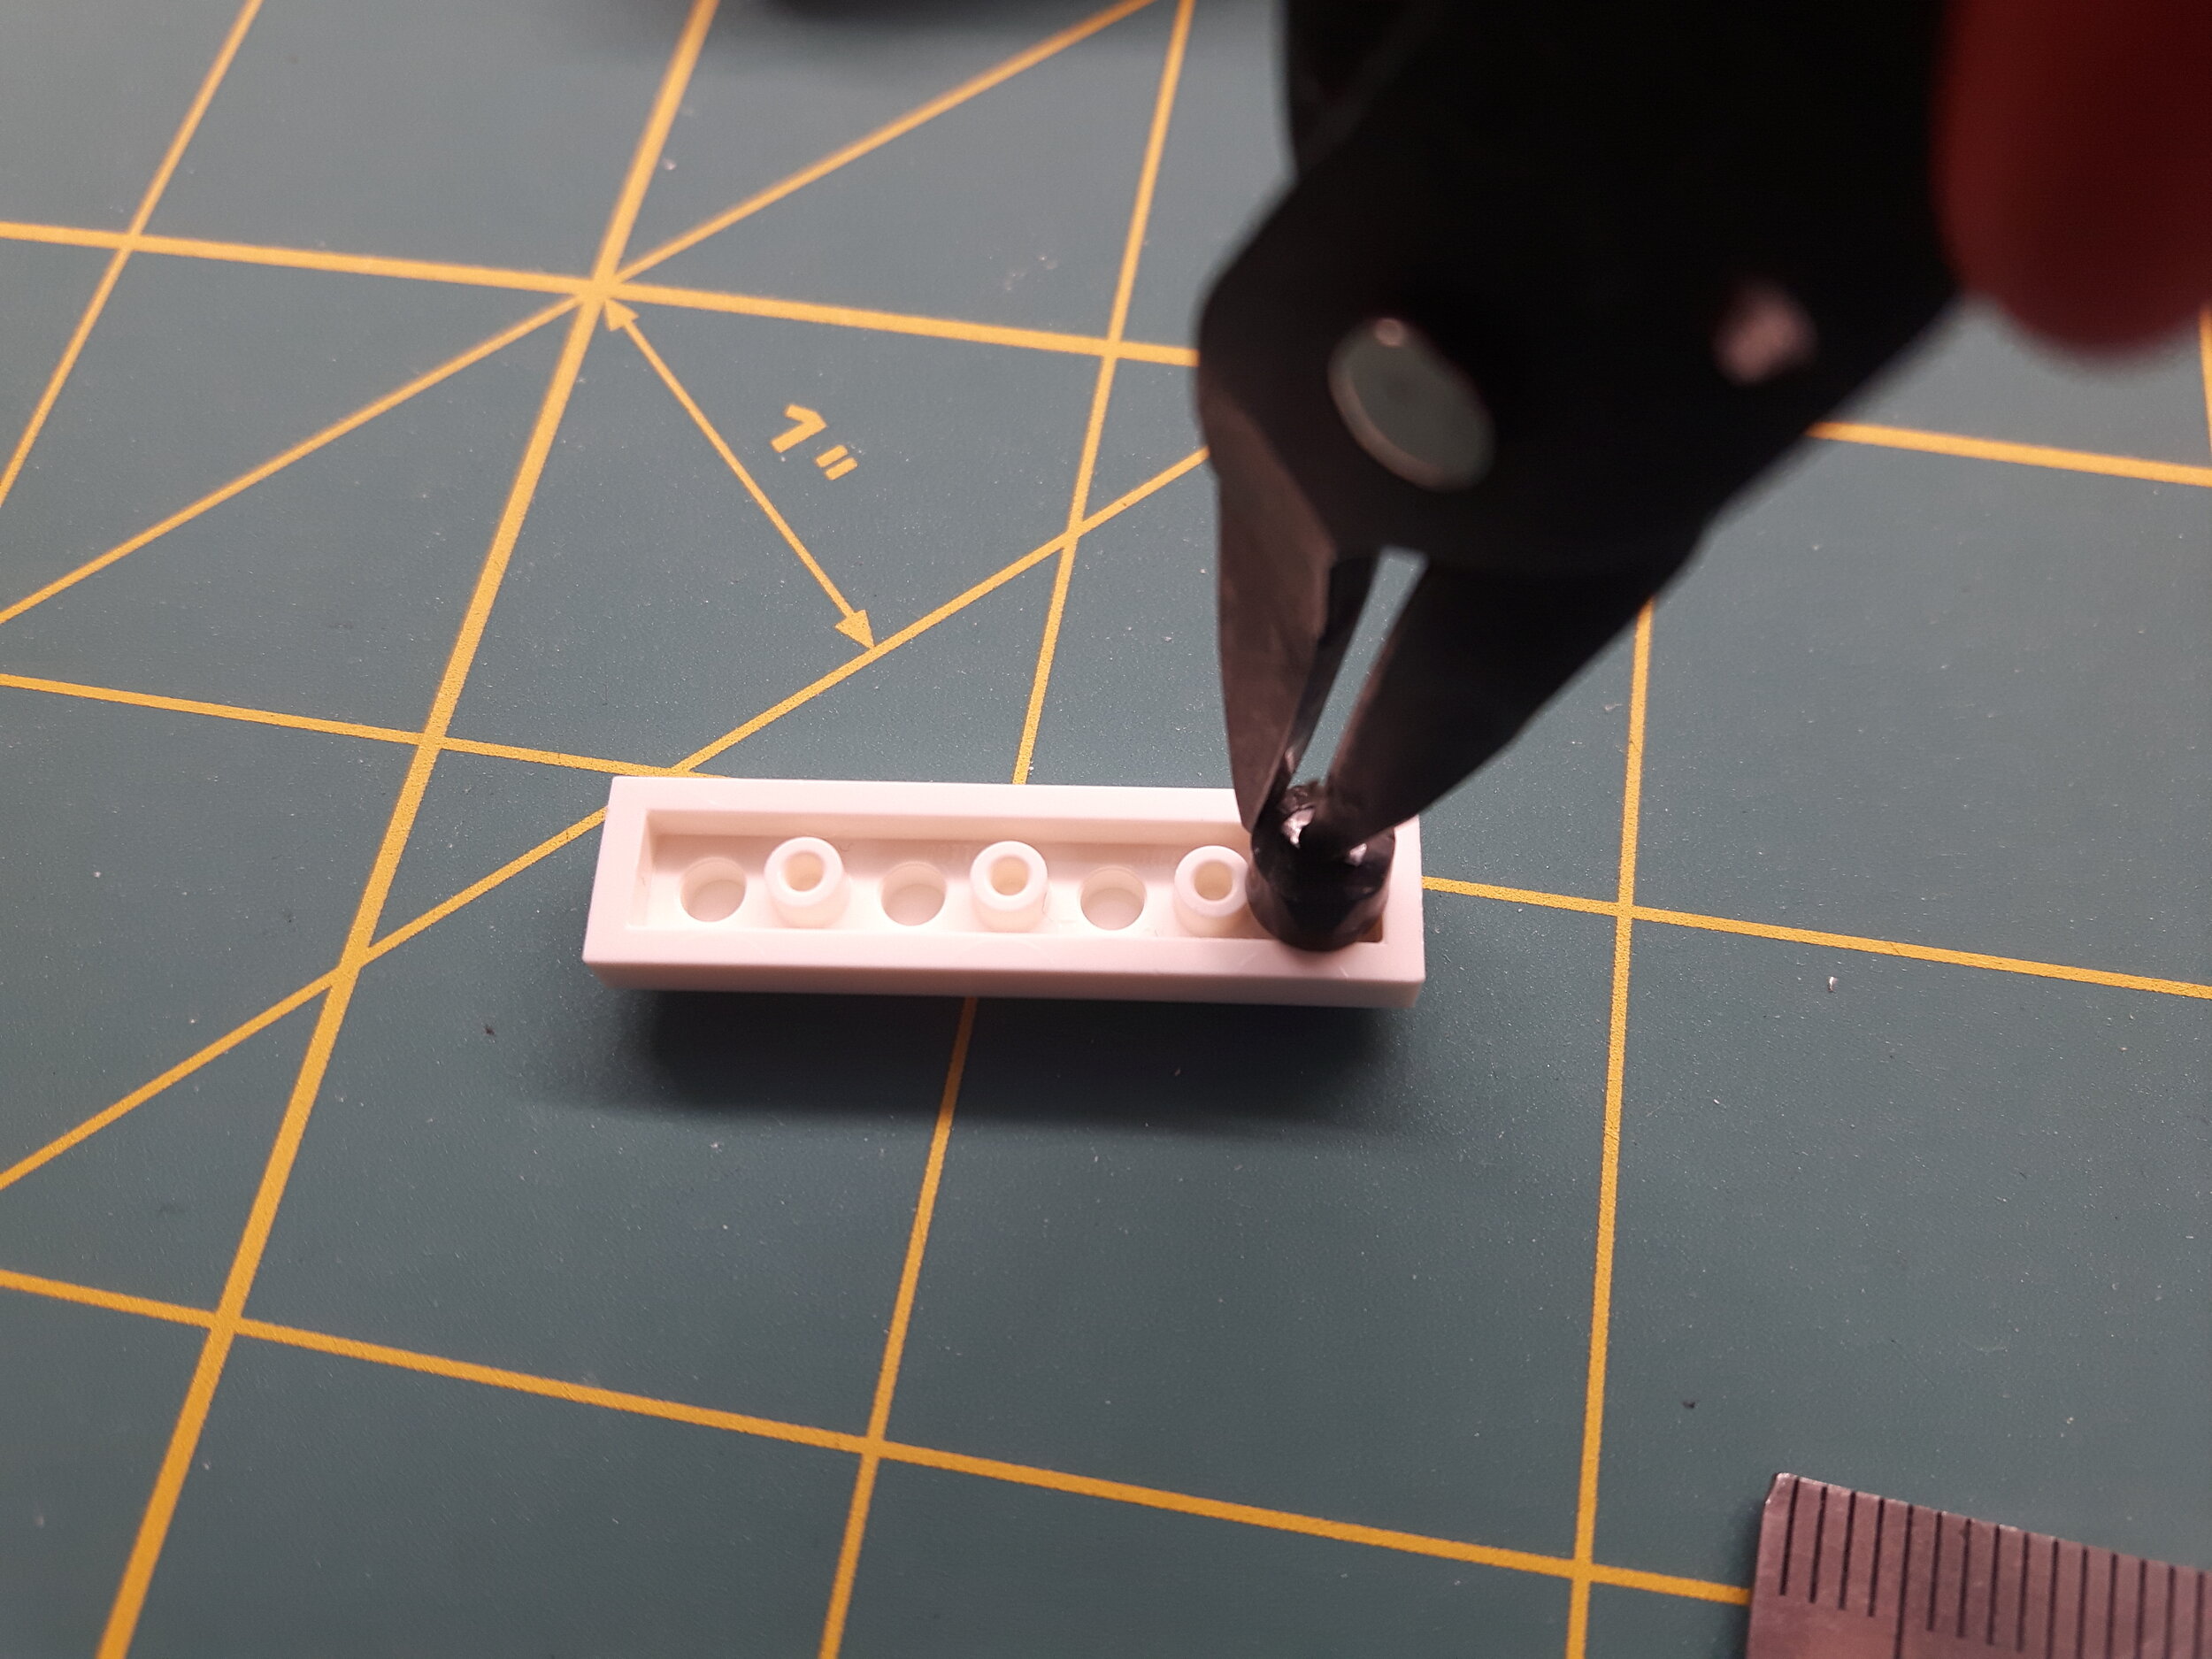
Creating these studs is not difficult. You will require a piece of flextube and a piece of pneumatic tube, a sharp blade, and preferably a ruler and pair of pliers.


To begin making the incredibly useful “tube studs,” we need to first make the pneumatic tube a bit more rigid. Plunge the flextube into the pneumatic tube, using a twisting motion when combining them.

While you were building Lego, I was studying the blade.
The two pieces should look like the photo above. Make sure to align the two tubes as straight as you can make them. The flextube should be inserted about 3-4mm into the pneumatic tube.

Next, you need to cut off any excess protruding flextube. Then you can trim your “tube stud” to any length you require. For a plate-to-plate connection using this flextube/pneumatic combo, you will need to cut the tube to about 3mm.

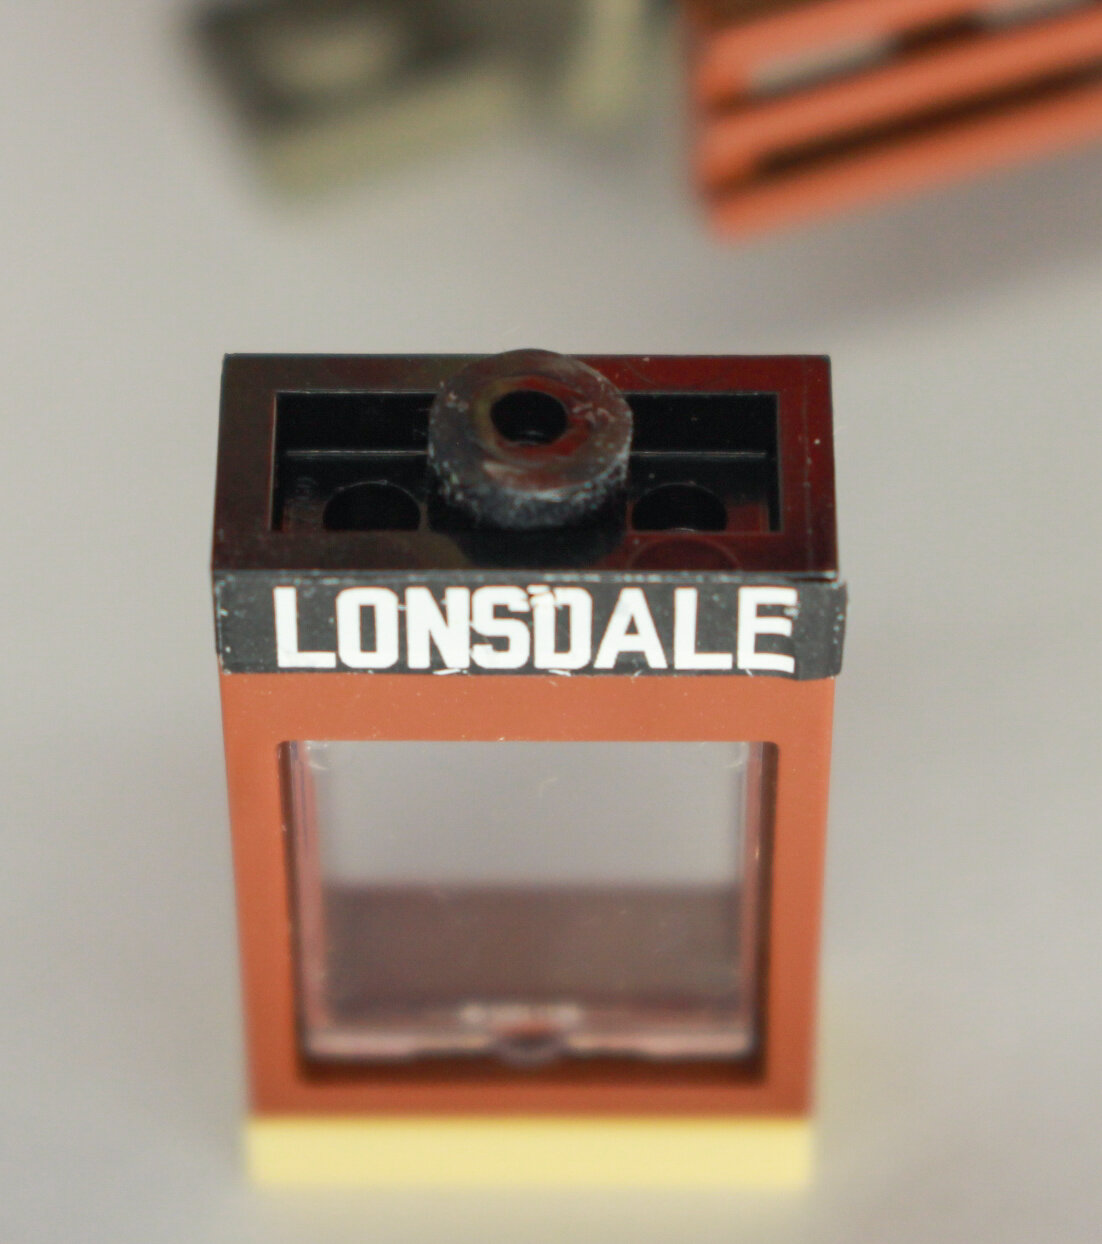
Using the pliers, carefully twist the stud into place in the base of a LEGO plate. Be careful to not dislodge the flextube inside the pneumatic tube, else you’ll likely have to make a new stud.


From here it is easy. Twist the opposing plate onto the tube stud, and your connection is complete! There are three points on the streetcar that use variants of this technique, highlighted below in blue.


As you can see, I have used a tube stud as a decorative element by inserting it into a 1x2 technic brick w/ two holes, and then threading a string that is then attached to the trolley pole.

I also used a tube stud technique as a way to invert the front windscreen. Since the window is assembly is built upside-down, I needed a stud to connect it to the roofing. By utilizng a tube stud on the underside of a 1x2 plate applied to the centre pin, this connection can be achieved. The bottom of the centre-windscreen is also connected to the lower part of the cab via this method.
String
Many times, LEGO string can be used as a connection point when you’ve absolutely exhausted all other options. A string can be threaded through flextube, tied in various configurations, or run underneath various connections without losing too much clutch.

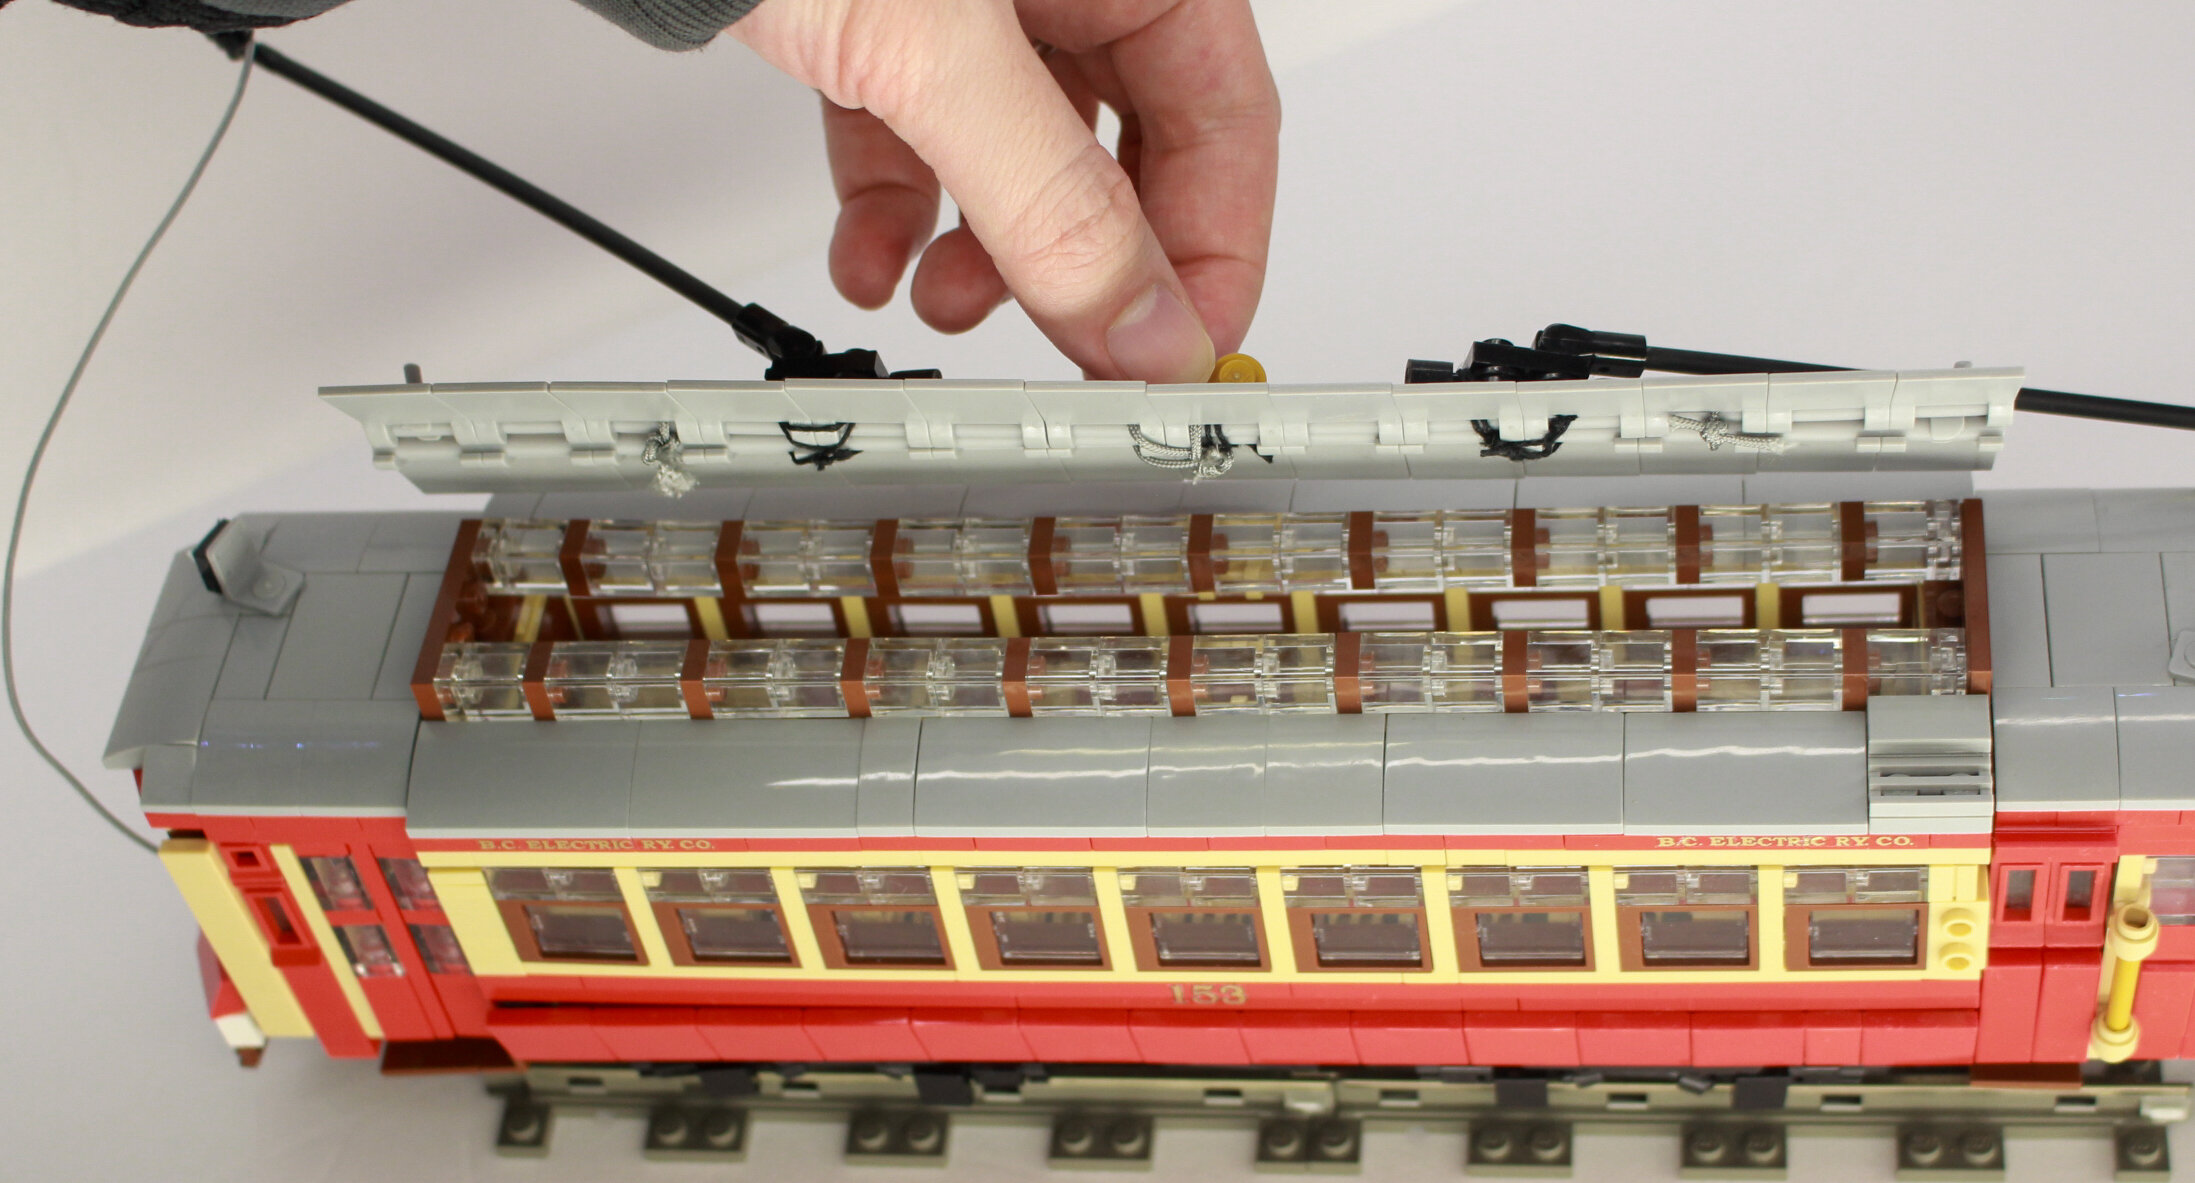

The roof of my streetcar is actually held together with string as you can see above. String also is used to secure the trolley pole bases to the roof.


I also use string when I have no way to cover and gaps in the body of my model streetcar. Above, you can see how I threaded string through flextube to frame the front windows, pinning the string in between plates to secure it.
Gravity
In some cases, gravity is your friend. While not technically a connection, it is an official technique used in many interesting ways. For example, by sacrificing durability for realism, I elected to drop sections of the roof onto the body of the model using gravity alone. But why, you ask? Well, if I were to connect everything via traditional connection points, the roofline would sit too high in comparison to its real-life counterpart.


As you can see, the upper line of windows are inset without any connecting points, and the roof sits on top of them. Though you can’t see it, the central body of the streetcar also sits freely atop the chassis.


As long as you are not planning to take your models into space, using gravity to your advantage is a viable connection technique—though you need to take care when moving the models or setting them for display.
Minifig Hands
Minifigure hands are extremely useful when combined with flextube. You can use them to create subtle angles and make connection points in awkward and confined spaces. You saw one example higher in this article, but here are quite a few more instances of this technique in the streetcar model.


To achieve the slope on the back of the streetcar, you can see it would be nigh impossible to connect it to the body of the model in any traditional way. Instead, I used a minifig hand to create the connection point. As displayed, a minifig hand holds a piece of flextube with a ring of pneumatic tube on the end to create a tube stud, thus connecting the 2x1 slope to the hand. An additional ring of pneumatic tube on the wrist of the hand is then wedged into the base of the cab to hold it in place.


The pilot (read: cowcatcher, but for people) is made by clipping two grille tiles into minifig hands with a piece of flextube again around their wrists and attached underneath.
For a closer view, here you can see the side paneling clipped on with a minifig hand on each end. The hand is inserted into the flextube that is connected to the cab. Then a stud with bar is held by the hand which secures the side panels.


Conclusion
While certainly tedious to employ, the results of these delicate and morally questionable connection points speak for themselves. By using them, you achieve more subtlety and realism while still utilizing all LEGO elements. I highly encourage any of you who have not built with these “barely legal” techniques to try them out—if not just for attempting outside-the-box thinking, but so that you too may anger the community purists!

What barely legal or dubious connections do you use while building LEGO MOCs? Leave your thoughts and experiences in the comments below.
Do you want to help BrickNerd continue publishing articles like this one? Become a top patron like Charlie Stephens, Marc & Liz Puleo, Paige Mueller, Rob Klingberg from Brickstuff, John & Joshua Hanlon from Beyond the Brick, Megan Lum, Andy Price, Lukas Kurth from StoneWars, Wayne Tyler, Monica Innis, Dan Church, and Roxanne Baxter to show your support, get early access, exclusive swag and more.