Ballasting Track: The "X" Factor for Your Train Layout
/Best of BrickNerd: Weekend Highlight — Article originally published June 11, 2021.
There is something special about a LEGO train layout that triggers immediate excitement and delight in folks of all ages. At least that has been my experience in nearly a decade of publicly exhibiting train layouts of various shapes and sizes both solo and collaborative. Beyond the obvious factors such as the movement of trains and the large size of a typical layout, there are certain “X” factors which also contribute to the visual appeal of a LEGO train layout.
One of those “X” factors (and the subject of this article) is the so-called “ballasting” of track. That is, the decoration of standard LEGO / L-Gauge track elements to make them appear more “realistic” and less toy-like.
What is Ballast?
Image via Wikipedia
So what does the term “ballasting” actually mean? “Ballast” refers to the layer of supporting material on which train tracks are laid. This is typically a layer of crushed stone acting as a stable roadbed that supports the track. The ballast resists displacement of the track—especially important when under the severe load of a passing train. This keeps the track both flat and aligned to maintain safe train operation. Additionally, ballast facilitates water drainage and resists vegetation growth.
Obviously, LEGO trains do not present the same civil engineering requirements as real trains nor do we need to worry about rainwater management! The reason we ballast our track is to transform its appearance into a realistic model of track. This is part of a broader goal of treating our LEGO train layouts as any other scale model train layout. Every element of a layout deserves the same attention to detail and this includes the track and the surrounding infrastructure typical of a real railway.
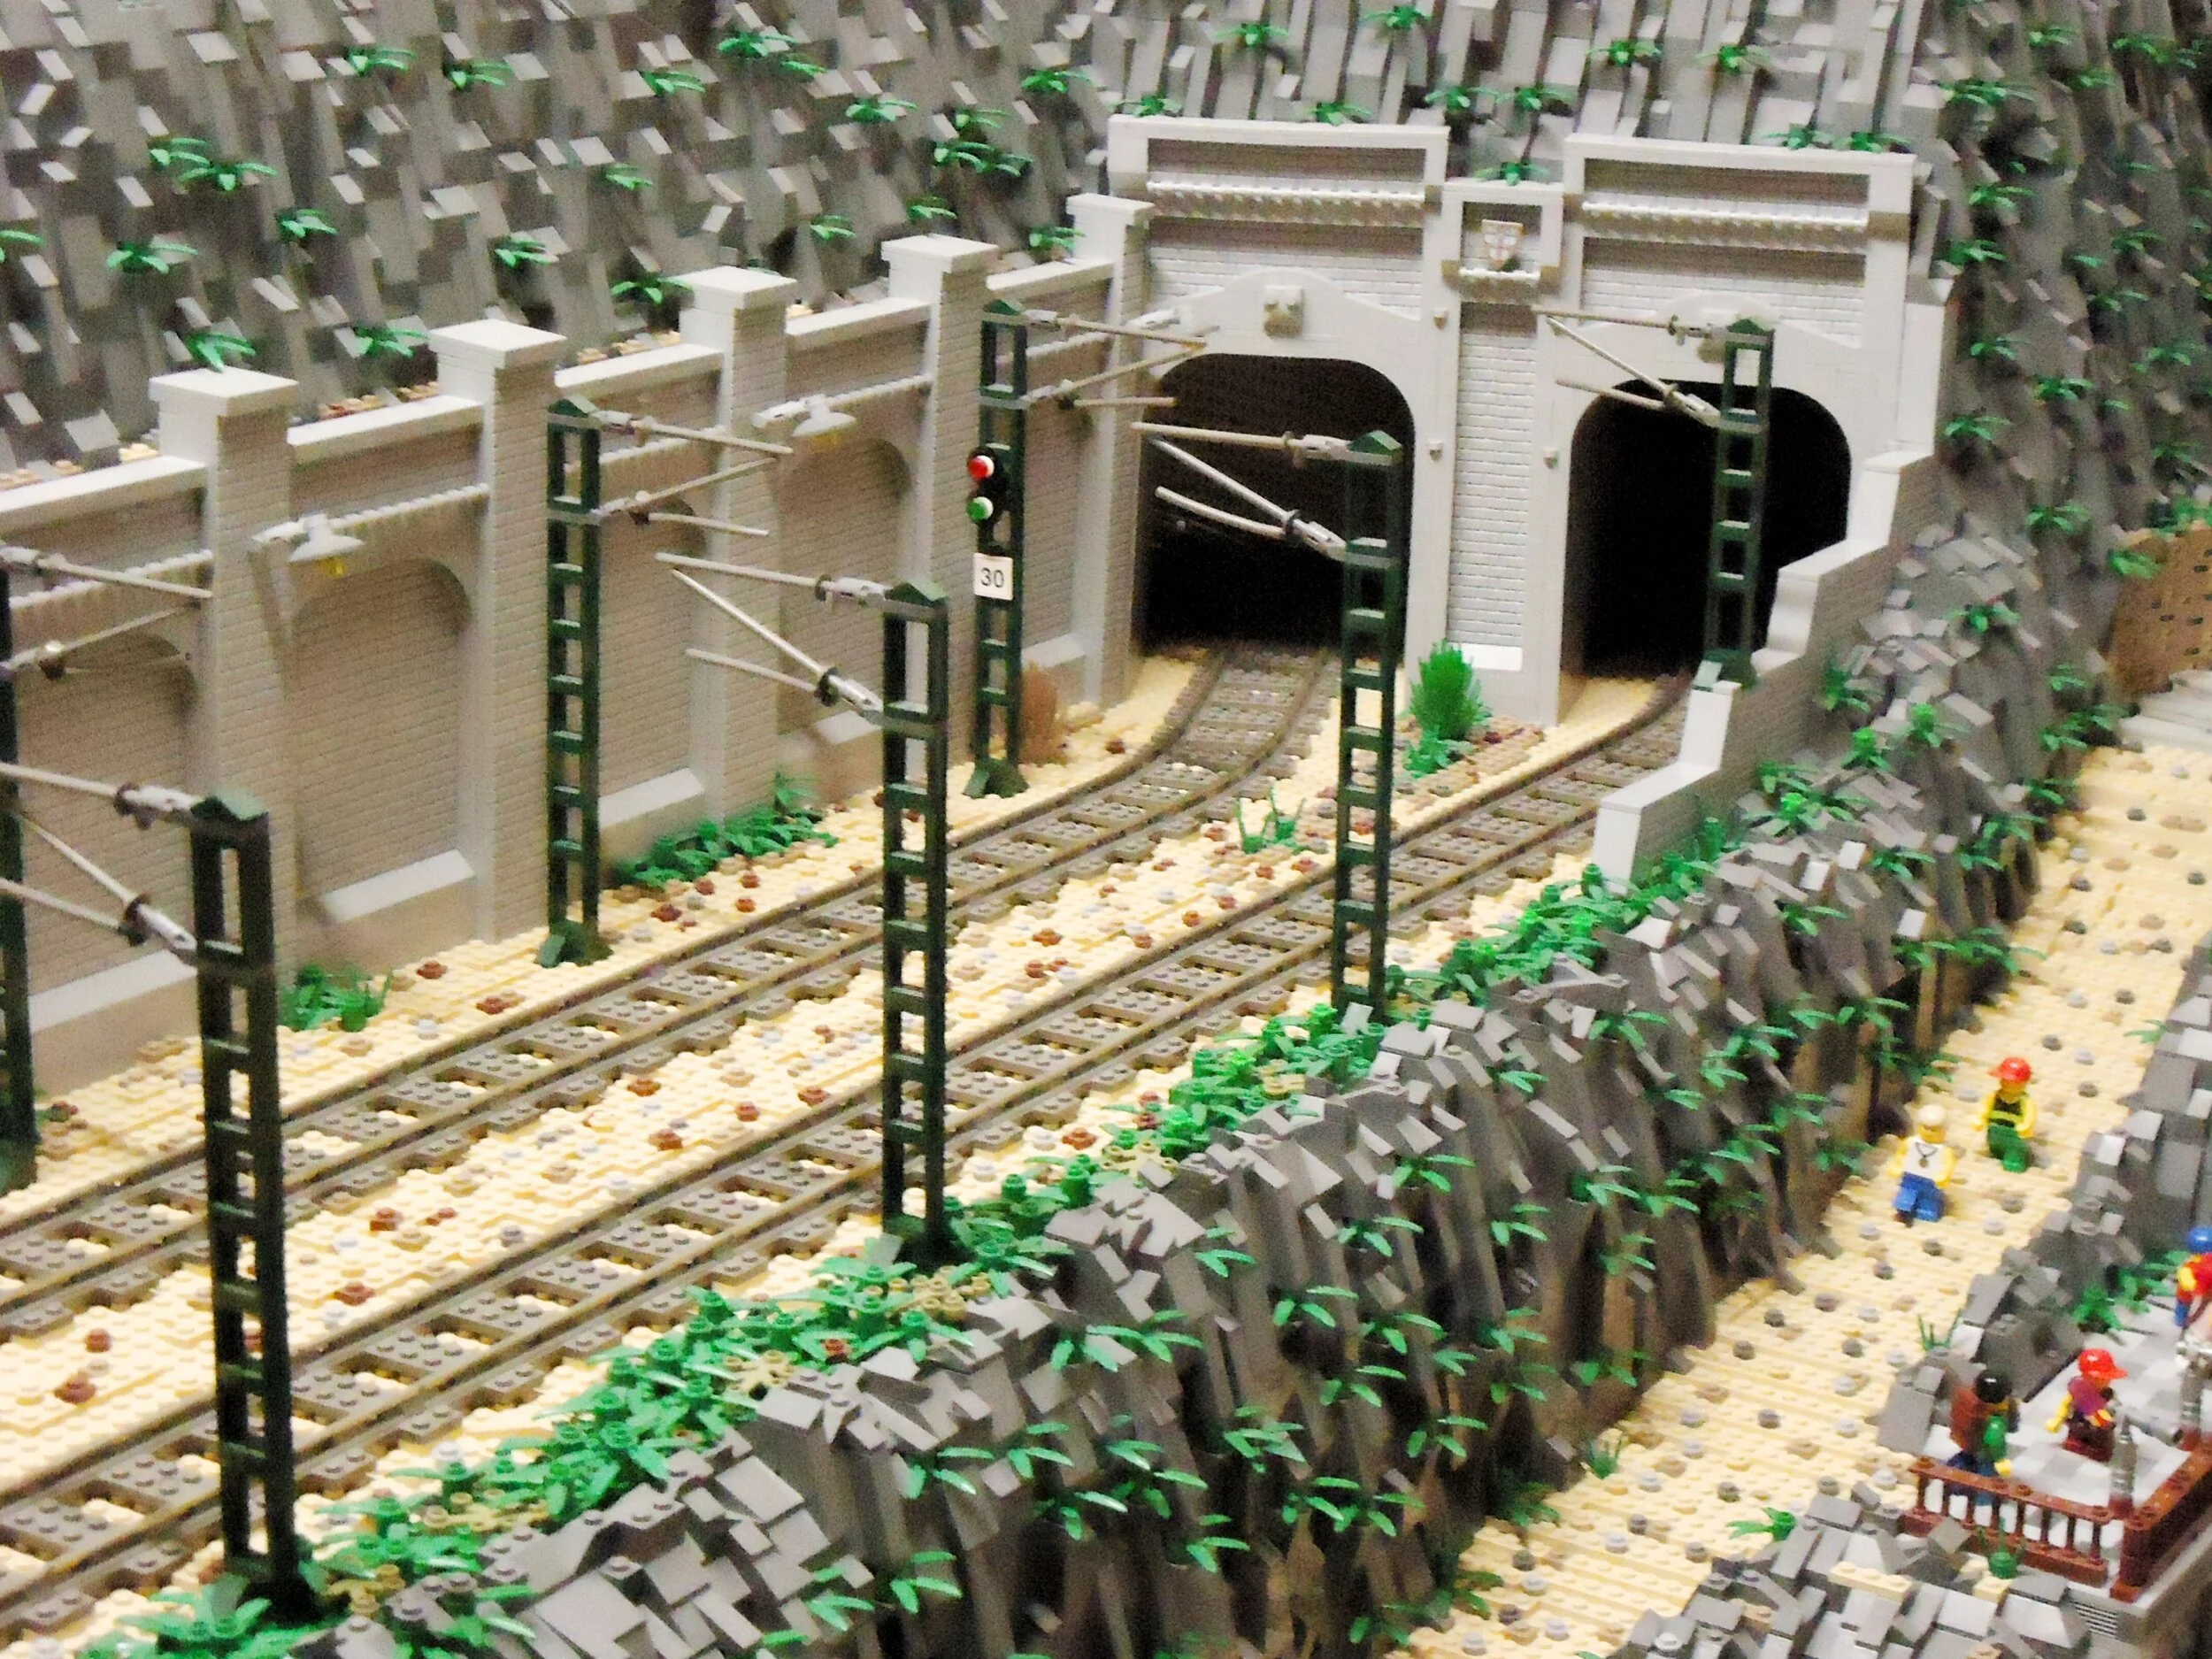
Styles of Ballasting LEGO Track

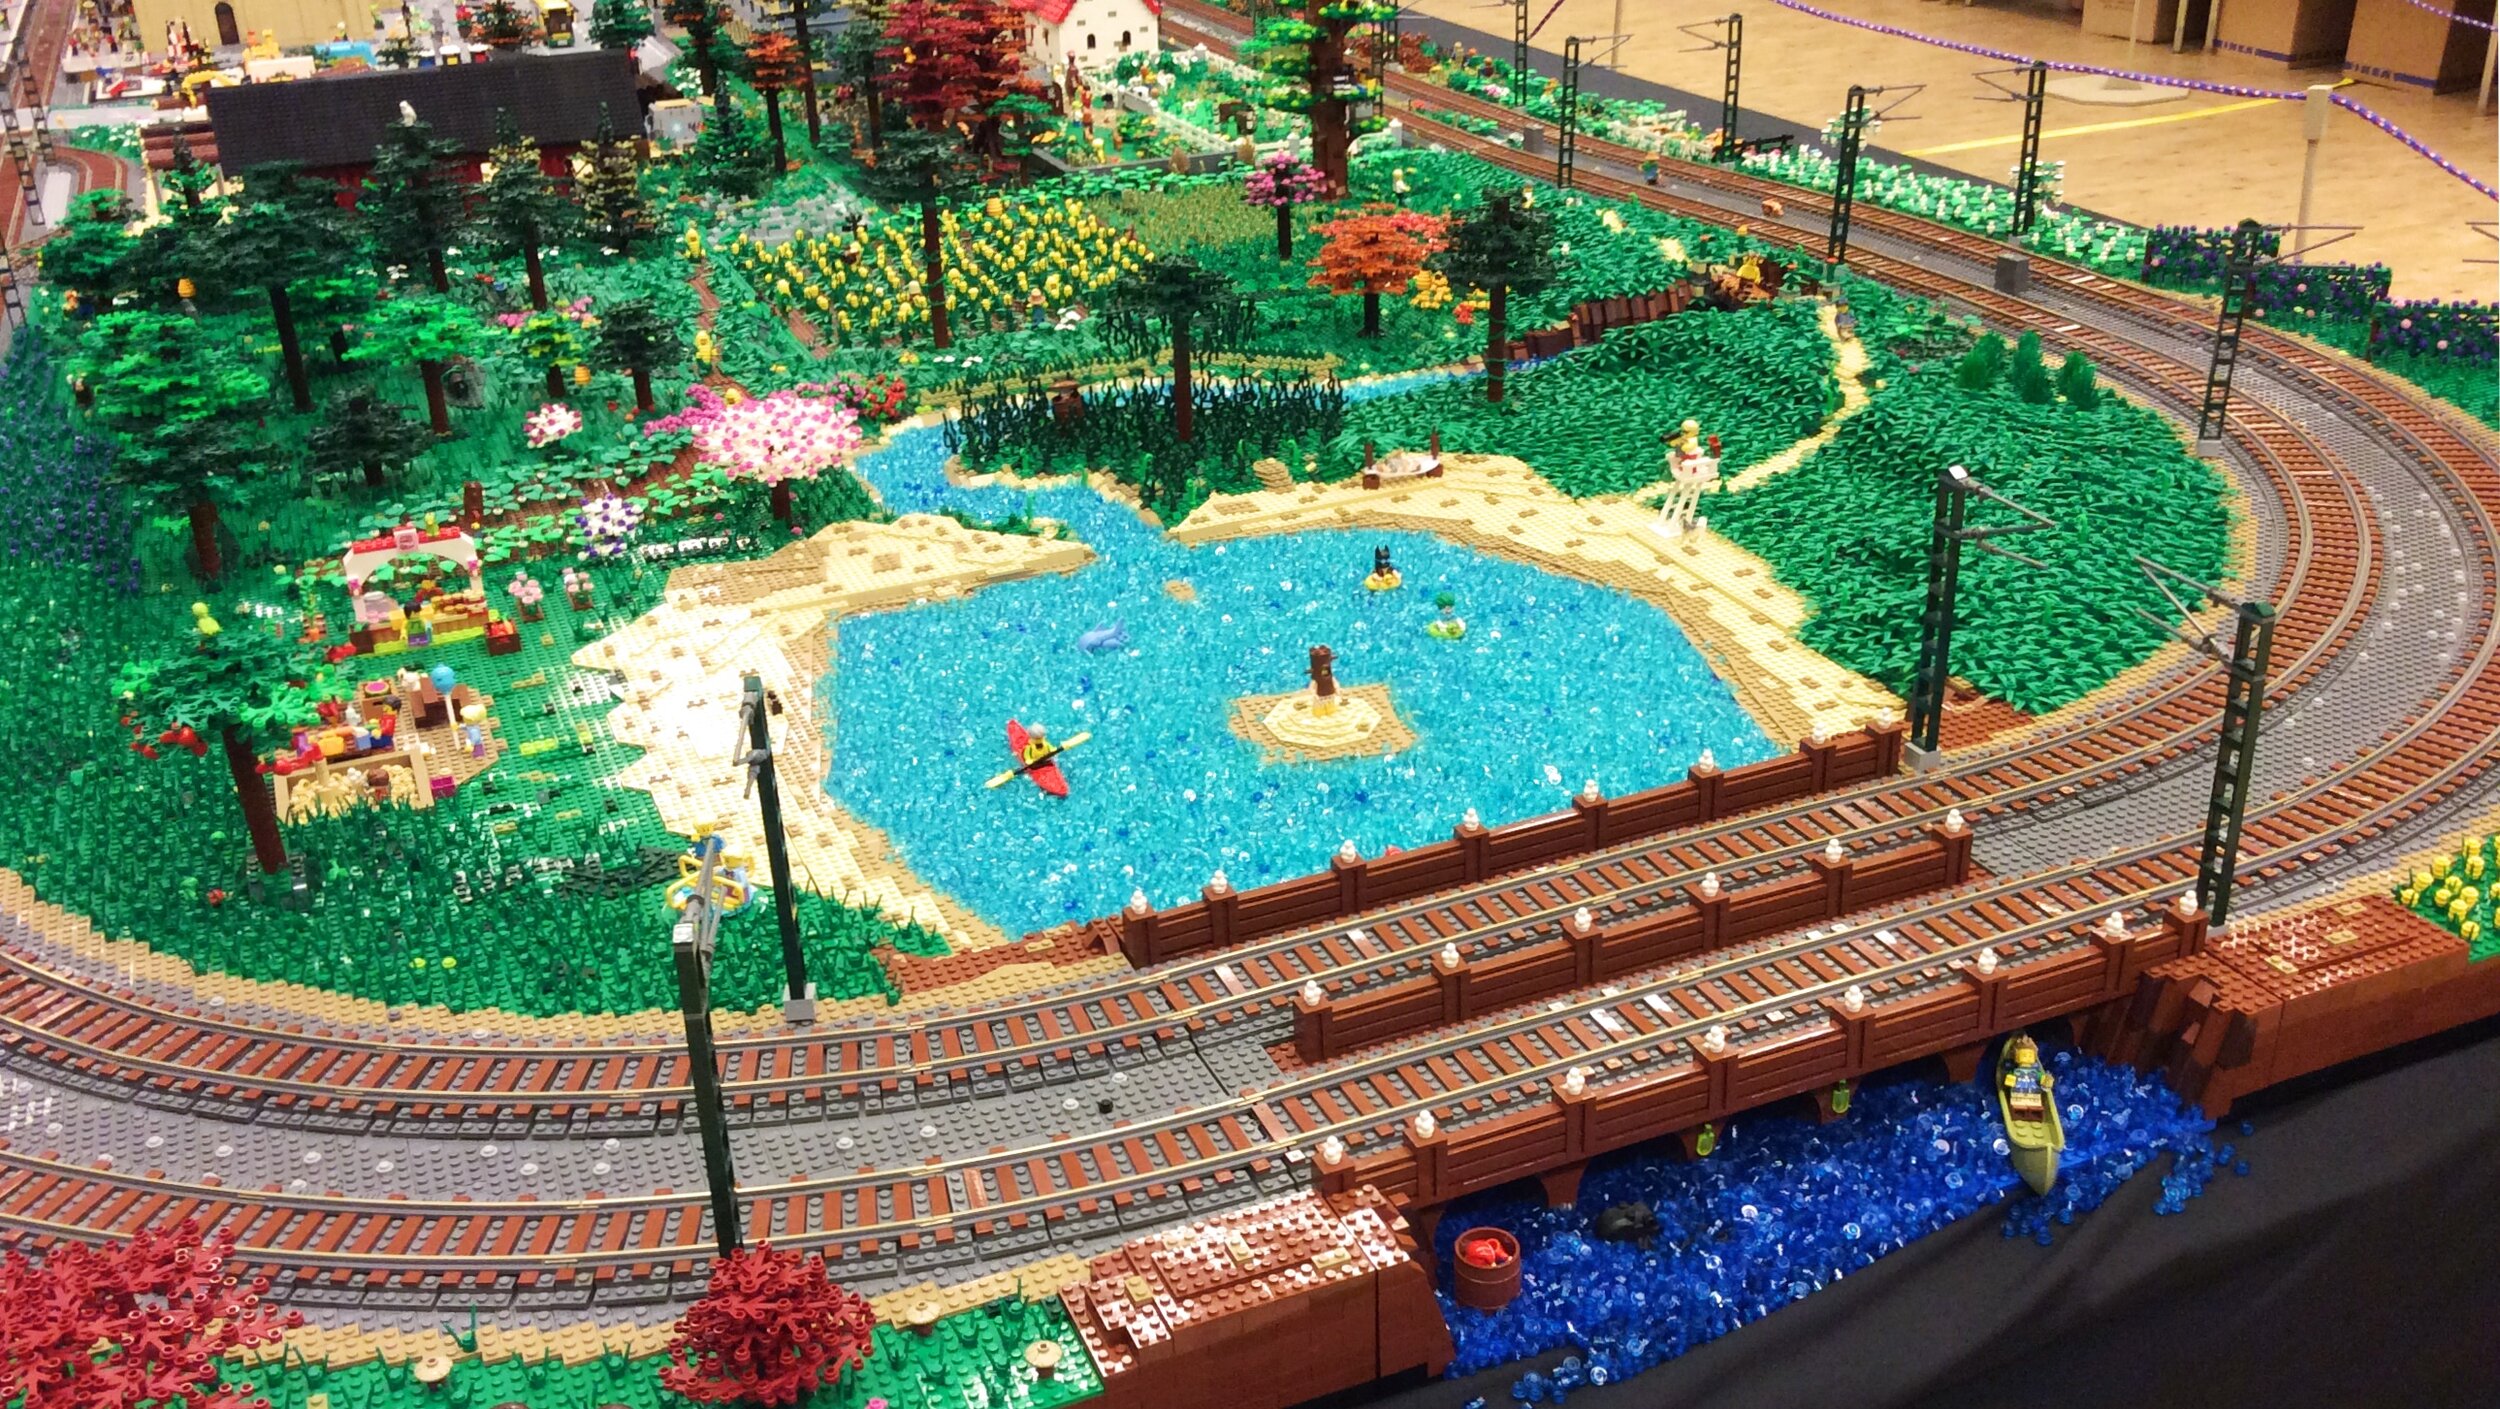
photo credit: Andreas Kvant
The aim of ballasting track is to make it look more realistic by adding the missing roadbed under the track. This is true in other model train scales too—hobbyists add ballast around their tracks as well as painting and weathering for even greater effect. However, when we talk about “ballasting” in the context of LEGO track, we also include one more feature which strictly speaking is not ballast at all! That is, adding a better representation of the ties (or sleepers) under the rails.
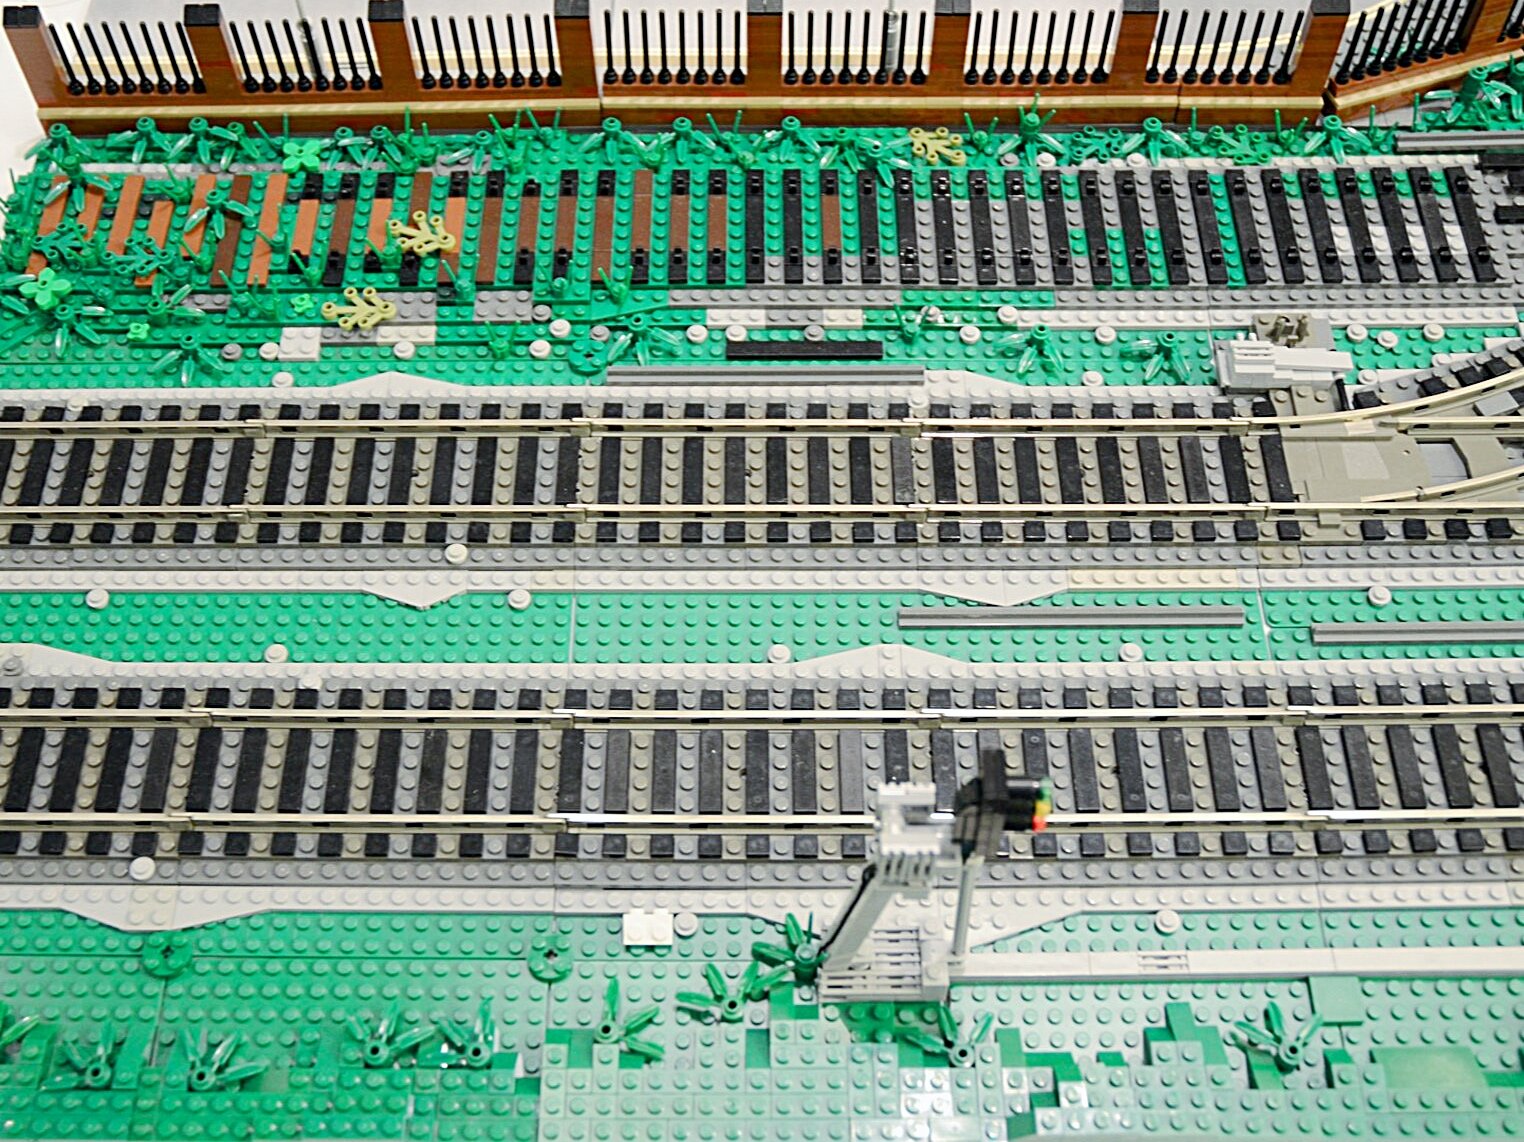
Therefore, ballasting LEGO track involves a range of possibilities in terms of how it is done, how many parts are used, the degree of realism, and other creative and pragmatic tradeoffs. For convenience, I will show how ballasting can be achieved in 5 progressive tiers. Starting with level 0 (i.e. no ballast!) up to level 4 with full ballast and ties.

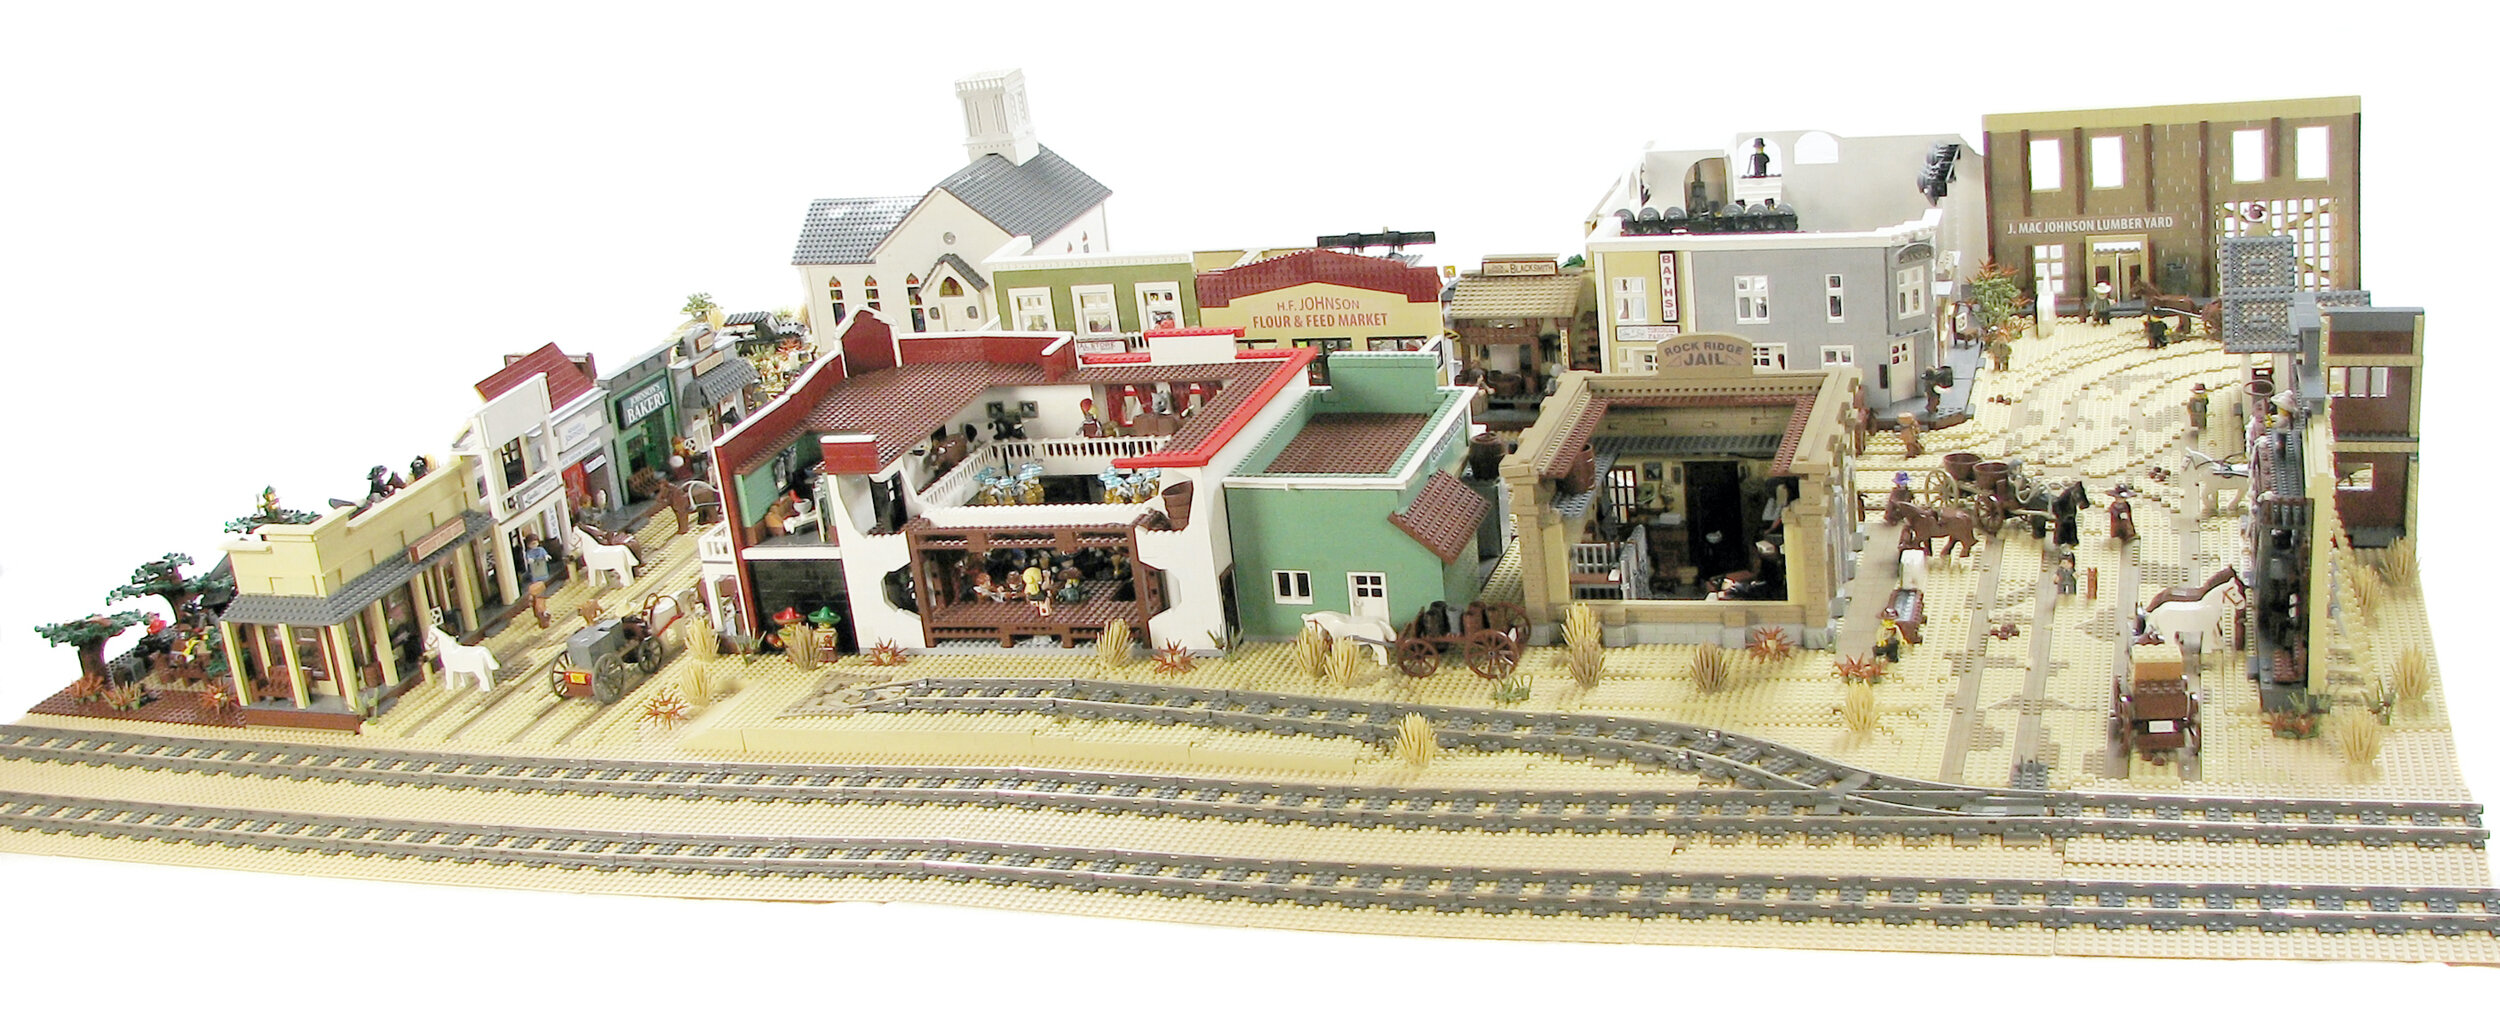
Level 0: No Ballast!
It may seem odd to include a discussion about not ballasting track; however, there are two good reasons to do so. Firstly, it serves as a reference point against fully-ballasted track to illustrate just how dramatic the transformation is. Secondly, it also acknowledges the fact that layouts can still be awesome even with un-ballasted track! See below:
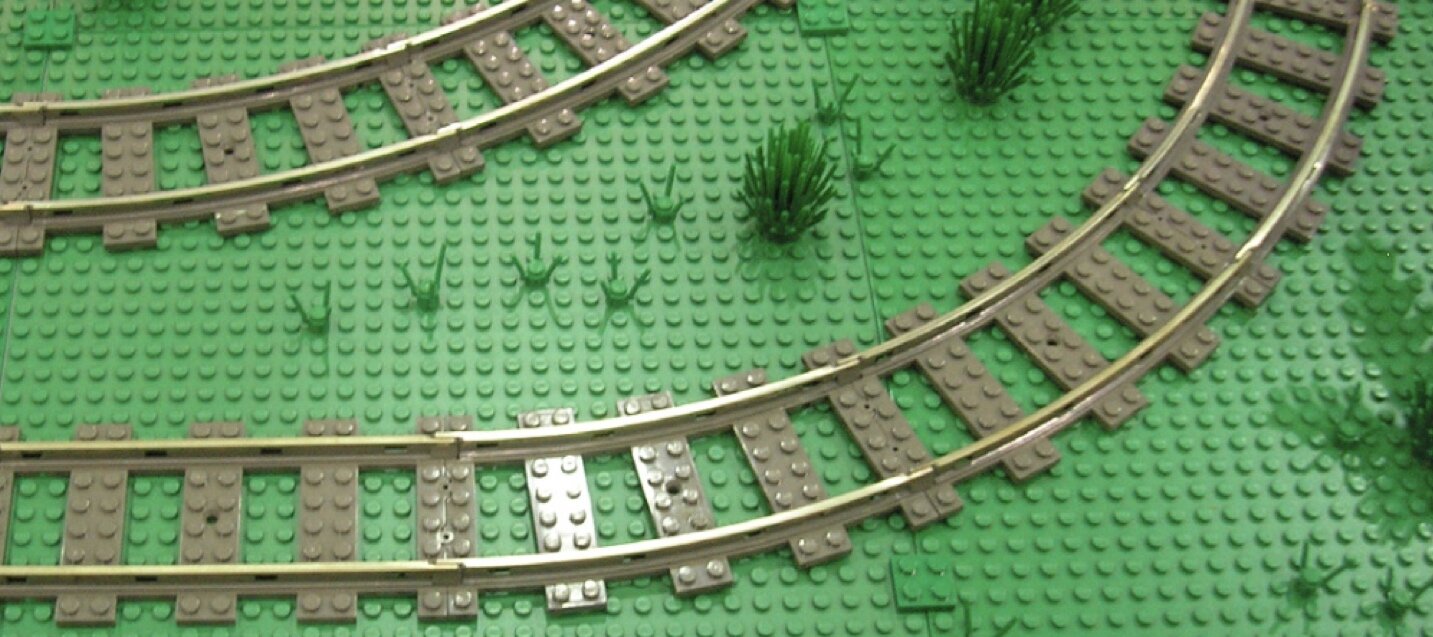
Level 1: A Layer of Plates

For Level 1, the track is laid over a single layer of plates. The plates are laid within the envelope of the track with a margin of one or two plates beyond the edge of the ties. This represents the typical ballast shoulder found in real track.
The choice of colour depends on preference or can be influenced by the prototype; however, for this application it is recommended to use a contrasting natural tone such as light bluish gray, tan, dark tan, or black. The aim is to choose a contrasting colour to the dark bluish grey of LEGO train track. Otherwise, infilling with dark bluish grey will simply make the track disappear and somewhat defeats the purpose!
Level 2: Two Layers of Plates
In this technique, track is laid under two layers of plates. The idea with this method is to give a better representation of the tapered ballast shoulder vertically as well as horizontally on either side of the track. Furthermore, altering the colours of ballast elements in a somewhat random way can give a better illusion of texture. However, don’t overdo it! Excessive use of random colour or using too many colours can over-emphasize the ballast and visually distract rather than blend.
Level 3: Tiles for Ties

This tier (and the next) transcend the actual ballast and turn our attention to the track itself. As mentioned, LEGO track is dark bluish grey. This somewhat restricts the use of this colour for ballast. However, if we can represent the ties in another colour by covering them with tiles, then this is no longer a consideration. Furthermore, real track ties are rarely dark bluish grey! Typically, wood or concrete are used for track ties—representing these materials using shades of brown and light grey can make a big improvement.
Clearly, this adds the burden of requiring a large quantity of tiles; however, the benefits are significant. Also, tiles in neutral tones are generally plentiful and not unreasonably expensive compared to other elements.
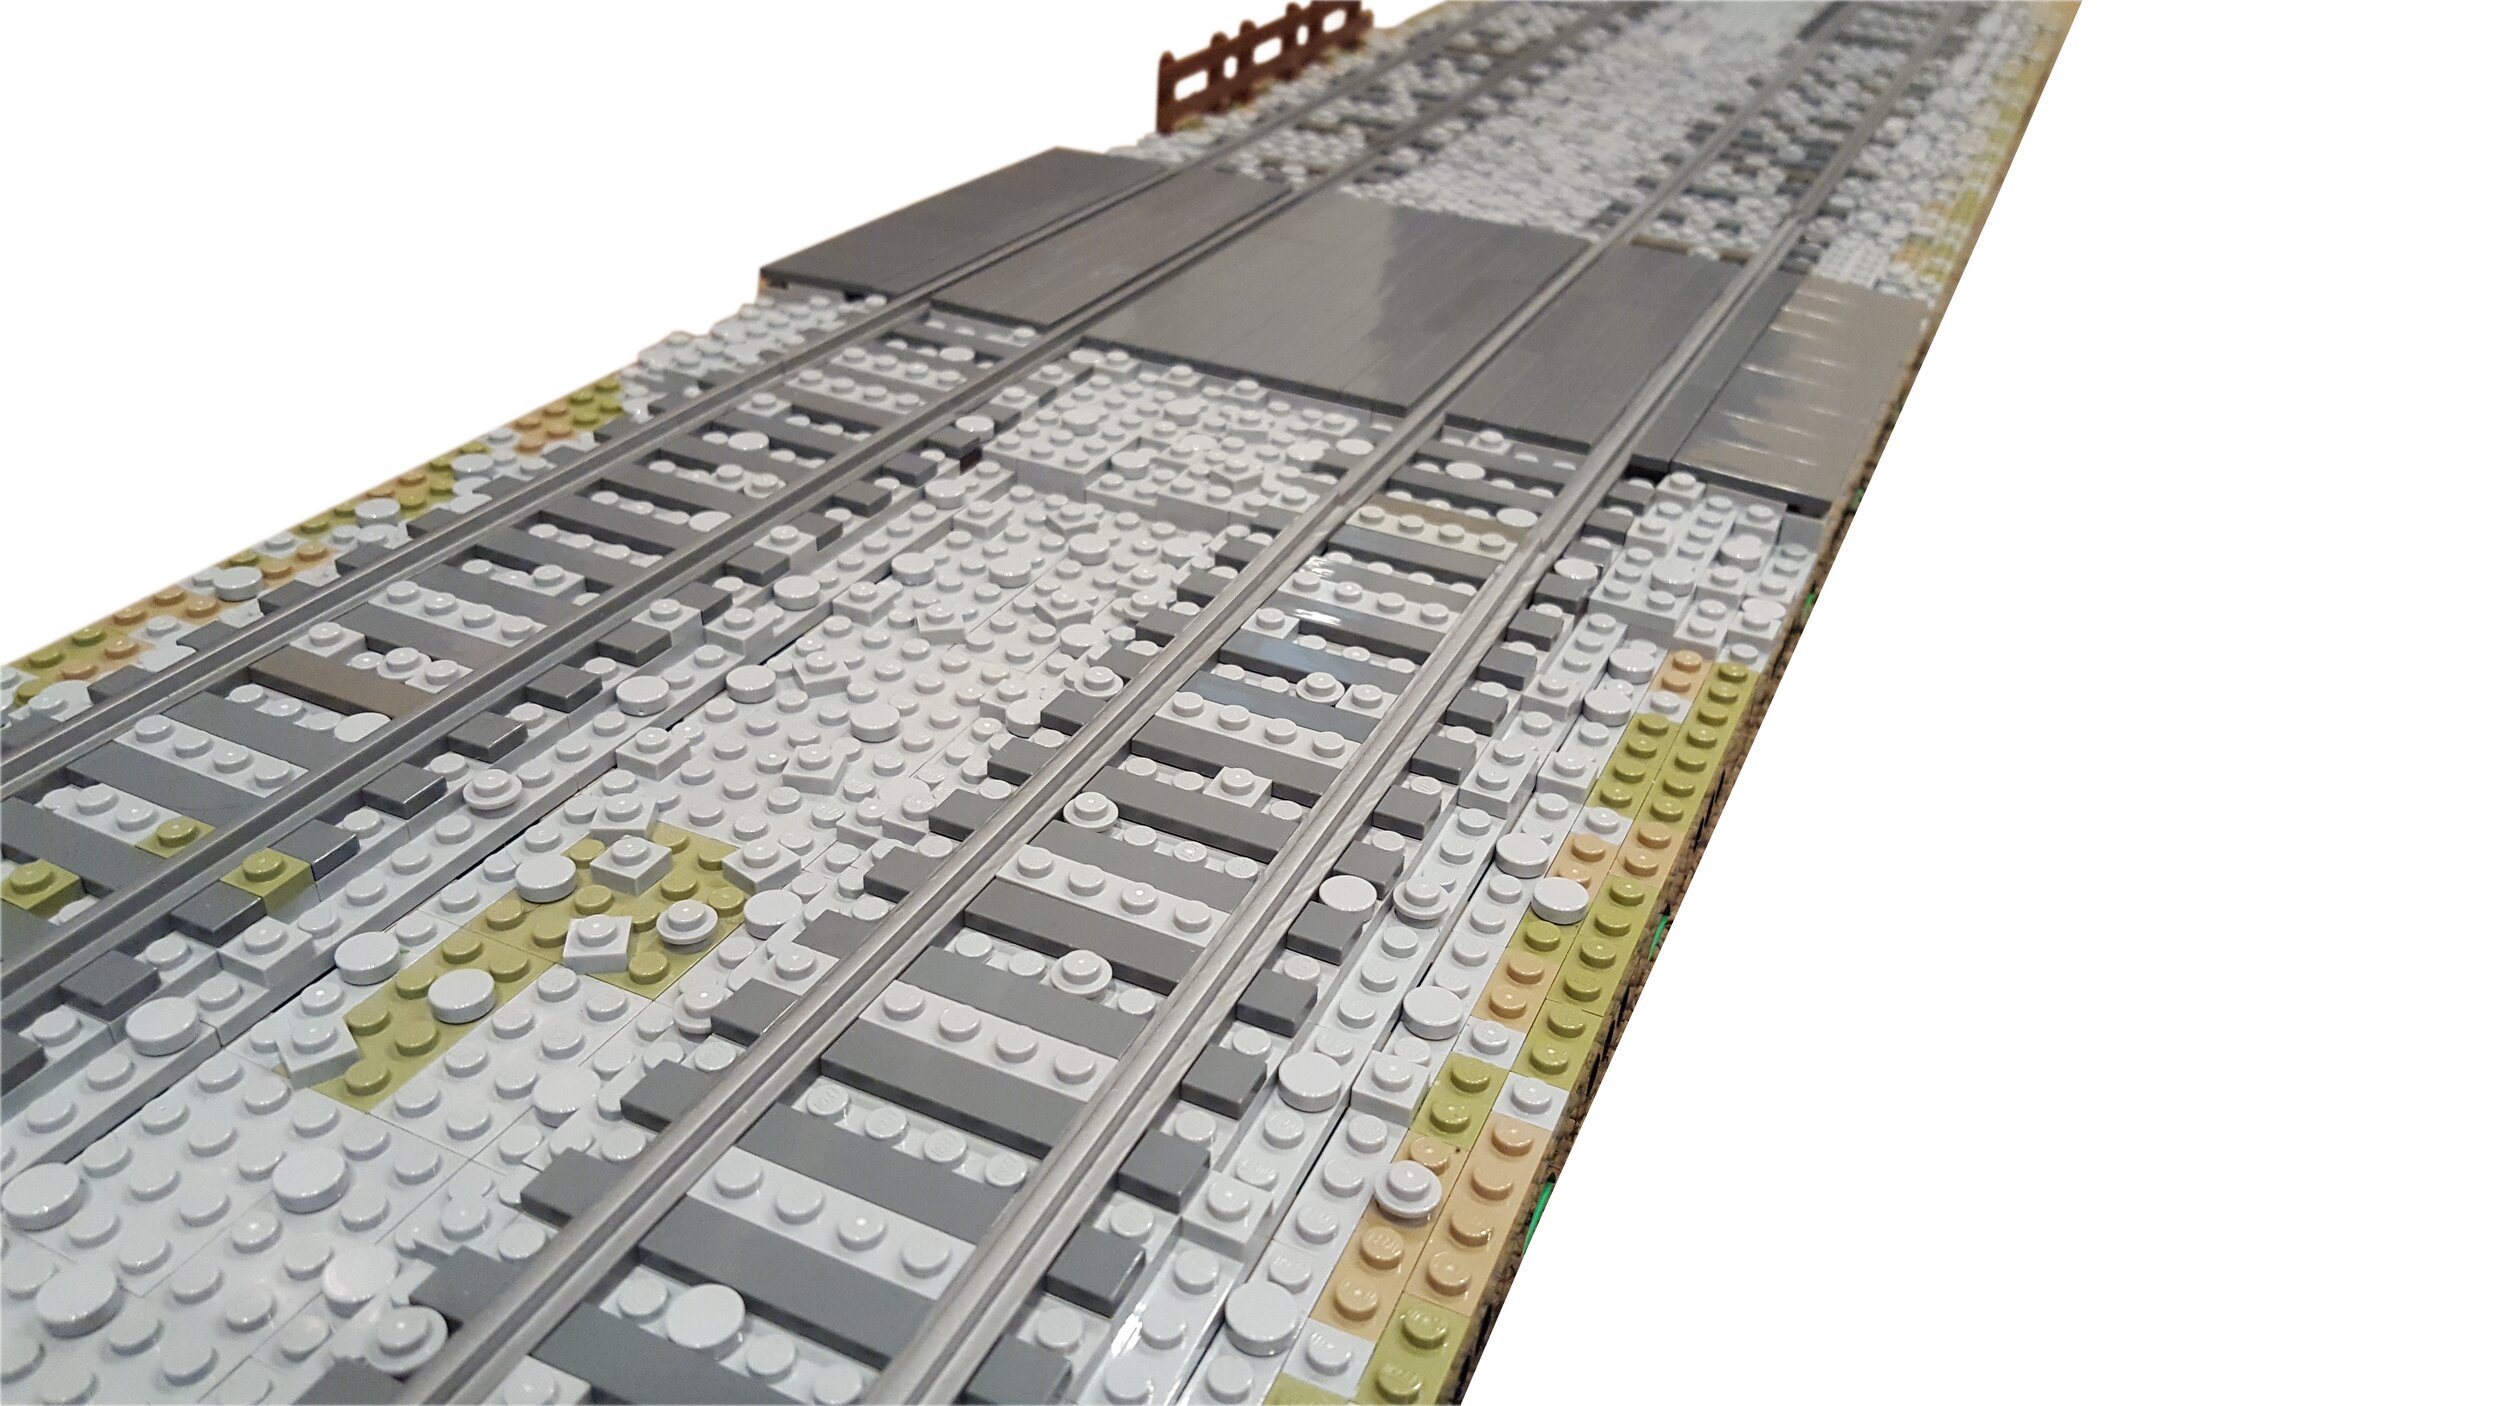
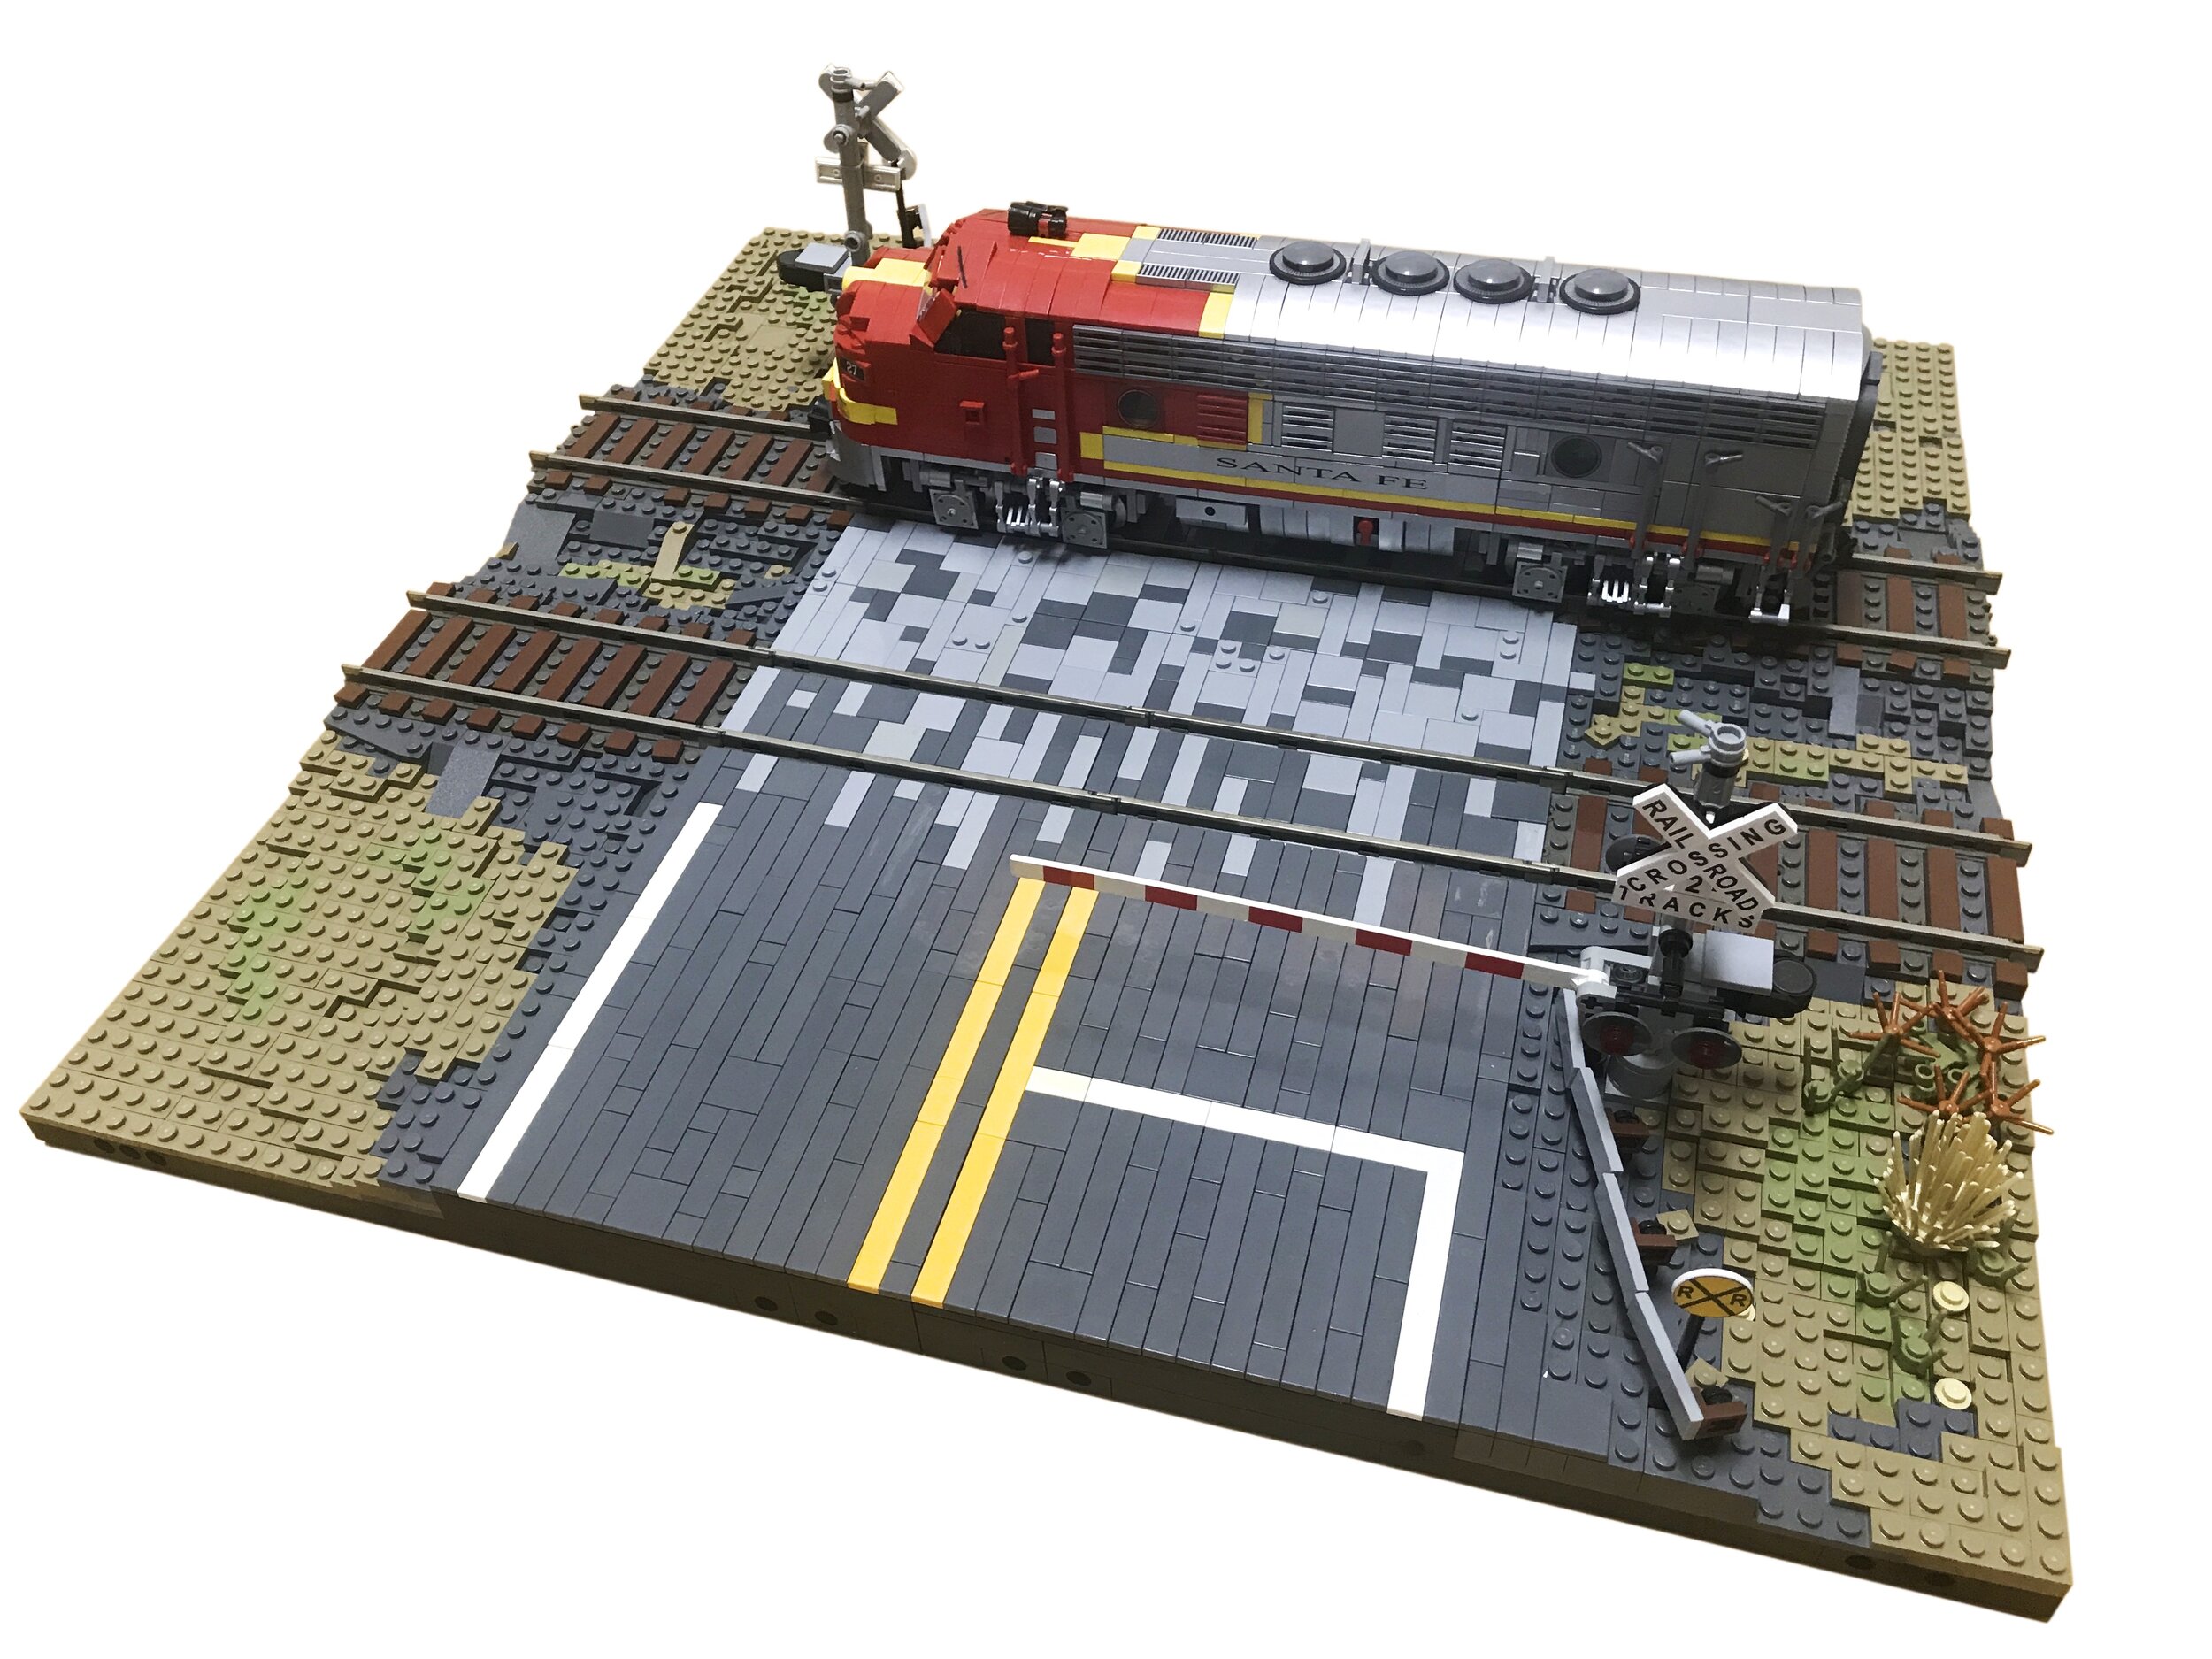
Level 4: "Finescale" Ties

The final tier represents the apex of transforming ordinary LEGO track into a “scale model” representation of track. Paradoxically, it introduces a new constraint to achieve its look by requiring the use of dark bluish grey as the dominant ballast colour—something we have avoided up until now.
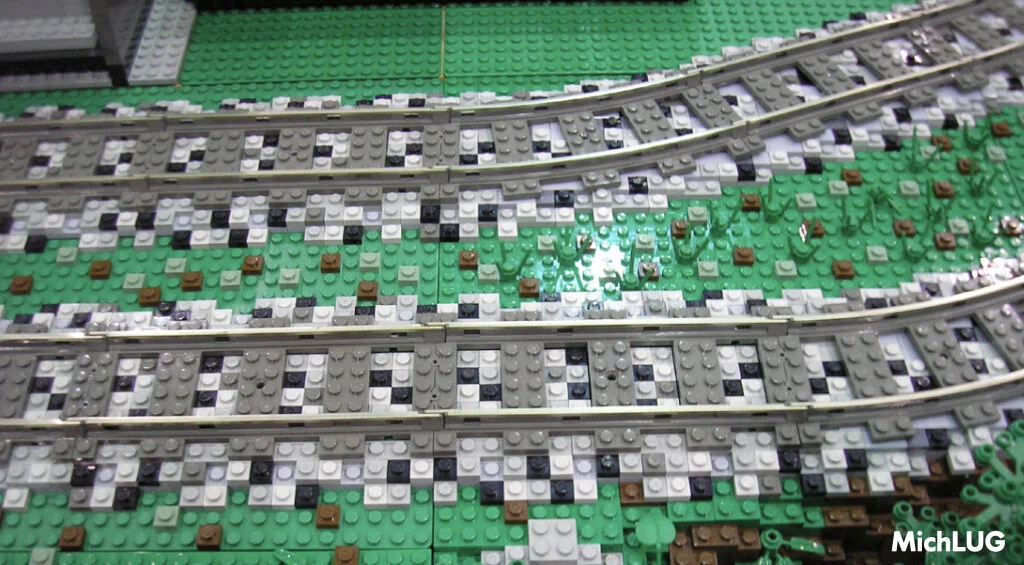
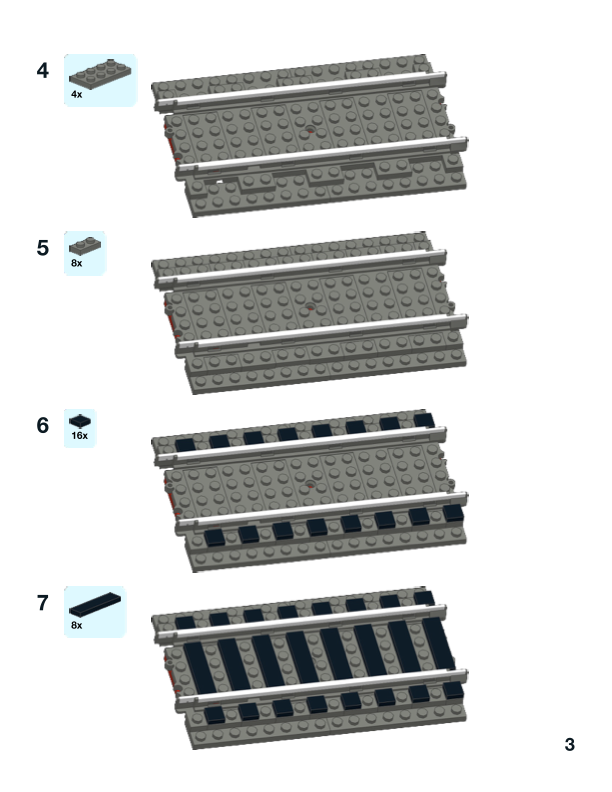
The reason for this requirement is that we need to infill the LEGO track elements and make their standard 2-stud wide ties disappear. Once blended away into the ballast, we can now apply tiles to represent the ties instead. This is an important factor in the transformation. We need the dark bluish grey plates to act as a “textured” backdrop to the rails and ties. The exposed studs helpfully reinforce this illusion of a crushed stone trackbed below the track.
With this uniform backdrop of dark bluish grey, we can now place tile elements at intervals of every other plate. We use 1x4 tile elements between the rails and 1x1 tile elements on each adjacent side.
The 1-stud tile width is actually closer than you think to achieving a scale representation. Without going into all the math of deriving the “scale” of LEGO trains using the track gauge, the world of LEGO trains is approximately 1:40 scale or around 1 stud per 1 foot (1 stud per 30 cm). Therefore, when you consider the typical real tie/sleeper dimension is around 8 ft x 1 ft laid on 2 ft spacing, the representation of ties with a 1x8 profile is impressively accurate!
The choice of tie colour will be based on the prototype you want to represent or simply a preference. The colours most often used are black, reddish brown, or light bluish grey. Black and brown tones approximate wooden ties and light bluish grey nicely depicts concrete. Black ties may seem unusual; however, real wooden track ties are often soaked in creosote to improve their weather resistance. This makes the ties closer to black in appearance than the conventional wisdom of using brown for wood.
There is also the practical consideration of the availability of tiles in different colours. Many years ago, when ballasting track started to become more common, the palette of suitable colours for tiles was not as diverse as today. Also, the large needed quantity of tiles forces the use of colours that are relatively plentiful and inexpensive. Thus, black has established itself as a dominant tie colour used in many club and personal layouts.
How to Ballast a Track Element
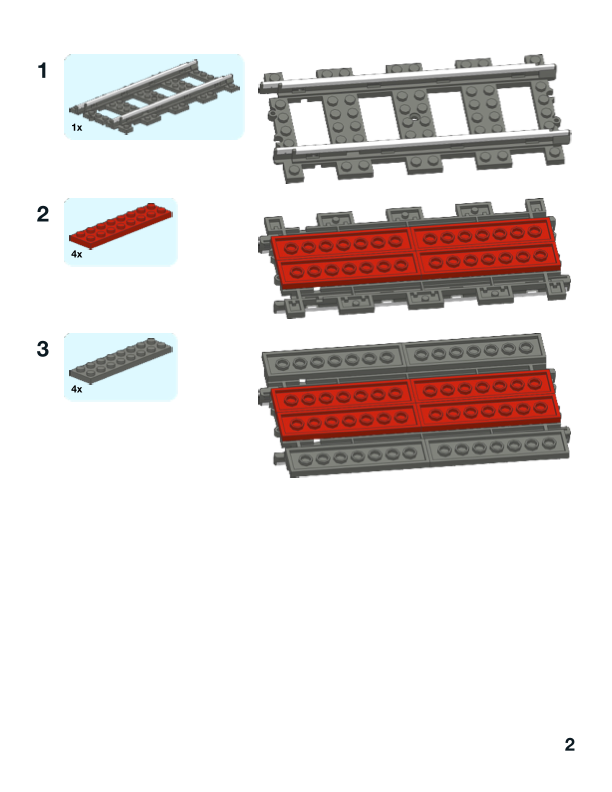
Let’s consider ballasting both a standard 16-stud long straight track and R40 curve track element. We'll ballast this track using a very common method adopted by many LEGO clubs and personal layouts: the so-called “Penn LUG” style. It’s not certain that Penn LUG originated this style; however, they have likely accelerated its adoption by virtue of the vast scale it is used on their publicly exhibited layout!
Instructions for ballasting these elements (in addition to other tracks) can be found at L-Gauge.org.
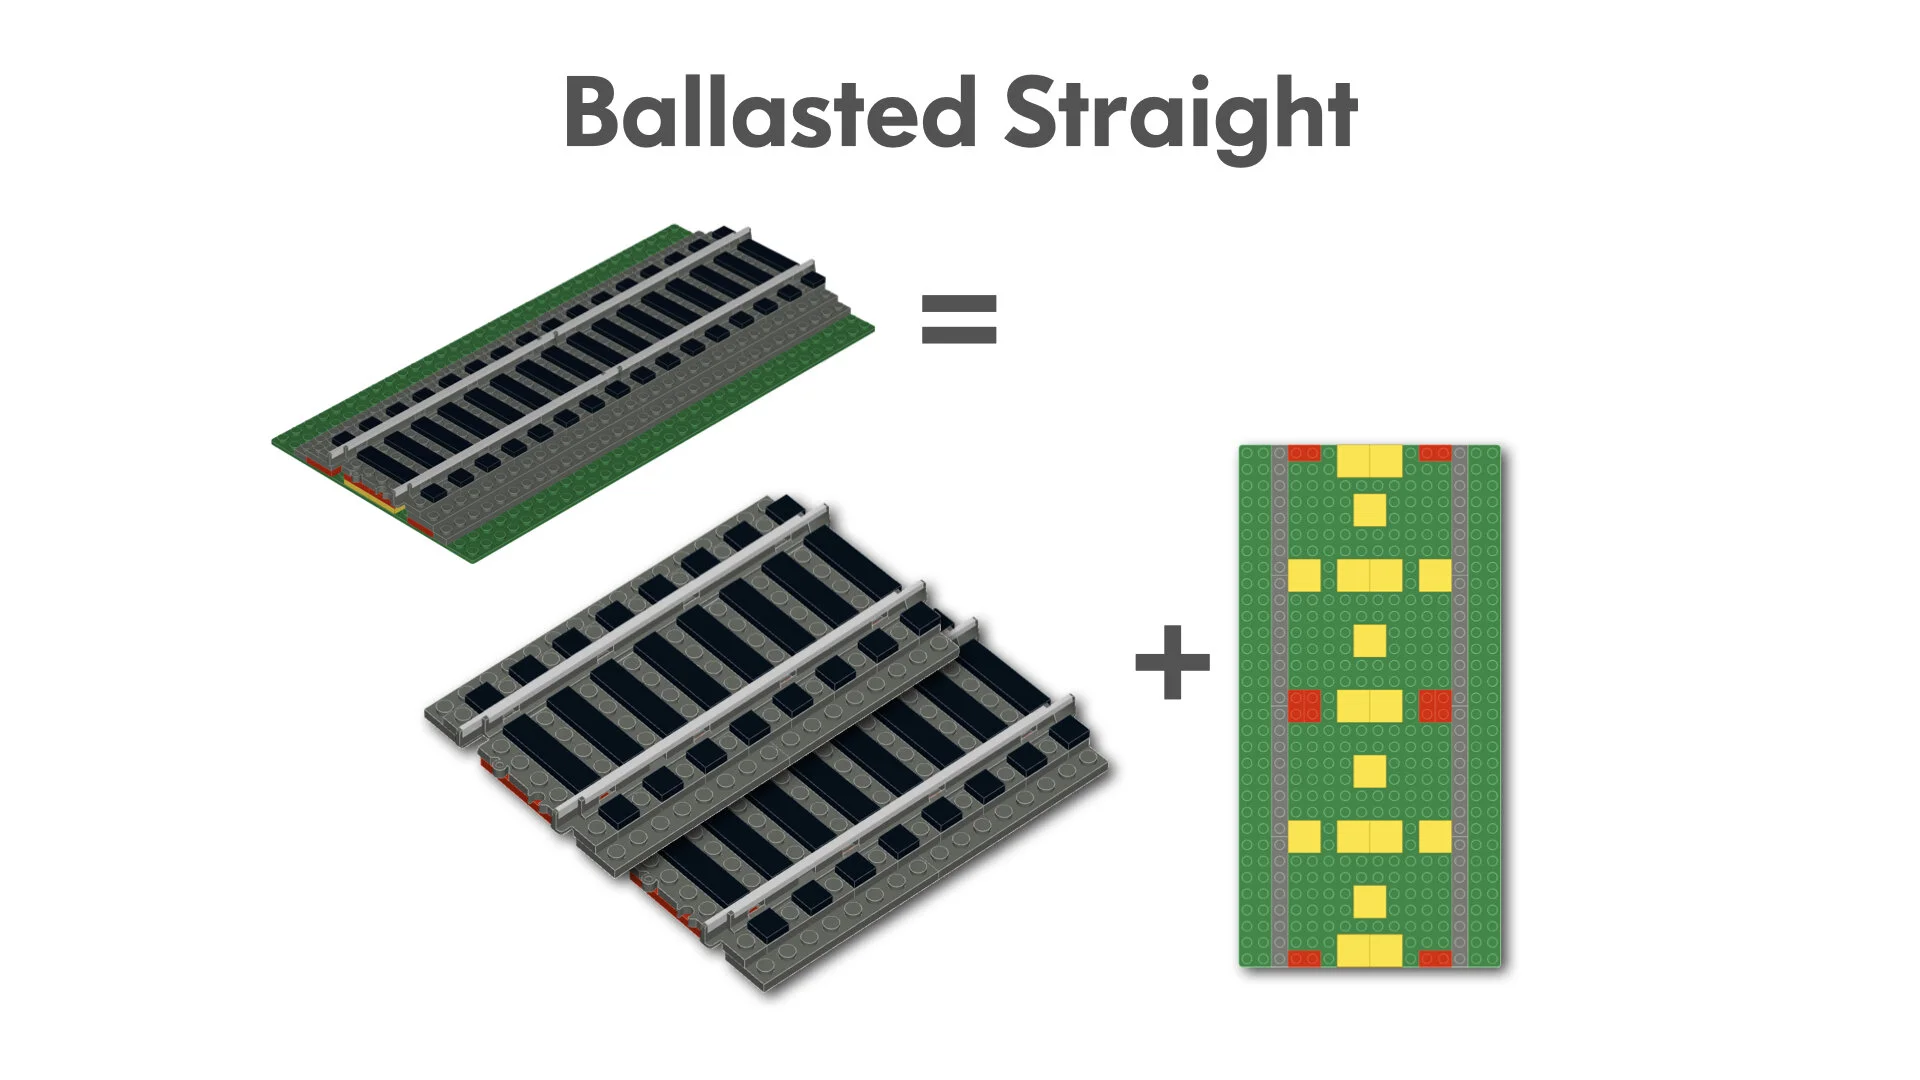
Ballasting a Straight Track
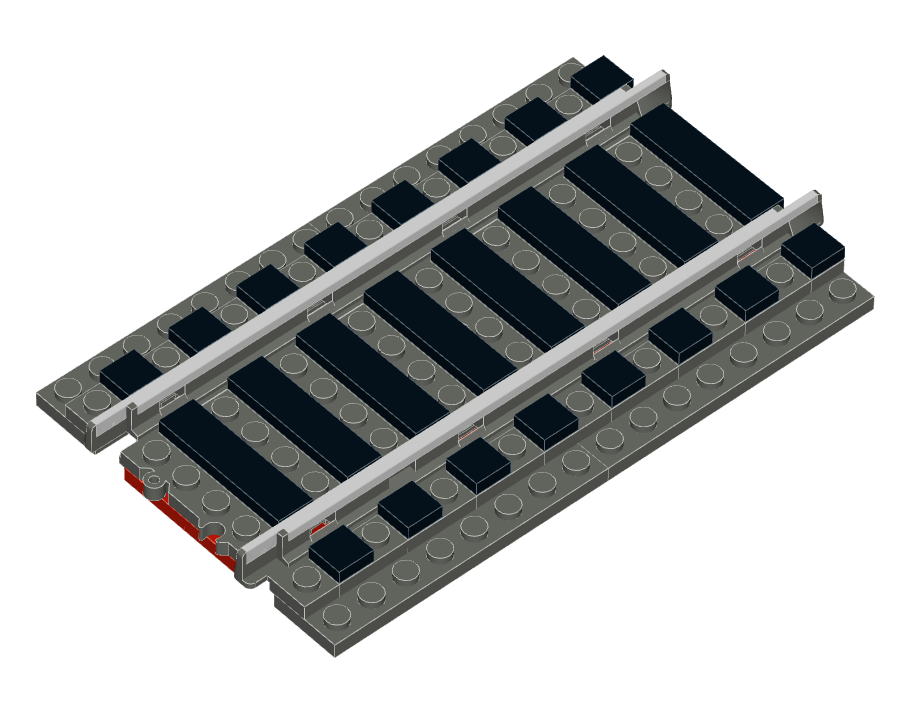
Straight Track
Ballasting a standard 16-stud straight track element is relatively easy and requires 44 parts to complete.

Ballasting a Curve Track

R40 Curve Track
Ballasting a standard R40 curve track is somewhat more tricky than straight track since it requires some elements to be placed at rotated orientations often only secured with one stud.
When you consider that each element of track requires an additional 50x LEGO elements to ballast, it is easy to see the very rapid escalation of parts required to build a layout!
Ballasting Other Track Elements

Ballasting other L-Gauge compatible track elements can be accomplished in much the same way as the straight and curve track shown above. Usually, these methods will require somewhat unconventional building techniques since many elements are attached along a curve. We are so used to attaching elements at precise and discrete LEGO system grid locations, that these techniques ofter feel uncomfortable at first—but I assure you, you’ll get used to it!
Full instructions for ballasting most items of track, including the tile bases to mount them on, are freely available to download from the L-Gauge.org resources page.

The methods of ballasting track introduced above contain a key pragmatic feature in implementation: “floating” the track. That is, the track element is only ballasted to the depth of one plate and is not permanently attached to the trackbed. The track is designed to “float” on a bed of tiles and is only secured at the extents with a few studs. The second layer of plate ballast is implemented as a thin cosmetic border around the tiles that support the track. This method has several advantages:
Avoids accumulated mechanical stresses inherent in laminating multiple layers of LEGO plates.
Allows the track element itself to be ballasted conveniently ”offline” and in “production” away from the layout in say your LEGO workbench or kitchen table.
Allows easy re-use of your ballasted track for different layouts.
Facilitates participation in club and collaborative layouts since a contributed and combined inventory of ballasted track makes bigger layouts a possibility.
Lastly, this method works great with curves. Since curve track elements are virtually impossible to either stud-attach or rest at the correct height; floating the track on tiles is the obvious accommodation. Furthermore, it will lie at the same height as adjacent straight track elements which will likely be stud/grid aligned.

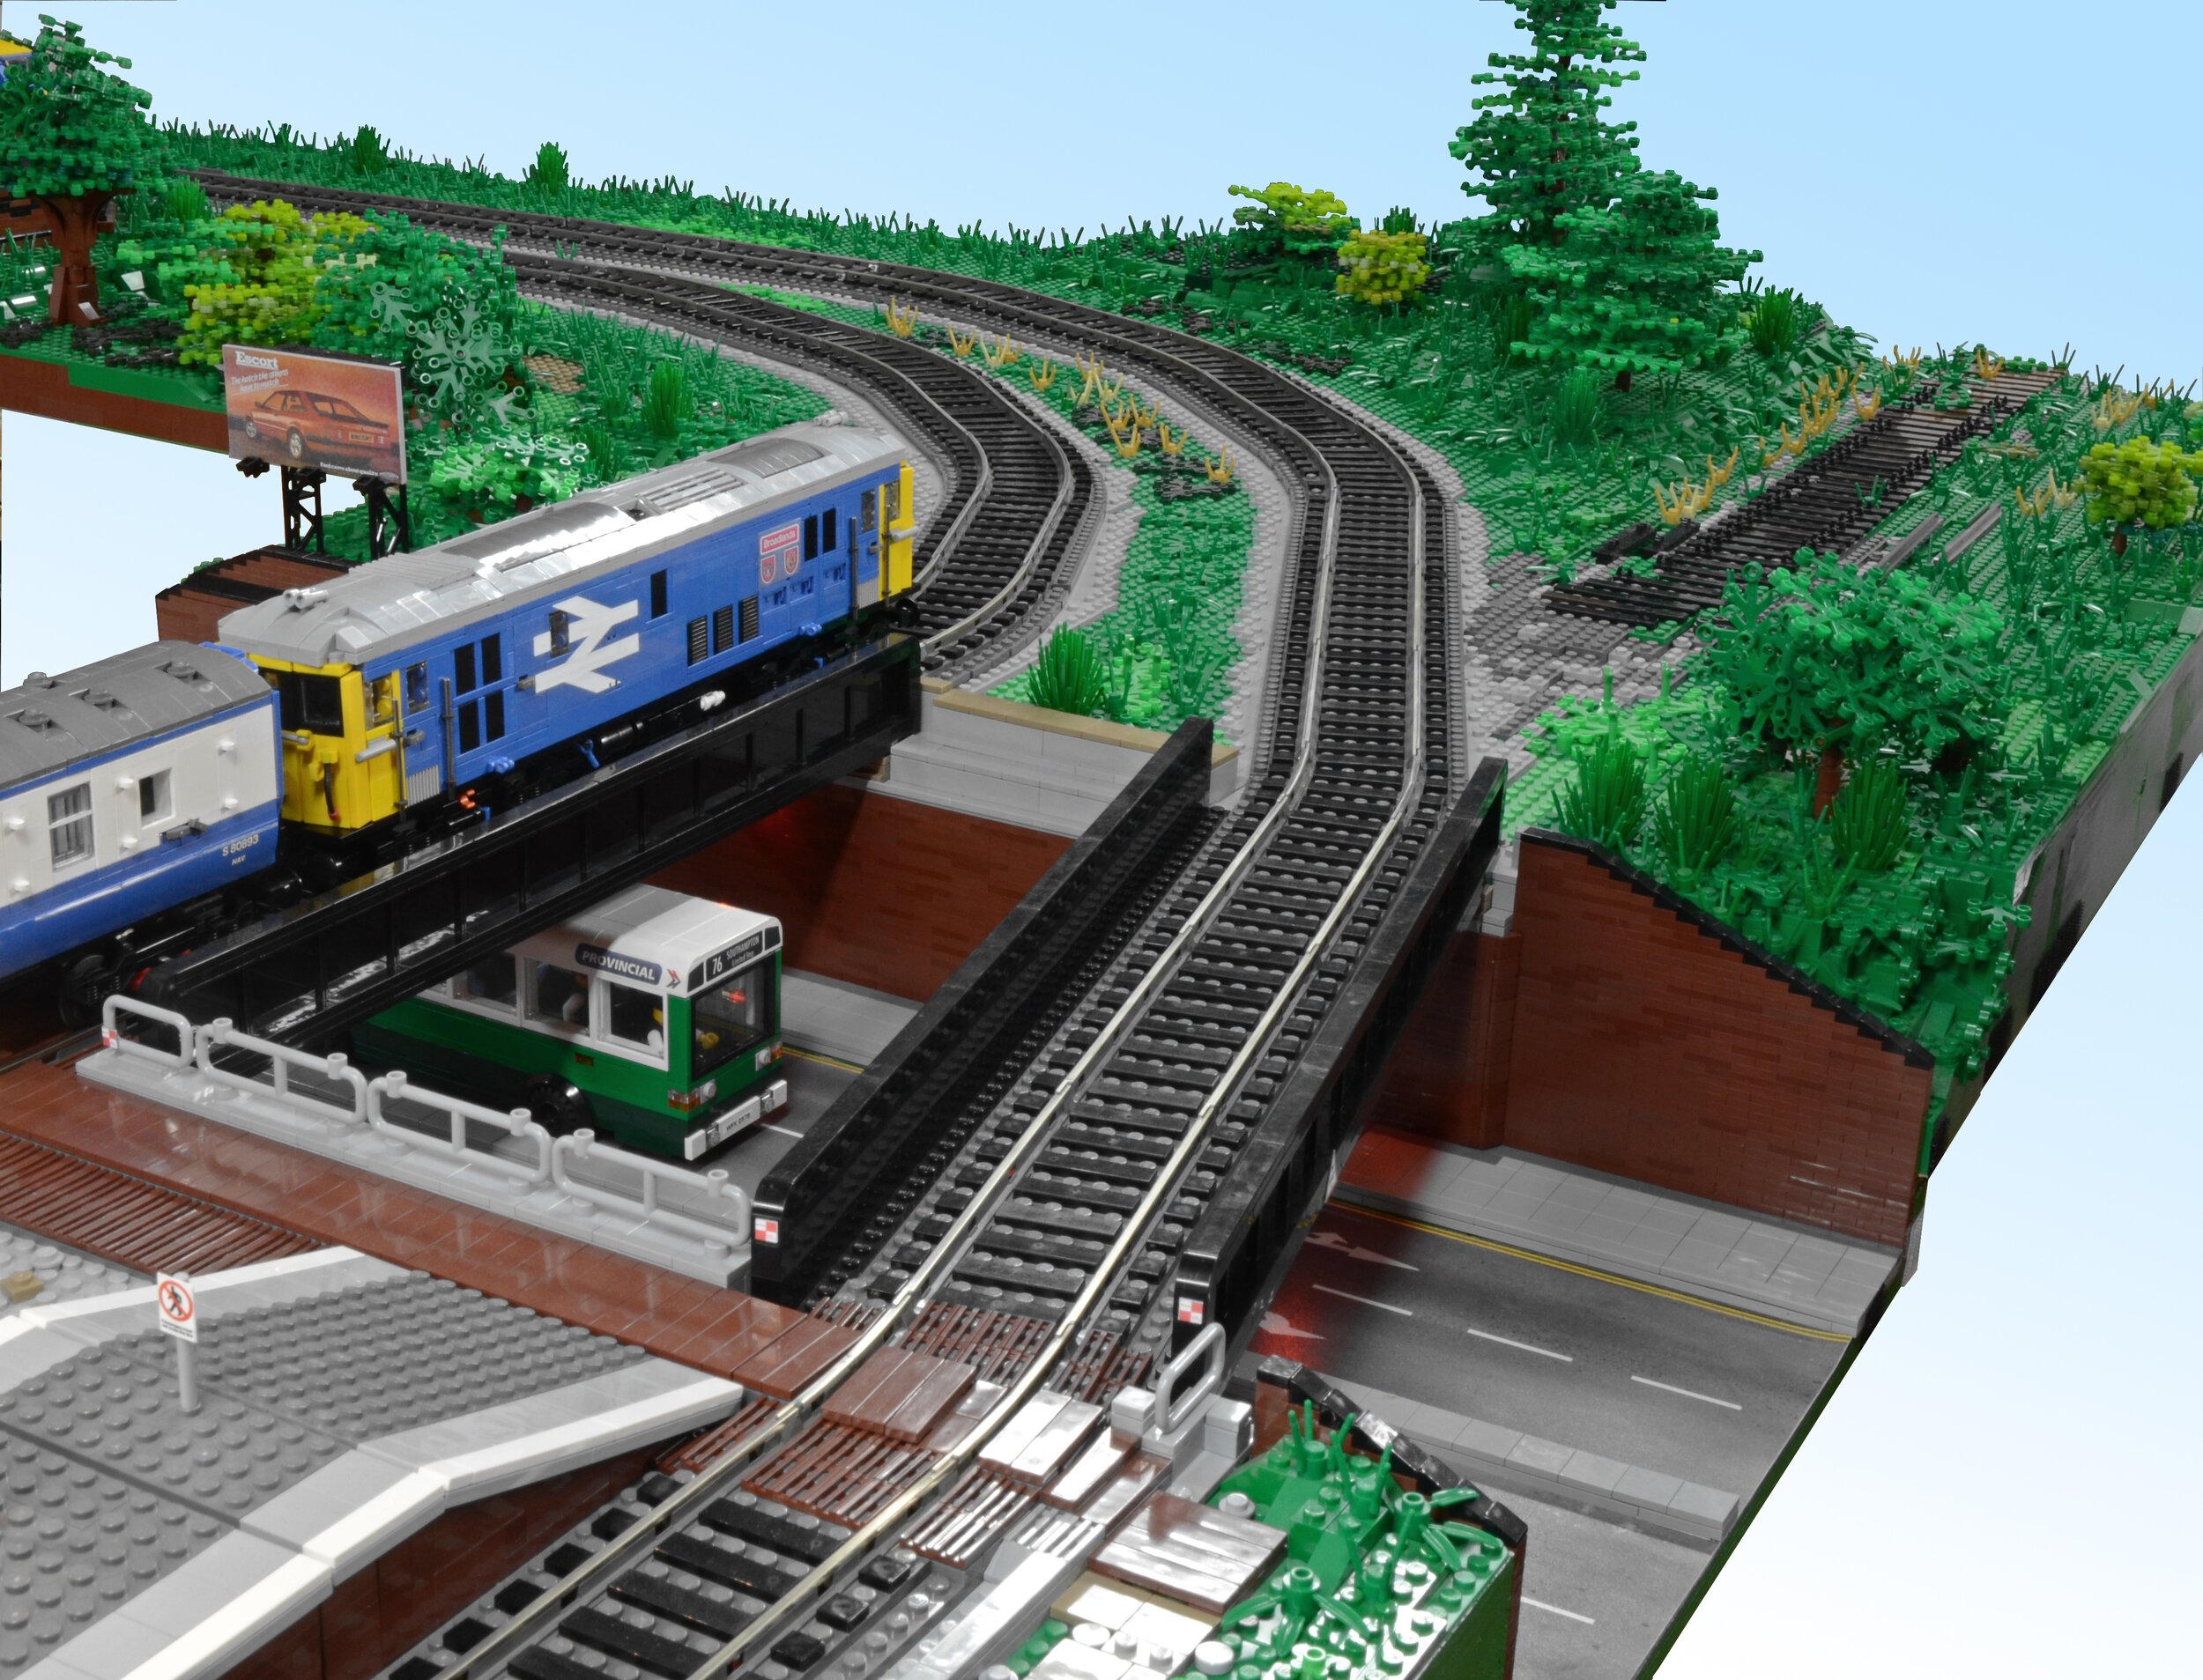
Modern Track
Up until this point, we have only considered ballasting conventional track made from rails supported by cross-ties of wood or concrete. Although this is by far the most dominant type of track in the real world, it does not stop us from considering other modern pre-fabricated track forms used in high speed or urban rights of way. These are often made from pre-fabricated concrete slab sections laid either in ballast or a concrete bed. Examples of this rendered in LEGO are shown below:
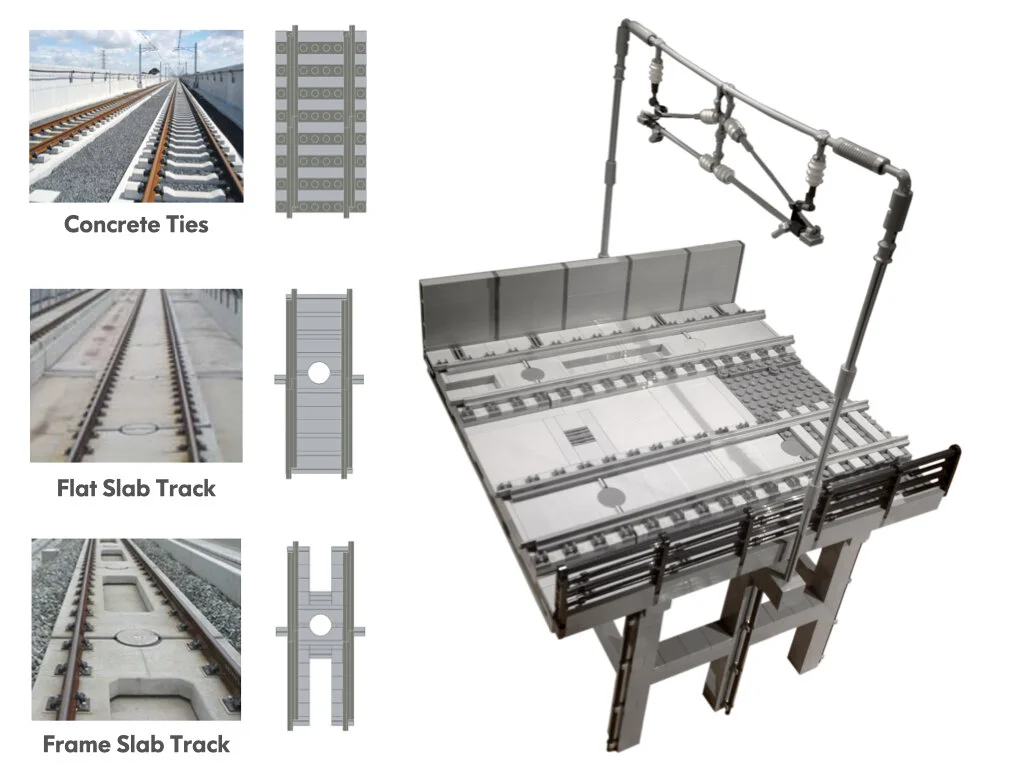
more details can be found at l-gauge.org

Finishing Touches

As mentioned previously, the ultimate goal of ballasting track is to improve its appearance and to strive for an authentic representation of the real thing. There are several extra building touches that can be used to push the illusion of realism even more.
Realistic Borders
Often when ballasting LEGO track, we can’t help but make a uniform and perfectly manicured ballast shoulder. Real track maintenance crews would envy our pristine edges perfectly following the right-of-way! In reality, the ballast is poured into the right of way and sculpted to support the track. The process of profiling the ballast is focused mainly within a narrow corridor around the track. Therefore, excess ballast and uneven pouring will spill outside this corridor and leave an uneven border.
We can represent this by randomly placing additional plate elements along the nominal track corridor. Elements such as 1x1 square or round plates are helpful for this purpose and break up a uniform appearance. Taking this concept further, the use of wedge plates at random intervals along the border enhances this illusion even more.

Textures
The illusion of the natural texture of ballast can be emphasized by introducing subtle variations with both colour and form. A simple but very effective example of this technique is randomly placing 1x1 dark bluish grey round plates among the track ties and along the ballast shoulder edges.
Extending this concept further, the dark bluish grey plates used to infill the track elements can be substituted (sparingly!) with other shades of grey, black, tan/dark tan, and brown/dark brown. The idea is to introduce enough variation of colour to break up uniformity, yet with enough restraint to avoid breaking the illusion by introducing too much contrast. It is best to perform these colour substitutions at 1x1 stud “resolution.” If the patches of colour are too large, then they draw too much attention from the overall look.
One exception to this recommendation is the use of green plates to infill track ballast in small irregular patches to represent areas of track that are overgrown with vegetation and are seldom maintained. The creative opportunities of representing old abandoned track or rural tracks which are rarely maintained are worth exploring.
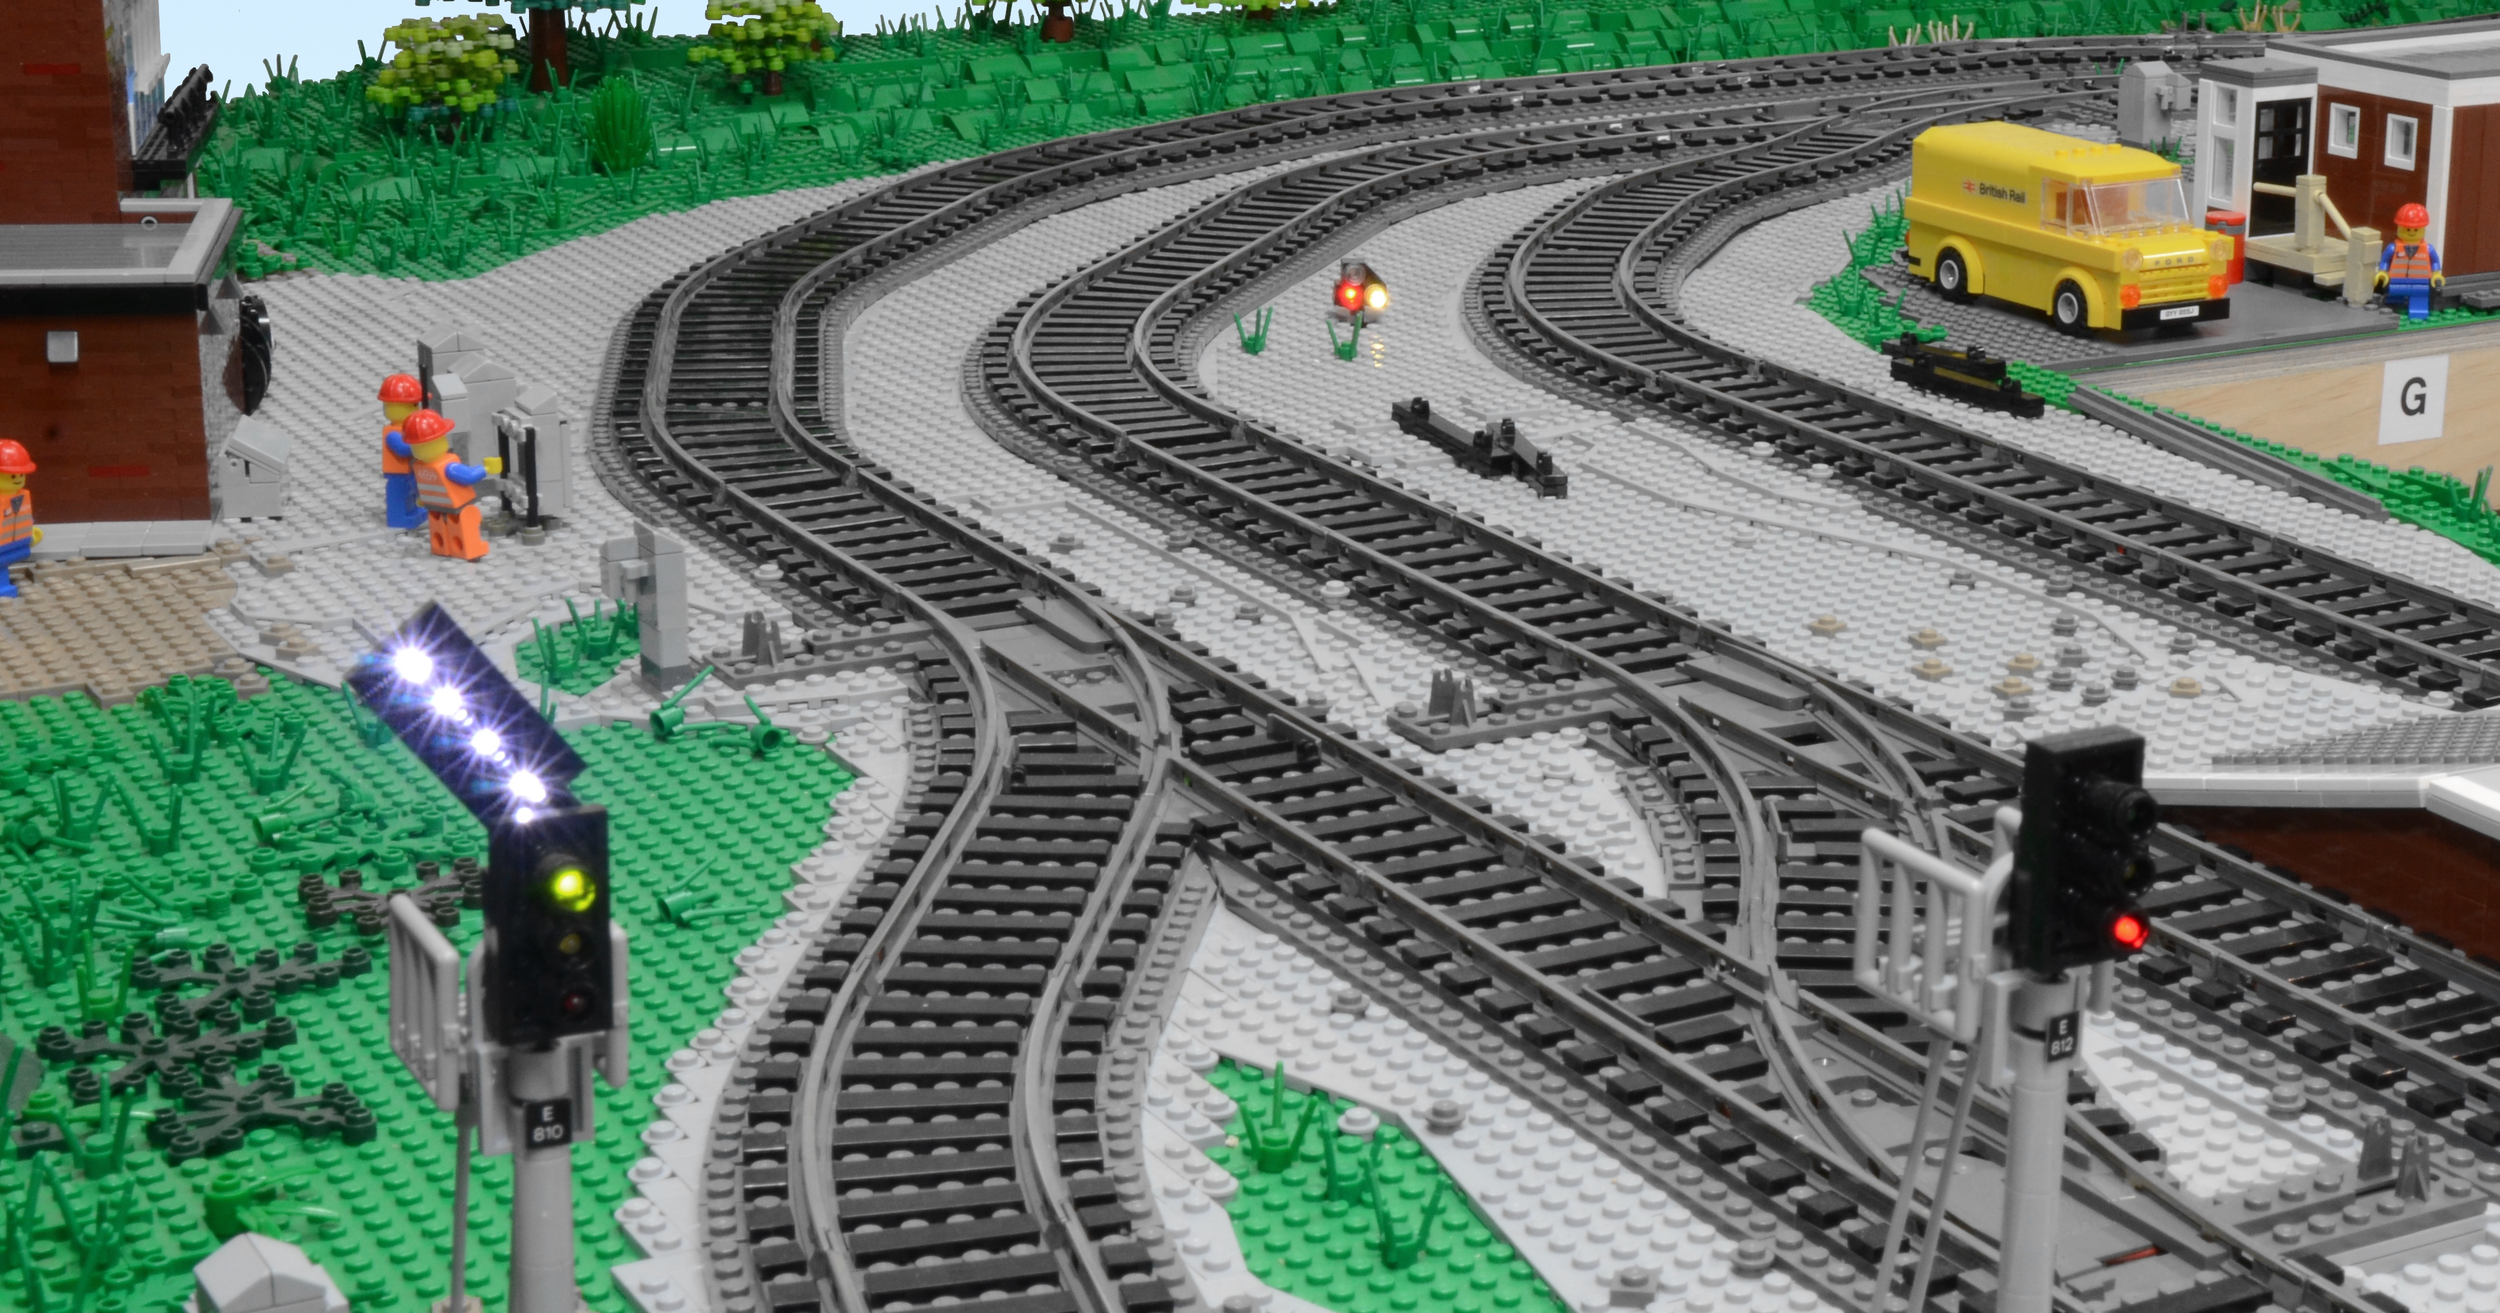
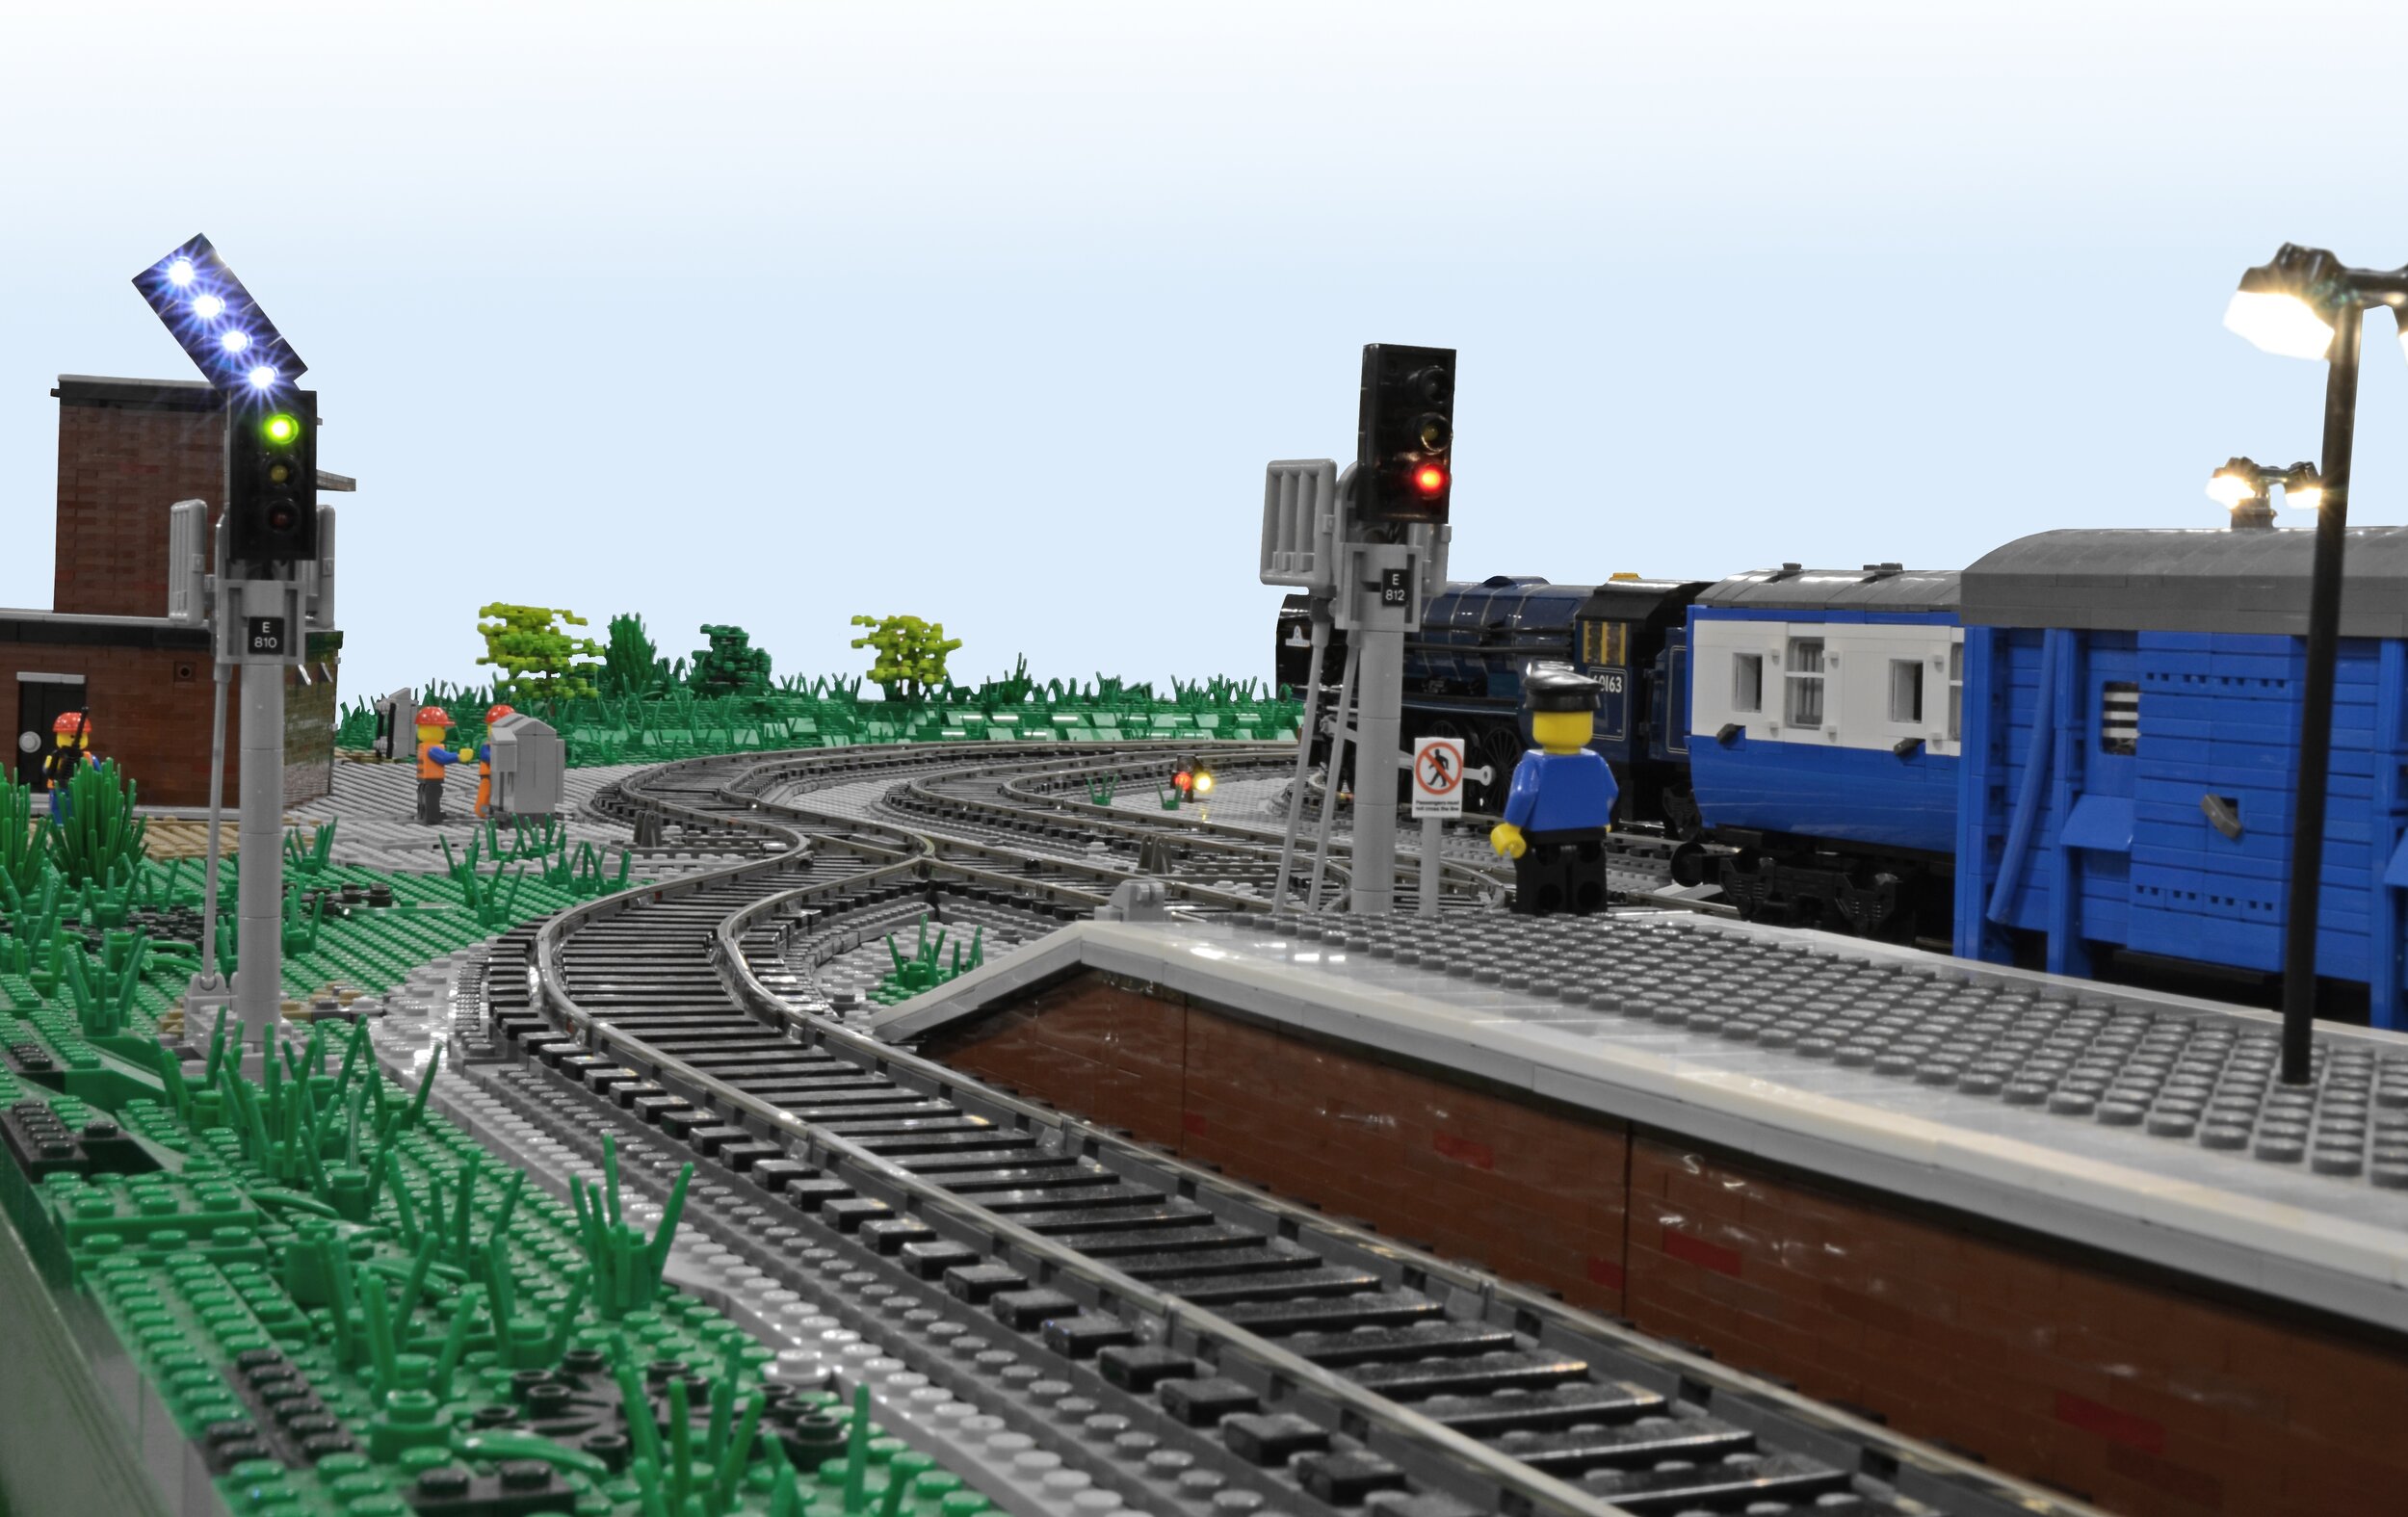
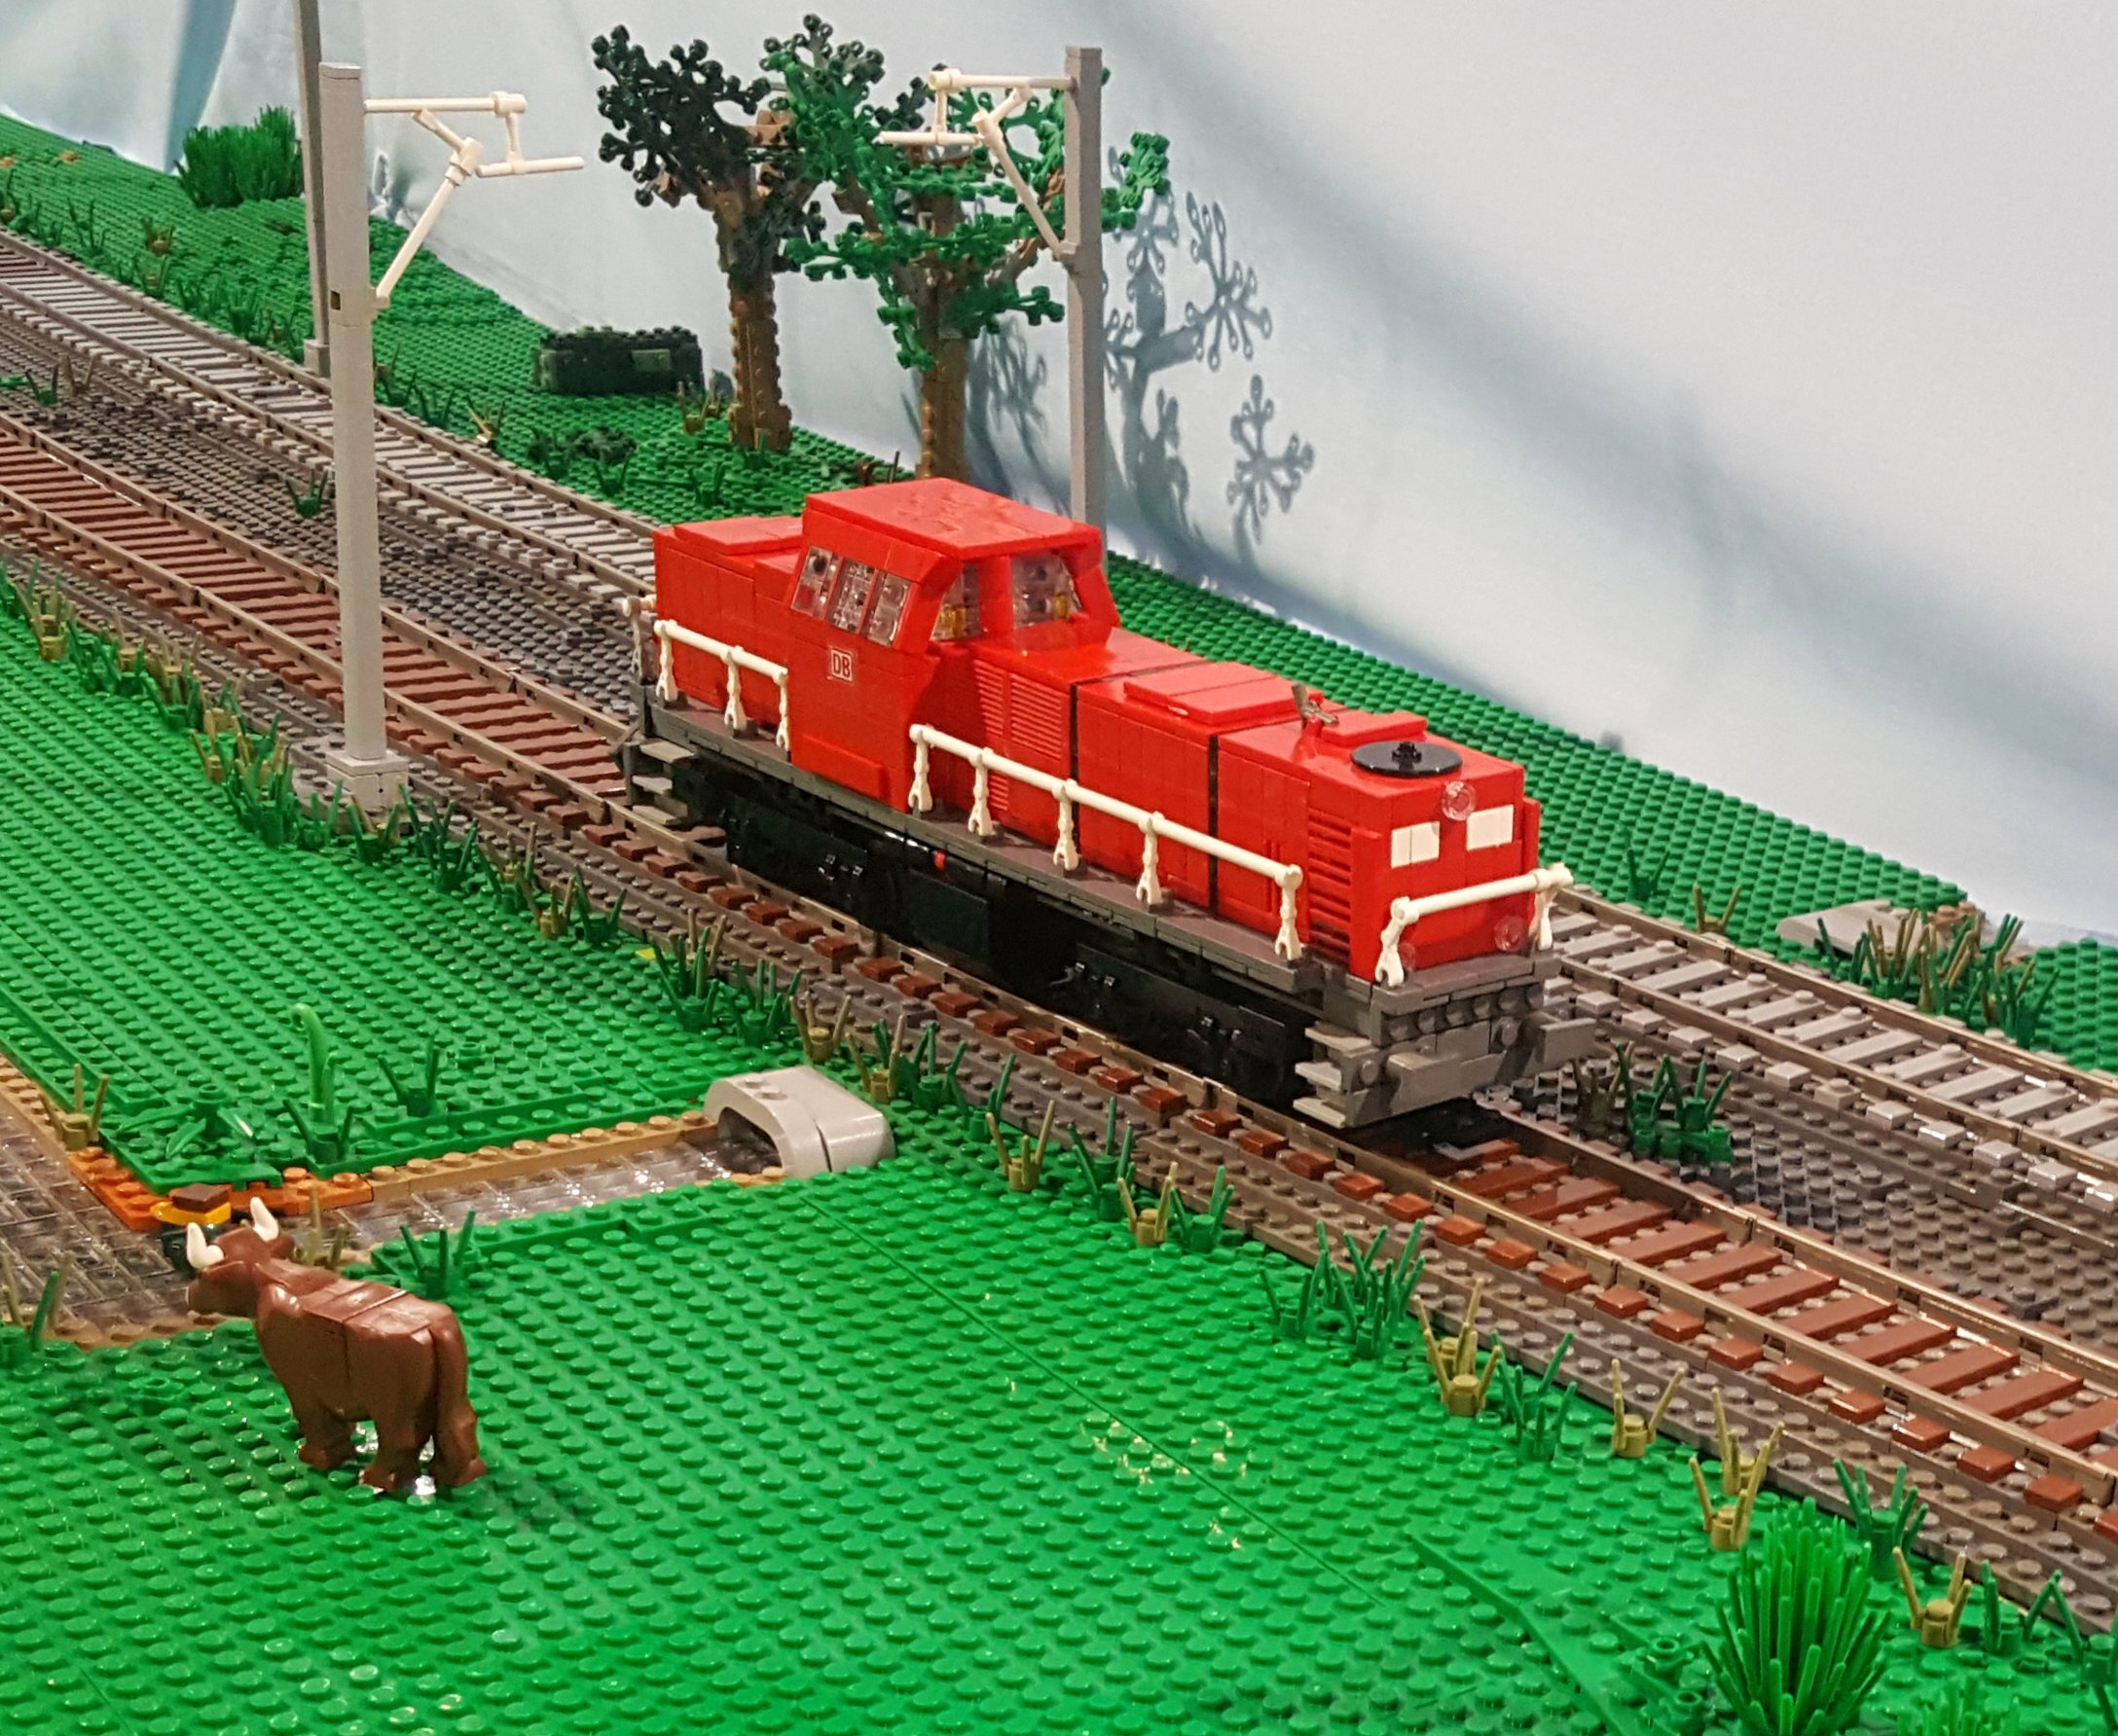
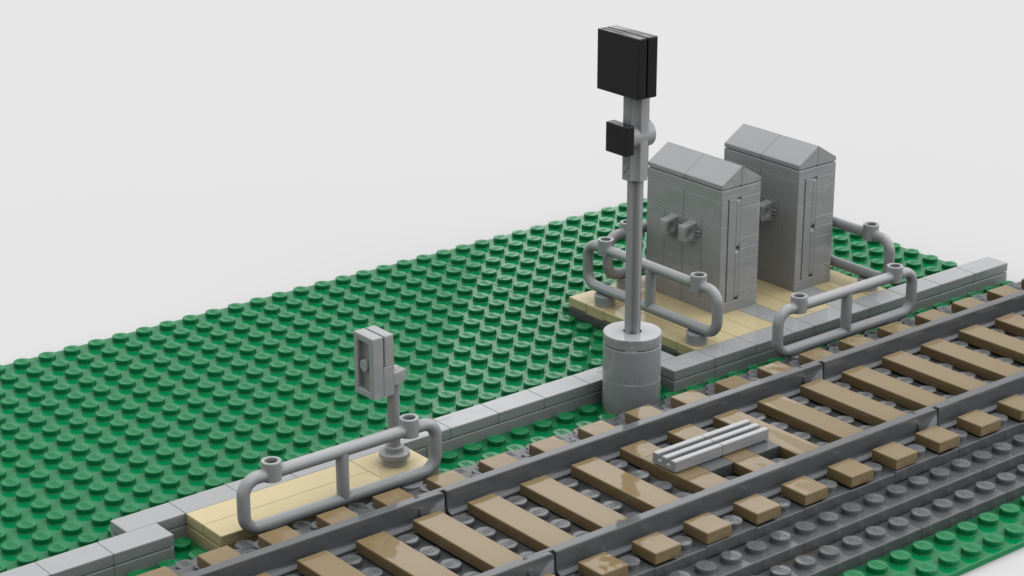
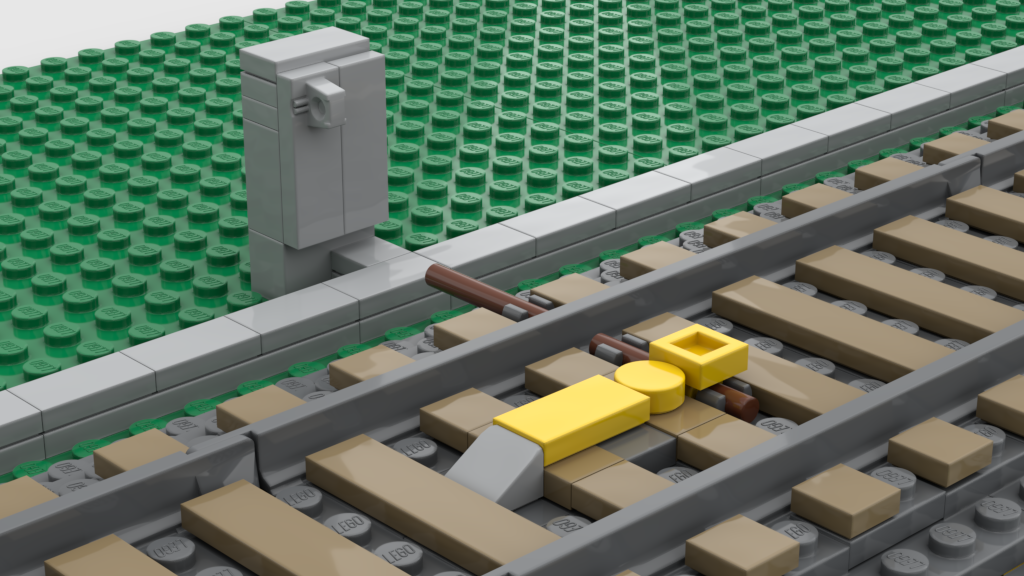
Lineside Infrastructure
If there is one thing rarely seen on LEGO train layouts that add extra “X” factor, it is the lineside infrastructure and civil engineering surrounding the track. Items such as drainage troughs, signals, electrical cabinets, fencing, signage, wiring conduits, lighting, etc. are ever-present on real railways but seldom represented on our LEGO layouts. While this topic is not strictly about ballast, it is easy to consider these details as part of the process of ballasting your track. Cutting away a small section of ballast to build a cable trough or mount a signal post is an easy and effective way to add those finishing touches.
Final Thoughts

I’m going to end this article by starting some controversy and debate! Shown above is my MOC of steam locomotive Tornado. It is resting comfortably on Carl Greatrix’s masterpiece LEGO train layout during the Great West Brick Show in the UK in 2014.
Notice anything special? How about the ballasting technique? Is it level 0, 1, 2…? In my mind, it’s level 9: “Boss”! Carl has ballasted his layout using traditional modeling techniques by using O-scale model train ballast secured in place with the well-established method of soaking the ballast with a 1:1 solution of PVA glue and water. Furthermore, Carl has subtly used scenic textures for some, but not all of the landscape. In my mind, it looks sublime and when you achieve the right balance, it can look gorgeous.
I argue that this is a legitimate and compelling approach not only to ballasting your LEGO track, but more broadly, to building a complete layout. When you build all the “man-made” things out of LEGO and render the “natural landscape” things from other mediums, the combination can look amazing. In fact, not so long ago, LEGO depicted models and dioramas in catalogs and product box-art using similar mixed-media techniques. This technique also has the advantage of being very cost-effective and can therefore allow you to build larger train layouts.
I have done it both ways. I have built scale model train layouts and LEGO train layouts. I was tempted to ballast my Fareham layout using traditional scenic techniques but opted instead for the “purist” approach of exclusively using LEGO elements for the entire landscape. In the end, I like them both. I have future plans for layouts, including a garden layout, and I’m keen to explore this topic in even greater detail!
How do you ballast your LEGO track? Leave your thoughts in the comments below.
Do you want to help BrickNerd continue publishing articles like this one? Become a top patron like Charlie Stephens, Marc & Liz Puleo, Paige Mueller, Rob Klingberg from Brickstuff, John & Joshua Hanlon from Beyond the Brick, Megan Lum, and Andy Price to show your support, get early access, exclusive swag and more.