Drafts of a Mac: Is A LEGO MOC Ever Really Finished?
/Today’s guest article comes from Kelly Bartlett who shares how creating multiple drafts of a LEGO MOC can help with problem-solving and the creative process.
Recently, I built a LEGO MOC for someone who wanted a 1:1 scale model of a laptop. It seemed like a fairly straightforward commissioned project, but I ended up going through several drafts before I deemed it “complete.” Whether builders design their MOCs digitally or build them with bricks like I do, we inevitably go through various drafts, making changes along the way before arriving at a final product. So let me take you through my process of designing the “BrickBook Pro” and how problem-solving over the course of multiple drafts made the end result a better creation.
First Draft: Shape and Color
The first draft of any MOC I build is to explore the basic shape and look of the build. It is quick and small. With this model, I was aiming to capture the color scheme, the depth of the top and bottom of the laptop, and the best type of hinge to use to make the LEGO version look like a real MacBook Pro.

Second Draft: Refining Shape

Since the client wanted an Apple laptop, I tested out rounded tiles on the corners of the top layer of plates for the edges of the screen. This seemed like the easier way to achieve the look, but I didn’t like being able to see the right angles of the plates on the lower layers underneath the curved tiles. I needed another solution.
Third Draft: Refining Shape

After exploring the pieces available, I found a solution. To get rid of the protruding right angles, I needed to use rounded plates on all three layers that made up the base. This gave the smooth look of a completely rounded corner that I was going for.
When it comes to building, knowing all the available LEGO parts is like a superpower. Most of the time when you think “I wish such and such part existed,” is usually does in some close form factor.
Fourth Draft: Scale
Now I needed to figure out the actual size of the model. I had to ask myself, what would the appropriate stud width and length be? If I wanted to be able to include every key on the keyboard, the final build would be larger than 1:1 scale. So for this project, it was decided that it was more important to get the size and scale correct—which meant some keys would not be included on the keyboard. I was okay with that, as the omissions would not be glaringly obvious.

Fifth Draft: Color and Stickers


Now that I knew the shape, size, and layout of the MOC, I started creating what (I thought) would be the final draft. I created custom stickers for the lettering on each key, including some of the tiniest stickers I’ve ever made! Then I built a replica of my “rainbow draft” using a more accurate color scheme.


After the stickers were placed and the rest of the model completed, I wanted to see how I had done. I placed the LEGO model side-by-side with the MacBook reference material, and I was pretty happy with the way it came together. The shape and overall feel were spot on!
However, I noticed two issues that still needed editing:
I explained to my client that with this low-profile hinge, the computer would not be able to close forward like a real laptop. The tiles on each layer prevented forward folding. They replied that they’d like it to be able to open and close like a real laptop—so I had to go back to the drawing board to change the hinges.
The combination of matte 6x6 tiles and glossy 2x6 tiles broke up the look of the screen. I’d like a smoother, more consistent screen rather than one that looked like it needed help.

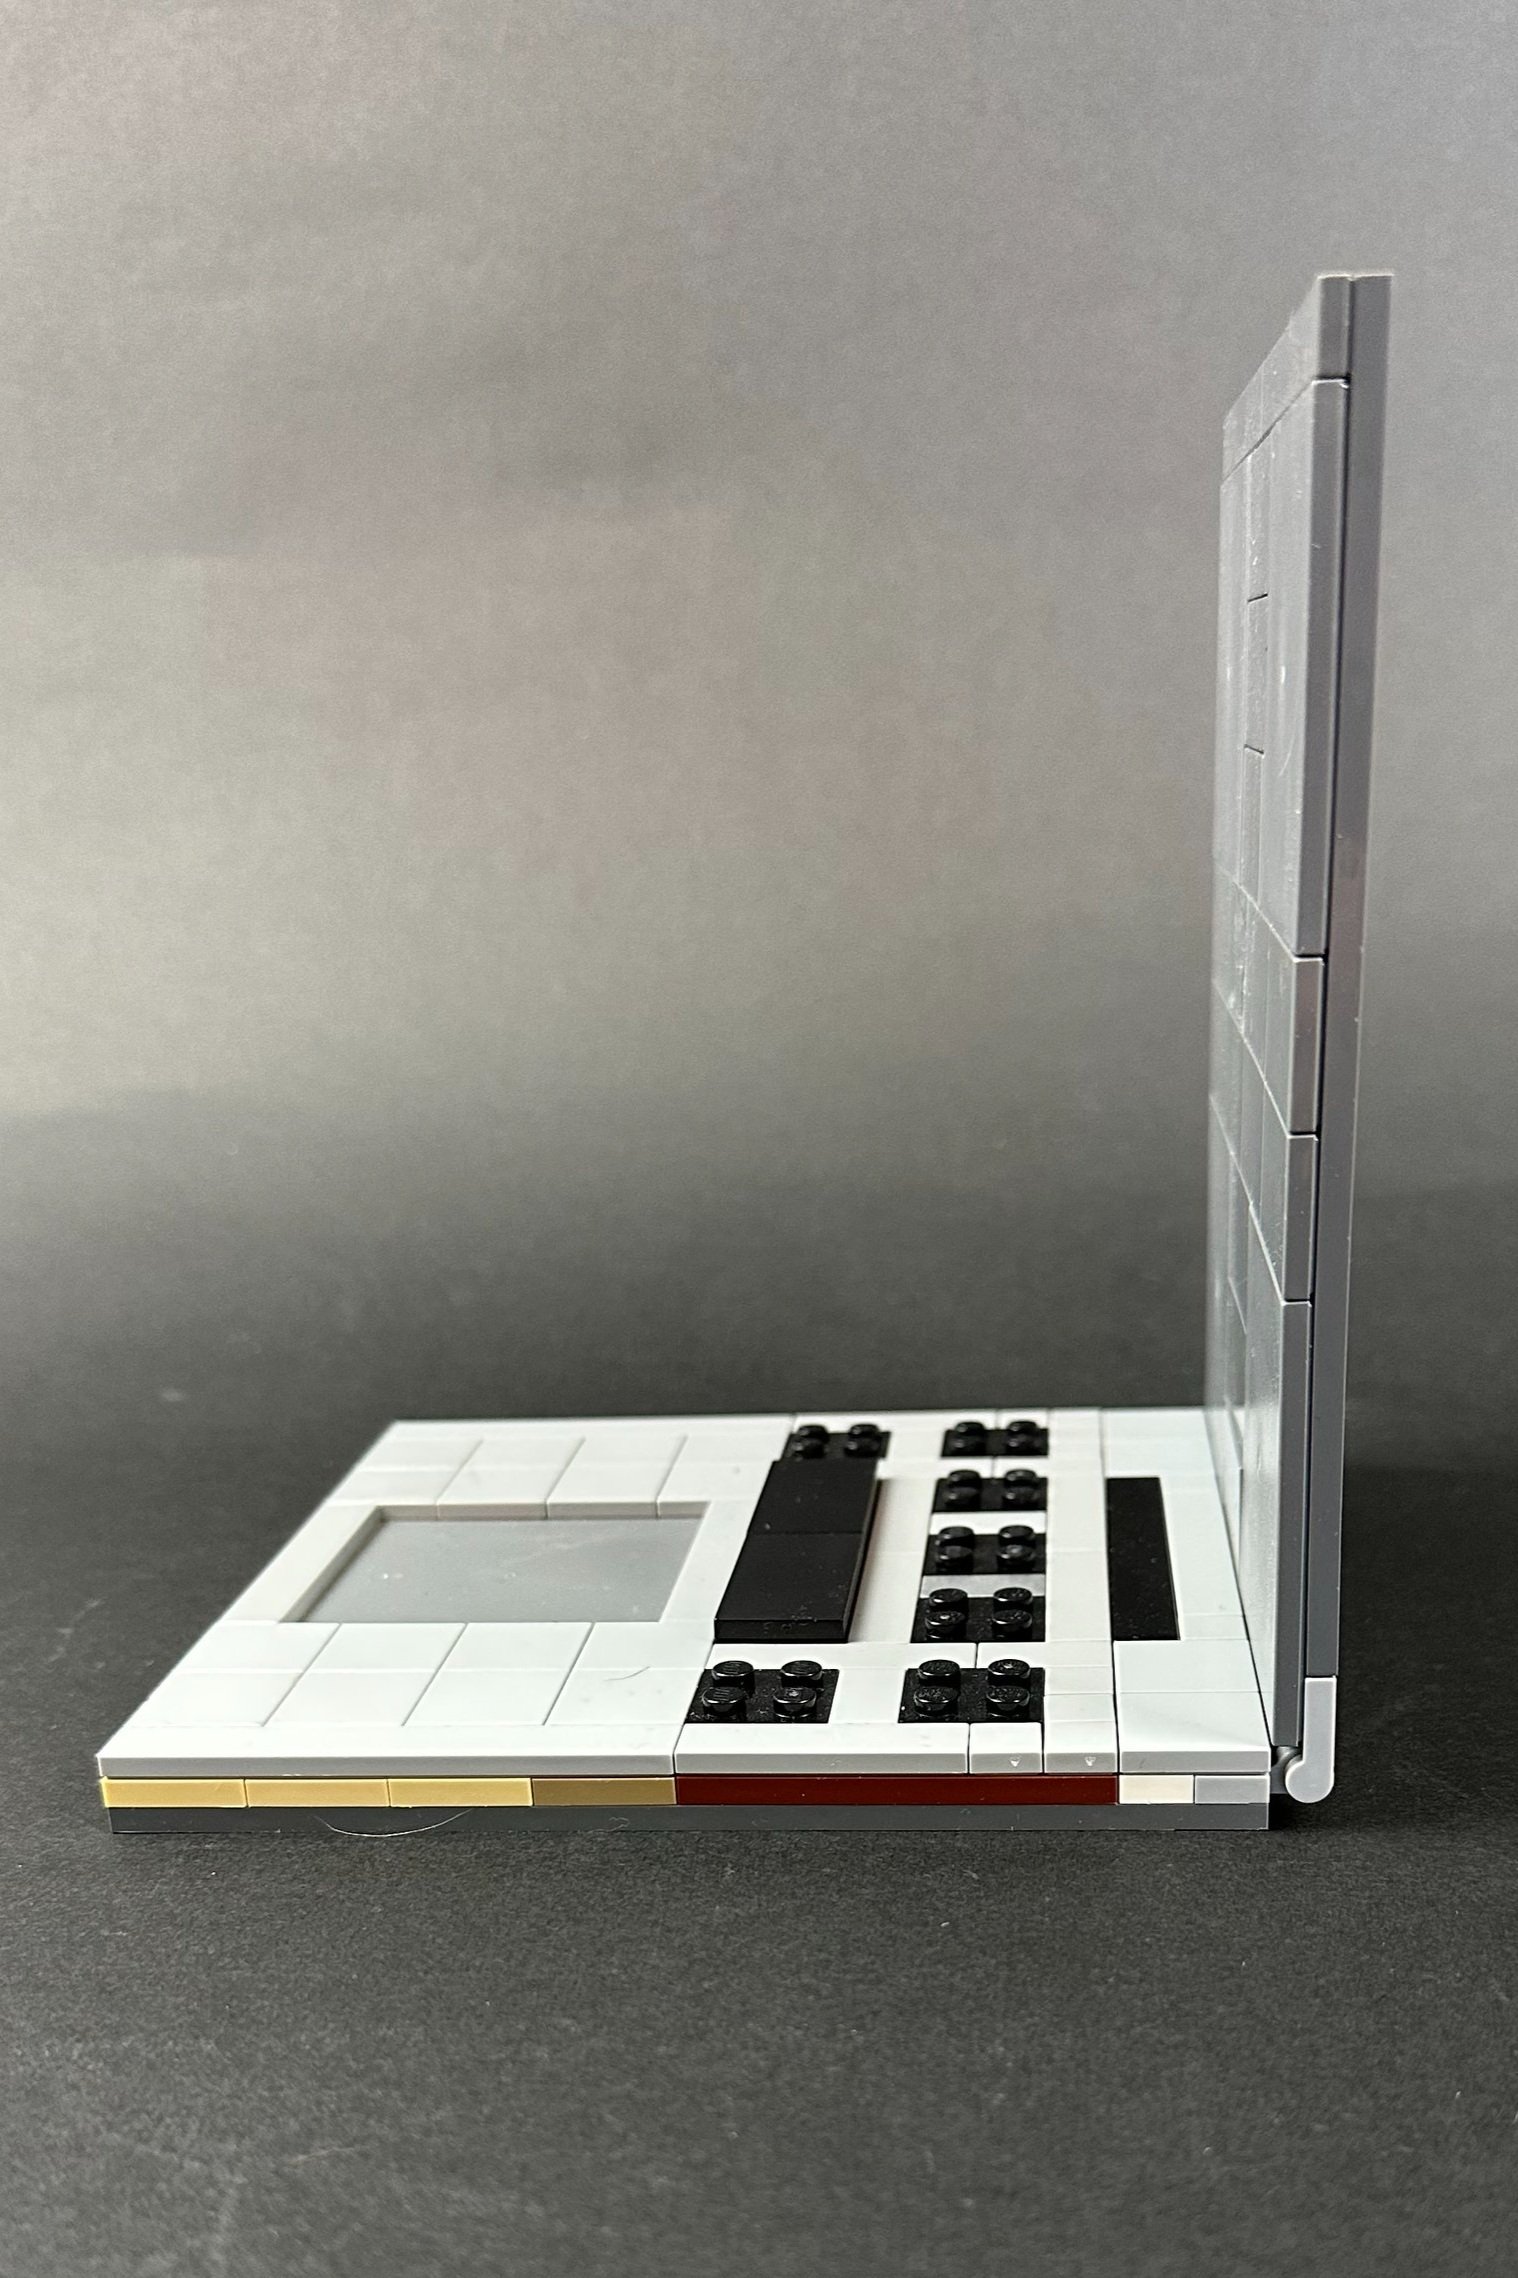
Sixth Draft: Editing Aesthetics and Function
For my next draft, I looked to a different laptop model for inspiration on hinges that folded forward. I didn’t want to redesign the entire base, and it looked like I could swap out the 1x2 clips and bars I currently had in place with 1x2 hinge bricks. It just meant this laptop will be a combination of computer brands! The client approved the prototype photos and was excited that the model would be able to open and close.
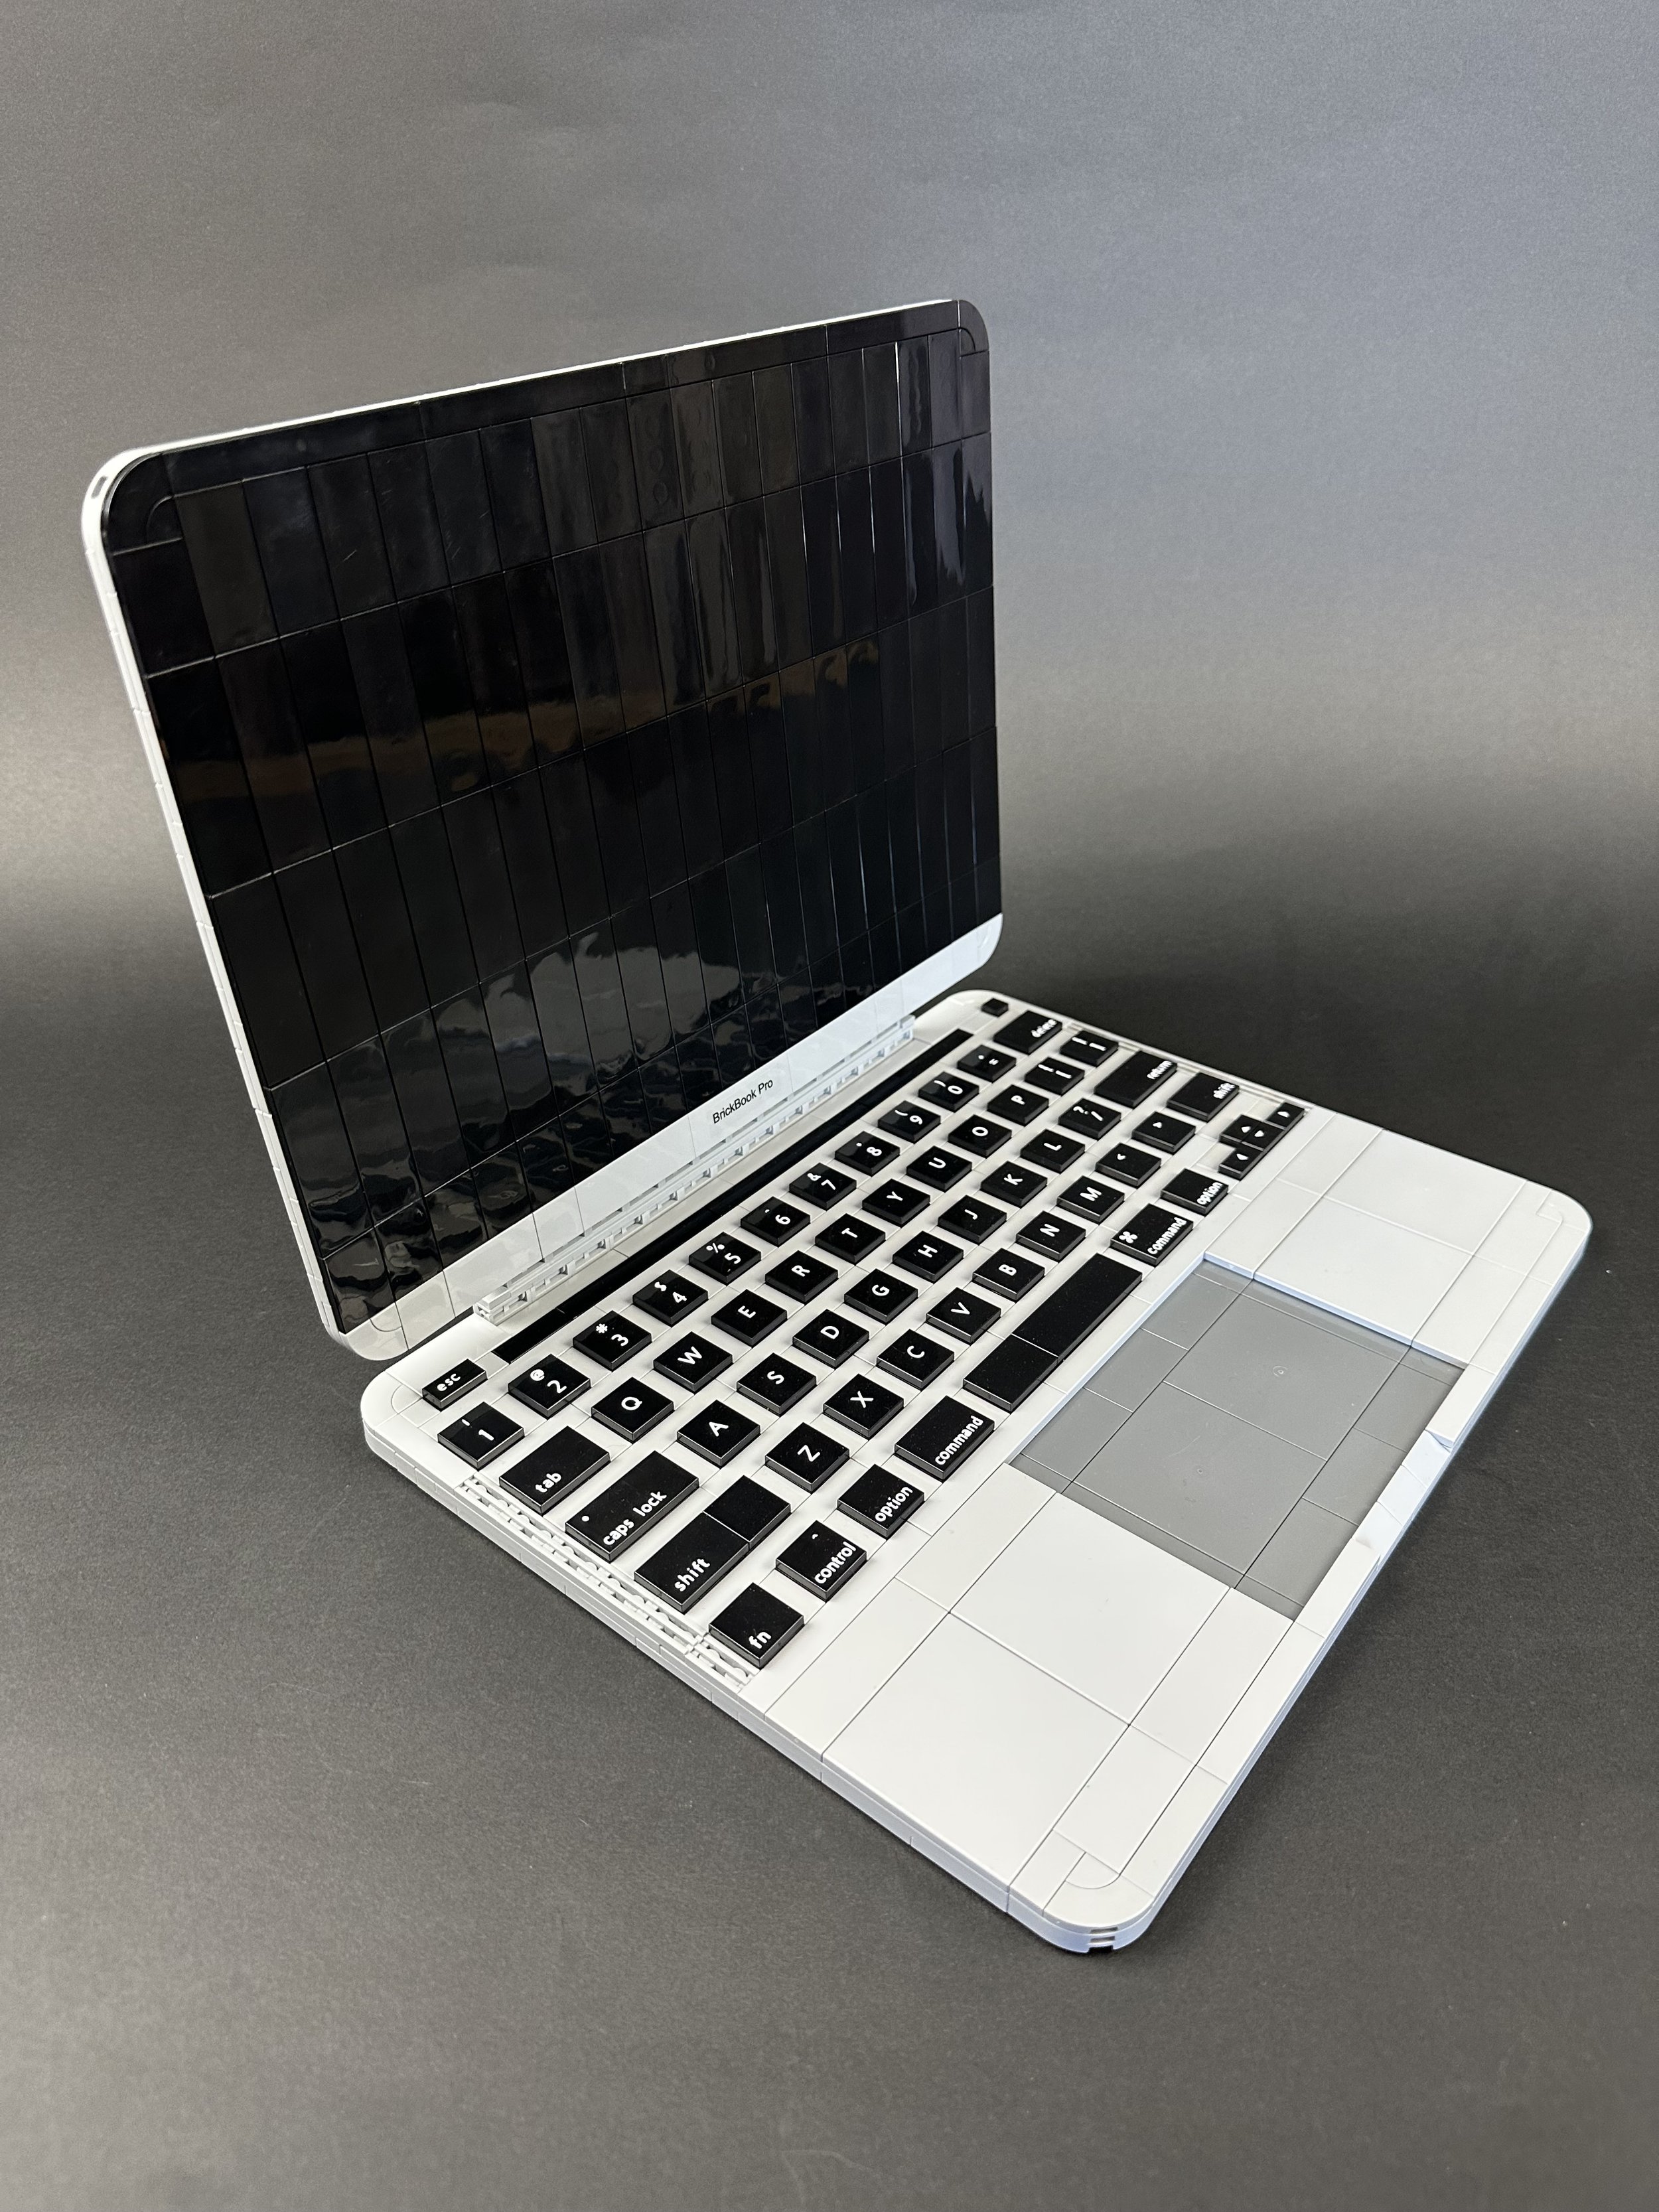
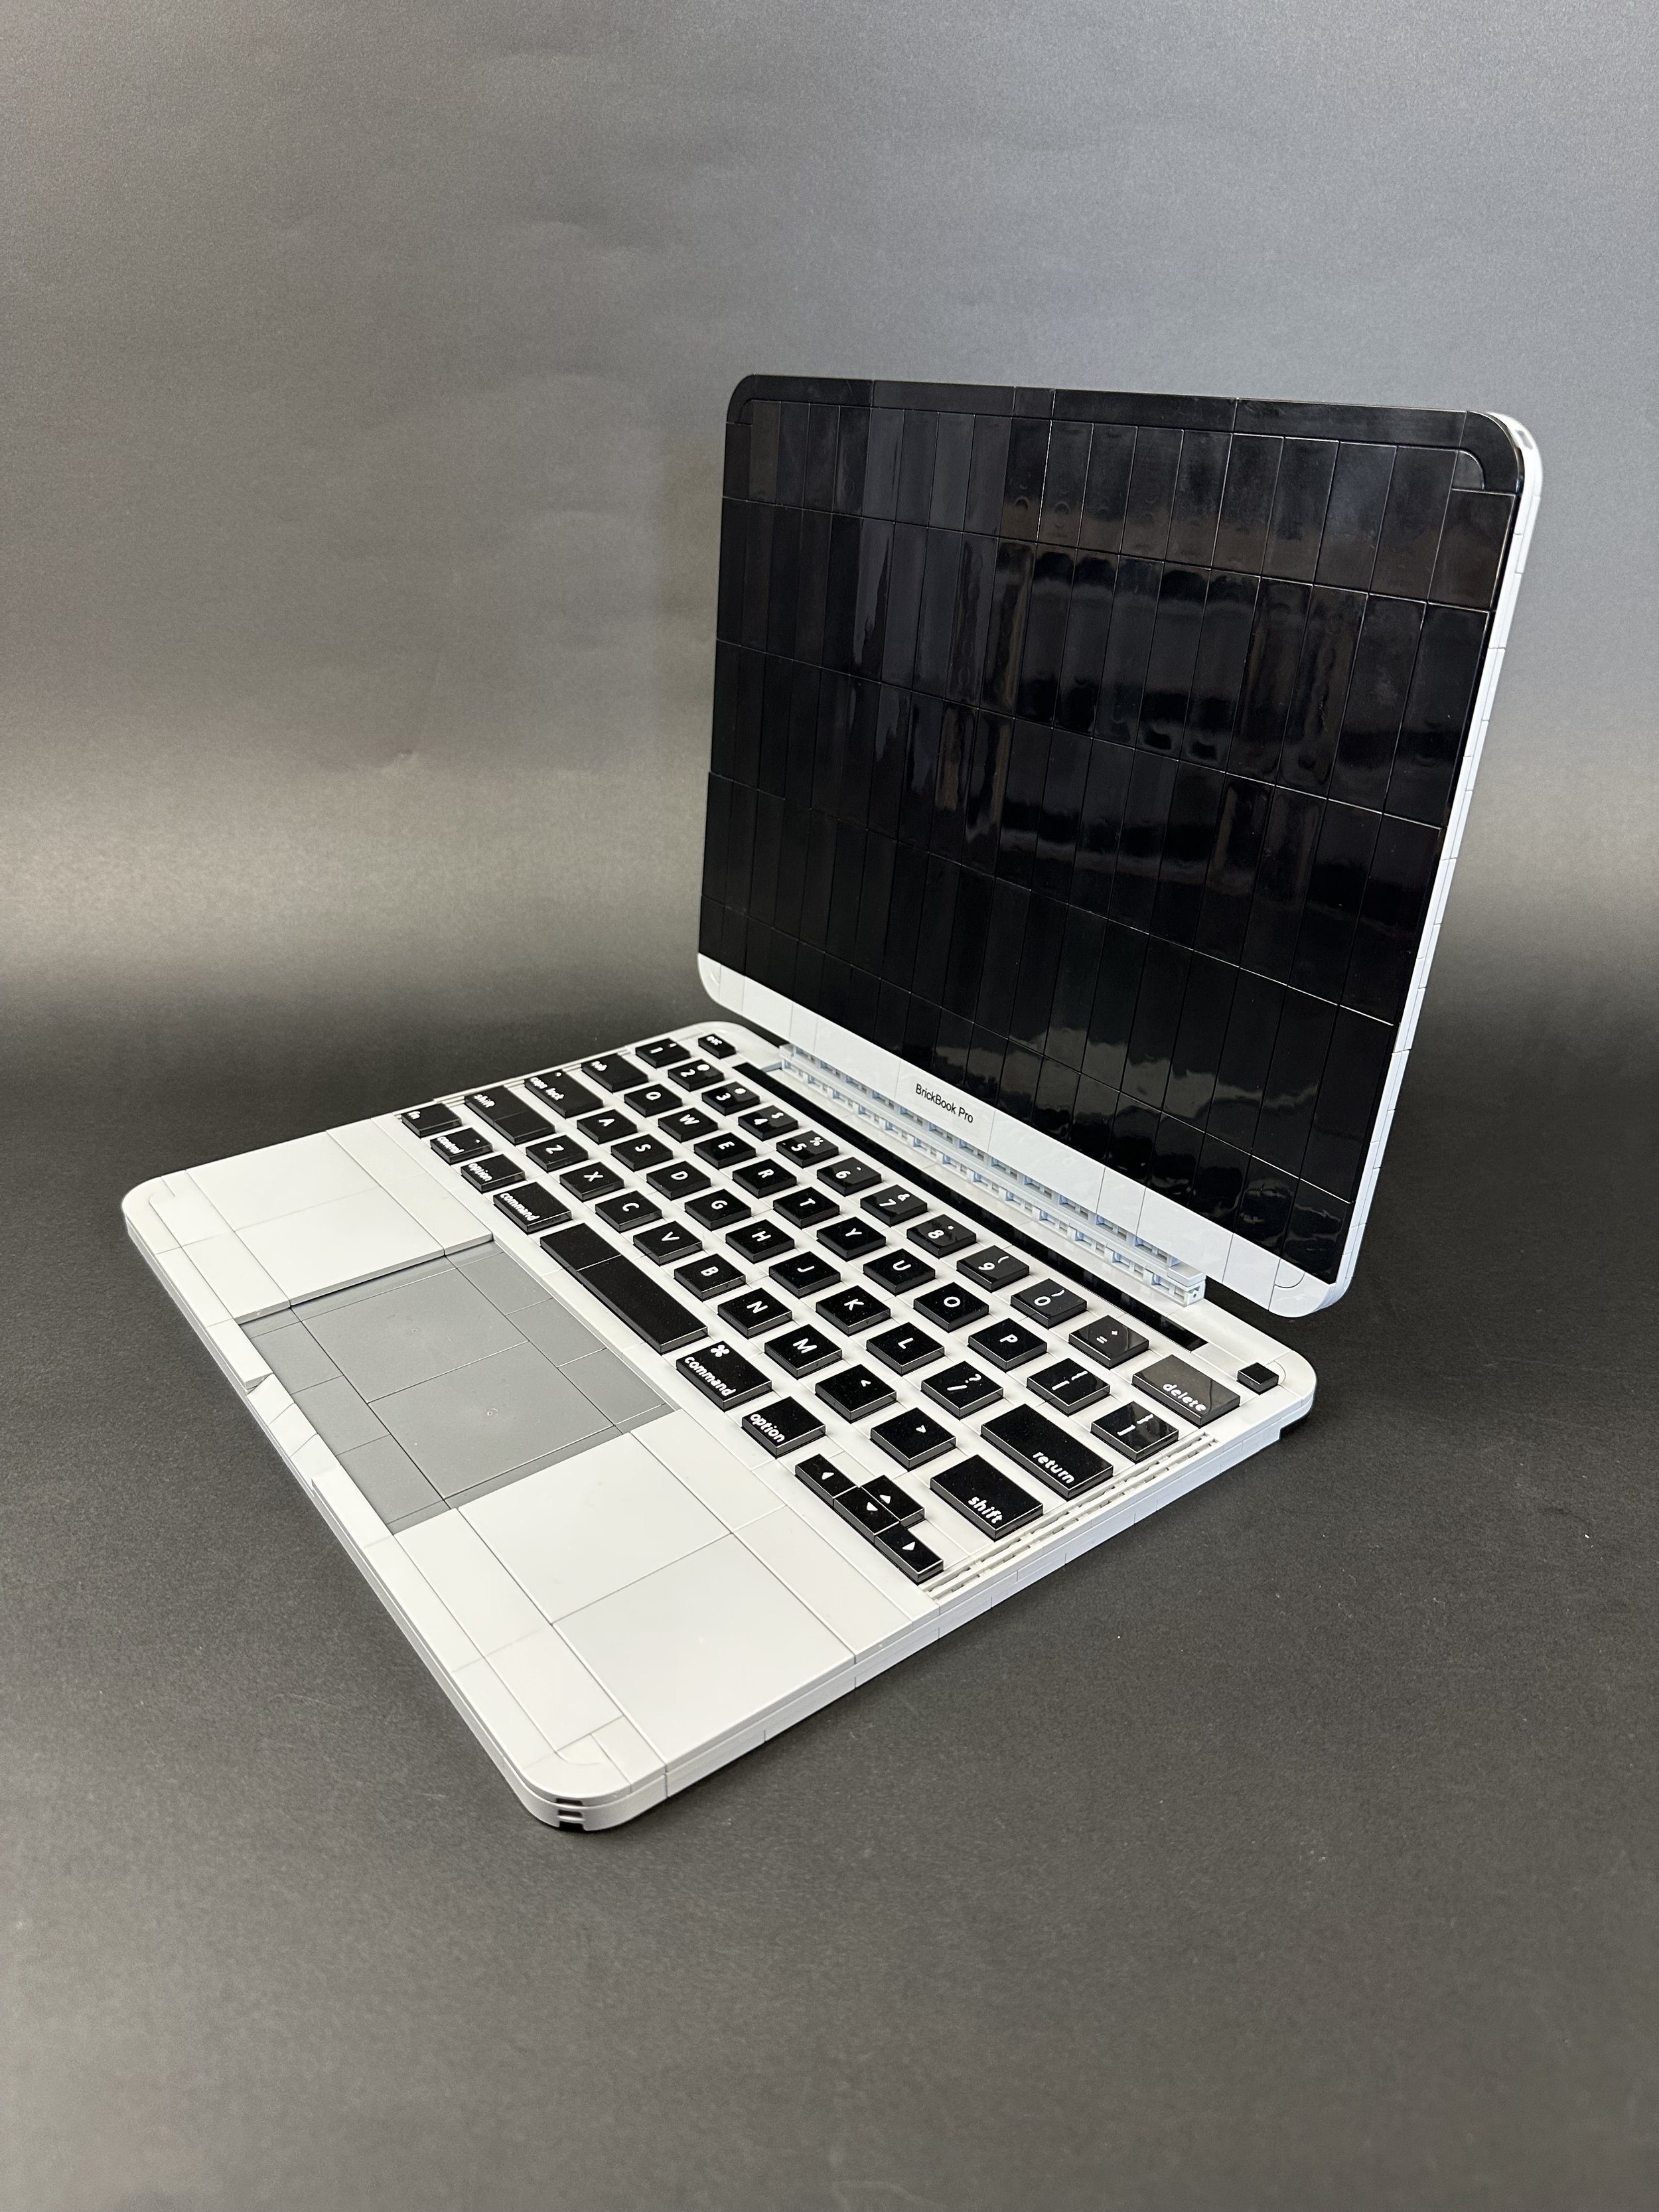
I also redesigned the screen using only glossy tiles, and I like this cohesive look much better. It looks so much more real having the same texture across the whole screen. And with that, I think the laptop model is finally complete.


Is a MOC Ever Finished?

Or is it!? Could there be a seventh draft? When do you know if your LEGO MOC is completely finished? Can’t a design always be tweaked or improved?
For me, this laptop MOC is good enough to call “done.” I am happy with it, and my client is happy with it. If I looked at it long enough, I’m sure I could find other changes to make, but they would probably be pretty minor and may not even add significant improvement to the build.
Maybe the secret is that a MOC is never really done. As the creator, you get to make the final call… after all, we LEGO builders have countless ideas and never enough hours in the day. So maybe we can revisit a MOC again a few years later when more new pieces are available or maybe we’ll move on to the next build. Wherever the creative journey takes me, I’ll know there will be multiple drafts in my future!
Best of BrickNerd - Article originally published March 16, 2023.
How many drafts do your LEGO MOCs go through? Leave your thoughts in the comments below.
Do you want to help BrickNerd continue publishing articles like this one? Become a top patron like Marc & Liz Puleo, Paige Mueller, Rob Klingberg from Brickstuff, John & Joshua Hanlon from Beyond the Brick, Megan Lum, Andy Price, Lukas Kurth from StoneWars, Wayne Tyler, Dan Church, and Roxanne Baxter to show your support, get early access, exclusive swag and more.