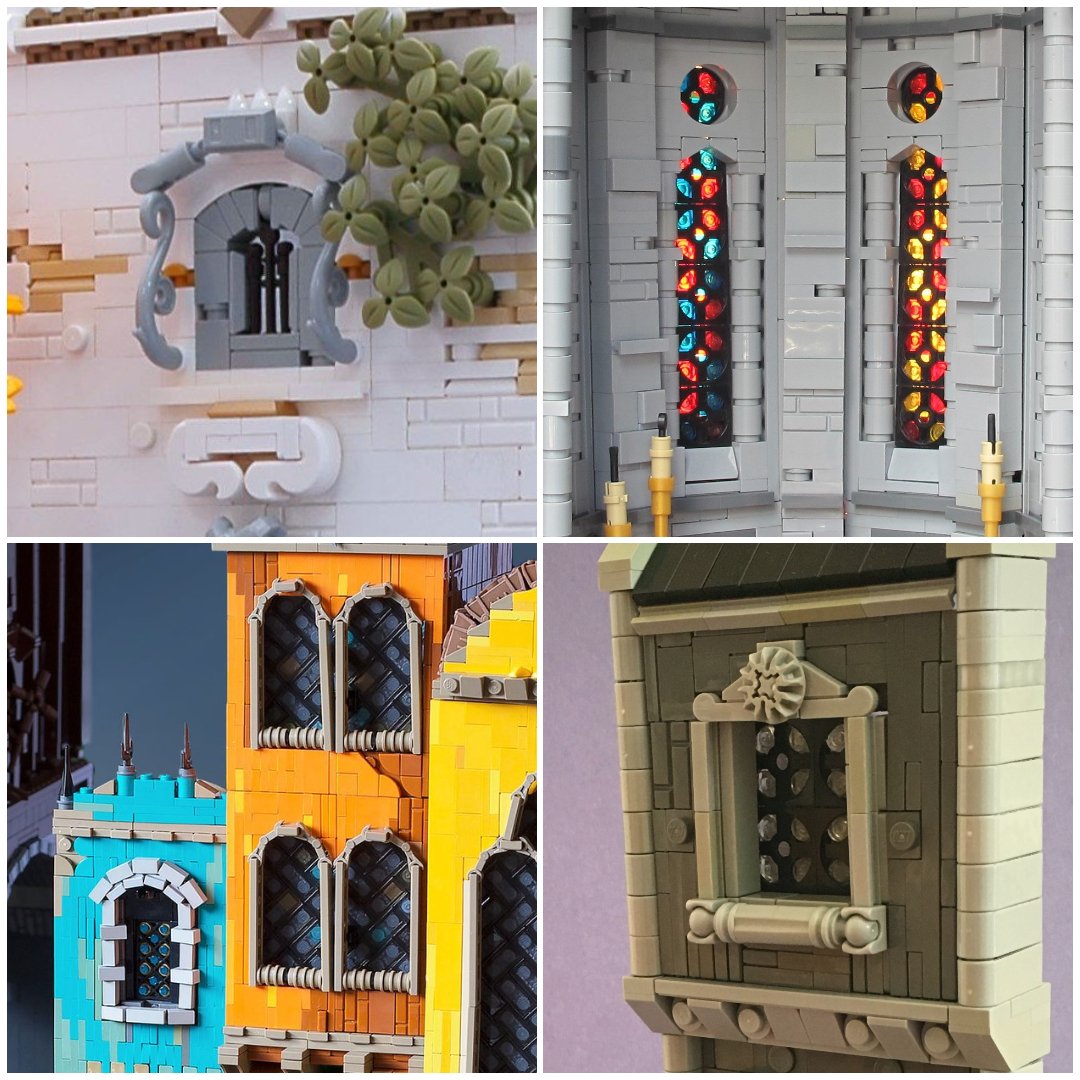
Let There Be Light: Making My MOCs More Memorable
/What do you do when a LEGO event is fast approaching and you’ve got no new MOCs to show? Well, you could always try to sprinkle some magic on some older stuff… by adding lights!
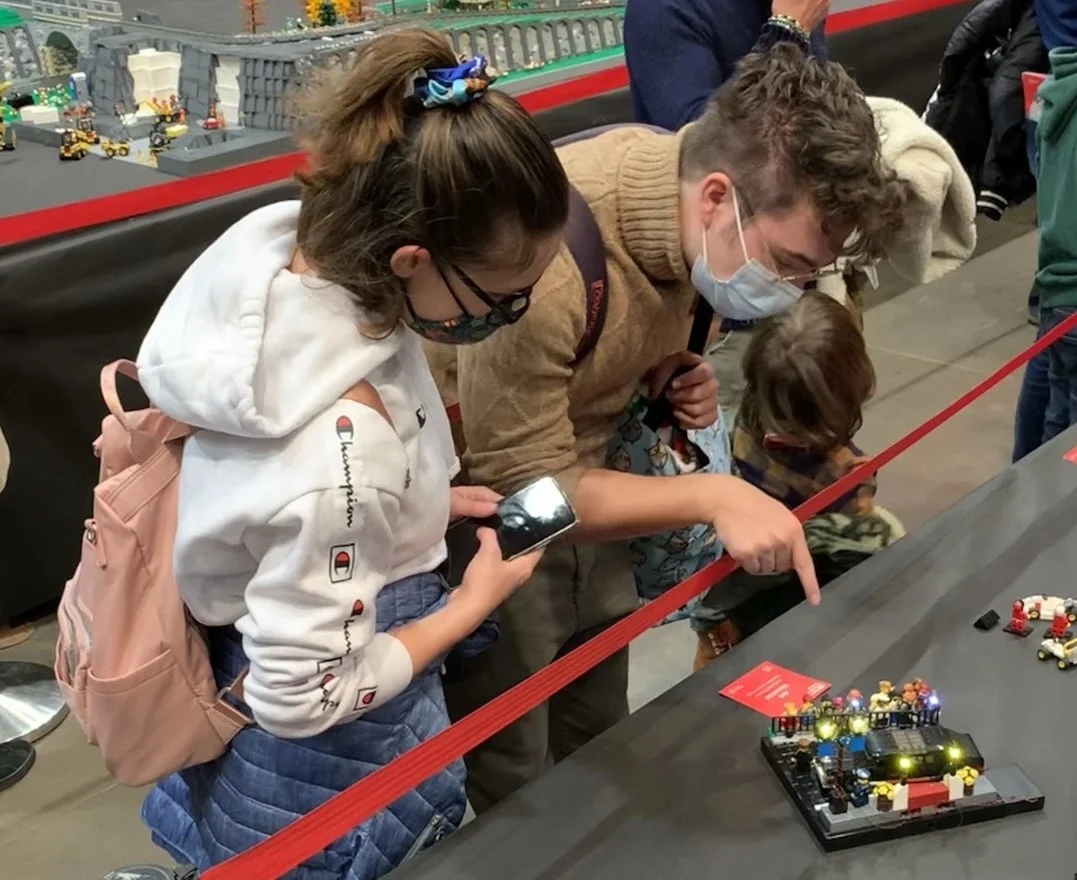
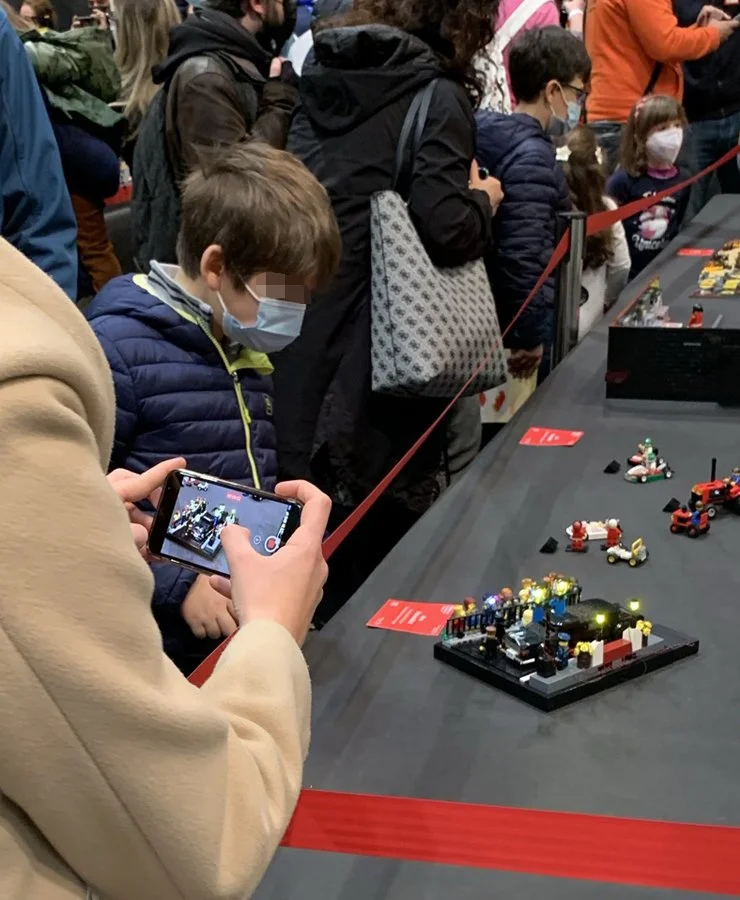
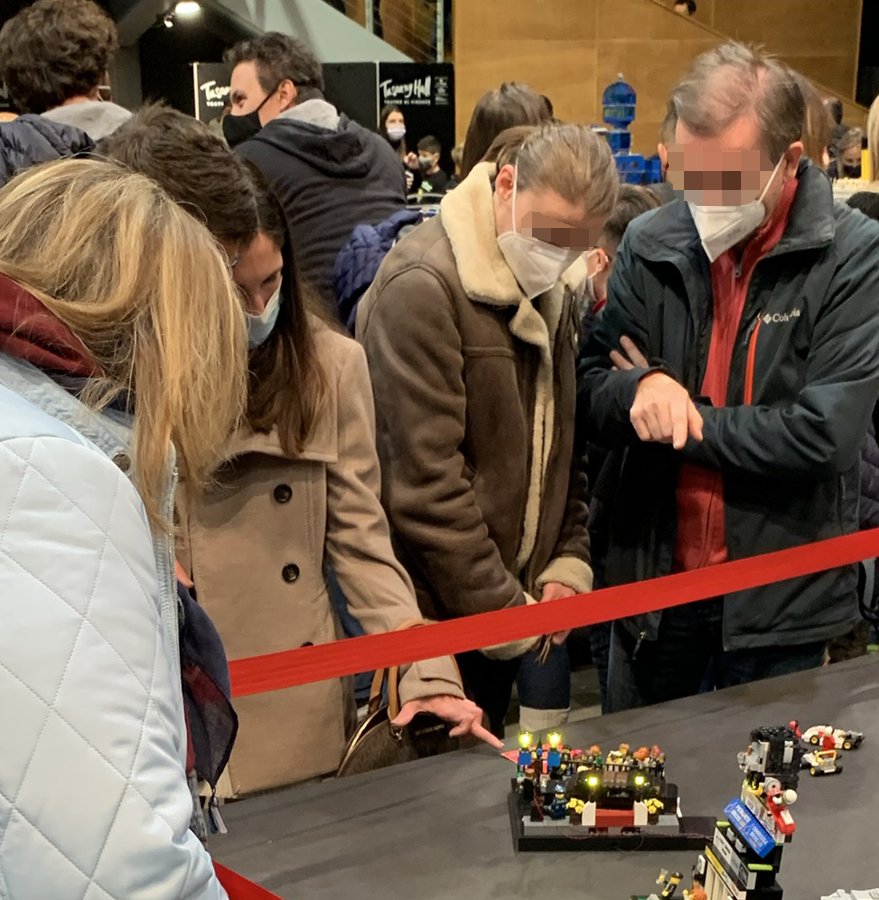
When the index finger (also known as the pointer finger) comes out, you know they’ve discovered your new lights
[Warning: Article contains several GIFs depicting flashing camera lights.]
The City of Blinding Lights
…is, obviously, New York. In my case, however, it would have to be Chicago—or rather the suburb of Schaumburg, Illinois, which since 2007 has played host to Brickworld, one of the world’s largest LEGO conventions. I went there in 2015 to experience my first LEGO event outside Europe.
Back then, it wasn’t that common—at least not at the conventions I’d been to—for builders to install lights in their MOCs. Sure, there would be some blacklights used to get fluorescent elements to glow, or the odd light bulb that had been placed inside one of the bigger builds in order to show off the interior properly, but nothing like the flashing spectacle we often see today.
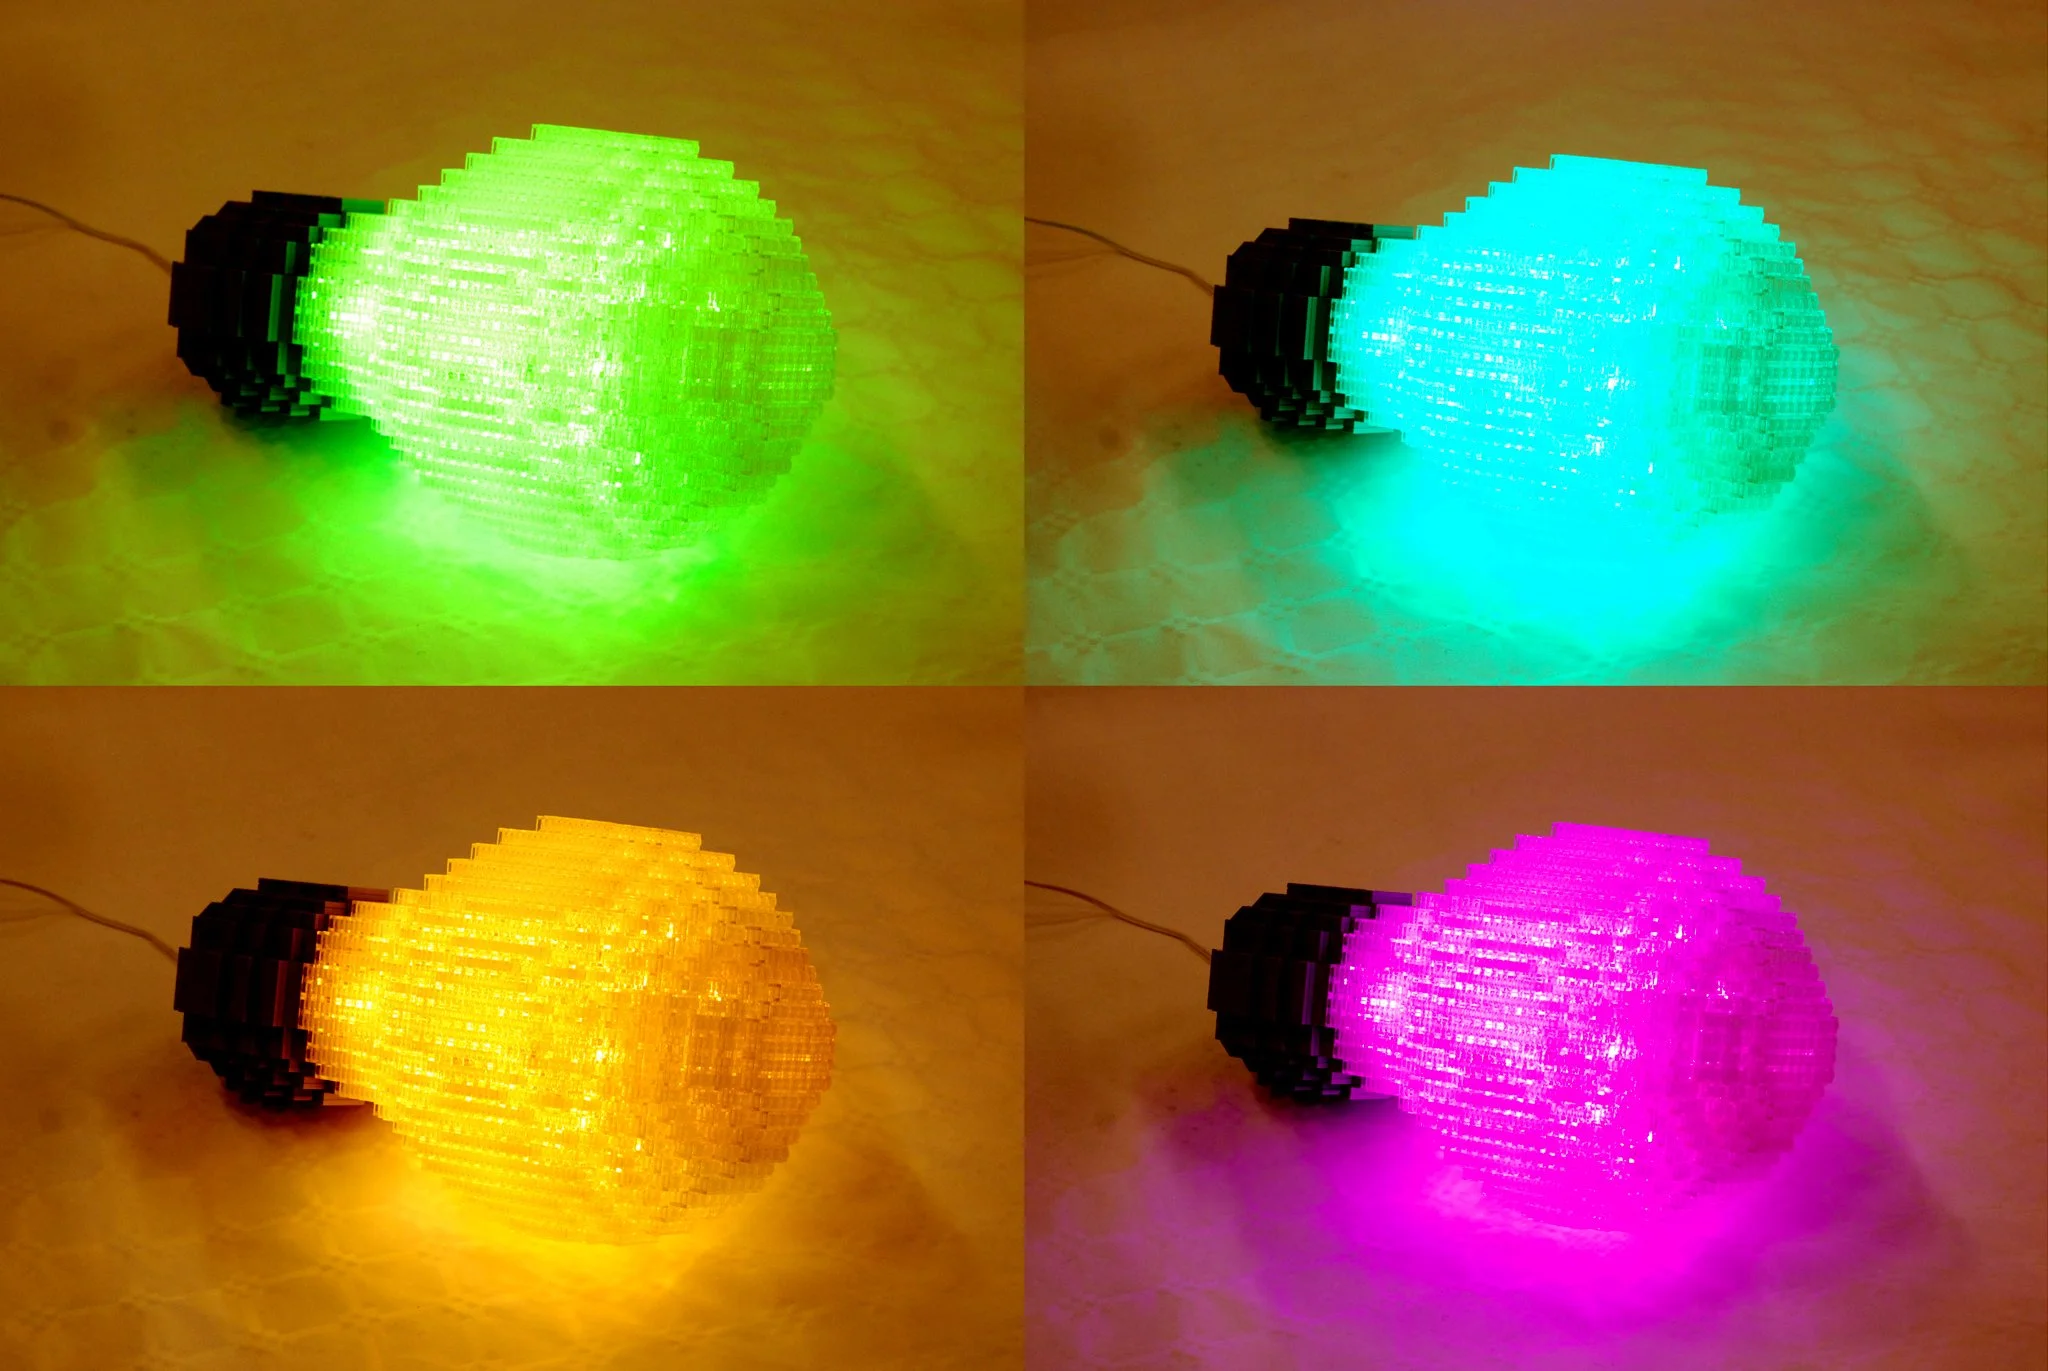
One of the very few lit models at my very first LEGO convention, the 2012 LEGO Fan Weekend in Skærbæk, Denmark: Tobias Reichling’s lightbulb, which pulsated lazily and pleasantly through the colour spectrum
That said, a couple of startups providing ready-made lighting solutions had caught my eye: Lifelites and Brickstuff. Seeing as I had discovered what seemed to be an aversion on my part to sensibly put together a building without adding an insanely detailed interior to it—which then is really difficult to put on display when you’re also adding solid walls (as you do in a proper building)—I had studied their products with interest.
Of the two, Brickstuff seemed to be offering the most easily-hidden products. As I’ve later explained many times to people who are curious about lighting solutions, if you’re building something that you’re planning on adding lights to, you can normally quite easily build your way around the problem. You can add channels for wires to run through, and leave room for lights, however thick and chunky they may be. That means you can use pretty much any kind of small LED product on the market, and you’ll probably find a good—and cheap!—selection at your local DIY store.
But in my case, I wanted to add lights to some buildings that I had already built, and I was hoping not to have to tear them completely apart to do it. That’s why I decided to go for Brickstuff. I knew they would be present in Chicago, so I knew I could probably have a chat with them there, and see what kinds of lights they’d recommend in my case.

My setup at Brickworld 2015, sans lights. I realise that my presentation skills did, at the time, leave something to be desired
A Enlightening First Encounter

My first live encounter with Brickstuff: LEGO set #10247 Ferris Wheel, fitted with pulsating lights, mesmerising the public at the booth at Brickworld Chicago 2015
After having set up my table, featuring the buildings I was planning on installing lights in, I made my way over to the Brickstuff booth, where I met founder Rob Klingberg for the first time. You can read some of the story behind the how the company got started in the guest article Rob wrote for BrickNerd, but it’s telling that he had brought his kids along with him on the trip. It really is a small family business, and at least for me, that felt like one good reason to choose Brickstuff.
Now, it is of course entirely possible that he was able to recognise the scent of a Norwegian visitor with money to spend, but either way, Rob welcomed me with open arms (not literally, we didn’t know each other that well yet) and walked back to the table with me to see what I would need to put lights in the six buildings I had brought. He listened to my requests, then put together a great package deal and showed me the basics of his very simple plug-and-play system.
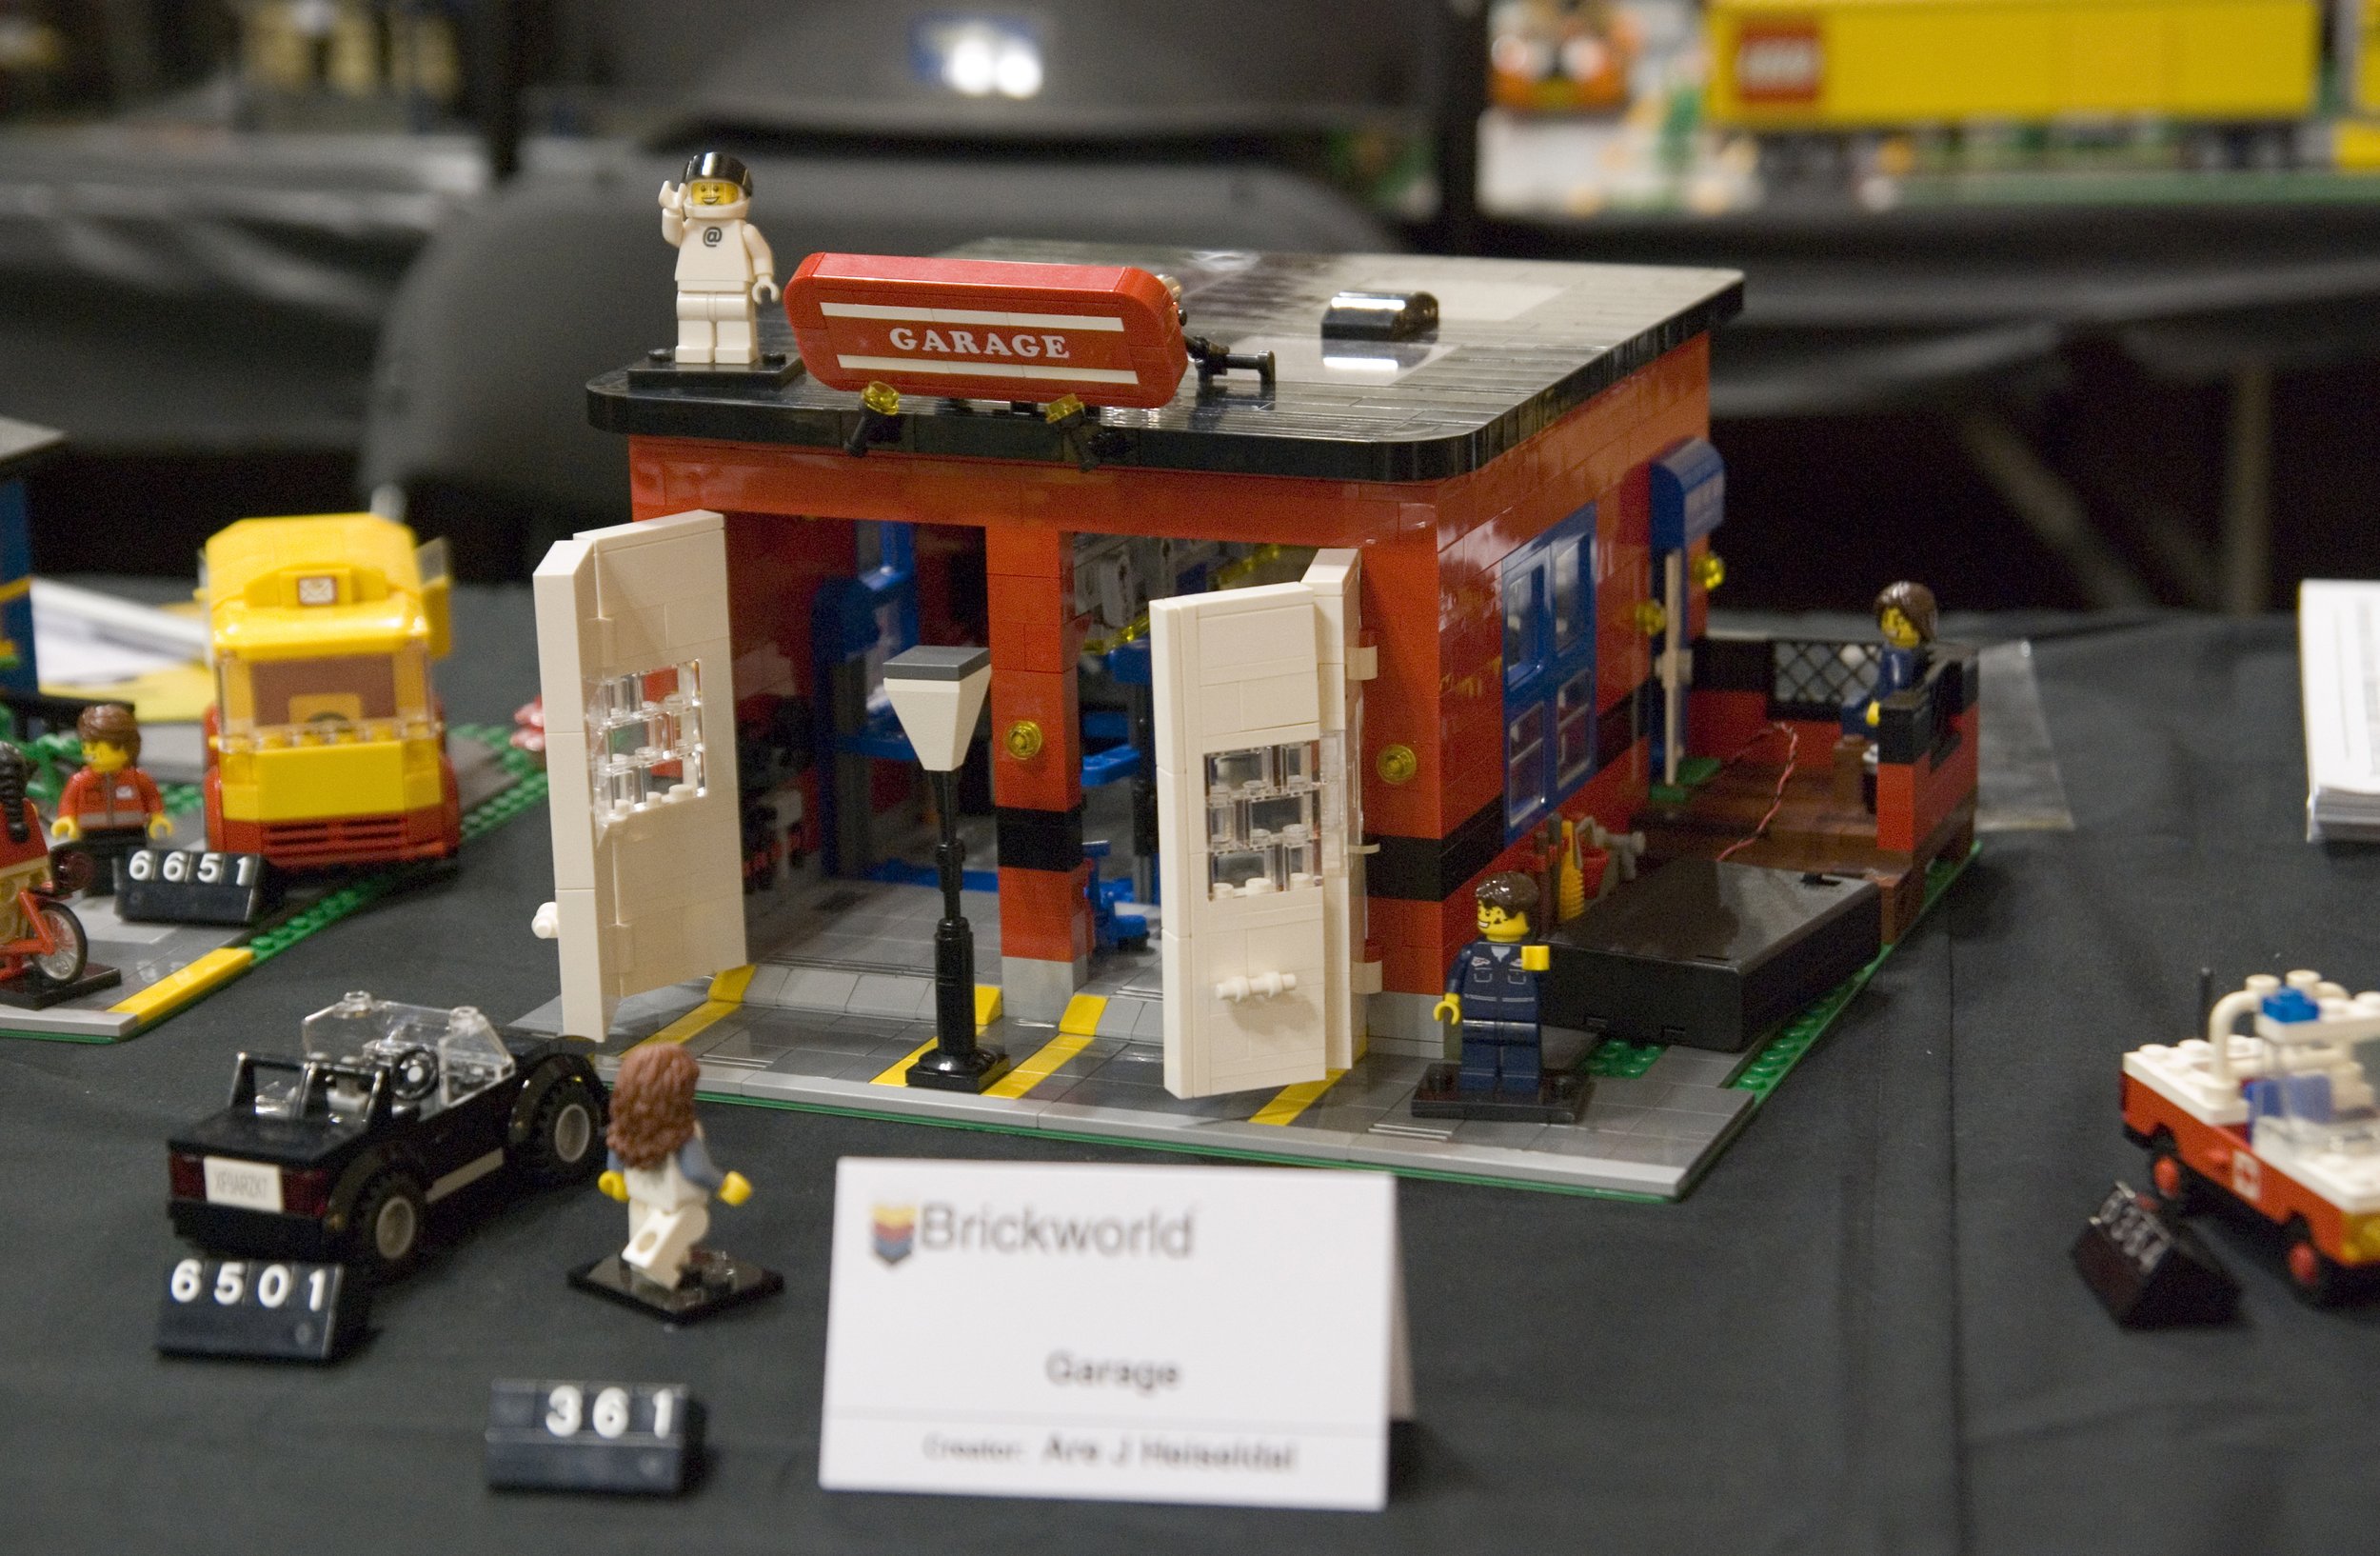
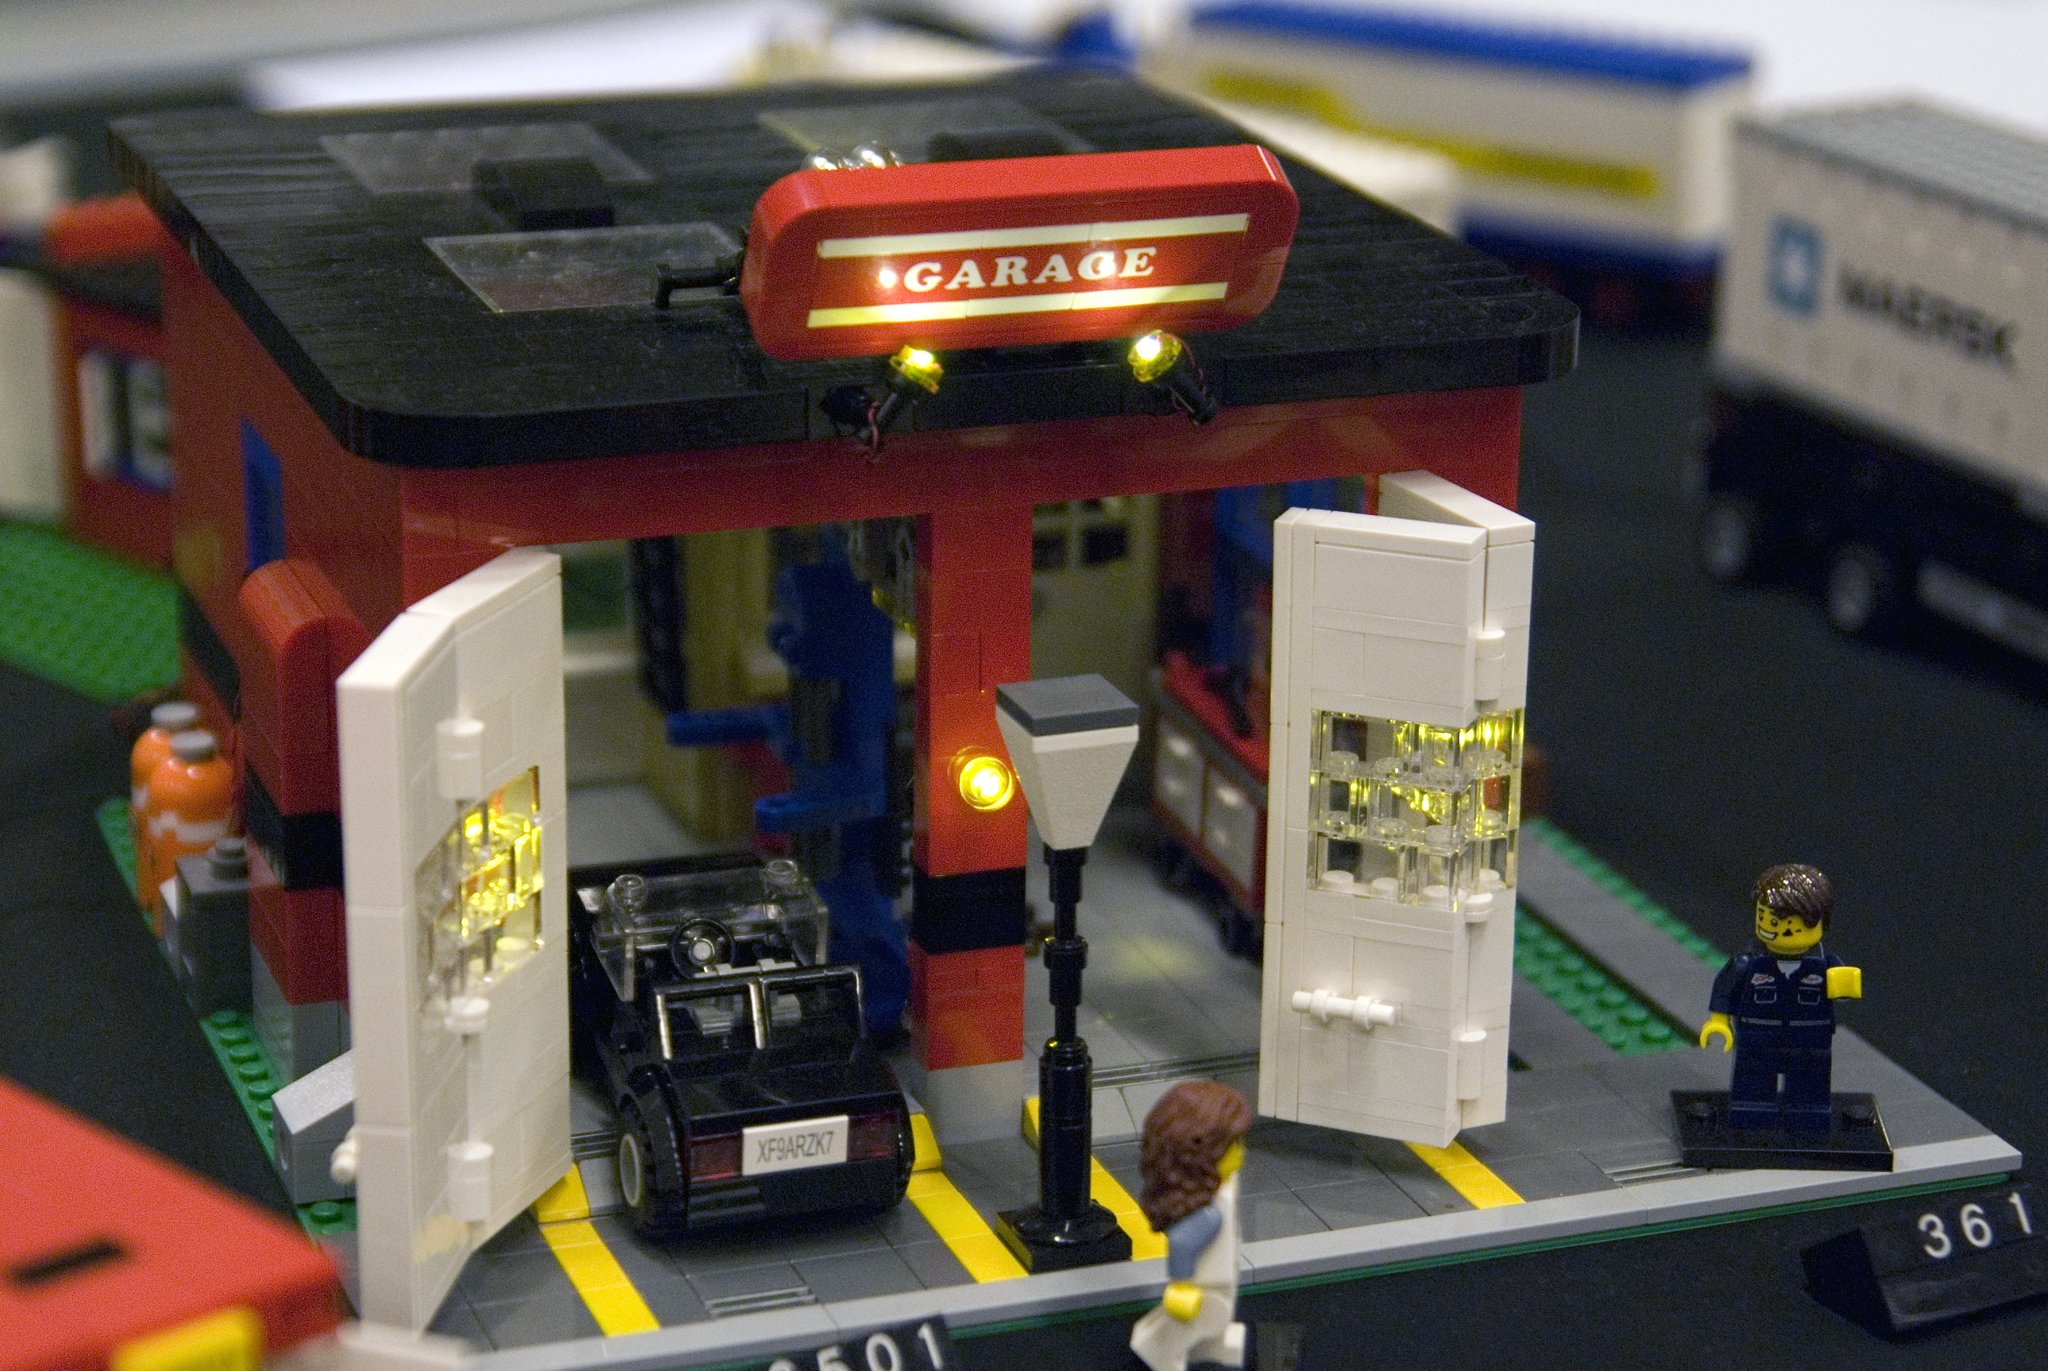
Brickworld Chicago is, among other things, famous for its “World of Lights”, which is an after-hours event when all the lights in the hall are switched off and the only things stopping the attendees from bumping into each other and causing catastrophic disasters to each other’s builds are the lights installed in and around people’s MOCs. I did not know this was a thing before I came to the event, but I figured it couldn’t hurt to try to install some lights right away, so I fiddled around with the wires and managed to retrofit my homage to the lovely 1979 LEGO set #361 Garage with some of the lights I’d bought.
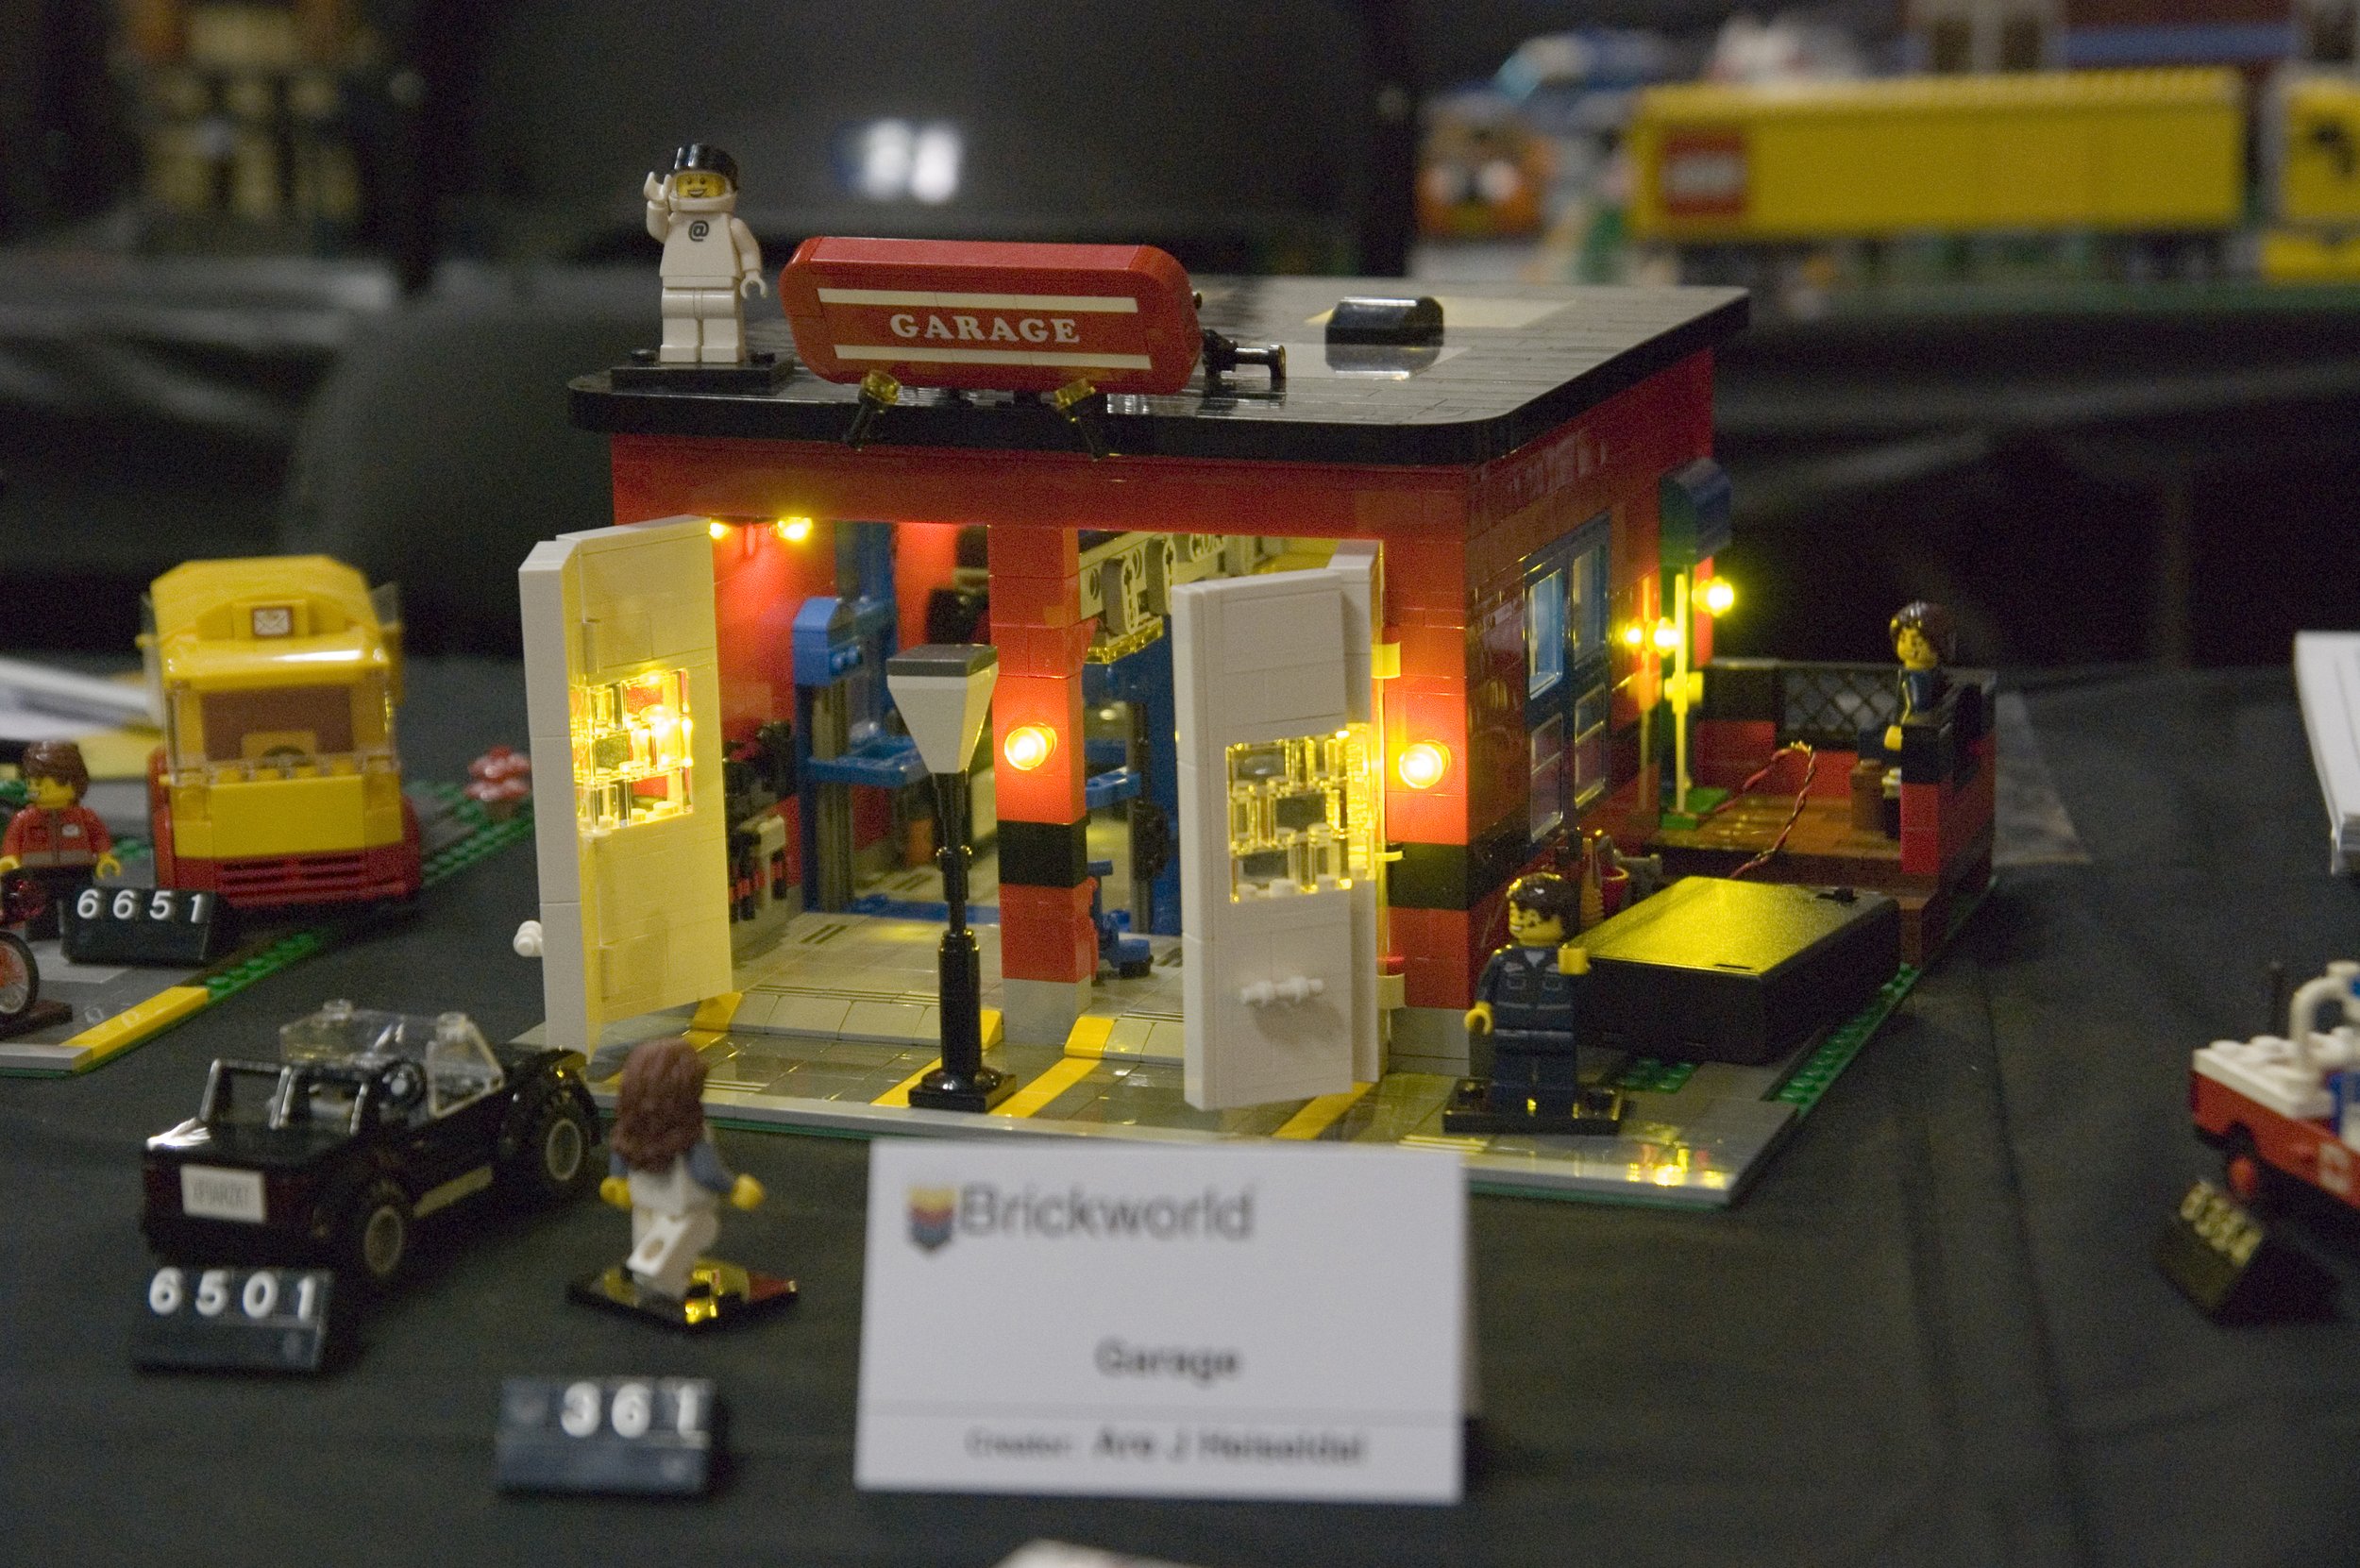
To my eyes, the result was stunning. I just couldn’t help but be mind-blown by the possibilities offered by this system of super-thin wires and tiny, tiny LED lights, and especially the fact that I was now able to go over my MOCs again and add this new level of ‘life’ to the models. Where I’d built a lamp on a table, or an outdoor light feature, or a floodlight, I could now put an actual light.
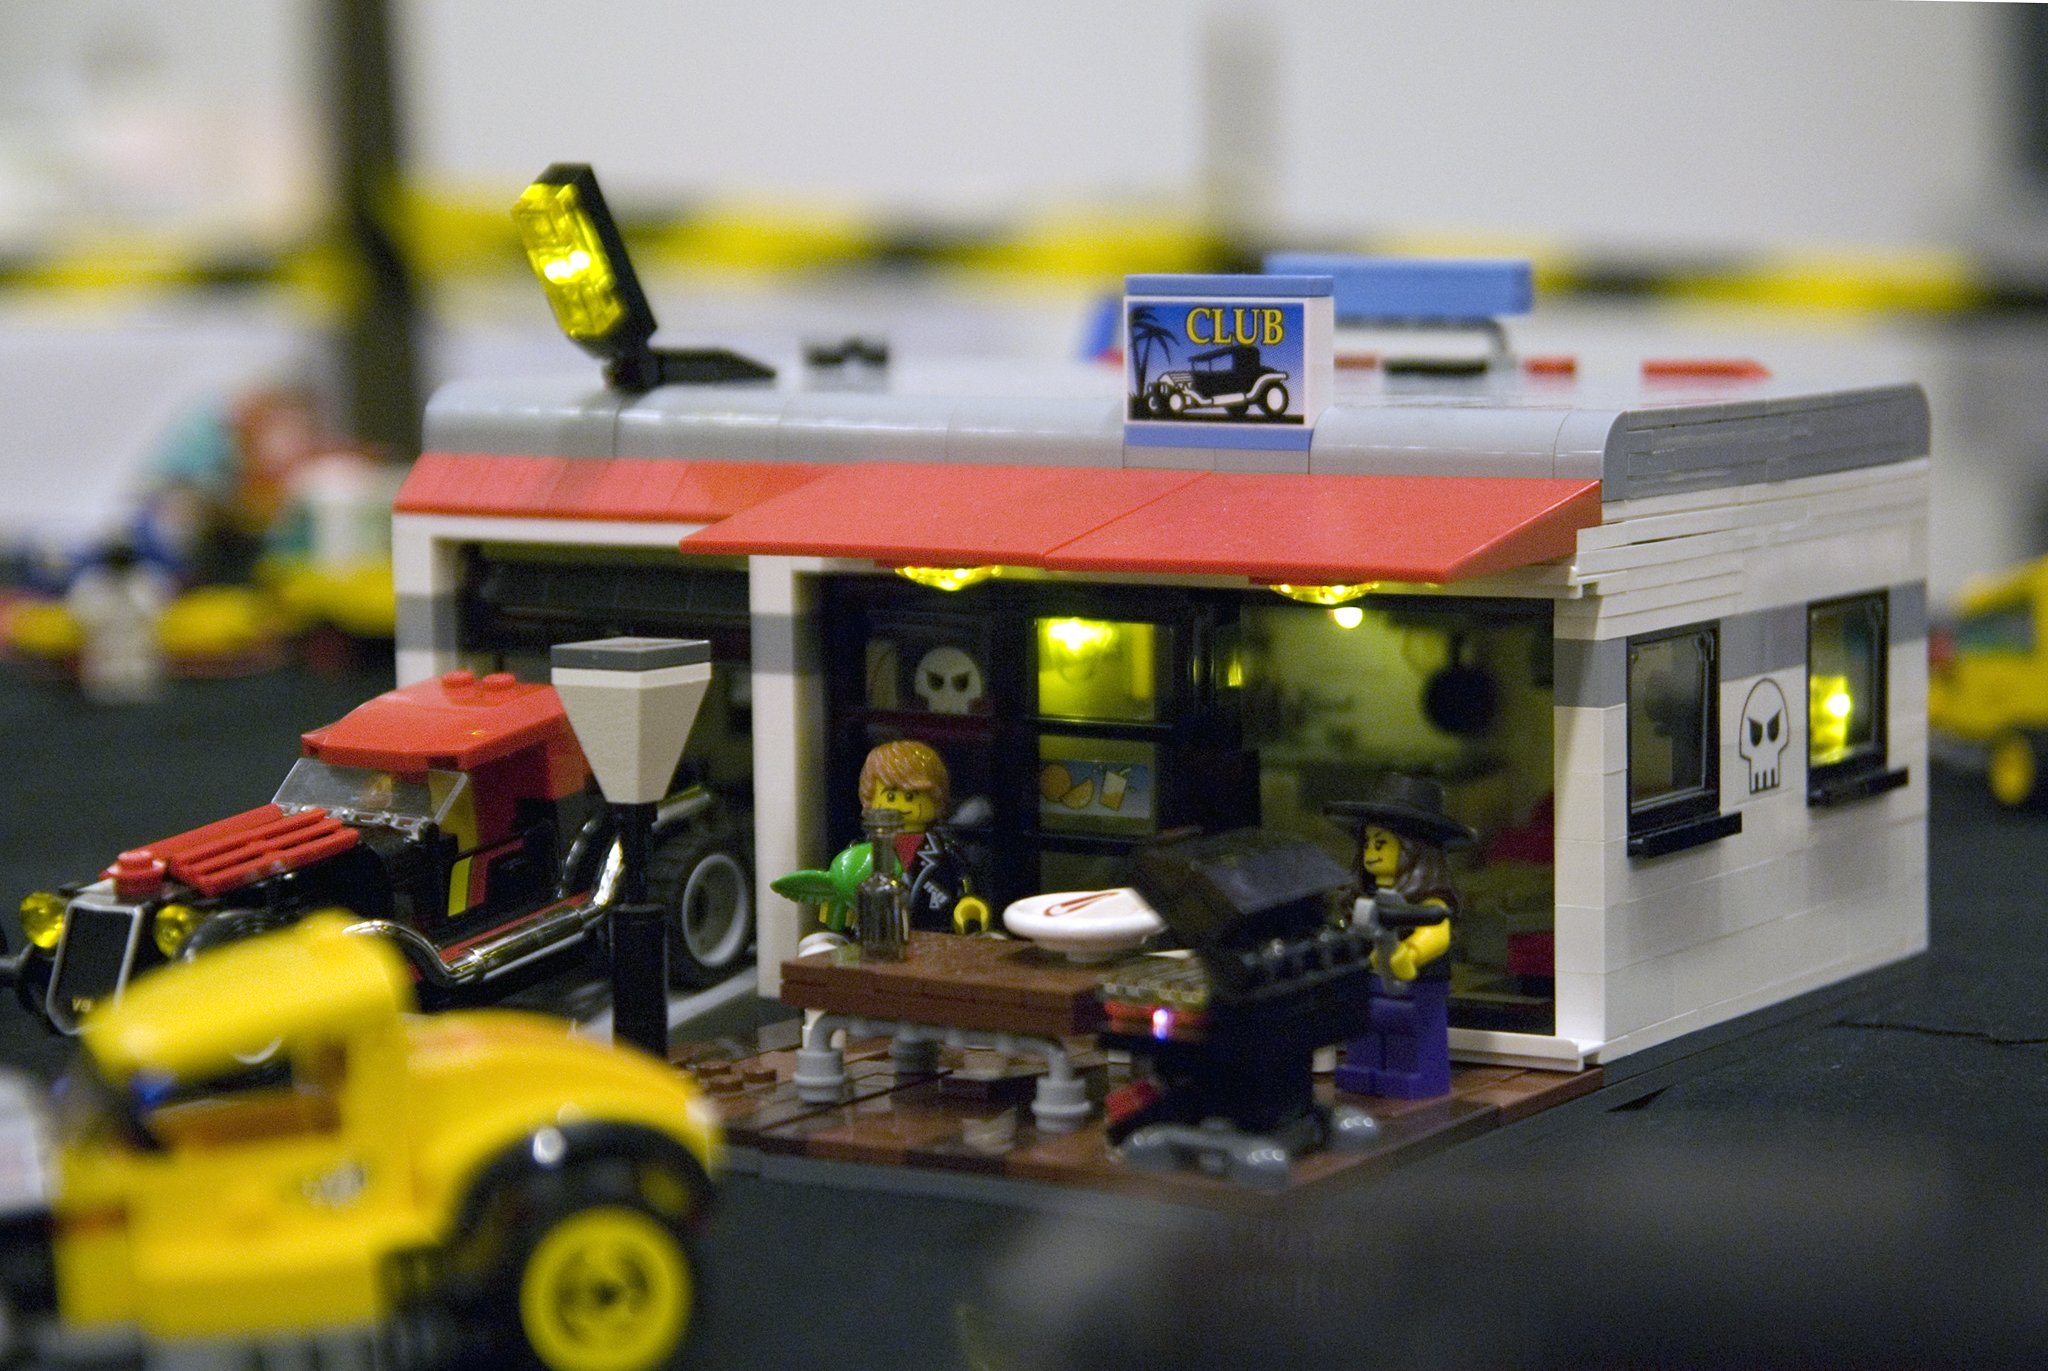
I didn’t have time to do the same to the rest of my models before the World of Lights started, but at least I could now put some light sources inside the rooms of the buildings, to show off the fact that they all had interiors. I managed to finish about 30 seconds before the lights went out, and then my table looked like this:
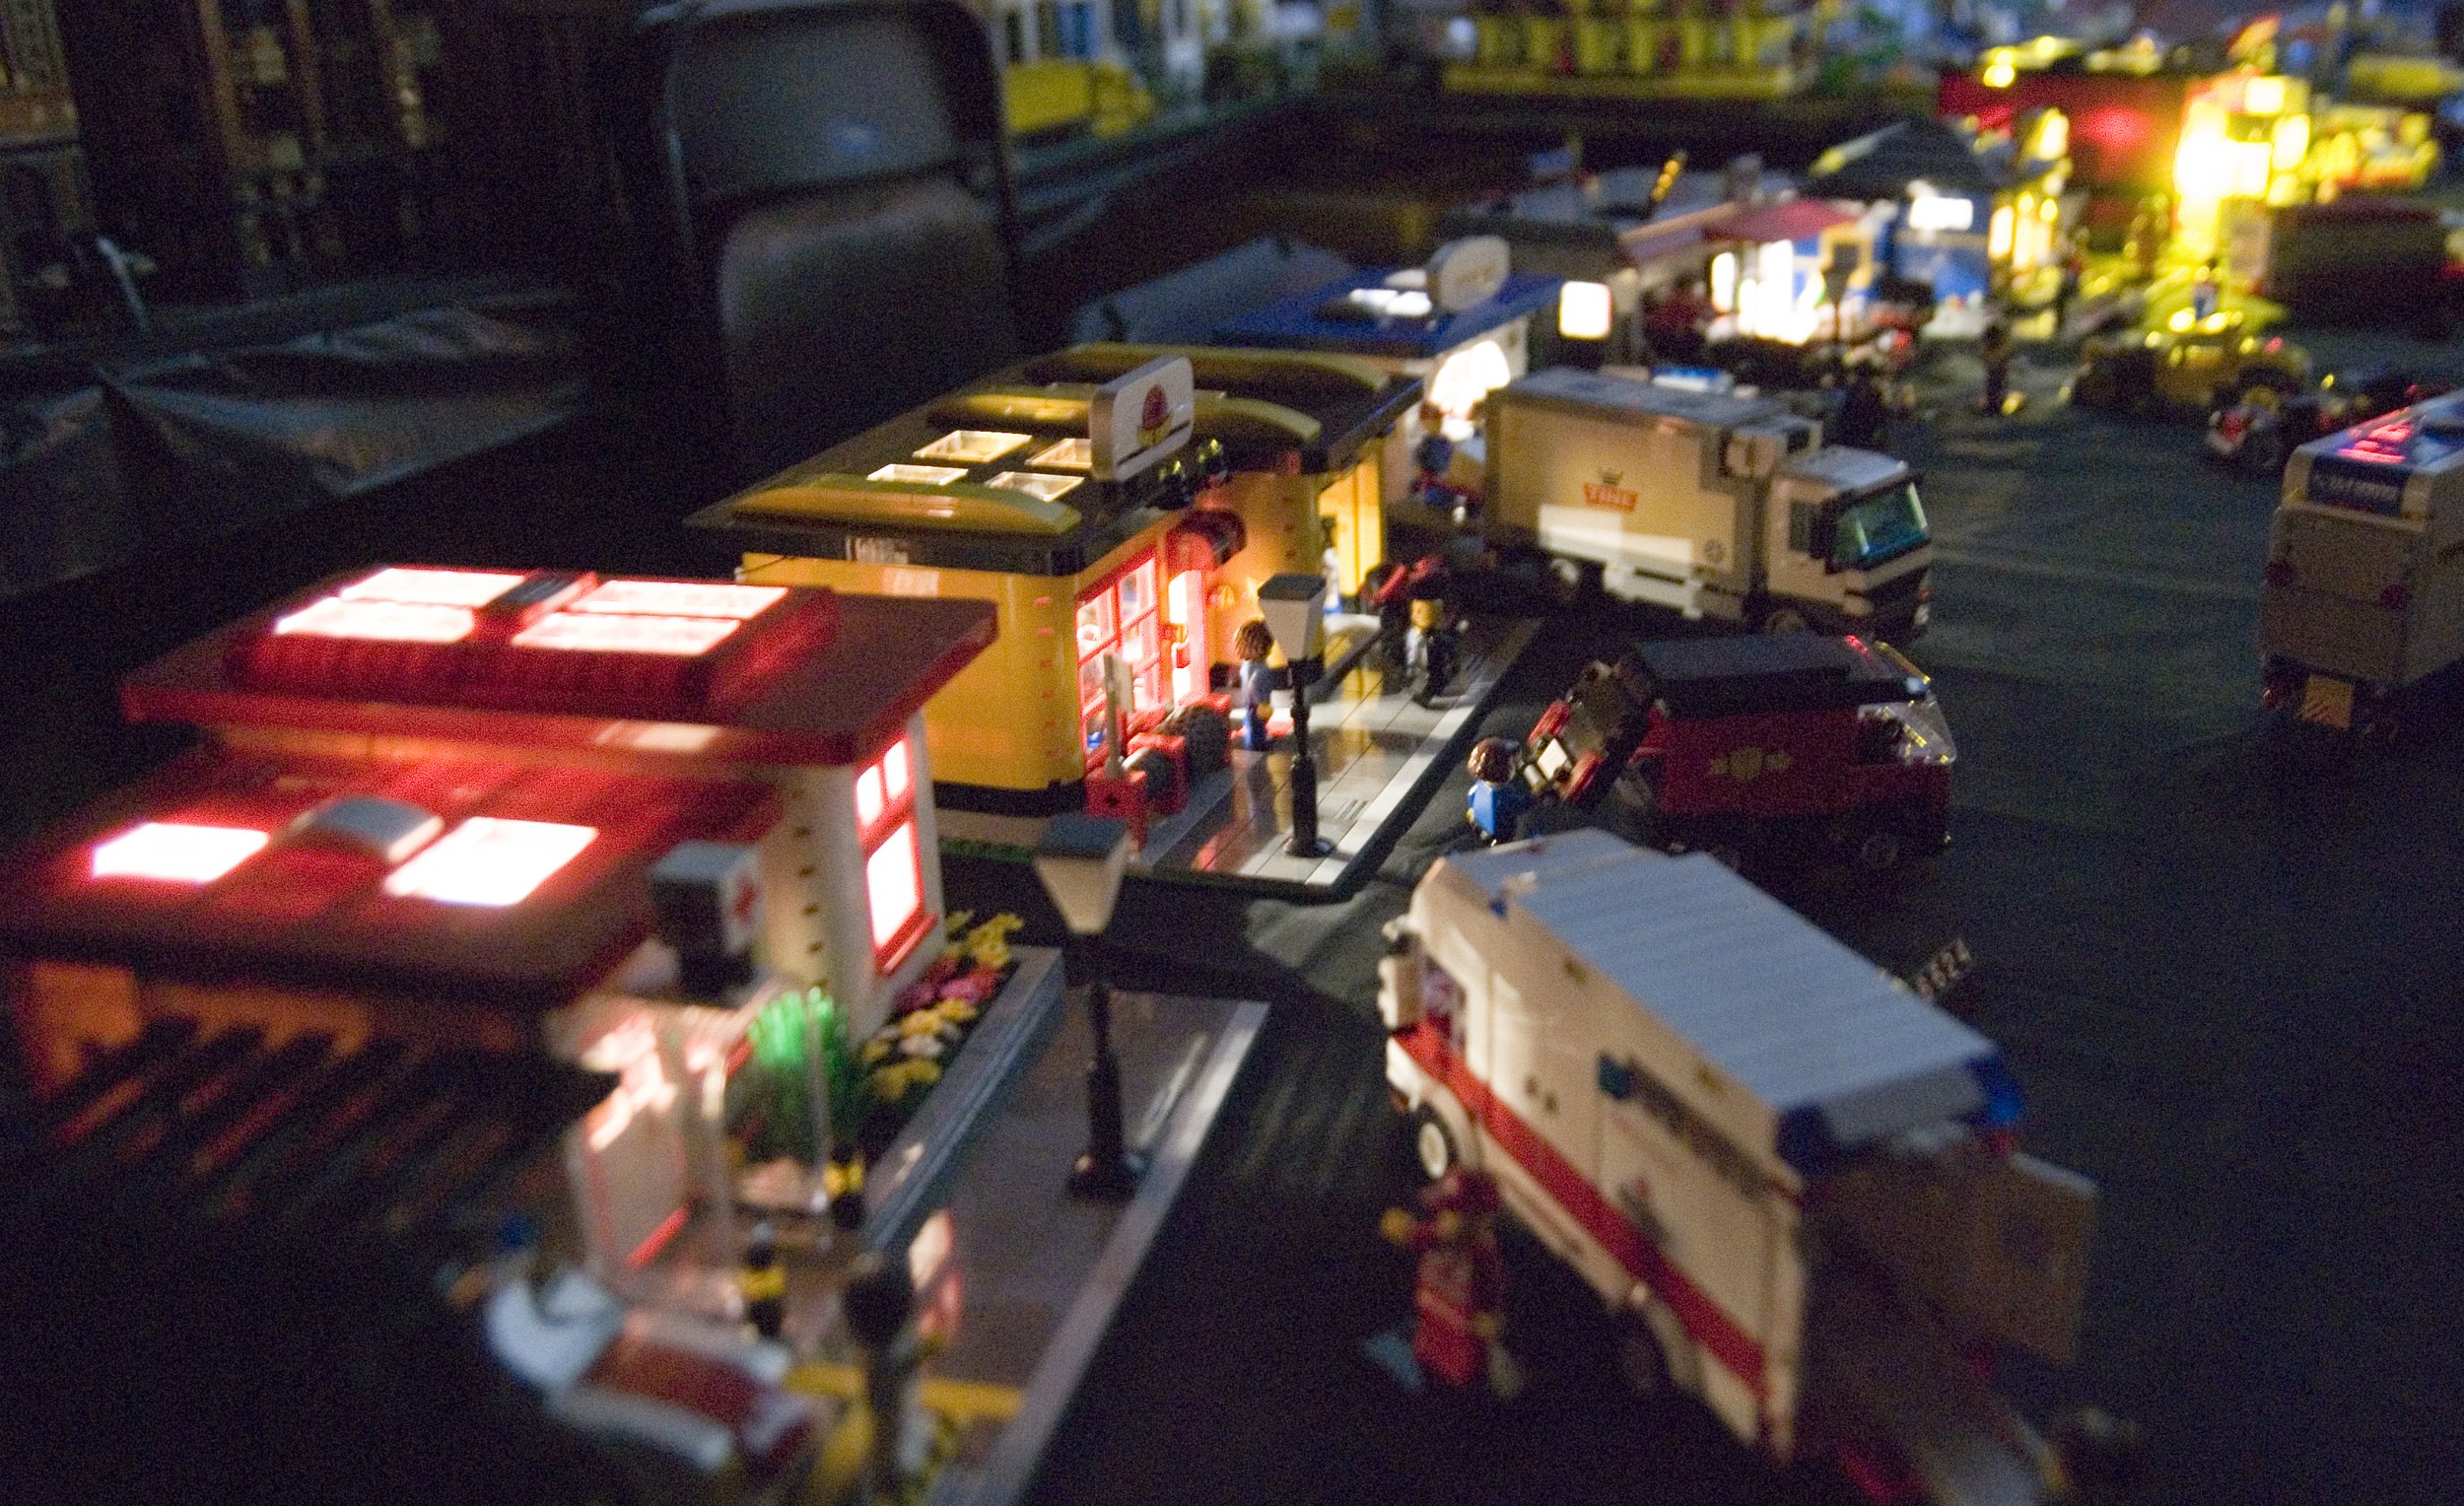
So much life! And all just because of some batteries and tiny LED lights
Lights, Camera, Action!
Brickworld 2015 really did become a watershed moment for me—before and after the light bulb was lit, quite literally! When I got back home (after having found a friendly little ‘hello, your bag has been opened’ note from the TSA in my luggage—apparently, adding all those wires to my models was a giant red flag. Who would have guessed?), I finished retrofitting the other five buildings I’d brought with me… and then proceeded to order a whole lot more lights and wires from Rob.
This brings me back to the opening paragraph of this article. I should mention that I do have friends within the LEGO community who aren’t all that happy about some builders’ tendency to add lights to everything at conventions, their thinking being along the lines of “your MOC should be attention-grabbing enough on its own, and adding lights to do that job for you is cheating a bit”—and I have to admit don’t entirely disagree with them. It can sometimes feel a bit ‘shouty’.
However, I choose instead to look at it as adding that extra touch to a MOC that was already finished. I have the same approach to certain custom parts, like for example the weird and wonderful stuff that Brickforge offers (I’m not into military MOCs, but their ‘civilian’ parts are super nice, too!), the lovely printed parts from Eclipse Grafx and Citizen Brick, or the custom chromed elements that I can’t seem to get enough of from Chrome Block City. They just make things pop.
And sometimes, I suppose like many (most?) other builders, I suffer from builder’s block. Which meant that a while back, when I found myself in a particularly busy period of visiting several events—and then visiting the same events again the following year—I didn’t necessarily have all that much new content to bring. That was the case for Fairy Bricks’ lovely Bricktastic event in Manchester in 2018, and I didn’t feel like arriving in the exhibition hall empty-handed, so I came up with the idea of ‘upgrading’ some MOCs I’d built earlier with some Brickstuff products.
Light’em Up

The very first article I wrote for BrickNerd was about my contribution to a giant model of the Norwegian Royal Palace, which ended up on display inside the actual Royal Palace in Oslo—and I got to help set it up! If you read that (bless you, it’s a long read, like most of my articles) you might remember the limousine I built for the minifig versions of the royal family (pictured on the right).
I’ve always been very fond of cars, and for the first four or five years after my return to LEGO building as an AFOL, I built quite a few. Some of them I’m very pleased with, but just plopping them on a table at a LEGO event doesn’t really do them justice—they’re just too small. So I wanted to build some scenes, some vignettes, that could make them ‘shine’ more. And the first one I gave that treatment to, was the Royal Ride.
It made sense to me to place the car—and its two famous occupants—in a setting with a red carpet, an entrance to some important building, and some onlookers trying to get a glimpse of royalty. So I ended up with this:
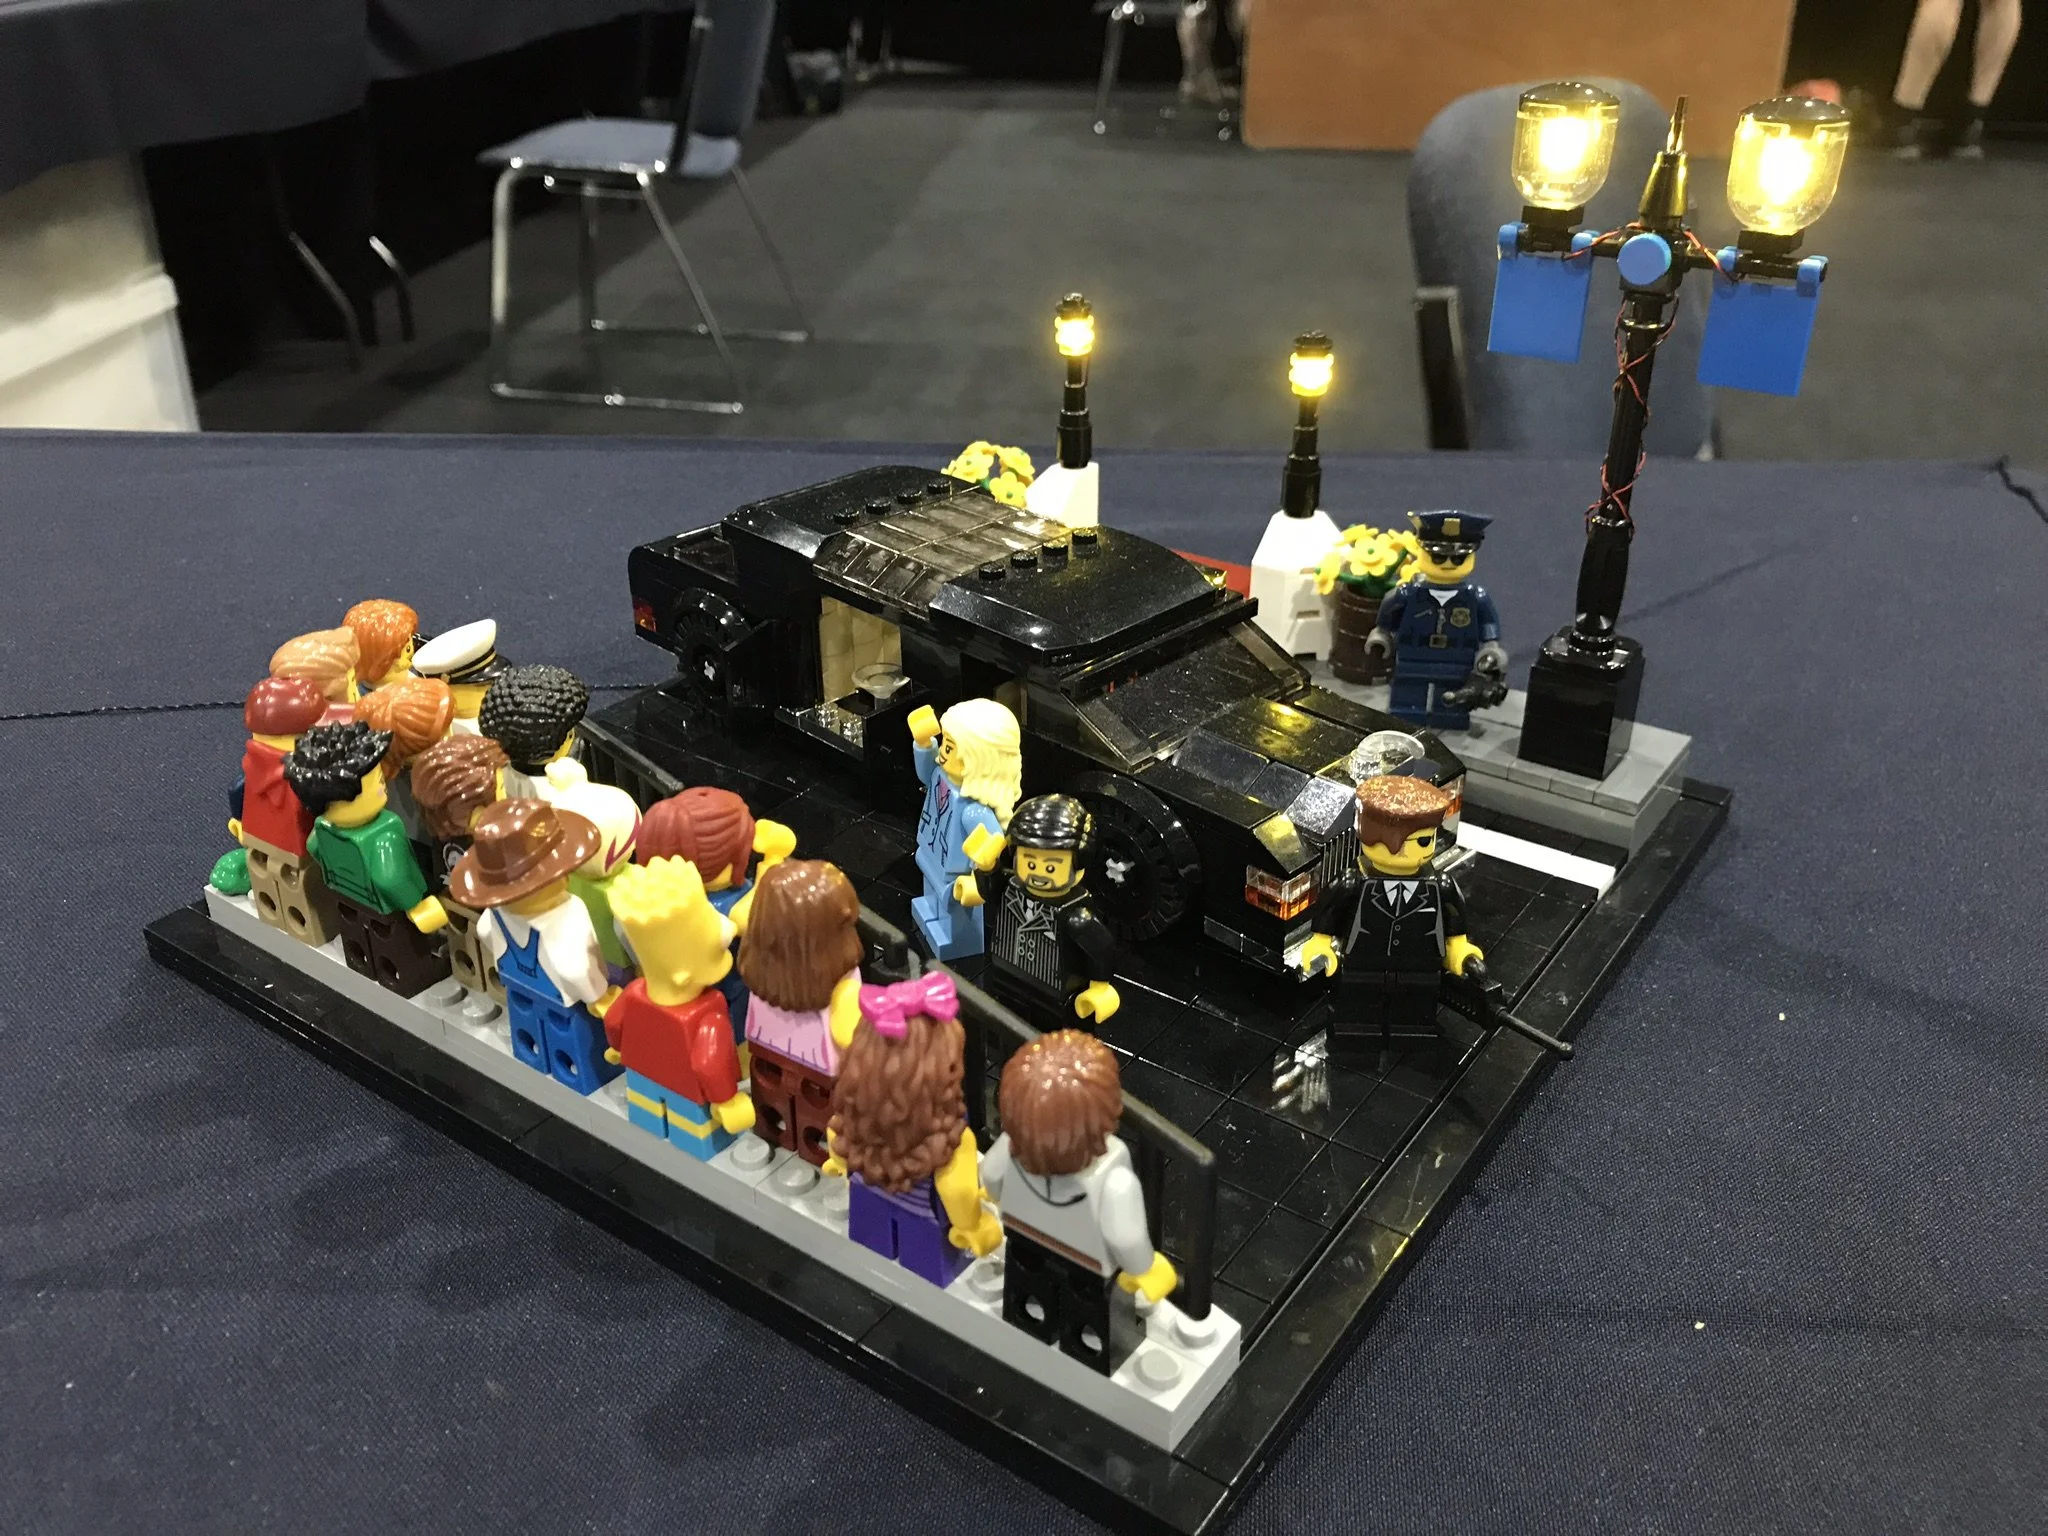
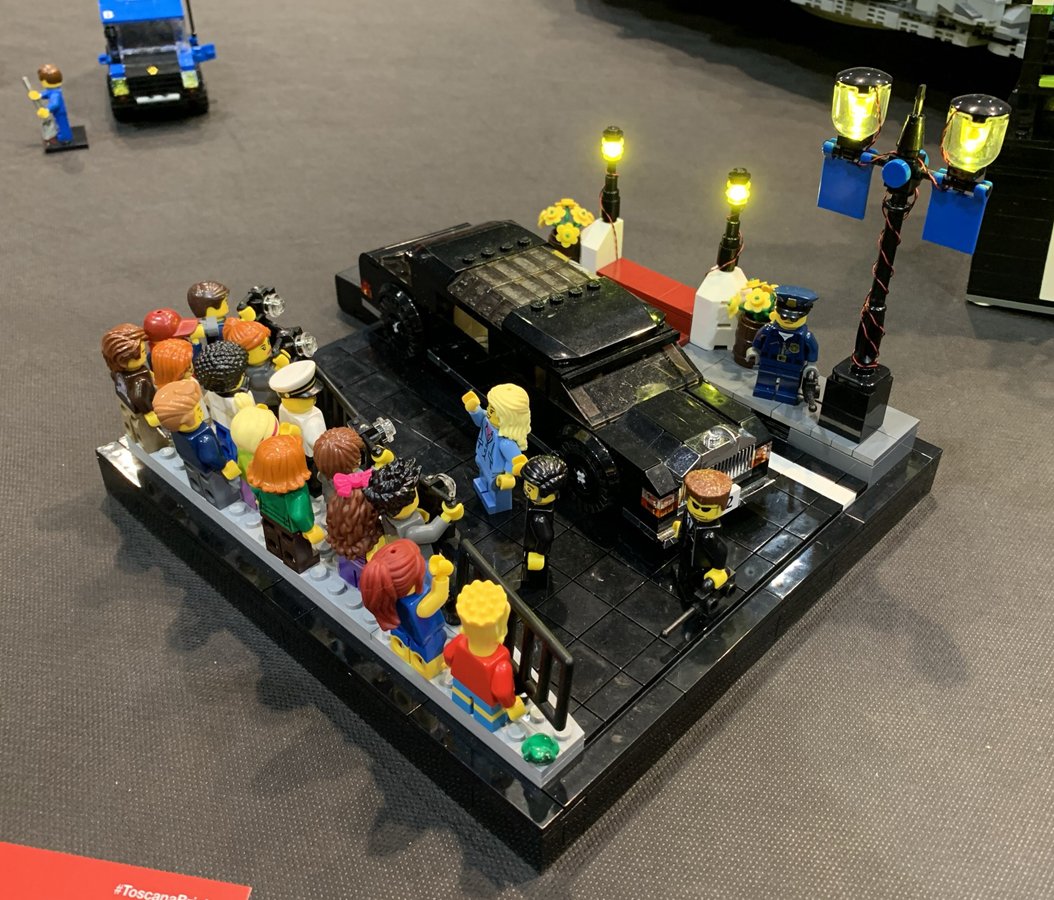
The Royal Ride vignette, on display at Bricktastic 2018 in manchester
The Crown Prince and his wife arriving to attend some gala event, with a police officer and a guard from the Norwegian Secret Service on the lookout for dubious types in the street, while the famous couple are greeting the crowd. I then added four Brickstuff lights to the scene to brighten it up a bit, and displayed this and two other vignettes featuring previously-built cars at Bricktastic:
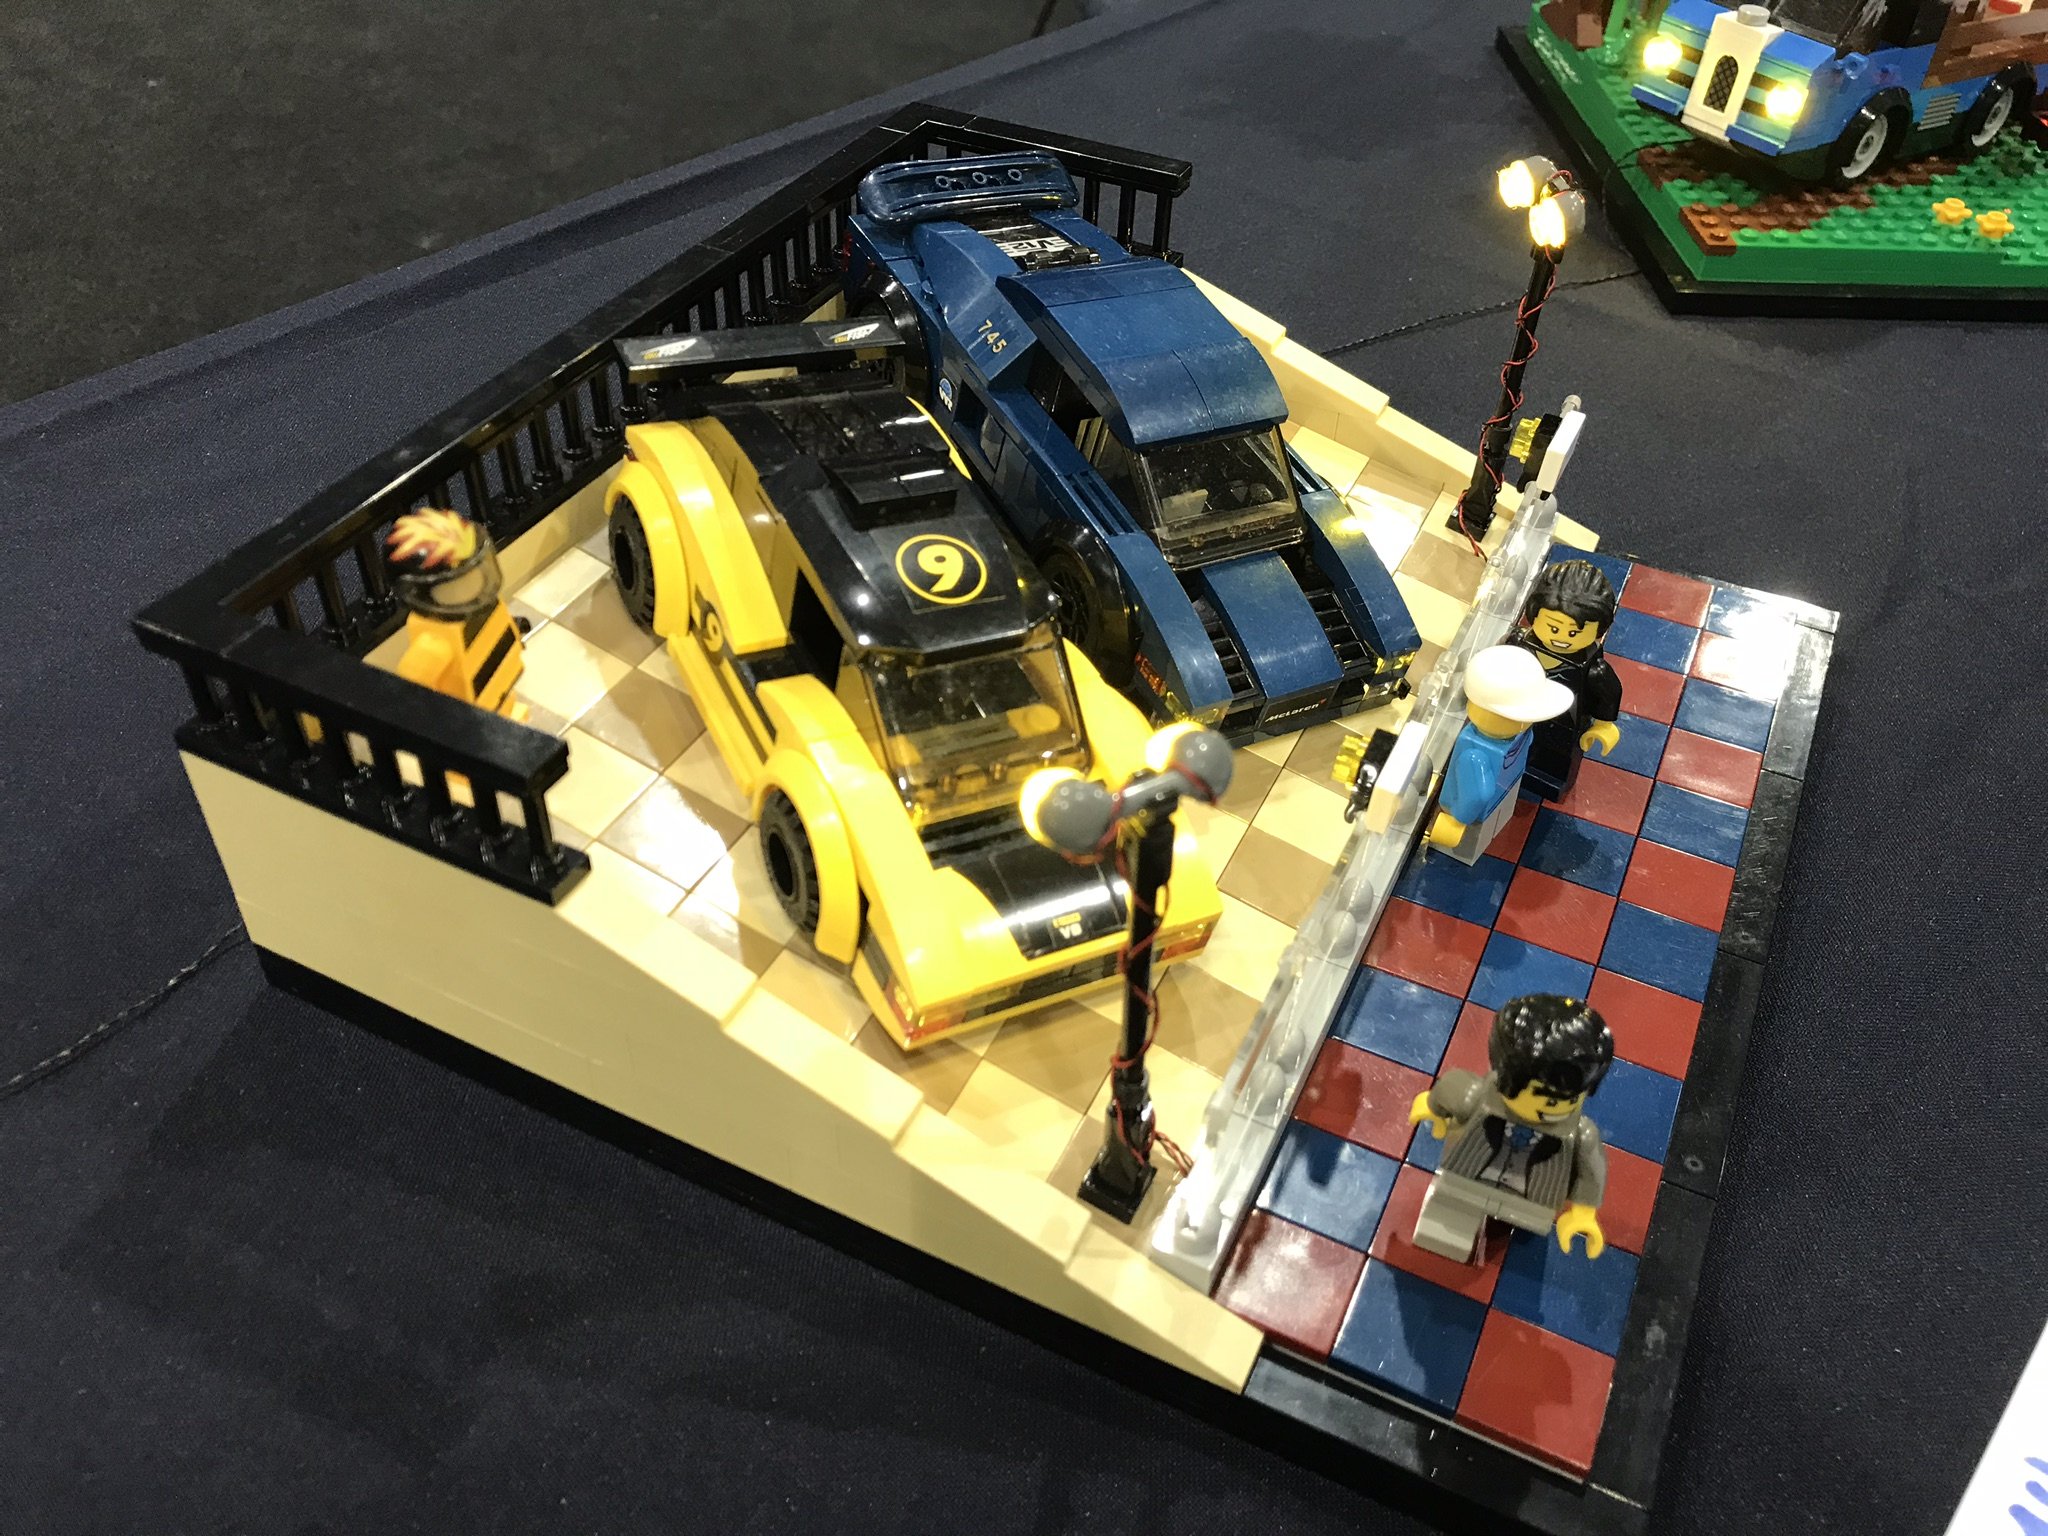
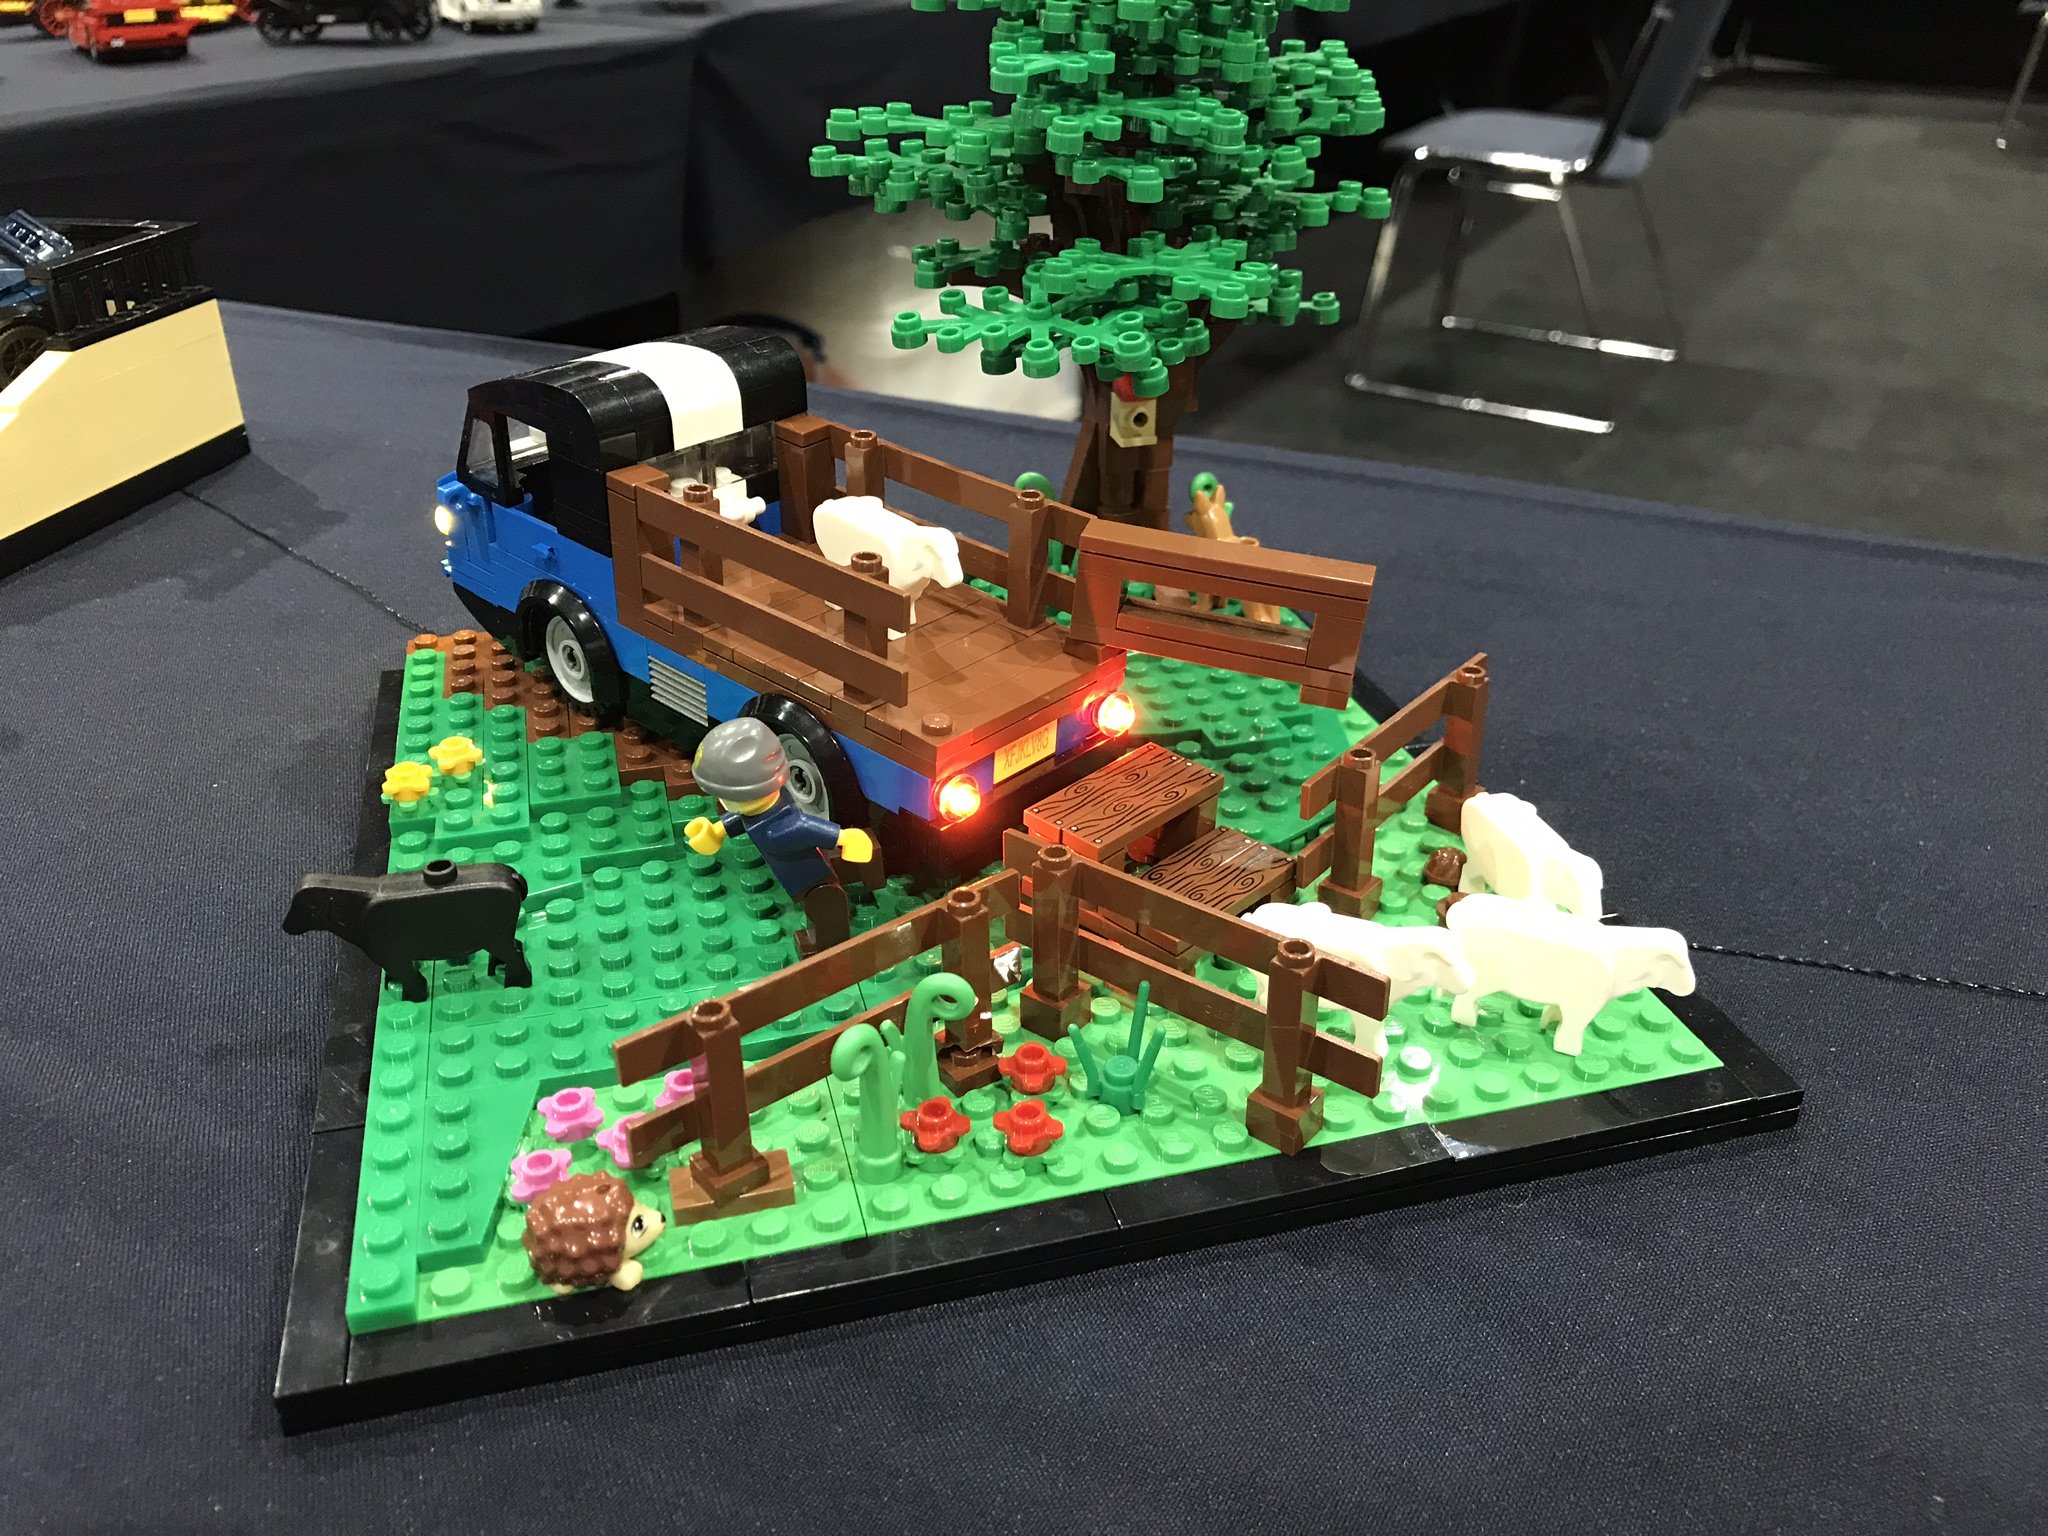
A scene from a car museum and a shepherd running after the black sheep of the family. Yes, I know that LEGO does finally have a proper sheep mould! But back when I built these vignettes, the only non-brick-built alternative was the now-discontinued Brickforge version (I told you they had some great civilian-themed stuff!).
An Offer That I Couldn’t Make Light Of
We have now firmly established that I really like Brickstuff’s… eh… stuff. So when Rob, who happens to be a friend of BrickNerd, reached out about the possibility of testing a new product, I volunteered very quickly. The product in question was their LEGO Camera with Random Flash Effect—basically an actual LEGO camera part (BrickLink calls it “Camera Handheld Style with Extended Bar Handle”) with a 1x1 round trans-clear plate added as a lens. But the real pièce de résistance is a tiny (and I mean tiny!) LED that has been inserted where the actual flash would be located on a real camera.
It’s really bright. And tiny!
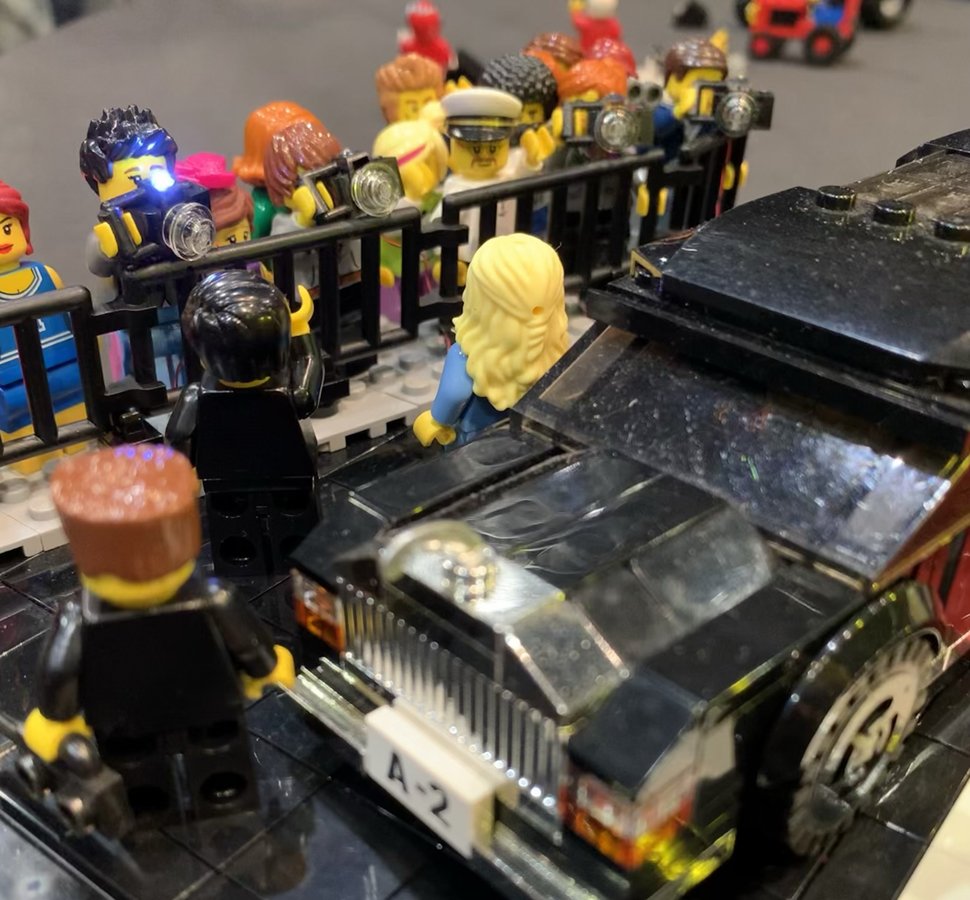
As the description explains, the LED flashes with a random time interval. This means that the more of them you add to a display, the more spectacular the effect will be. Rob was kind enough to send four flashing cameras my way, and obviously I knew which MOC they would have to be added to. After all, that scene with the limo and the royal visitors wasn’t really complete without a paparazzo or four!
The vignette already had four Brickstuff lights built into it, so in order to add four more I would have to use an expansion adapter. These are offered with four and ten ports, and as I needed four more I went for the smaller version. Making this comfortably under the model was difficult as the base of the vignette was only two plates thick, so I raised the whole scene by a brick and a plate:

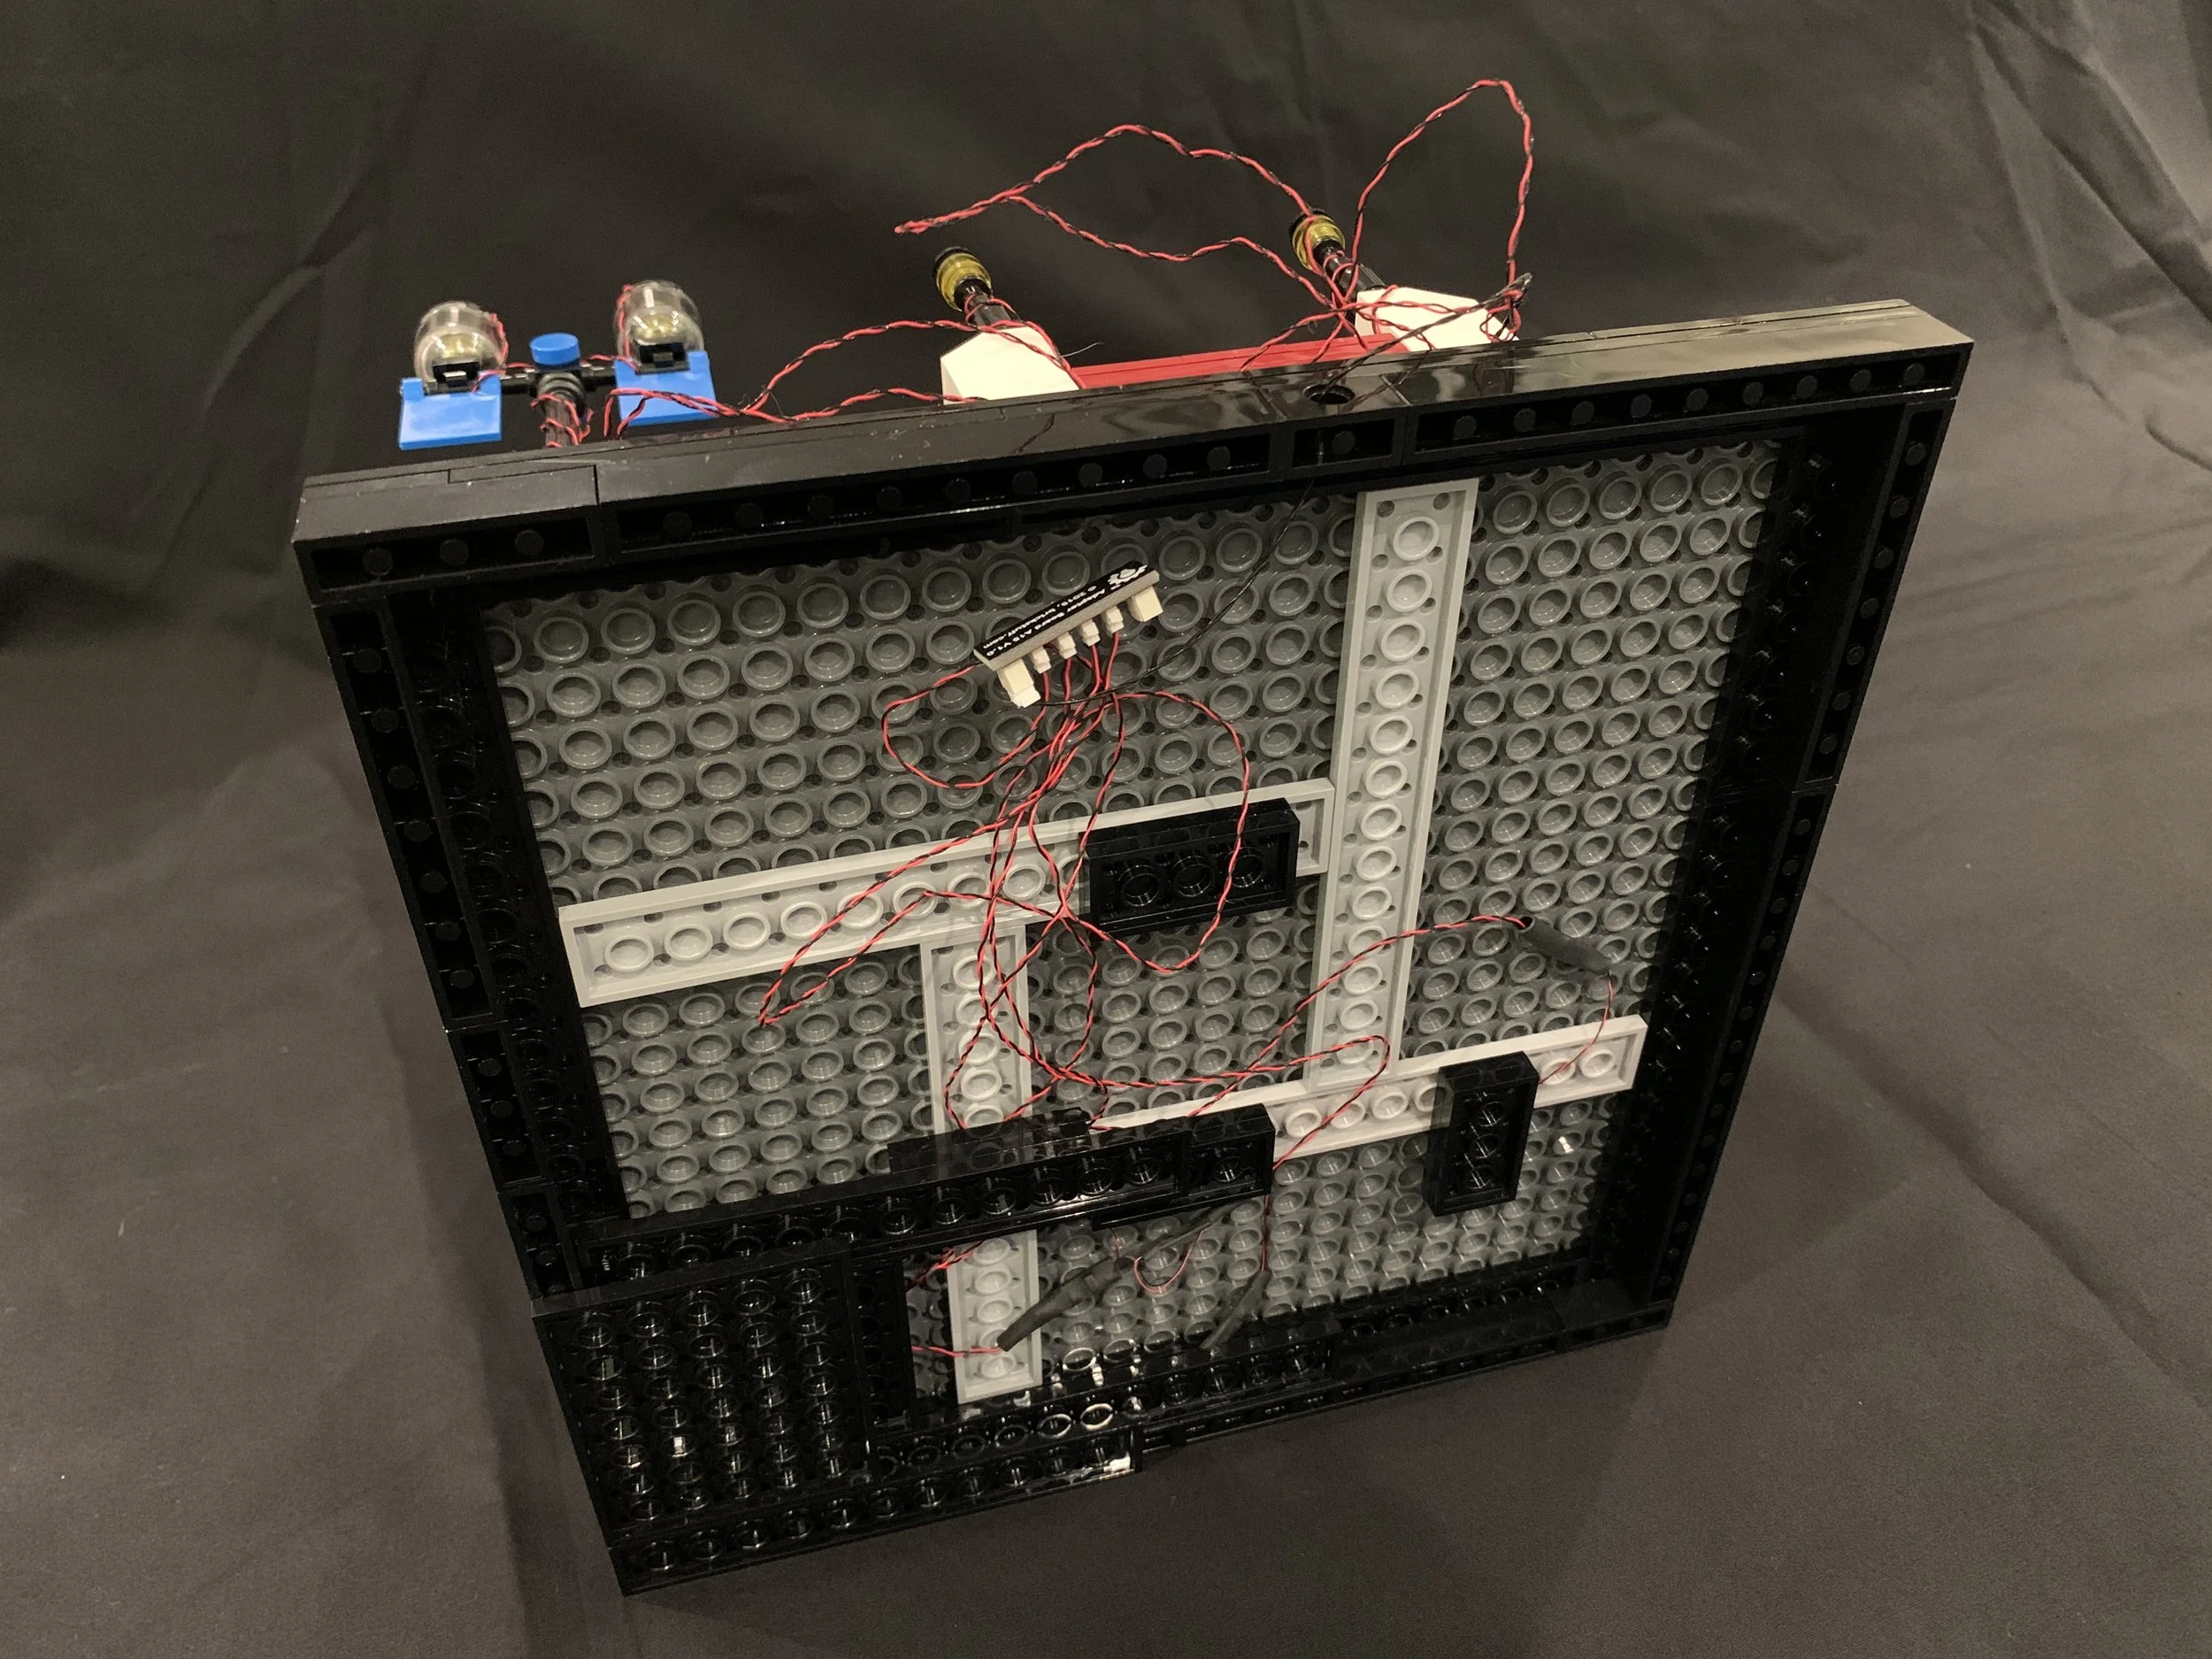

Then I ran the wires between the plates that make up the base, under the tiles, and had them come up underneath the wedge plates that form the edge of the pavement (sidewalk to you American types). This really shows off the big advantage to the super-thin wires that Brickstuff provides: Even though there’ll be a little gap, you’ll be able to squeeze them between bricks—or, even better, you can conceal them under tiles. The wires are so thin that you can actually run them in the tiny grooves that follow the lower edge of every modern LEGO tile.


You can see above how thin these wires are, and even though the red and black colour scheme may seem distracting, they don’t really stand out that much on the table. Most people don’t get this close to my models anyway—and if it was really important to me, I could always just use a black marker on the wires to hide them even more.
I added the new flashing cameras to the vignette in time to display them at my first international event in almost two years, the Bricks in Florence Festival in Tuscany, Italy in November, which our resident event reporter Francesco wrote about back then. Yes, it was just as lovely as it sounds, and being able to travel internationally was amazing after such a long time.
The Bricks in Florence Festival (BIFF), in Tuscany Hall, Florence, Italy. Lovely venue, lovely event, lovely people
I was very excited to see how the public would react to the ‘flashy’ addition to my vignette, and it didn’t take long before I was rewarded with the familiar pointing fingers from people walking past. The typical situation would be that they walked slowly past the table, and then at some point the flashing would catch their attention, which would lead to them leaning in to look closer. When the battery isn’t brand new anymore the flashing isn’t super bright, either, so it doesn’t shout for attention across the room, which I like. Then the flashes are more like small winks to draw people in when they’re already looking at the MOC.
Lights Out
The GIF below gives you a pretty good idea of what the lights look like on display. It does, unfortunately, also bring to light (see what I did there?) one of the few drawbacks of the Brickstuff system, and one that I have encountered before:
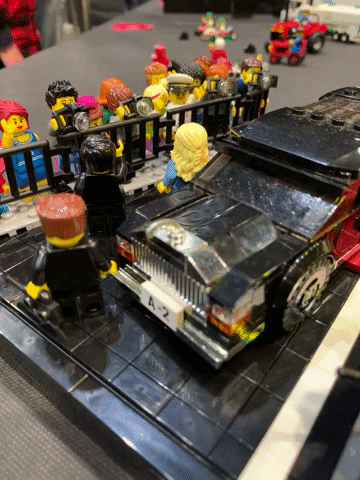
The paparazzi in action—in Italy, even!
With wires this thin, it’s almost inevitable that sooner or later one or two will break. I don’t know when that happened in this case—all four cameras were certainly flashing when I tested them before leaving for Italy—but if you look closely, you’ll see that the guy taking pictures with the second camera from the right seems disappointingly shy, not shooting away like the others do.
Somewhere between the LED and the plug going into the expansion adapter, the wire must have snapped. I don’t know where, and I don’t have the tools or the skills to fix it just yeat. This system is intuitive and super easy to use even if it’s fiddly due to its diminutive size, but be aware that every now and then, you will have to replace a wire—and this is probably even more common if you’re applying these lights to models that you’ll be taking apart again. Do note that I definitely don’t blame Brickstuff for this—it’s just an unfortunate and probably unavoidable side effect of scaling down the lighting systems to this size.
I also mentioned earlier that if you’re already planning on adding lights when you’re building something, you could in many cases get away with using lighting solutions that are both easier to find and much cheaper. Because Brickstuff is, undoubtedly, a premium product. It’s hand-made by a small manufacturer, and hence quite expensive (even if the four flashing cameras in question were for me, in this case, free of charge). That said, even on normal occasions when I have to pay for everything myself, I keep coming back to Rob’s many brilliant products again and again (much more often than my wallet appreciates) because, well, I just haven’t found anything better. So the recommendation is warm and honest!
A Flash of Inspiration
So the next time you are looking to add a spark of life to your old LEGO MOCs, consider using a light or two. You’ll be amazed at how your creations will come alive and catch the eye, both for yourself and for people visiting events where you’re displaying. Sure, maybe you want to build something big and (literally) flashy, something with a ton of lights that will grab the attention of people as soon as they enter the room. But in many cases, it’s just that tiny little detail you’re adding, that will make a world of difference.
And I’ll finish with a very good example of just that, from the exact event where it all started for me: Brickworld Chicago 2015. In the corner of one of the halls, there was a big city layout with trains running around it. I’ve been trying to figure out who built it, and I think it was the Northern Illinois LEGO Train Club (NILTC)—if you know better, please let me know!
My point, though, was that there was this huge skyscraper (as in much taller than a human) which, during the public hours, was nothing but, well, a huge skyscraper. We’ve all seen them built with LEGO, and sure, they’re huge and attention-grabbing, at least from a distance, but up close they tend to be a bit bland and boring. And then it was time for the World of Lights.
The lights go out, and I walk past this big dark skyscraper. But wait a minute, there’s a faint flashing light in one of the windows, placed just at eye-height for an adult! I lean in…
…and spot a minifigure sitting on a photocopier, pants down, photocopying his butt when nobody’s watching.
That is the perfect lighting touch: Adding a level of detail that nobody even suspected would be there.

Best of BrickNerd - Article originally published March 26, 2025.
Have you added lights to any of your MOCs? Did you use Brickstuff or a different lighting provider? Do you have any tips and tricks to share? Let us know in the comments below!
Do you want to help BrickNerd continue publishing articles like this one? Become a top patron like Do you want to help BrickNerd continue publishing articles like this one? Become a top patron like Paige Mueller, Rob Klingberg from Brickstuff, John & Joshua Hanlon from Beyond the Brick, Megan Lum, Andy Price, Lukas Kurth from StoneWars, Wayne Tyler, Dan Church, and Roxanne Baxter to show your support, get early access, exclusive swag and more.