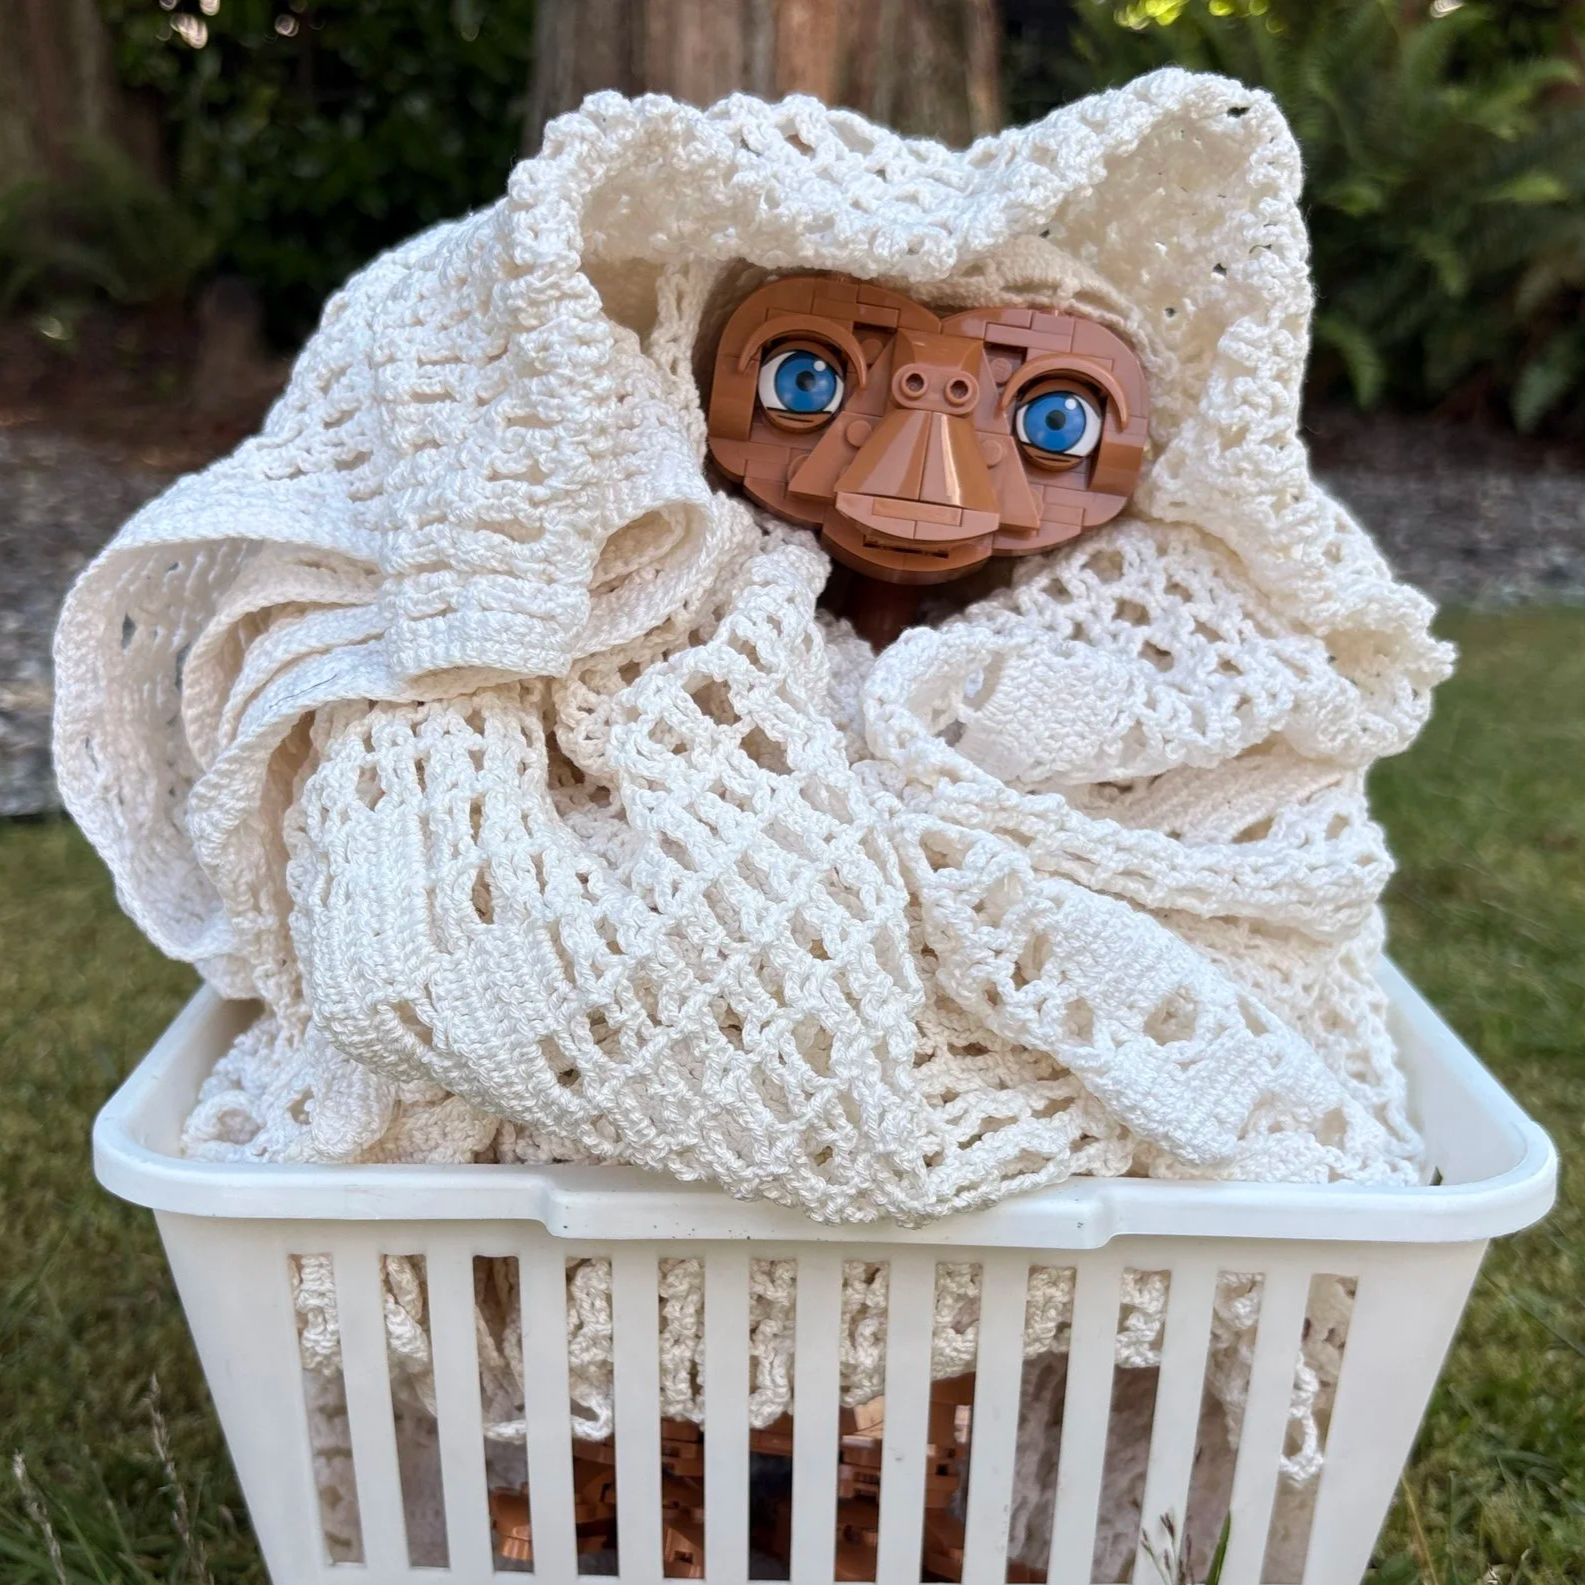
Sacrificing LEGO for Science: A Look at Yellowing
/Best of BrickNerd: Weekend Highlight — Article originally published November 23, 2021.

We all know that long term exposure to ultraviolet light has a detrimental effect on LEGO bricks. Somewhere in your collection are white pieces that could be mistaken for tan, a blue part that has faded and has an off tint, and some old grey that is a little more yellow than when it was new. But how fast does it set in? Is a month on display in a room with windows enough to cause noticeable damage? Let’s sacrifice some LEGO for science to find out.
Problem
It’s a well known problem: UV exposure discolors LEGO bricks! My LUG participates in a Christmas lights display and we were previously in a windowless area and have been relocated to an area with south facing floor to ceiling windows. How much are we risking our bricks?
I wouldn’t expect a month’s time to do the damage as seen on my Space Shuttle Discovery which spent somewhere around seven years in an east facing basement window as others shifted my childhood collection around until I settled in a house big enough to bring all my collection under one roof.


Also LEGO has changed the plastic formulation over the years, which could have an effect on the discoloration rate. Colors are additives which is part of what drove the brittleness seen in Dark Red and Reddish Brown.
There could be other issues as well, molding temperatures, release agents, cooling rates, etc. I’m not a molding expert, chemical engineer, or chemist, so I’m speculating based on what I know of other manufacturing processes. The methods to make our beloved LEGO elements is complicated. For more discussion check out these links:
LEGO Sun Damage - The Brick Blogger
The Case of the Yellowing White Bricks - Brickset
Hypothesis
Let’s set a hypothesis for our experiments. Sunlight exposure for approximately one month will have little noticeable effect on the colors of the bricks.
My collection suggests that blue and white bricks are most susceptible to discoloration. I included a transparent clear part as well due to the recent community discussions of new pieces seeming to not be as clear as they once were. A day late due to Chief BrickNerd Dave’s suggestion, I also added a bluish light grey bracket to the test as well.
Method
Exposure of one set of bricks to a window with southern orientation to maximize direct sunlight for at least a month with regular (weekly) photographs under consistent lighting to judge the amount of color change. The amount of difference will be analyzed by using the eye dropper tool in photo editing software to collect the RGB color values which will then be compared. All parts will be mounted to the base piece. This should help in spotting discoloration as certain studs will be shielded from UV exposure.

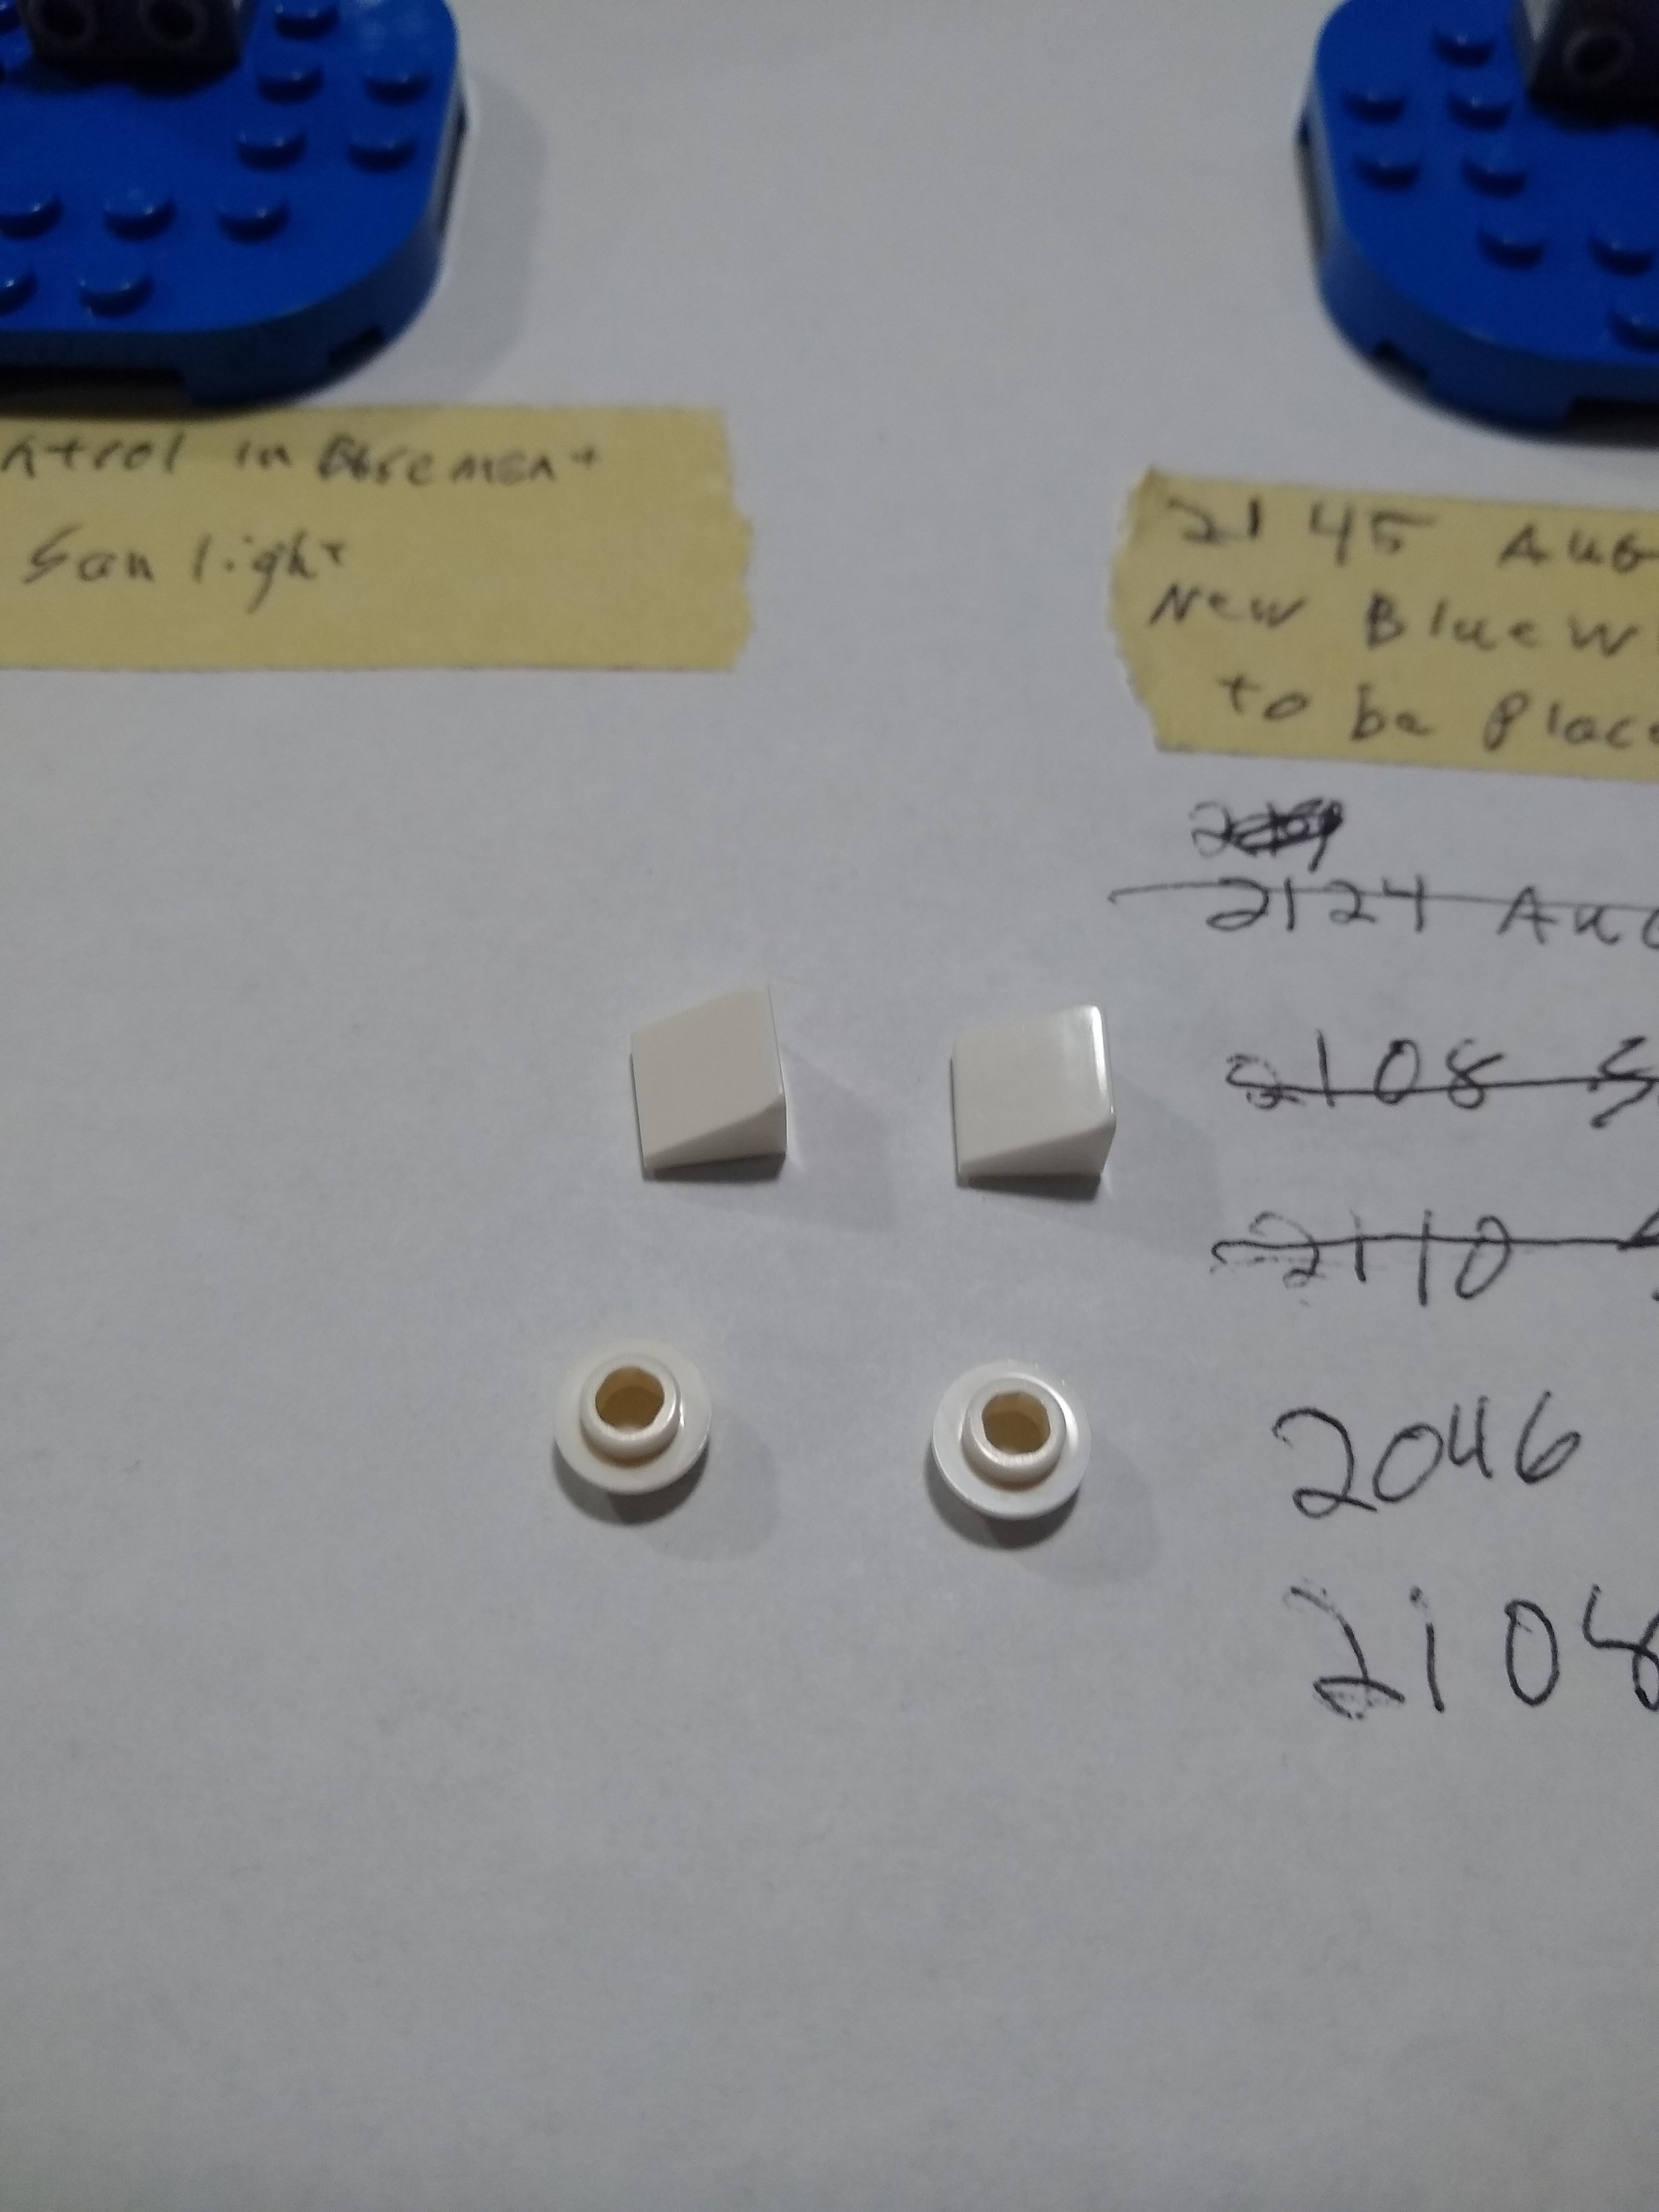
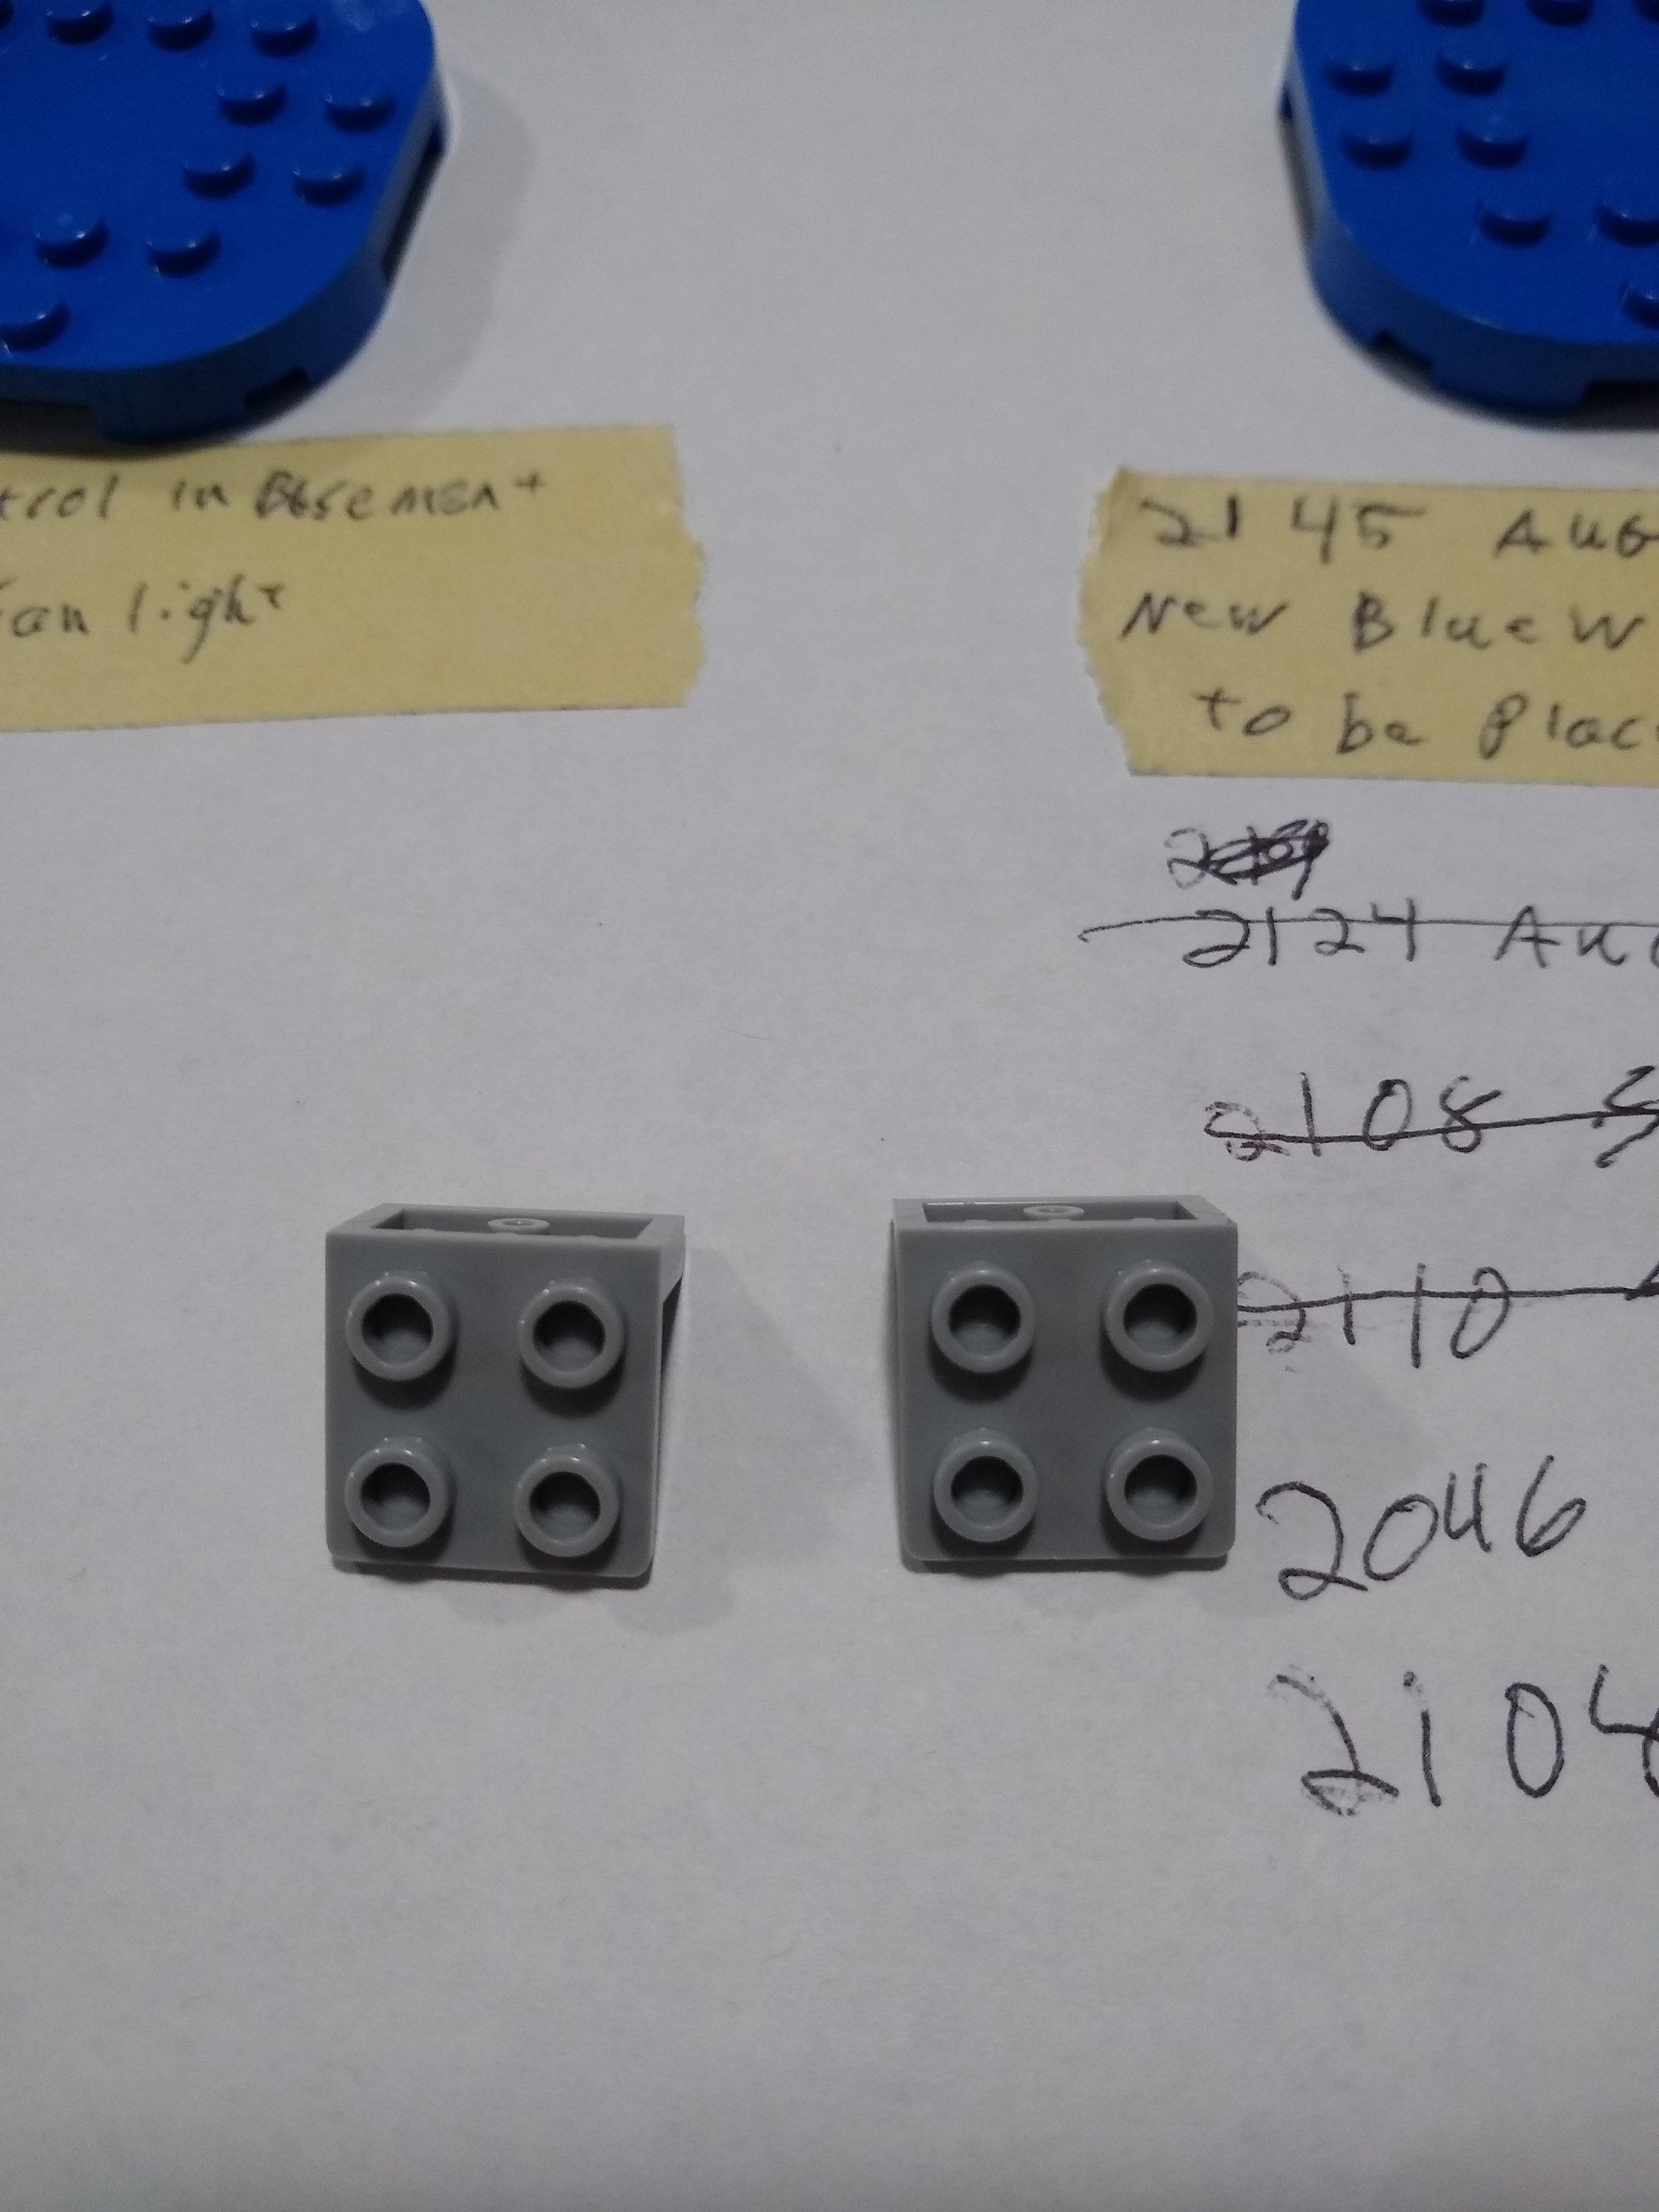
Control Sample with the addition of the grey bracket Aug 19, 2021
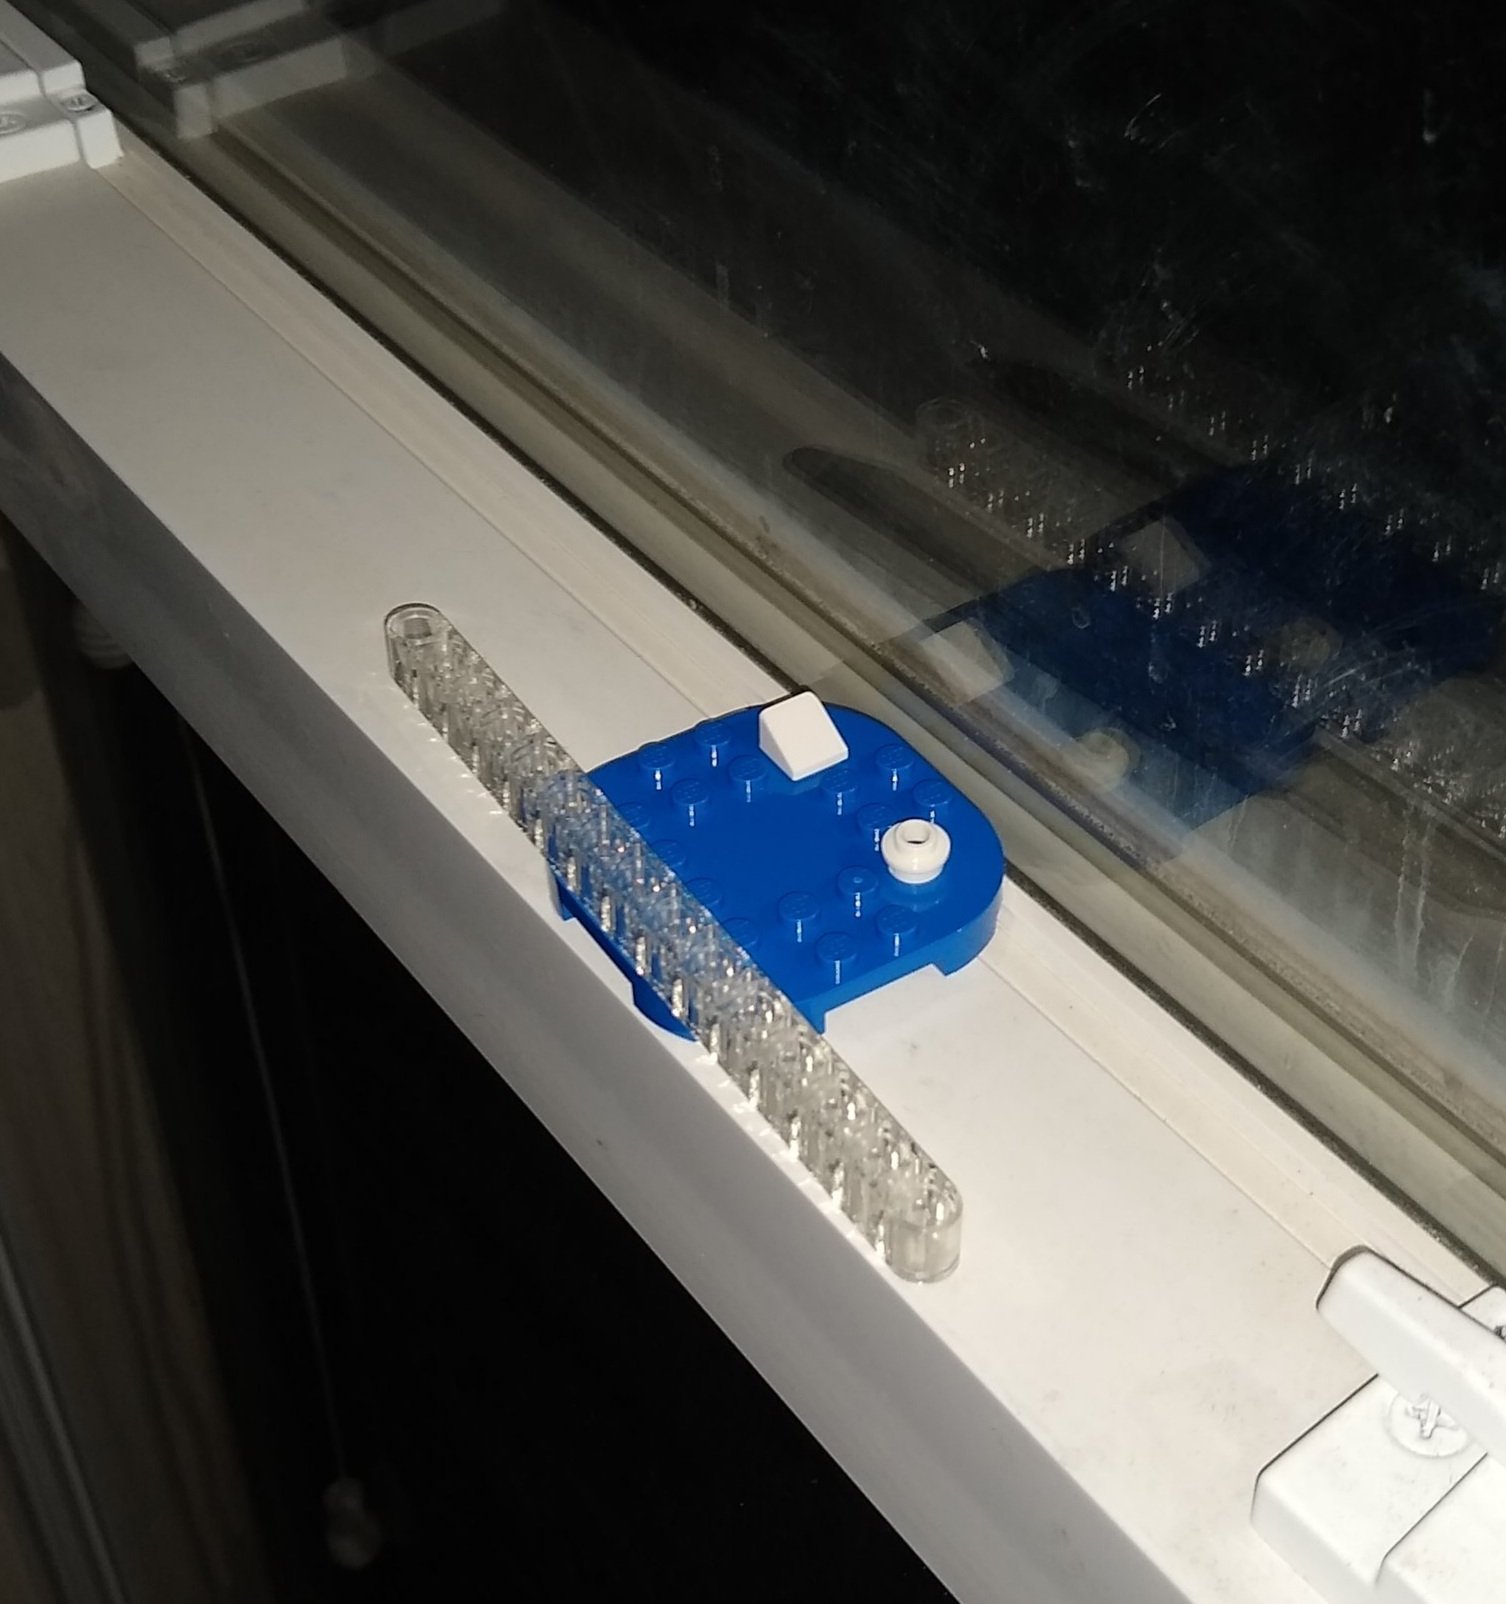
Hanging out on the window Aug 18, 2021. Let’s catch some rays!
Results
After a month, I took side-by-side photos next to control pieces not exposed to the light. You can scroll through the gallery below to see the results.


Some notes on Red-Green-Blue Values
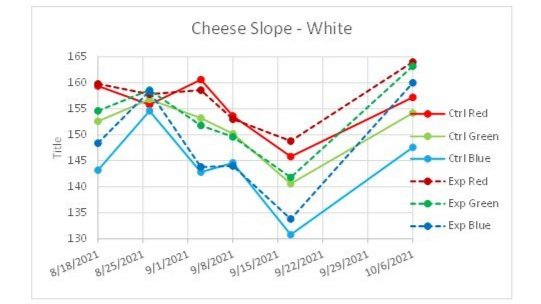
After analyzing the color values, I figured we need to establish a common language before we dive into the results. Looking at the numbers, 0,0,0 is pure Black and 255,255,255 is pure White. Any combination of three values that are roughly equal are going to be in the Black-Grey-White continuum.
Secondary colors are Yellow (Red + Green), Magenta (Red + Blue), and Cyan (Blue + Green). So a clear indication of yellowing would be an increase in the Red and Green values while Blue stays constant or decreases.
Orange and Purple are tertiary colors which is one of the reasons these colors can be difficult to create digitally, print, and occasionally just look off in digital photos.
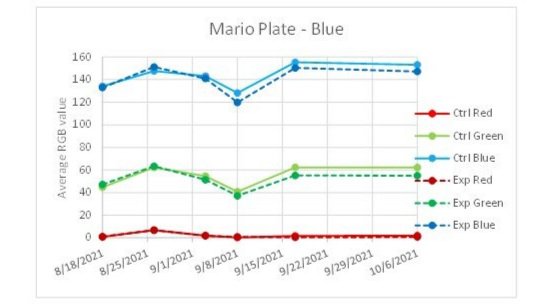
For the Blue Mario Plate, the Blue and Green lines stay fairly flat there is some wiggle and difference between the control and test objects but nothing I would call significant. Both white elements stay with in a band of 35 color value points (CVP—I made that up!). As the values track with each other week to week and there is no large increase in any value over the others I’d say the fluctuation is due to lighting differences in the photographs.
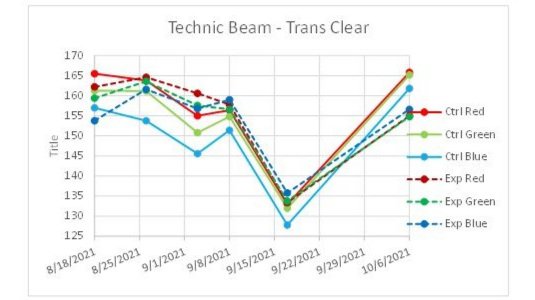
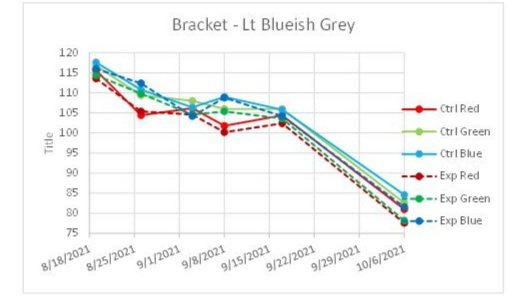
The trans clear shows that the control had a slightly lower blue value than the experimental piece. (Which supports something I should have noticed in the beginning, and will discuss more in a moment.) Due to the color variation from thickness changes this was a very difficult piece to measure. Also in measuring a clear piece, I was really measuring the paper behind it and the amount that the clear piece distorted that color. That said with the exception of the dark September 17th measurements this part was fairly consistent. Light blueish grey was super consistent, no one week registered more than 10 CVP apart between Red, Green and Blue! The drop off for the final measurement was a lighting issue.
So the data interpretation suggests that seven weeks of exposure has minimal effect on the color of the brick. However as the windows in the house were installed before I purchased it I cannot conclusively say that they received true UV exposure. So that might be an unknown factor.
So here is where I admit that my scientific rigor could have been a lot better! I wanted to photograph the test samples each Wednesday evening for at least a month to six weeks. Well that didn’t work out exactly—data was taken on three Wednesdays, a Thursday, and two Fridays over the seven weeks from Aug 18 – Oct 6. To further complicate things some of my photo taking was not as consistent as I thought it was. I should have set up a more dedicated set up, gotten more identical pictures, and marked reference points on the bricks for measurements.
Also late in the experiment I noticed that the trans clear Technic beam used in the control set had a slight yellow tint to it and the experimental piece was more clear. (The higher Red and Green values I mentioned above.) I’m not sure how I didn’t see this until the end! So now that I’ve poked holes in the sloppiness of my methodology (think I’ve disqualified myself for even an Ig Nobel Prize).
So what was done right? The test panel was located in the same position on the window sill each time. The control was kept away from any sunlight in my basement LEGO area. Photographs always have the control on the left and the experimental piece on the right.
Conclusions
So what can we conclude? Well, I’m calling my test inconclusive as I did not control for the potential that my windows have an unknown UV coating. Placing samples outside may better test the specimens, but caution will have to be taken to protect the samples form dirt, pollen, wildlife and other hazards of the outdoors. A small clear enclosure would likely suffice, a screened in patio, or similar structure could be used. This could make a great science fair experiment, but it does have a bit of longer time span—longer than anything I did in school.
Given my experience with other plastics (toys, totes, flower pots, etc. that have been left outside year round) I still believe that the UV breakdown is a long term processes. This is further supported by the fact that it is well known that The LEGO Group does significant environmental and quality testing on all elements, and I would think that color fastness would be addressed in that testing in some way. So my final thoughts are that short term displays where bricks get exposed to direct sunlight are likely not something to fret about in terms of yellowing, but anything over several months and I would be cautious, especially if the build contains older bricks.
Onto the next brick experiment!
Have you ever purposefully tried to yellow your LEGO in the sun? Leave your thoughts in the comments below.
Do you want to help BrickNerd continue publishing articles like this one? Become a top patron like Charlie Stephens, Marc & Liz Puleo, Paige Mueller, Rob Klingberg from Brickstuff, John & Joshua Hanlon from Beyond the Brick, Megan Lum, Andy Price, and John A. to show your support, get early access, exclusive swag and more.