A Rover to Remember
/I always find Febrovery too short of a month—28 days of rovers showing up in my feed isn’t long enough to satisfy me—so realizing that this year we’d get an extra leap day of rover goodness was a good feeling. And boy was it a good day. Not only did we get an extra rover from the regulars, we got this beauty from Scott Wilhelm!

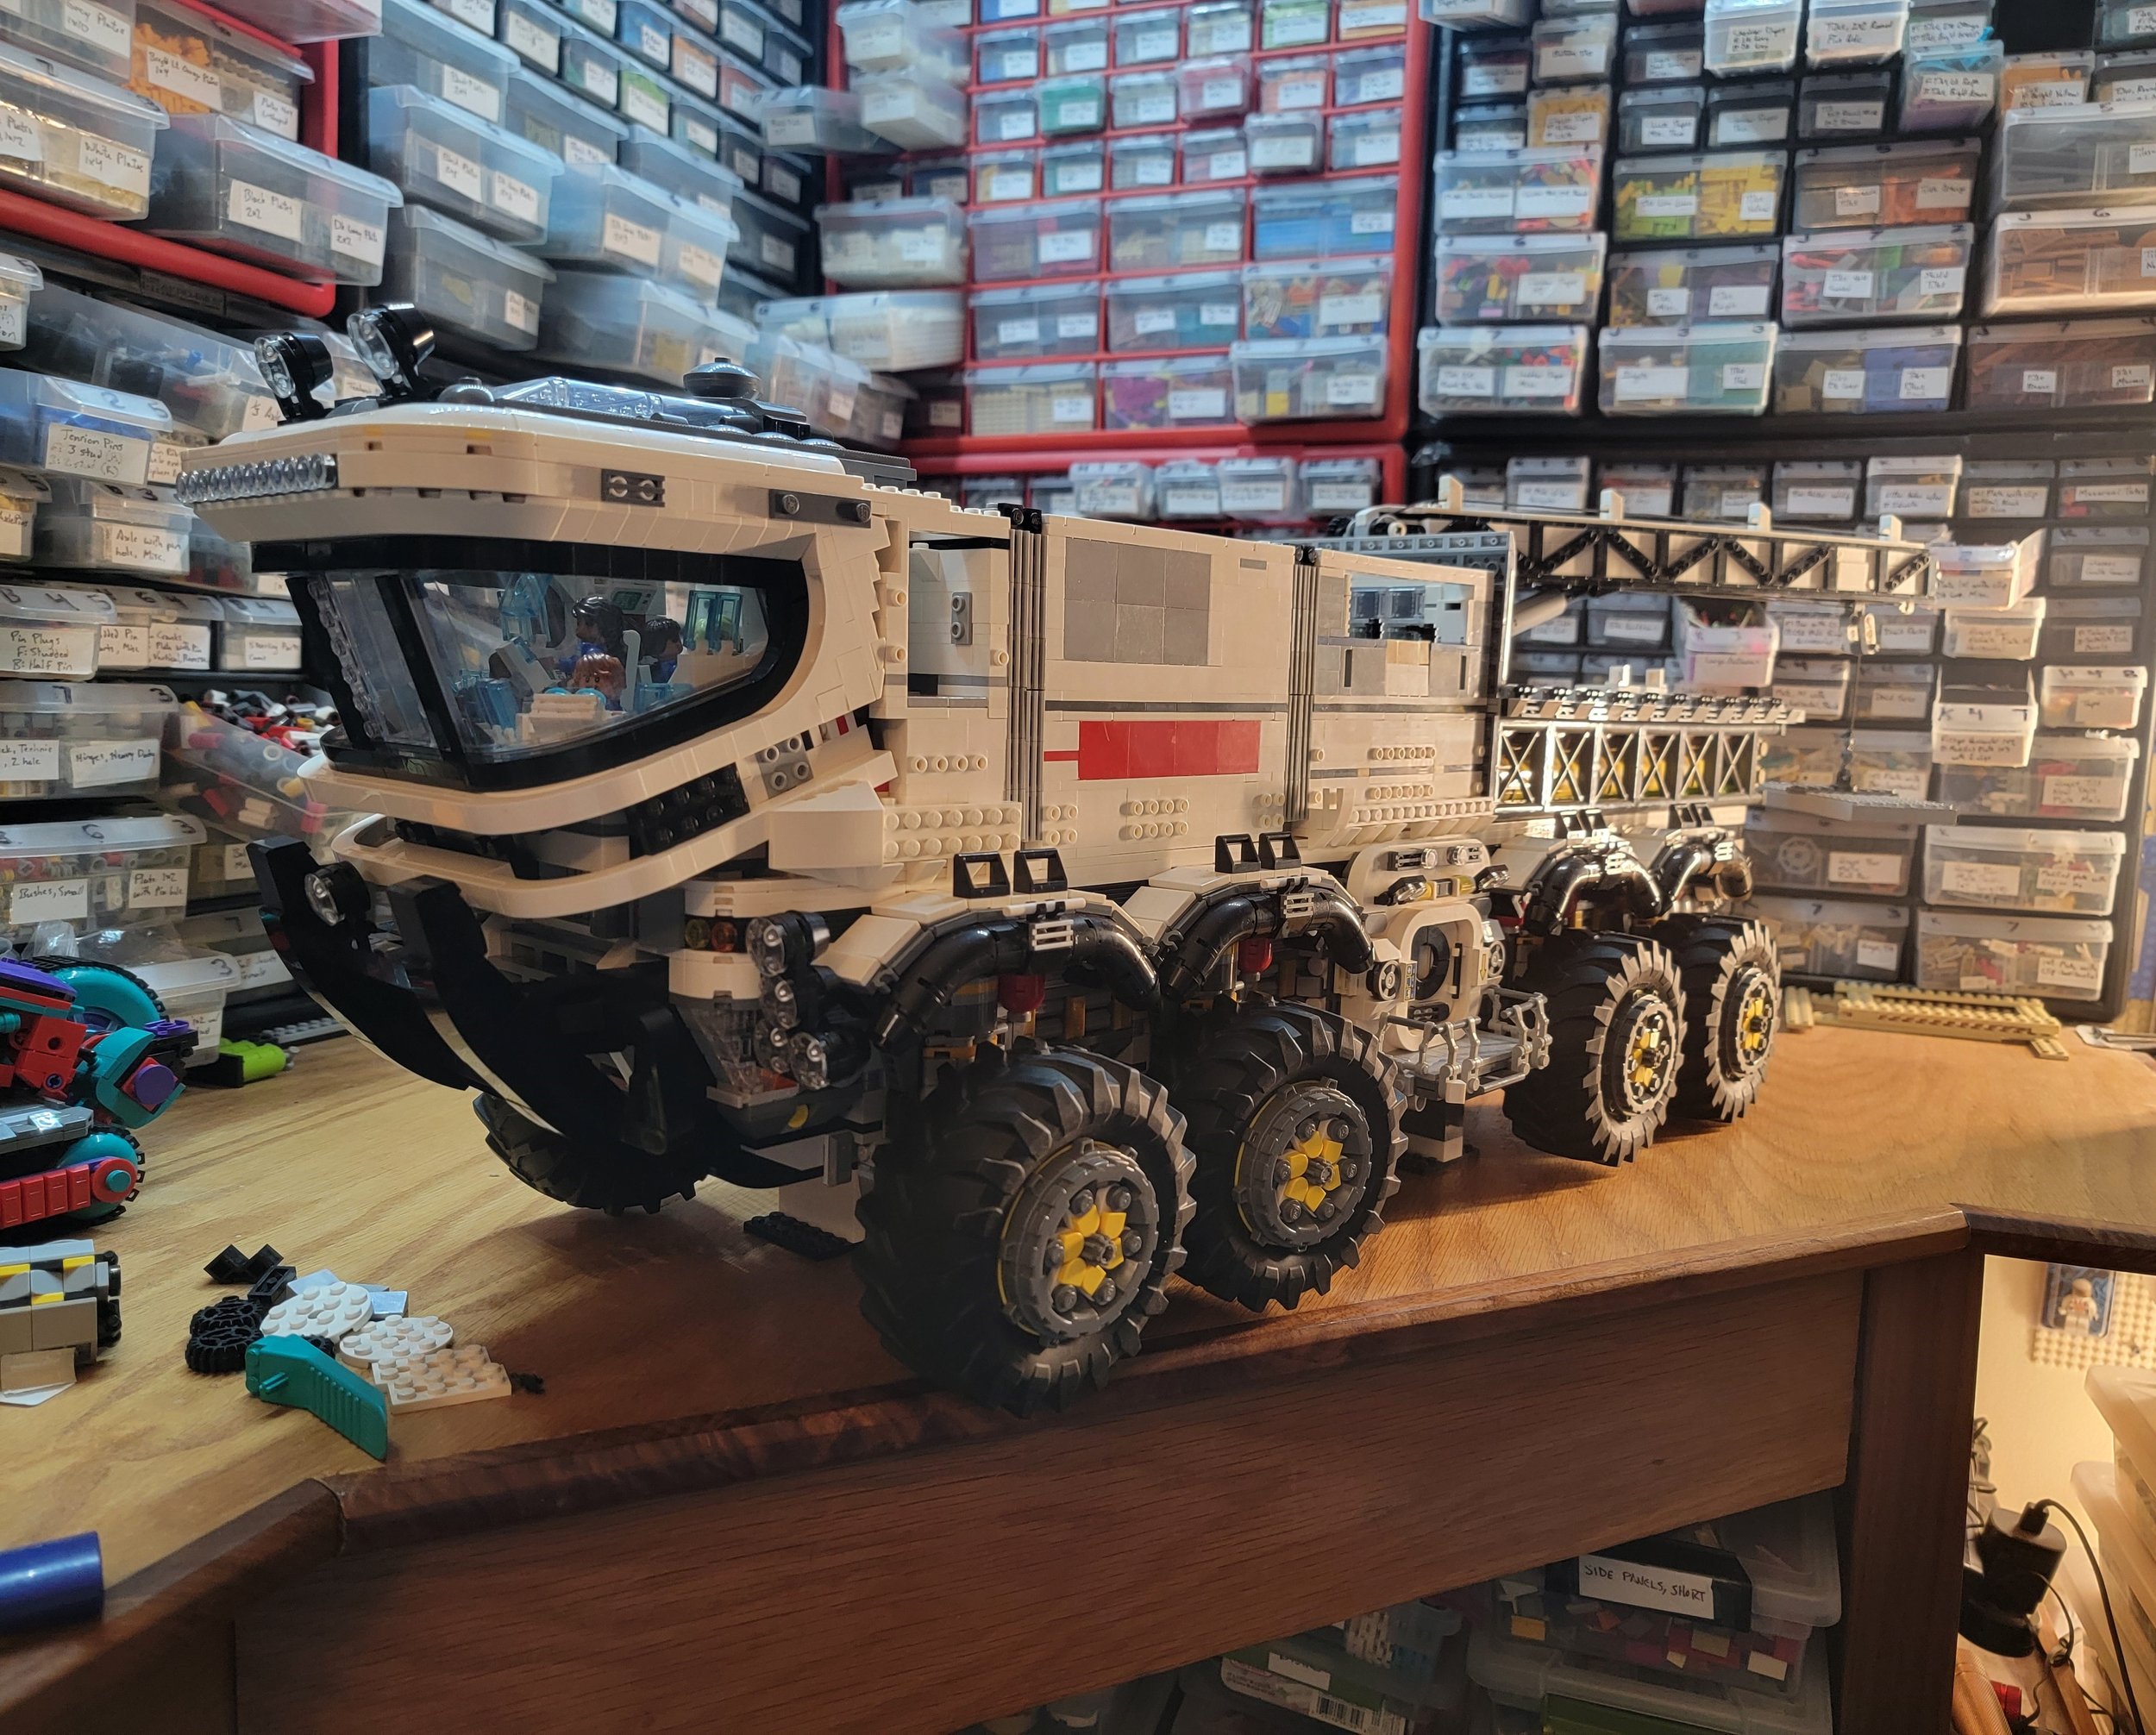
This rover has everything you could wish for or imagine, and then some—massive tires, full interior, movable crane, lights, and remote-control motor. No wonder builder Scott Wilhelm waited for a February with 29 days to tackle this project! In fact, even with that extra day, I was wondering how he pulled it off—so I asked him about that and a few other questions while I was at it.

Geneva: In the description you mentioned that you’ve been wanting to do a big rover with those giant tires “forever,” but when and why did you decide this would be a leap day rover?
Scott: I usually try to post a couple of rovers for Febrovery, and I had already built one back in December while struggling with writer’s block (is it writer’s block with LEGO?) for the Space Jam competition. So along with that rover, I had four things half-built for the contest sitting on my desk gathering dust. Anyway, when February rolled around, I realized I had the full month to do whatever I wanted and decided it was time to go big.
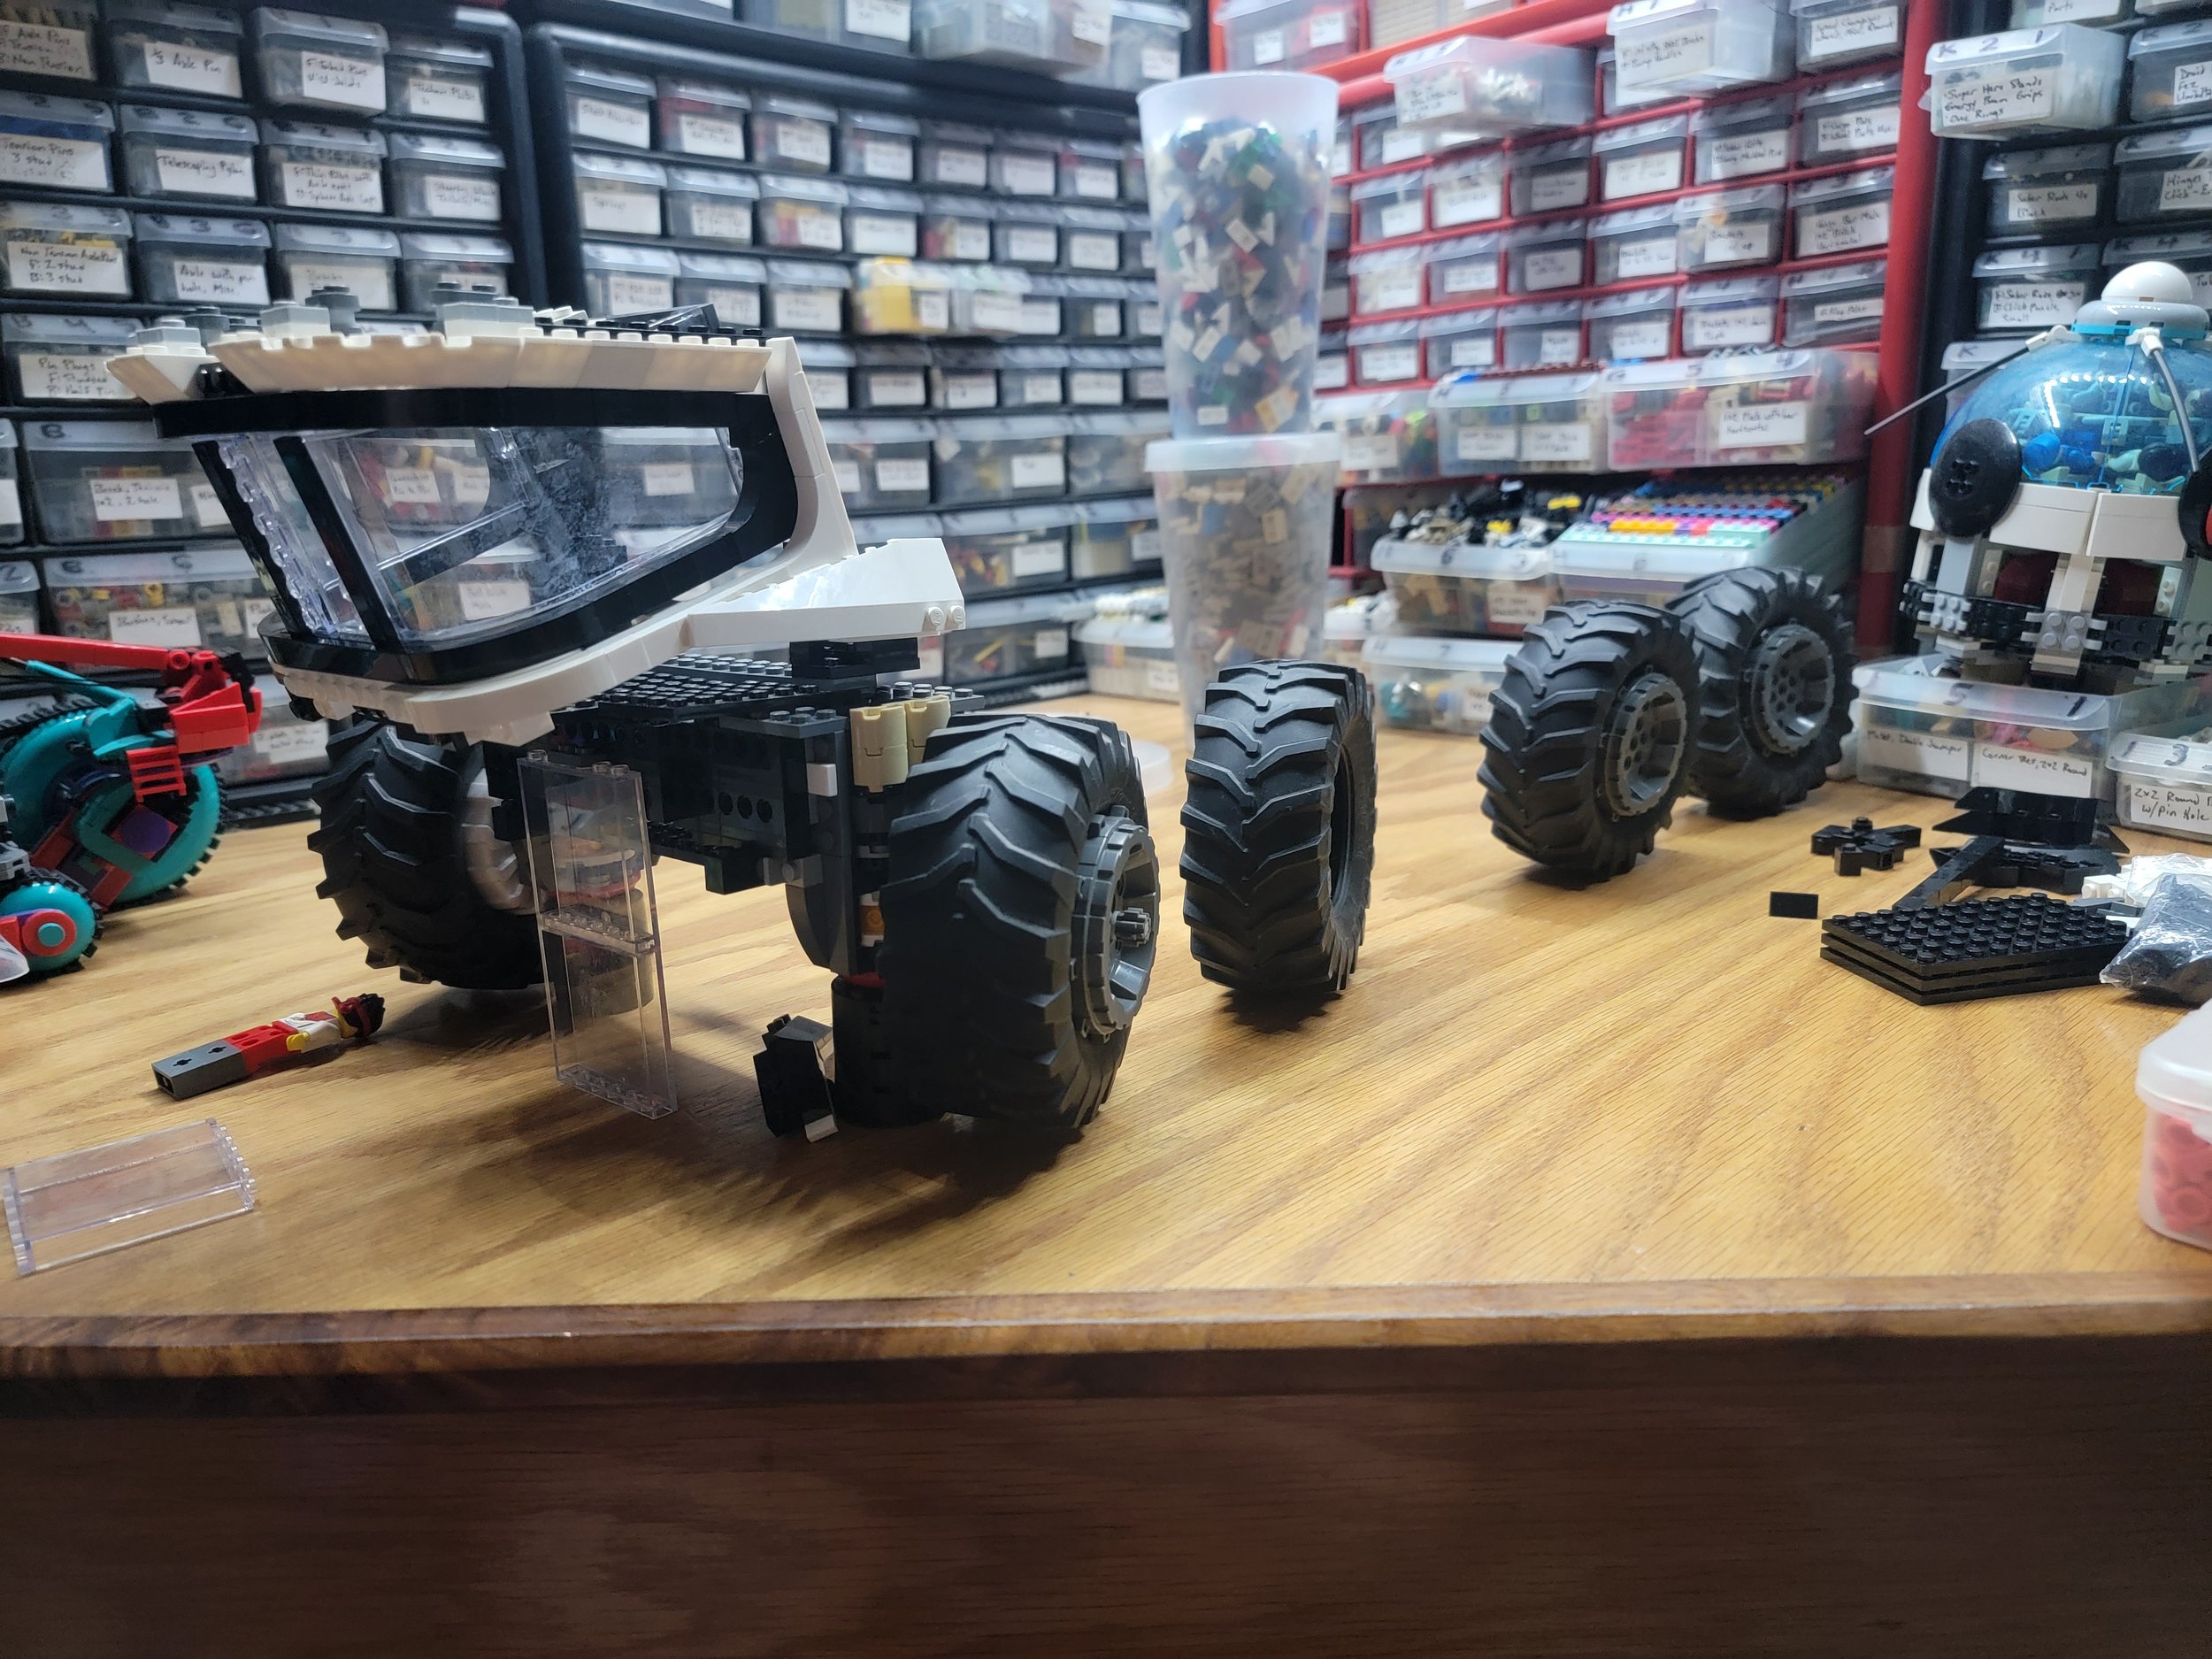
But even after laying the wheels out on my desk with the windscreen mockup, I still didn’t realize just how big it would eventually get. I hadn’t even decided to motorize or light it until I saw later how much room I would have for those things. The leap day thing happened when I was scrambling near the end to finish, and I remembered I had the extra day. I finished just in time to get one picture uploaded on the 29th and called it a leap year rover as a joke as if I built it all with just that extra day.

Geneva: How long did the building process take?
Scott: Pretty sure I started February 1st, but it may have been a day or two earlier. I tend to start builds for these challenge months on day one of the month in question. I know a lot of people build ahead, but I’ve never been great at planning out builds like that. I also got into the LEGO community through SHIPtember, which had a rule back when it was a contest that you couldn’t start until the first day of the month, and I guess that habit stuck for me. I worked fairly solidly most evenings and weekends throughout February. My family started calling it “Second SHIPtember.”
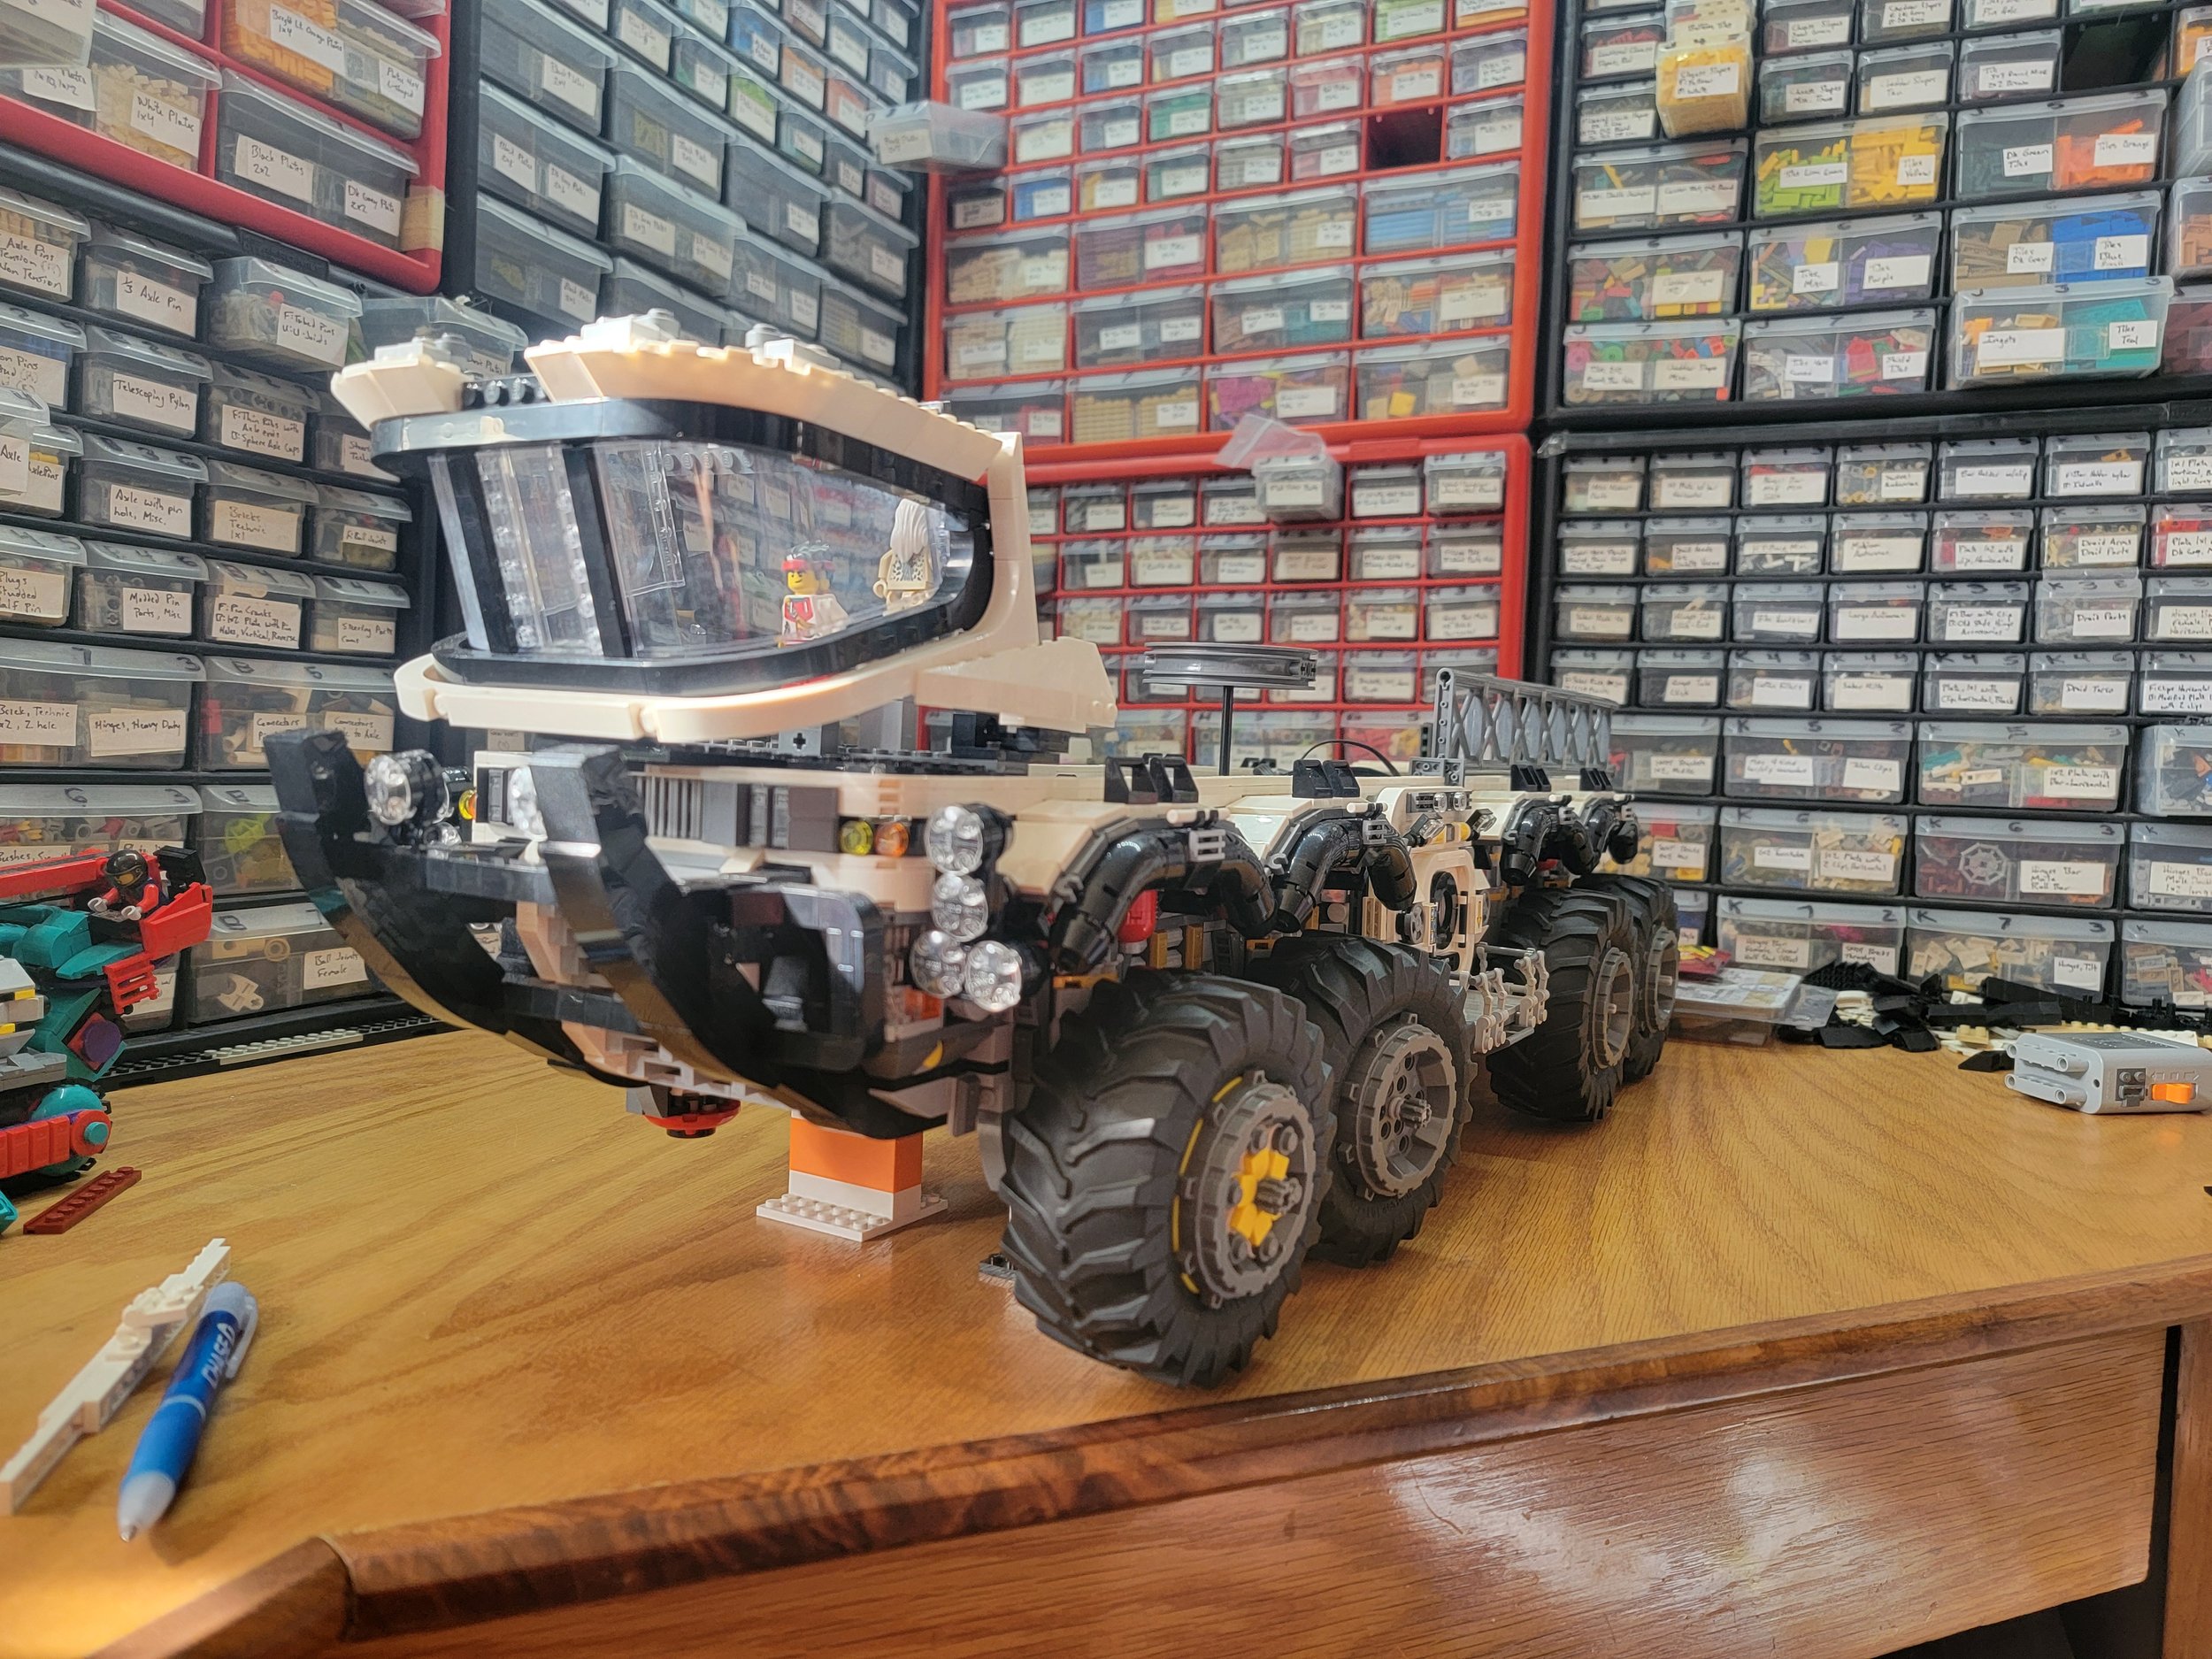

Geneva: This is obviously a big rover, but it's not until you think about how small the minifigures inside are that you realize it’s not just big, it’s huge! About how big is this rover in inches?

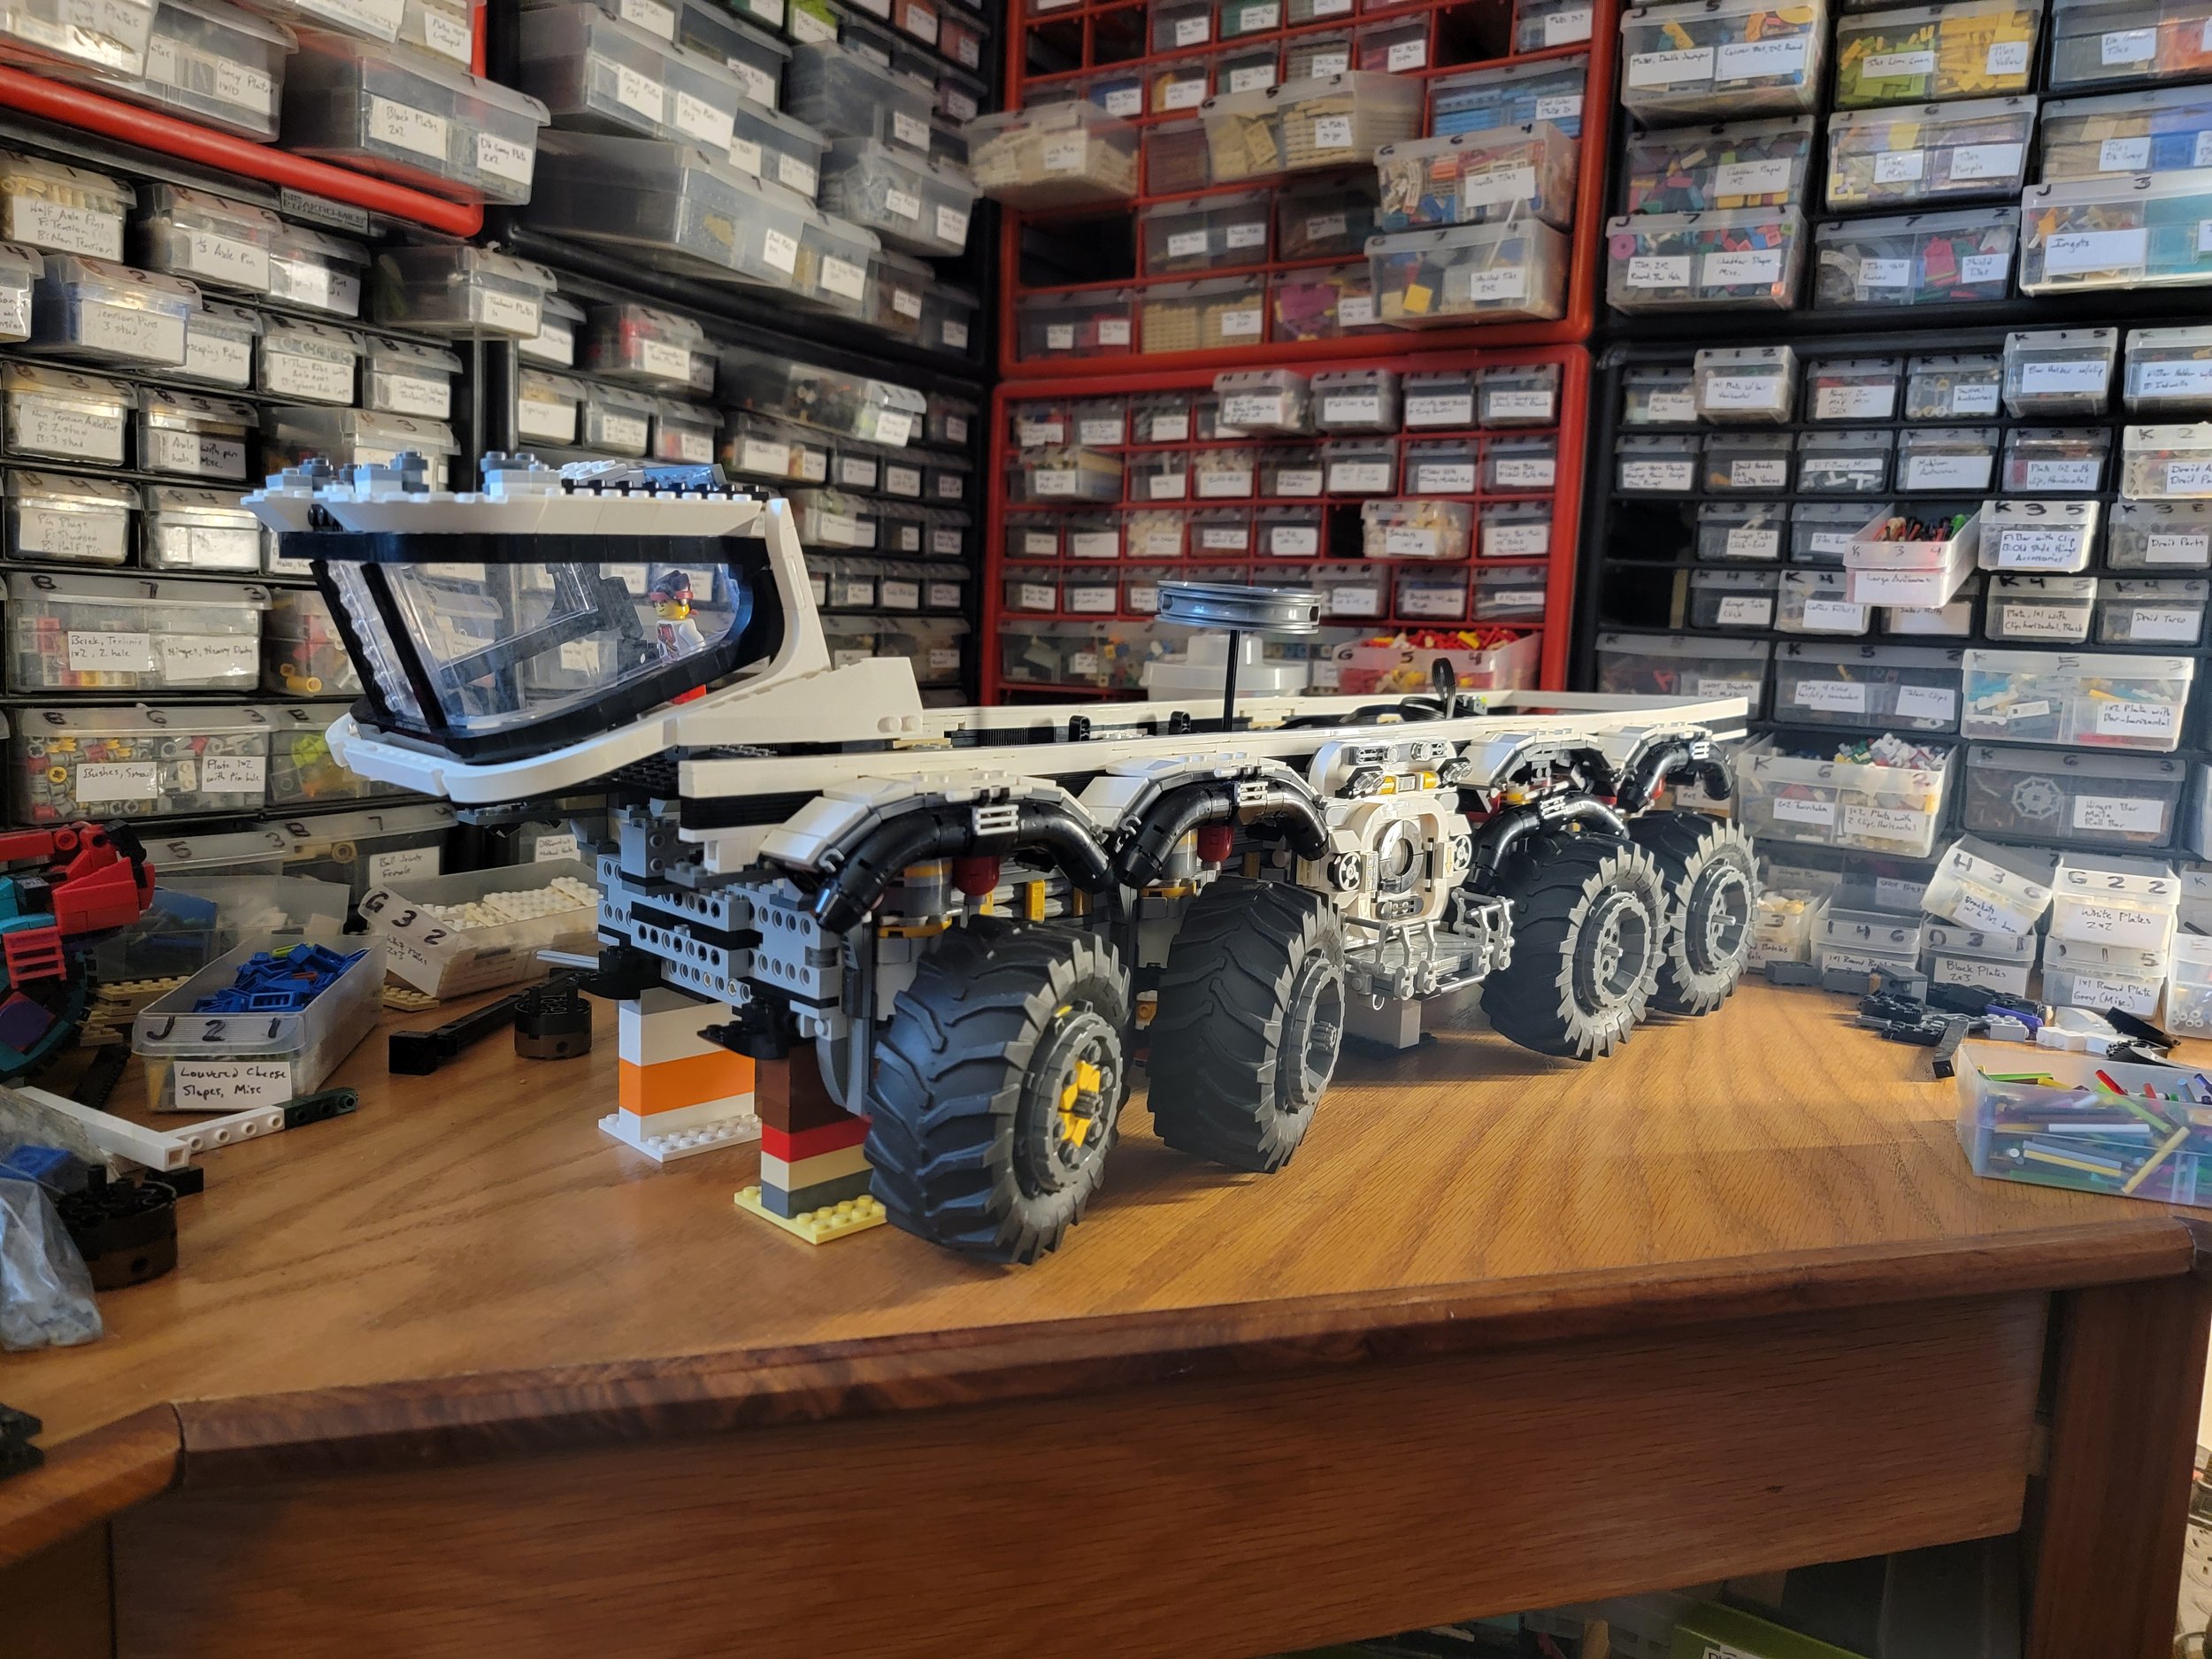
Scott: It’s 94cm (37”) long on the dot, including the crane boom. About 27.5cm (10 3/4”) wide and 35 cm (13 3/4”) tall.
Geneva: How much does it weigh?
Scott: I weighed it and it said 26.4 lbs. That seemed heavy to me, so I got on the scale and then held it and sure enough…
Geneva: Were there any special challenges associated with its size and weight?
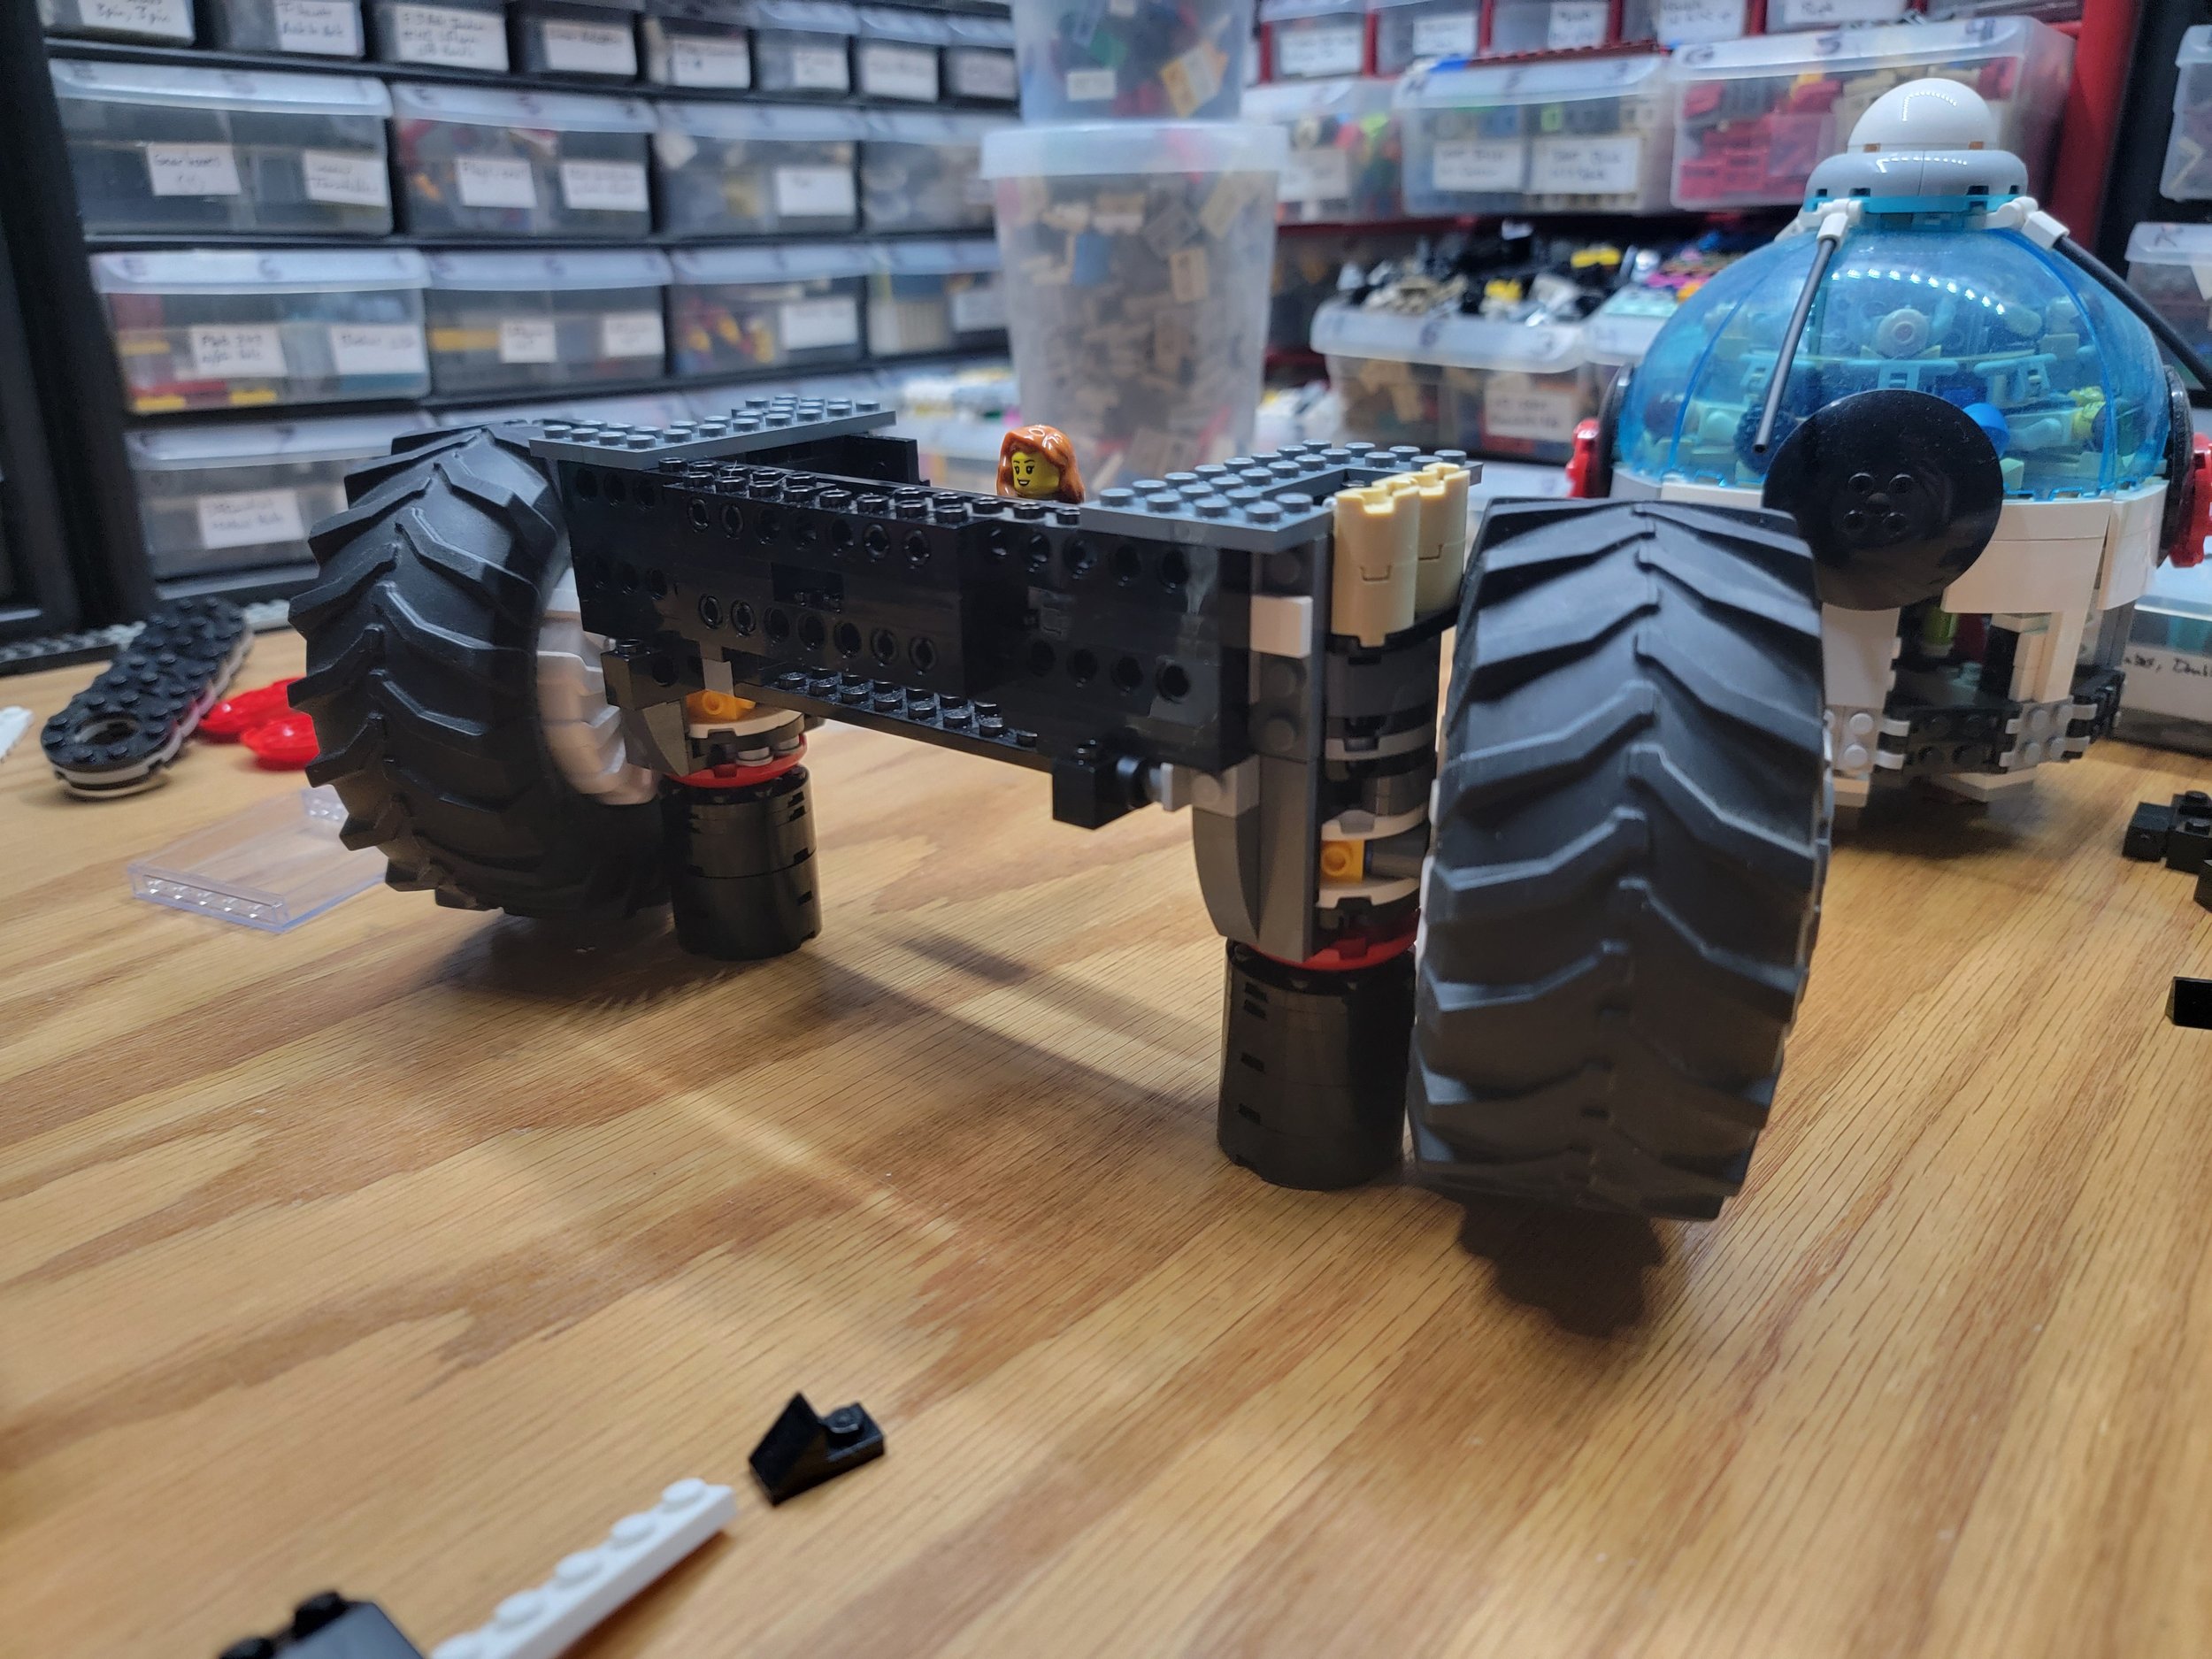
Scott: I’ve built somewhere around 13 SHIPs and some other pretty large-scale builds, so I'm pretty used to building big in general: Technic frame, proper weight distribution, plate sandwiching, etc. The biggest problem there is usually running out of workspace and having to move such a heavy build around. Though I had that issue a bit here as well, my SHIPs are always built on stands; with wheels, it was a whole different story.
As I would build and press pieces into place, the axles would stress and bow, and the wheels began to sit crooked. It’s one of the reasons LEGO attaches wheels as late as possible in their instructions, and I didn’t want to damage parts during the build process. I wanted to keep the wheels on because they help with proportions and positioning other elements, so I ended up making some small stands that looked a bit like jack stands to hold the weight. That way I could keep the wheels on as I built, and not have to replace bent axles when it was time to drive.

Geneva: Did you use any concept art or create a sketch of the model beforehand?
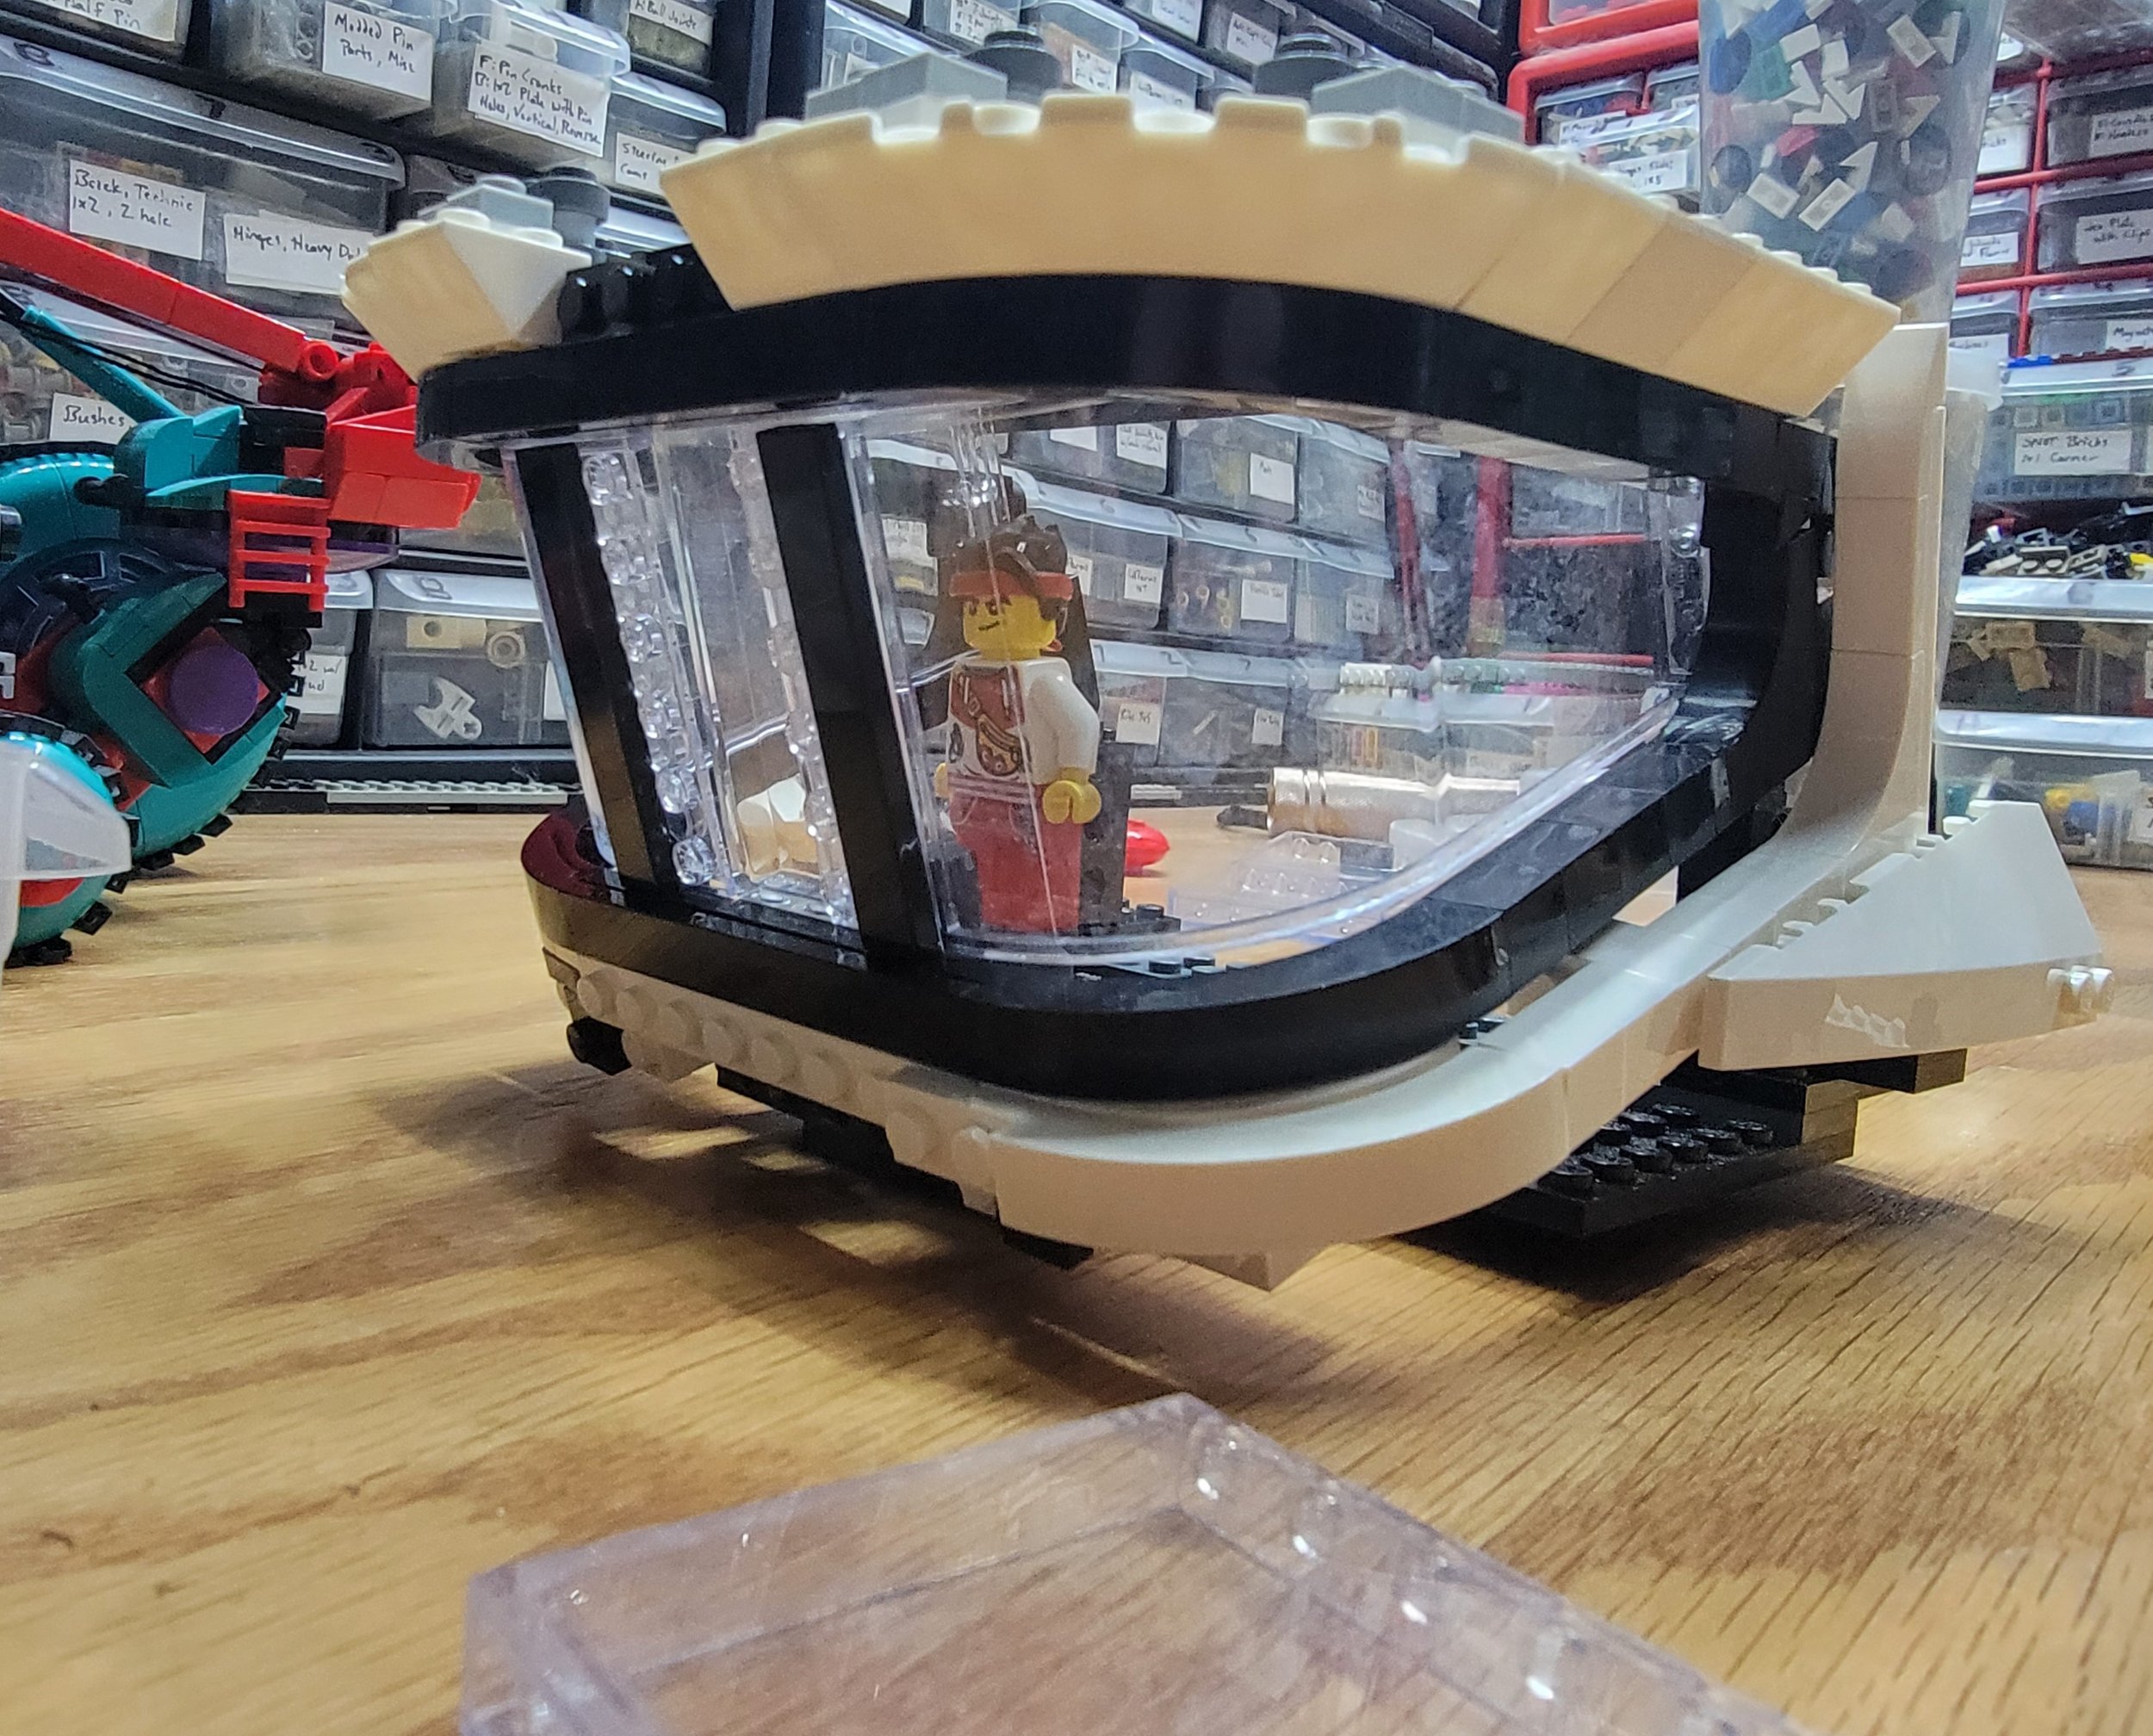
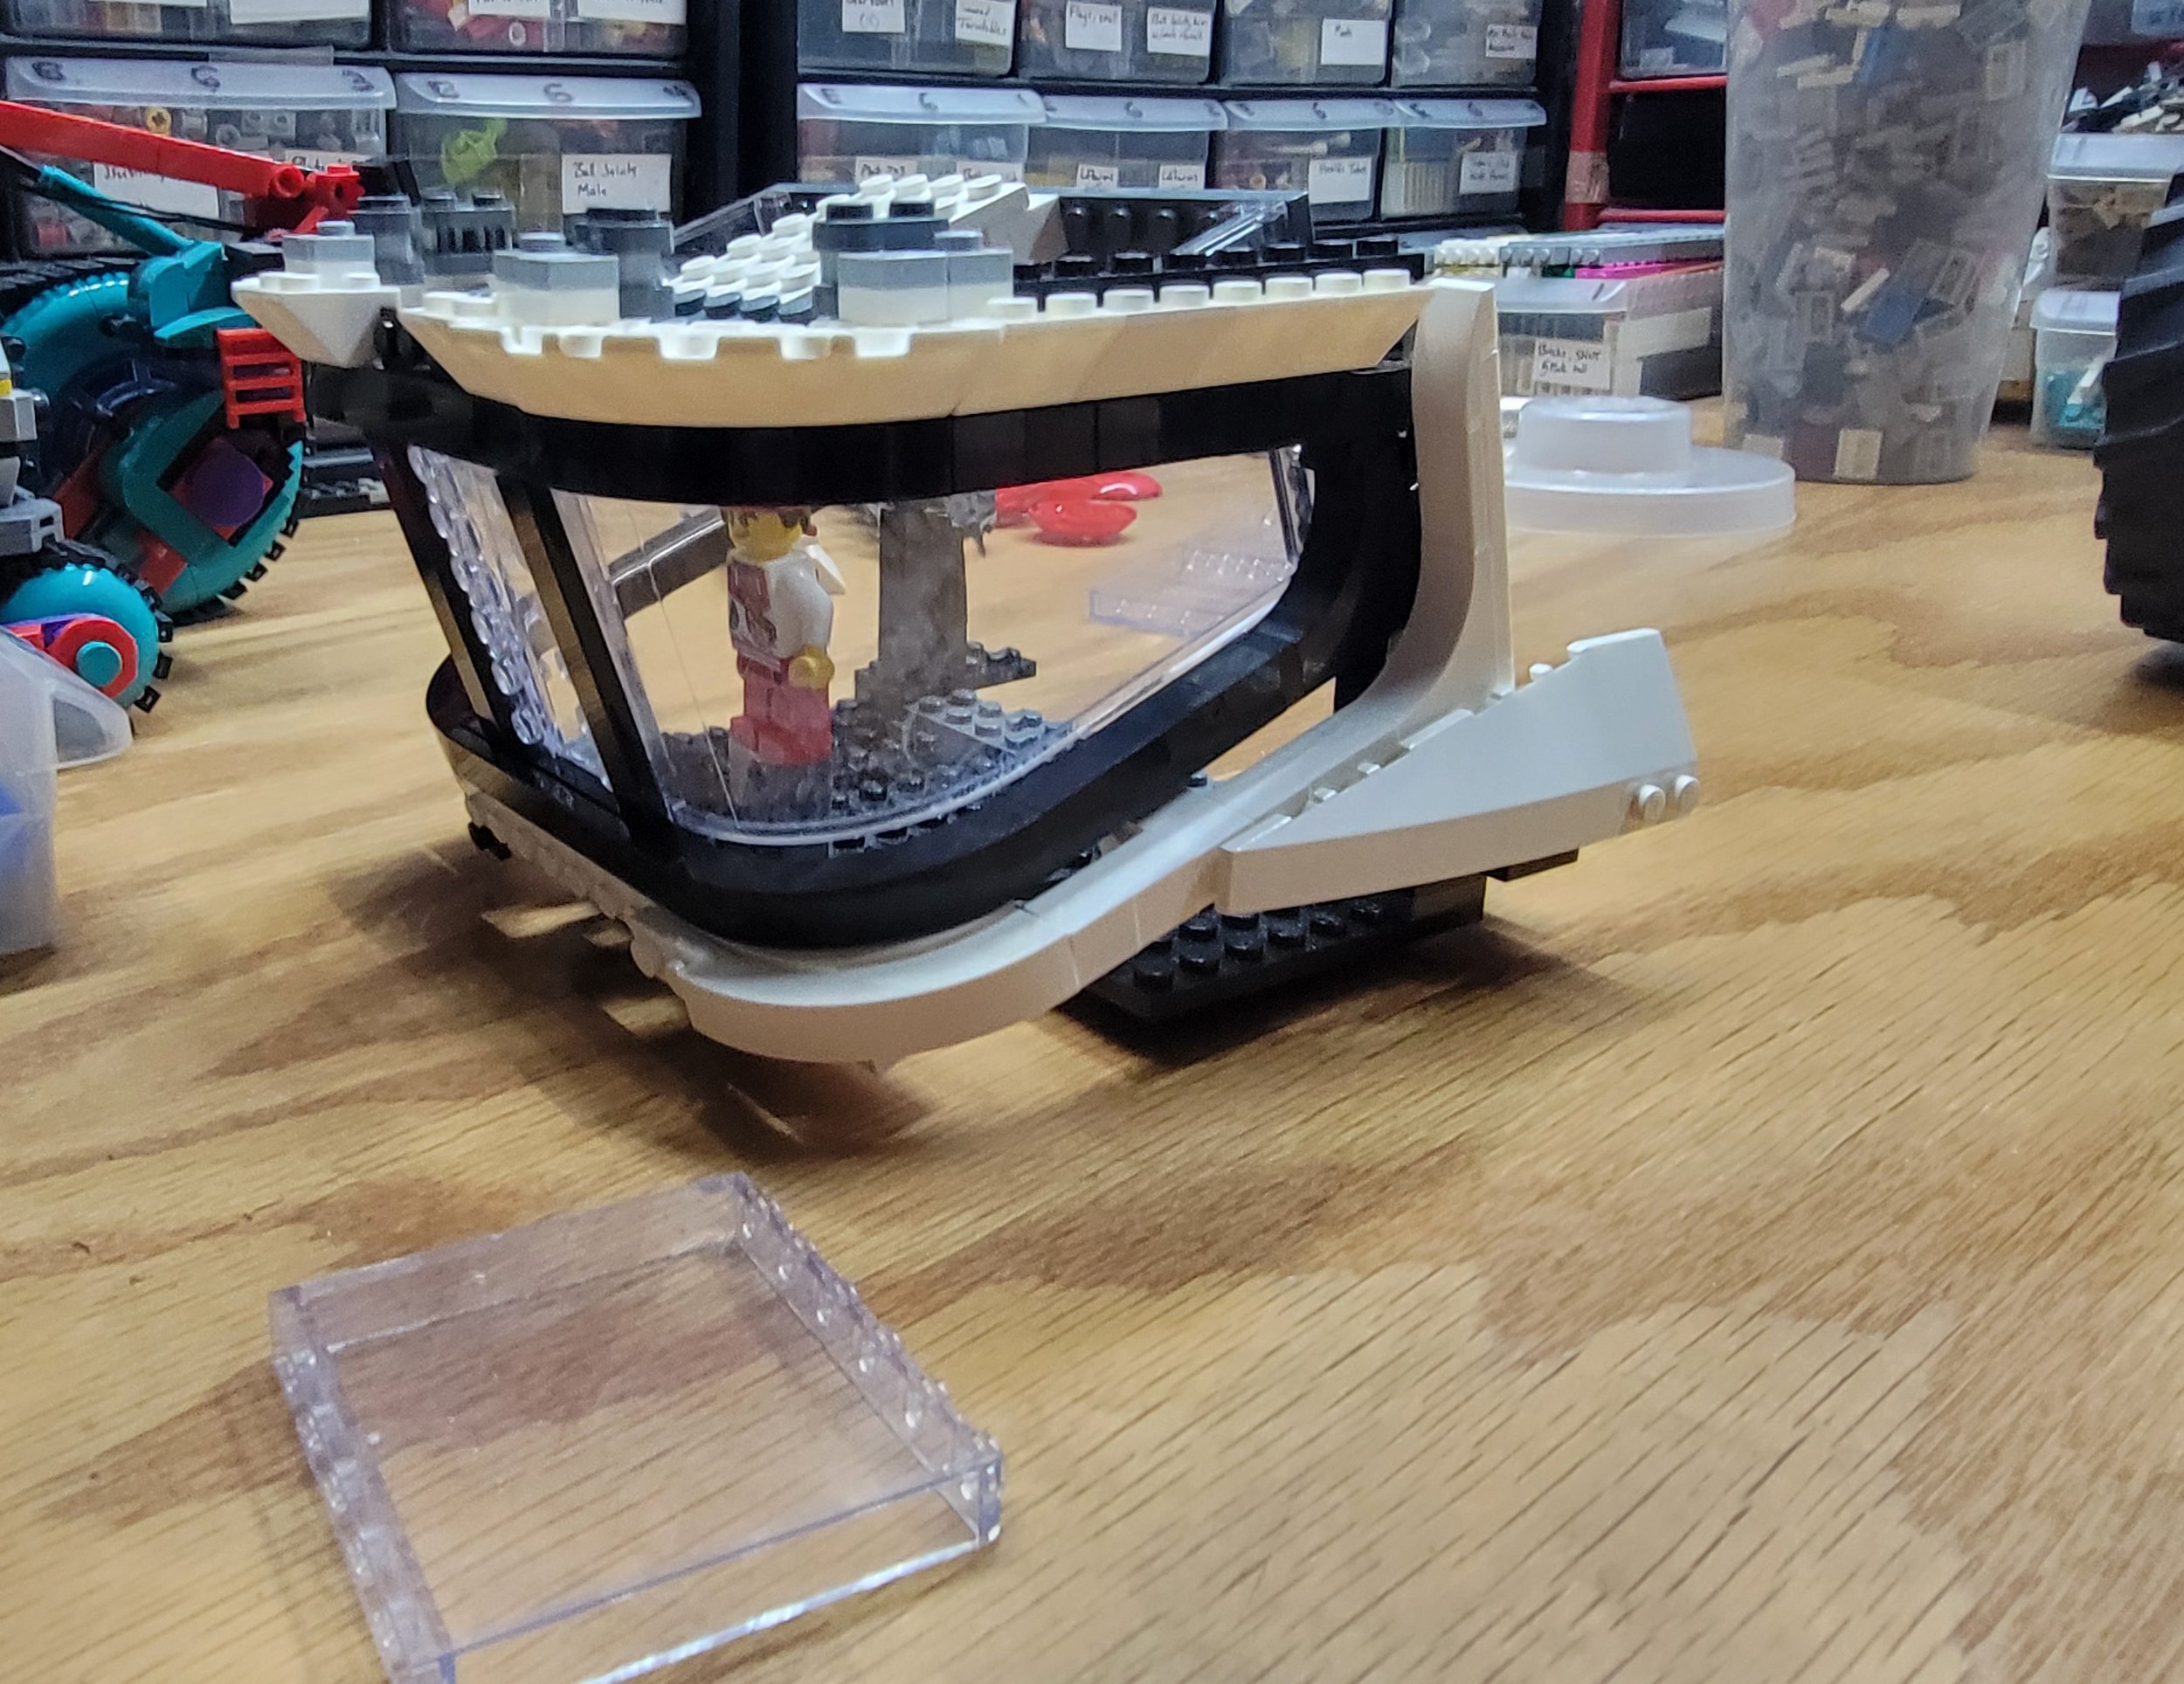
Scott: No specific concept art this time. I rarely base an entire build off something existing, and when I do, I try hard to credit the creator, even when it’s obvious, like with the Fury Road vehicles I made a few years back. This time, though, as I mentioned in the Flickr description, I played around with the canopy parts until I had the look I wanted, staged it next to the wheels, and just went from there. I actually simplified the windscreen quite a bit, as I initially wanted something more faceted, similar to the rover from The Martian, but the scale seemed off.
That being said, throughout the build process, especially for larger builds, I always look at things like sci-fi and industrial vehicle images for detail ideas and reference, and I'll sometimes scroll through some of my favorite MOCers’ feeds for inspiration. I try to have functional looking greebles and details, and looking at existing objects and mechanisms is a way to do that and try to keep even the craziest concept somewhat grounded and believable.

Geneva: What were the challenges of motorizing the vehicle? Have you motorized a creation before?
Scott: I got my start with motors with 8064 way back when I was seven. I’ve dabbled with them ever since and done some smaller builds with them through the years (decades, actually...) My first highly Technic(al) use of them was a few years back when I built a remote-controlled Jeep Rubicon with four functions (drive, steering, winch, and a 2-speed gearbox).
One of the biggest problems I had there, I had with this rover as well: weight. My build style is definitively NOT conducive to motorization. I needed much more torque to get this thing moving than a single LEGO motor could provide, and even coupling a Power Functions XL and L motor on each side wasn’t enough. I am somewhat familiar with gearing and torque, but prolific LEGO enthusiast Sariel’s Unofficial Technic Builder’s Guide was extremely helpful in coupling and gearing my motors down enough to get the required torque. Even then I had to upgrade to Buwizz to get the performance I wanted.

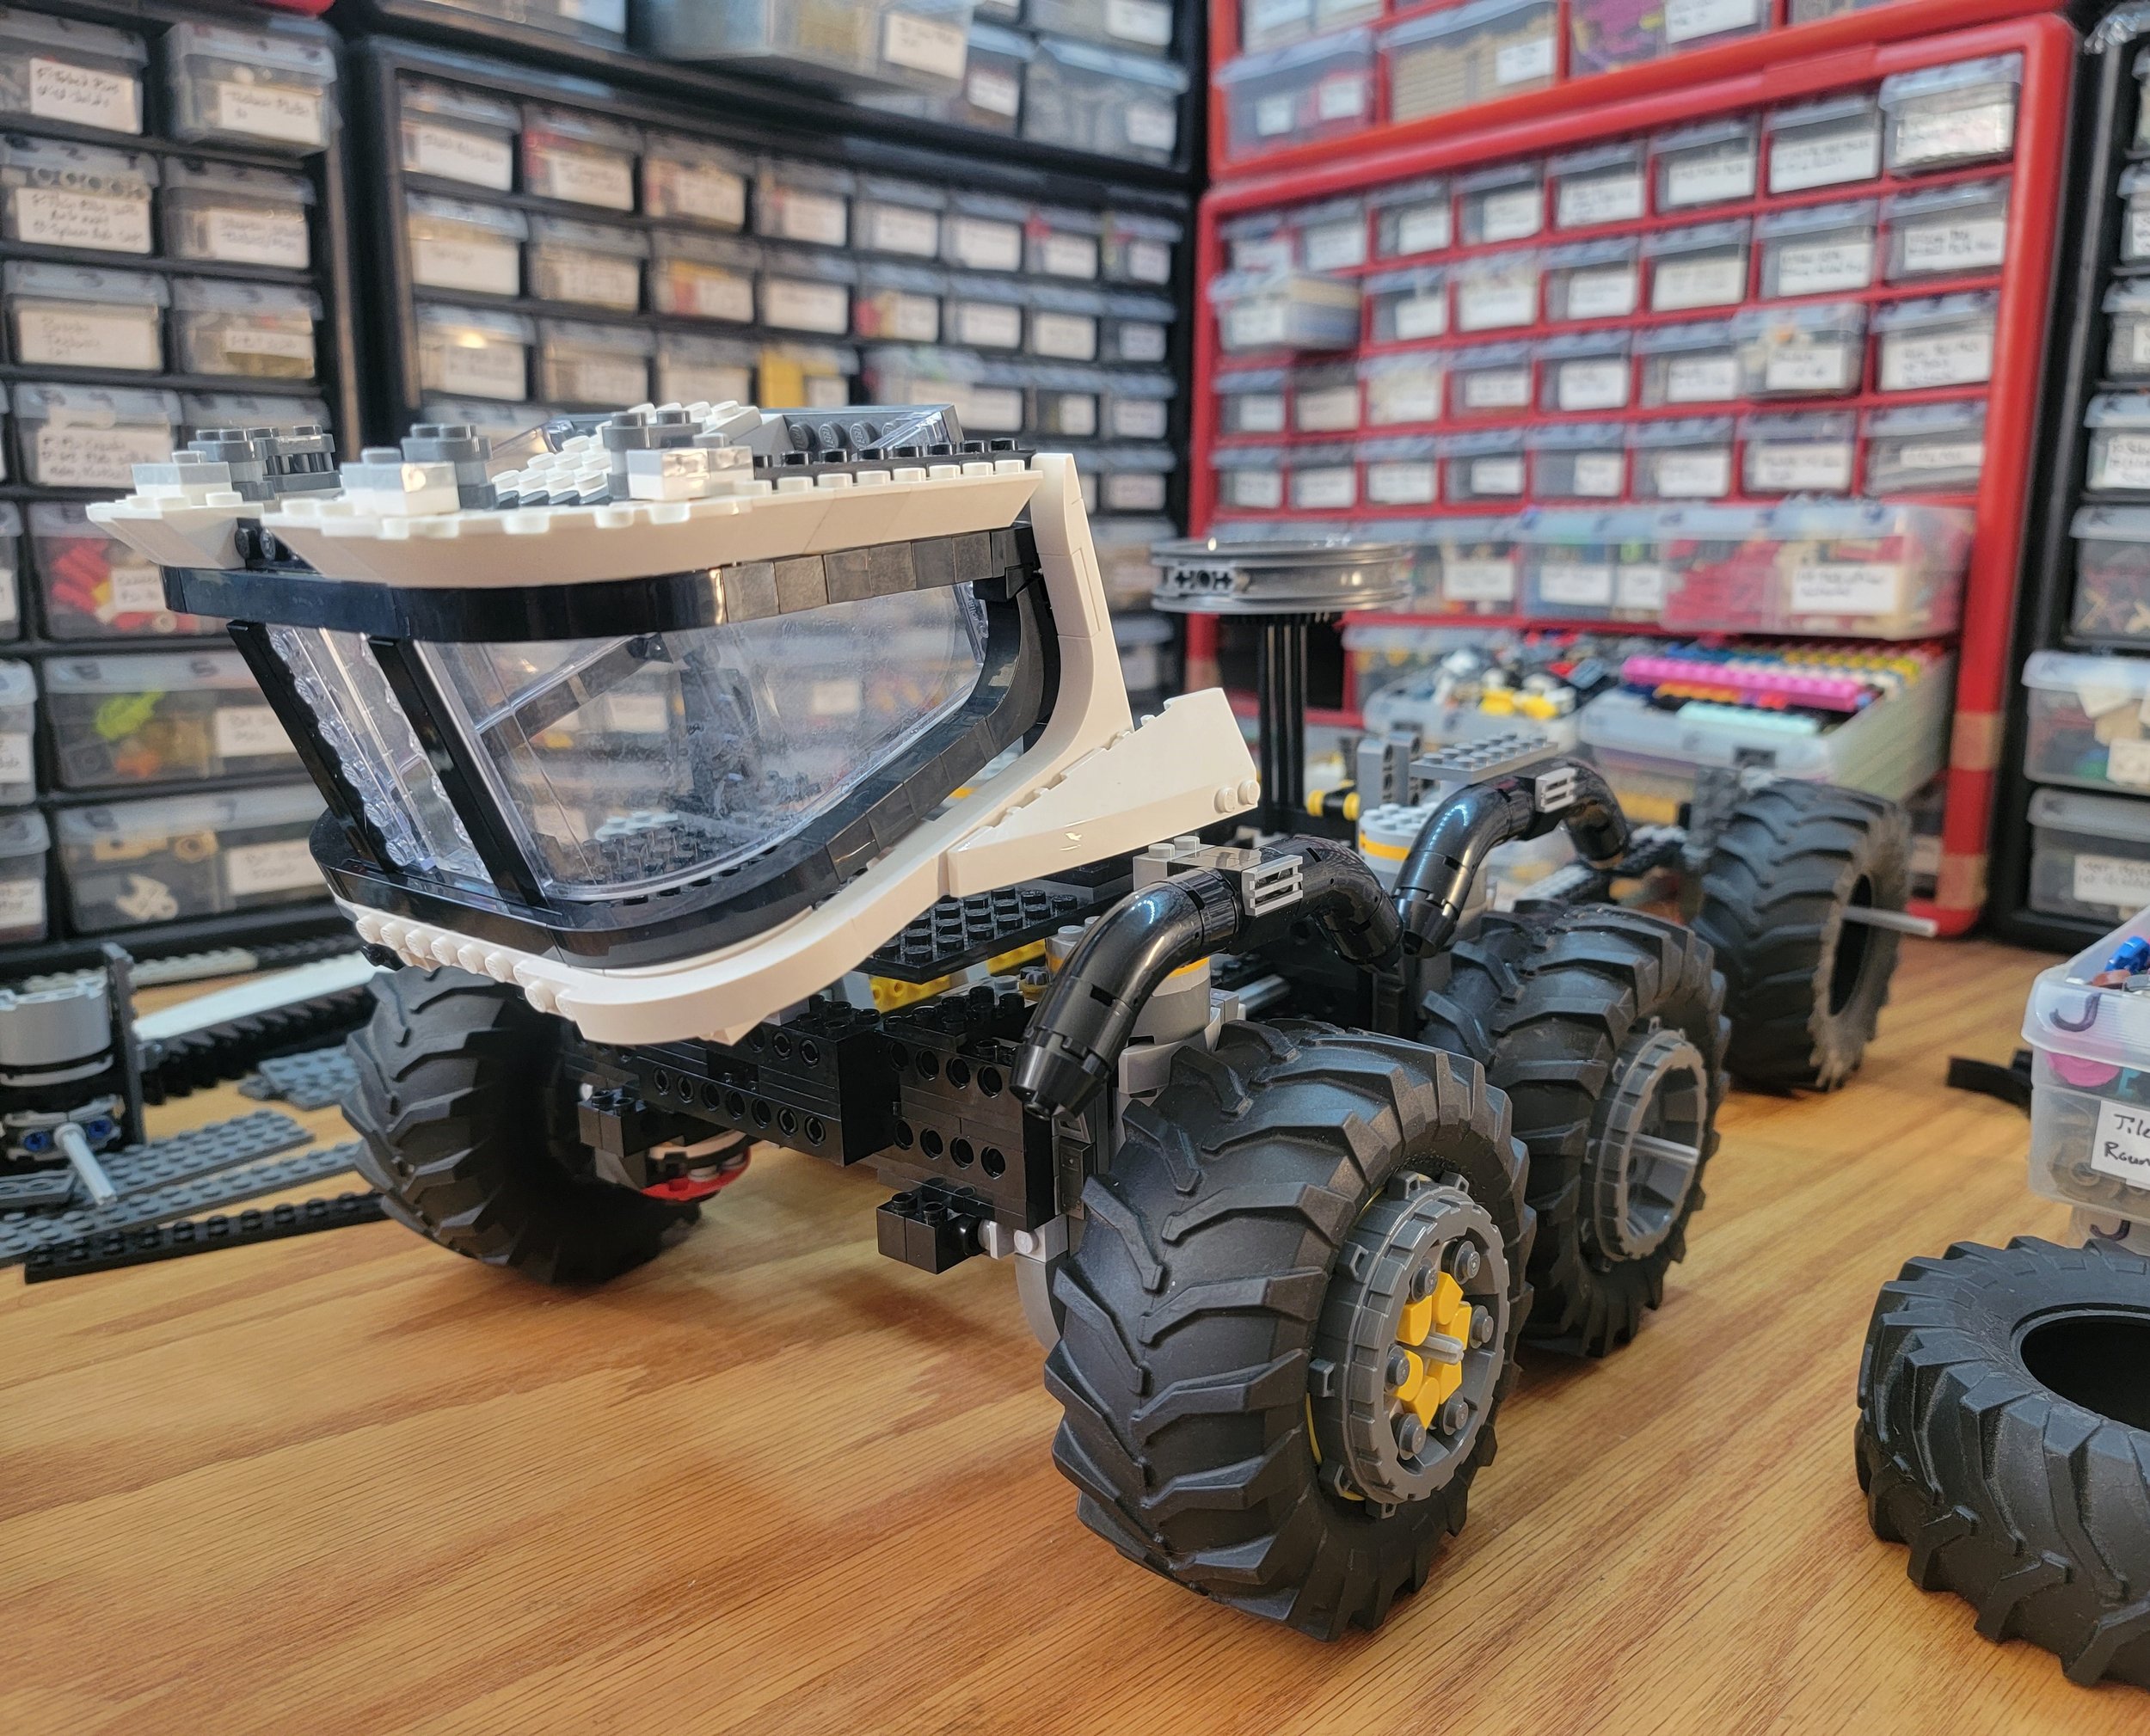
Steering was also a huge issue. Most Technic MOCers are all too familiar with the substantial backlash of LEGO’s gears, and the wandering this caused in the wheels made 4-wheel steering a massive headache. Also, the axles are below the level of the chassis to increase ground clearance, and this meant I had to transfer the motor’s power not only out to the wheels from inside the frame but down the vertical portions as well to reach the axles and the added components caused even more wobble. On top of all that, I try not to have Technic showing in my system builds. I’m like C3PO, it bothers me when my parts are showing! So I needed to encase this all inside a system structure.
I tried three or four different ways to transfer the motion from the motor, including long pushrods down either side as well as a couple of other less-traditional methods I’d seen in official sets, and landed on brick-built racks coupled to steering arms made with the only piece I could find that could hold the racks as well as pivot inside the 2x4 round panel hiding the mechanism: a cam. This transferred the motion with as little backlash as possible, but there was still more play in the wheels than I wanted, so I ended up hard-coupling both sets of steered wheels underneath the frame to tie their movement together directly, somewhat defeating the purpose of raising the chassis in the first place. C'est la vie...

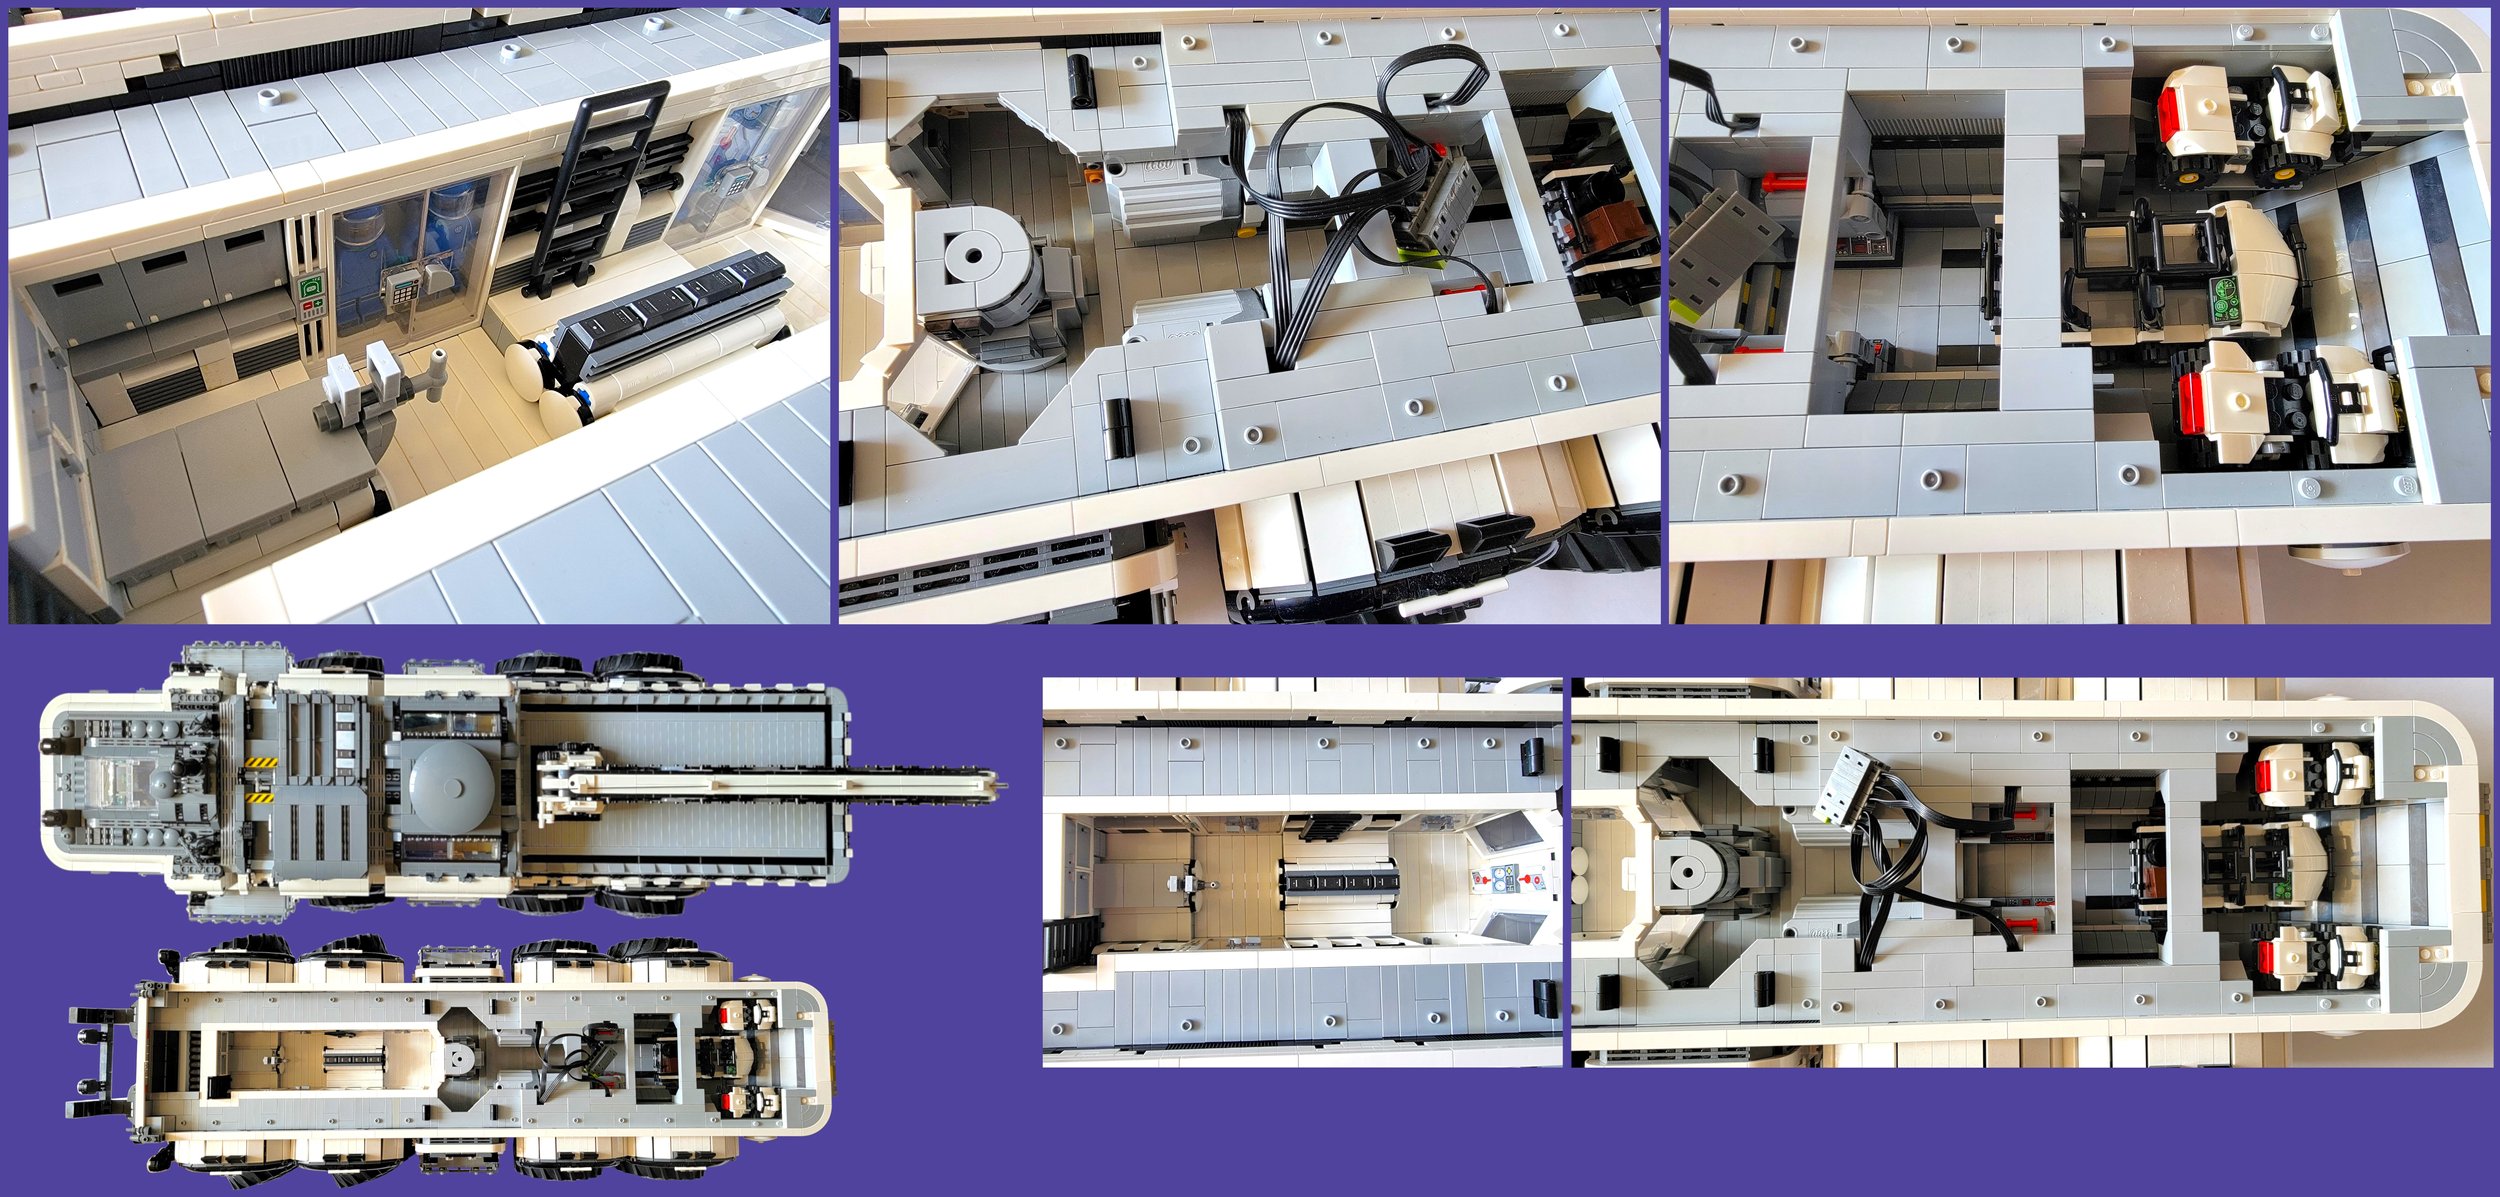
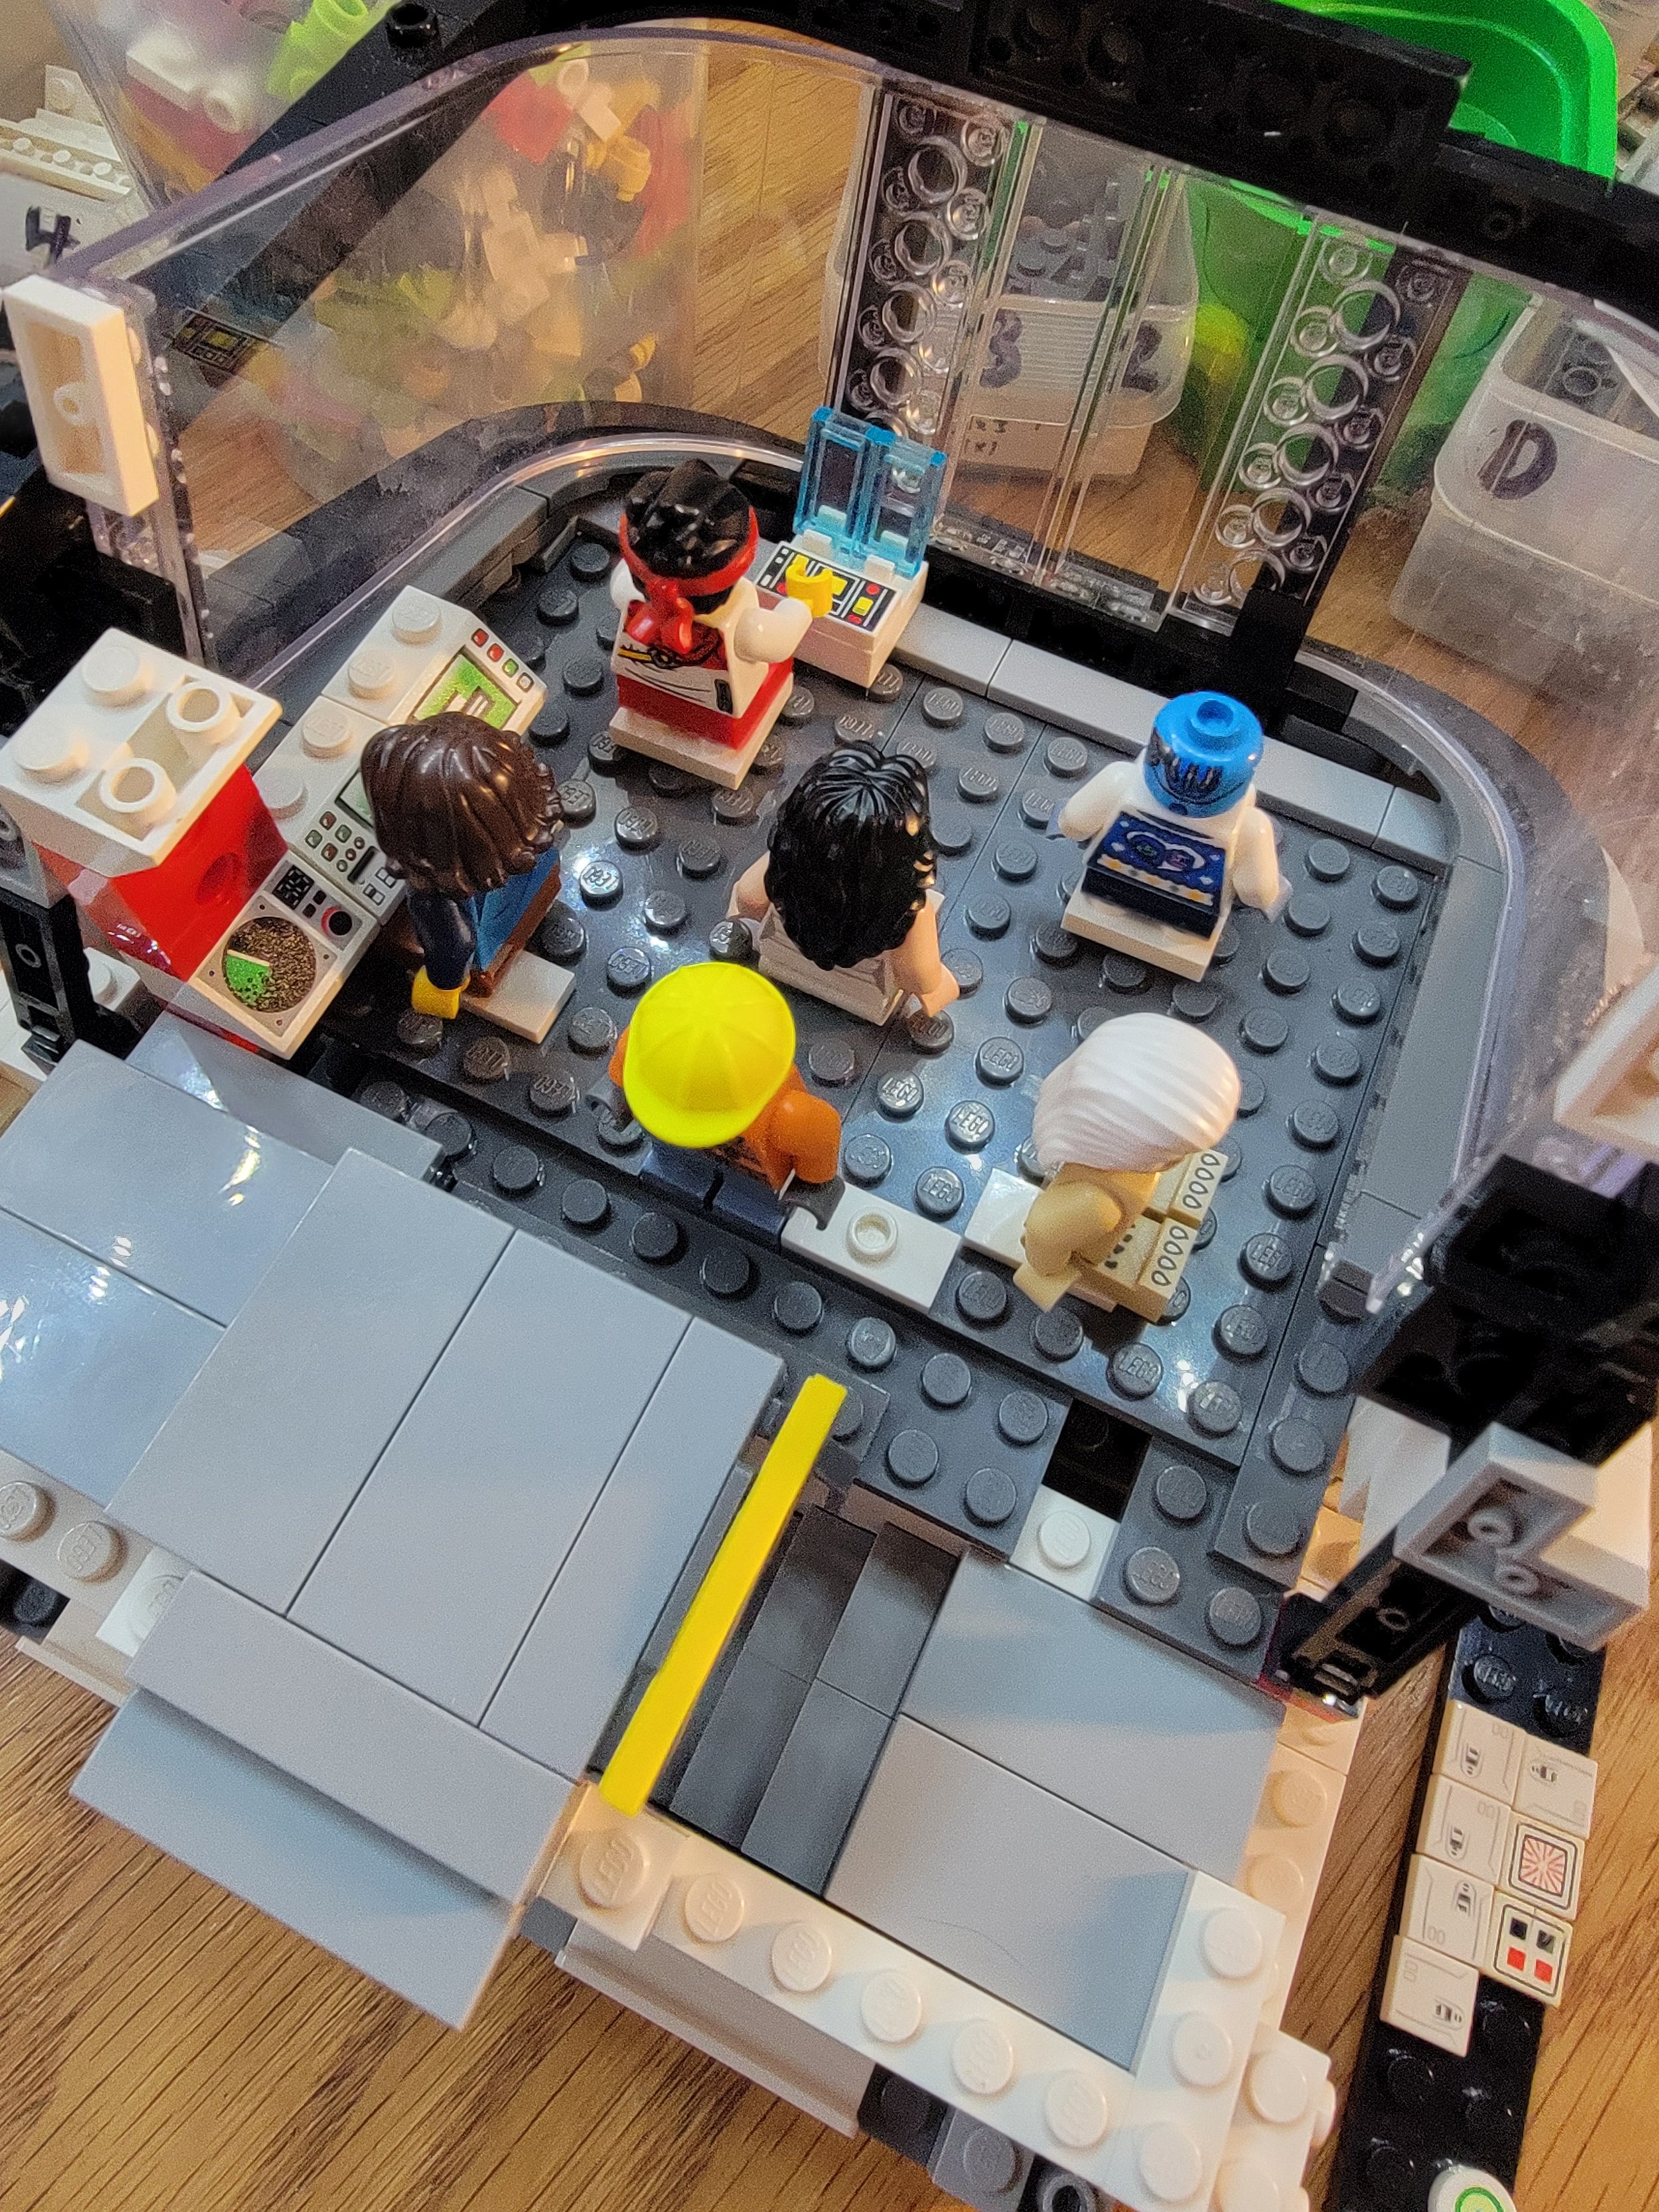
Details like these space suits show up better with Lighting!

Geneva: And it’s got lights, too—how hard were those to integrate?
Scott: Lighting is always tough. On one hand, it adds so much to a model, and honestly, I have more experience incorporating lighting in builds than I do adding motors. On the other hand, since you have to go third-party to get any kind of variety and functionality, LEGO bricks, and by virtue of the things made out of them, aren’t necessarily made to accommodate them.
Like with motors, I always figure out the aesthetic of the build first and then do my best to hide these other components inside the structure. The con here is that I have to tear the entire build apart once I have the look figured out, in this case, once for the motors and then again for the lights, because trying to do both at the same time would have been a nightmare. This is ultra time-consuming, but the huge pro is that there’s very little compromise from the original design to incorporate these extras. Some builds look like they were built around their motors, and though it’s always the case that you’re literally building around them, I try to minimize that type of appearance.

Light testing!
For lighting in general, I use Light My Bricks components. I originally bought kits for Ninjago City and a couple Harry Potter sets from them as their demo videos are generally more impressive, but I stuck with them because even though they have a higher price point, their quality really shines, especially when cramming a bunch of lights and wires in a super-tight space with no damage.
You’re always going to have some wire visible, but I try to hide wires and connectors as best I can. This means opening up cavities inside for storing/running components, which can affect the structure, so you have to be careful there, too; it’s a balancing game all around.
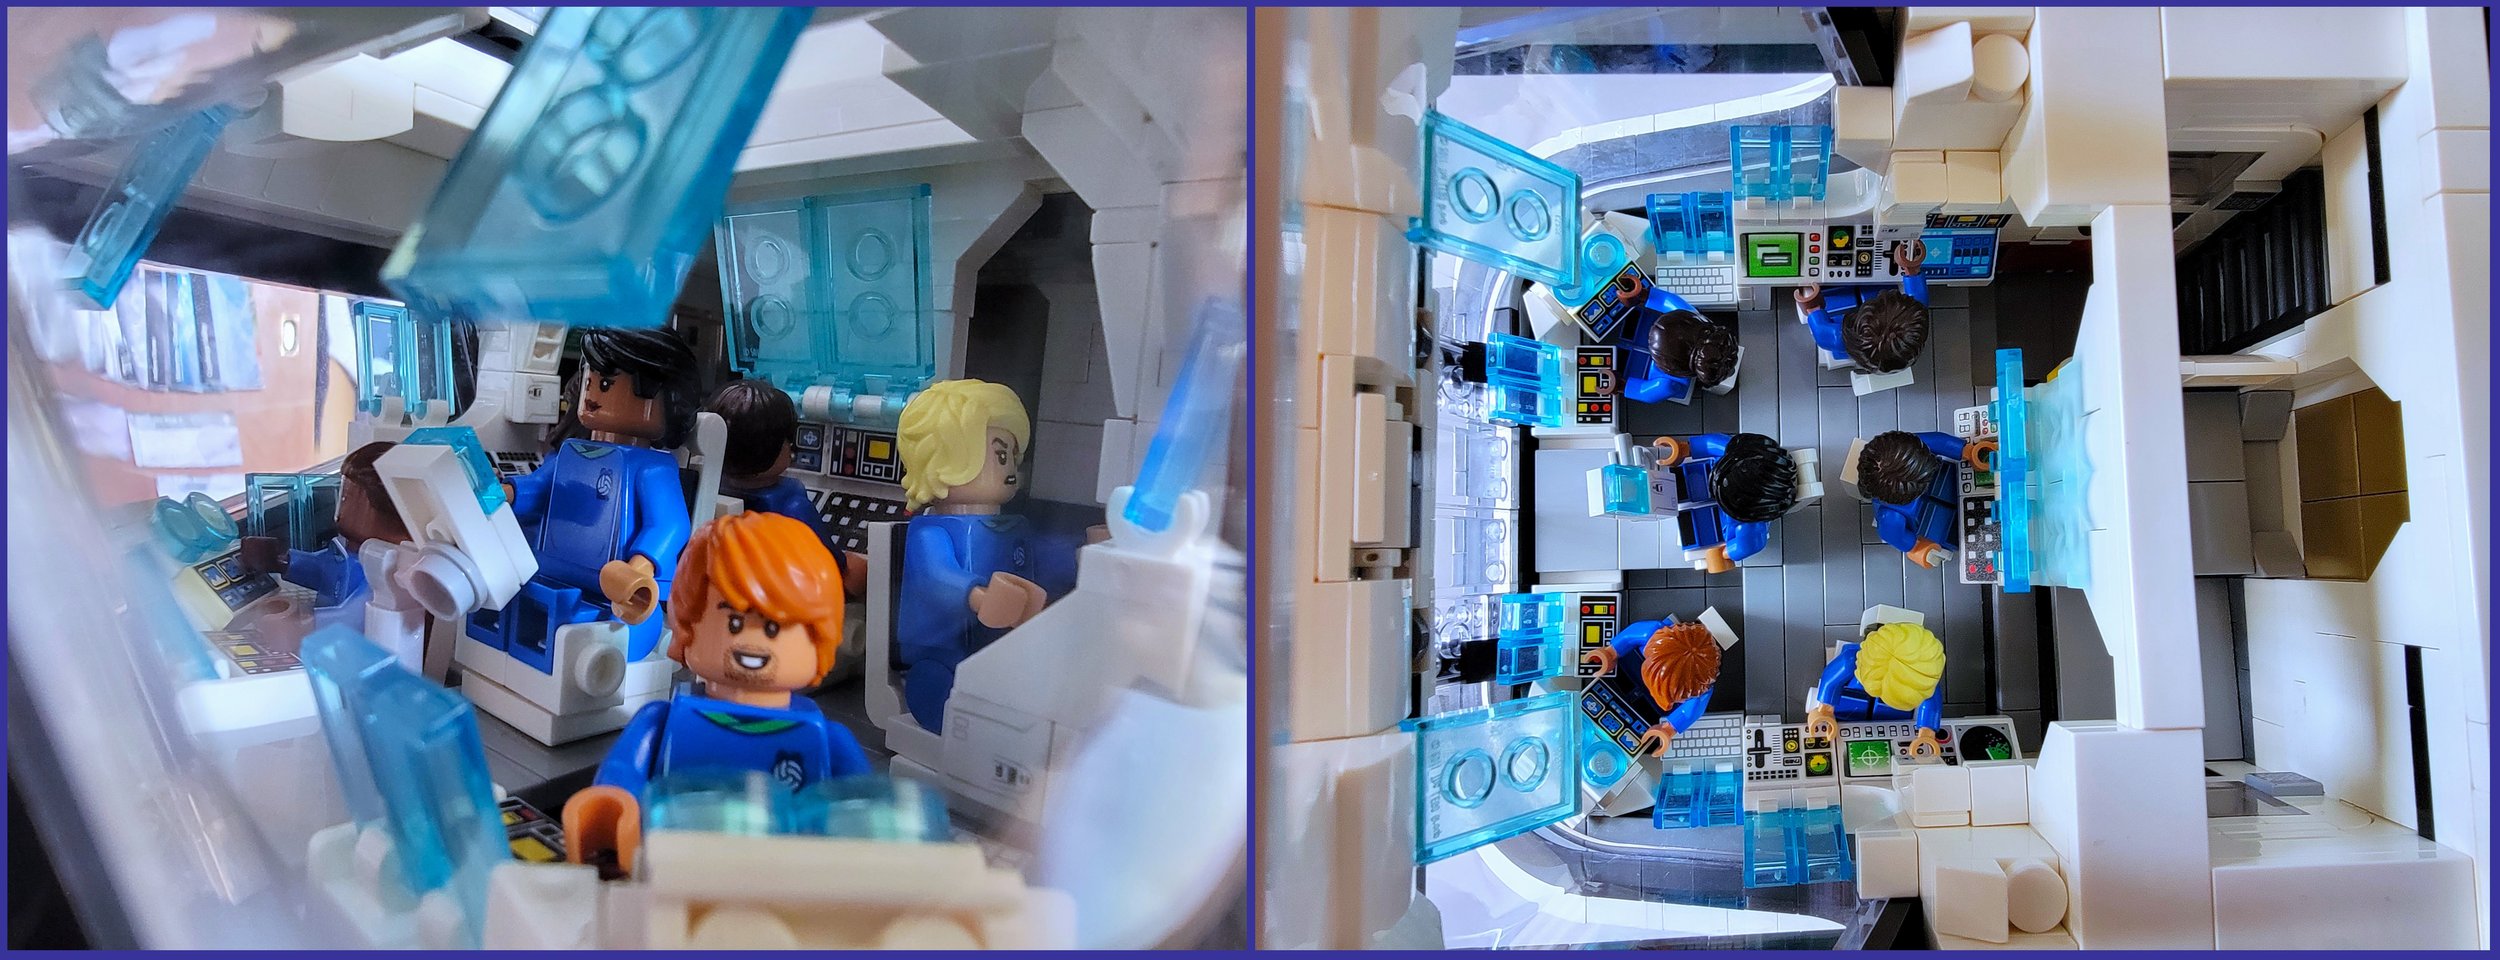
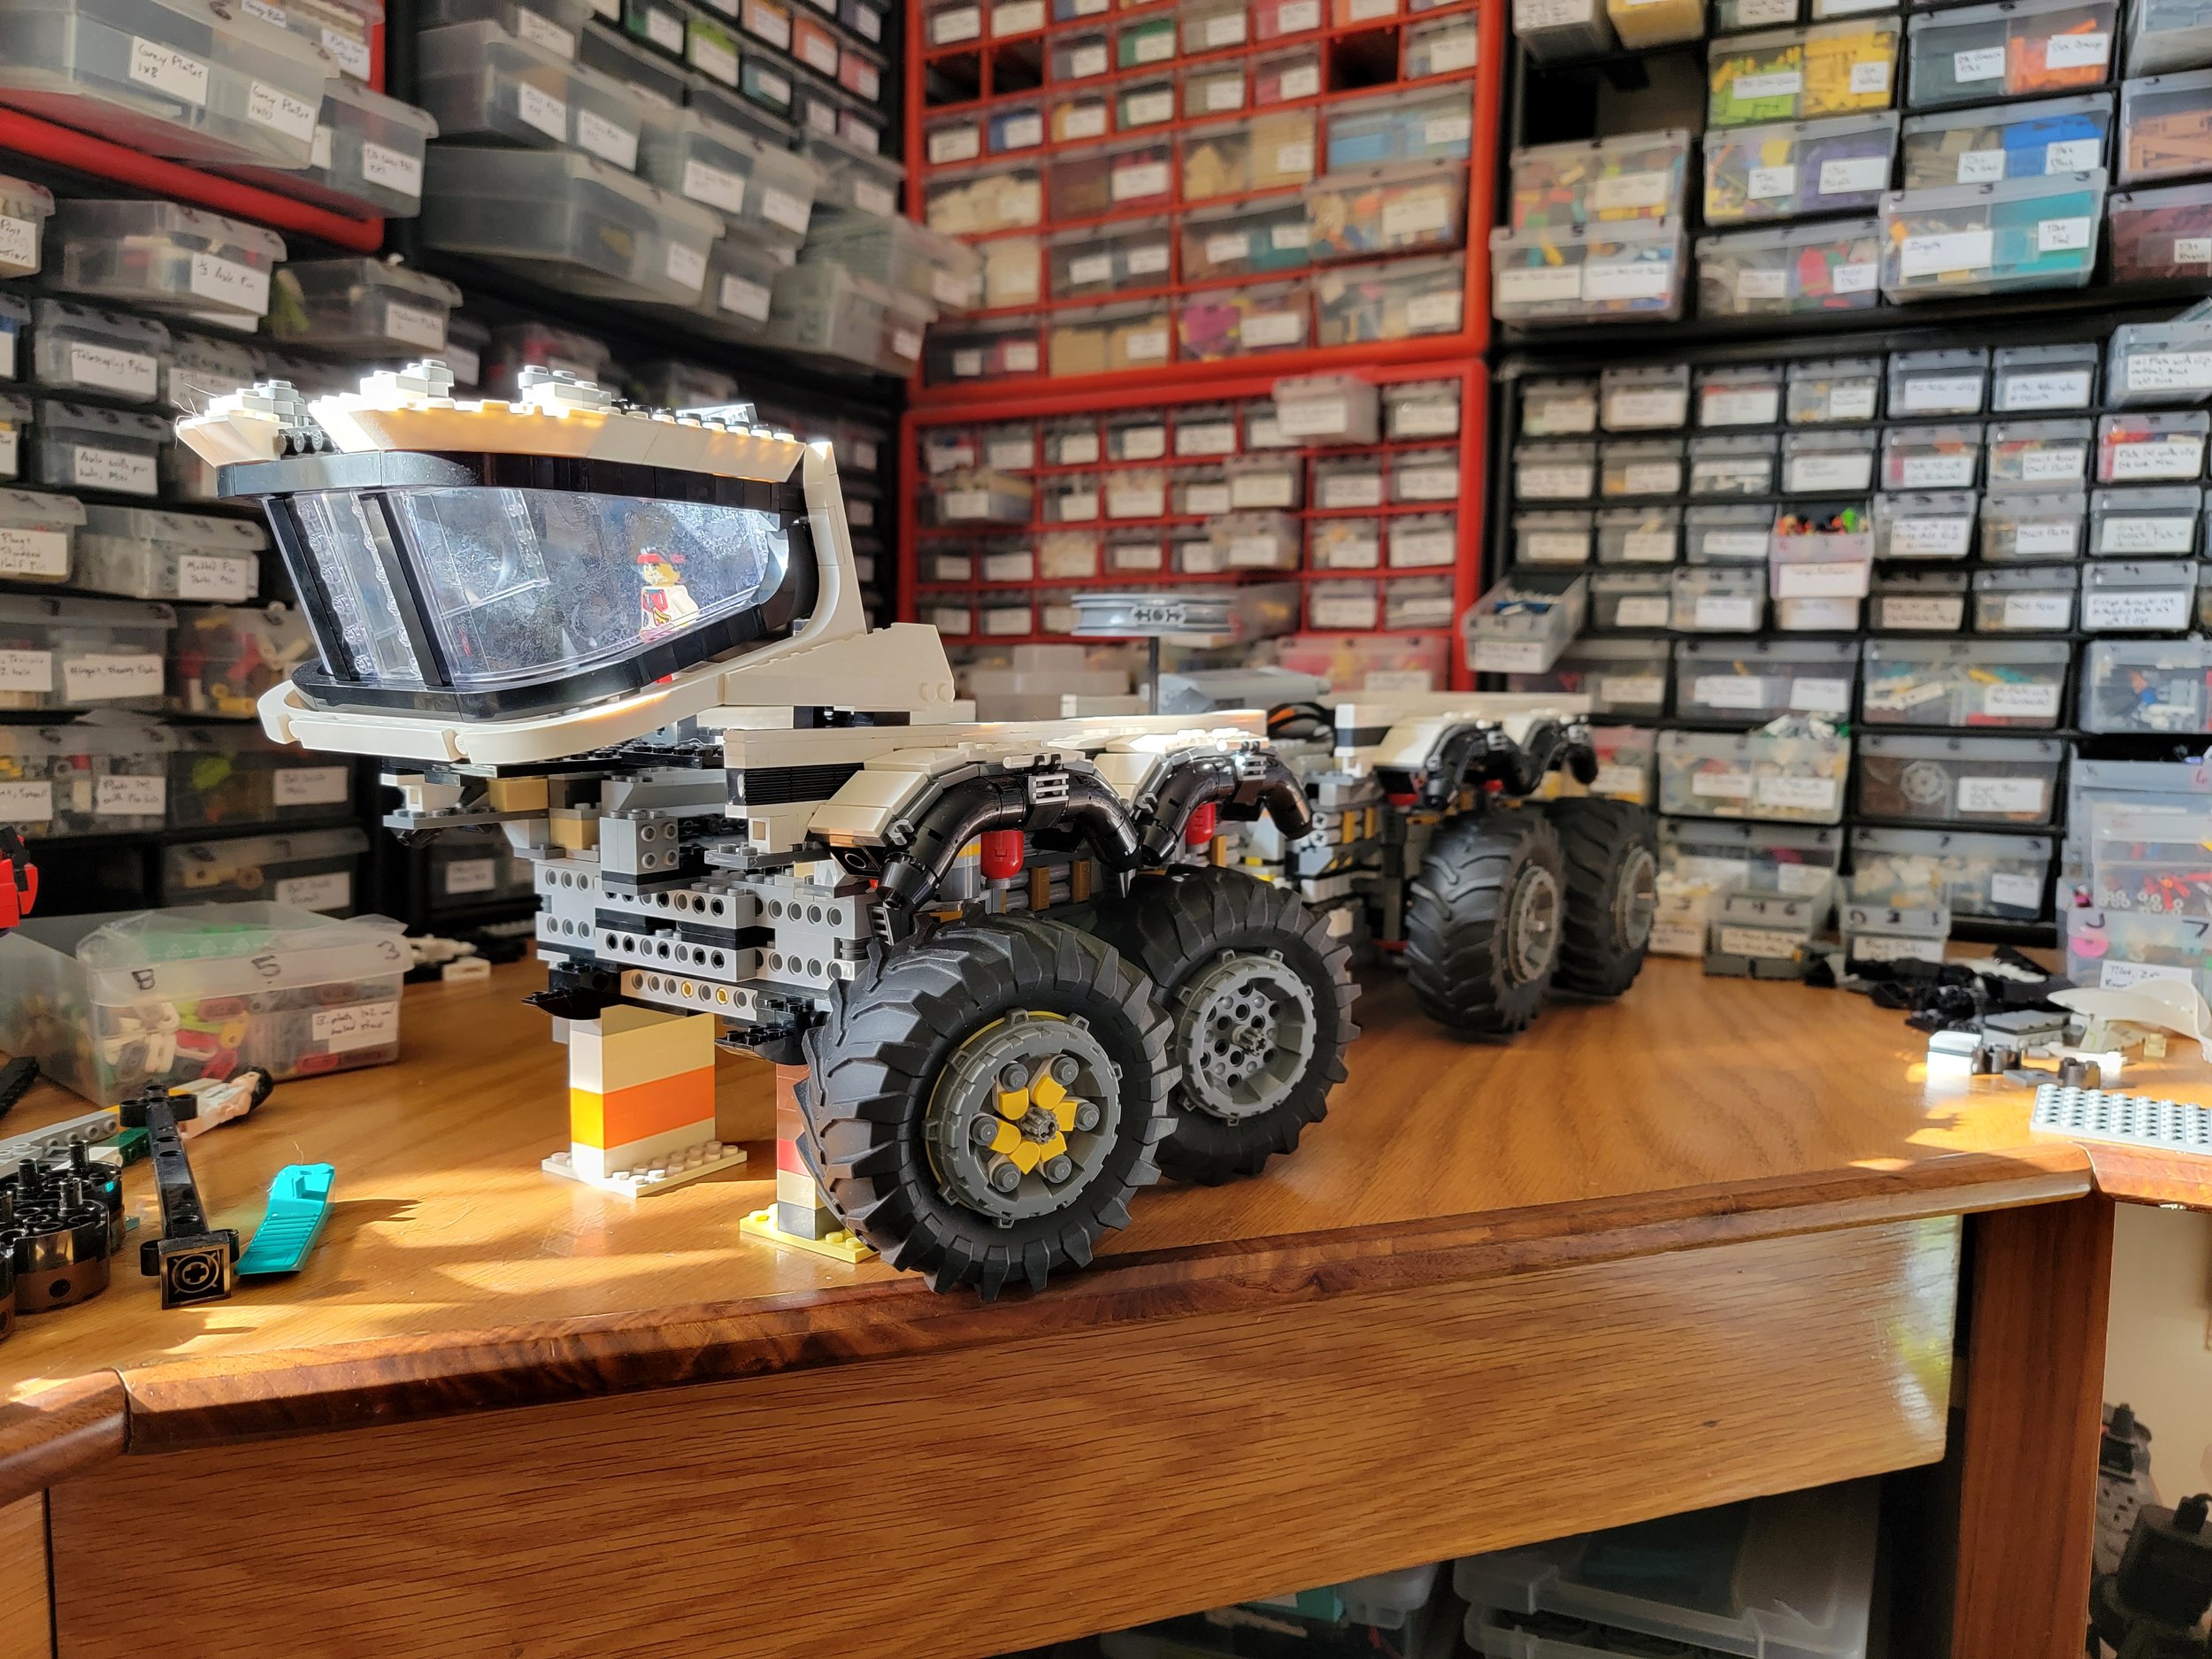
Geneva: What’s your favorite thing about this rover? (My favorite thing is definitely being able to see the lit interior behind that huge windscreen!)
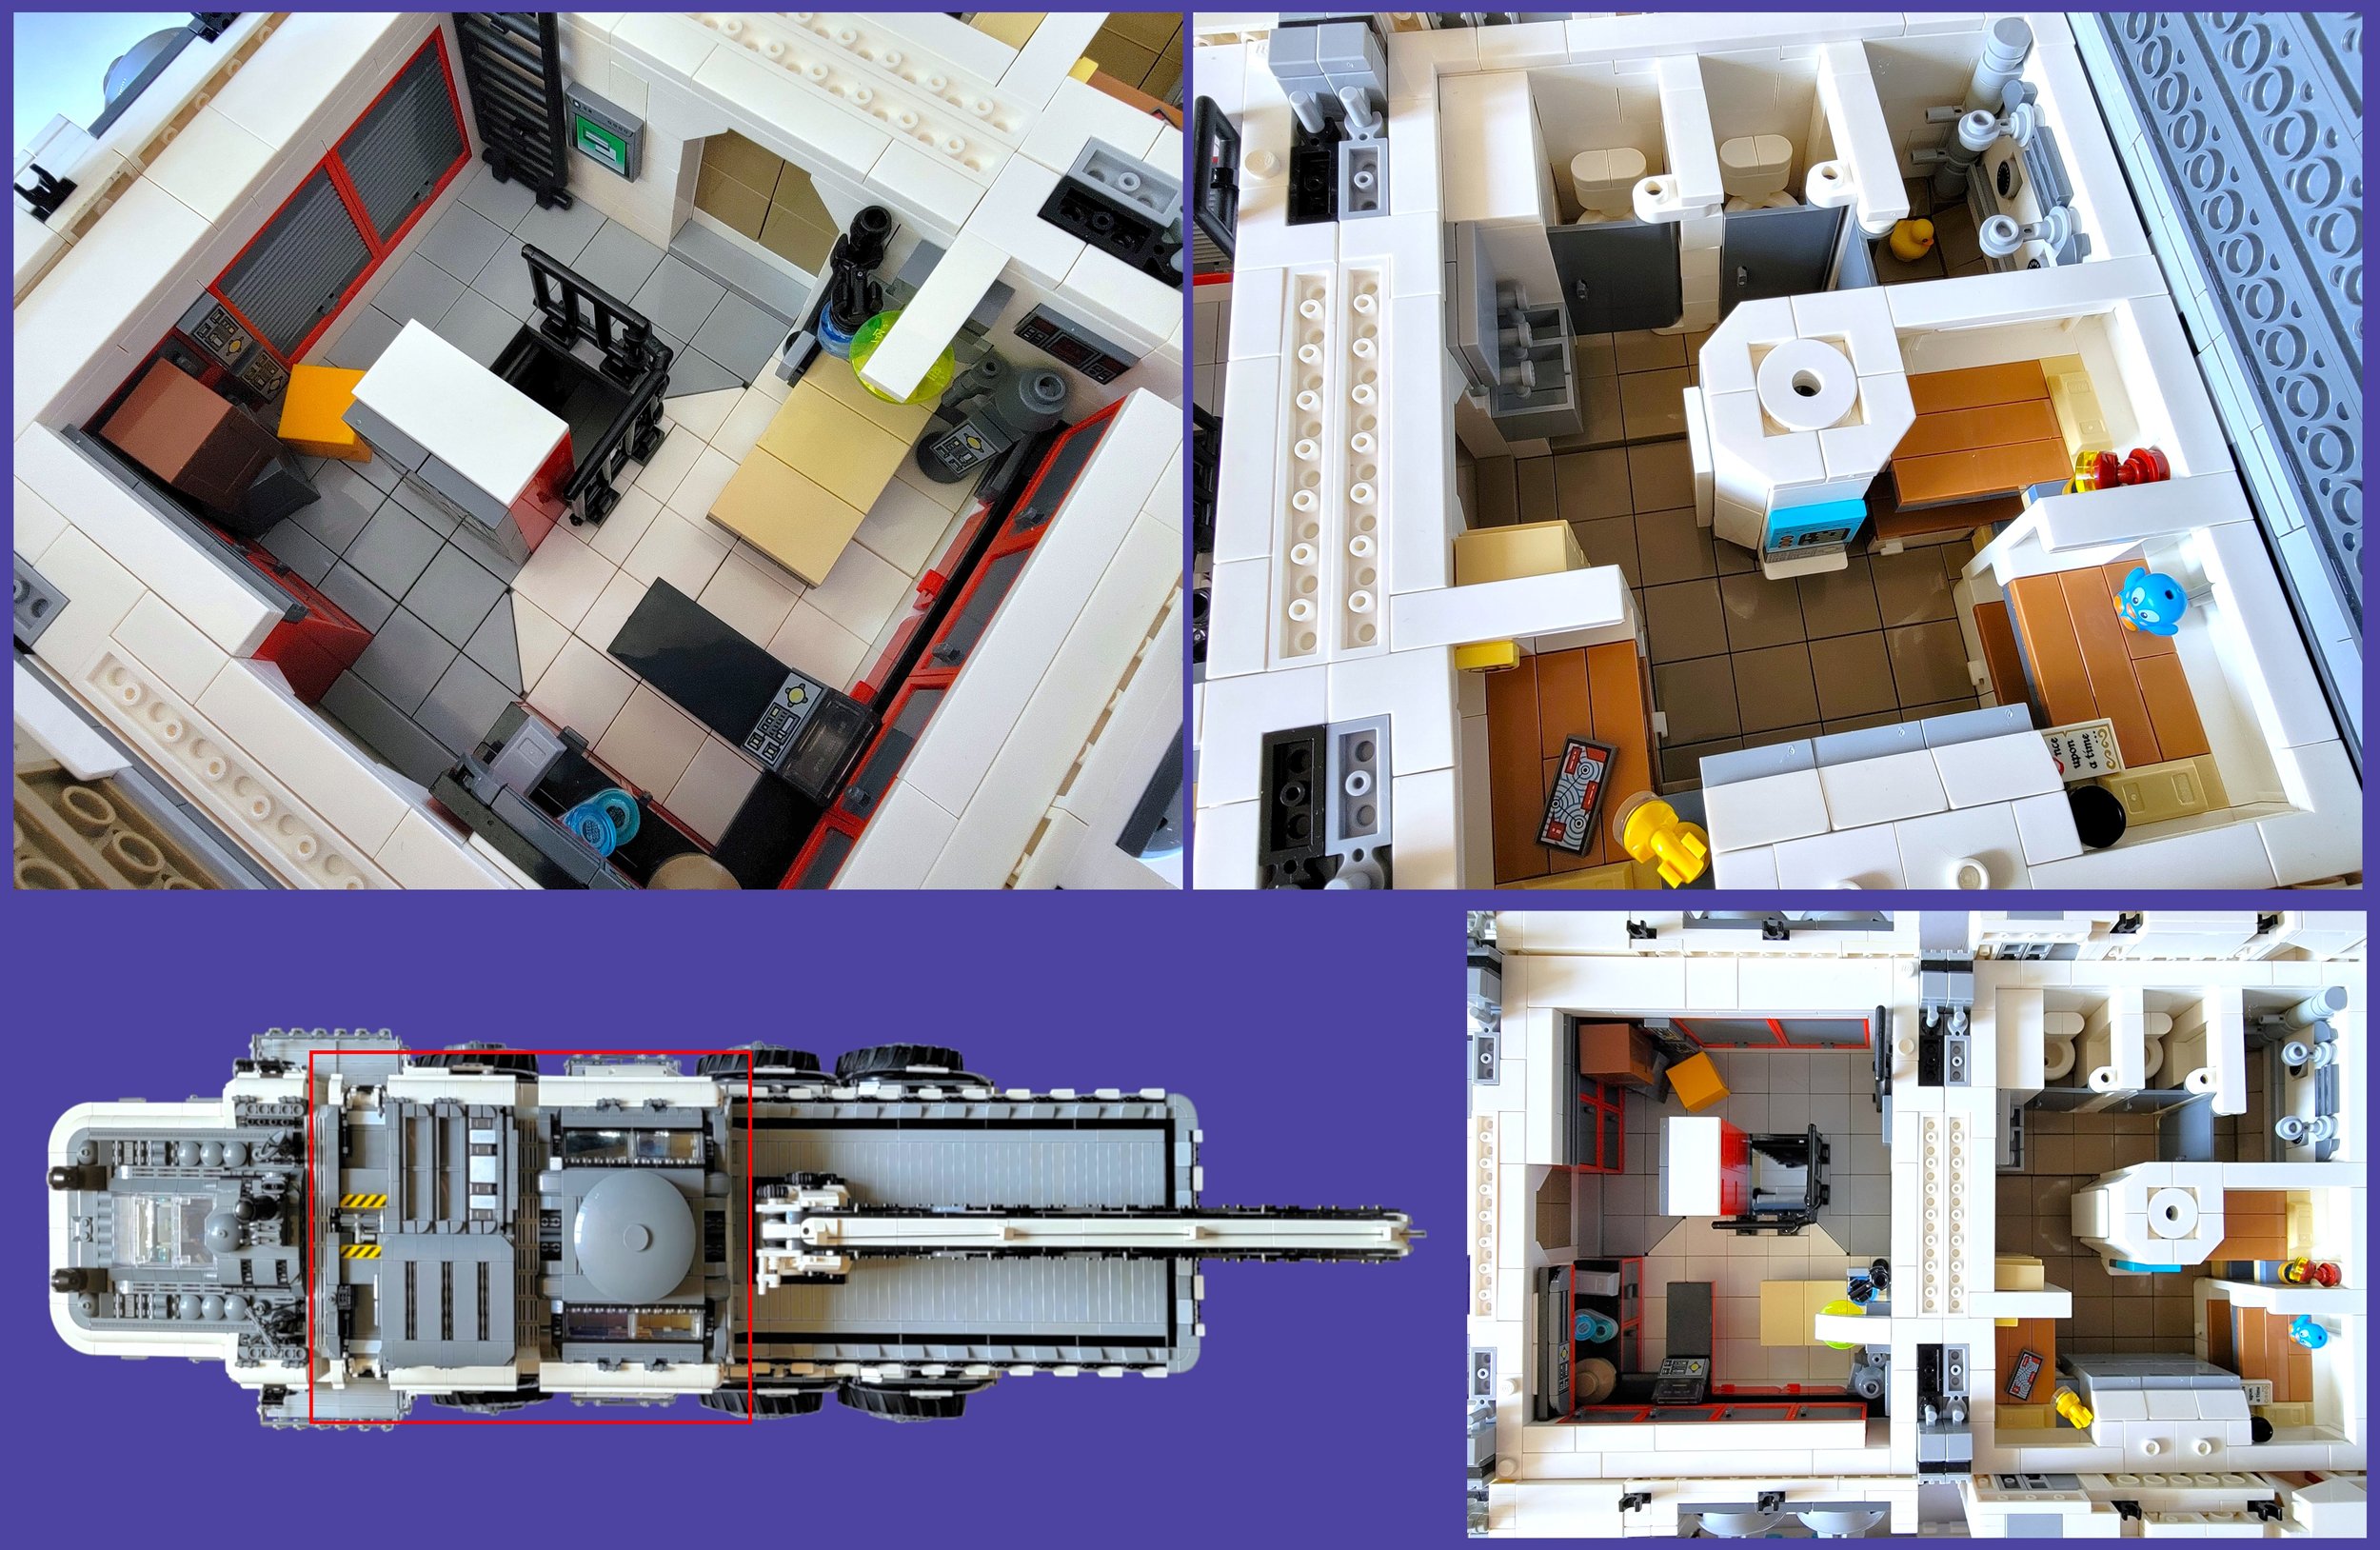
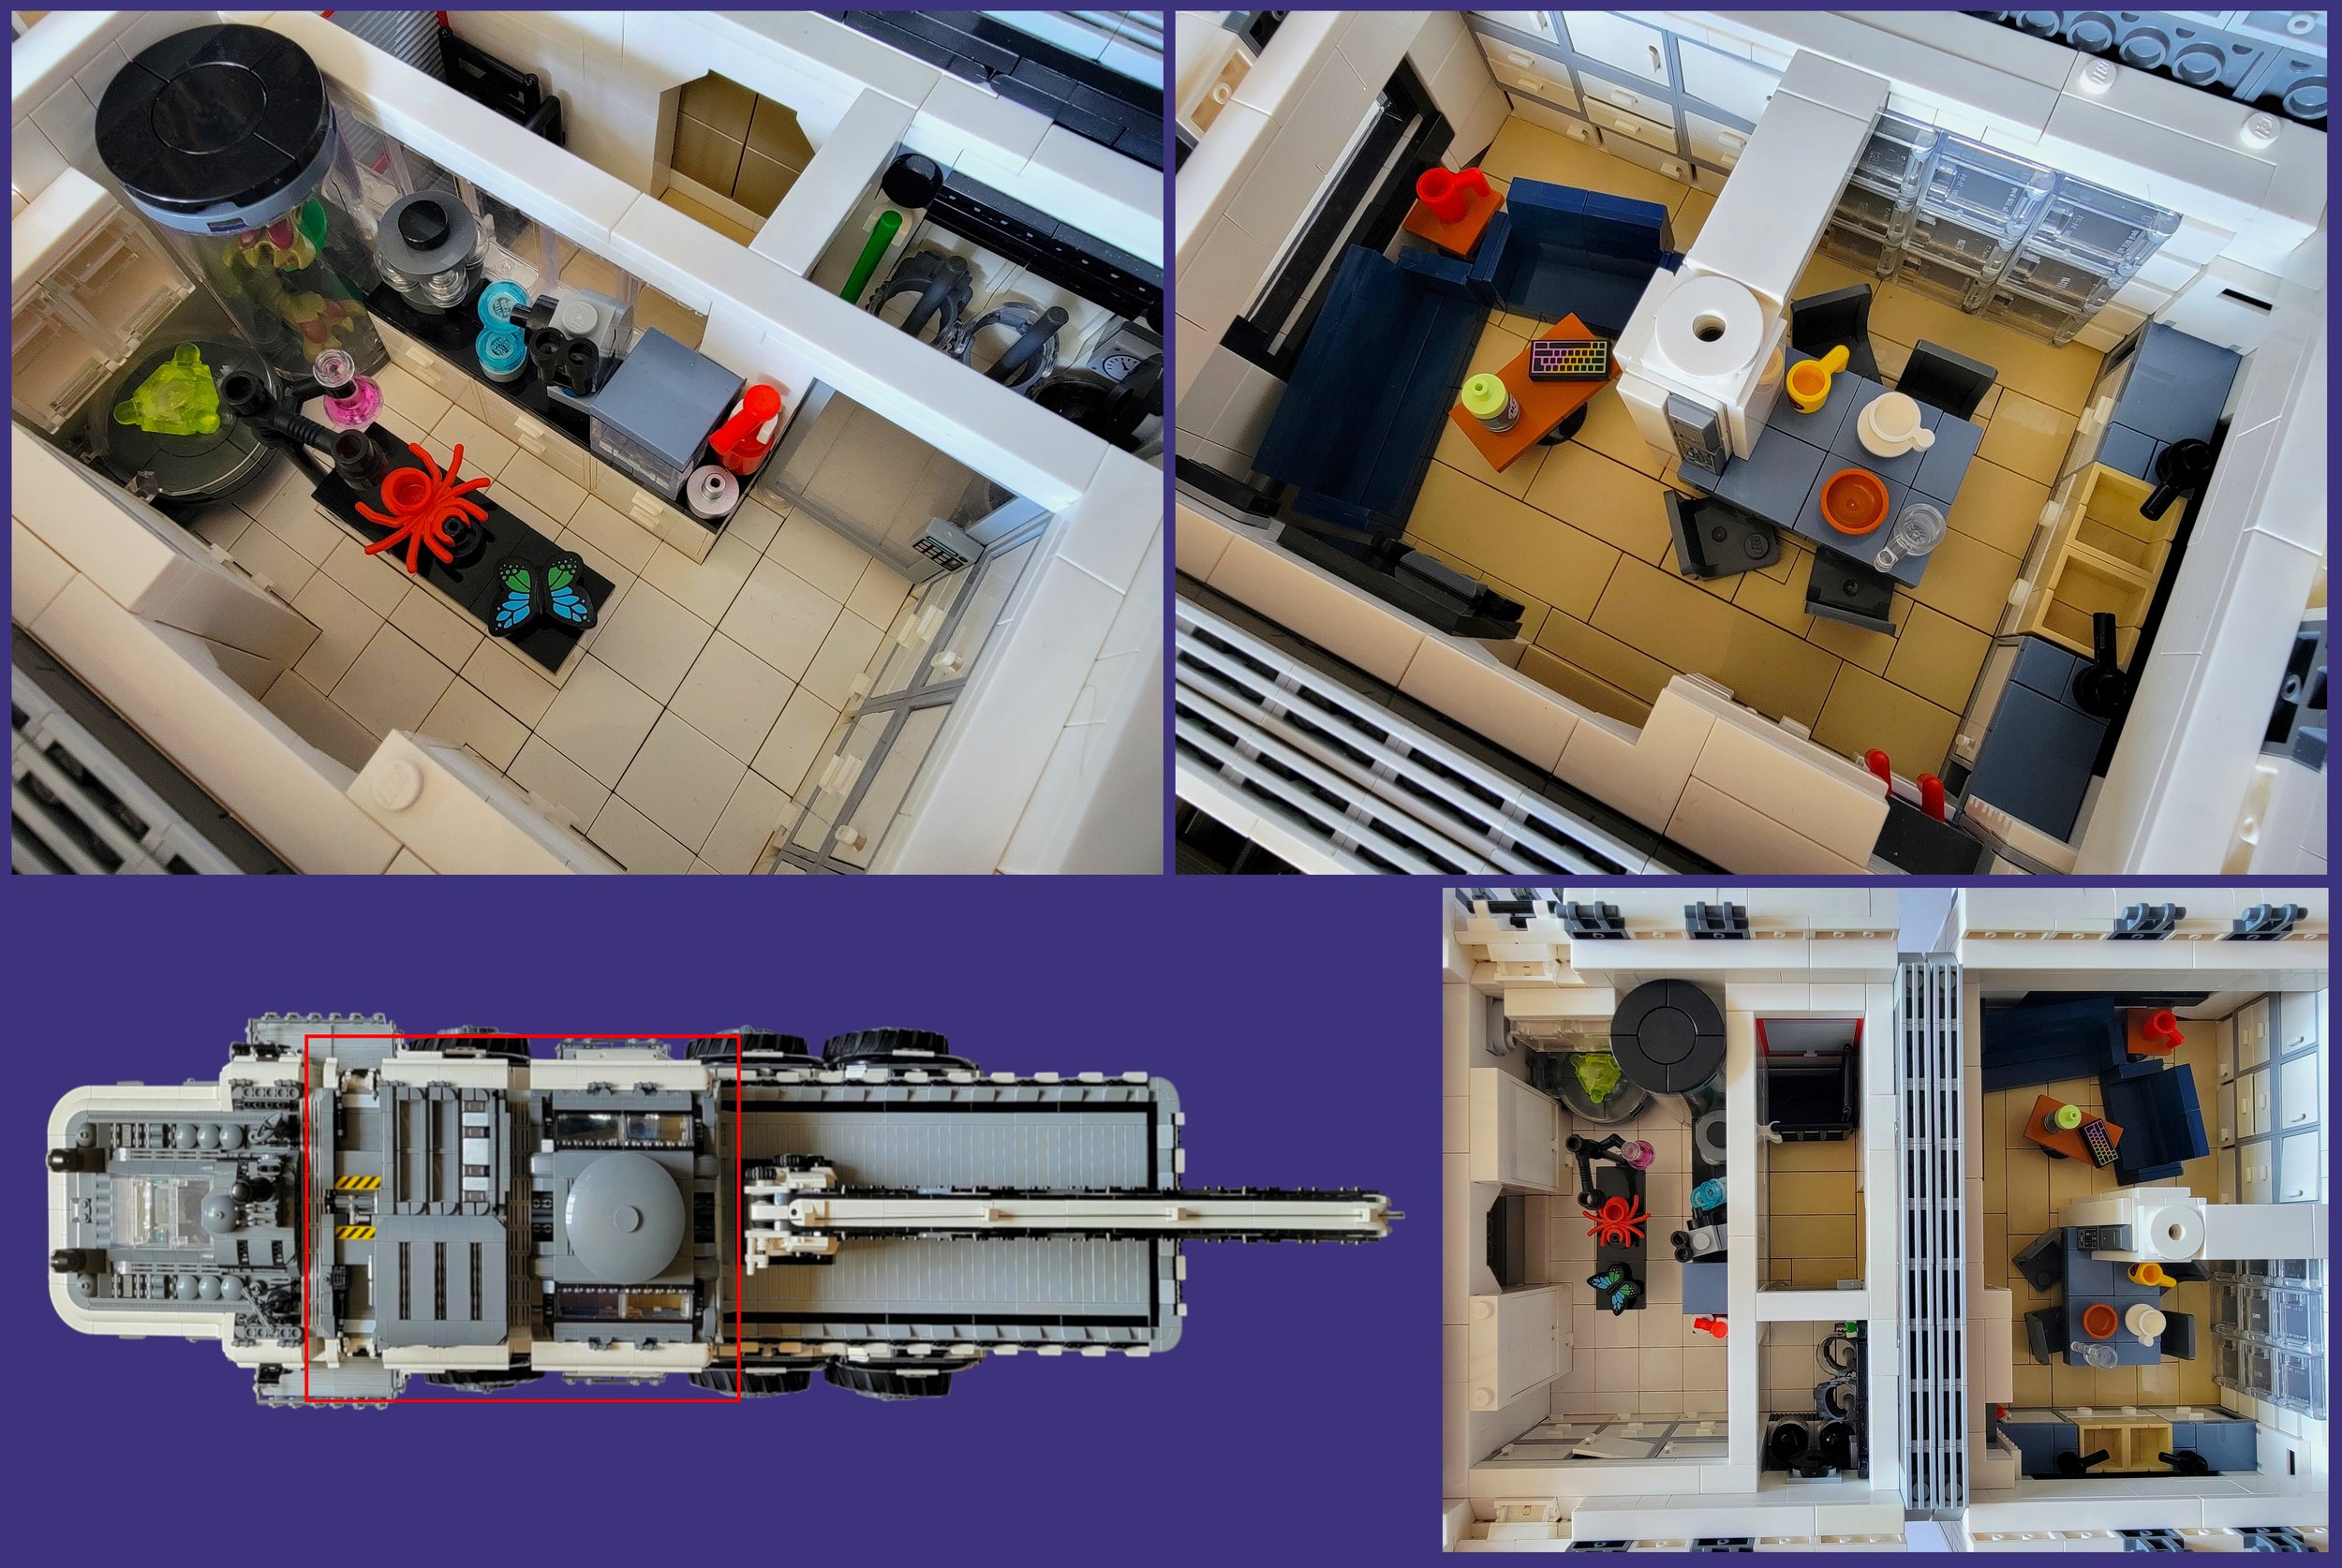
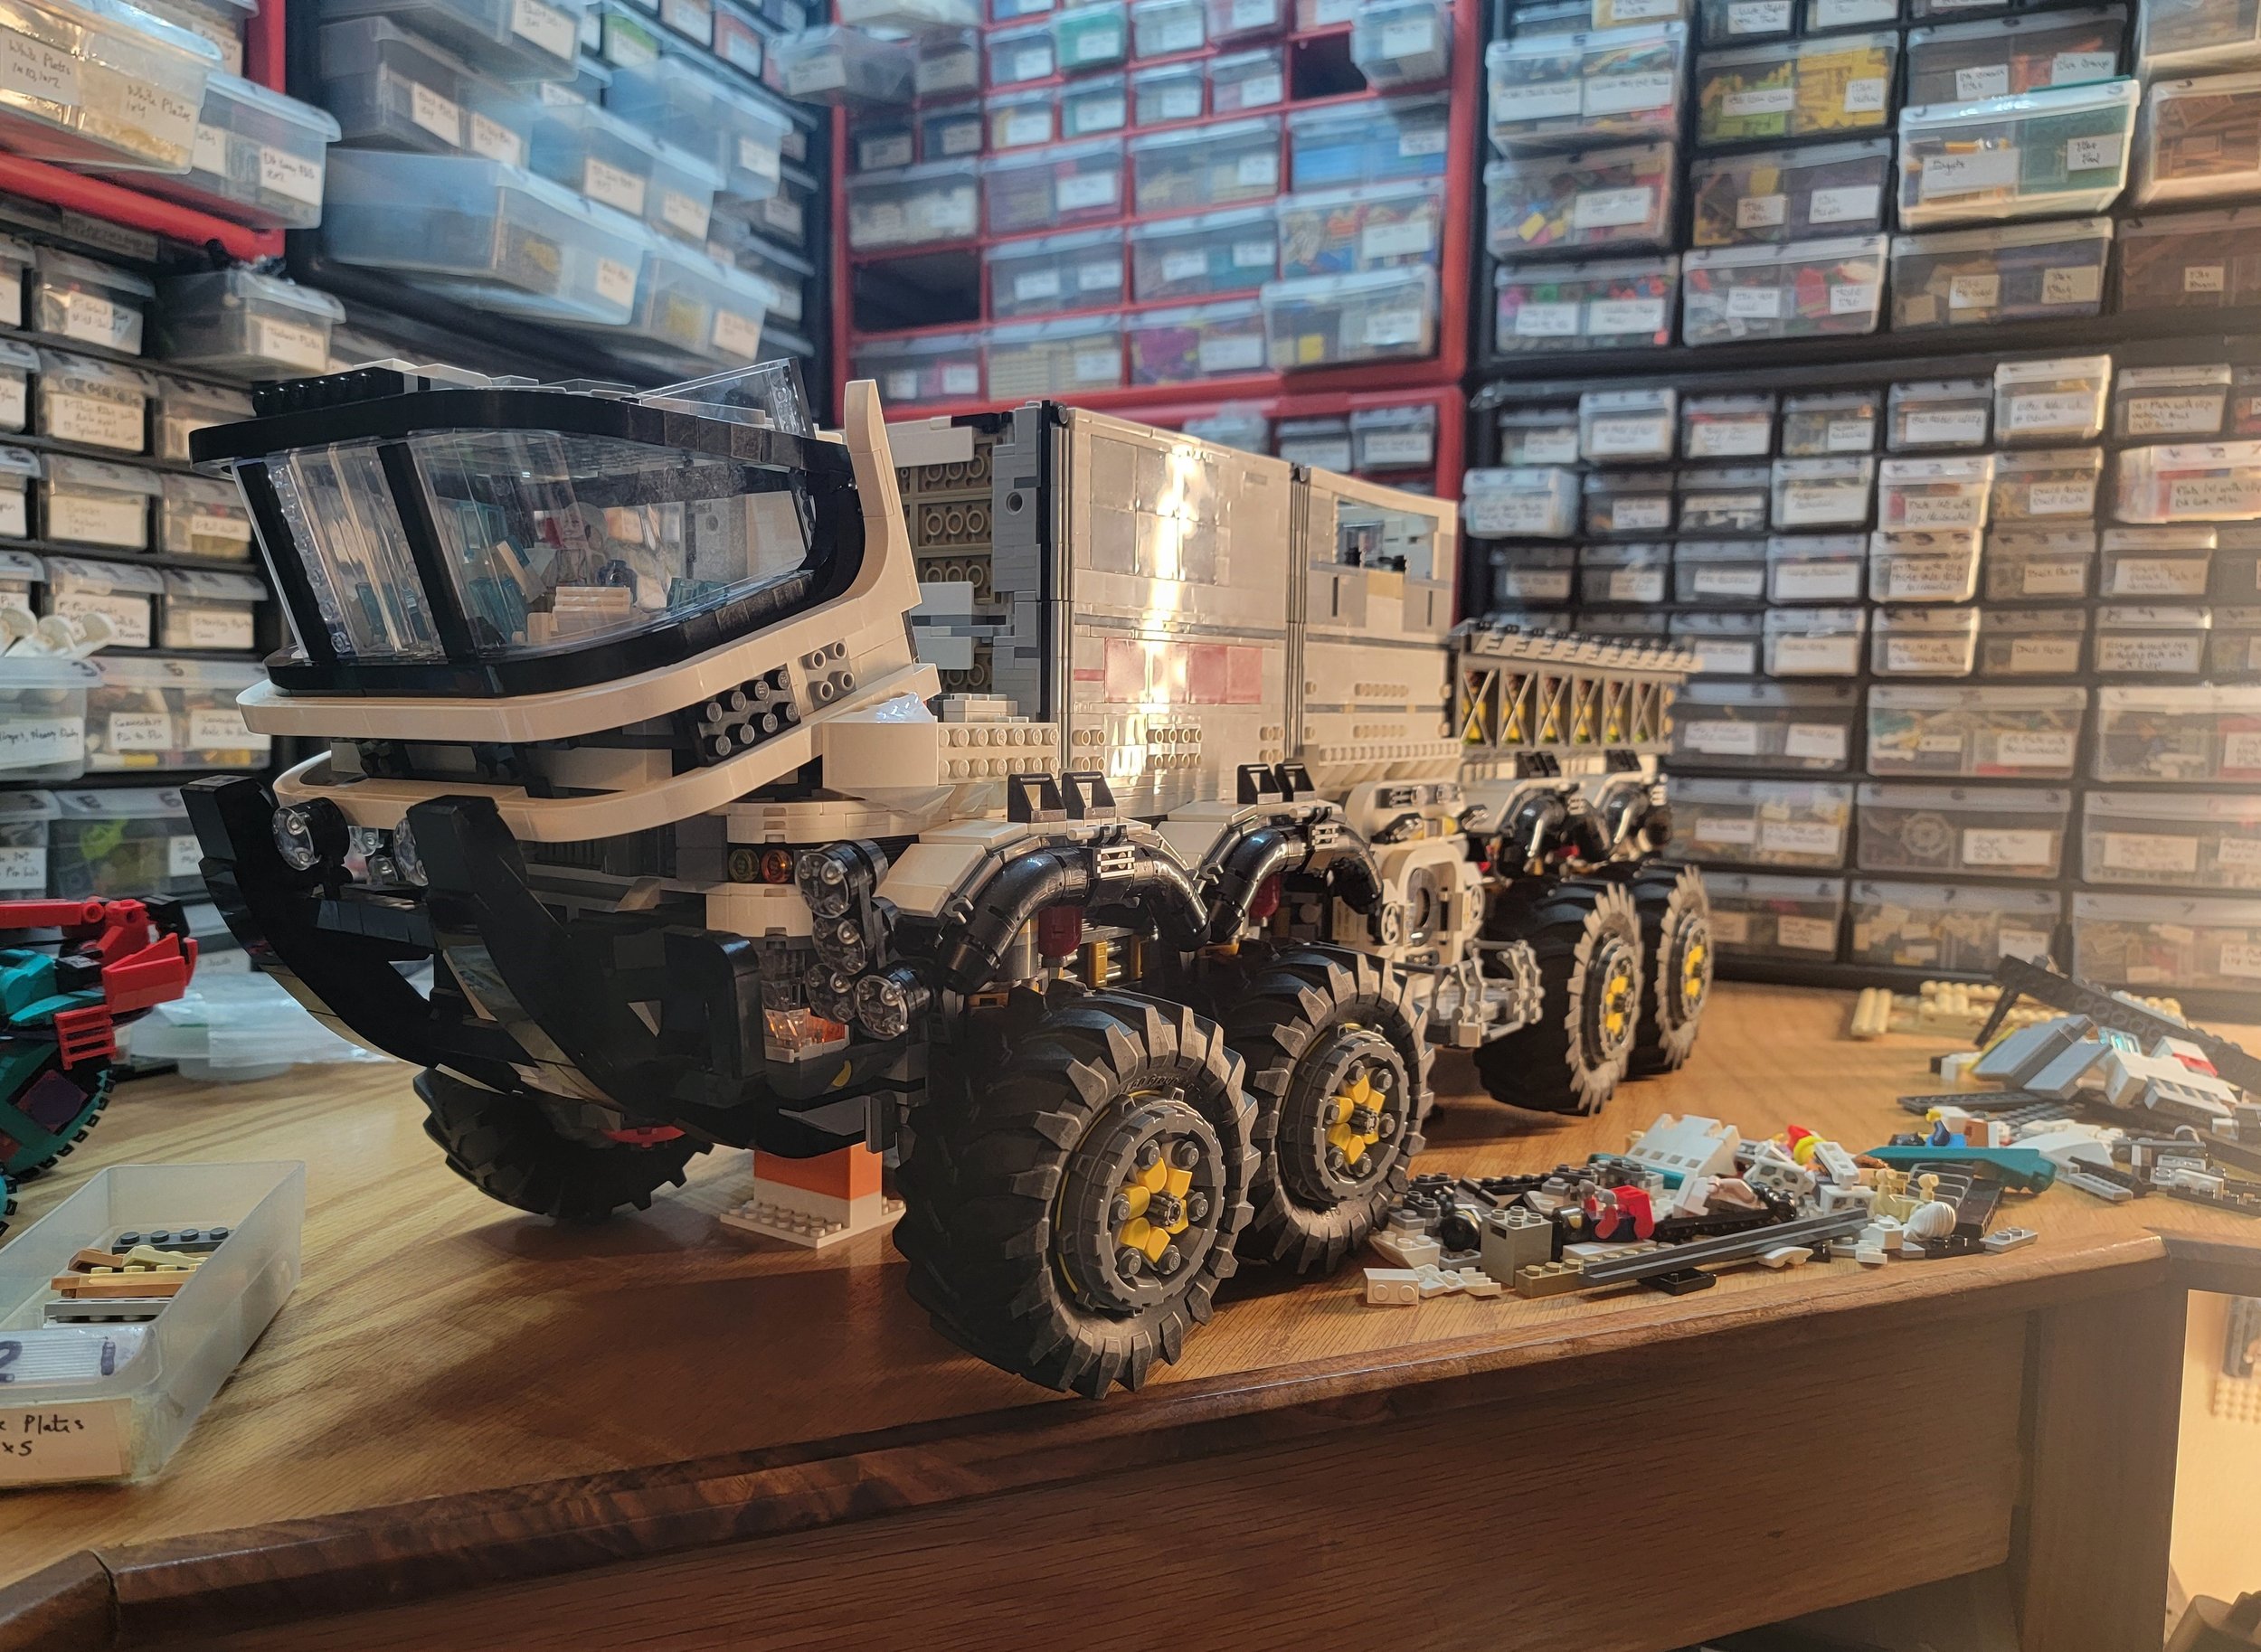
Scott: There are a lot of things I like (but plenty I’m not totally happy with as well). The modularity makes it simple to assemble and disassemble for display, the R/C is fun to play with, and I think the layout in general feels pretty realistic for the function of a rover that does... whatever this one is designed to do. The lighting provides a nice accent and focuses your attention on things that might be missed; I love how this happens with the spacesuit and weapons storage lockers in the belly section. And like you said, large windows and being able to see inside does increase the realism.
But my favorite single part is probably the cargo crane. It has four points of articulation: raising and rotating boom, winch in/out, and traversing boom trolley. It was a fun challenge to fit all this in a relatively small, brick-built footprint while maintaining a solid structure. I may try to motorize the rotation and raising of the boom, but I don’t think I could cram more than those two functions into it with the space available.

Geneva: After such an epic build, are you feeling tired or eager for the next thing?
Scott: A little of both. I'm definitely ready to build more, but I might pass on motors and lighting for a bit.
Geneva: Do you have anything in the works just now? I know you’ve done great work for past BrickNerd contests, so can we expect an AdoraBuild from you?
Scott: I always have half-built MOCs and table scraps just waiting for inspiration to strike, but I’ve been heavily vehicle-focused as long as I can remember and I’d love to branch out more into landscapes and character builds, but especially creatures. I have one creature-build in particular with a good start that I’d like to pick up and really refine more over the next month or two. Still well into the sci-fi realm that my MOCs tend to live in, but legs could be a welcome change from wings and wheels...
Adorable is a bit out of my LEGO comfort zone, but working outside of that can be fun too, and the categories have some variety and room for interpretation. I’ll probably give it a go. My first thought was an adorable plush Nerdly, but maybe that’s a little too on-the-nose, plus Nerdly is already pretty adorable...
Geneva: I’m looking forward to seeing what you come up with! Thanks for taking time to chat with us and sharing more of your rover. I hope to see it rolling around a convention floor someday!
Have you ever gone all out on a MOC with lighting and motors? Tell us about your experience in the comment section below!
Do you want to help BrickNerd continue publishing articles like this one? Become a top patron like Charlie Stephens, Marc & Liz Puleo, Paige Mueller, Rob Klingberg from Brickstuff, John & Joshua Hanlon from Beyond the Brick, Megan Lum, Andy Price, Lukas Kurth from StoneWars, Wayne Tyler, Monica Innis, Dan Church, and Roxanne Baxter to show your support, get early access, exclusive swag and more.