DIY LEGO Lighting: Creating Custom Light Effects
/Upon seeing the name of this article, you might be asking yourself, “Hey BrickNerd, haven’t you already published multiple articles on custom lighting for both sets and MOCs?” And the answer is yes! You should absolutely check out our past lighting articles, peruse our LEGO Lighting Compendium and explore our other lighting experiments. But where this article is going, we don’t need vendors. That’s right, we are going to dive into completely DIY lighting, from the hardware itself to using code to drive it.
Now, if soldering and writing code sounds terrifying but you aren’t satisfied with the pre-made lighting solutions currently available from vendors, then I highly recommend sticking around! You might find that custom lighting for LEGO is not as scary as it seems. I’ll be using a recent MOC of mine as a demo project, showing the electronics I used and the code I used to drive it to get the perfect glow and lighting effects. So grab your soldering gun because things are about to get hot and nerdy in here!
The Pros and Cons
Let’s start off by going over a few reasons why you might want to use this style of lighting over the more standard options available from some of the amazing vendors in the LEGO fan community.
The Good
Absolute control—You are not limited by what is currently offered by vendors. You are only limited by your imagination.
Cost saving—Because you are doing a lot of the manual labor yourself, like testing and development as well as final assembly and soldering, you can often save money compared to a similar system from a vendor.
Integration—You can design your entire lighting system around a specific MOC or project, ensuring perfect wire lengths for your application, or you can even add other electronics from outside of the world of lighting.
The Not-So-Good
High entry bar—There is a lot of prerequisite knowledge needed to be able to do this type of project. Heck, it’s basically a whole hobby unto itself—electronics, simple circuit design, soldering, and coding, just to name a few.
Time-consuming—There is absolutely nothing plug-and-play about this. This will take much longer than adding premade lighting and controllers to a build.
Clearly, there are more pros than cons which means custom lighting is usually a good choice. Still not sure about trying it out? What if I tempt you with some pictures of what you can do with custom lighting and how it was used in New Hashima?


Still not convinced? Oh well, I guess we can jump right into how you can do this yourself.
The Hardware
Let’s start with the physical component of DIY lighting. This is where you will get all the electronics, controllers and wiring you need for your project. This is also the most personalized part. Each project will be unique, and the hardware you get will reflect that. There are a ton of places to get individual electronic components out there on the internet. Where you go will be dependent on what kinds of parts you are looking for.
Personally, I prefer to use Adafruit. This is where I got all of the parts I used in the build I’m using as a demo. Adafruit is not the cheapest way to get parts but they are absolutely worth supporting given all the work they do in the open-source hardware market. They also have amazing tutorials and well-written drivers for almost all of their components. This means you don’t need to spend hours pouring over a data sheet to figure out what signals to send and drastically lowers the knowledge needed to start out with custom electronics.
Sparkfun is another great site with similar options to Adafruit. If you are looking more for raw components, DigiKey is the most prominent place to buy from, though you need to know exactly what you are looking for, and it isn’t as great for casual browsing like Adafruit or Sparkfun would be. Then there are the Chinese sites like Ali Express. These will be by far the best prices, but what you save in cost you lose in documentation, support and reliability. This is great if you know what you are doing and you can tinker around to get everything to function.
The Wires
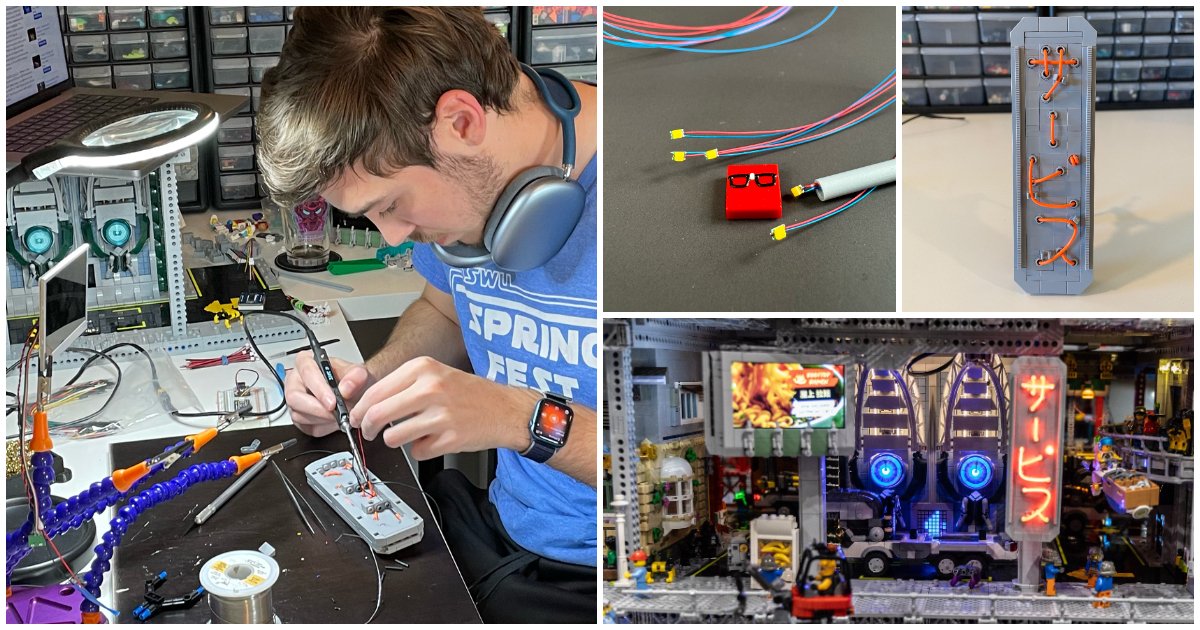
For my project, I purchased all of the electronics I used from Adafruit. I used two main lights, a string of LEDs in a long flexible strip which Adafruit calls nOOds (as in noodles), and some ultra tiny LEDs that can fit anywhere. Our little friend Nerdlette, a custom 1x1 LEGO tile, is showing off these LEDs and providing a bit of scale below.


The tiny LEDs are especially useful within the LEGO ecosystem because they are small enough to fit through flex tubing (like in the above image), which is fantastic for hiding the wiring! That is what I did to get an LED into the correct location to light up one of the old LEGO Dimensions stands. It also provides some excellent structural support for the fragile wires.

The noodles are a little interesting to work with as the positive and negative terminals are on opposite ends. This means that you’ll need to make an enclosed loop around whatever you are holding it with. For example, the sign I made required me to solder the noodle lights in place after placing them into the LEGO structure… which was one of the most terrifying moments I’ve ever had. Hot metal plus soft plastic is a recipe for disaster!
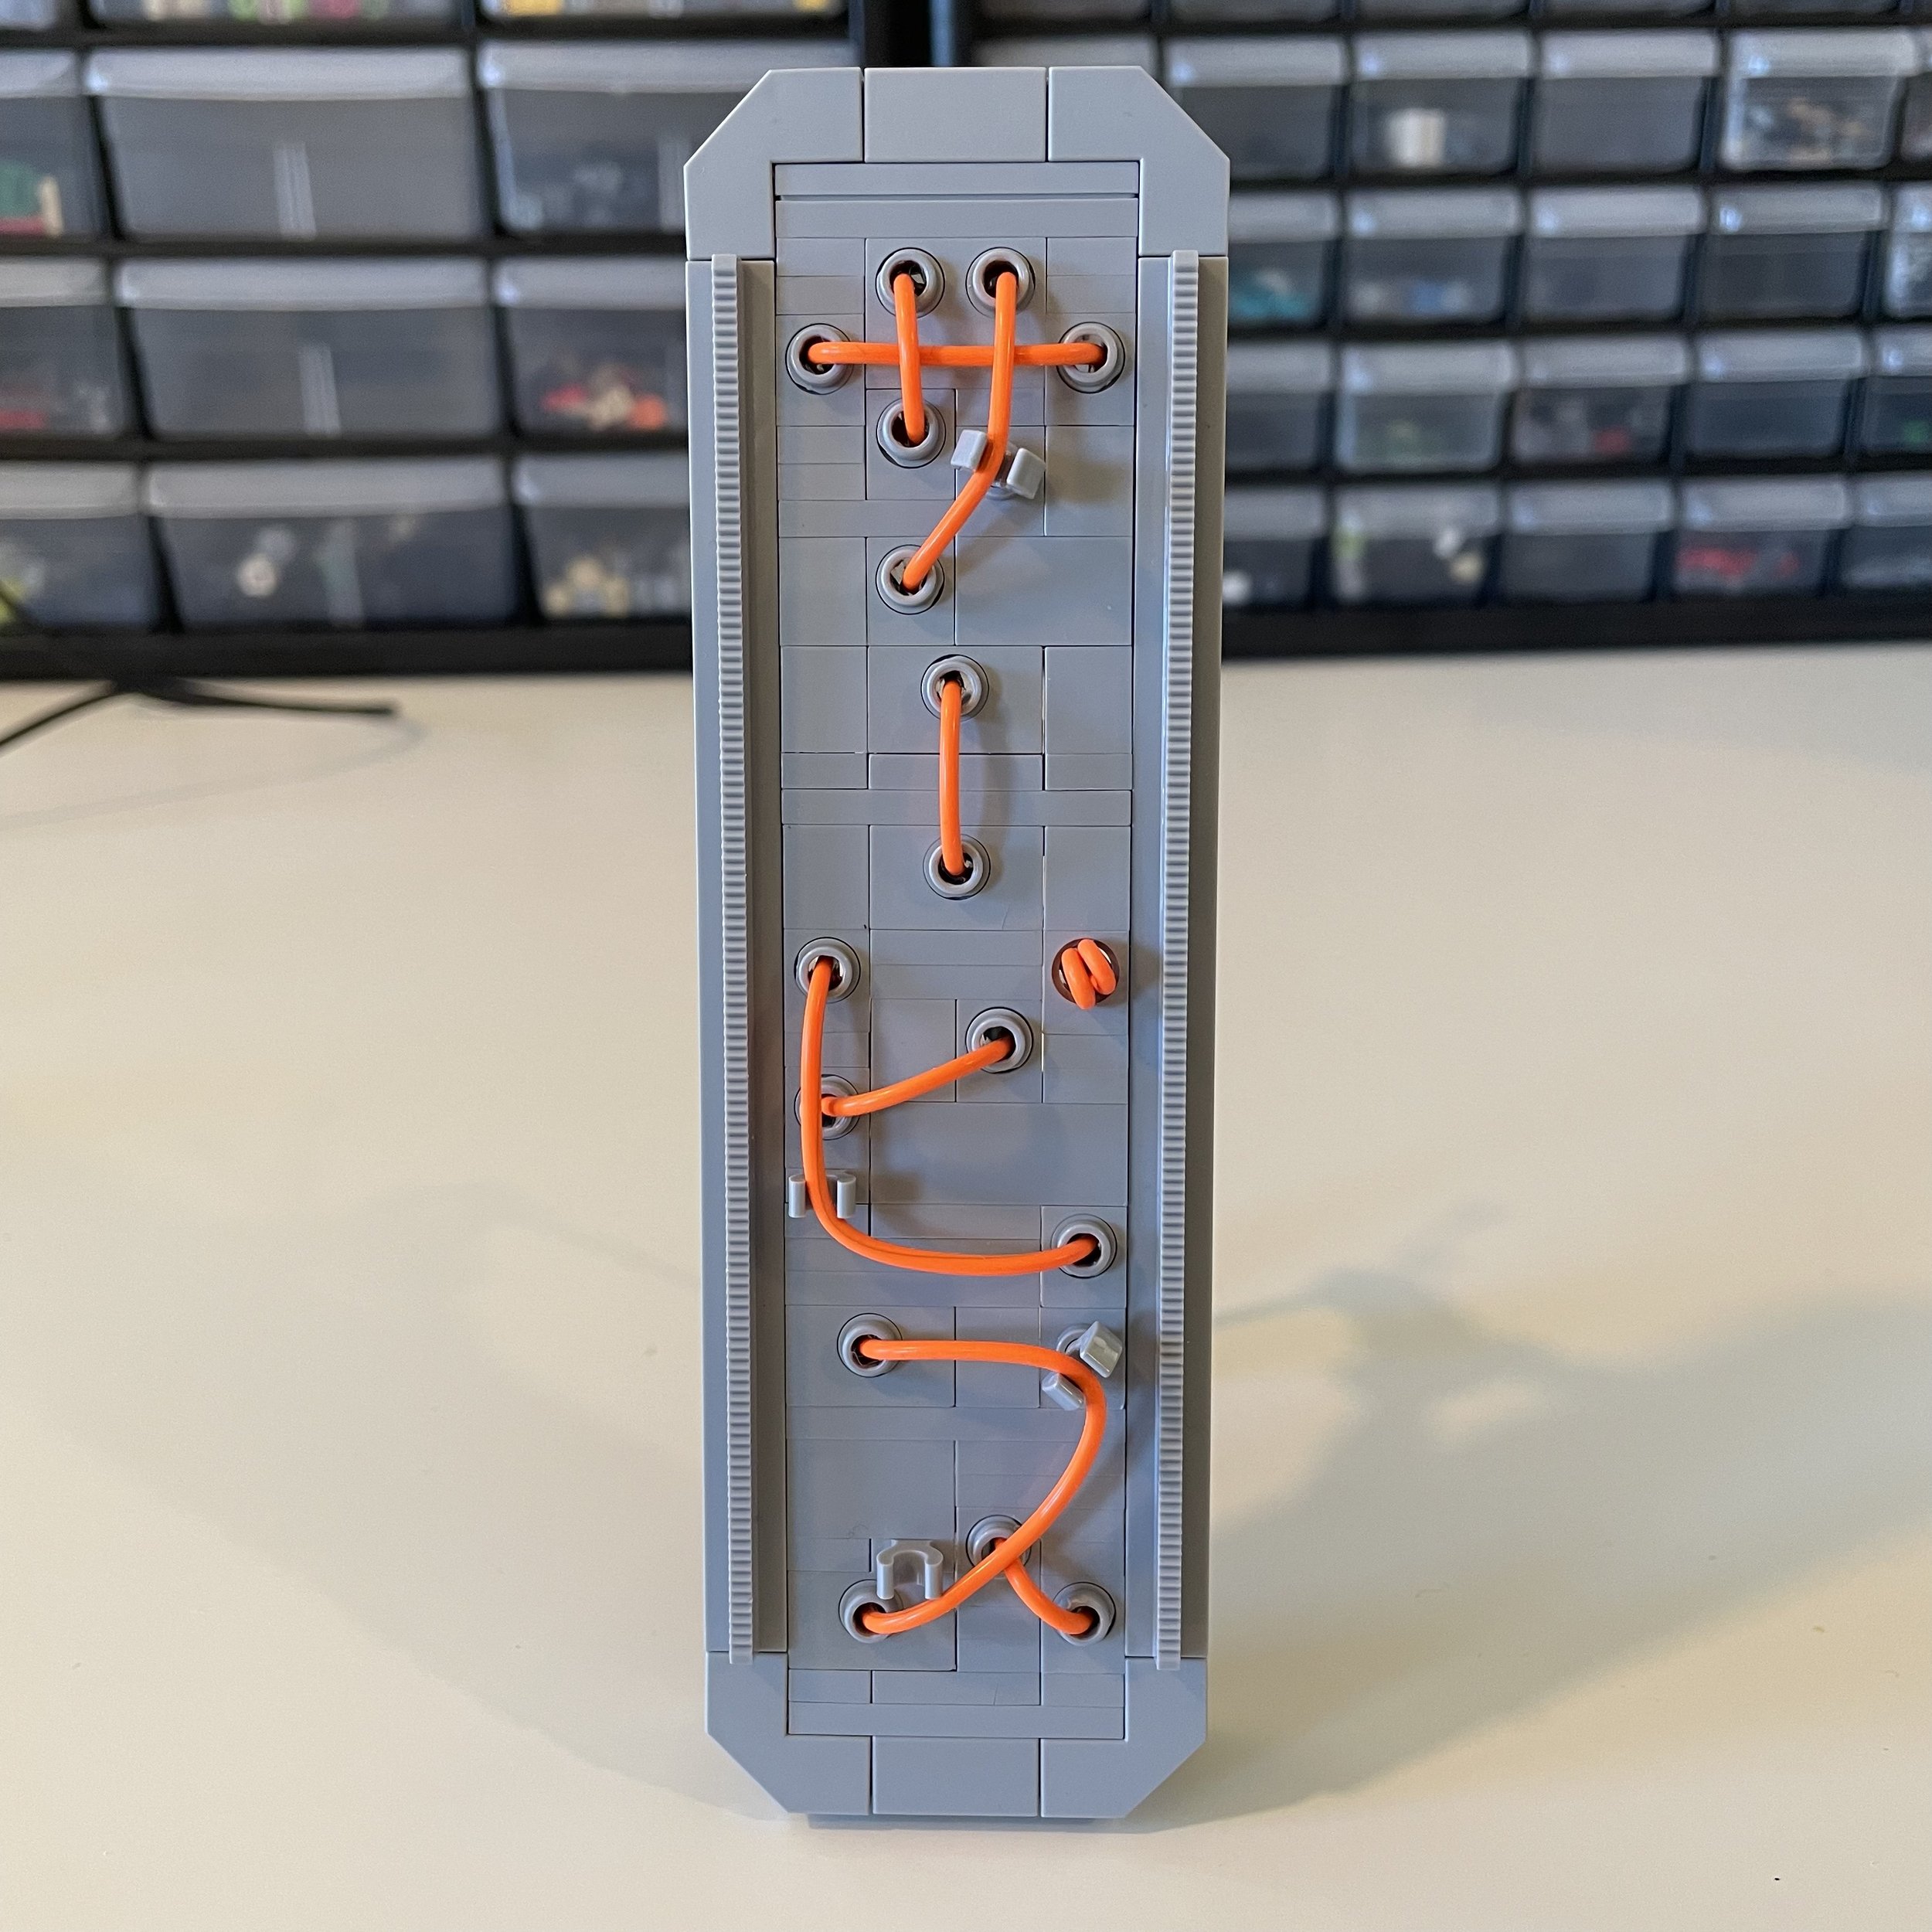


Mildly terrifying opperation
The last bit of lighting I used was an 8x8 LED matrix (with an extra board to make wiring and coding easier). This was initially an impulse buy that turned out to be incredibly perfect for my project. The outer dimensions fit into a 4x4 stud area like it was absolutely designed for it—see for yourself in the image below.

The Brains
Now that we have lights, we need some way to control them. I knew that this build would be on video a lot, so if you know anything about LEDs, you might remember that they can flicker pretty badly when filmed. This is due to the brightness being controlled by turning the LED on and off rapidly. This does a great job of tricking the human eye but falls apart when shot on video. I wanted to make sure that would not be an issue, so I went with a special chip capable of providing constant current control which eliminates all flickering. (Specifically, I used the Adafruit AW9523 GPIO Expander and LED Driver.)
The most critical choice, the microcontroller, is also the most subjective because the options out there are more than capable of driving many LEDs at the same time. I used this as an opportunity to try out Adafruit’s new board, the QT Py RP2040. This had a few important features including a USB-C port, 3.3V logic (which matches the rest of the components I picked), and a handy STEMMA QT port for easy I2C communication. This was the main communication protocol I used to run both my LED driver board and the 8x8 matrix and meant that I could chain them all together with simple wiring without too much hassle. It also has a tiny footprint that makes tucking it somewhere out of sight in a build a little easier.
The following image shows the final “brain” of my build with the microcontroller, the LED driver, and the 8x8 display.

Each of the colored connectors lead to a different LED or LED noodle. The small board in front is the QT Py RP2040 connected to the LED driver board over the built-in I2C port which also passes through to the 8x8 matrix board on the right. The next image shows th ebrain fully integrated into the bowels of the MOC. (It turns out that LEGO three-stemmed foliage elements are the perfect size for mounting the LED driver board to the rest of the build!)

You can see the color-matched connectors I used so I could remember which one goes where. The loop in the USB-C cable is there for extra slack and strain relief so if it gets tugged or jerked at all, that force is not transferred to the microcontroller.
The Code
With the electronics in place, unfortunately absolutely nothing will happen if you plug it in now. We need to write a program to control each LED and tell them all how bright to be at any given moment. This is where the real magic happens and how you can set your build apart from ones that use traditional lighting methods. Time to unleash your full creativity!

Enter the Matrix
Nah just kidding, coding for lighting is not nearly as complicated as the Matrix might suggest—no crazy maths or simulations needed!
I used the Arduino framework for my project. This is partly because it uses the popular C++ coding language (also the one I use for my day job) and partly because of the libraries that Adafruit maintains for their products. I was able to get started very quickly by using the guides and demos provided by Adafruit to jump into building the boards I had never worked with before.
I am going to be fairly brief in the code section as I could go on for days about this stuff. But I will provide links to some fantastic articles and tutorials that will help fill in some of the gaps I may leave depending on your prior knowledge of this subject. And remember, there are many ways to achieve the same results with code. You might very well know of a much better solution than the one I used, and if so, please share in the comments— I love to learn!
For now, let’s dive into how to control a bunch of LEDs at the same time—it’s not as simple as you might think. Here is a link to the source code from my project. This is what I will be referencing in the next section.
Control Loops
Arduino code is made up of two main sections called setup and loop. The code within setup will run exactly once and is used to initialize whatever your program needs. The loop section on the other hand will continue to run cyclicly forever. We will jump over the setup section as it is highly specific to the hardware you have, but if you are using the same electronics I did, my entire setup is at the GitHub link above.
Blinky Lights
The easiest thing to do is make an LED blink. Here is some basic code that turns on an LED, waits half a second, and then turns the LED off again. Let this loop, and the LED will forever turn on and off with a period of 0.5 seconds.

This is a fantastic solution… as long as you only have one LED to turn on or if every LED is acting at the exact same time. The issue here comes in on line 2 of the code. As soon as we call that delay function, the entire system shuts down for half a second. That means that no other LEDs or systems can be controlled during the delay.
So how do we get around this? How do you delay for a specific amount of time without actually using a delay? Well we have to get a little clever and create a scheduling system to keep track of the delays for us! Each LED gets its own tracker (in the form of a class for the coders out there) that knows what pattern the LED is currently supposed to be performing and tells it exactly when to turn on and off. It does this by checking every millisecond if a change is needed, and if it is, updating the LED accordingly.
There is more code involved here, but setting up code for a blink looks something like this:

The important parts of this are the onTime and offTime parameters, as well as numBlinks. These define how long the LED should stay on and off for and how many times it should blink before stopping. Now it just checks if it’s time for the next blink and does all of the calculations for me! Obviously this is a gross oversimplification but given that the real code is a few hundred lines over three files, I think this is good enough to get the point across.
At the end of the day, what this enables is very easy updating and testing of new patterns and combinations of patterns across all of the LEDs in your system. Rather than a ton of tediously calculated delays, my main loop function can look something like this:

The code is defining a large pattern that repeats itself every minute and interacts with each LED I have available to control. The ease of testing and modifying makes this solution fantastic, and the source code can be reused for many projects in the future.
The Result
Now we have the electronics and the software to drive them in place, it is time to connect the power source and turn on the lights! When we put it all together, the end result looks something like this:

OK, I lied it’s not quite like that, I just didn’t have good video taken of the lights themselves when it was done. But that is very close to what the final version came out to be. (Oh, and the screen on the left is separate and not controlled by my code. Also did you see my two hidden Nerdlies!?)
How To Learn More
There are a ton of fantastic articles and guides on how to do a lot of what I had to gloss over here when it comes to custom lighting. These resources will do a much better job than I will in explaining how to get this going for yourself:
Adafruit three-part guide on multitasking with Arduino (I highly recommend these)
(Can you tell I like Adafruit?)
Turning On the Lights
This DIY LEGO lighting article is simultaneously incredibly nerdy, even for BrickNerd, and at the same time offers only barely enough information to get you going into the world of custom lighting. The benefits of doing your own lighting for MOCs means that you have no limits, and anything you can think of is possible.
So if you are the type that likes tinkering and trying out new things, get out there and get building and make your creations shine! We’ve seen how vendor lighting can enhance a build while staying fairly static, so this DIY route will hopefully make it easier to add lighting effects to your builds. From the feeling of motion to that extra special character to set you apart, custom lighting can take a build from good to great. Now go forth and shine!
Have you ever worked with custom electronics combined with LEGO before? Let us know in the comments!
Do you want to help BrickNerd continue publishing articles like this one? Become a top patron like Charlie Stephens, Marc & Liz Puleo, Paige Mueller, Rob Klingberg from Brickstuff, John & Joshua Hanlon from Beyond the Brick, Megan Lum, Andy Price, Lukas Kurth from StoneWars, Wayne Tyler, Monica Innis, Dan Church, and Roxanne Baxter to show your support, get early access, exclusive swag and more.