Light Painting: Add a Little Magic to Your LEGO Photos
/Light painting is a wonderful technique that you can use for creating a magical and whimsical atmosphere in almost any photo. It is the technique of moving a light source around while taking a long-exposure photograph, either to light up your subject and scene or, in the case of my favorite scenario, to shine light at the camera and 'trace' magical lines. You will see light painting used across many photo genres, and there are many interesting examples on Flickr.
As it pertains to LEGO photography, the drawing of light is an expressive way to create many magical moments, especially when it comes to the world of minifigures—and of course lighting Christmas trees, speed effects, magic, energy, and more!

"Rockin’ Around the Christmas Tree!"
Getting Familiar With Your Camera
To use this technique yourself, the first thing you will need to do is become familiar with the settings on your camera. The main settings you will vary are shutter speed (exposure time), aperture, and ISO. Each of them will have a different impact on the photos you take. To understand how these settings interact, you can read our prior article on Photo Tips for a Non-Professional Photographer.
The main thing you will want to do for a light painting photo is to have a long enough exposure time so that you can ‘draw’ the light around your scene, while at the same time having enough light so that the rest of the photo looks correct (not too dark, or too light). The longer the better, but I usually try to give myself four seconds. You may need to take a couple of pictures without painting the light to first ensure the scene still looks good using the long exposure settings. Be sure to have your camera on a steady surface or a tripod. Having a remote trigger or timer for when the camera takes the photo is also essential so that there is no vibration that blurs the picture during the exposure.

Woo-Hoo! Let’s Play a Fanfare for Fireworks!
But if all this sounds too complicated for you, there is one more option that might be helpful to you. The lesson comes from taking photos of one of the most spectacular independent lighting sources that literally paint the sky—fireworks! Light painting and fireworks have many analogies, but here is their most interesting similarity—you can skip the major part of knowing about all the manual camera settings if your camera has a special "Fireworks" setting/mode.
If you have the “Fireworks” mode in your camera and have used it before, you know that it already offers automated exposure settings and doesn't require any extra effort. All you need is your personal choice of focus, brightness, white balance and background.

Now with all of this camera talk out of the way - let's get out our magic wands and start painting!
Making Your Magic Light Wands
How would a light show be without a magic wand to wave? There are two kinds of these wands that you can craft for yourself and experiment with using the following lighting elements:
String lights that are spaced along a wire, that you can roll up around a wand and then trace multiple lines together at once.
Small mini-lamp, the kind that people typically wear on their fingers at dance party raves or light shows. You can use attach one at the end of a wand to draw a single line in the scene like you would with a pen.
These two types of lighting elements, attached to your wand of choice like a pen or pencil, will play the role of your light painting “paintbrush”. You can find out more about how to obtain these kinds of lighting sources in my previous post, “Lighting LEGO with what you have on-hand.”
"Dancing in SPACE is all the RAVE!"
Time to Practice
It's now time to prepare your scenes and introduce your characters (and as I mentioned earlier, be sure to use a camera tripod so that your images won't be blurry during an extended exposure time). In the diagram below, you will see five different kinds of motions I will move the lights. Let's try out the five different lighting painting drawing techniques around different LEGO characters and see how each of these shapes looks in the final photos.
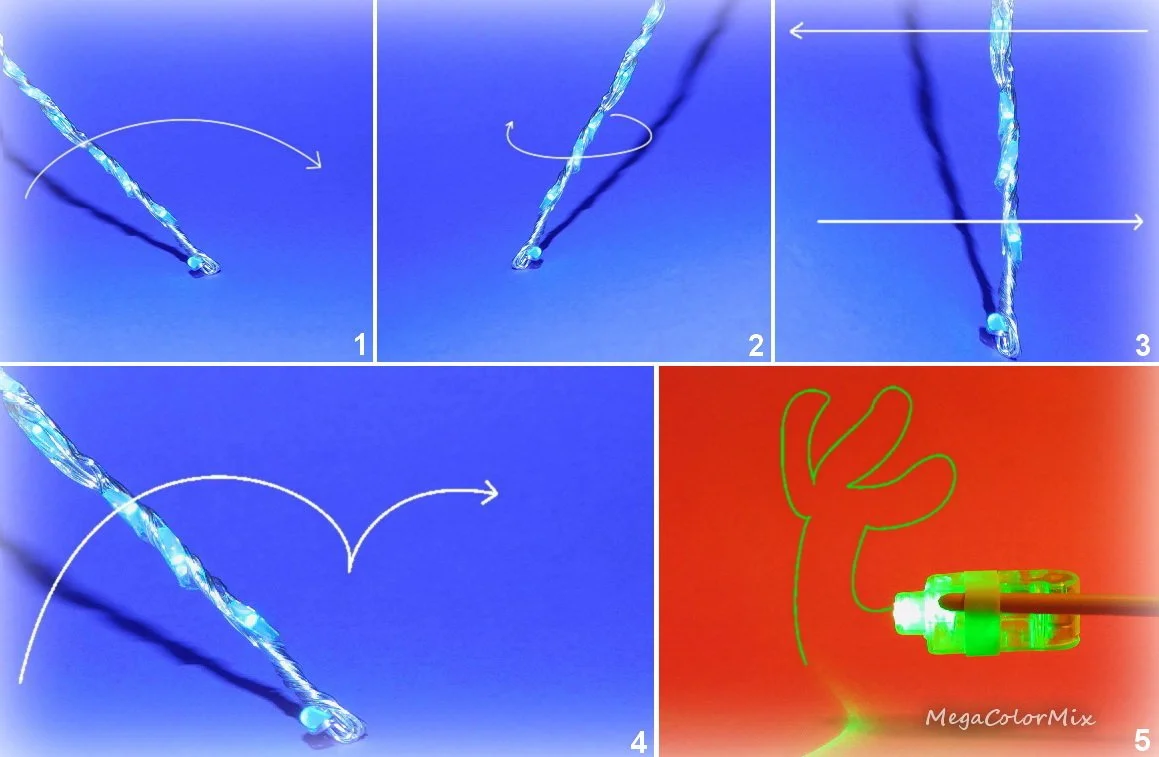
Lighting Techinigues that will be shown below; Diagrams 1-4 use the string Lights. Diagram 5 uses the finger light.
1. The “Hand Fan”
As mentioned earlier, I usually give myself about four seconds of exposure time to do the light painting. Trying to paint during the process of shooting is an amazing creative challenge, but don’t panic. Practicing your hand-waving technique in advance will help. For the “Hand Fan” painting style, move your improvised lighting stick from left to right as shown in Diagram 1, making the arch in the form of a hand fan (or half-circle). Doing so, you will get what looks like to be magical power emanating from the White Eagle sorcerer.

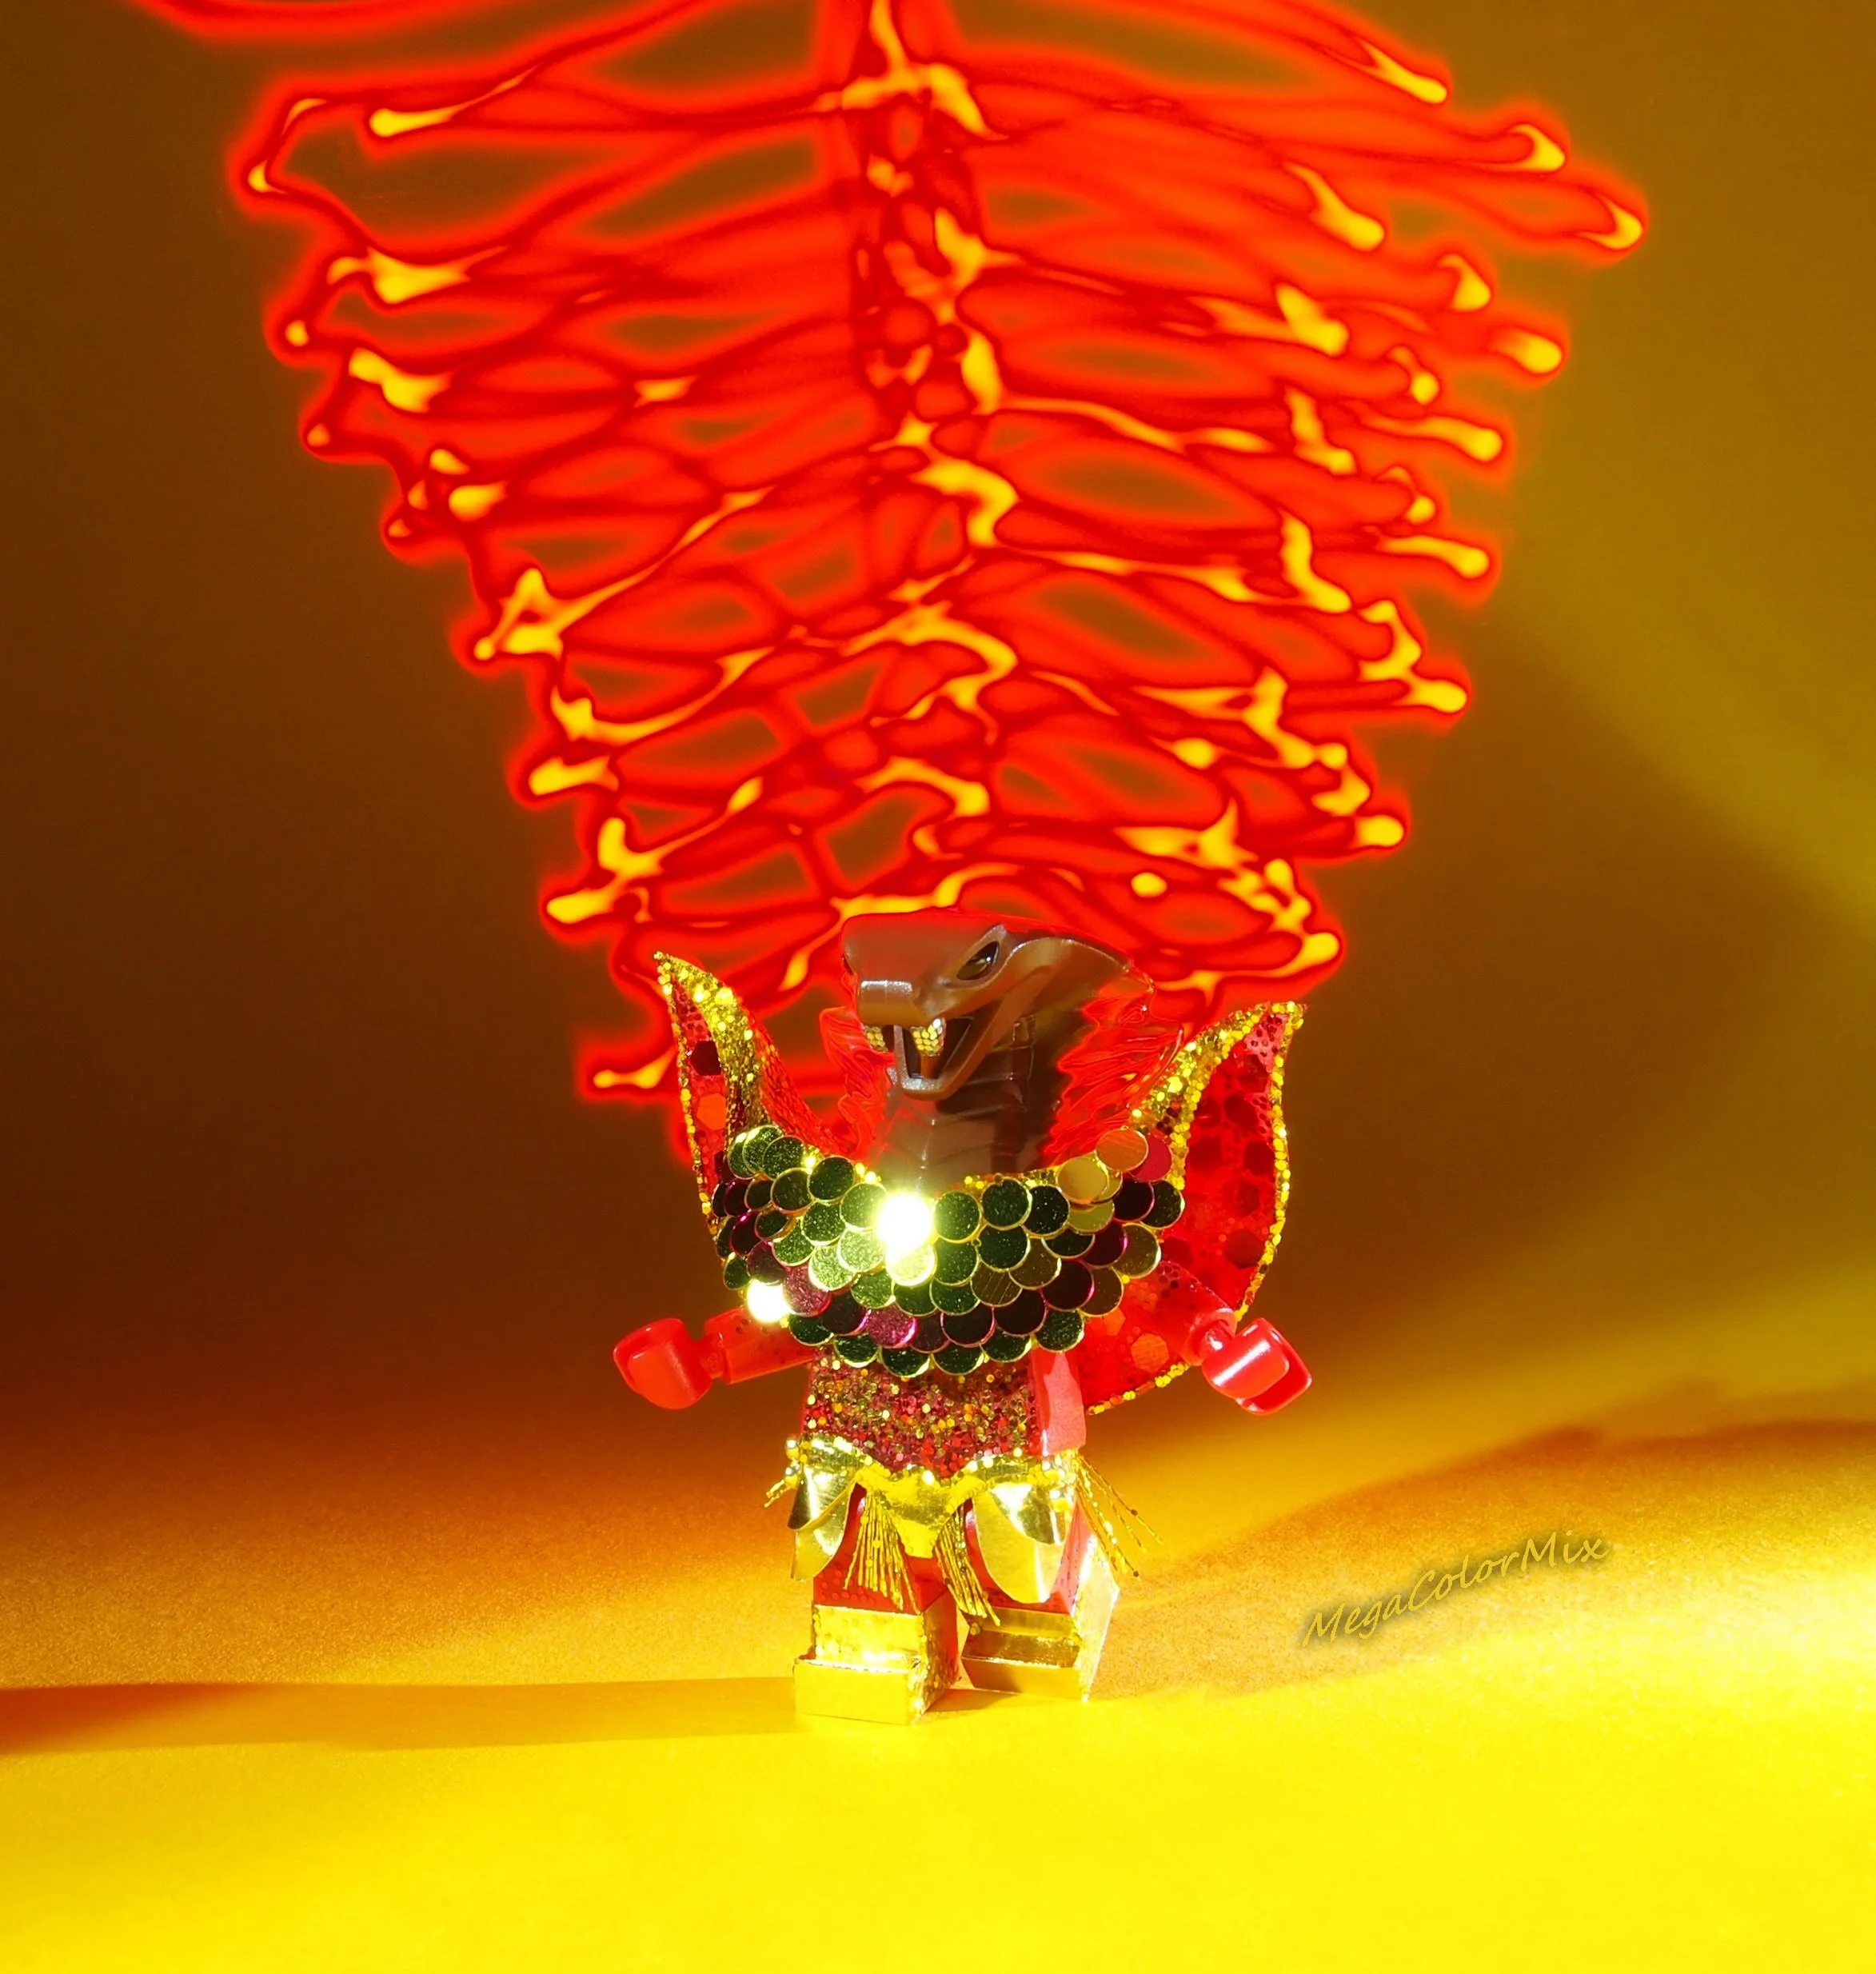
2. The “Fire Tornado”
For this technique, you will be using more lights and less movement: just rotate the lighting stick, leaving its lower end motionless (Diagram 2). The end result will looks like the tornado below, created by this stunning and shiny Serpent Wizard.
3. Multicolor Stripes
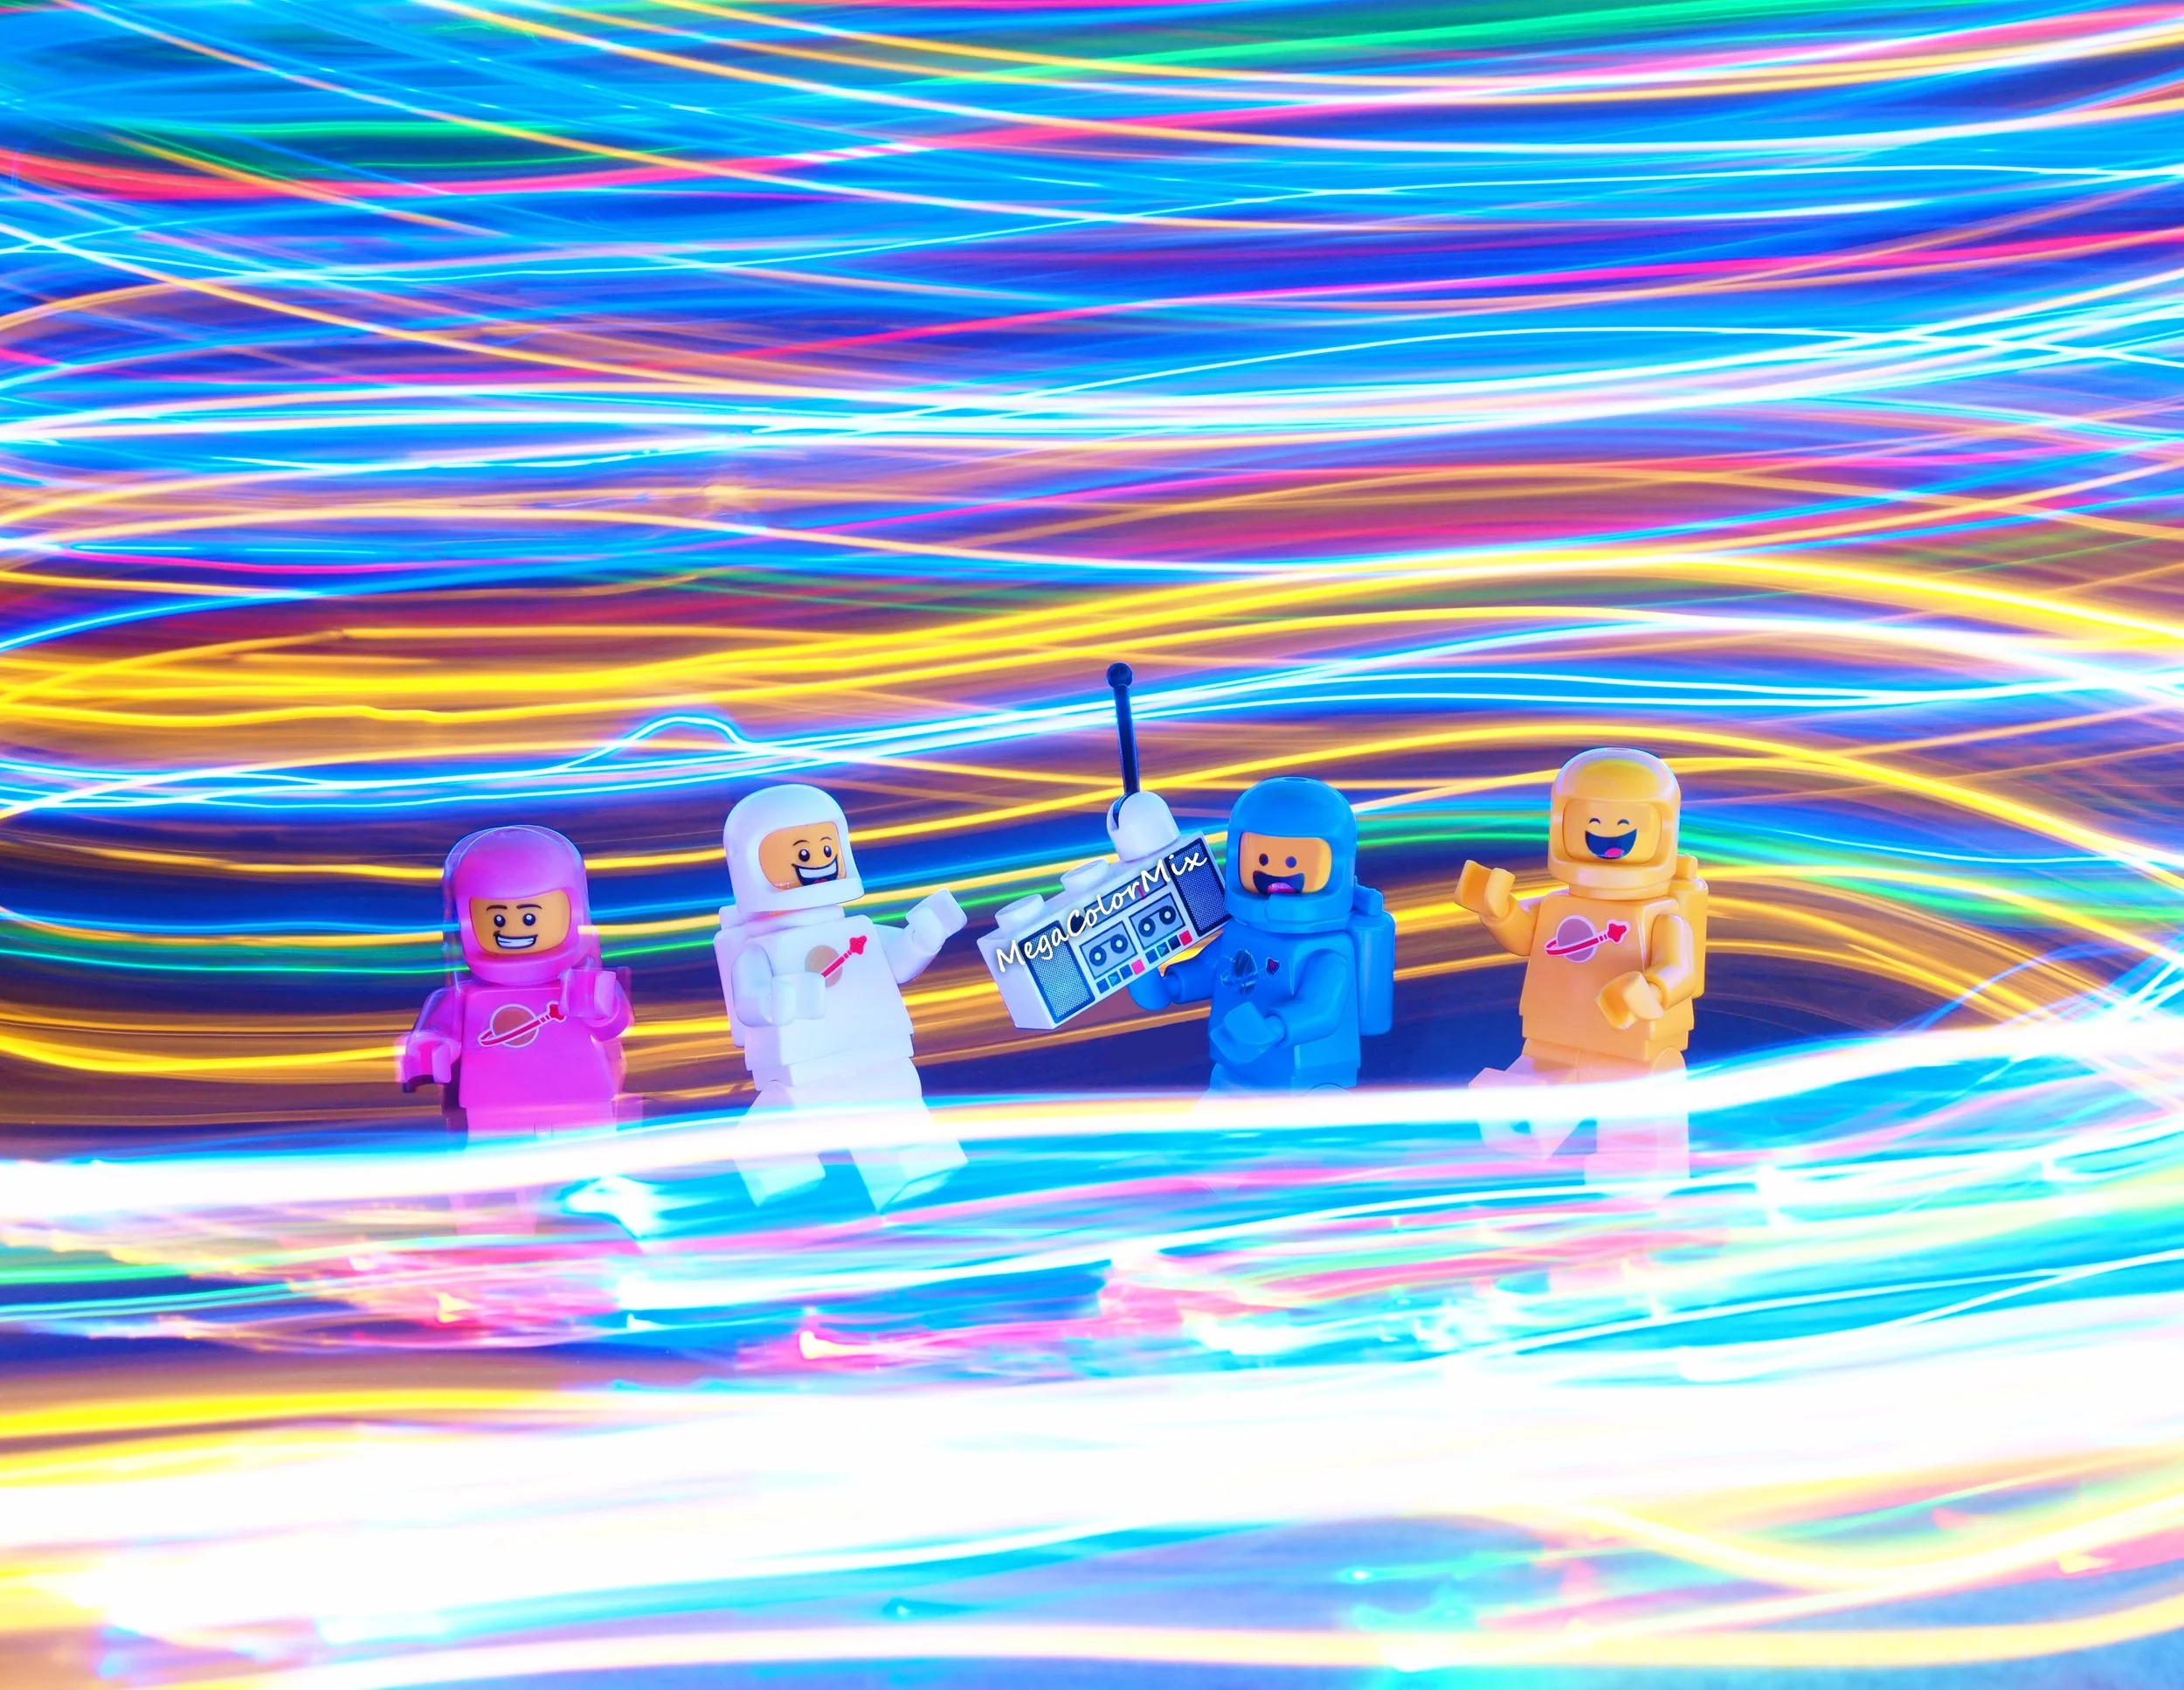
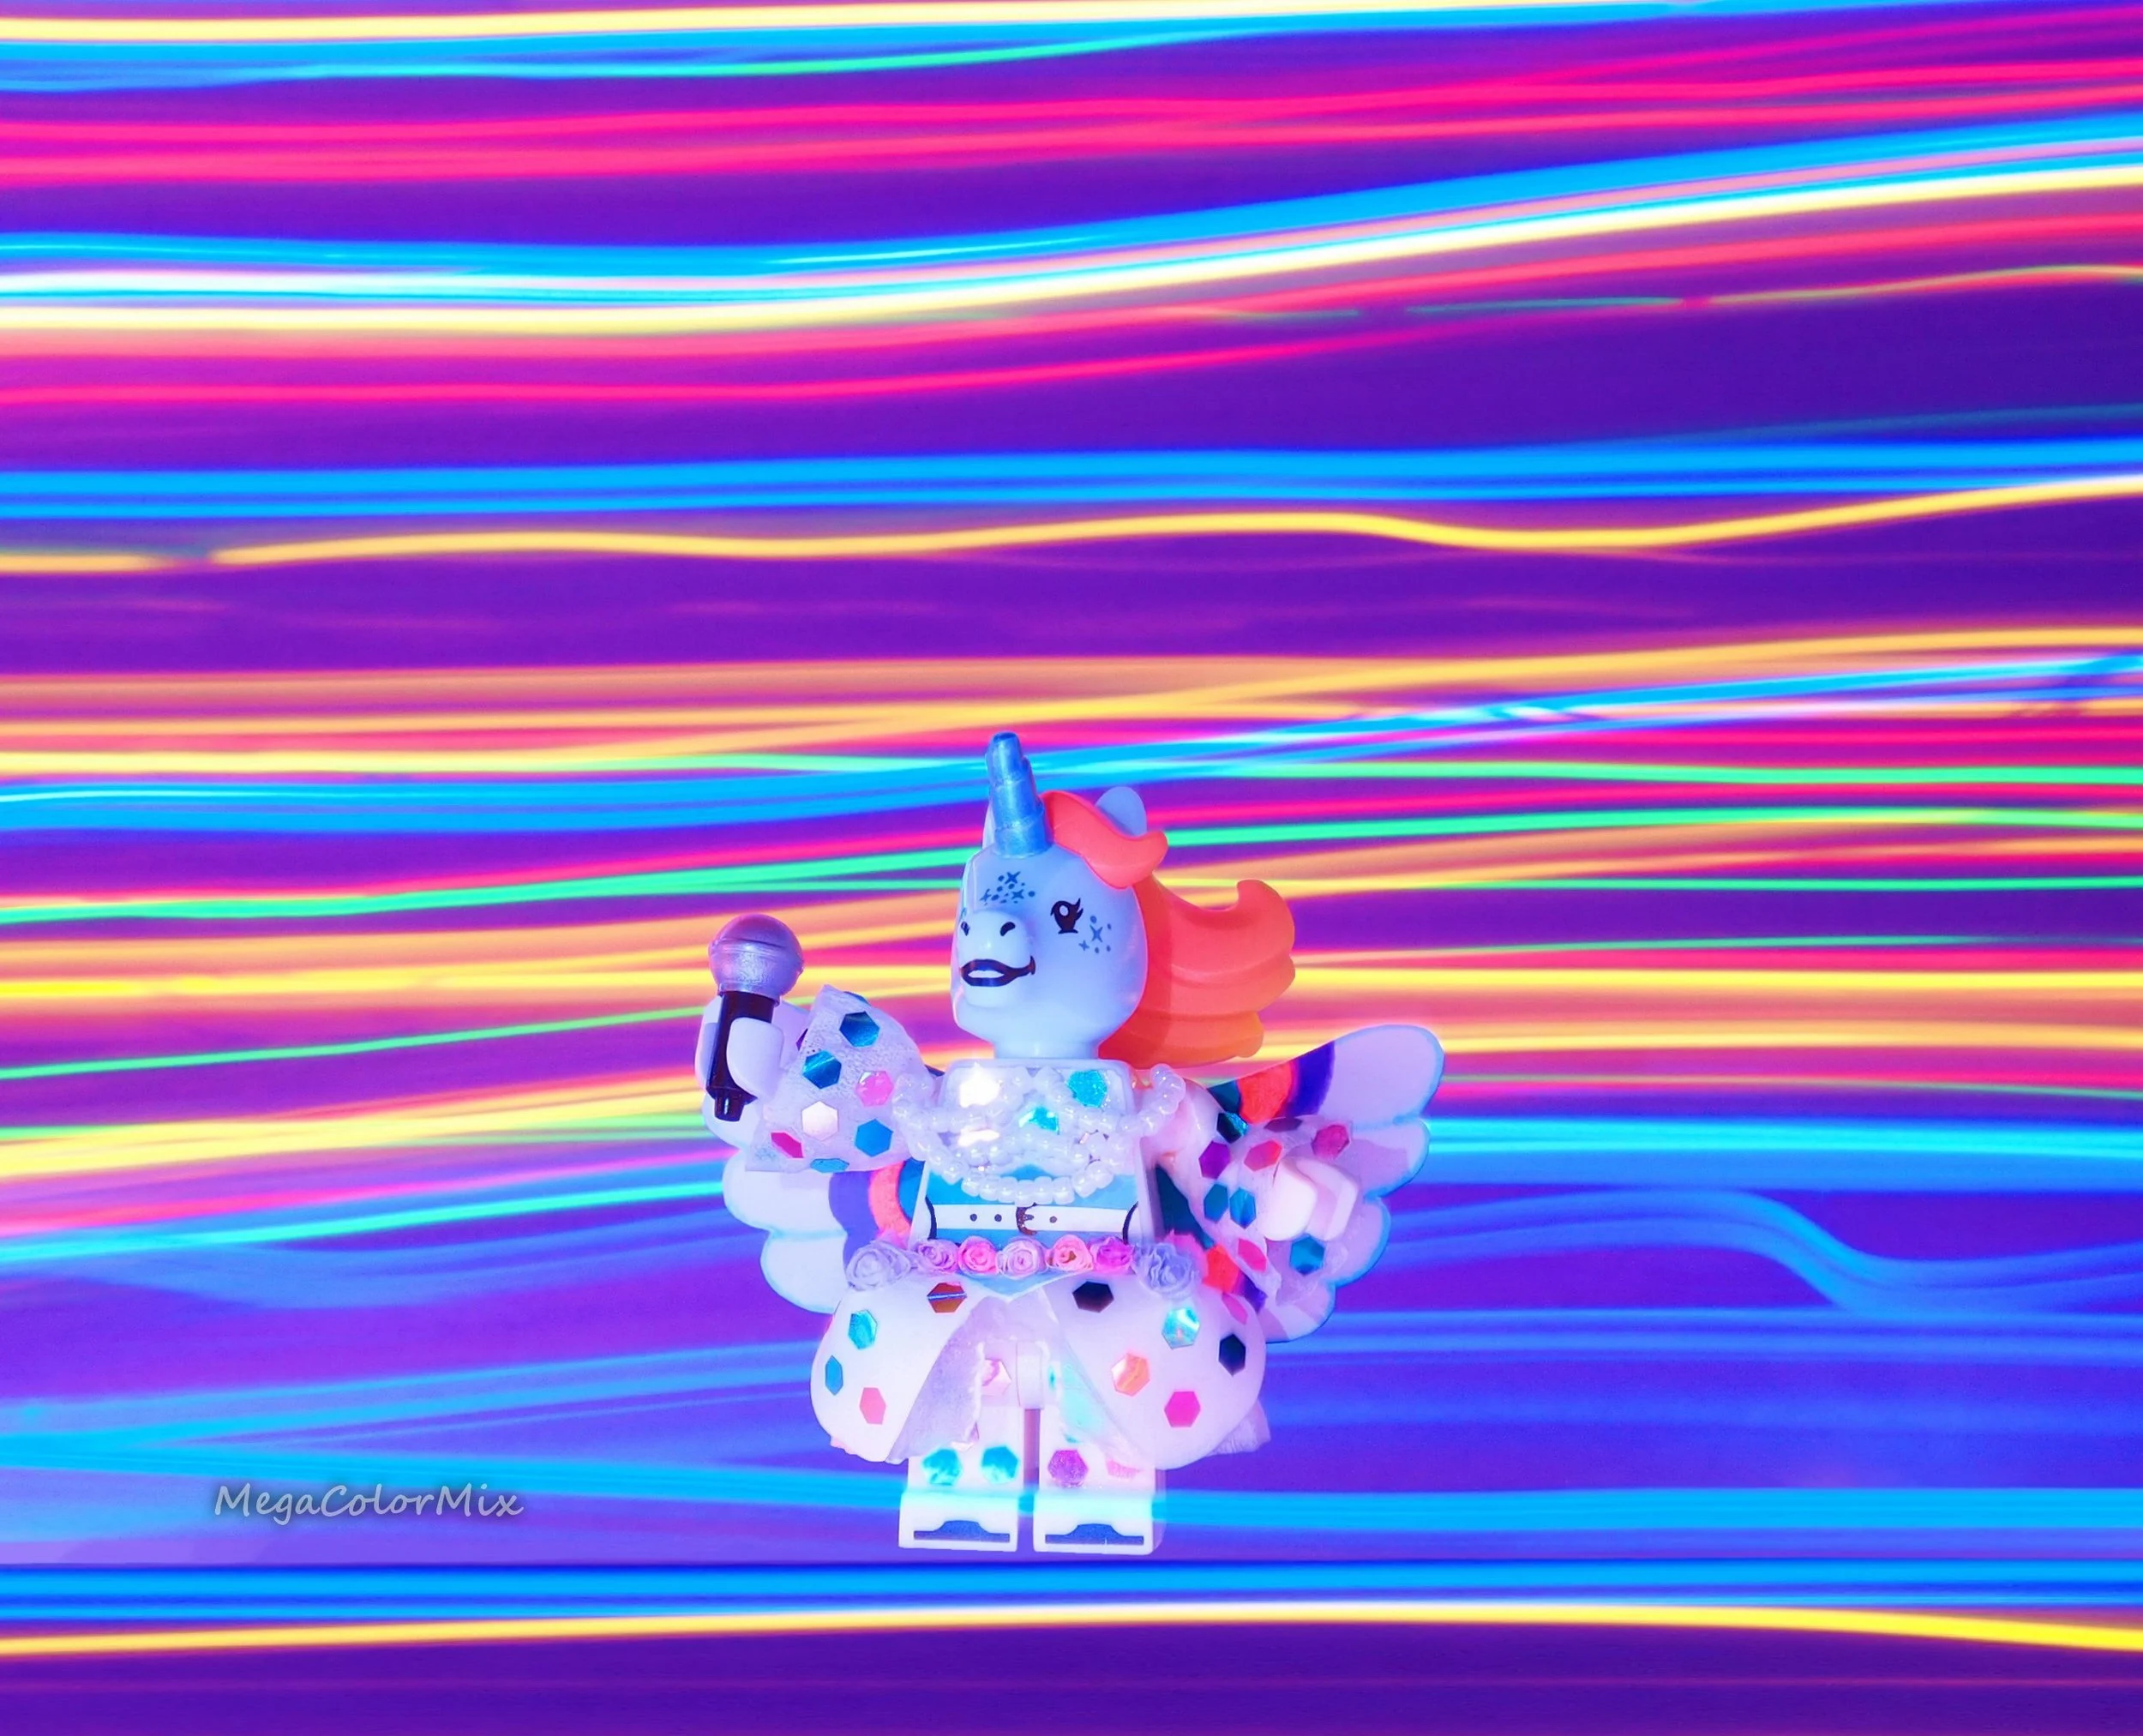
I like to use the “Fireworks” camera mode for this technique. It's important to use that “Fireworks” mode in total darkness with only the minifigure being slightly illuminated by your surroundings. The effects painted by the light brush will be bright enough to fill the background. This is one of the simplest movements on the list: you only have to move the whole stick from left to right while holding it vertically, forming many stripes that delight the eye. It is also important to mention that the string lights that I wrapped around the wand were multi-color (in contrast to the single color used in the examples above).
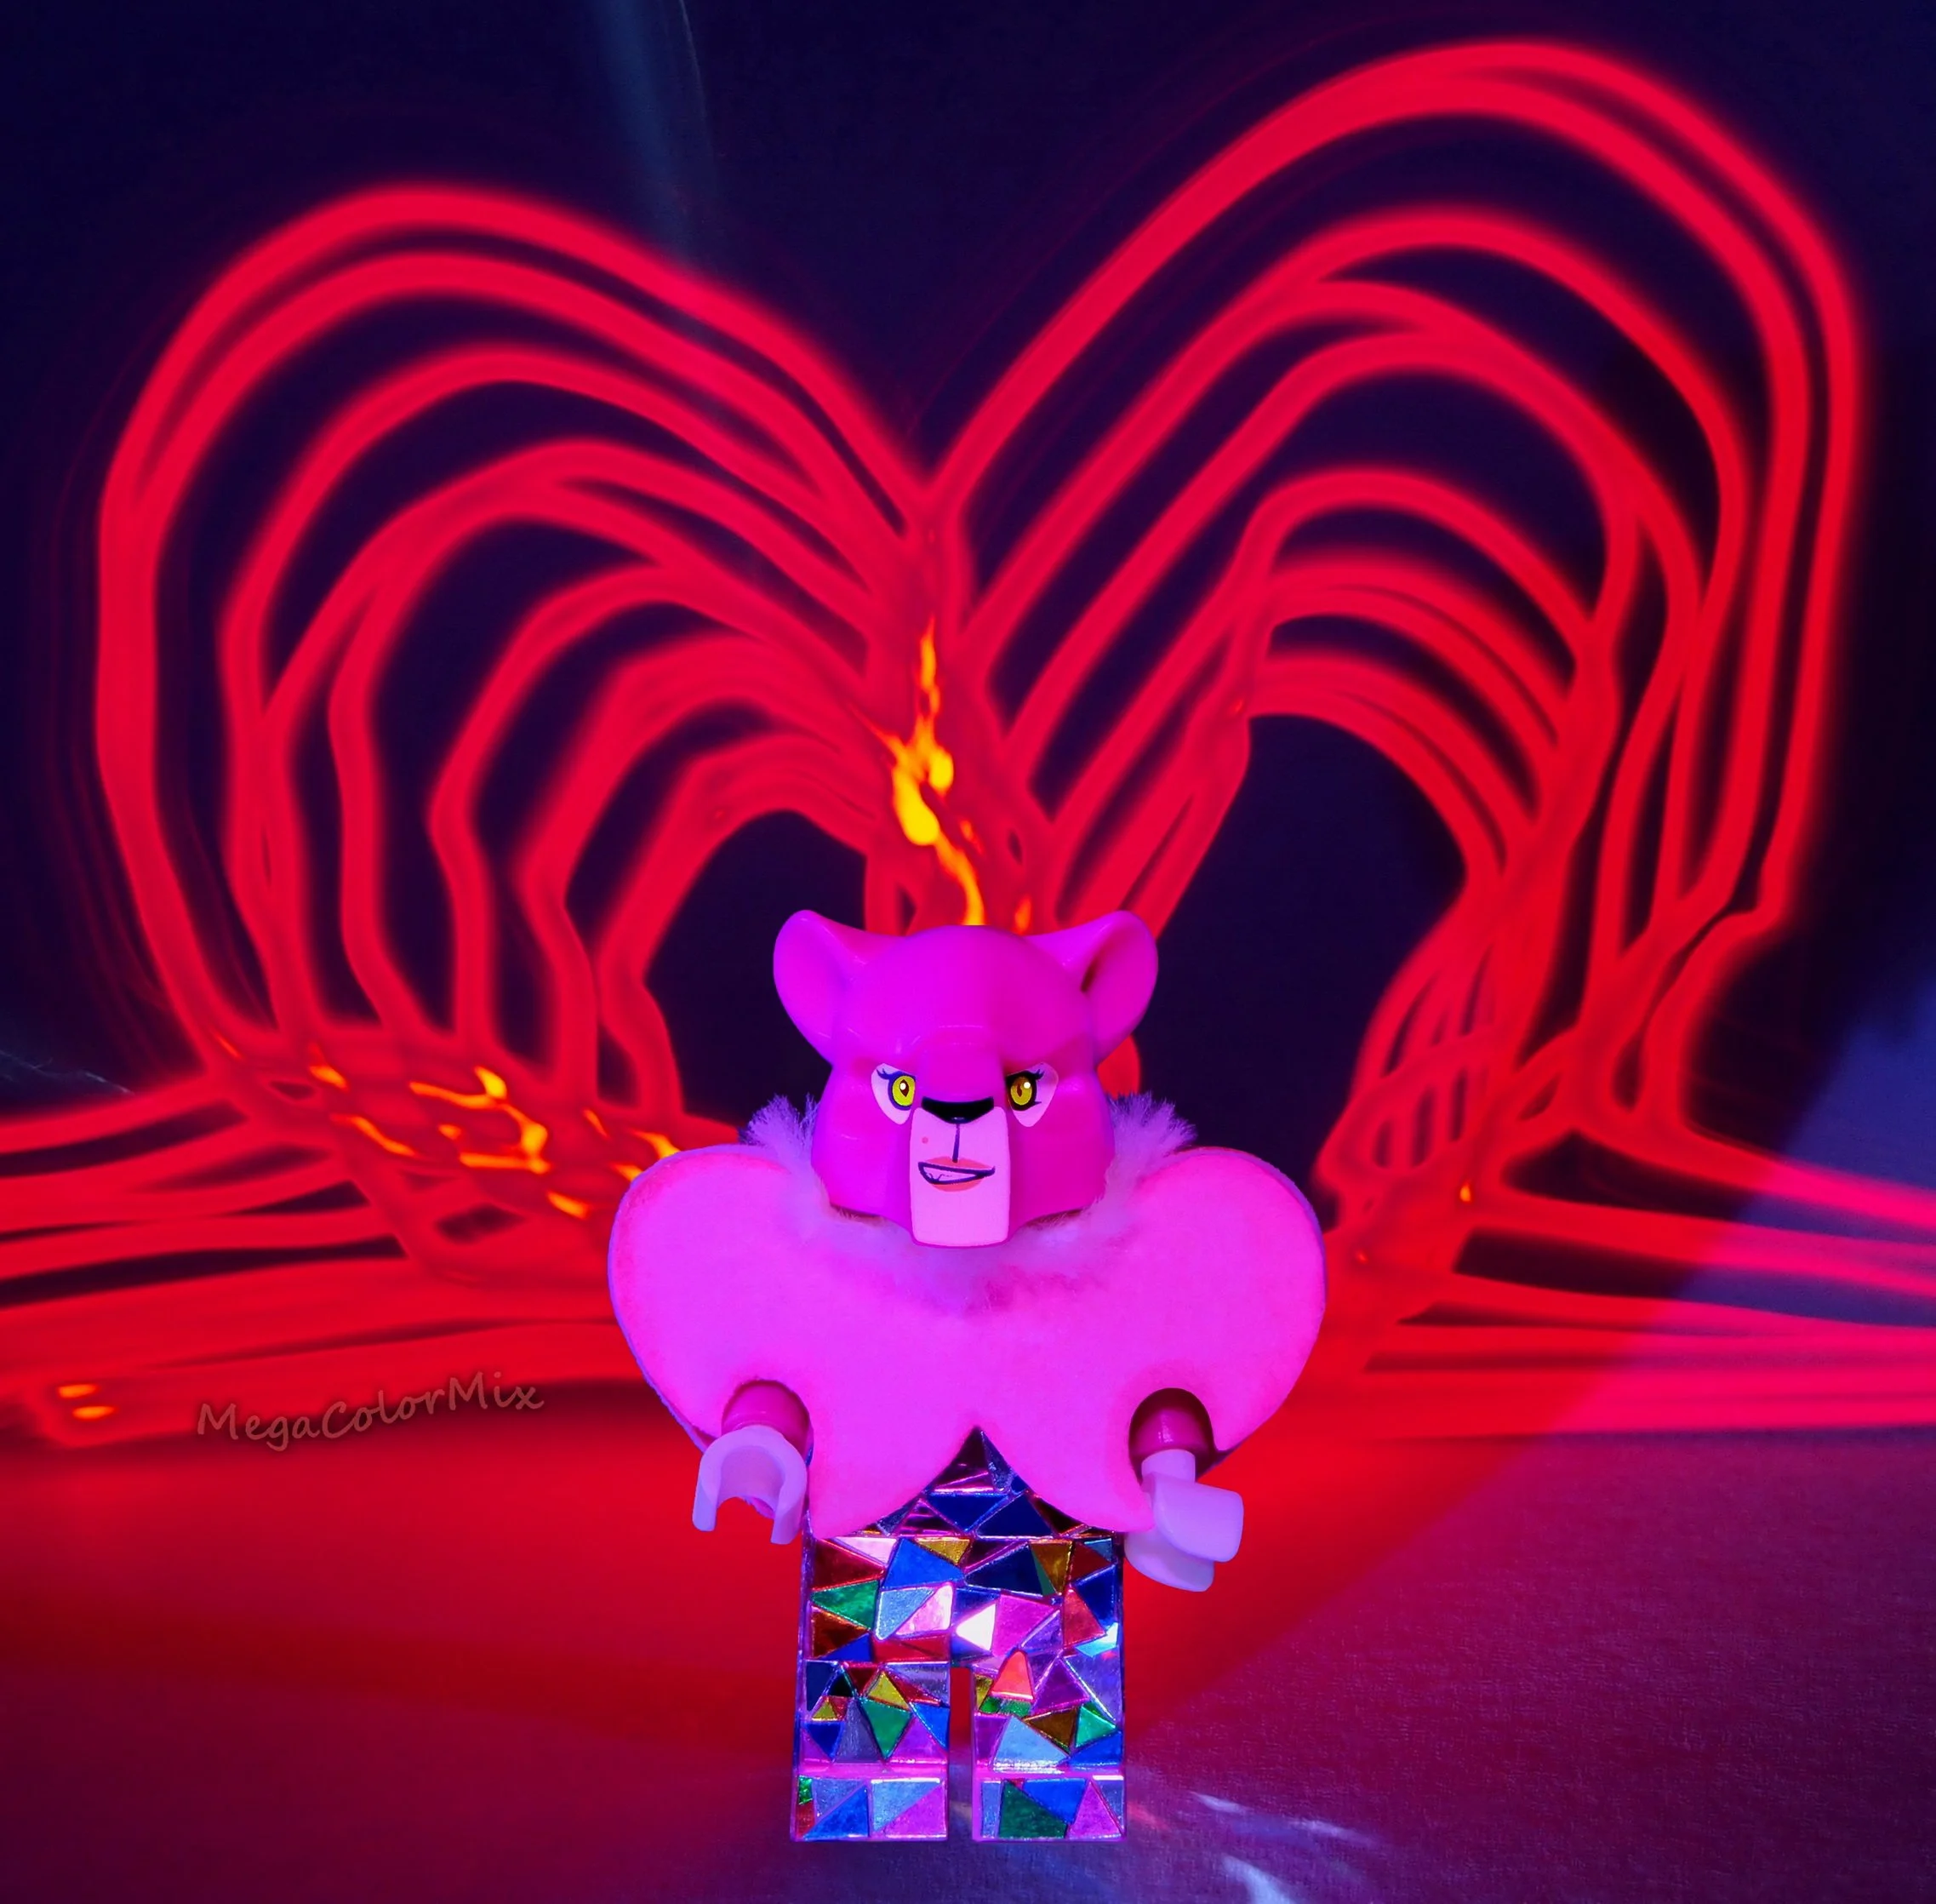
4. The “Heart”
Moving the light brush with a fixed lower end in accordance with Diagram 4, you will be able to create an eye-catching painting in the form of a heart. When drawing patterns like these, you should keep your background scene simple, as these lighting techniques will create the harmonious pairing of a LEGO character and a colorful painting, as in the case of this perky Pink Panther.
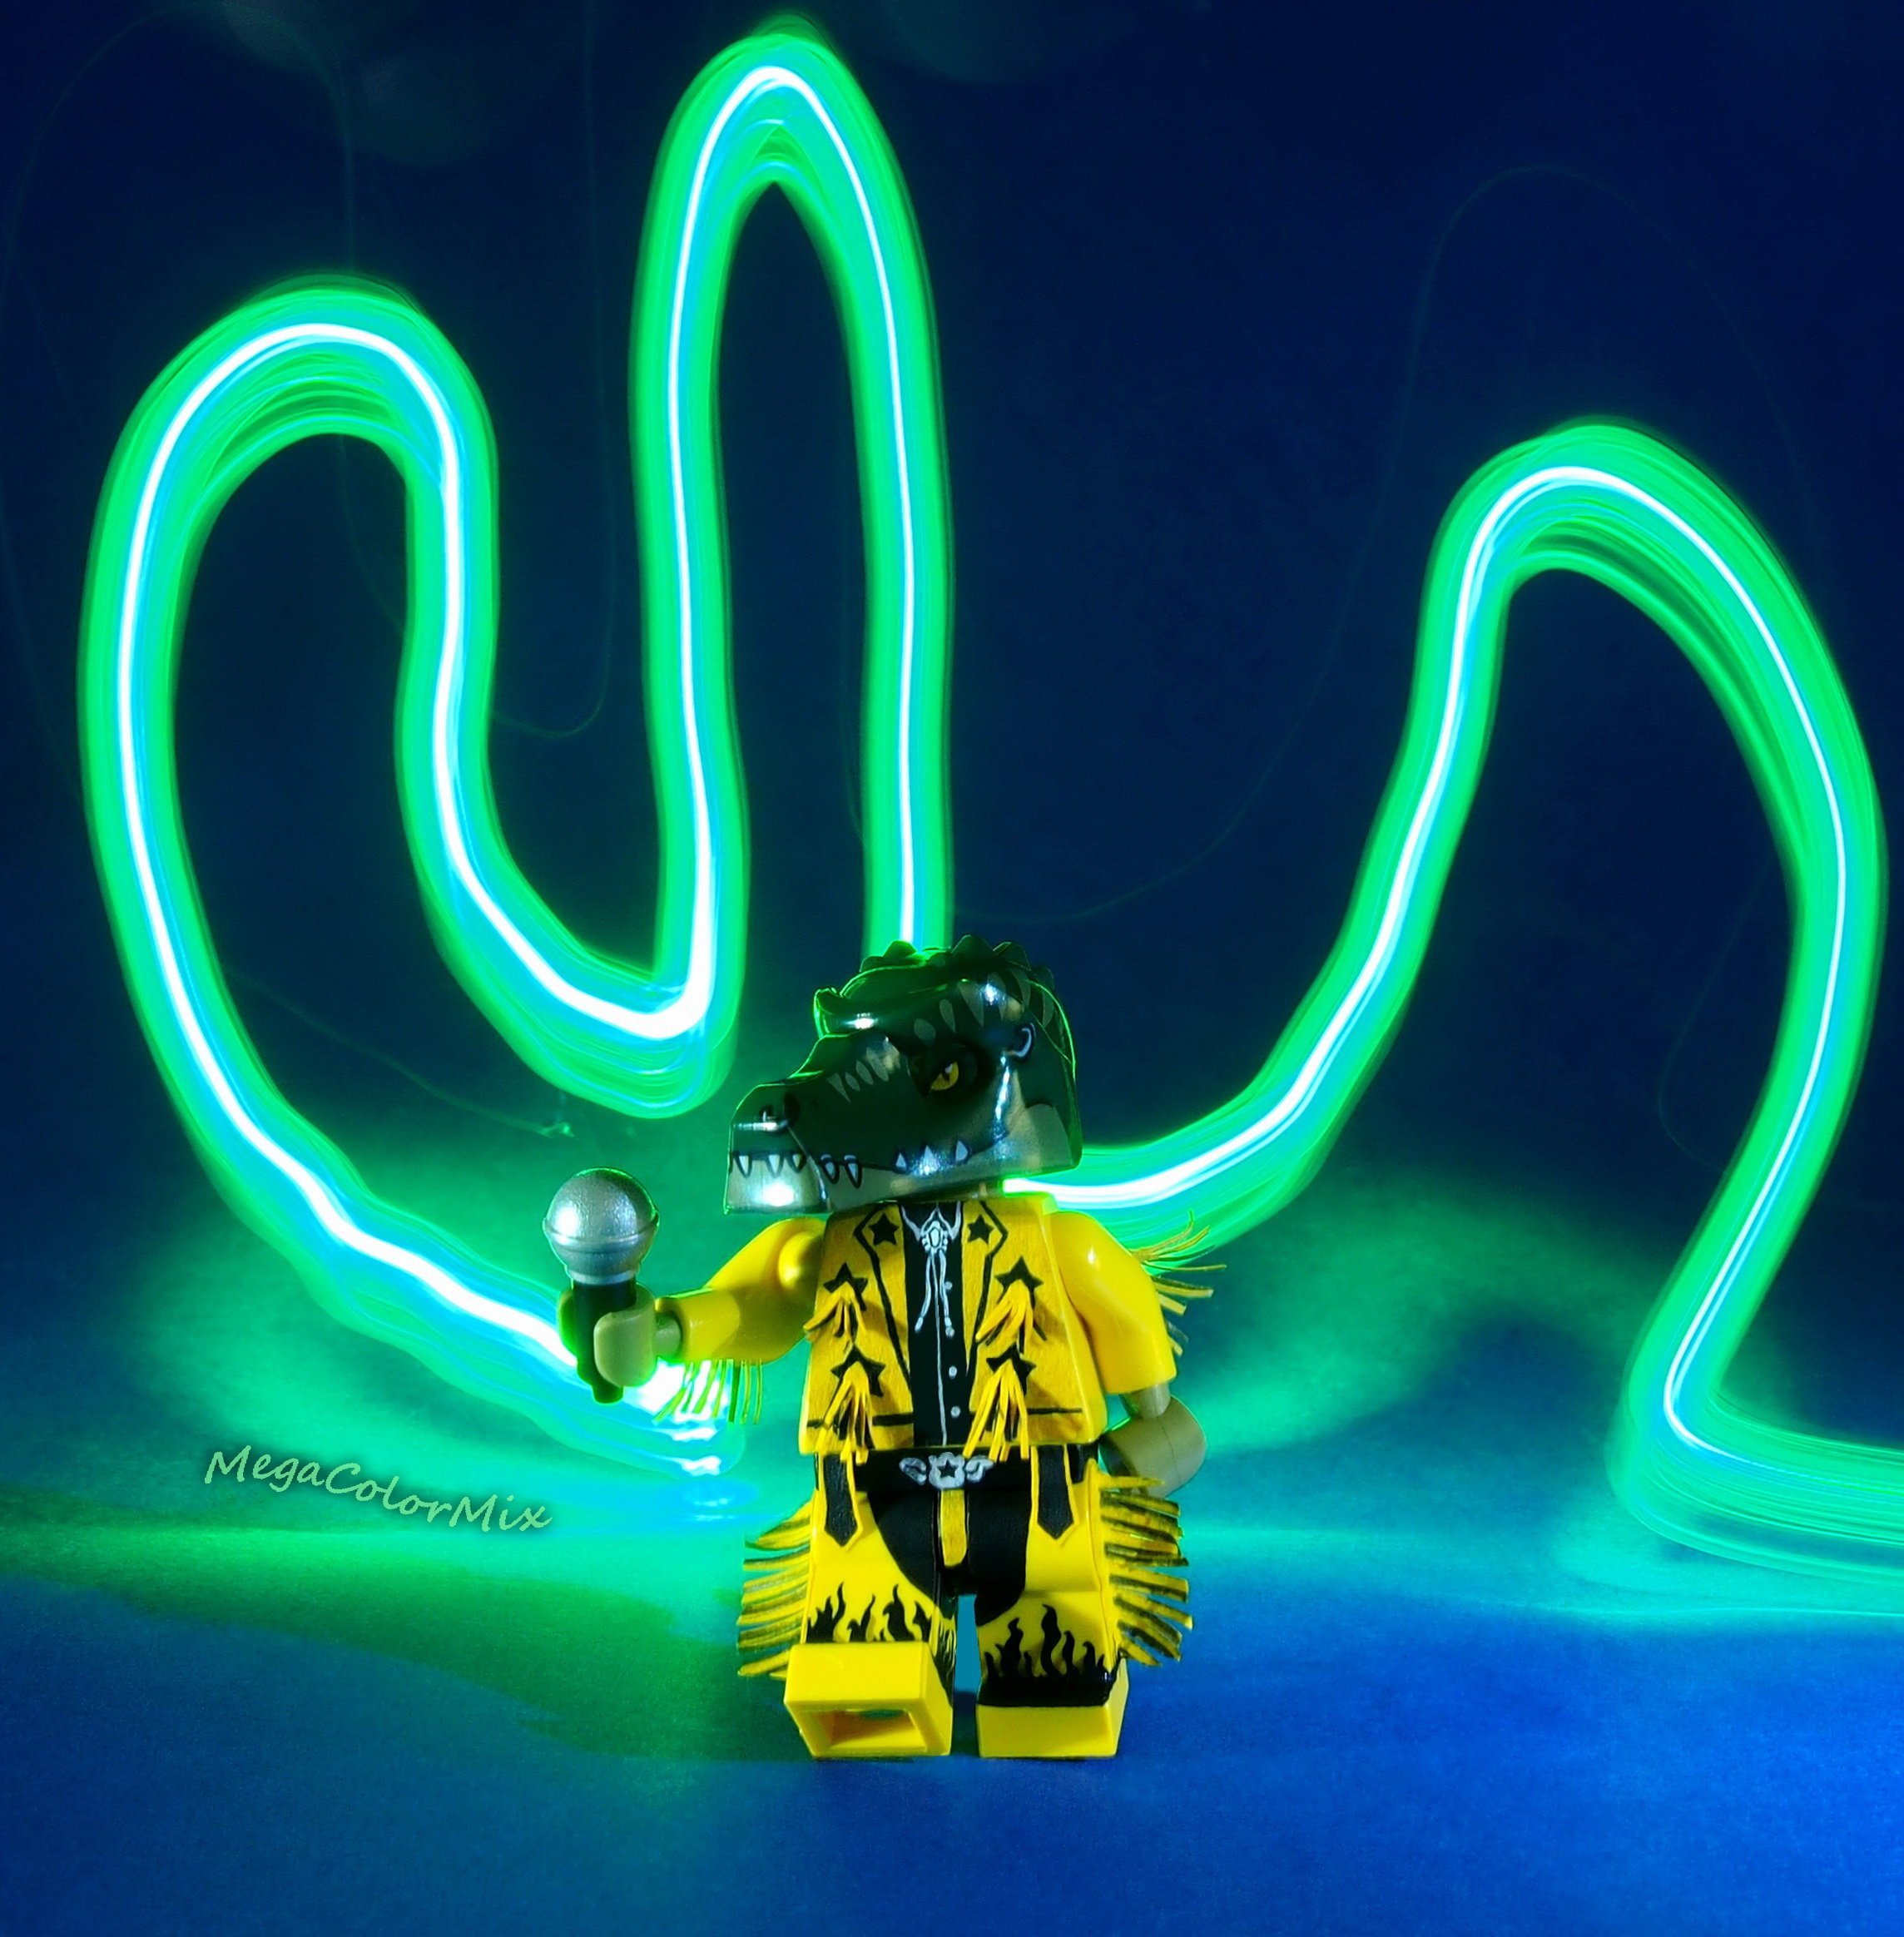
5. The “Cactus”
Don't feel discouraged if you don't get a realistic and clear-painted image on the first attempt of trying to draw a shape like a cactus or any shape you want to try. For example, the cactus for this crooning Cowboy Crocodile looks simpler than any other painting. However, this is the most difficult task because it requires less light and more precise movements. I made this one using a single finger light on the end of the wand that you can see back up in Diagram 5.
Most Important Lesson: Have FUN Experimenting!
I hope you enjoyed this lighting adventure as much as I did! When you try it out for yourself, I hope you enjoy both the process of shooting the photos and the results you get using the different light painting techniques for your LEGO characters and MOCs. Mistakes and all, you can learn a lot about both light and LEGO using these techniques. But the most important lesson of all comes from famous painting instructor Bob Ross who said, “There are no mistakes, just happy accidents.”
Have some special photo effects of your own you would like to share? Let us know in the comments below!
Do you want to help BrickNerd continue publishing articles like this one? Become a top patron like Charlie Stephens, Marc & Liz Puleo, Paige Mueller, Rob Klingberg from Brickstuff, John & Joshua Hanlon from Beyond the Brick, Megan Lum, Andy Price, John A. and Lukas Kurth from StoneWars to show your support, get early access, exclusive swag and more