Painting With Water: Adding a Splash to Your LEGO Creation
/Playing with various water shapes results in many amazing possibilities to photograph with LEGO. In previous articles, I demonstrated how water provided the movement for my minifigure surfer action shot as well as the perfect backdrop for minifigures at the pool.
But those are minifigures… what about using water with LEGO bricks or MOCs? The combination of geometrically strict LEGO bricks and soft shapes of water seems impossible at first. However, by augmenting your LEGO creation with water, you can get an impressive and unexpected result!
Here is a DIY water-and-plastic process that you can create for your LEGO photos.
What You Need
A white or colored paper background
Plastic bag
Adhesive tape
Thread
Mid-sized glass
Plastic syringe/baster
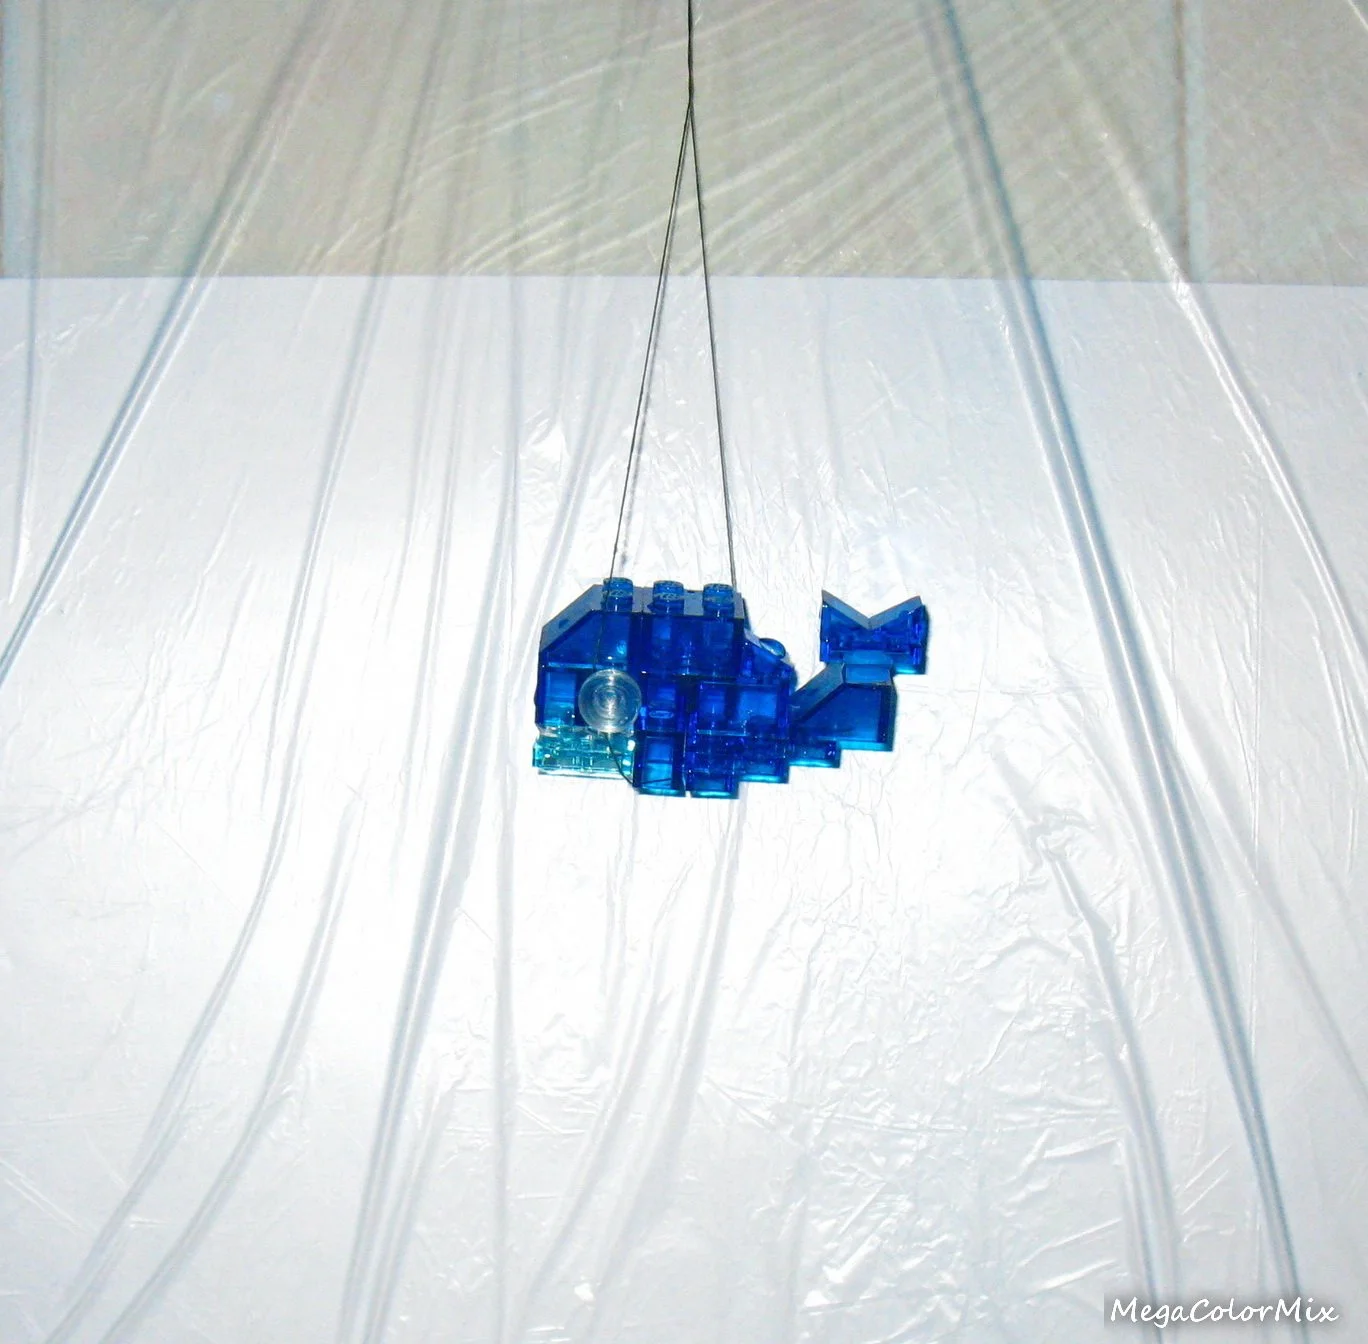
Several LEGO creations/models (preferably transparent) with one missing element, for example, a fish without a tail. Here we have a fish, a flower, a jellyfish and a whale.

Preparing for the Show
Let's organize a studio in the bathroom! Put your paper background in a plastic bag so that it will stay dry and clean. Stick your background to the bathroom wall. Finally, hang your LEGO model using thread in front of your improvised background.
Let's Paint with Water!
Everything is now ready for your water experiments. Fill the glass with water and wave it quickly under the model in a circular motion. The water should jump out from the glass and reach the lower part of the model.
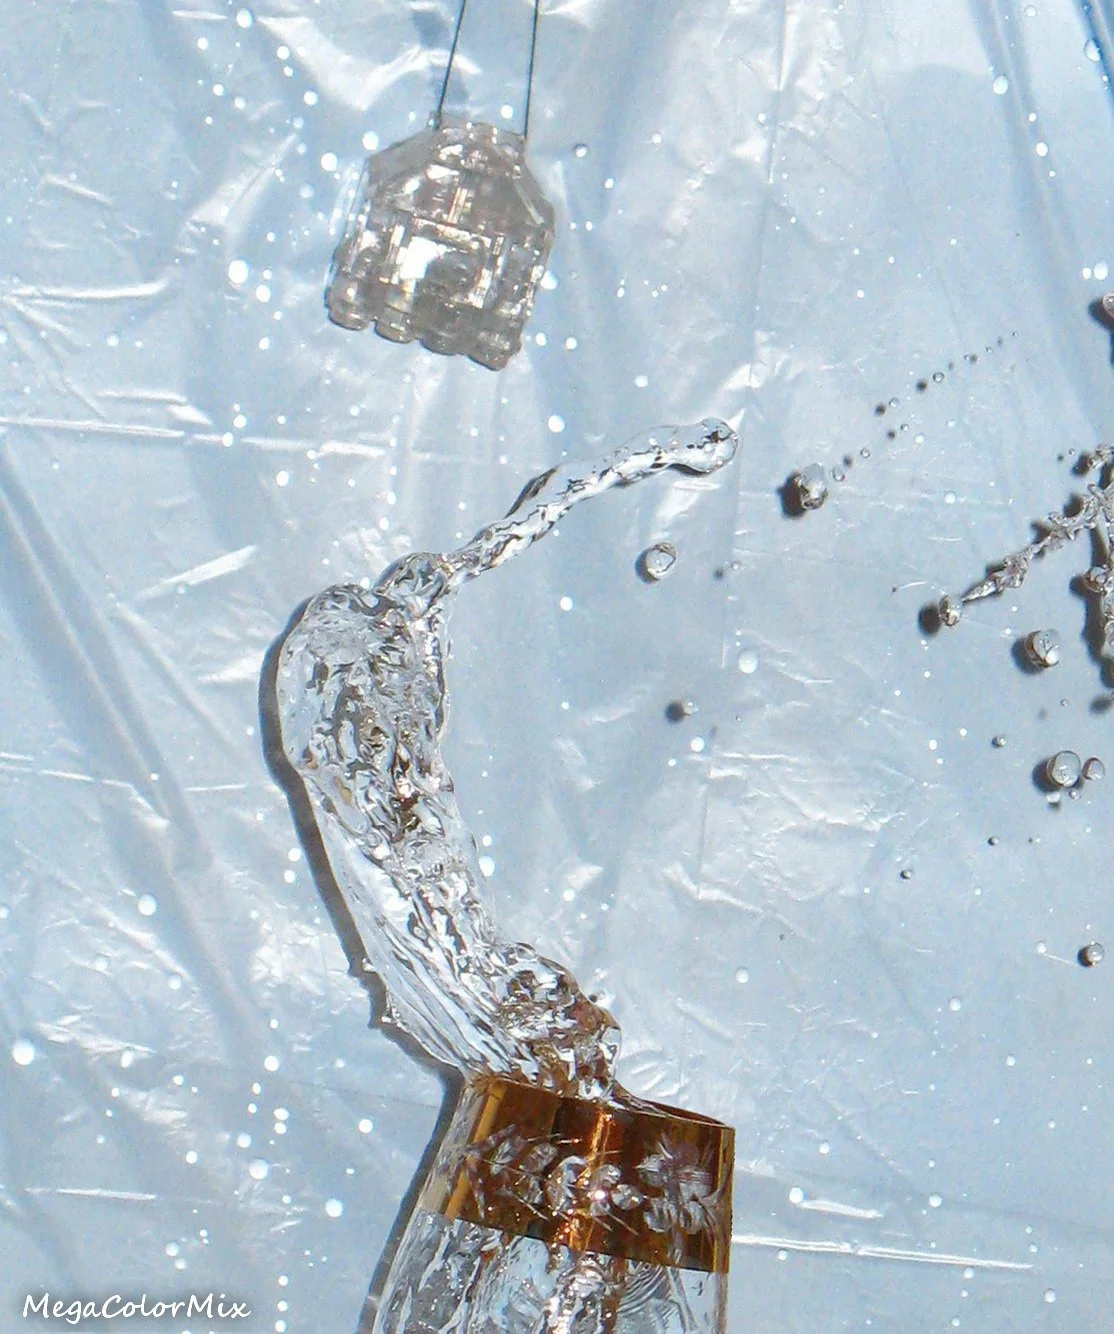
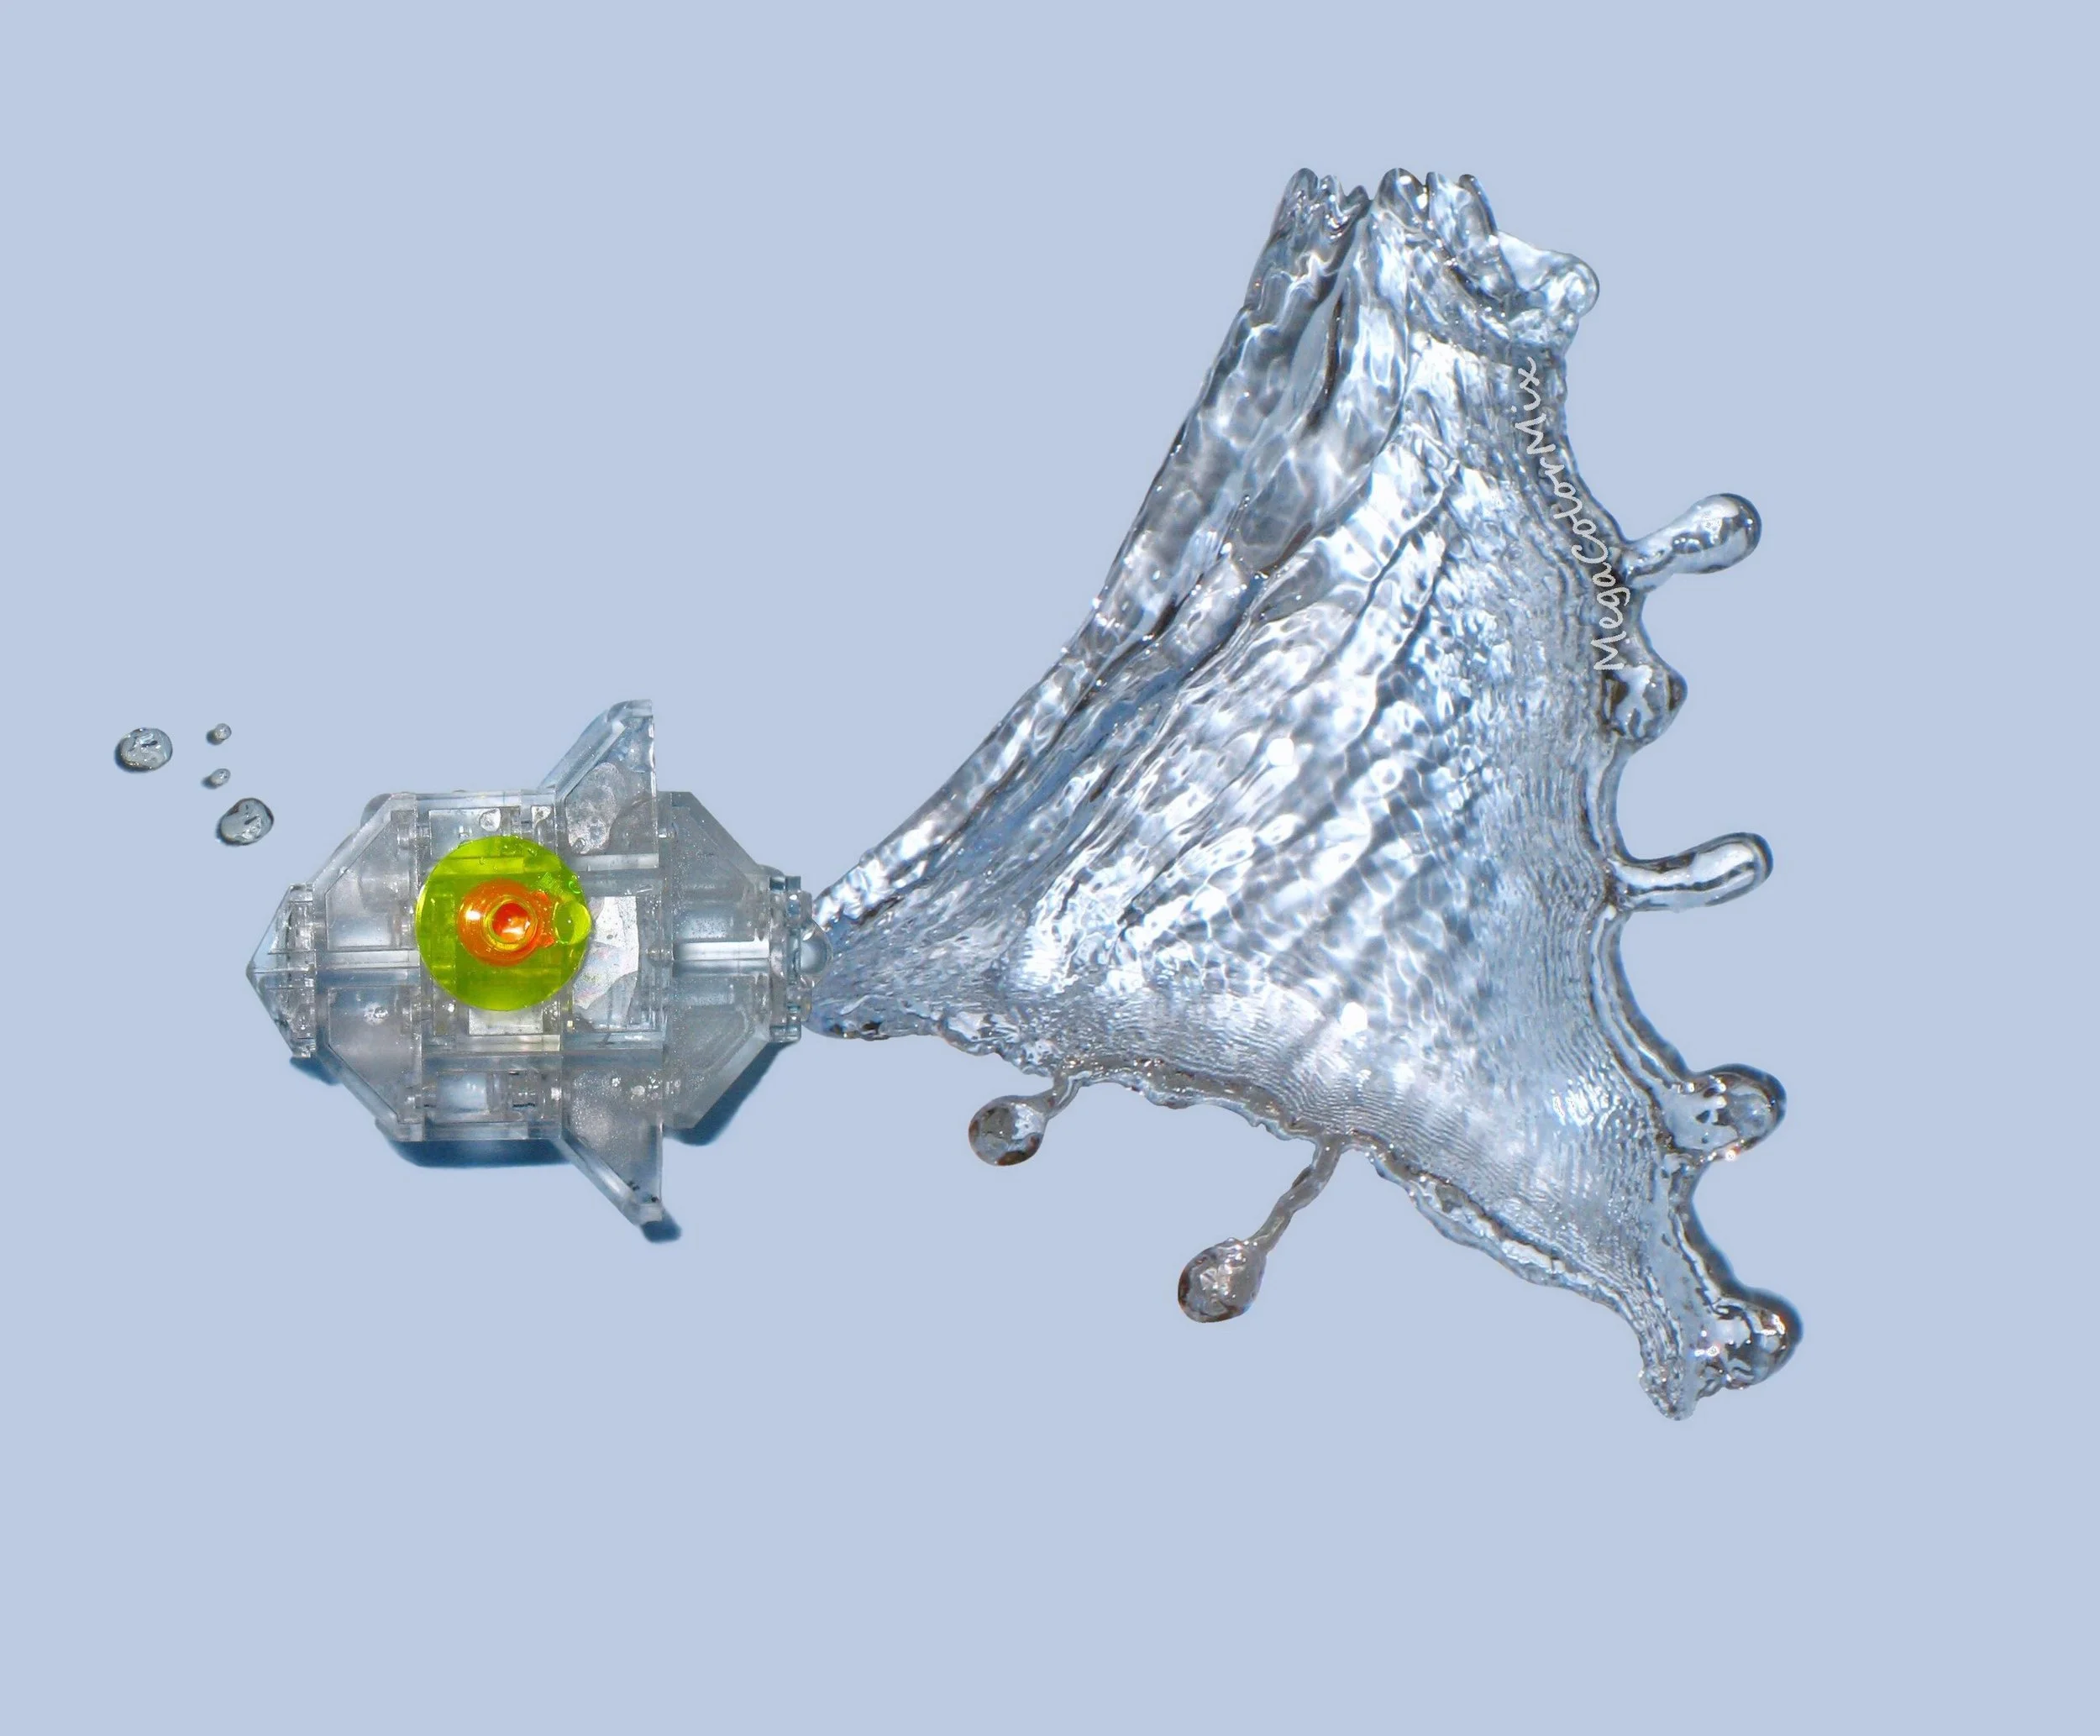
The collision of the model and water will give a rich splash that can imitate any missing part of your model, for example, the tentacles of the jellyfish. To get the perfect shot, you can use the timer settings on your camera or you can also ask an assistant for help. If you have more helping hands you could possibly use more glasses of water to create more splashes of different shapes.

You also can place your model upside down and then turn the final shot right side up if your splash looks better at another angle. In the example below, the photo was rotated so that the splash formed part of the fish’s tail.
Another way to paint with water is to use a plastic syringe or baster. Squirt water from the syringe into the air from below the model so that the thin fountain or stream of water will reach the flower and make it look like a stem or even a leaf.
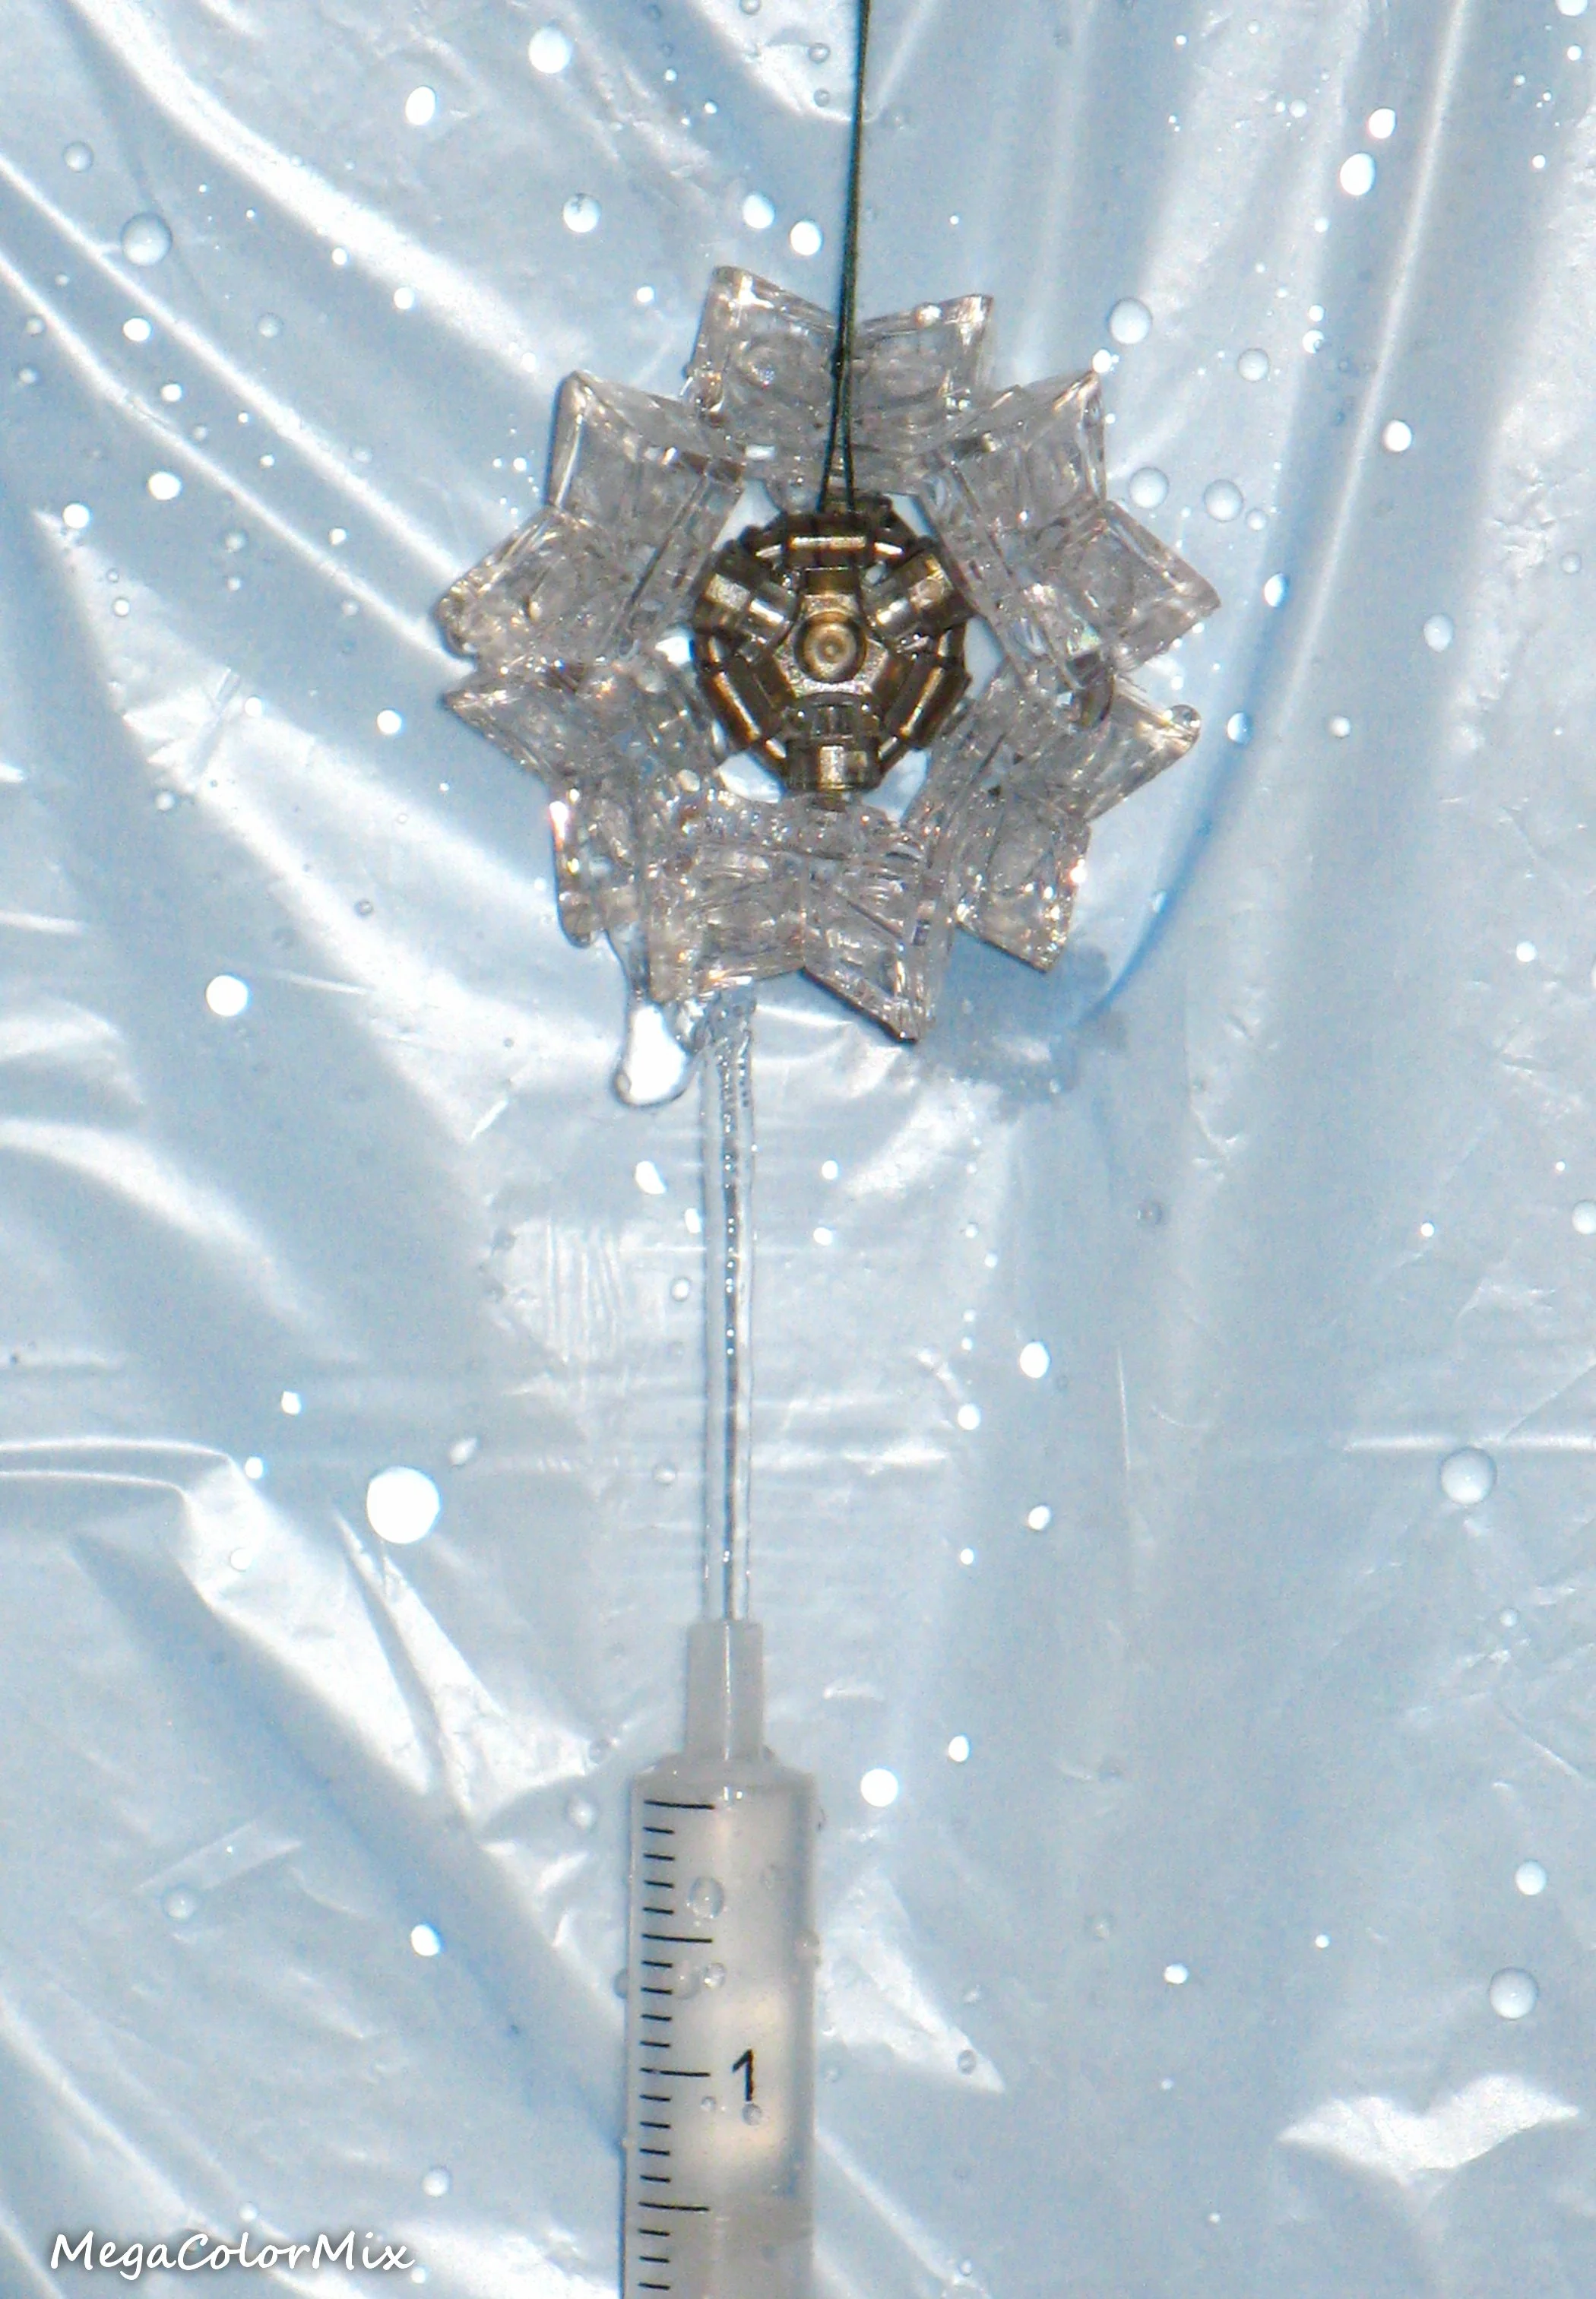
The transparent LEGO parts can be perfectly combined with the water fountains, and the contrast of water and plastic transforms into a harmonious duo.

The Final Photo
Once you’ve taken your photos, choose your favorite shape of a splash and remove the extra drops or shadows digitally along with the string and background. However, the focus of your picture should still be the natural splash you created.

These shots are taken with the use of a flash and without any additional camera settings. The whole process is time-consuming, but the amazing result is definitely worth the effort! After painting with light, I hope you will give painting with water a try!
What do you think of painting with water and bricks? Have you ever tried this technique yourself? Let us know in the comments below!
Do you want to help BrickNerd continue publishing articles like this one? Become a top patron like Charlie Stephens, Marc & Liz Puleo, Paige Mueller, Rob Klingberg from Brickstuff, John & Joshua Hanlon from Beyond the Brick, Megan Lum, Andy Price, John A. and Lukas Kurth from StoneWars to show your support, get early access, exclusive swag and more.