This Old Track 2: 12V Edition
/
Although this article may seem like a planned successor to my original "This Old Track" article discussing ways of maintaining and restoring 9V metal track, I have to admit that it is not. Rather, it is the consequence of an experiment that got out of control!
This experiment was simply an investigation of every LEGO 12V Train system power accessory. I wanted explore how each worked, in particular, I wanted to experience what it was like to setup and use the modular brick form-factor control panel switches. I have always admired from afar these elements, and never having owned any myself, invested in buying at least one of every type to finally discover their operational characteristics.

The 12V LEGO train system offered a variety of fabulous power operated accessories—dramatically elevating the operational experience and expanding the play-value of LEGO trains
In order to really appreciate the operation of these power accessories, it made sense to include them in the context of modest train layout. Therefore, I designed a small layout which became a bigger layout and now is part of a bespoke showcase layout complete with custom built tables and a fleet of 12V style rolling stock! I hope many fellow LEGO builders recognize this familiar scenario of simple projects which grew well beyond the original concept! In any case, a layout needs track. I did have a modest collection of light gray 4.5V track from this era, but this was not enough for a layout, and I did not have any of the 12V metal centre rails which are the heart of this track system.
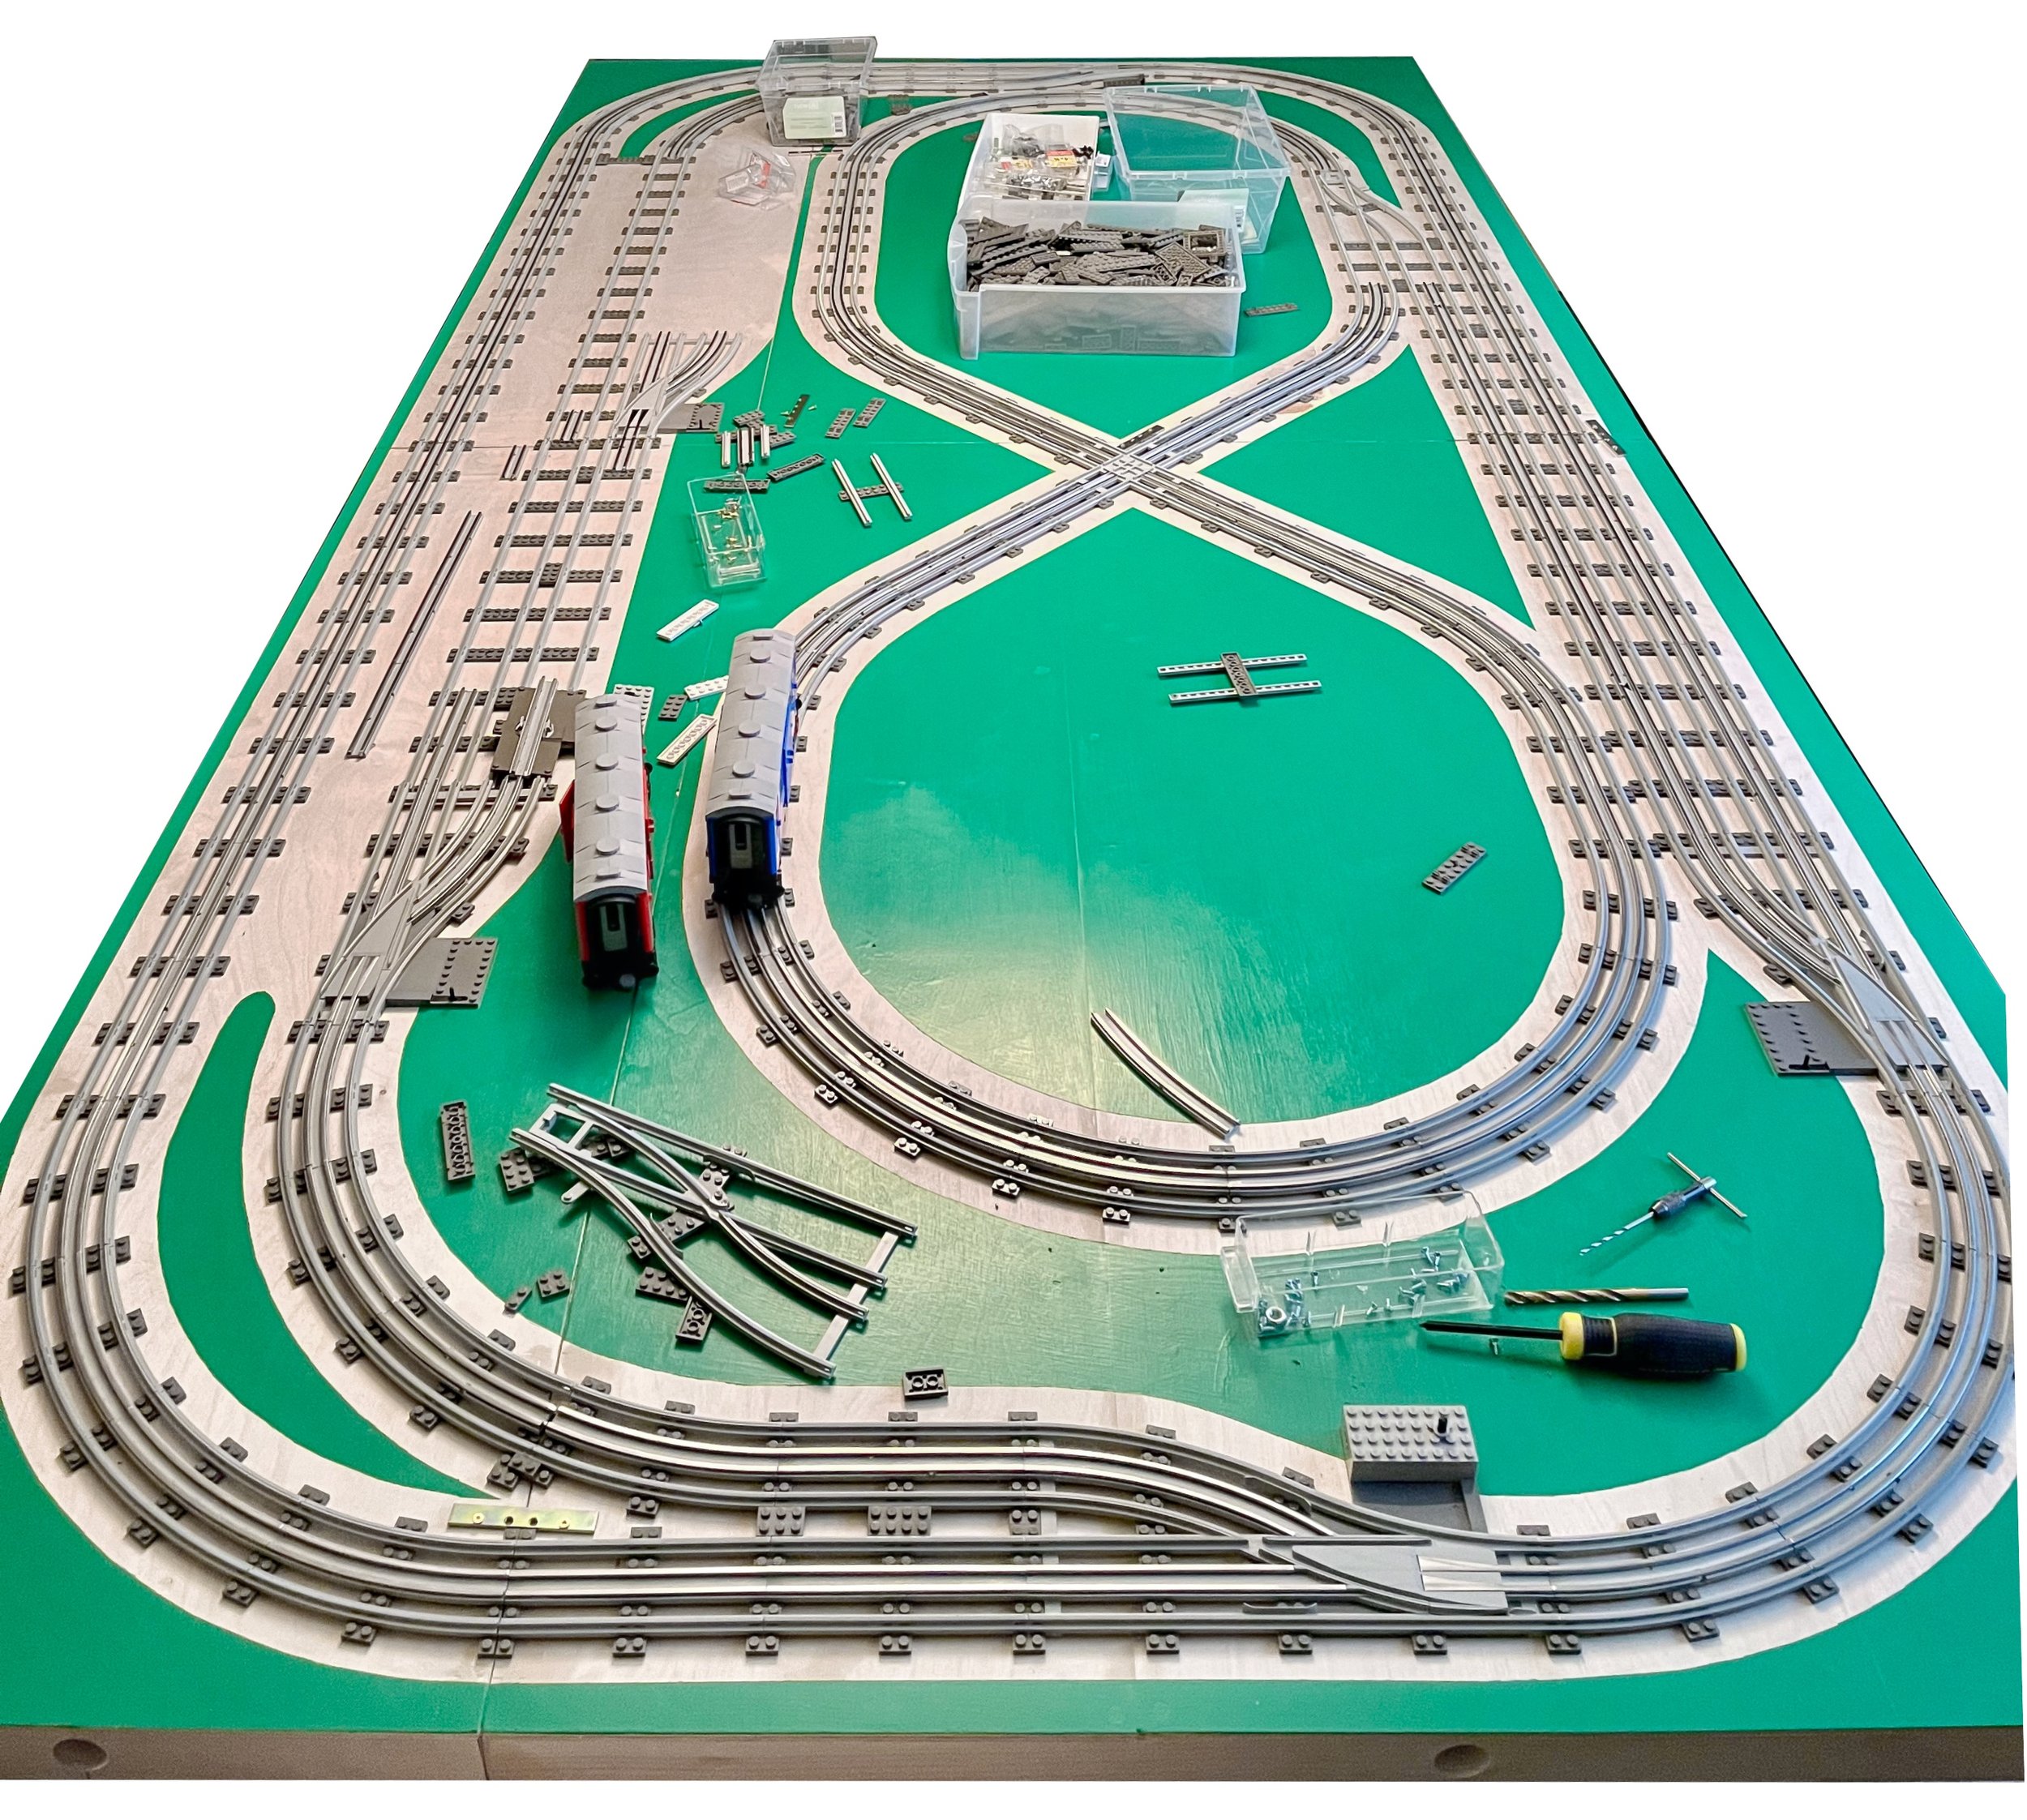
The experiment which went out of control! A showcase 12V train layout I am building to explore the amazing modular power accessory system—a prominent and beloved feature of lego light grey 4.5V/12V train era of the 1980’s.
Purchasing 40+ year old 12V track comes with the challenges of finding suitable sources, with adequate quantities at reasonable cost. I was ready to accept the reality that the track I was going to receive was going arrive in a range of physical conditions ranging from mint to catastrophically damaged! I was not wrong. Most elements arrived in acceptable condition, but several were in dire physical condition and I was unsure they would ever be fit for purpose.
This article will discuss some of the methods I have used to clean and restore LEGO 12V train track elements. This includes some of the same techniques and processes discussed in my first article with 9V metal track, but also includes some new processes aimed specifically at restoration of yellow discolouration very typical not only of track elements, but almost all light gray, white, and sometimes blue LEGO elements from this era.

Tools and Materials
For cleaning and simple maintenance, the following items are required:
Lint-free wipes (Kimwipes brand is highly recommended)—these can be purchased from scientific and/or industrial supply sources (e.g. U-Line, Acklands Grainger, etc.) and can also be found on Amazon
Paper Towels - if you can’t find lint-free wipes, paper towels are an ok alternative. Paper towels are also useful for drying track sections after washing or wet-sanding.
Cotton Buds - any brand (e.g. Q-Tips) will suffice and are widely available from any pharmacy

For more involved restoration tasks, you will also require:
Wet-and-dry sanding papers or sticks - recommended grit range 800 to 1500. These can be found in most hardware and/or hobby stores
Toothbrush for scrubbing (grab a few extra at the dentist)
Soft bristled paint brush for scrubbing

Chemicals
For most cleaning and maintenance tasks, 99% isopropyl alcohol (IPA) performs extremely well. It can be easily found in any pharmacy; however make sure it is 99% (not 70%) concentration. Alcohol evaporates quickly and leaves little to no residue.

Removing tarnish from metal requires polishing using brass metal polishers such as Brasso. Alternatively, ordinary toothpaste performs surprisingly well as a polishing agent. Make sure to use a non-gel toothpaste, i.e. a white paste-like consistency toothpaste. The secret to toothpaste’s success is the fact that it contains microscopic abrasives usefully suspended in the paste. These abrasives polish materials without leaving any scoring or hazing marks.
For more advanced restoration involving reversal of yelllowing of ABS plastic, we require the use of Hydrogen Peroxide (H2O2) in so-called “40 volume” strength (equivalent to 12% concentration). This is a stronger concentration than the typical 3% concentration you would find in a pharmacy for first aid disinfection. You can often find 40-volume (12%) Hydrogen Peroxide in beauty stores or hair salons since this product is often used for bleaching hair. I find it is helpful to have both liquid and cream variants of H2O2. Liquid is useful for soaking many items at the same time whereas the cream is useful for dealing with one or two individual items.
PART 1: Yellowing ABS and “Retrobrighting”

The most common attribute of ageing of light grey track from this era is yellow discolouration. The ABS formulations for colours such as light grey, white, and blue used in the production of LEGO elements from the 1960s up until 1990s often "yellowed" over time--a process which is accelerated when exposed to UV light such as sunlight. Without going into too much detail behind the underlying chemical processes, the yellowing is caused by the flame retardant additives included with the ABS formulations. These additives are typically Bromine based compounds which gradually oxidize over time and this oxidization is catalyzed (accelerated) with the presence of UV light. When these Bromine compounds oxidize, their physical properties change in such a way that the wavelengths (and corresponding colour) of light that they both absorb and reflect yields more light in the yellow-orange part of the visible light spectrum. Modern ABS chemical formulations often include special additives which give the ABS polymers resistance to the damaging effects of UV light.

The depressingly familiar sight of Yellowed ABS that many LEGO fans observe with vintage White, light Grey, and blue elements!
I was relieved to discover that this yellow discolouration is sometimes reversible. The original colour can sometimes be restored, if not completely, enough to make a noticeable improvement. The techniques used to perform this restoration were pioneered by folks involved in the restoration of vintage consumer electronics such as microcomputers, game consoles, peripherals, etc. The vast majority of late 20th century consumer electronics and products were designed with enclosures manufactured from injection molded ABS. The versatility offered to product designers with injection molding lead to its near ubiquity which continues today. As some products from 20, 30, 40+ years ago become either rare and/or highly collectable, the incentive to restore and repair these items also increases. As a result, techniques aimed at restoring discoloured ABS plastic enclosures have emerged which often yield shockingly effective results. The term often used to describe this colour restoration is "Retrobrighting" or "Retr0brighting".
Retrobrighting Process
The techniques I describe here to retrobright 12V track elements more or less follow the same process as others with the exception that I choose not to use UV light as a catalyst to assist the H2O2. The basic procedure involves immersing the ABS elements in H2O2 and then exposing them to UV light either from sunlight outdoors or a UV lamp. As I understand it, the UV light acts a catalyst or “accelerator” for the chemical reaction. An equivalent catalyzing effect can be achieved with simple addition of heat which is the technique I use.
Example
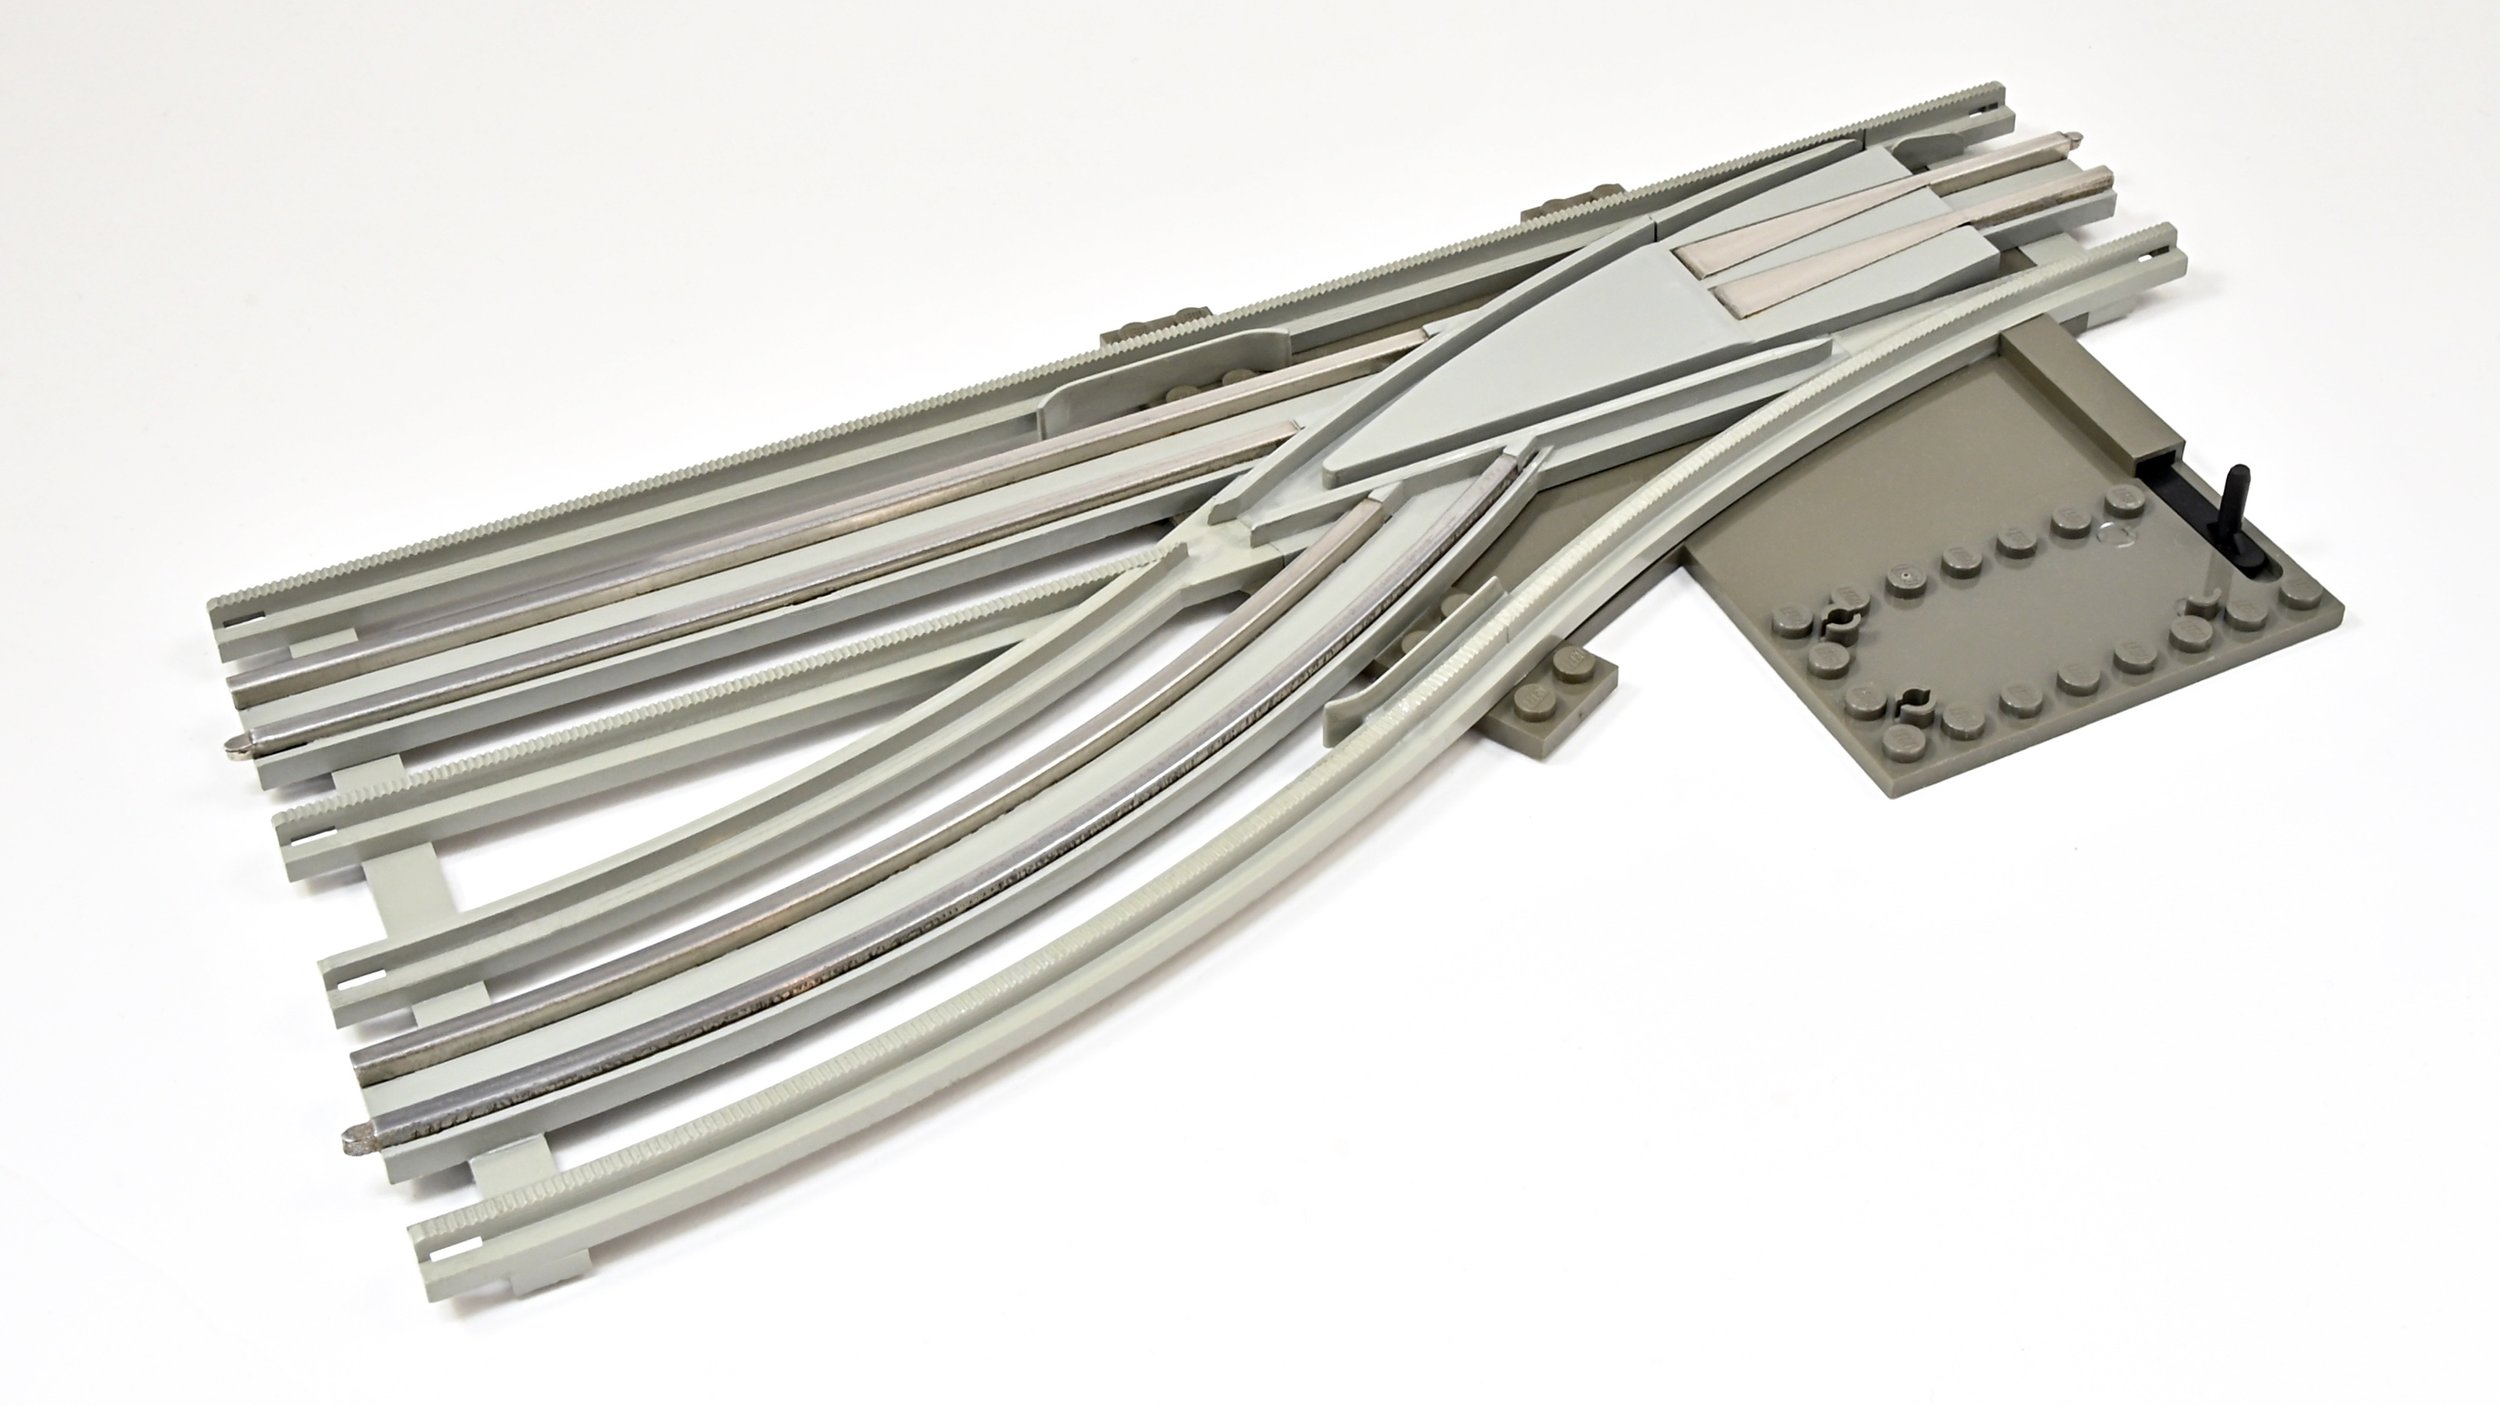
To illustrate the retrobrighting technique, let’s consider an example. Shown below is a 12V track switch in a typical yellow discoloured state.

The first step is to place the track element (or multiple elements at the same time) into a chemical safe dish such as the Pyrex glass dish shown below. Then, carefully and slowly pour the H2O2 into the dish so that it fully submerges the track element.

Carefully pour Hydrogen Peroxide to a chemical-safe glass dish and submerge the items for restoration. The use of gloves is absolutely mandatory.
Next, I carefully place the dish on a stovetop—a hot plate or other controllable heat source can be used as well. NOTE: do NOT use a flame (gas) based heating source/stove-top since it is simply too strong and will likely damage the track parts. Also, induction heating stoves will not work since the glass dish is not metallic and will not be heated by electromagnetic induction.
It is important to monitor the temperature of the solution to avoid damaging the ABS. I typically keep the temperature below 60º C (140º F). Often, only the lowest possible setting on the stovetop is required and you will likely have to cycle on and off to maintain a safe operating temperature range.

Monitor the temperature of the dish to ensure a safe operating range.
After about 1 hour on the stovetop, we can already see some changes beginning to occur.

During the retrobrighting process, it is normal to see bubbles forming. This is expected and is an indication of the chemical reactions occurring. You can periodically agitate the dish or stir the H2O2 gently to disperse the bubbles.

After about 2-3 hours, you should see significant reduction in the yellow discolouration. If not, you can simply leave the elements to soak in the H2O2 longer. Sometimes, I will remove the heat and just leave the items to soak overnight. I place a sheet of plastic cling-wrap over the dish to prevent evaporation of the H2O2 when left to sit for an extended time.
When the process has reached a satisfactory result, you can carefully remove the elements (using gloves!) and thoroughly wash them under running water for at least 1-2 minutes to ensure you remove all H2O2 residue. The washed items can then be pat dry with paper towels and left to air-dry for a few hours. Leftover H2O2 can often be reused; however, it loses strength over time and future retrobrighting attempts will have unpredictable results. I therefore discard leftover H2O2. This can be safely achieved by slowly dispensing down the drain with running water. H2O2 naturally decomposes over time to H2O (water) and diluting with water simply expedites the process.
The resulting 12V track switch is shown below. The light grey rails have almost all the yellow discolouration removed; however, the resulting colour is often not exactly the same as the original light grey as first manufactured. In any case, it is vast improvement!
Other Examples
LEGO 12V track consist of various elements, in particular the running rails and the 12V metal centre rails. These elements often yellowed to varying degrees and my approach was simply to treat all of them to hopefully achieve a better colour consistency among the total range.

Vintage LEGO elements exhibit a wide range of yellow discolouration which can be remedied with retrobrighting. The result can often reduce colour variation significantly as shown with these straight rail elements above.

For comparison, A modern Light Bluish Gray straight rail element is shown adjacent to before and after examples of straight rails treated with retrobrighting techniques.

A batch of curved centre metal rails is shown before and after retrobrighting. Expect some small degree of variation to persist after retrobrighting due to different relative age, ABS formulation, and ageing environment associated with each element.
PART 2: Cleaning and Restoration
The exclusively plastic components of 12V track, i.e. the plastic running rails and the dark grey 2x8 tie plates, often require no more than washing with soapy water and gentle scrubbing with a soft bristled brush. This will remove inevitable grime and dirt common with 40+ year old LEGO elements.
The metal components, that is the centre running rails, will require varying levels of cleaning and restoration depending on condition. The techniques used to achieve this aim are identical to what I have described in detail in my first “This Old Track” article. In any case, a brief recap of this process is summarized below.
Mild Tarnish / Grime
To clean metal track, the use of lint-free wipes lightly soaked in isopropyl alcohol works very well. The process is as follows:
Lightly soak a lint-free wipe in alcohol and rub along the metal rail surface. You will notice dirt and contaminants will begin to stain the wipe as they dissolve into it.
Follow up by wiping the rail with a dry lint-free wipe to remove any dissolved residue.
Repeat the above steps as required until the rail is clean and dirt no longer stains the wipe.
Moderate Tarnish / Mild Corrosion
Metal rails that exhibit more severe tarnishing and contamination may require polishing with a mild liquid abrasive prior to cleaning.
The abrasives I recommend for this purpose both work the same way. Microscopic particles suspended in a gel/paste polish and remove the top layer of oxidized metal from the rail. The paste/gel acts both as a lubricant to help move the abrasives and as a carrier to absorb and remove the oxidized metal particles away from the rail surface. You can use a dedicated metal polisher such as Brasso or equally well, you can use toothpaste. The method is as follows:
Apply a small blob of polish/toothpaste to the end of a cotton bud.
Rub the cotton bud repeatedly along the metal surface.
As the cotton bud tip begins to stain with removed contaminants, flip to the opposite clean cotton bud tip and dry-rub the rail to pick up polish residue.
Repeat this process as required to achieve a clean rail surface with the tarnish removed.
Dry rub the rail surface with lint-free wipes to remove any remaining polish residue.
Finally, clean the rails with isopropyl alcohol and wipes. This will remove any remaining residues and contamination and leave a clean shiny finish.

Metal polishers applied and scrubbed with cotton buds and lint free wipes will remove surface tarnish and staining.
And Finally, A Challenge!
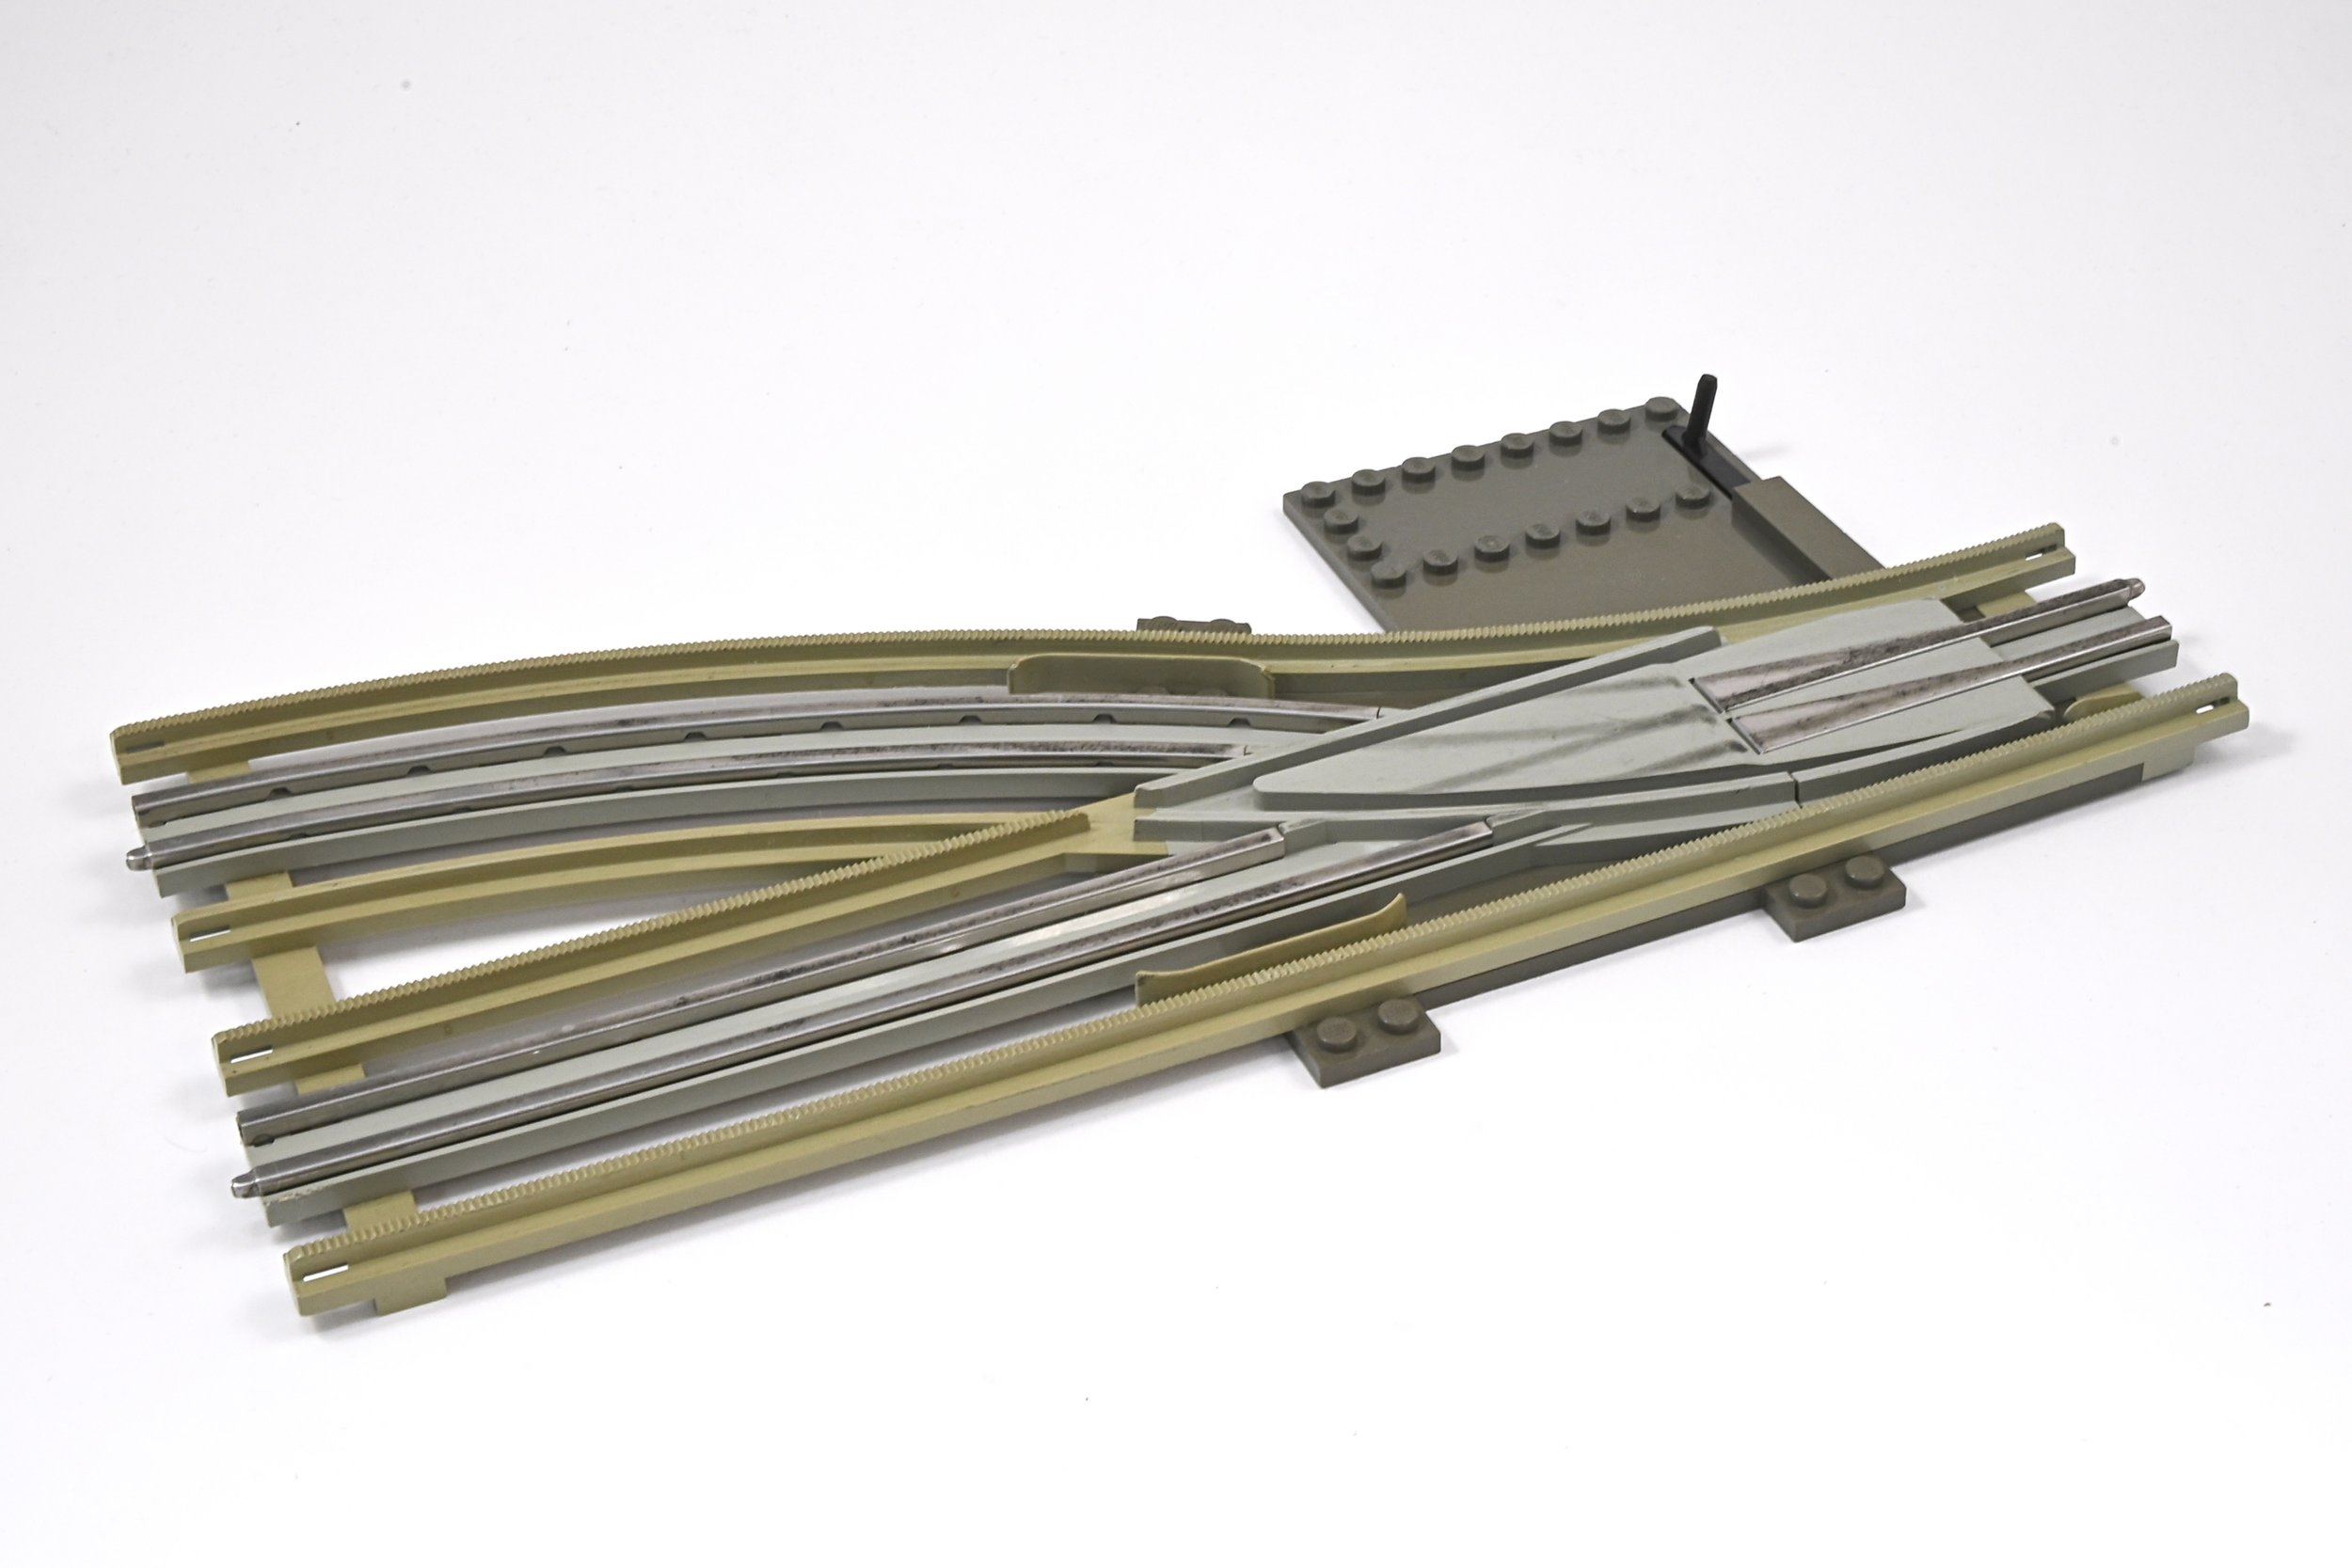
In “This Old Track” part 1, I showed the restoration of an extreme example of 9V track in horrific condition. Unsurprisingly, I can repeat this task with an extreme example of 12V track I had received! Shown below is a left-hand 12V track switch which I thought was beyond saving. In particular, the metal rails were heavily corroded uniformly along all surfaces. However, none of the plastic was broken or cracked, and the switch mechanism was still functional. Therefore, I felt it was a classic “Challenge Accepted” scenario!

Step 1 : Soapy Wash and Scrub
The first task is simply a thorough cleaning with soapy water. I usually fill a sink with soapy water and submerge the item(s) being washed. Then, each item is extracted to be scrubbed with a soft bristled brush and then re-submerged in water. I will often repeat this process 2-3 times. Finally, drain the sink, rinse the item under running water and let sit to dry.

A simple wash with soap and water will remove the bulk of dirt and grime and better prepare the track element for future steps.
Step 2 : Retrobrighting
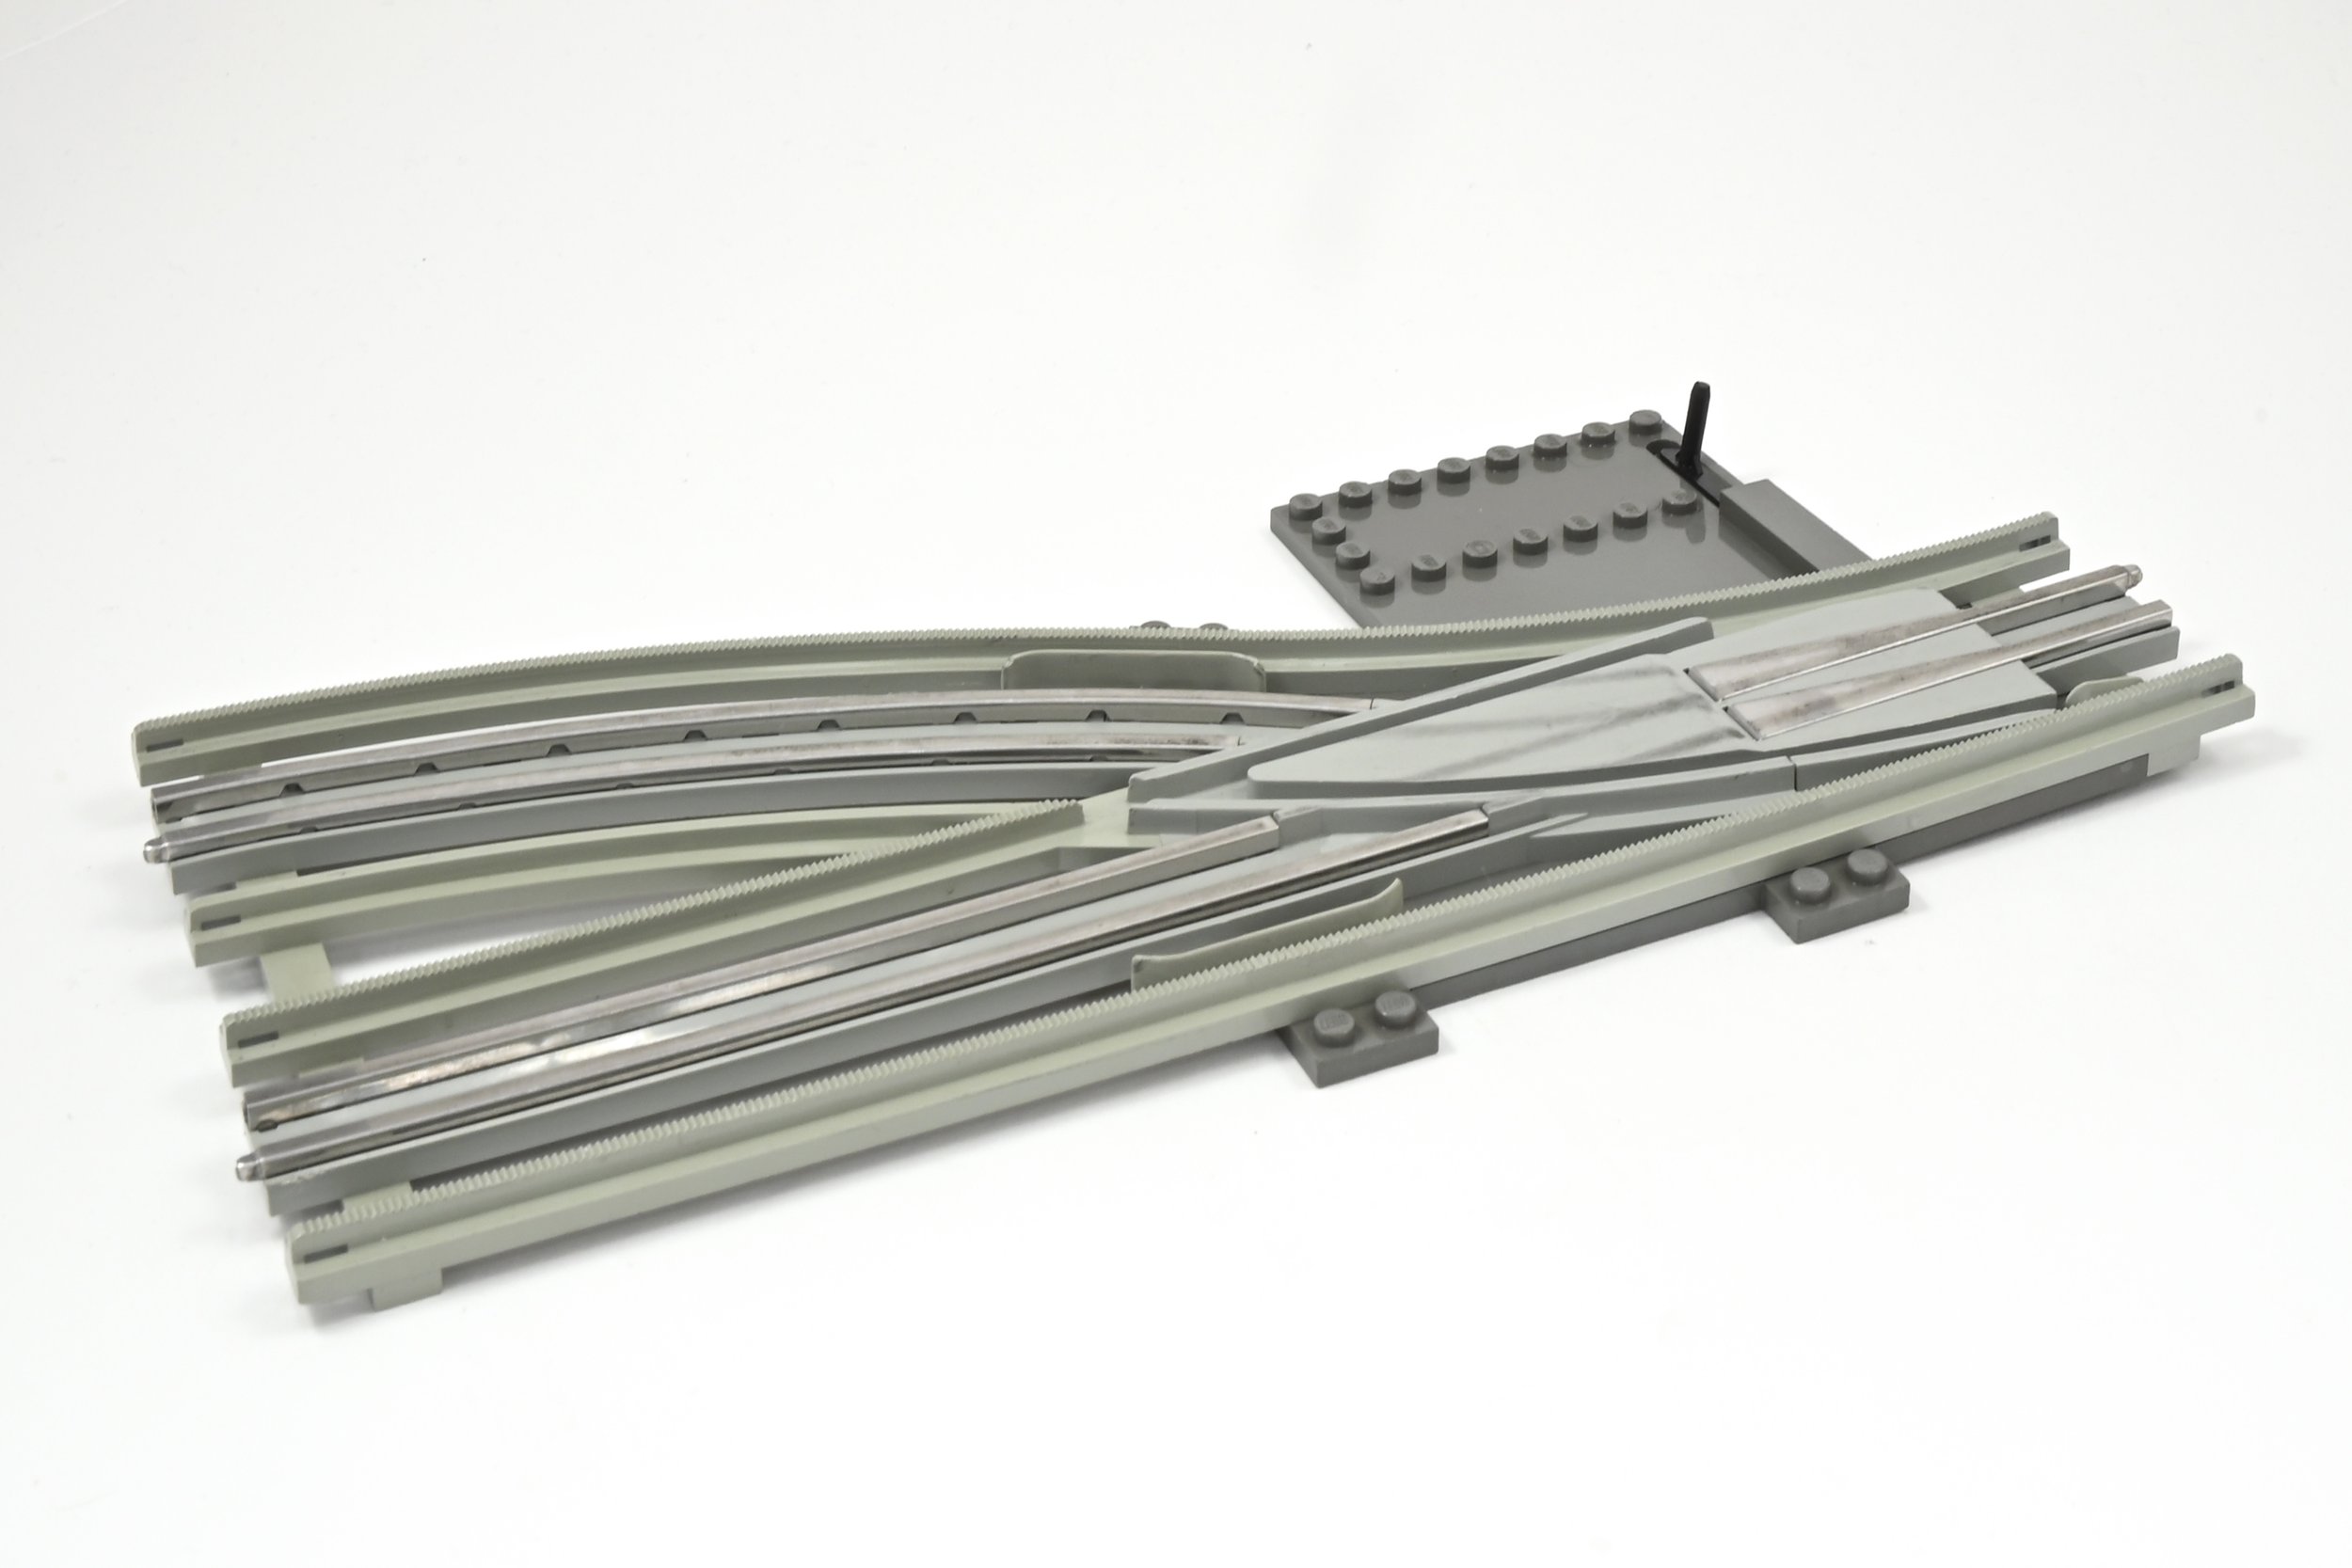
This switch was not excessively yellowed compared to other 12V track elements I have; however, retrobrighting was definitely required to remedy the slight yellowing that is clearly visible.

The Retrobrighting process has improved the appearance of the light grey rails. However, the metal rails have been affected by the chemical exposure of the hydrogen peroxide.
The retrobrighting process definitely made an improvement to the ABS plastic. However, I was concerned about the emphasized metal corrosion and corresponding stains bleeding into the adjacent plastic.
Step 3 : Metal Sanding and Polishing
The extent of corrosion exhibited by the metal rails was severe enough to require a wet-sanding to remove the bulk of corrosion, especially in more deeply penetrated locations. This process is the same as described in “This Old Track” part 1.
Starting with a coarse grit (800) sand paper, gently scrub the metal rail surface under constant running water. Repeat this process with a finer grit (1000, 1200) and finish with a final polishing with 1500 grit. It is important to sand under running water so that the water acts both as a lubricant for the sandpaper and continuously removes particles of oxidized metal as it is removed by the sandpaper. More importantly, wet sanding prevents the tiny particles which are generated by sanding from being aerosolized into the air and becoming a breathing hazard.
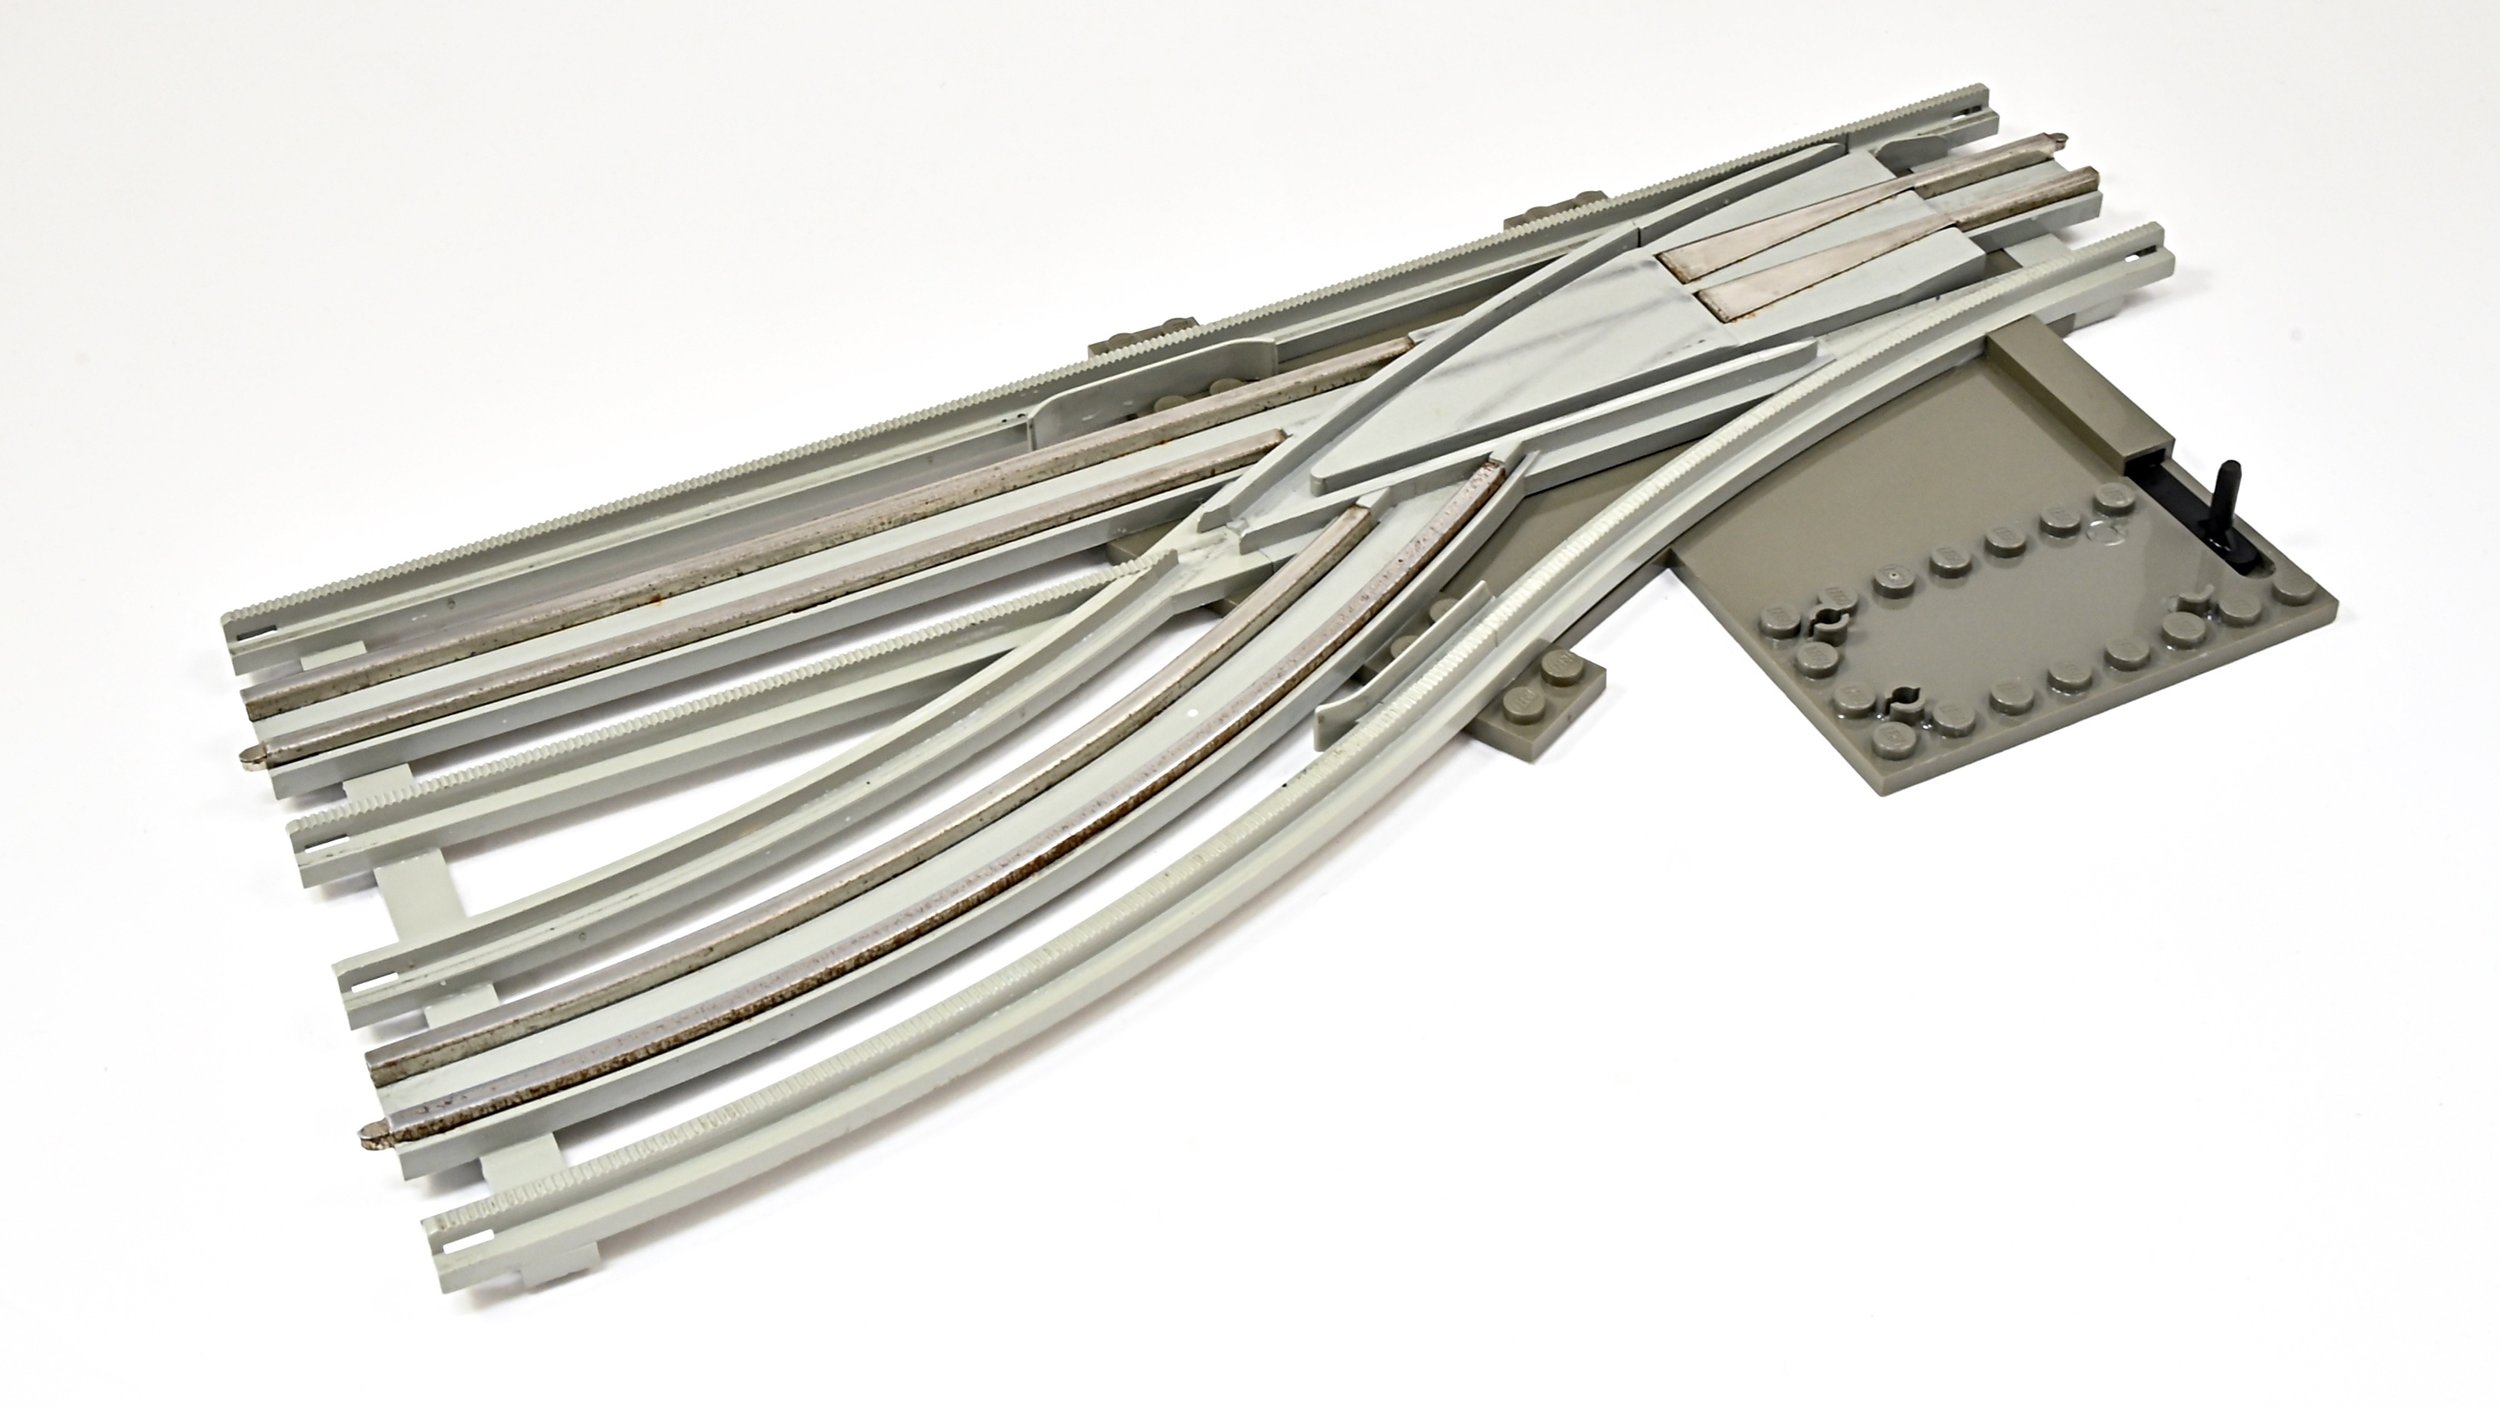
Careful wet-sanding the metal rails has removed most of the corrosion and staining.
Step 4 : Final Polish and Cleaning
Wet sanding removed the bulk of exposed metal corrosion; however, tarnish and staining are still visible on most of the metal surfaces. I systematically performed the lengthly process of using metal polish and scrubbing along each exposed metal rail surface (the top, and both sides). The extent of tarnish/corrosion was such that I had to frequently discard and use a new cotton bud since it would quickly become saturated with black tarnish residues.

Black stains common with 12V switches caused by repeated passes of motor bogie power pickup contacts
A common attribute of wear-and-tear on 12V track switches is the black staining of the plastic surface between the closure rails. This is caused by the phosphor bronze power pickup contacts on the bottom of the 12V motor bogie. These power pickups gradually accumulate dirt and grime during operation and deposit this grime each time it runs through the switch. This grime is not easily removed with soap and water and sometimes even Isopropyl alcohol is not capable of fully removing these stains. However, I have discovered that the same metal polish used on the metal rails is capable of removing these stains from the plastic. The technique is very similar to polishing metal rails. Using a cotton bud dipped in metal polish, gently scrub the plastic surface until the staining disappears. It is important to use a gentle scrubbing motion, since the plastic is much softer than metal and is more easily damaged. Clean the area with isopropyl alcohol and lint free wipes to remove the remaining metal polish residue.

Even after all of the previous processes and chemical immersion, some persistent stains still remain!
Surprisingly, even after scrubbing with soapy water, immersion in H2O2 and multiple rinses in running water; grime and staining can still be visible. In particular, the inside edges of the running rails where the wheel flanges pass are often stained with grime. Therefore, the final restoration task is a systematic scrubbing with cotton buds soaked in Isopropyl Alcohol along all of these surfaces. Cotton buds are well suited to this task since the tip of the cotton bud is able to reach inside confined spaces and inside edges.

The final result is shown above. Clearly a dramatic result. It is by no means perfect, there are still sections along the metal rail sides which were difficult to access to remove all of the tarnish and corrosion. In any case, it is a perfectly serviceable 12V track switch which I am comfortable will perform well and appear perfectly normal among a layout of other 12V track.
Conclusions
The LEGO 12V train system is often referred to as a “golden age” of LEGO trains. This corresponds to a time where the LEGO train theme offered such a diverse range of products, it required its own catalog! Jumping into the 12V train theme today is not for the feint of heart. It will require both money, time, and some degree of perseverance. Finding complete sets is difficult, and their prices are dramatically expensive. My approach was to acquire elements individually such as the track, power accessories, motors, wheels, magnetic couplers, etc. Since these parts will be coming from a variety of different sources, expect a wide range of “used” physical condition. Some elements might be in such poor condition, that restoration will be required. If you are sufficiently motivated, these efforts will be rewarded with the joy of rediscovering a lost but much beloved LEGO train world!
Resources
The topic of retrobrighting both LEGO elements and more broadly any ABS consumer product is quite deep but reasonably well documented. I would encourage anyone tempted by the prospect of restoring yellowed LEGO elements to first check out these resources to become better acquainted with the process, its limitations, and safety issues.
Dr. Lex Blog on retrobrighting LEGO elements
Brother’s Brick article on restoring yellowed LEGO bricks
BrickPicker article on restoring yellowing bricks
Videos
How to Restore Yellowed LEGO Bricks (Alex Nunes channel)
How to Restore Discolored LEGO Parts! (Jang Bricks)
Adventures in Retrobrite - New techniques for restoring yellowed plastic! (8-bit Guy channel gives a great summary comparing a few methods. I would recommend checking out other videos on this topic on his channel)
Now that’s a lot of info to chew-chew-chew on! Wait, I used that one last week…Have you ever attempted to restore LEGO Train track? Let us know in the comments below.
Do you want to help BrickNerd continue publishing articles like this one? Become a top patron like Charlie Stephens, Marc & Liz Puleo, Paige Mueller, Rob Klingberg from Brickstuff, John & Joshua Hanlon from Beyond the Brick, Megan Lum, Andy Price, John A., Lukas Kurth from StoneWars, and Wayne Tyler to show your support, get early access, exclusive swag and more.