
Castle Gate of Brik'neerd: How to Make a Castle Gate
/Castles – in some way, shape or form – are probably one of the most common sights in the LEGO fan community. I can still remember being a young kid sitting in my room playing with, in my opinion, one of the best sets ever (Kings Castle 6080). Given how many talented castle-builders there are in the AFOL community, there is a good chance I’m not the only one with fond memories like that! Regardless if someone is talking about LEGO conventions or just browsing through their Flickr or Instagram feed, chances are more than a few great castle builds are going to show up. Castles have been crucial to the development of the LEGO fan community over time, starting with the original Yellow Castle (6075) to the iconic Classic Castle community and beyond.

When seeing some of those amazing builds, I often feel it would be interesting to have a closer look at the process behind it. We often see the end results of MOCs but rarely the behind-the-scenes of the process of how they got to that final stunning photograph. Some castle builders do provide the community with some WIP (work in progress) pics or videos (Mark Erickson comes to mind as an example of a great builder who shared his work in a series of videos of a massive castle and landscape build—worth a visit to his YouTube channel, Mark of Falworth), but most often you only see the final result which can be a bit daunting, to say the least.
So with this article, my very first here on BrickNerd, I figured it might be fun to show some WIP-shots of how I made my most recent castle build. (It’s not just about showing off goats, I promise! #goatflexing—though if you want to see some SERIOUS goatflexing, check out Brickset’s Bonsai Tree review… I know that sounds silly, but trust me!) Hopefully, this build journal can act as a sort of basic guide for a few simple techniques and illustrate how a build can take shape.
When starting a build, it’s often a good idea to do a bit of inventorying to see what pieces you have. If you build digitally, you have all the pieces in the world! But I like to build with the bricks that inspire me. (This also helps to avoid stopping midway through a build and wait for those outstanding BrickLink orders to arrive…With this build, I didn’t really have a clear image in my head of what I wanted to create, I just knew I was in a “castle-mood.
I did, however, know that I had a lot of tan 1x1 bricks with studs on the side (aka SNOT bricks) as well as pearl gold 1x1 round bricks, and I knew I had bought way too many tan ingots that I really wanted to use sometime. (Sidenote: I’ve realized recently that the parts available on the Pick-a-Brick-wall at my local LEGO store—also available online—seem to dictate what I build quite substantially, letting the parts inspire me!) Anyway, I started the build thinking a round tower might be a good way to use those ingots, so that became the concrete starting point of the actual build.
Above is a picture of the basic structure of the towers. It’s basically just a bunch of stacked 1x1 bricks with studs on the side and 1x1 round bricks. Every three layers I added a layer of plates for stability. The 1x2 plates with rounded corners are one of my favorite pieces to be introduced in recent years as it is very versatile and perfect when creating curves and bends. The round 1x1 bricks allow the structure to be bent quite a bit which is ideal for round towers. It’s a very simple technique that’s been around for quite some time but it still holds up nicely as the pieces are common and fairly cheap. The ingots are then added last to give the tower a more polished brickwork look.
After finishing the tower, I came to the conclusion that a stand-alone tower was a little dull and that a gate would be more aesthetically appealing. The gate/wall is also a very simple structure where ingots are just placed on stacked headlight bricks. It’s a pretty piece-consuming technique but works well with the look of the towers, adds visual horizontal lines, and enhances the texture.
The golden swirls above the gate are held in place with 1x1 plates with flat clips which are in turn are just attached to the underside of the arch. It’s not the most stable solution but the plates clutch fairly well and it’s an easy way to make arches more interesting.
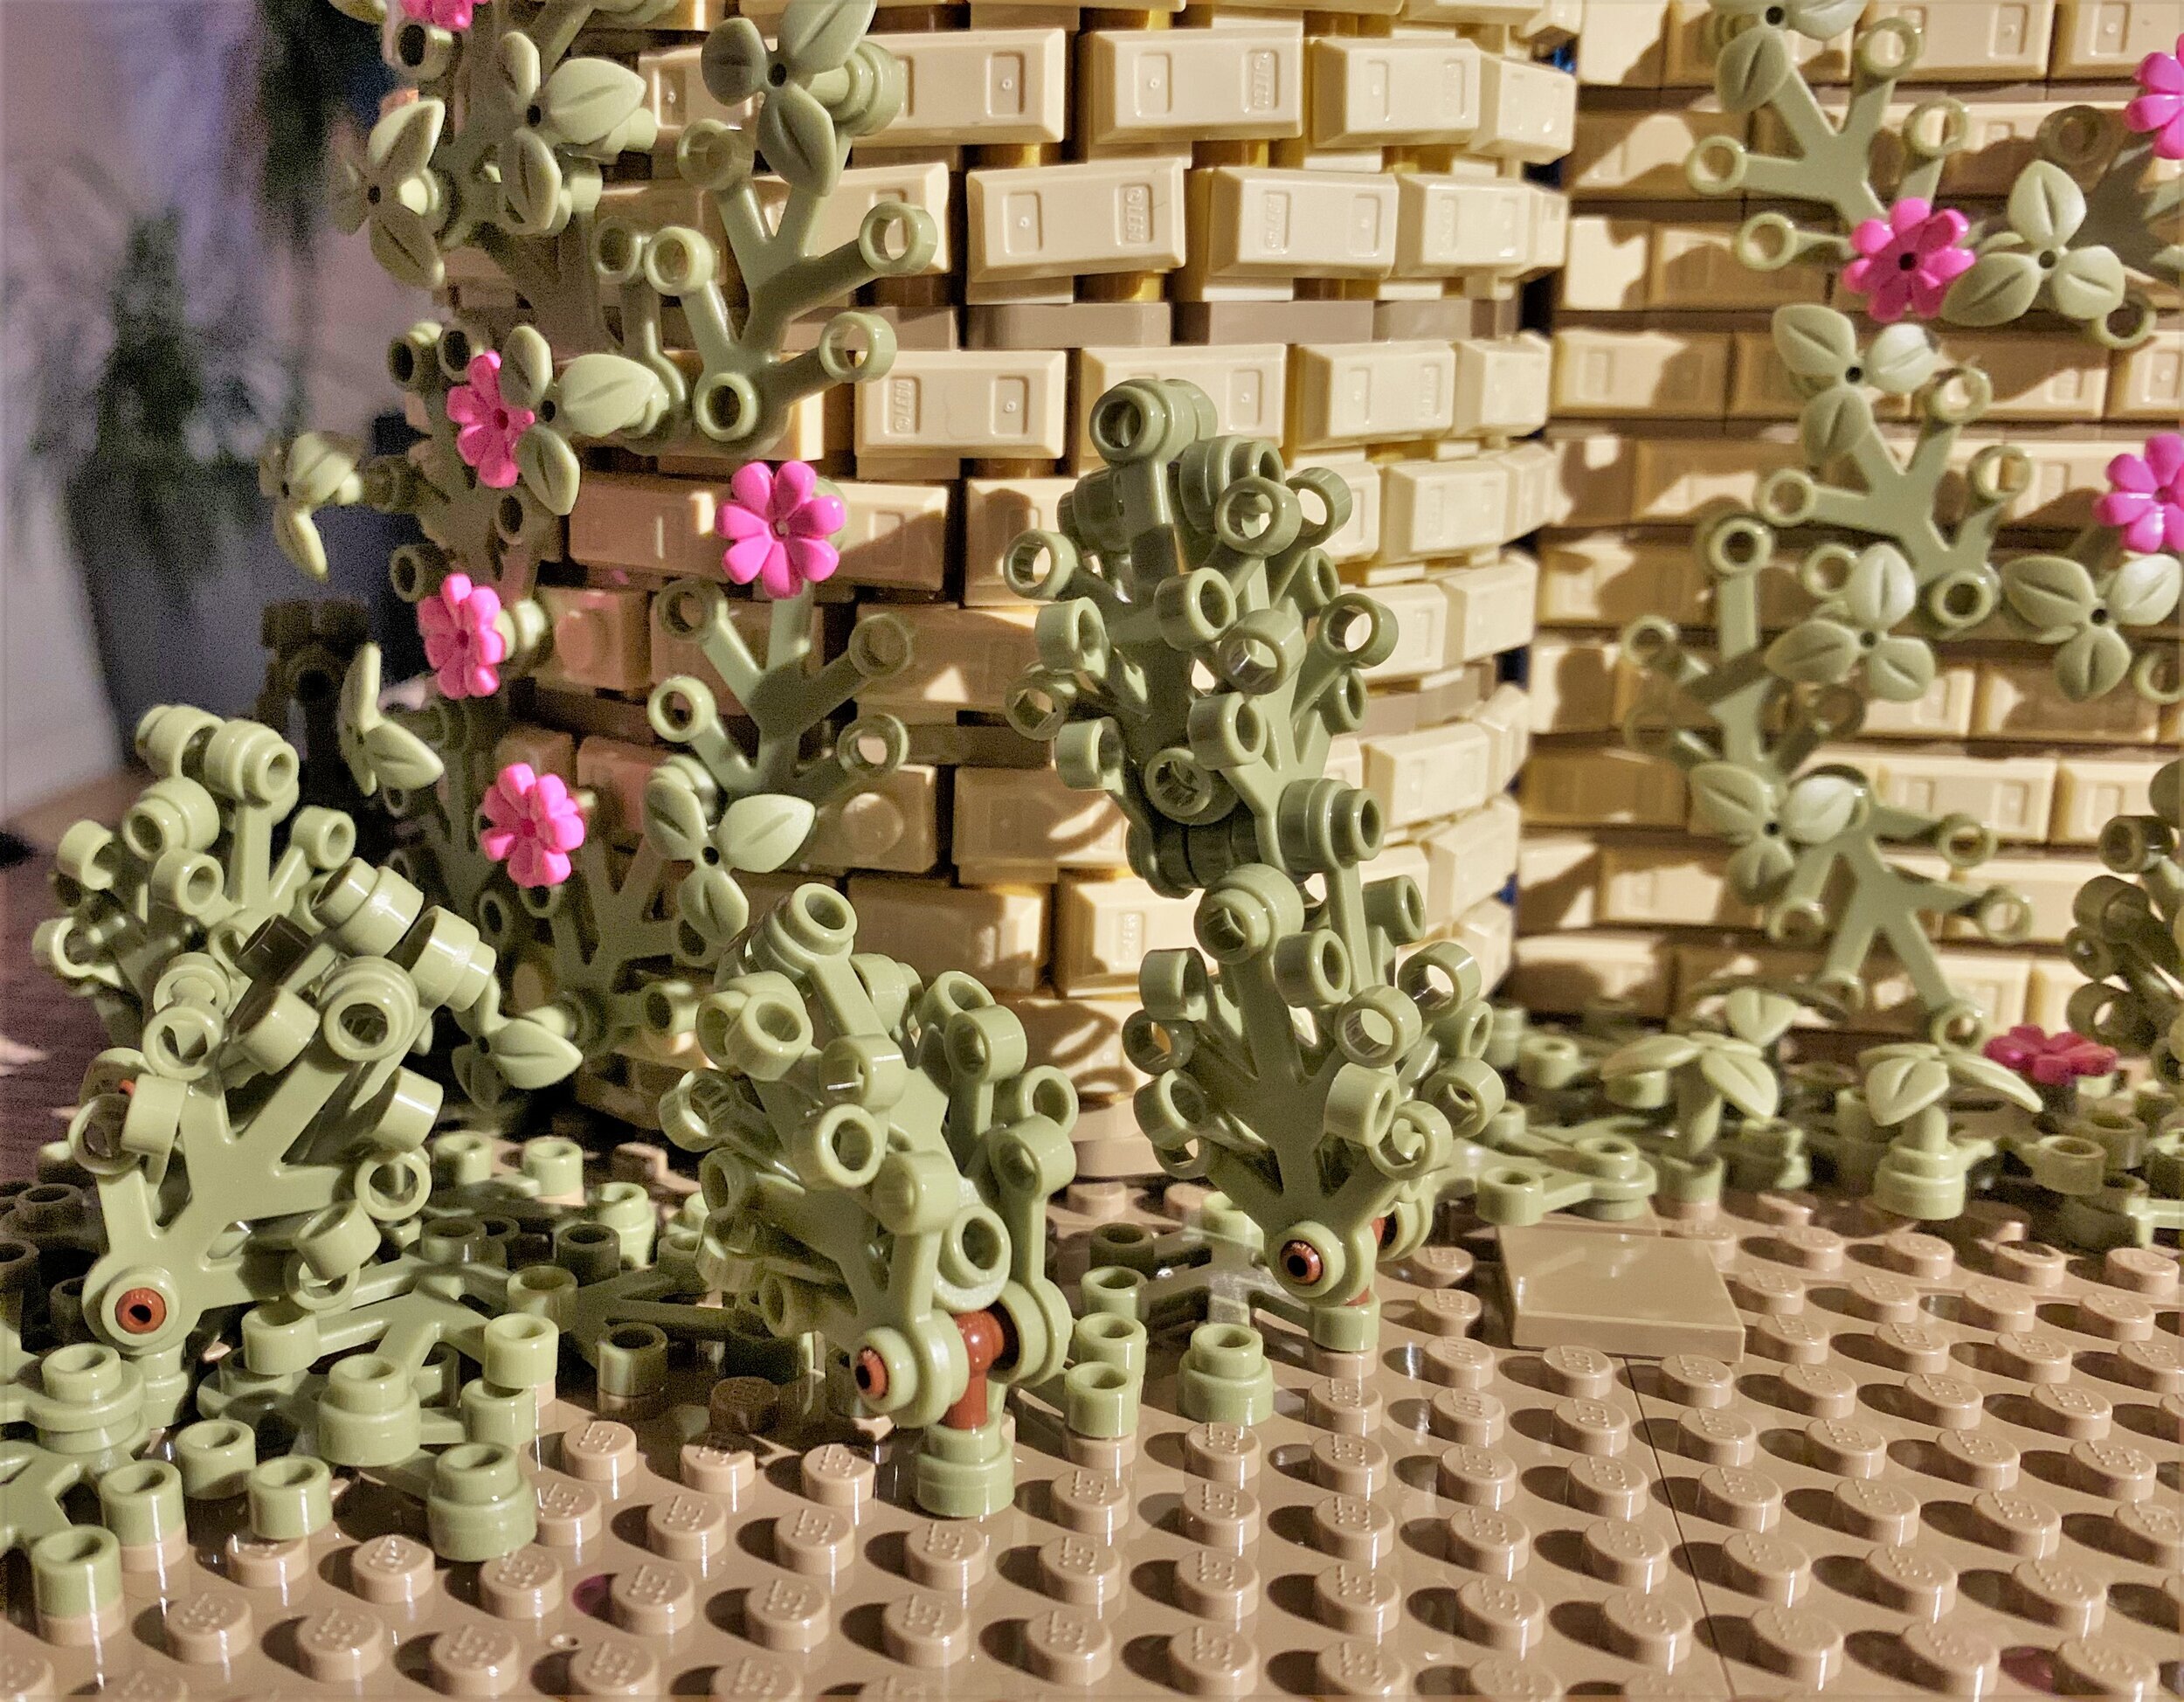
Adding foliage is a great way to make builds seem more alive, and LEGO has given us numerous plant pieces in recent years. Some are still pretty pricey, but as more and more of them show up on the PaB-wall, they have become increasingly affordable. When making growing and sprawling foliage I usually have a look at Full Plate’s work as he is a master in this category and has a lot of great tutorials for different techniques (Full Plate Builds).
By removing some of the smooth ingots, you can replace them with simple tan 1x2 plates to make it easy to attach olive green 4x3 leaves in an “organic” pattern. For variety and texture, I added some more olive green plant stems and then finished it off with pink flowers for a pop of color and to add some nice contrast against the otherwise monochrome feel of the walls.

To make the scene a little more realistic and to cover up a plain studded base, I decided to add a moat in front of the wall and a small stone bridge. The technique for the water is also rather piece-consuming (and not really necessary for this small amount of water), but the level of depth created is really impressive.
It’s comprised of three stacked layers of plates. The bottom layer is comprised of different shades of opaque blue plates, and the middle layer uses a variety of transparent plates. Finally, the top layer is covered with trans-light blue tiles to even things out. The different shades in each layer allow you to achieve many different shades of blue and thus simulate different depths of the water.
What moat is complete without a stone bridge? Here you can see how I recessed this tiny bridge into the base so the water detailing could flow around it. I used the same ingot pieces as before but in a different light grey color to add some subtle consistency throughout the entire build.
The stone path outside of the moat is made using a bunch of different tiles with the occasional plate mixed in for texture and where minifigs or animals (like a rare goat!) can be securely attached. I usually start with one type of tile (in this case light grey round 2x2 tiles) to outline where the path should go and then add the other different types of tiles in a somewhat irregular pattern. The key to making a pathway look more organic is to avoid the grid and to avoid placing pieces where the eye might detect a pattern.


This entire MOC started as a static, simple tower built from what was on the PaB-wall. Even though it started out as a rather monochrome-looking build, by adding organic foliage and layered water along with flowers in different colours, it created a scene that feels more alive, more photogenic, and more natural. The techniques are not that difficult and would be easy to scale down to not be as parts intensive.
I hope this article adds some insight into the different techniques you can use when building a castle. I hope it also illustrates how to follow an idea, let the LEGO pieces inspire you, and how to allow your creation to take shape naturally until it develops into something like the final result shown here (and at the very top of this article with the goats!).
If you would like a closer look (or want to hear my soothing voice), I made a video showing the finished build at Andreas Lenander Youtube. Thanks for having a look, and happy building!
Best of BrickNerd - Article originally published on January 4, 2021.
Leave a comment below to share your thoughts about this article, if you enjoy LEGO castles, and what simple techniques you would use to build a castle gate.
Do you want to help BrickNerd continue publishing articles like this one? Become a top patron like Marc & Liz Puleo, Paige Mueller, Rob Klingberg from Brickstuff, John & Joshua Hanlon from Beyond the Brick, Megan Lum, Andy Price, Lukas Kurth from StoneWars, Wayne Tyler, LeAnna Taylor, Monica Innis, Dan Church, Roxanne Baxter, and Steven Laughlin to show your support, get early access, exclusive swag and more.


