Hitting the White Curved Slopes: How to Create a Luxury Car
/
Although I enjoy building pretty much everything, for some reason I seem to have steered clear (pun intended…) of building cars. Perhaps it’s because the only thing I’m interested in when it comes to my own actual car is that it doesn’t break down (too much).
I do however enjoy looking at the amazing vehicles that the AFOL community keeps coming up with. There are plenty of talented builders out there that deliver stunning cars on a regular basis. One such builder is Martin Redfern. He has – in my opinion at least – a very unique style, making bulky old-time cars that are just delightful to look at. I’ve looked at his cars plenty of times and finally decided to give it a go myself. Start your engines!
Like I mentioned in my article on how to build a castle wall, I let the LEGO pieces I have on hand serve as my inspiration. I recently acquired quite a few rounded slope pieces in white, so deciding on the colour scheme for the car was a no brainer. I looked at some pictures of 1940s luxury cars to find some more inspiration (like Ray Jacobs and his firetrucks) since cars from that era are some of the most aesthetically pleasing ever created in my opinon.
The bulky fenders were starting point for this build and I must have re-done them about ten times before I was somewhat happy with the look of them. Here you can see how I “sketched” out the general shape and profile of the car. (Don’t mind the trans blue tiles, those are for another project I’m working on, though it makes it look like a snow car on ice!) What is most important is making the scale of your car based on the size of tires you have, since there are fewer options available unless you build them FebROVERy-style.
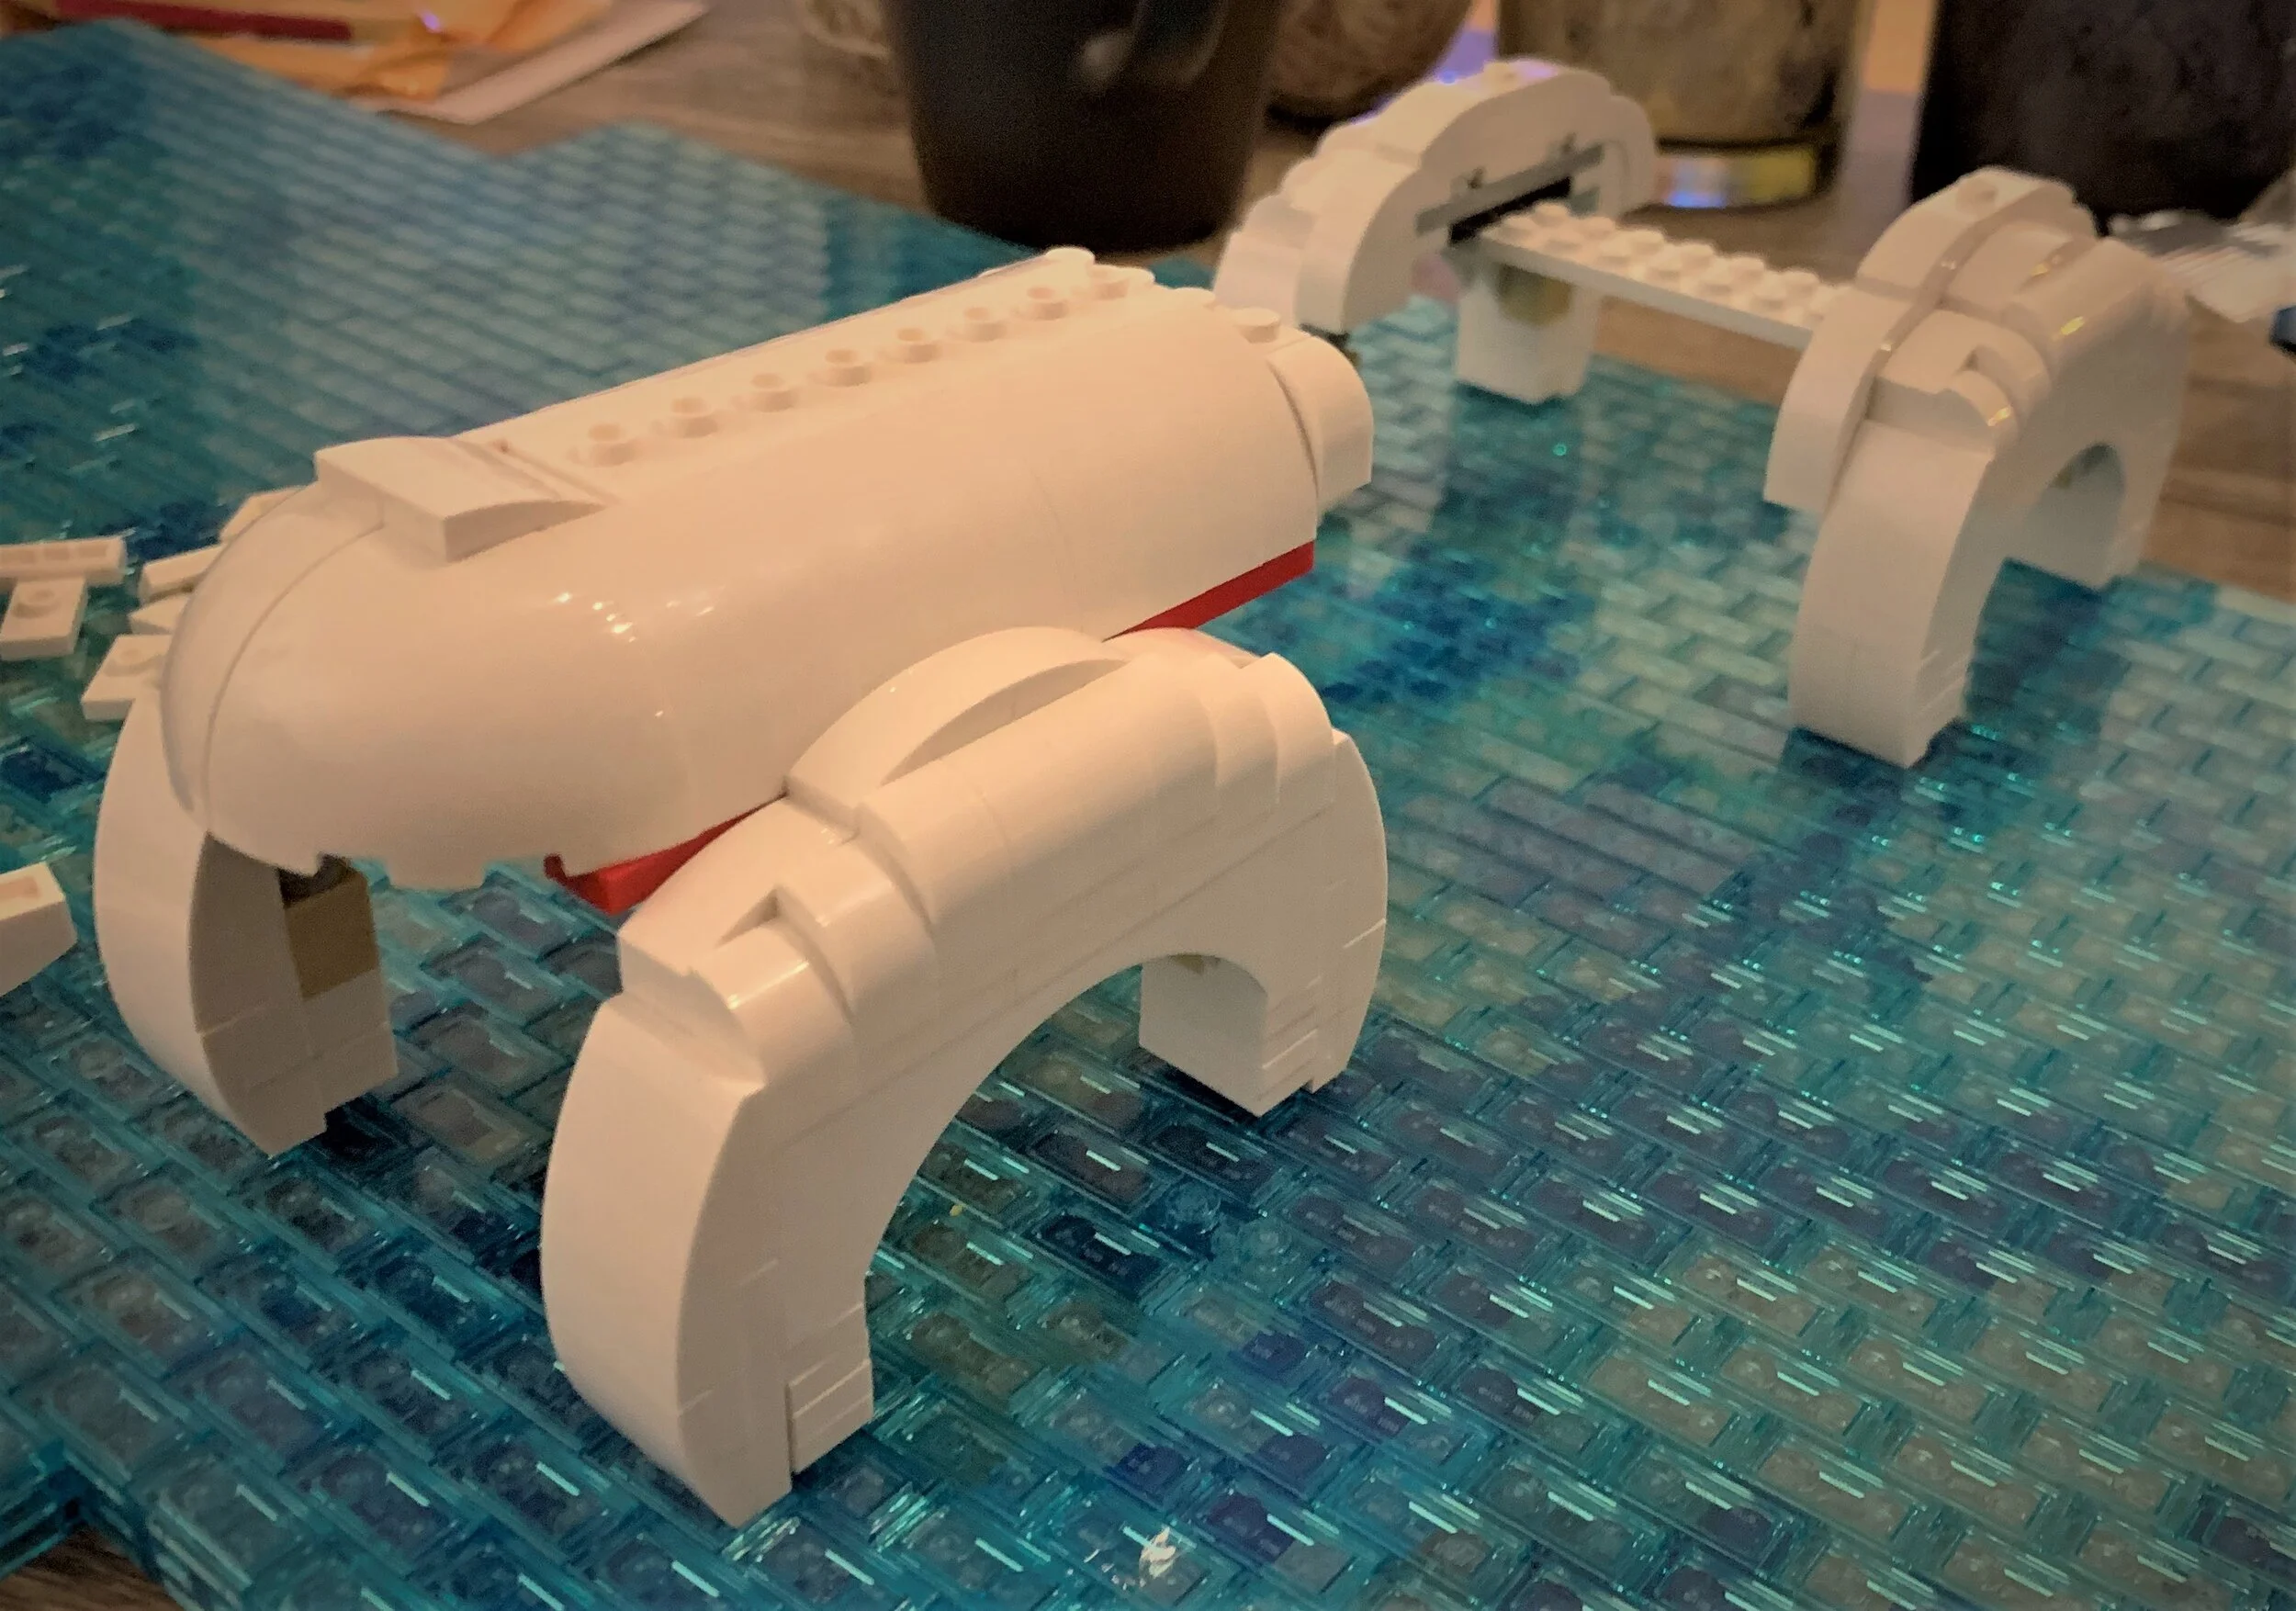
With the general shaping in mind, next I had to determine how long and wide the car would be. At this point, I was basically sitting with four bulky fenders held together with a few plates… but that made it incredibly easy to try different looks before finally settling on one I was happy with. While this might be a good ghost car, you can see how I was very easily able to adjust the height of the hood and length to get a good look at it.I was also able to play with colors and determined that red would be the perfect accent color for a few well-placed stripes.

The car’s size went through quite a few iterations before I was happy with the overall shape of it. One piece that I’ve been wanting to use as the front grill of a car for a while now is a grappler hook Batman accessory. I got a few of them from the good people at New Elementary a while back, and stacking them on top of each other creates a pretty cool pattern. (Plus who could resist both a Lord of the Rings AND Harry Potter-inspired hood ornament!?)

After the overall shape was done, I just added bricks and plates to cover the open sections of the car and (for once…) make the build more stable. Unlike official LEGO sets, when you are building for a picture or to take to a fan convention, you don’t always have to make the insides perfect—or even remotely resembling the innards of a car! (More on that later.)

Here you can see the exterior of the car completed with the tires on some wonderfully unconventional rims. From here I had to determine what the interior of the car would look like—at least what you could see from the outside. I ultimately decided on a tan leather look for a bench seat.

To give the car a final touch of luxury, in keeping with the look of those 1940s rides I love so much, I went on the hunt on BrickLink to find some chrome pieces. The supply of chromed LEGO pieces (that aren’t custom like some of our Patreon perks) is somewhat limited, but I was able to find a few that seemed to fit. The price of the two headlight pieces account for about half of the total cost of the car so far (thanks to Akiyuki for making them so rare because of his amazing GBC designs!)

Although my own personal knowledge of cars is limited at best, even I knew it needed an engine. After I was “done” with the body of the car, I reverse-engineered the available space I had and added a few more details on the inside to simulate an engine. It’s pretty basic and is completely unnecessary as it can’t be seen, but I still felt that it was an important feature to add. Who doesn’t like the surprise of seeing added detail hidden away and only known to the builder? Here you can see the seats, interior detailing and engine with the body of the car removed.

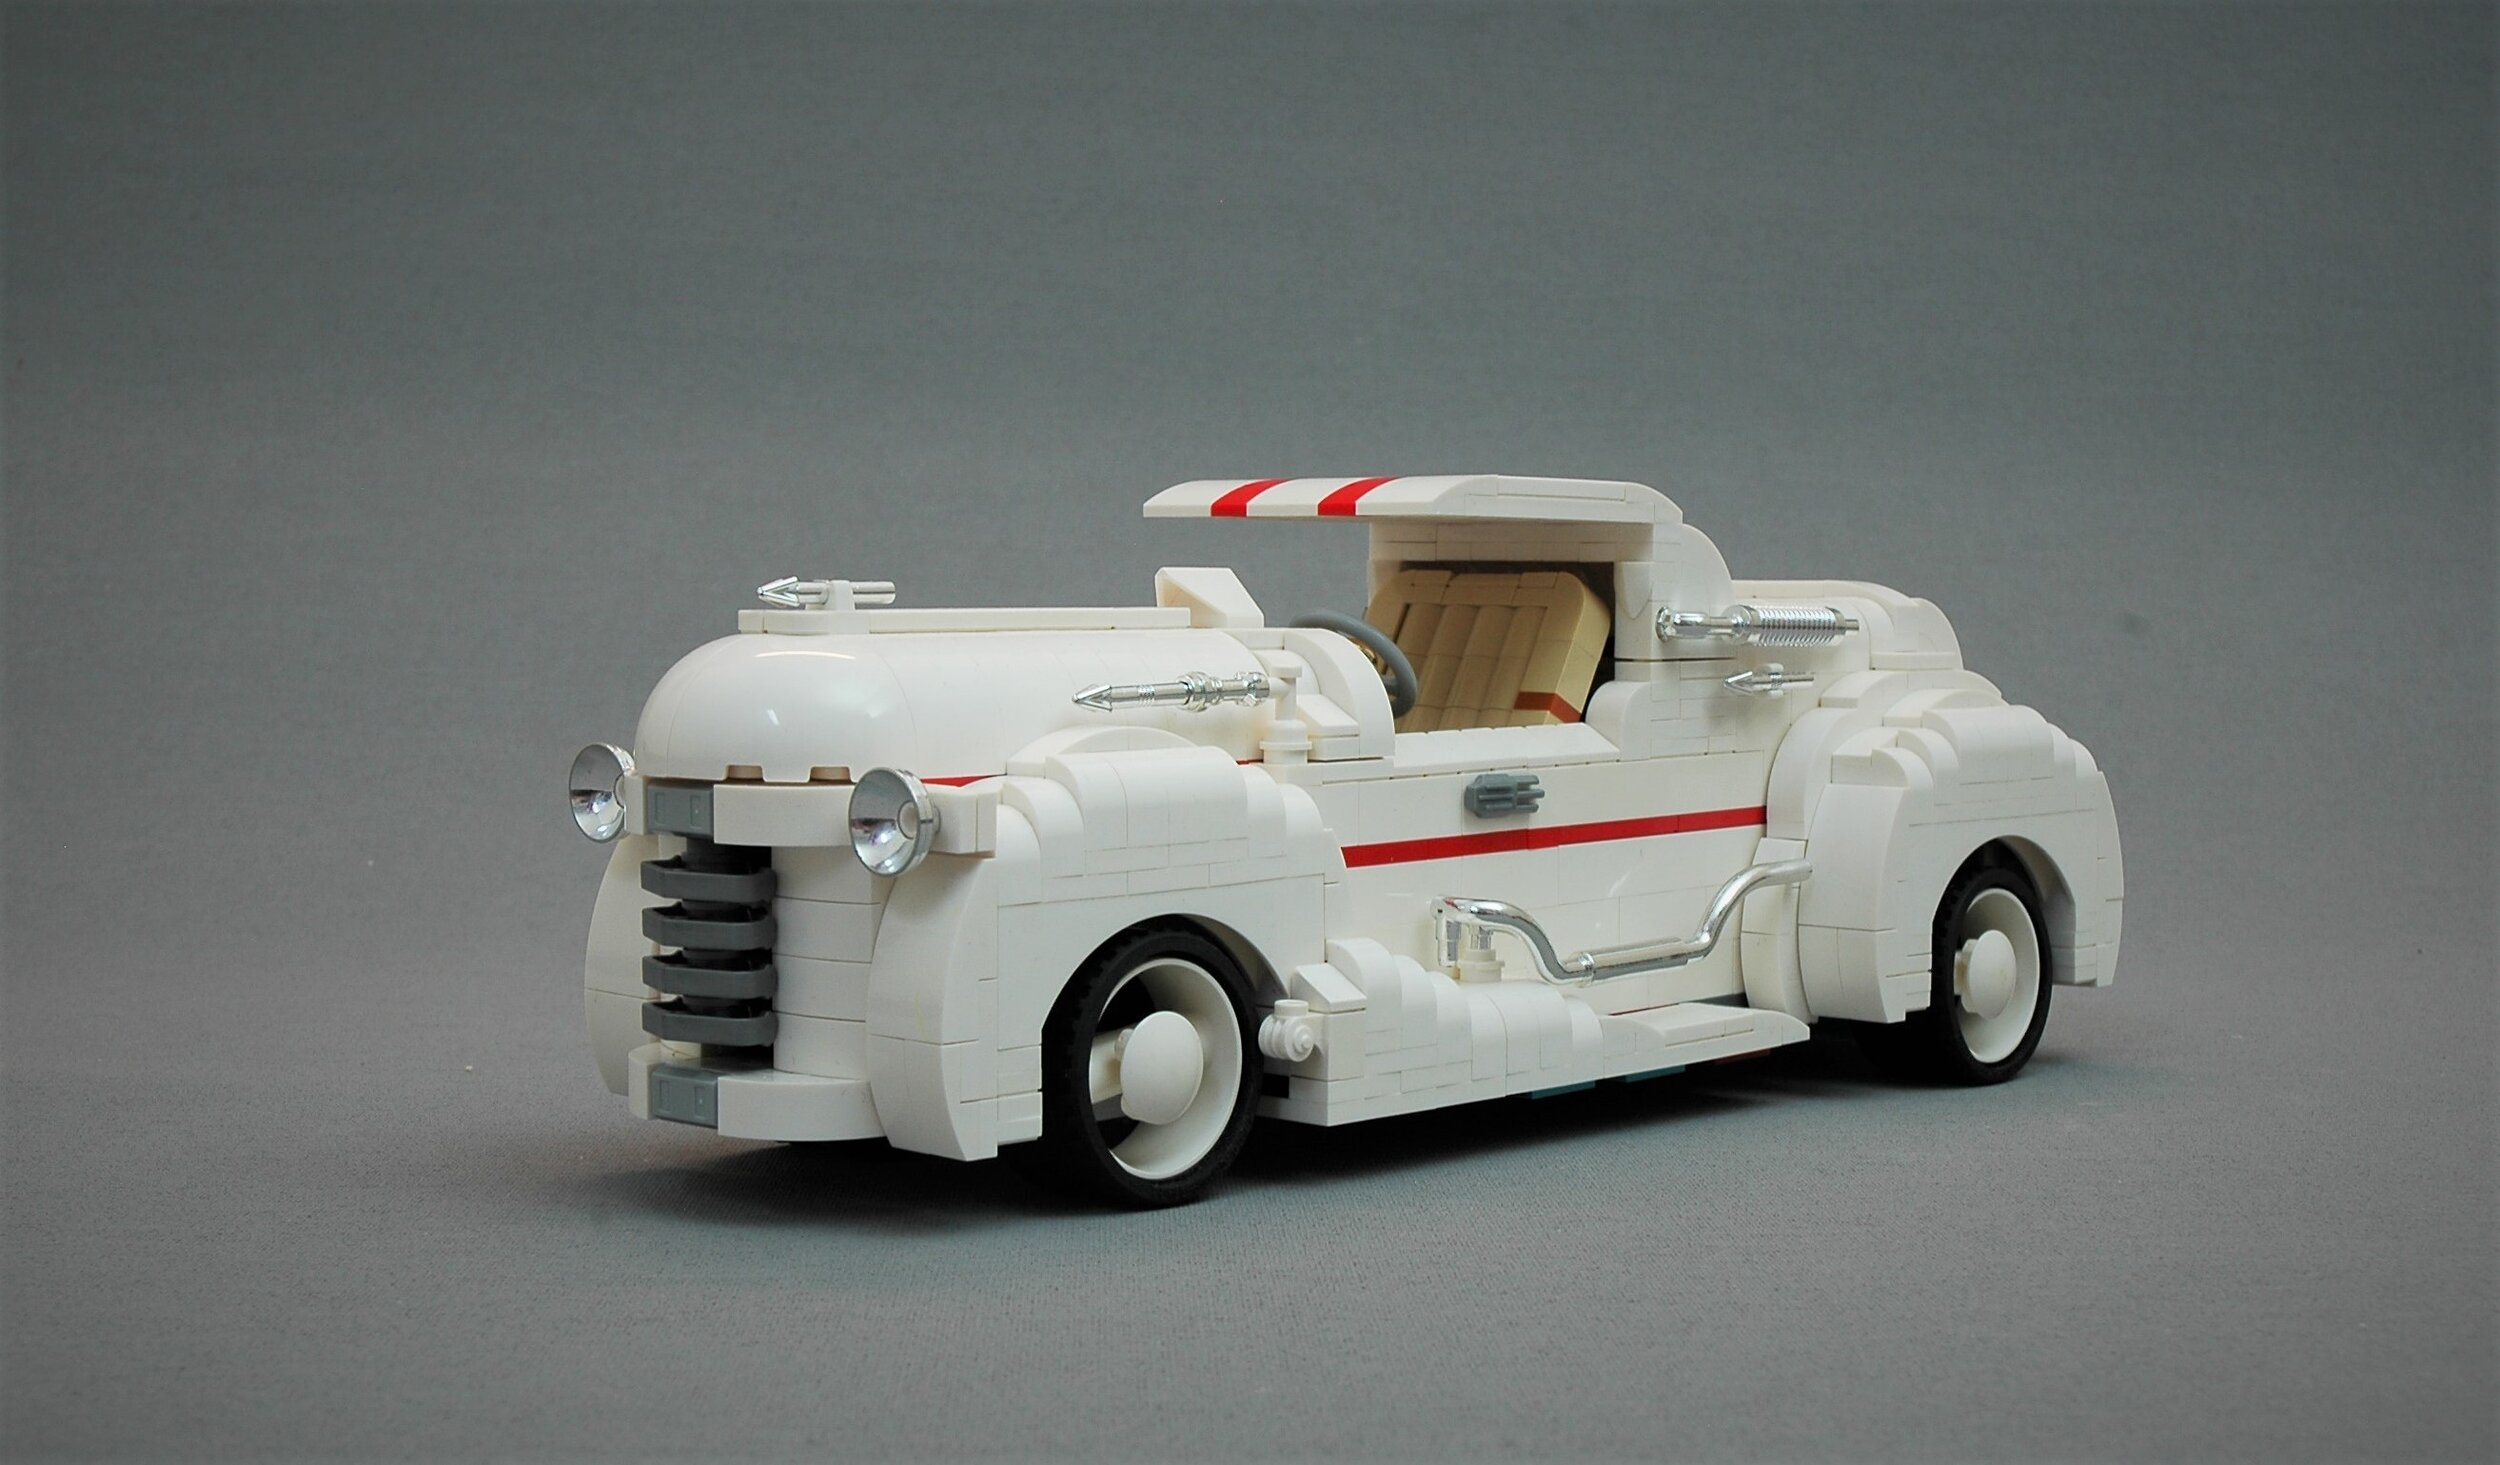
So this is what I finally ended up with. A 1940’s inspired luxury car with a non-functioning engine and ridiculously expensive headlights! I hope this article has given some insight into how a car can take you on a journey, from shaping and styling iterations to inexplicably building the outside first, then the inside.

If you want a closer look at my “1948 Silver Wraith concept car,” please check out this video where I take you on a tour of some of its features. Thanks for having a look, and happy driving!
Have you ever built a car like this? What is more important, the insides of a LEGO model or the outsides? Leave your thoughts in the comments below.