How To Modularize Your LEGO Train Layout with MILS
/
What is MILS?
Modular Integrated Landscaping System, or MILS for short, is a system that describes how to build modular landscapes. The modularity of MILS is its key innovation. By standardizing both how modules interconnect and the visual features of module boundaries; builders can combine their modules into collaborative layouts while maintaining consistency of style and appearance.
The origin of MILS can be traced back to HispaBrick Magazine issue 013. Antonio Bellon’s series of five articles (issues 013 to 017) are a must-read if you want an in-depth overview of the MILS standard and its background.
The key principles of MILS are as follows:
Collaboration - This is a core principle of MILS. The MILS system was created to allow builders to combine modules to make large collaborative layouts and dioramas.
Flexibility - The formality of the MILS standard is mostly confined to the boundaries between modules among collaborators. Intra-module boundaries within your group of modules are not bound to the MILS rules.
Universal - The MILS system can be used across many different layout themes such as castle, space, military, city, and can depict landscapes of vegetation, sand, snow, etc.
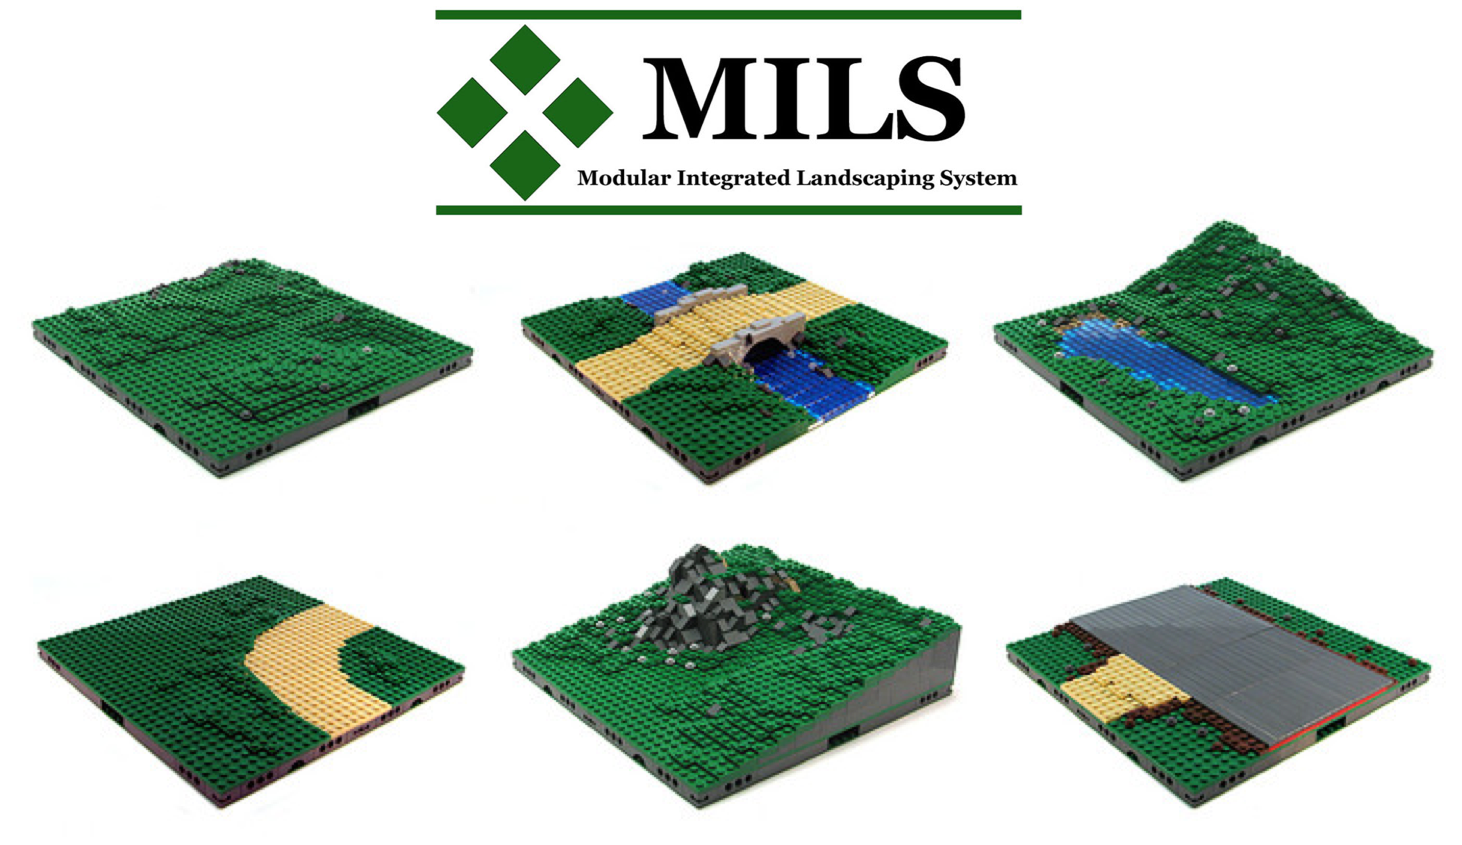
Anatomy of a MILS Module
The fundamental size of a MILS module is 32 x 32 studs. However, it is acceptable to build intermediate modules of 16 x 32, 8 x 16, etc. as long as these modules are capable of mating to adjacent 32 x 32 modules.

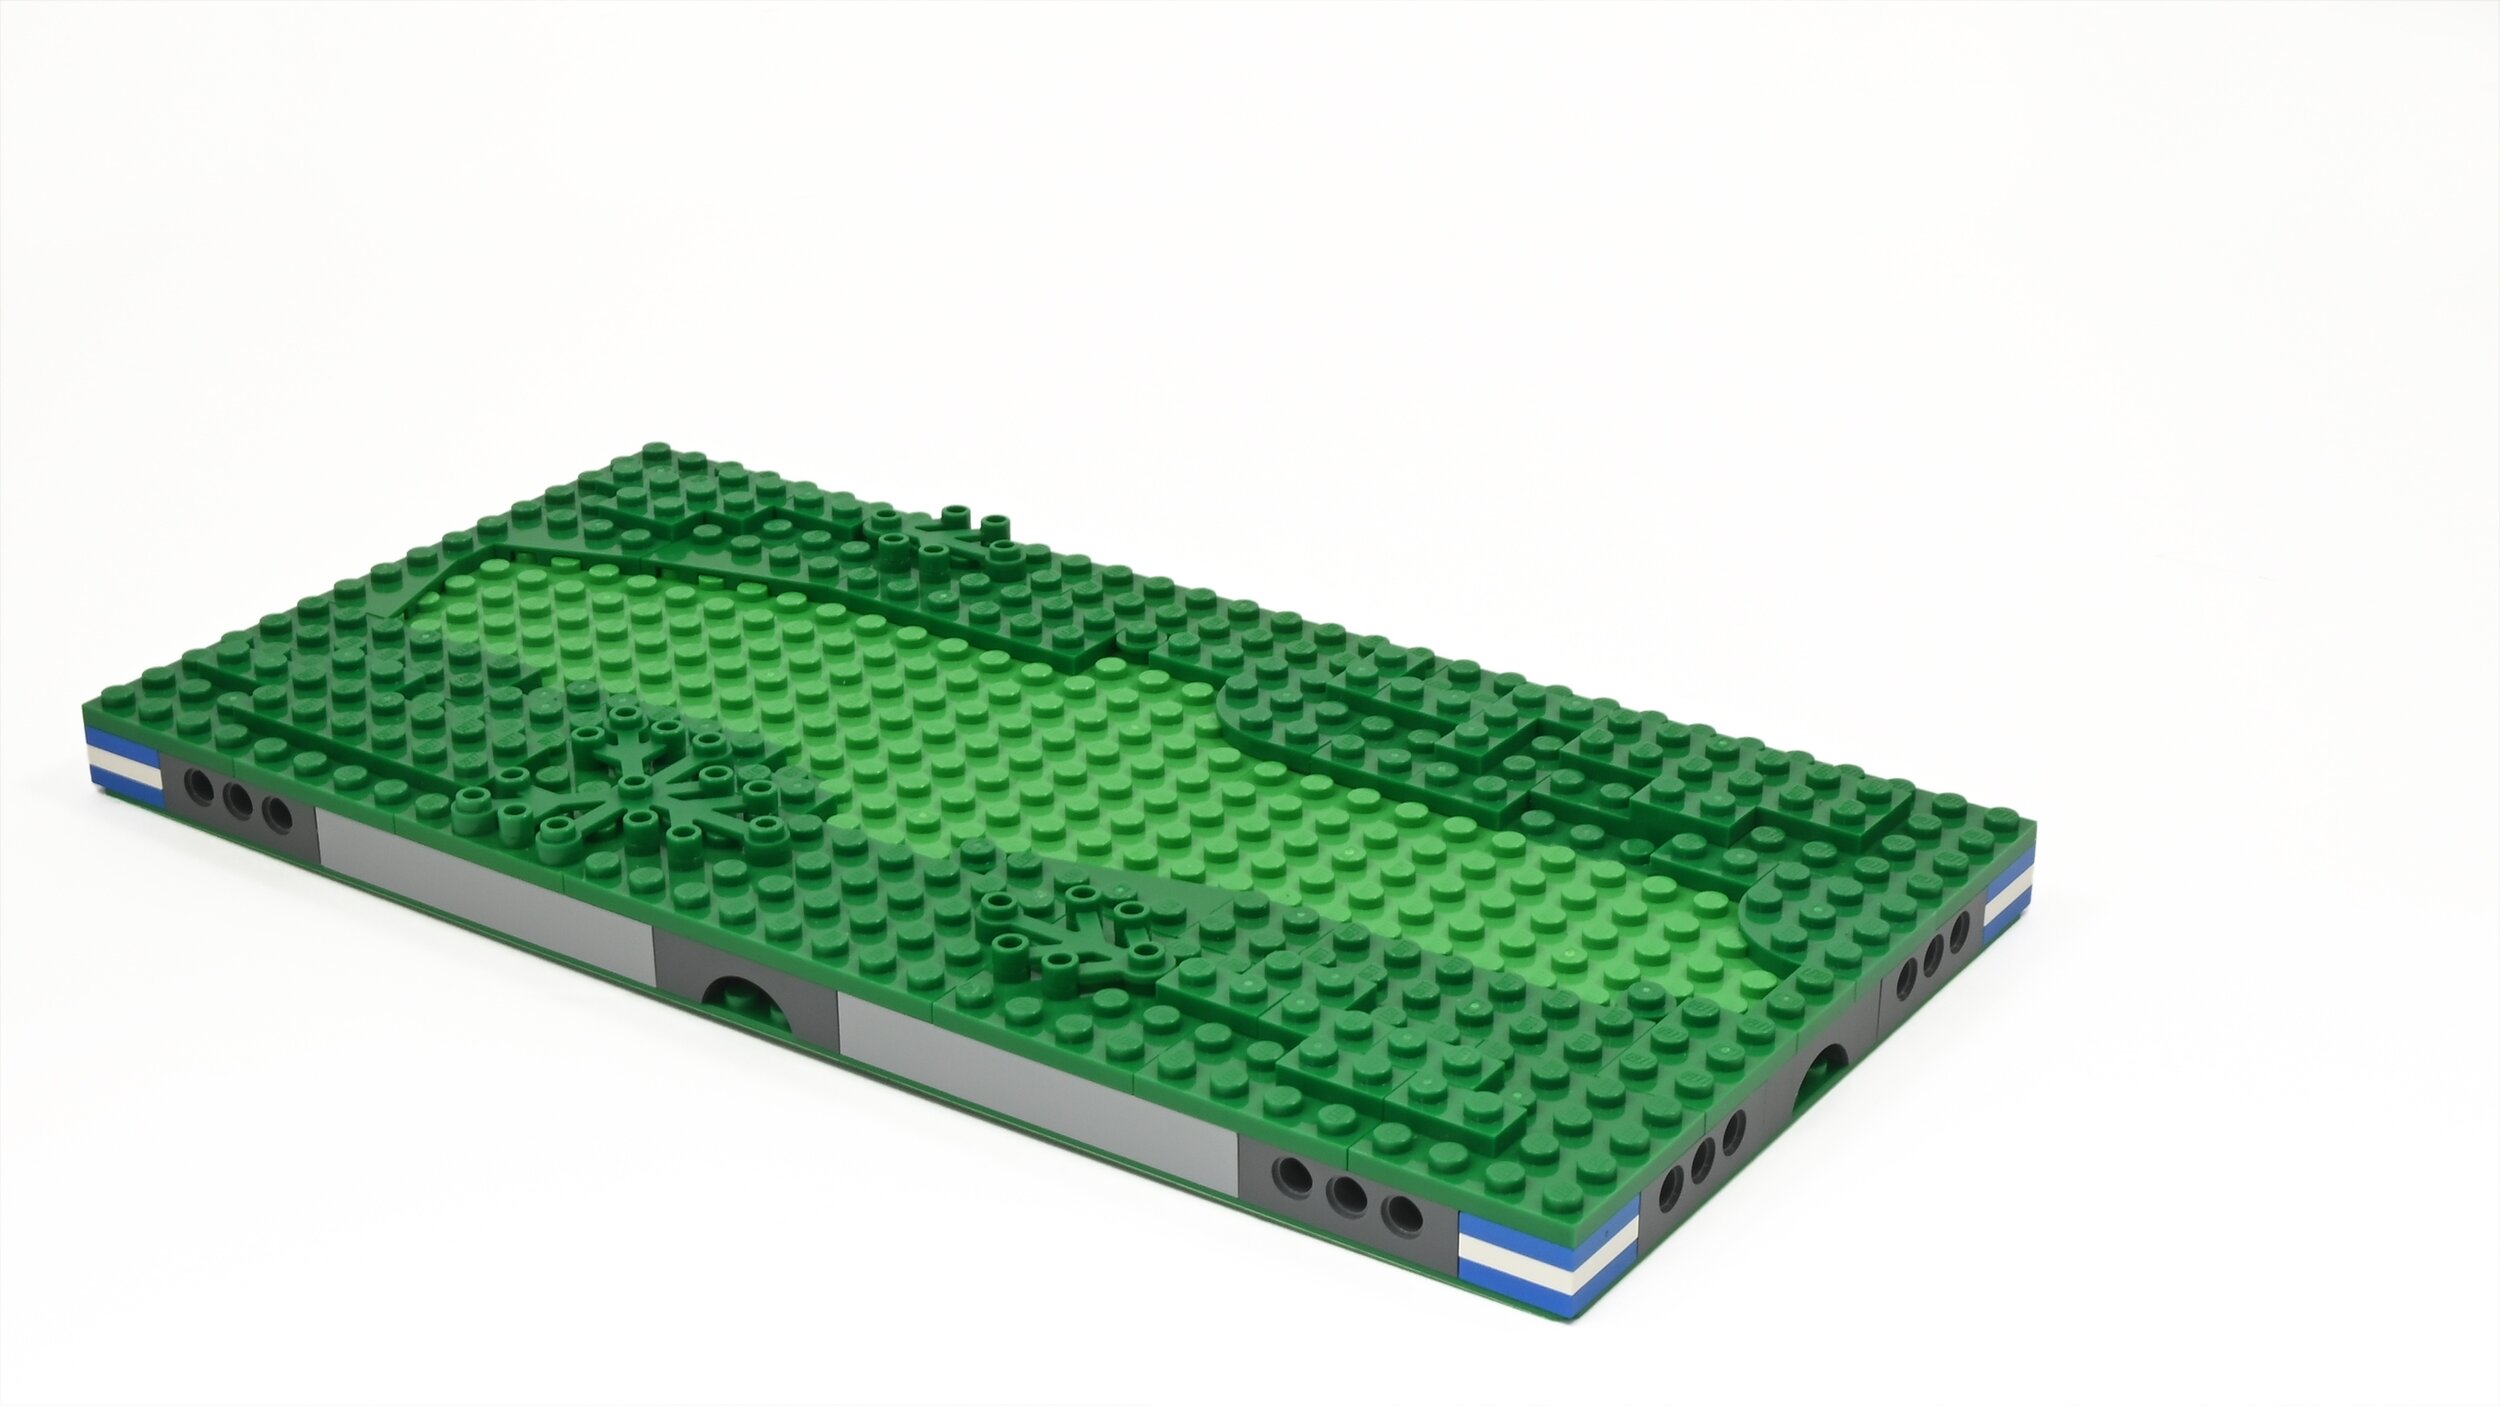
The diagram above shows the specified edge profile of a MILS Basic Terrain Module (BTM). The key features to observe are:
Height: "Ground" level is 4 plates above the baseplate (4.5 plates above the table)
Connection: 1x4 Technic bricks are used to perform interconnect with adjacent modules using Technic pin elements. The 1x4 brick resists lateral twisting and therefore forms a secure connection. Furthermore, the pin connections prevent both side-to-side and vertical shifting of adjacent modules.
ID Corner: Each 2x2 stud corner can simply be filled with a 2x2 brick or can be optionally decorated. Example decorations include:
- a unique colour code to show ownership of modules belonging to a builder
- a colour code to match to an adjacent module with the same colour code
Centre Pass-through: It is traditional, though not required to use a 1x4 arch brick to pass through wire connections to adjacent modules. This feature is particularly useful for discreetly and securely distributing power to lighting or accessories built into modules.

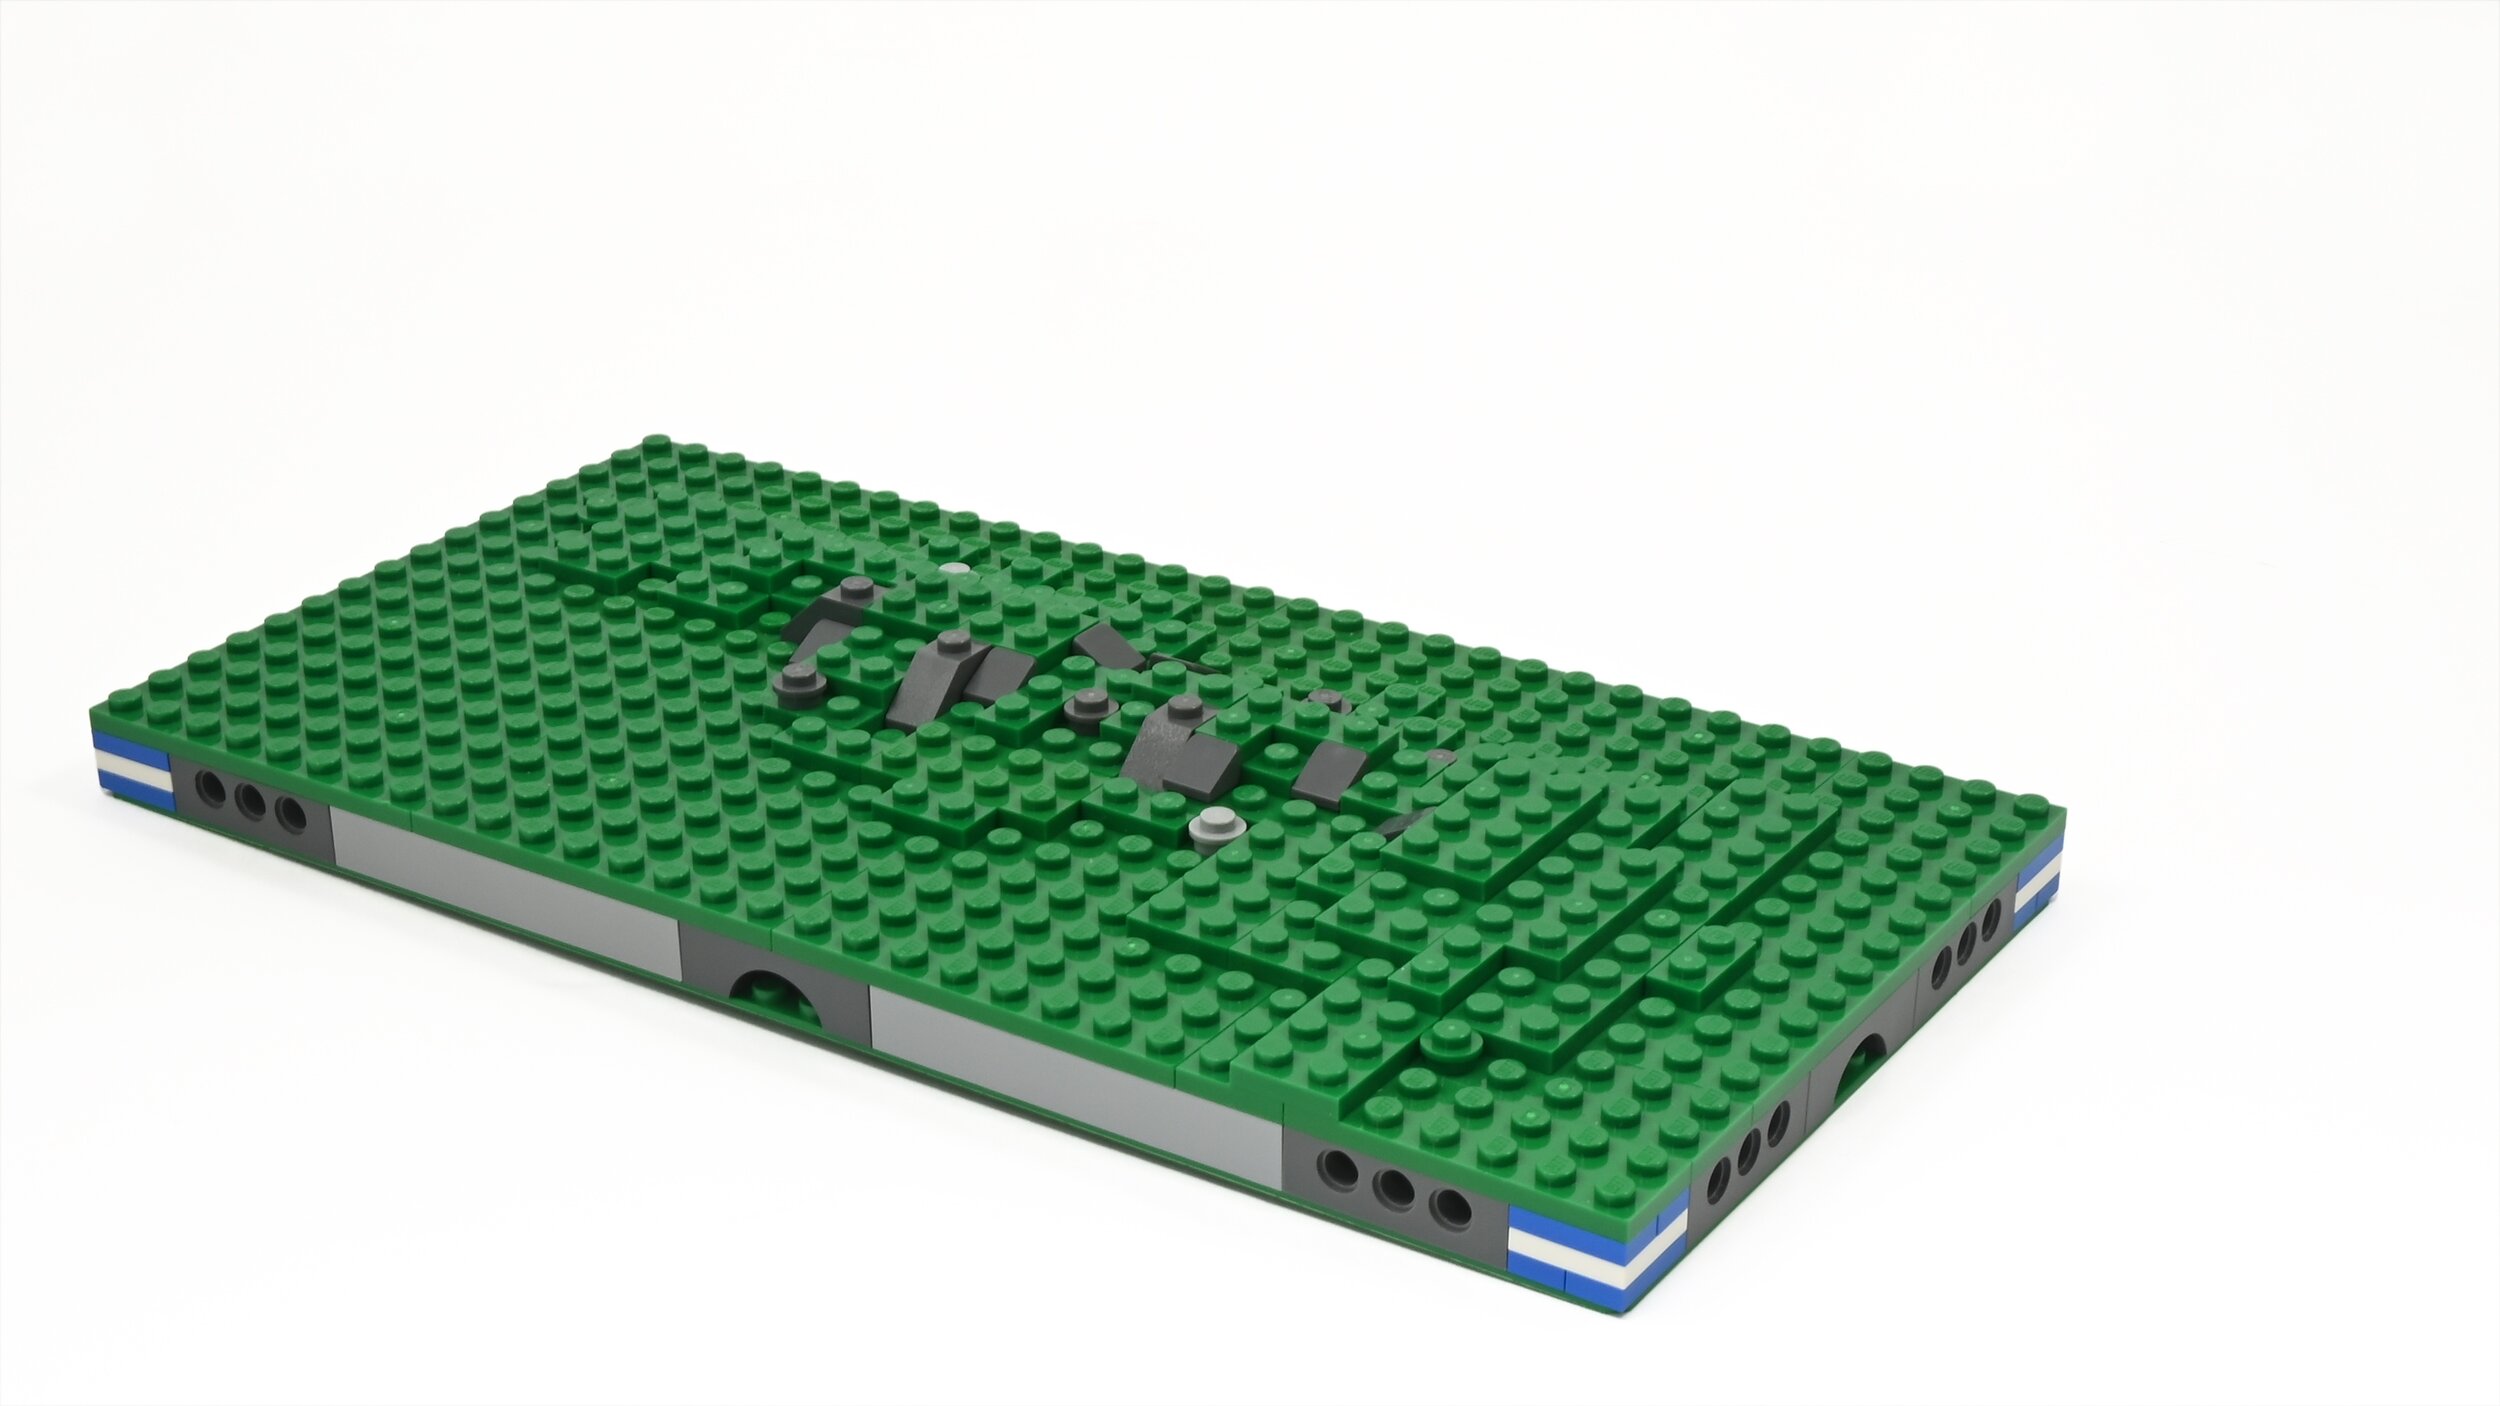
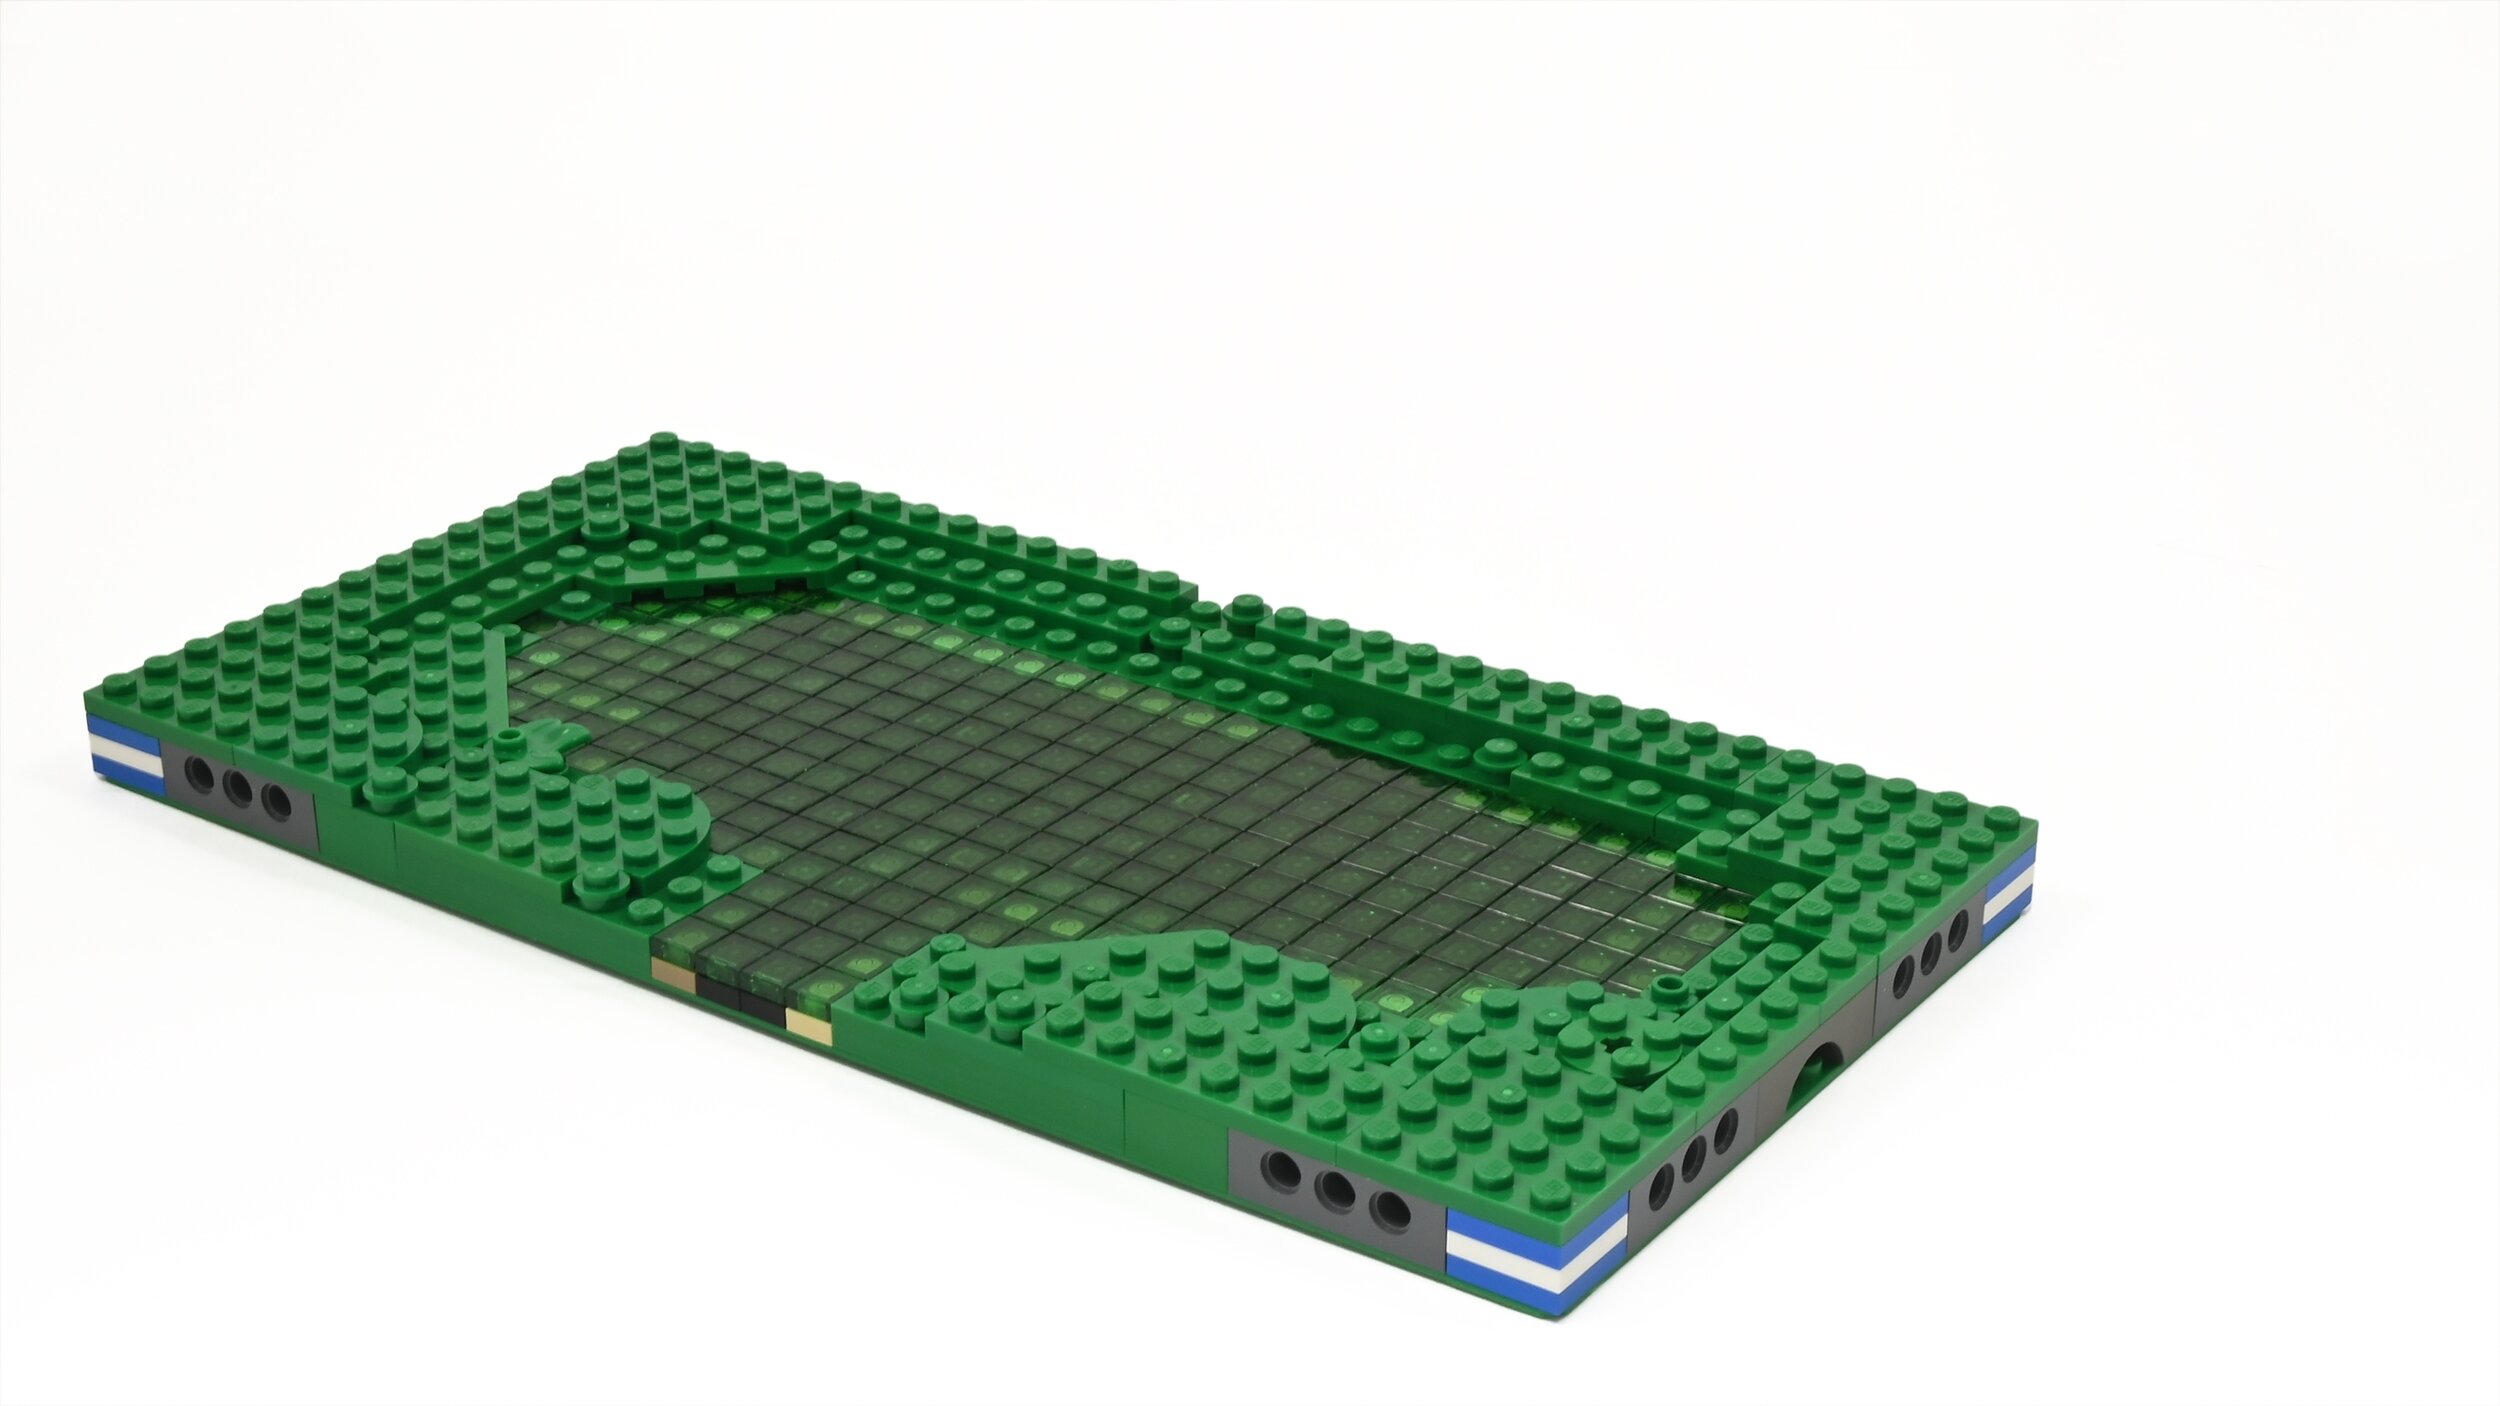
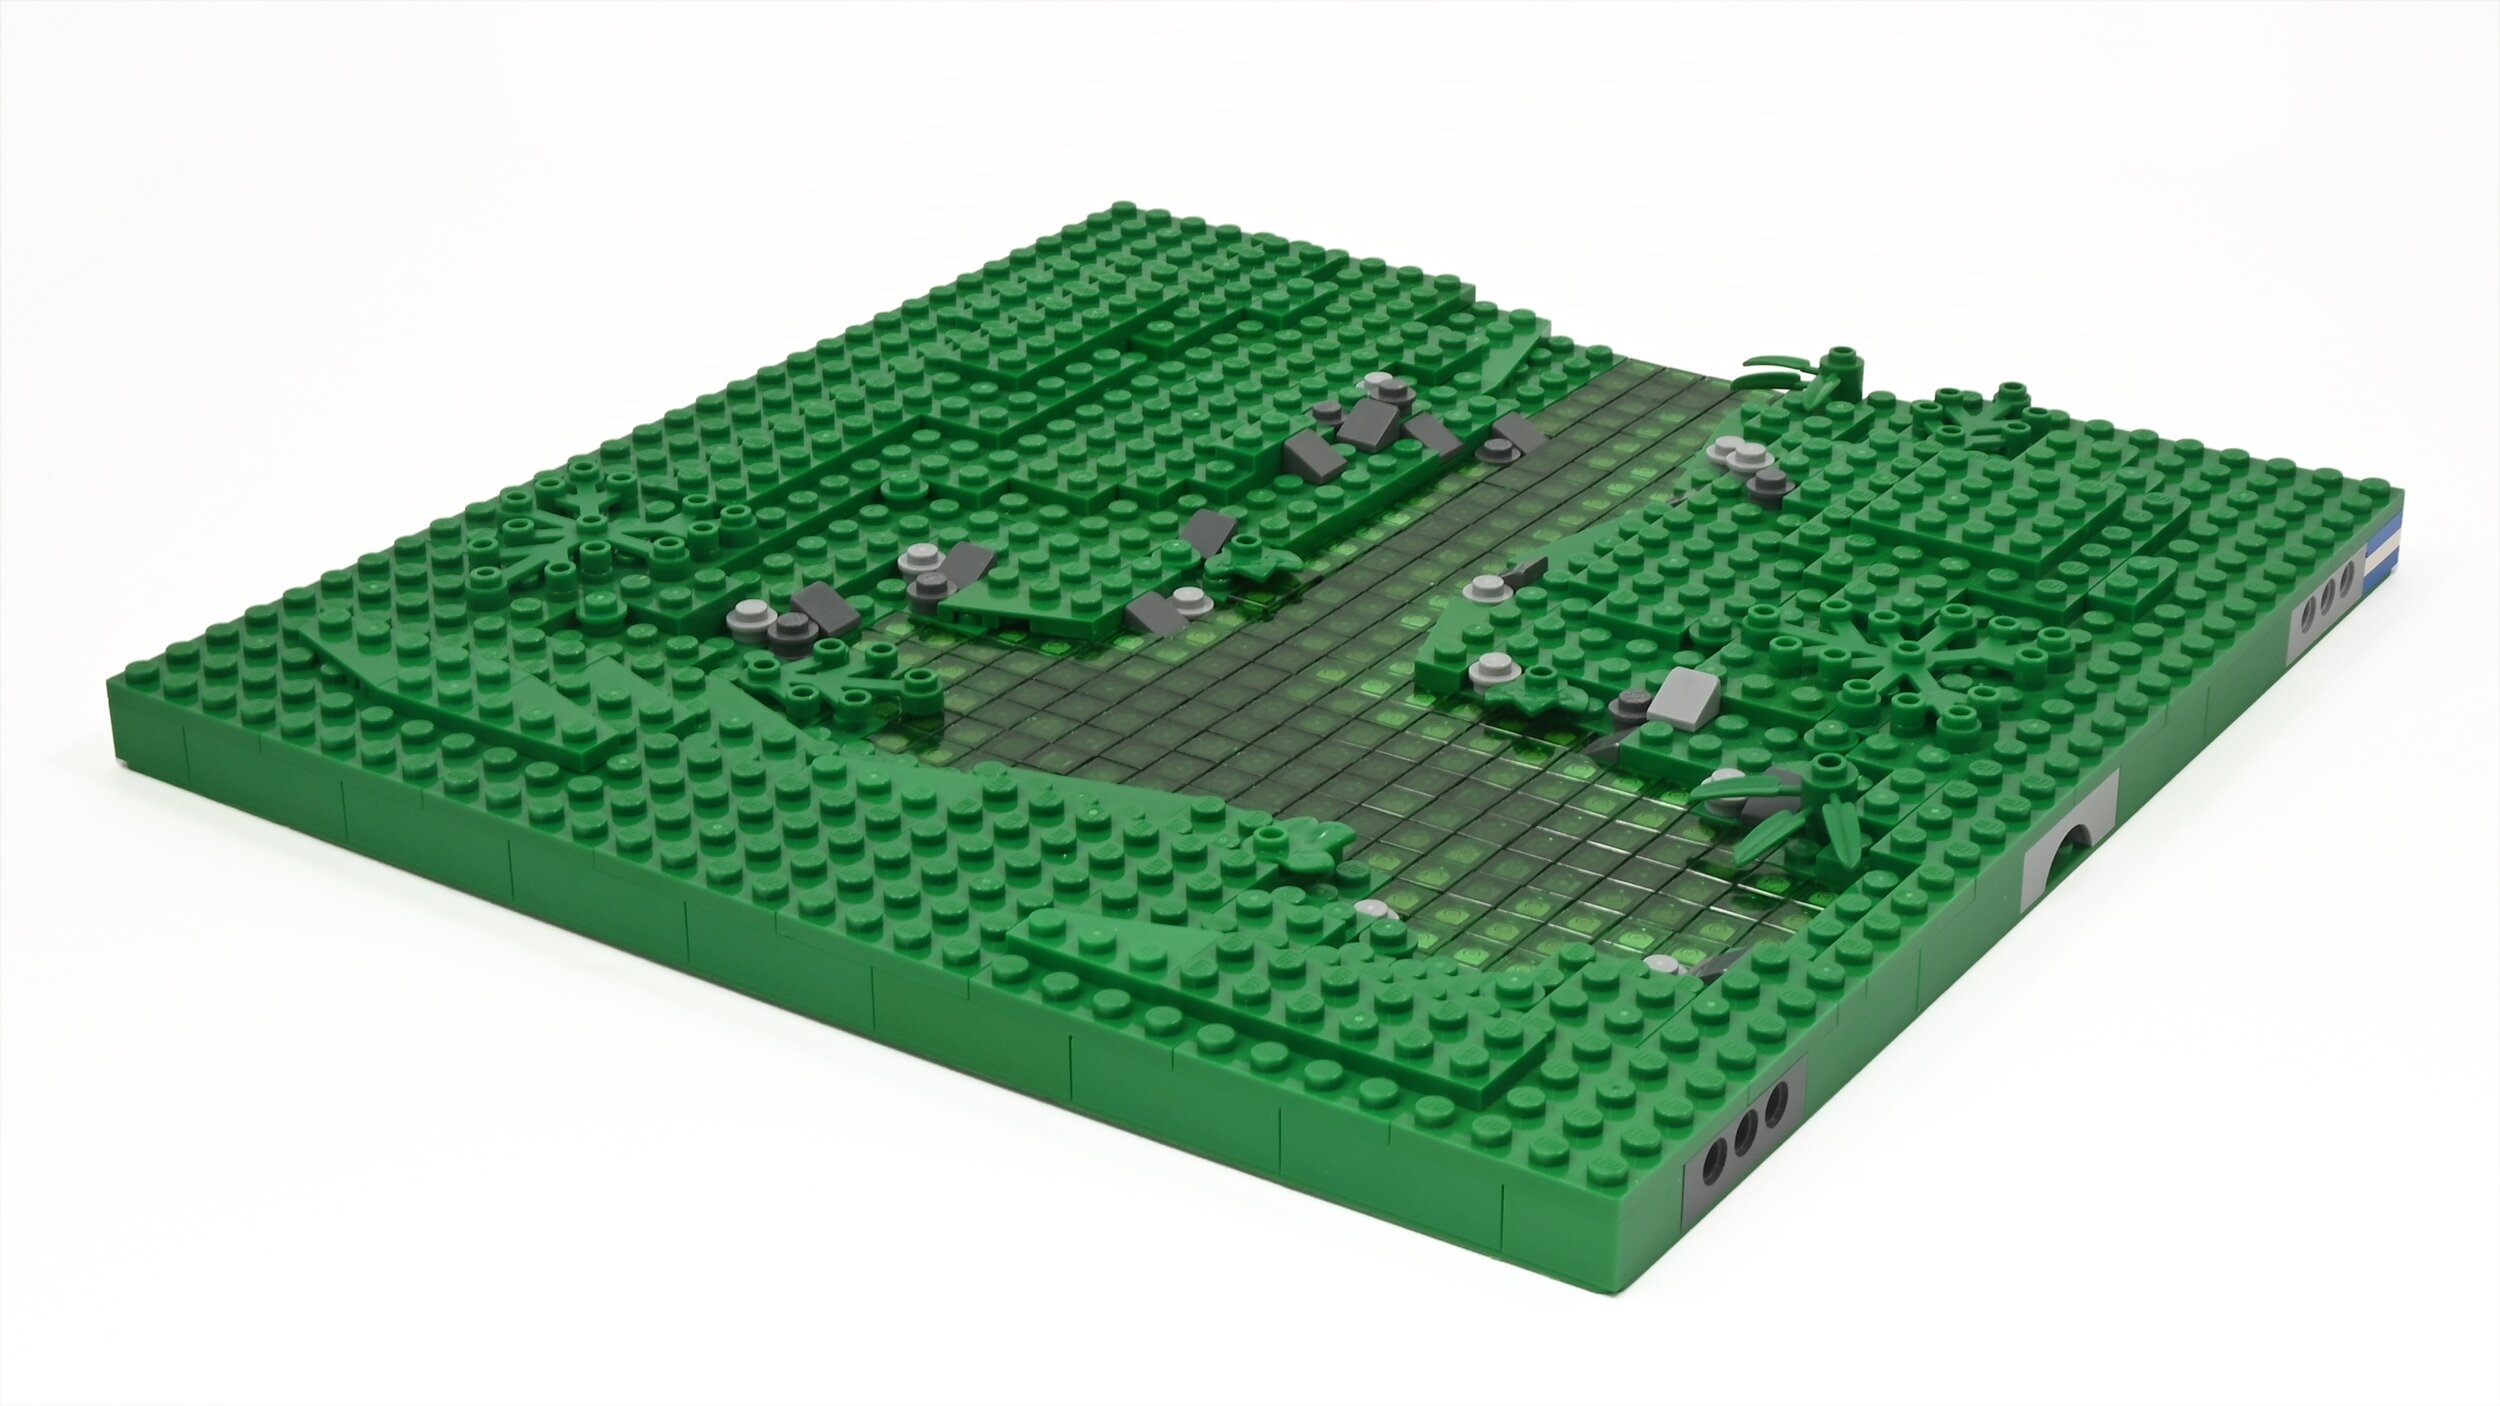
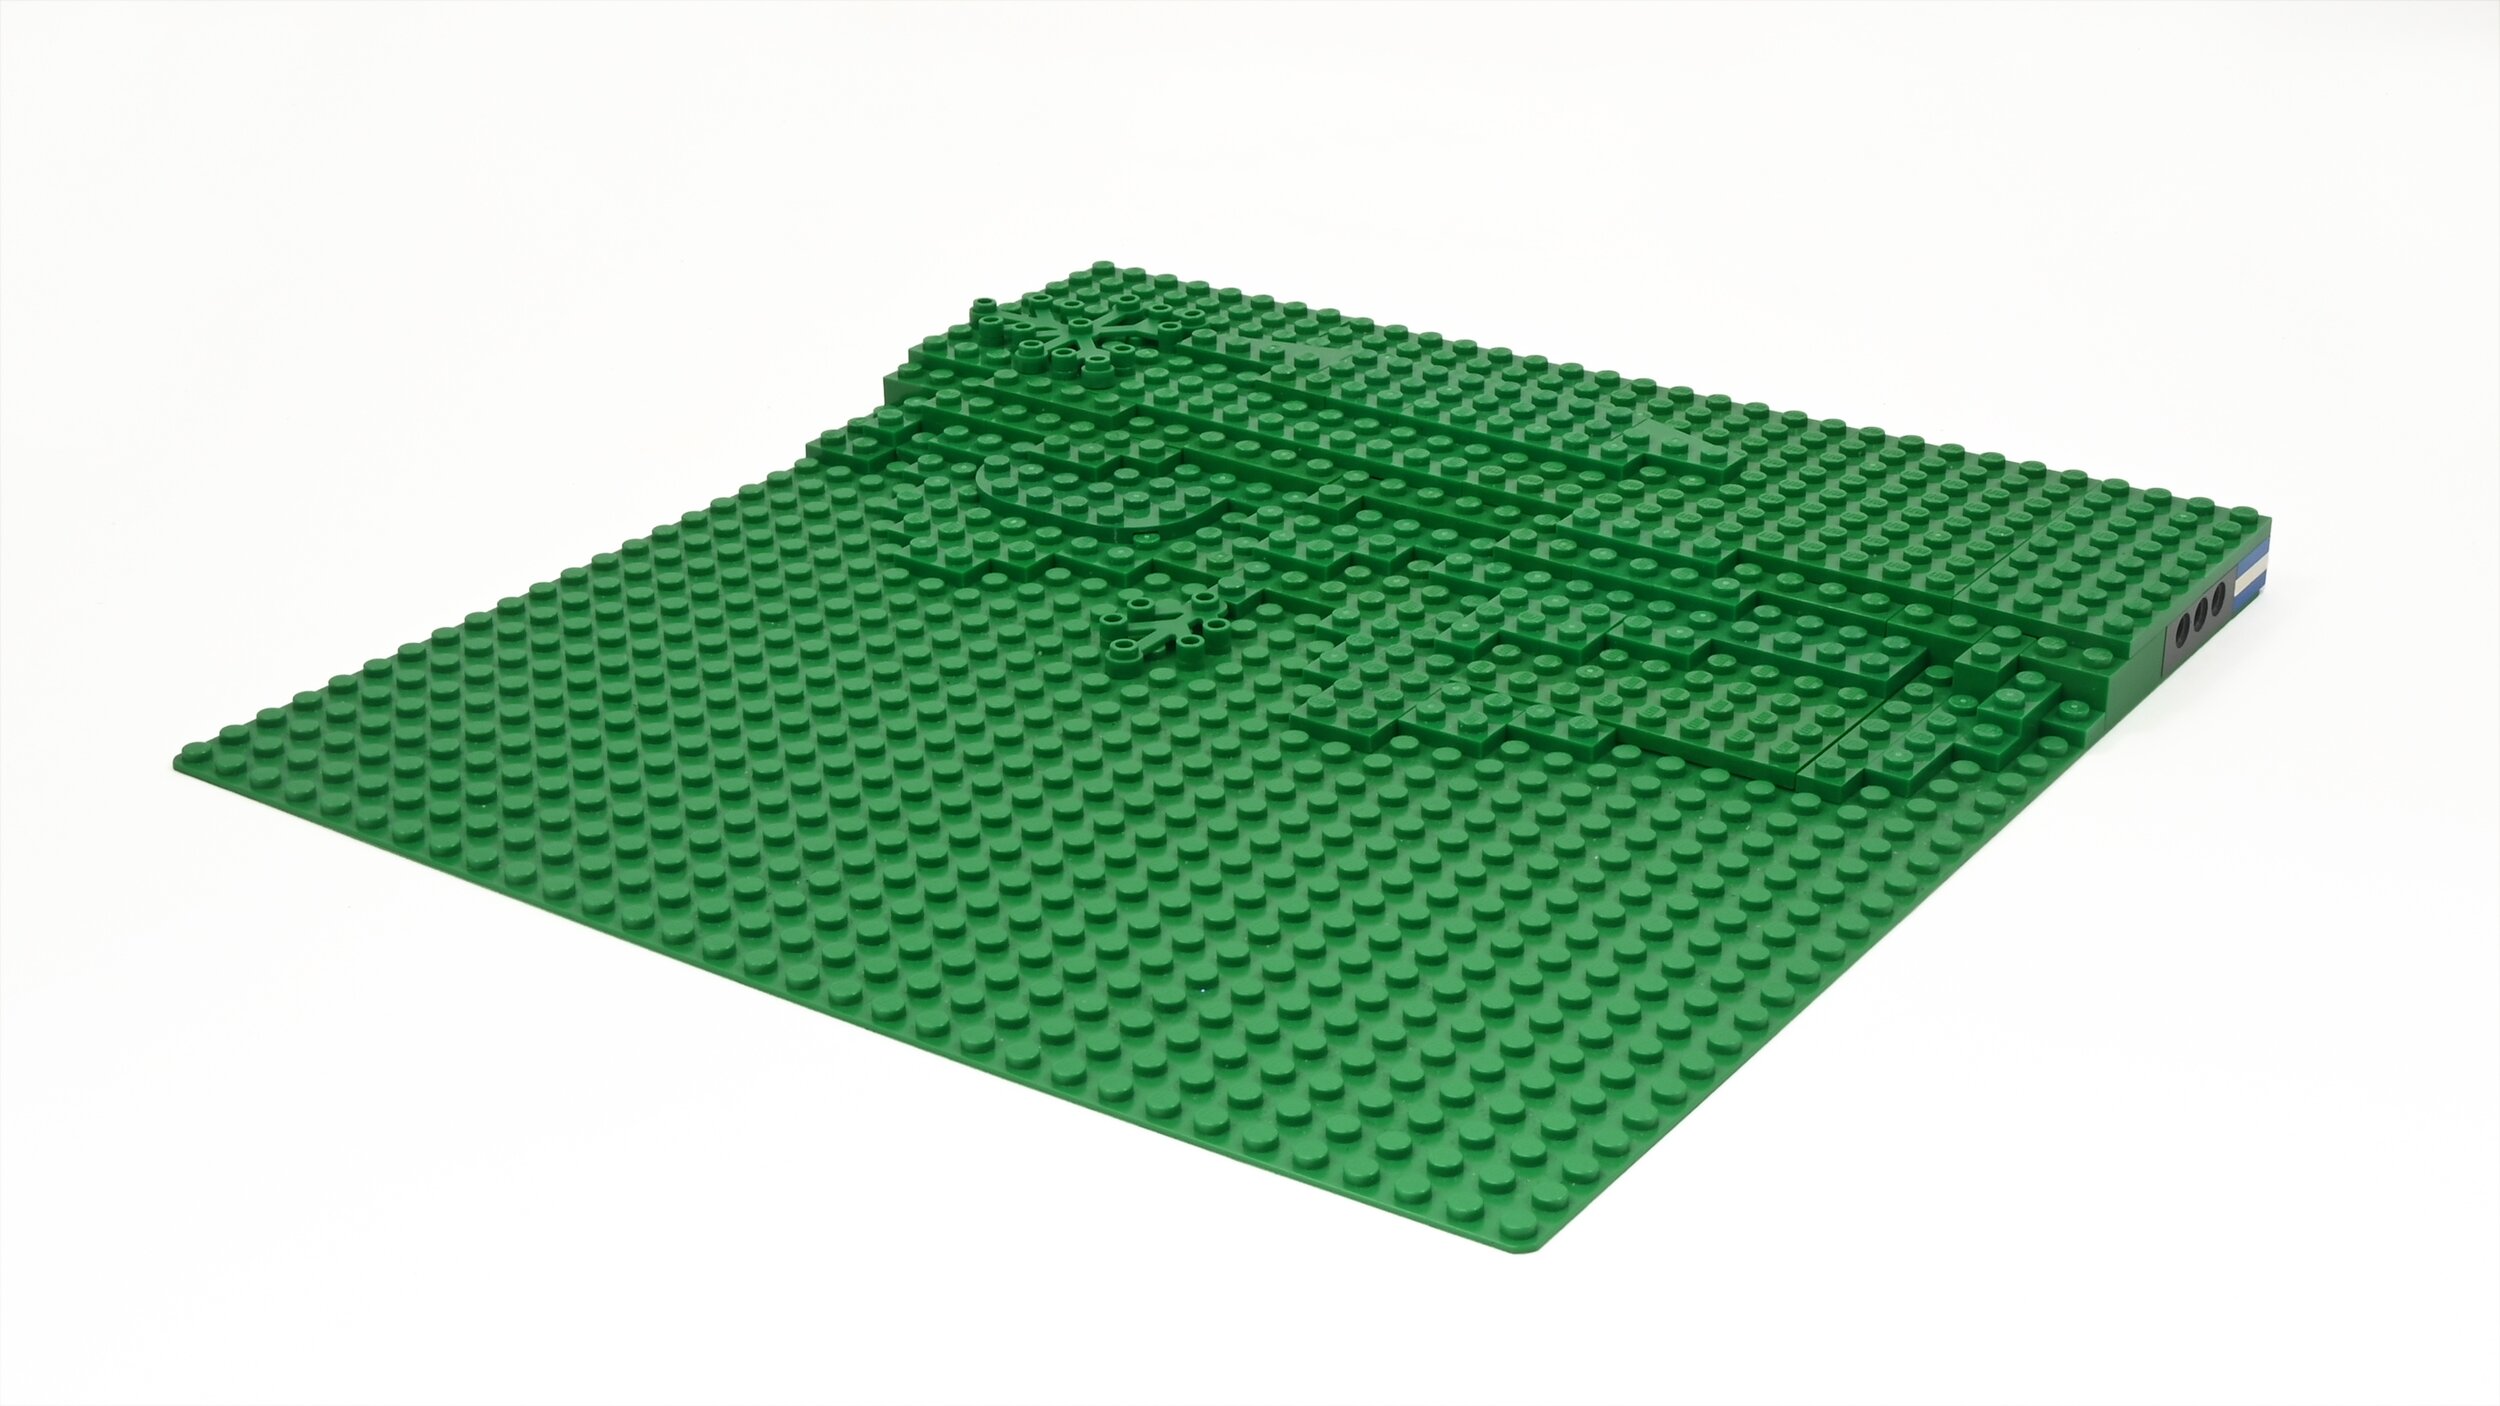
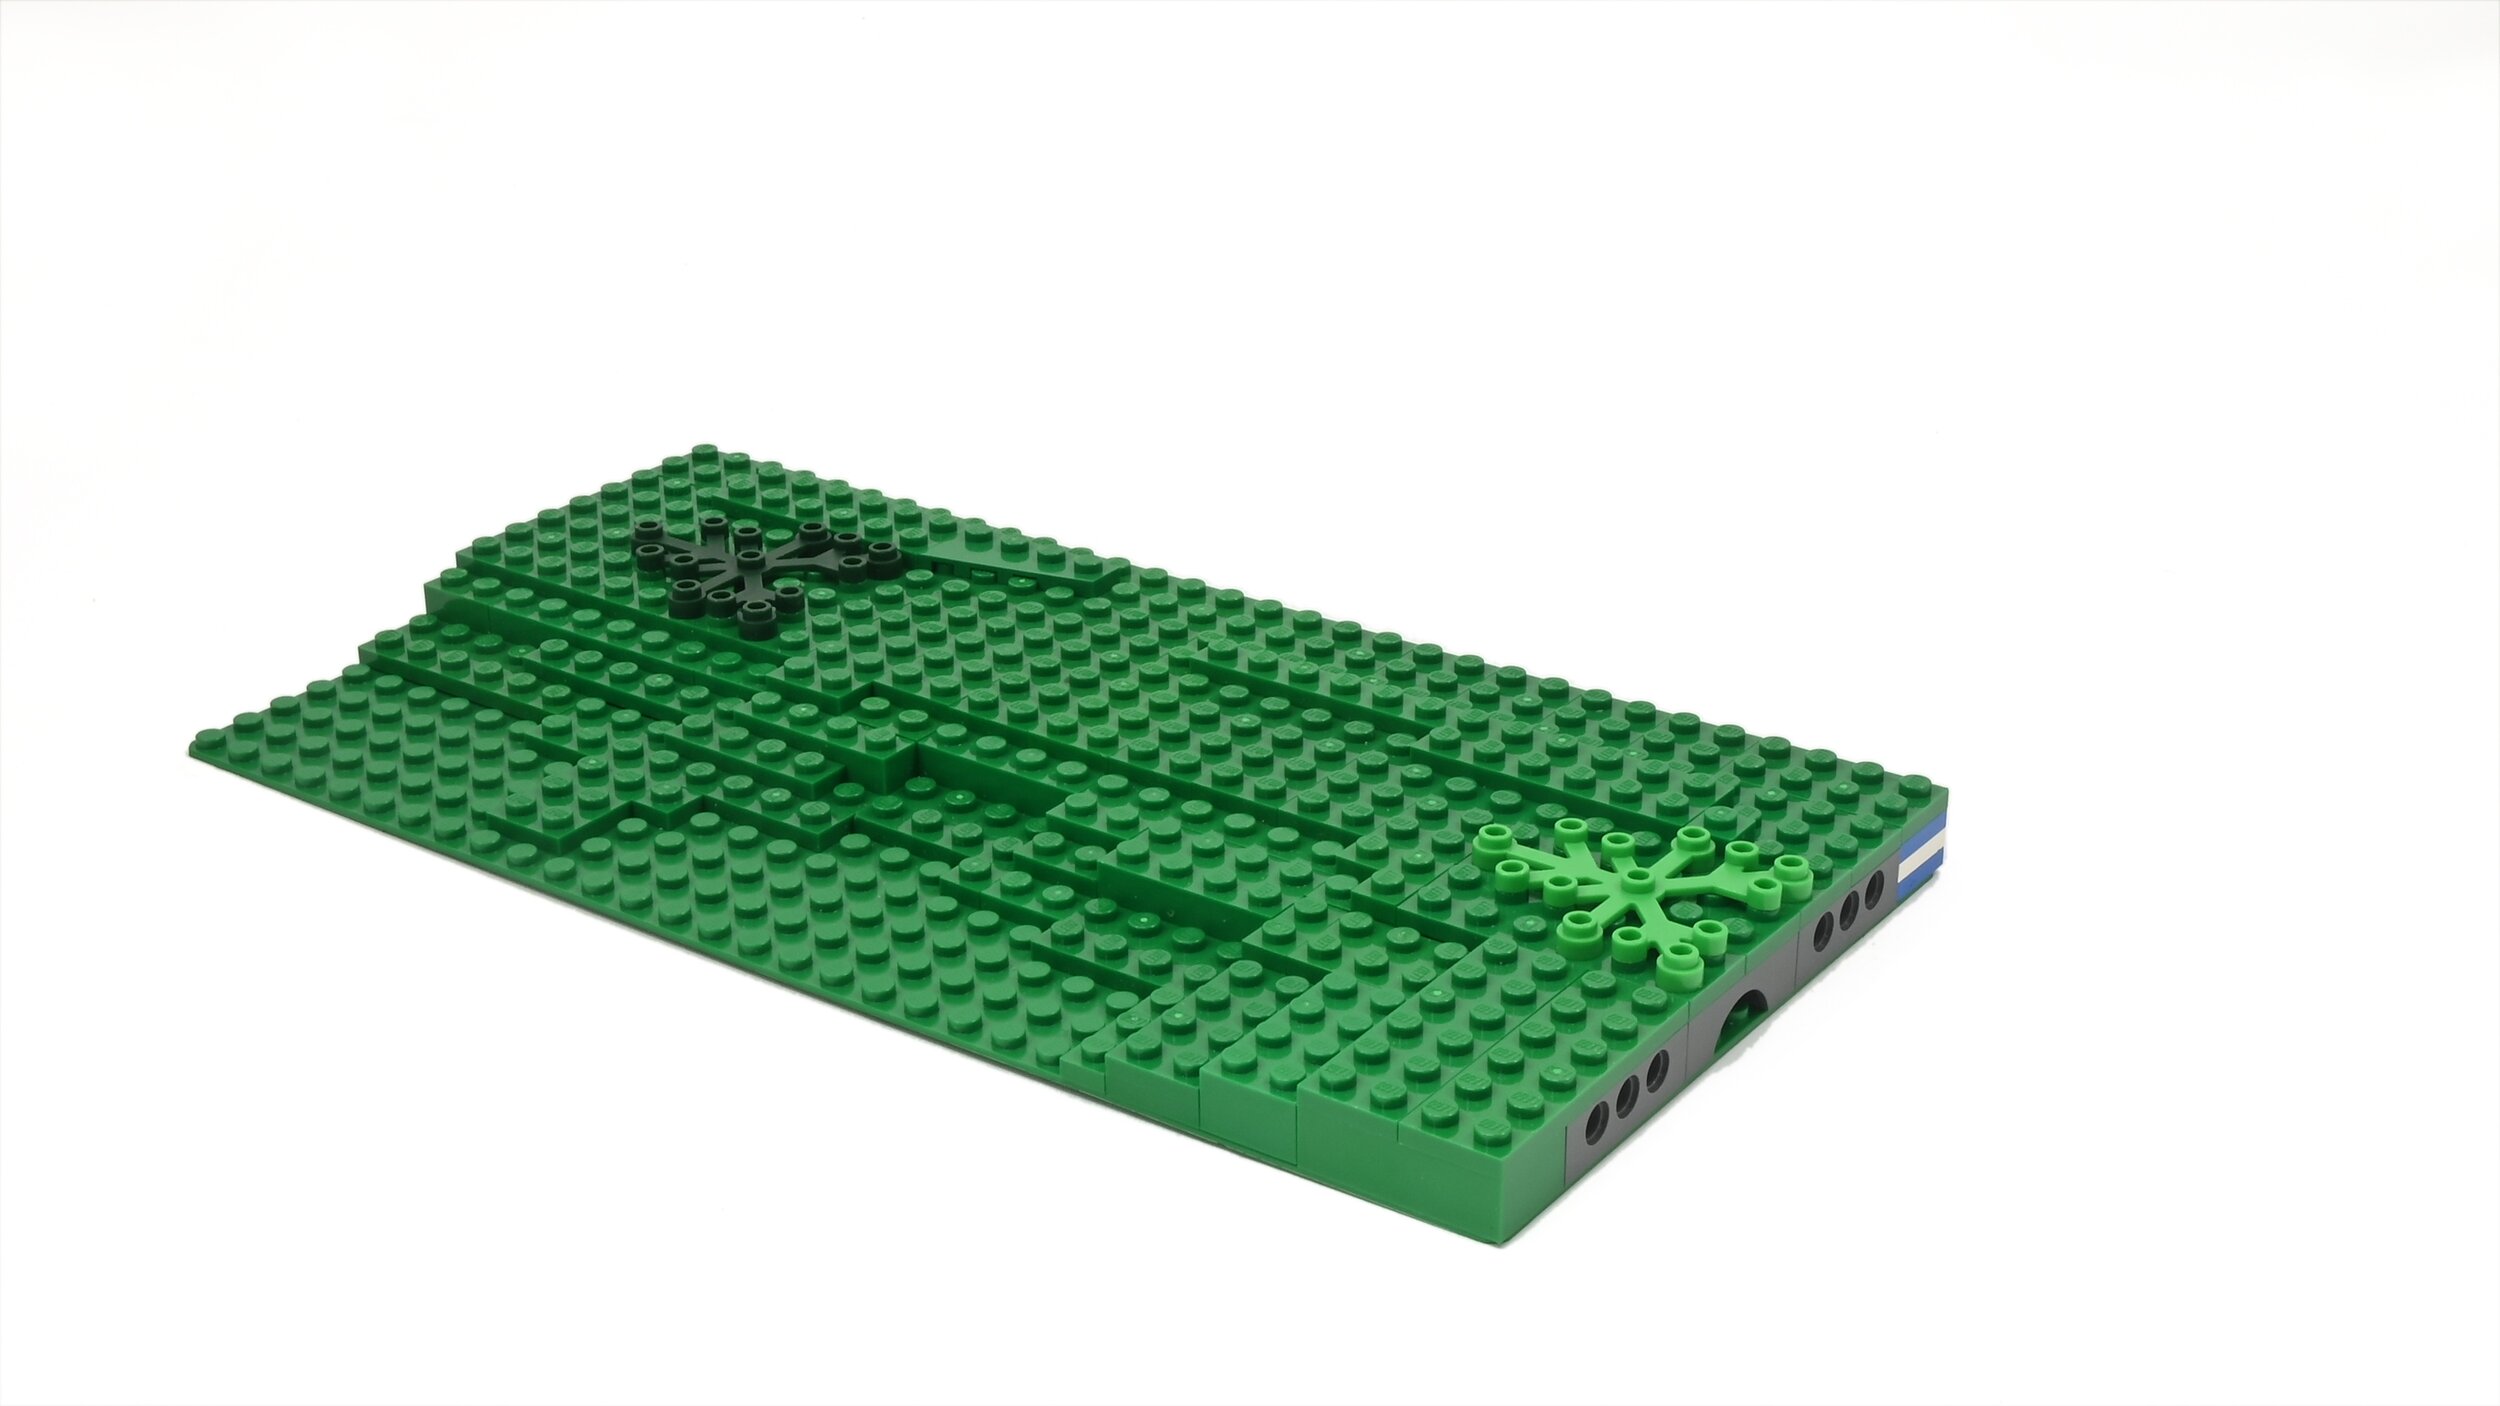
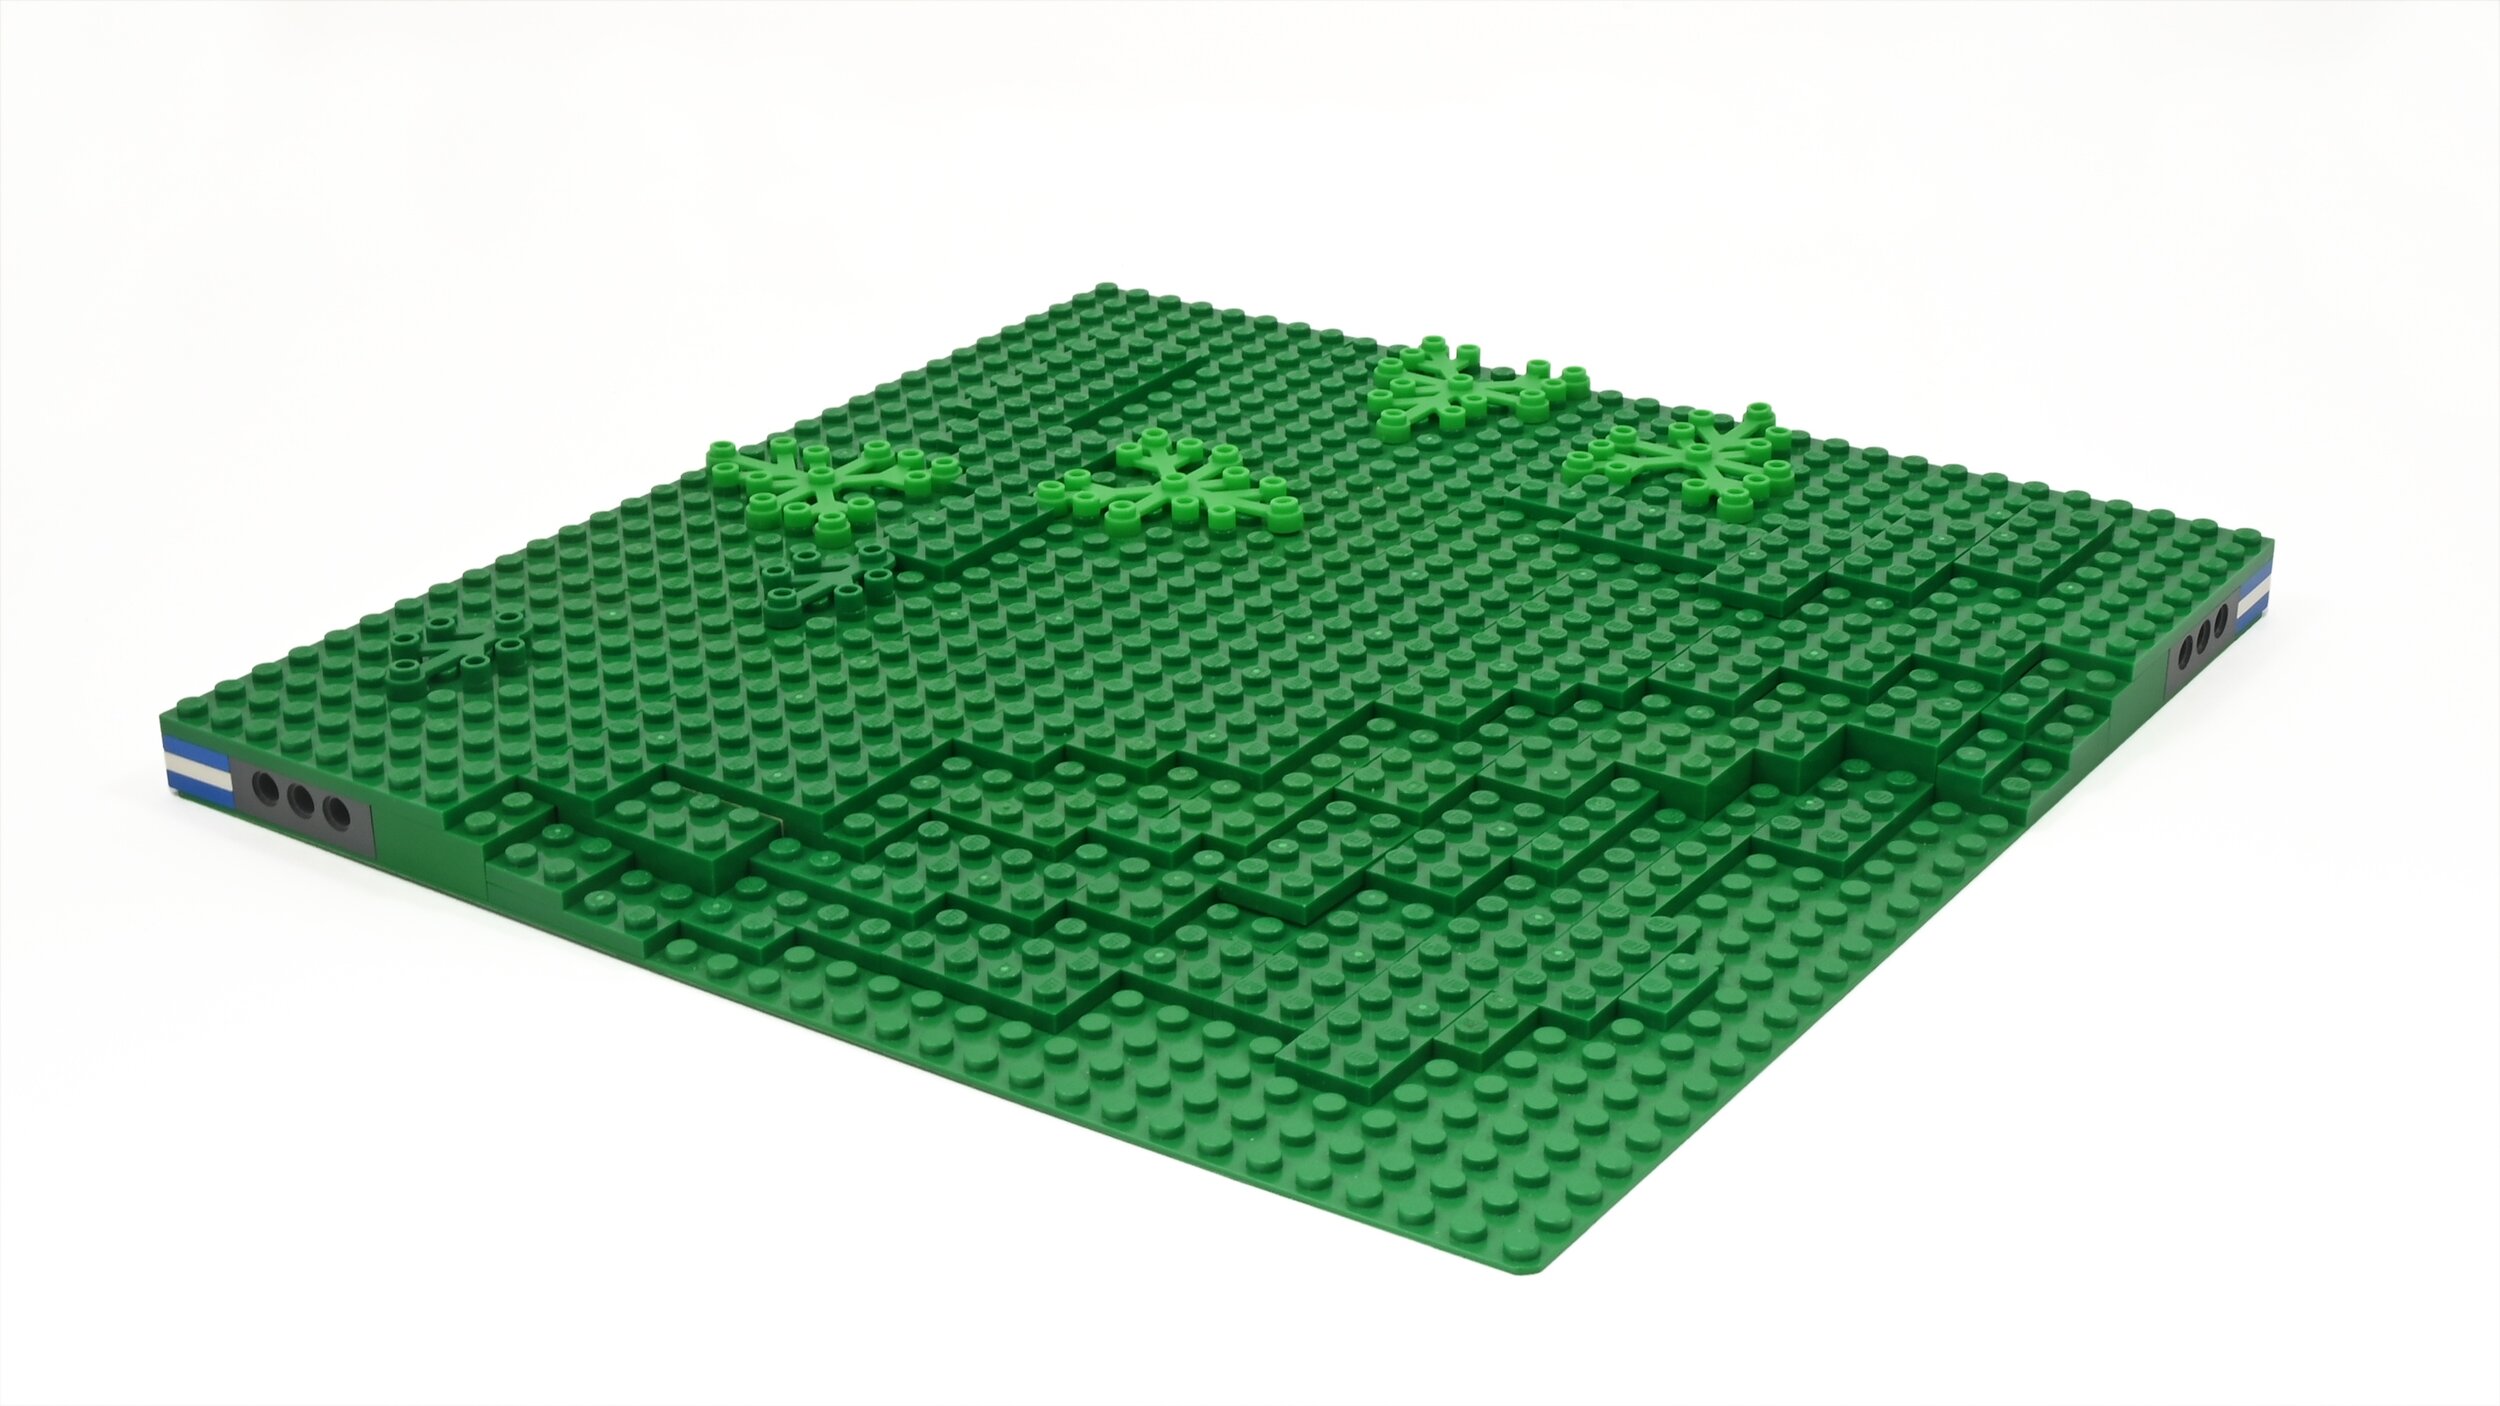
An example of the so-called “Basic Terrain Module” (BTM) is shown below. This 32x32 module is the most basic MILS module in the system. It is up to your creativity to decorate and embellish this landscape canvas with subtle elevation variances, vegetation, geological features, etc.!

Examples of decorated MILS BTM modules are shown below:
Benefits of MILS Modules
Strong & Durable - The sandwich construction of bricks between a baseplate and top plates results in a rigid module that resists bending and twisting. This is especially useful when building a layout on uneven table surfaces.
Consistency - Since the MILS standard describes many types of compatible geographical features, combining modules from different builders results in a consistent overall look.
Natural Appearance - Since the nominal ground level is 4 plates above the baseplate, this allows the terrain to be sculpted "below grade" to represent natural elevation variations, water features, and man-made features such as ditches and troughs.
Flexible Variety - When you or your group builds a significant inventory of MILS modules, the variety of different layout configurations increases. This allows a group to adapt to different constraints of footprint and/or floor space (depending on venue). It also allows a group to flexibly adapt to different inventories of MILS modules depending on how many group members are able to participate at a group layout event. The inherent compatibility and versatility of most MILS modules allow layouts to be easily reconfigured.
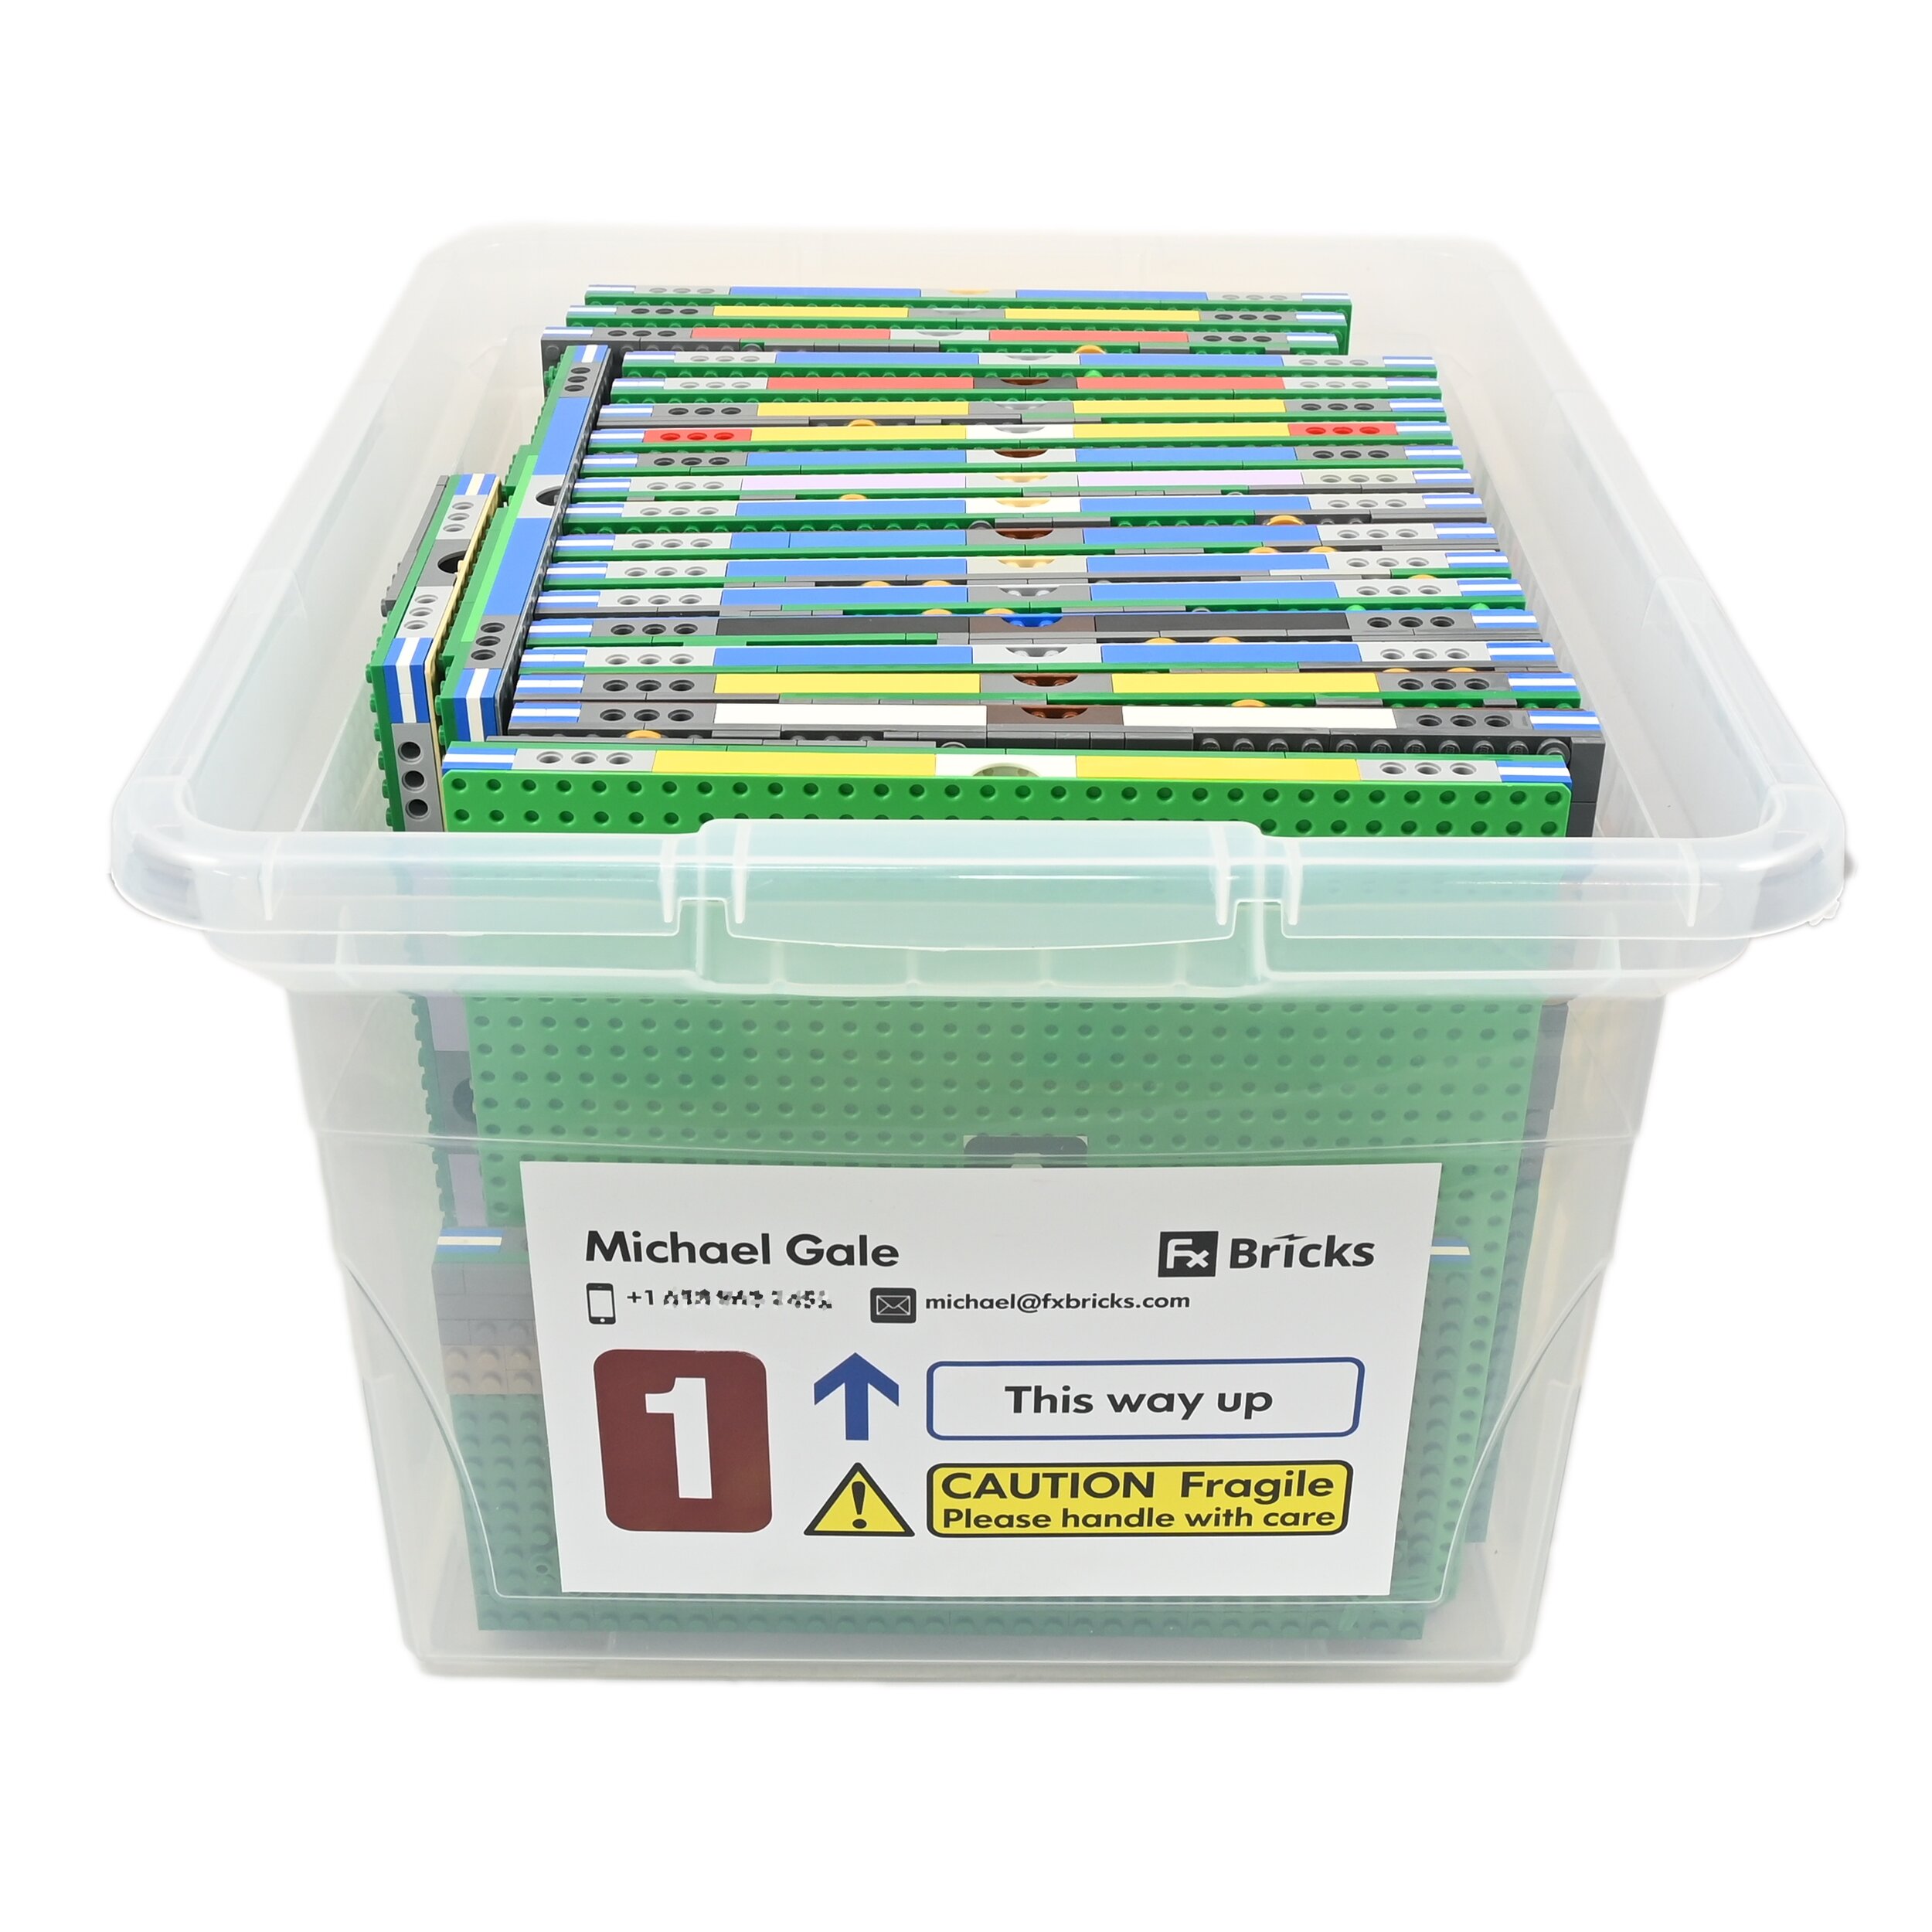
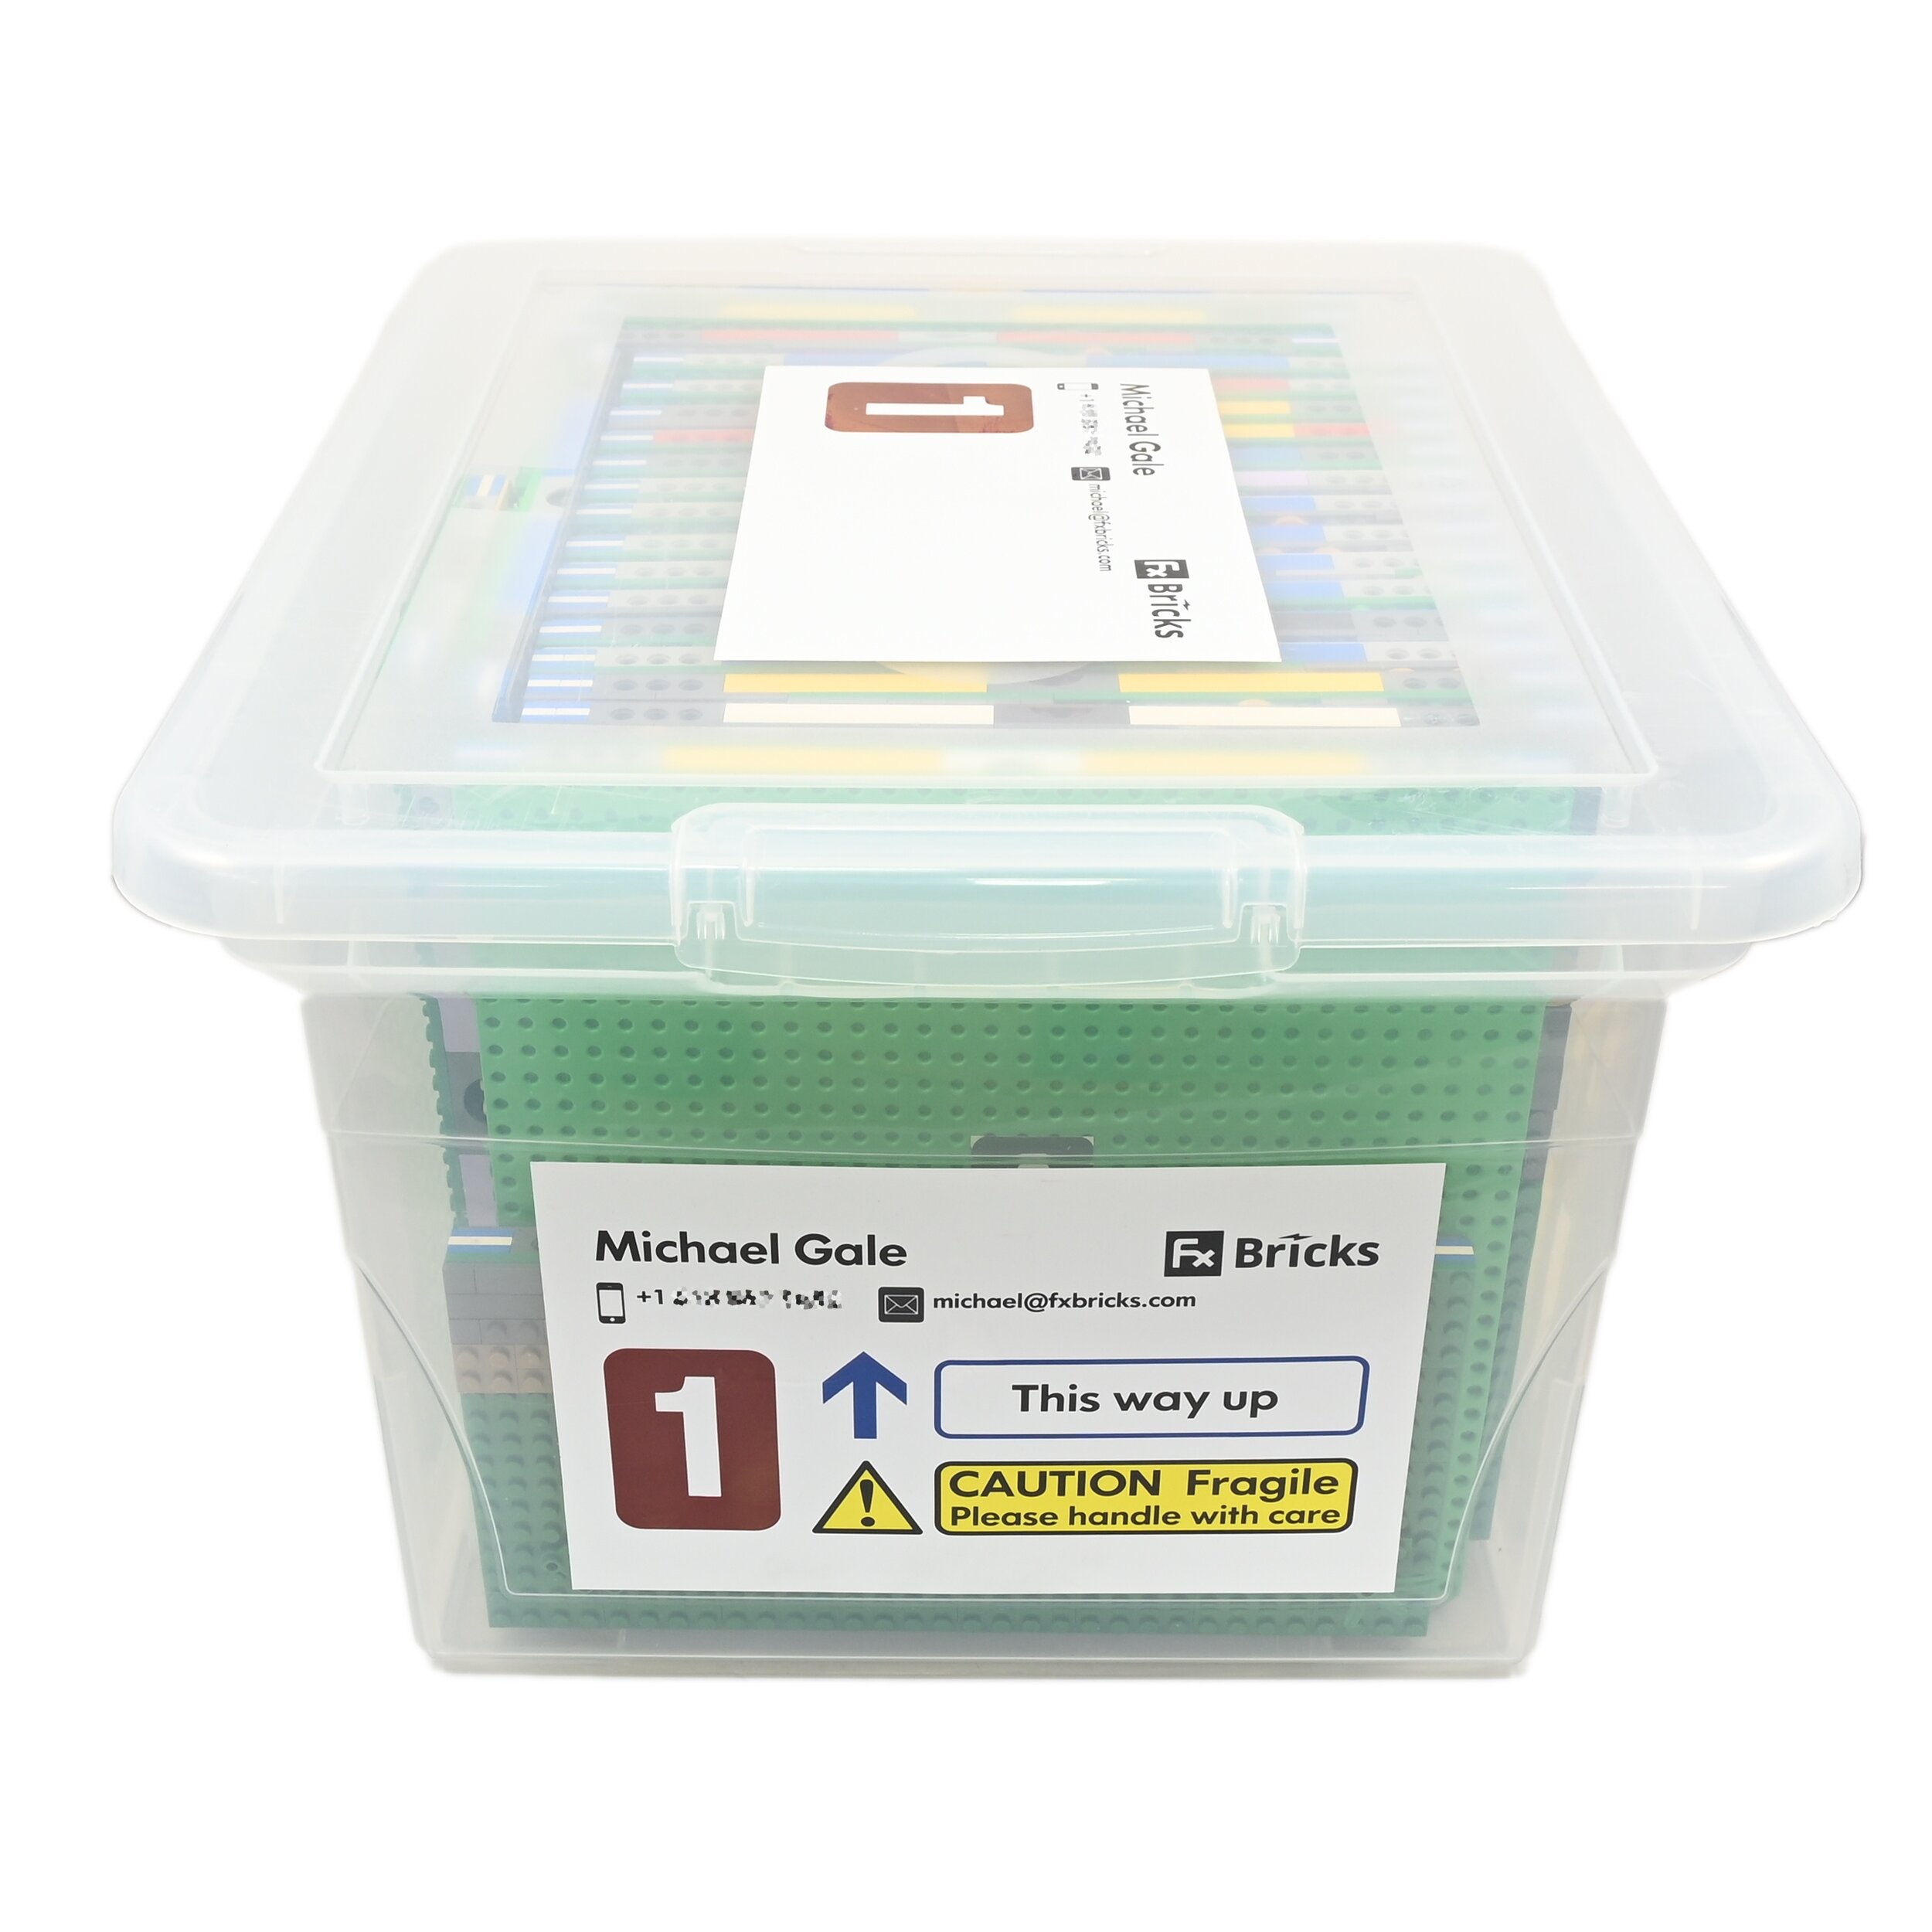
Portable - MILS modules are easy to store, transport, and pack in bulk. This is important if you’re frequently exhibiting your train layout at public events. I pack my MILS modules in transparent stackable “filing” boxes. I can pack an entire layout into 16x boxes which all fit in my station wagon car and I no longer have to rent a van!
Disadvantages of MILS Modules
Cost - It is obvious that compared to building directly onto a baseplate, MILS modules are very parts intensive. As a minimum, you require equal surface area of regular plates for every baseplate. Furthermore, the boundary edges demand specific elements for interconnection and lastly, many bricks are required to support the plates at ground level.
Requires Group Buy-In - It is possible to adopt MILS as a personal standard for building layouts (such as I do). However, the maximum benefits of MILS are enjoyed when many builders collaborate to build large layouts. Of course, this requires consensus among all builders to adopt MILS. This can be difficult if some individuals are faced with the prospect of laboriously rebuilding existing creations or dealing with the burden of buying additional parts to make MILS compatible modules.
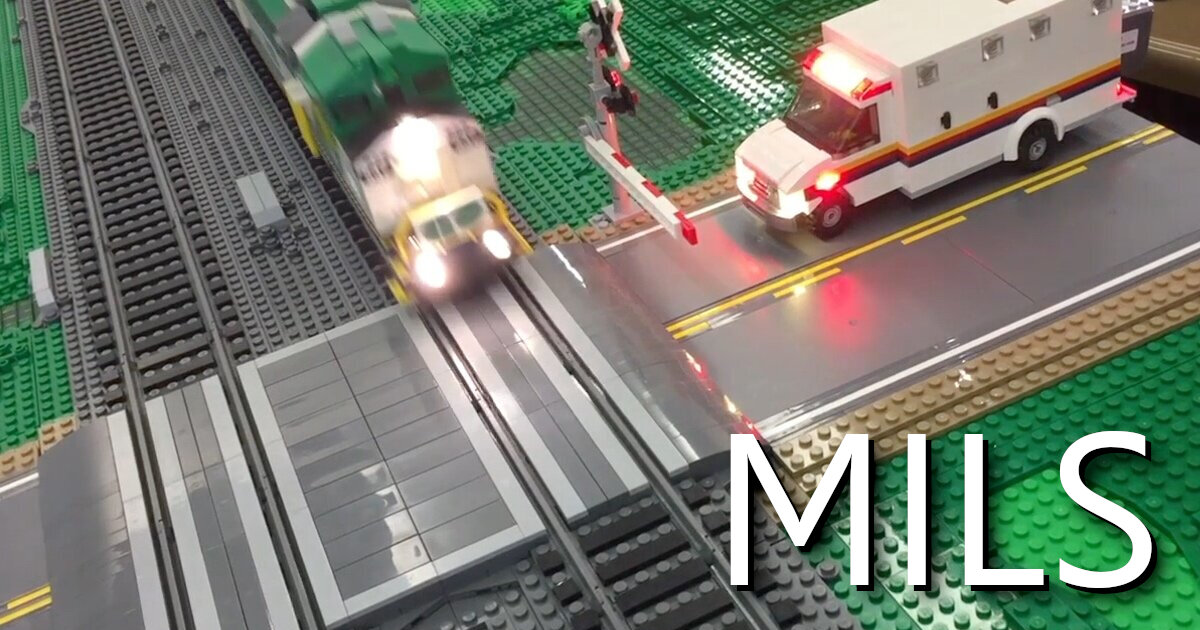
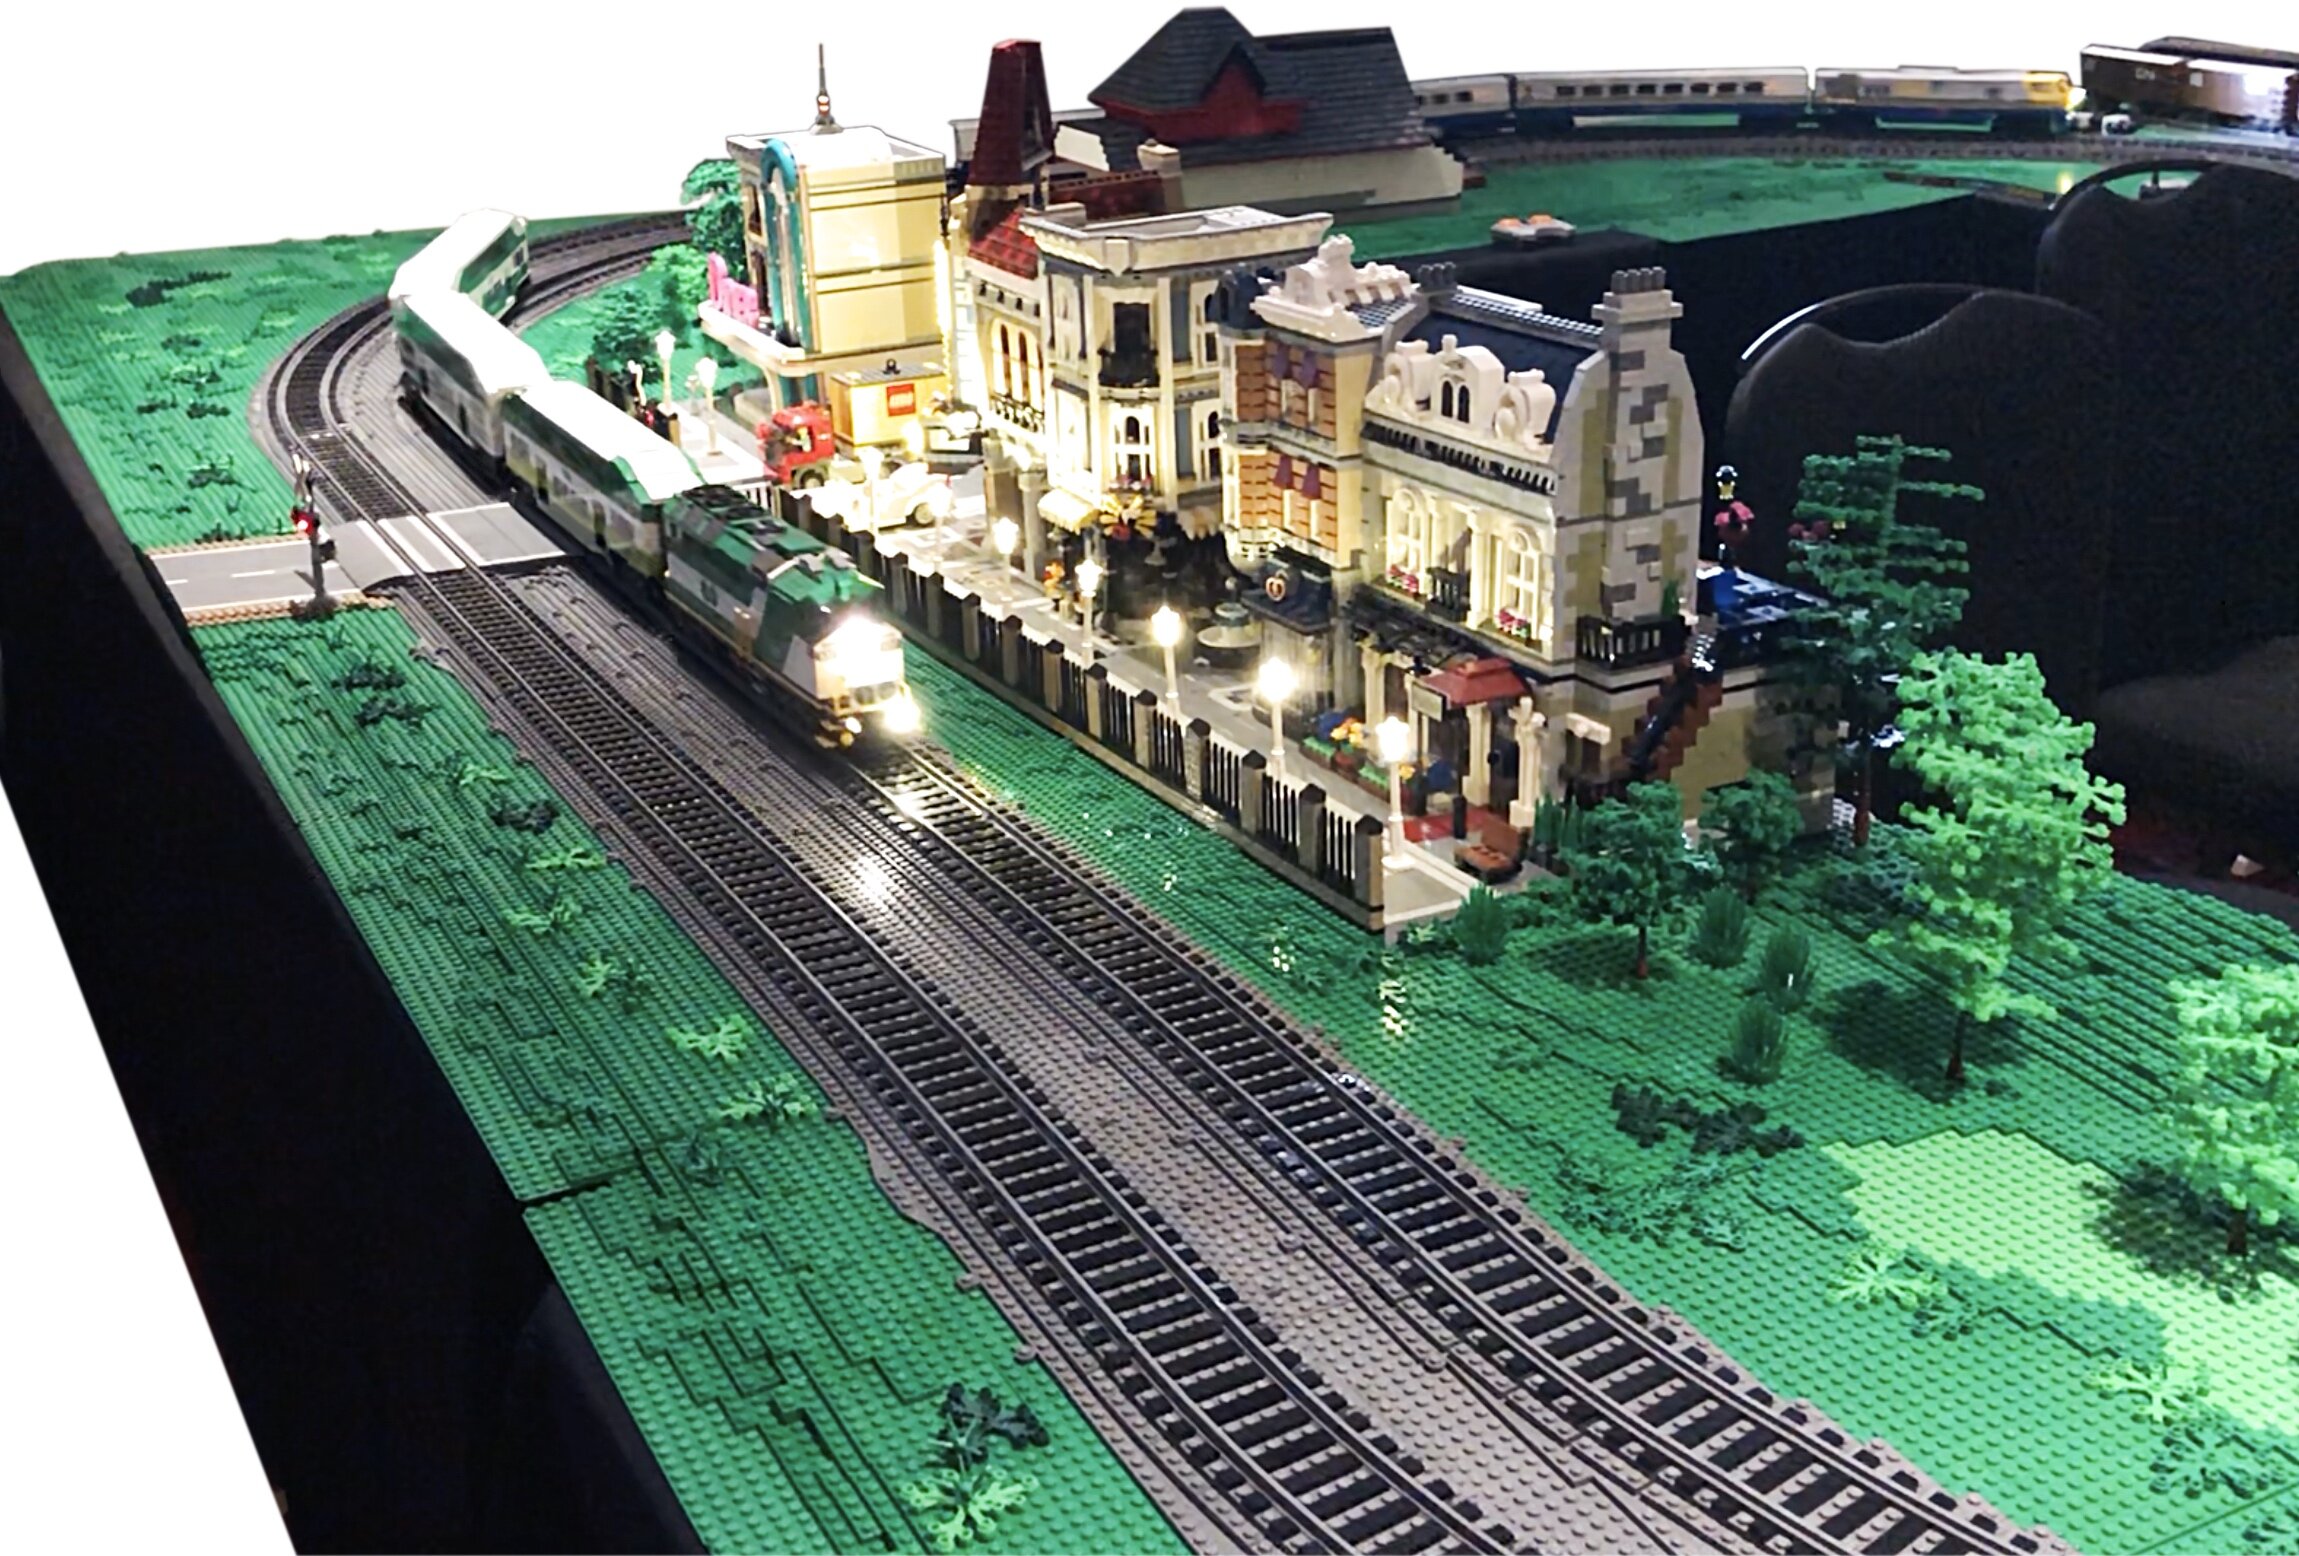
MILS for Train Layouts
After building an extensive LEGO train layout in a similar way as scale model train layouts—that is, building the layout on custom made tables (or baseboards)—I was overwhelmed with the time, energy, and specialized transport required to exhibit the layout at AFOL and model train events. Although my tables were designed to be transportable with integrated folding legs and a transport cart system, they still required a van or truck to transport them. Furthermore, the layout configuration was more or less permanent with both the baseplates and track secured to the tabletop with screws.
I was convinced that there had to be a better way of easily transporting an extensive LEGO train layout and at the same time embrace the principles of modularity, collaboration, and durable construction. Around the same time, I was fortunate to discover MILS. I was intrigued with the possibilities offered by MILS and using it as a basis to build a LEGO train layout.
Fundamentally, MILS is ideally suited for building a LEGO train layout since its modularity fits nicely with the modularity of train track elements. The adaptation of MILS for LEGO train layouts simply involves designing new MILS modules which form a secure mounting substrate for pre-ballasted track sections.

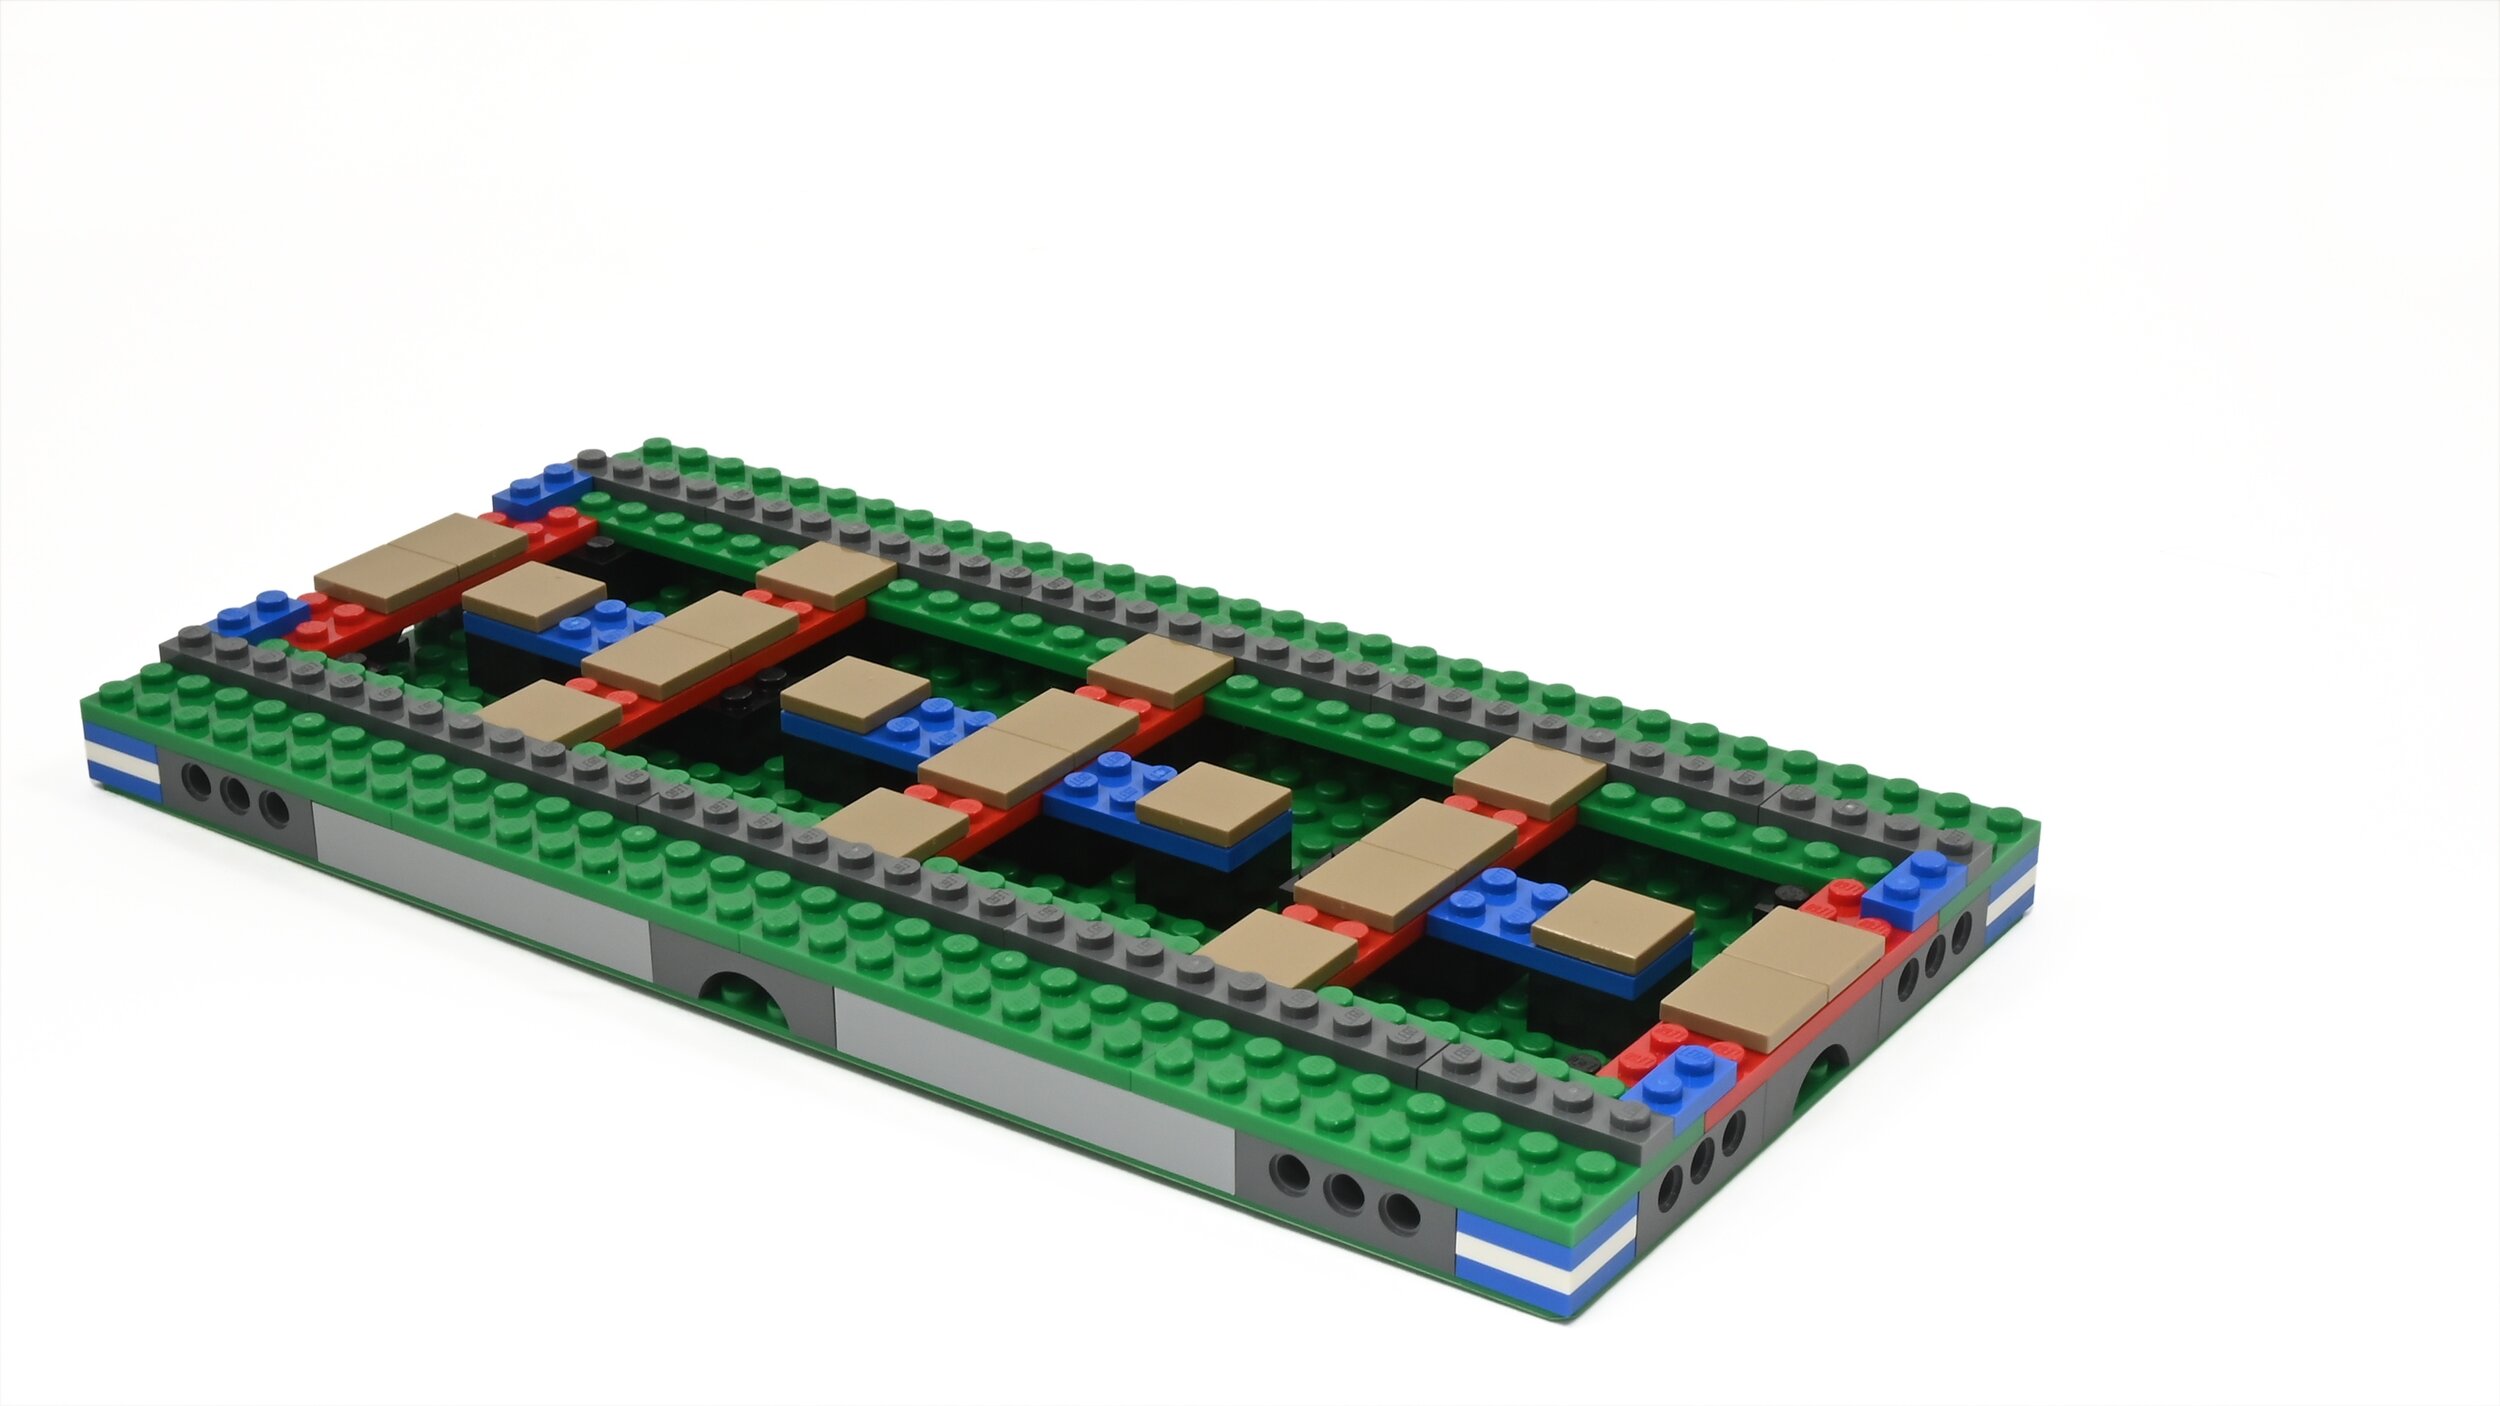
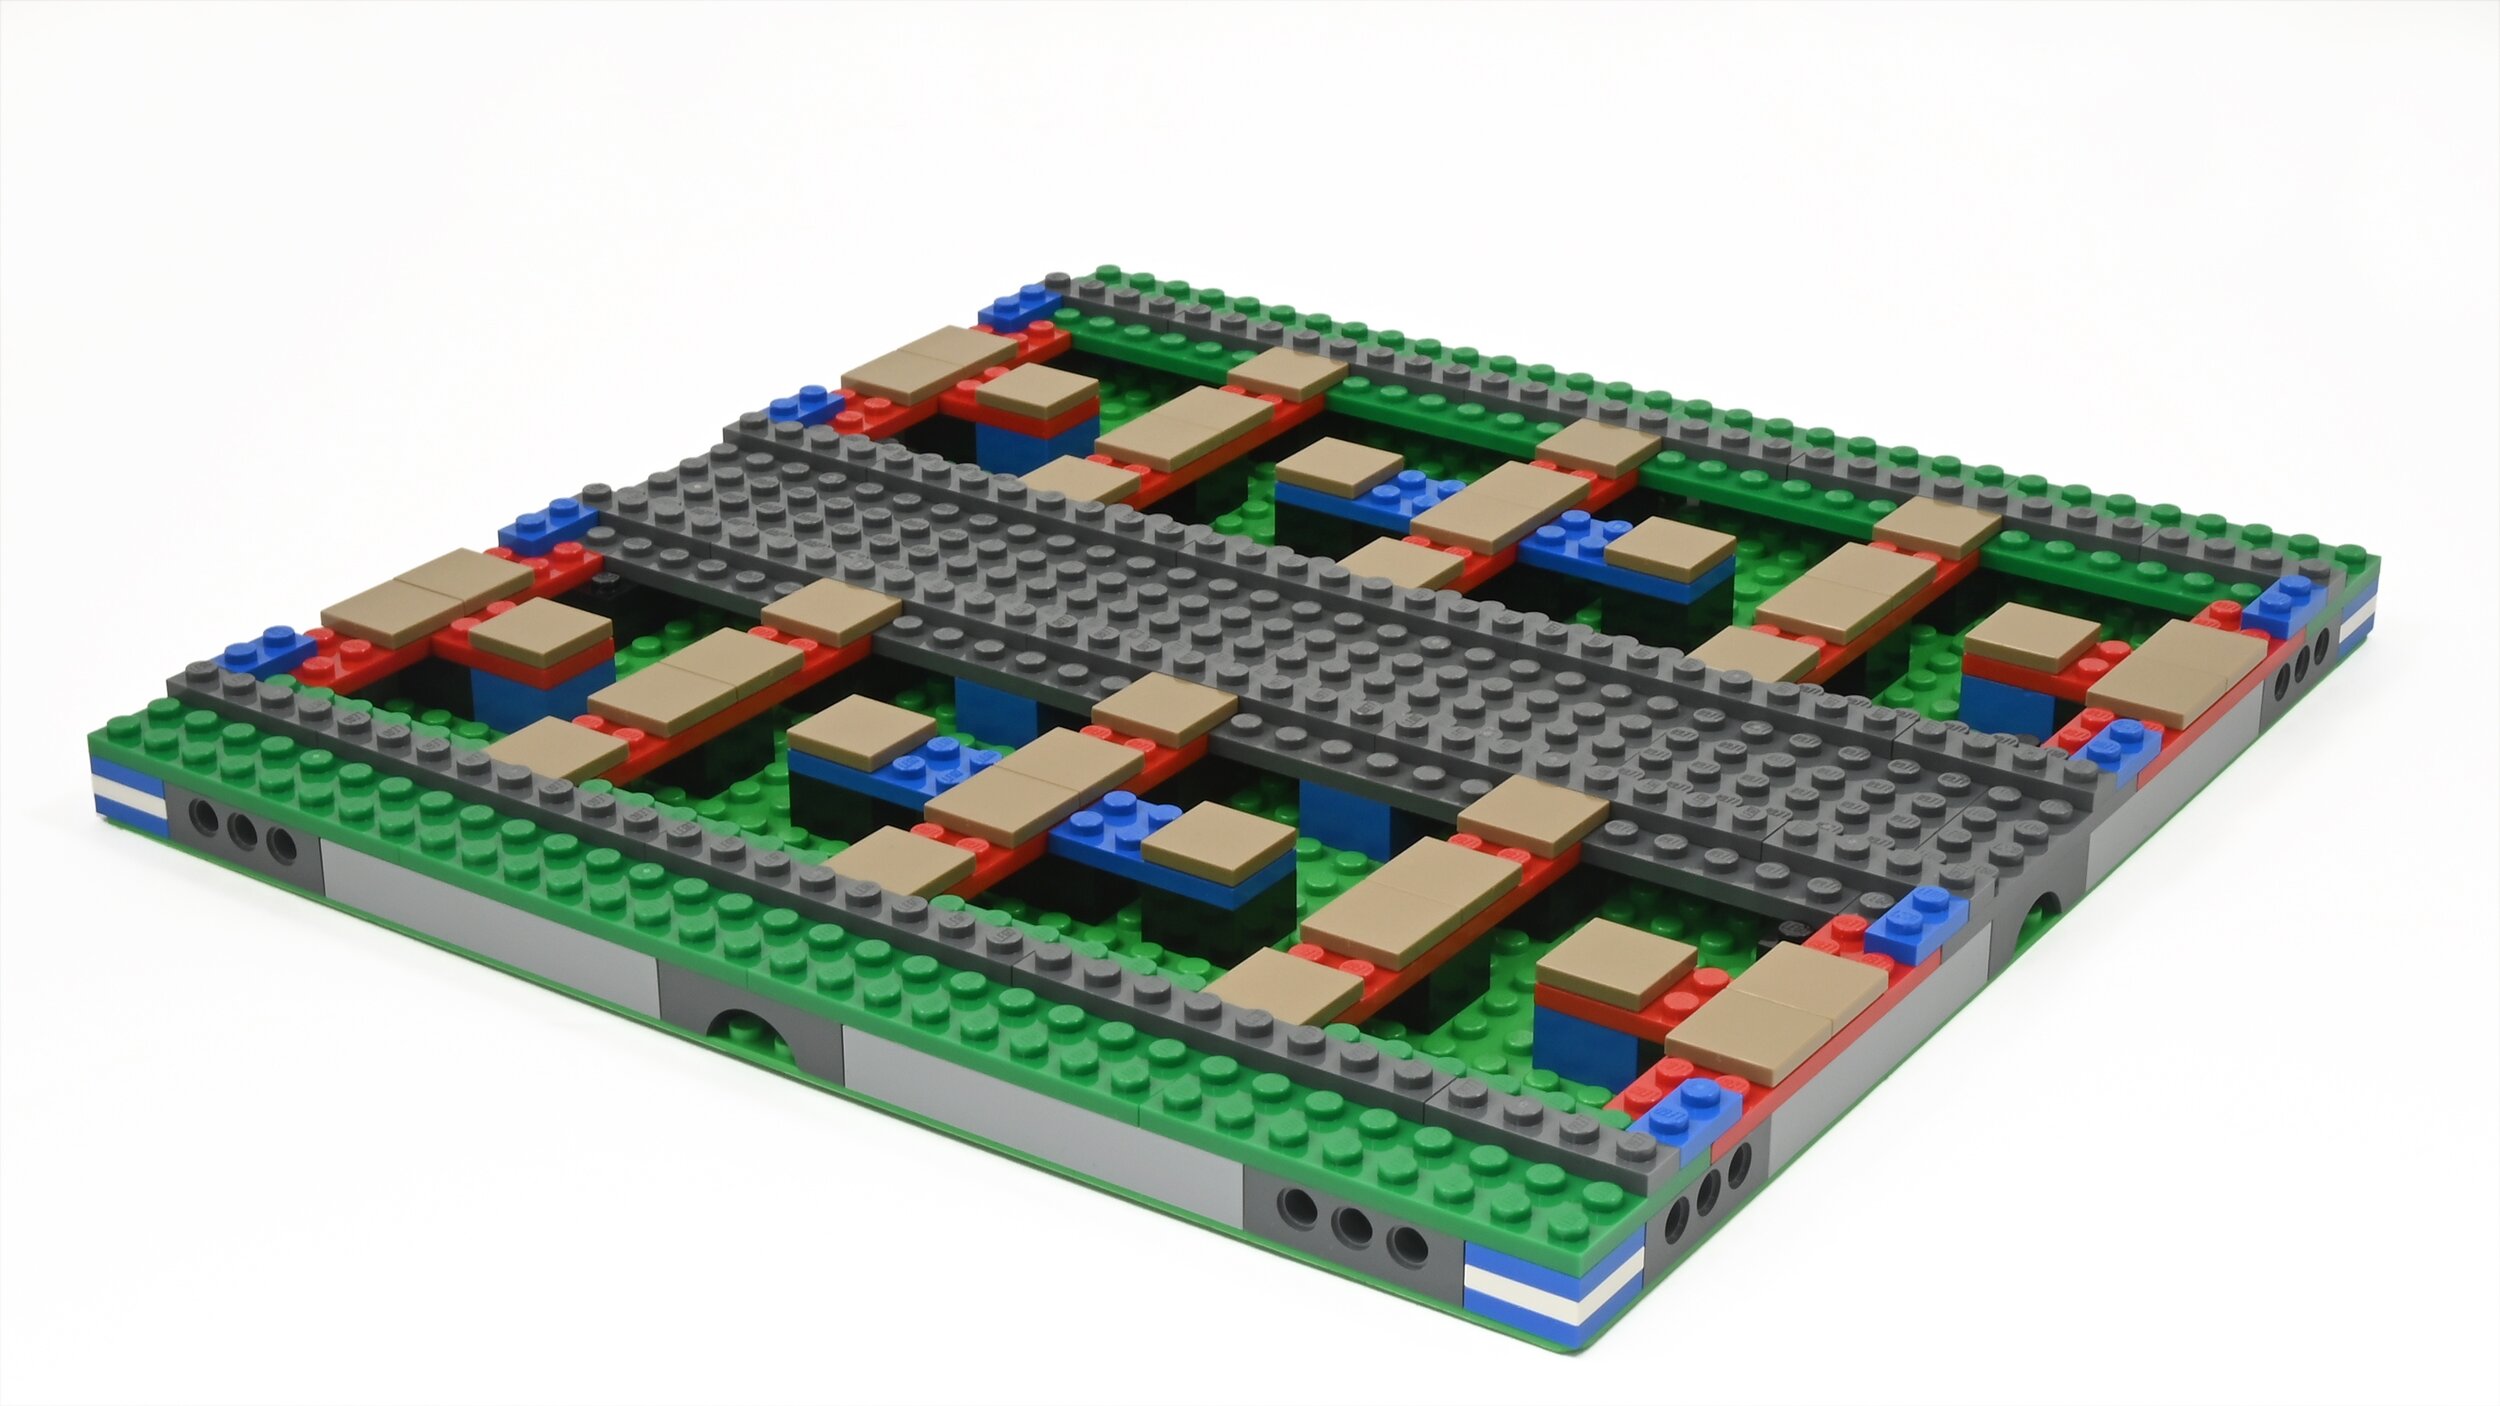
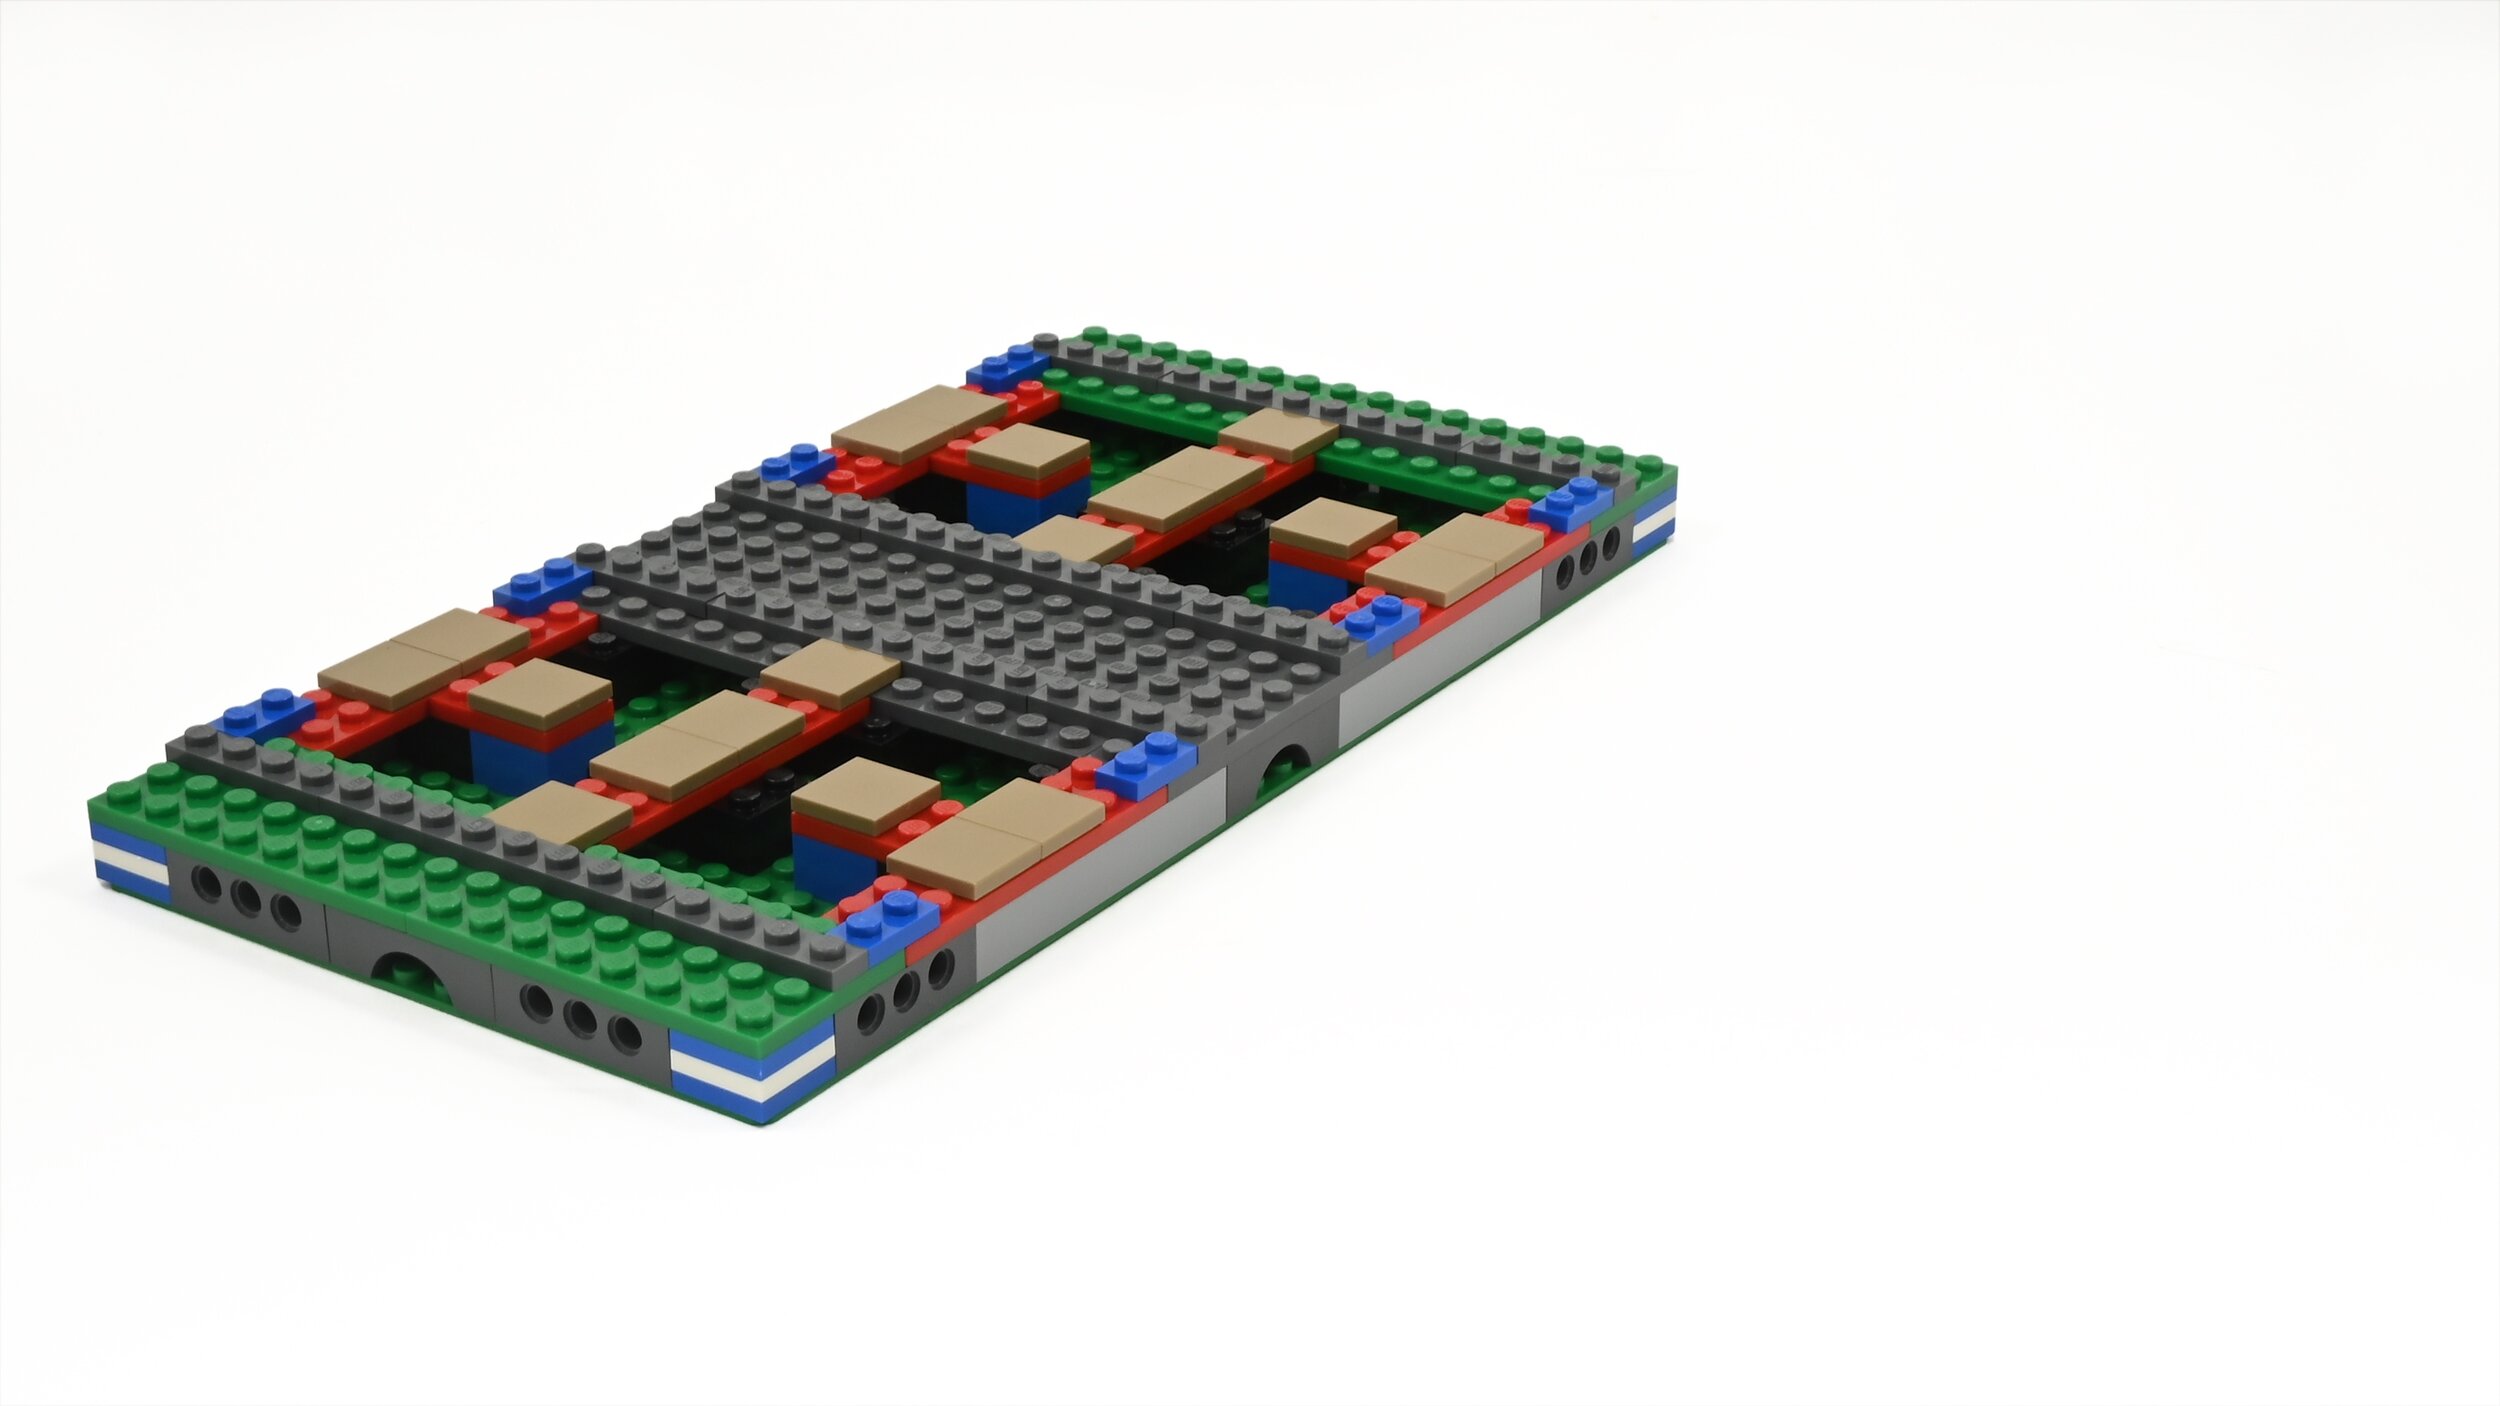
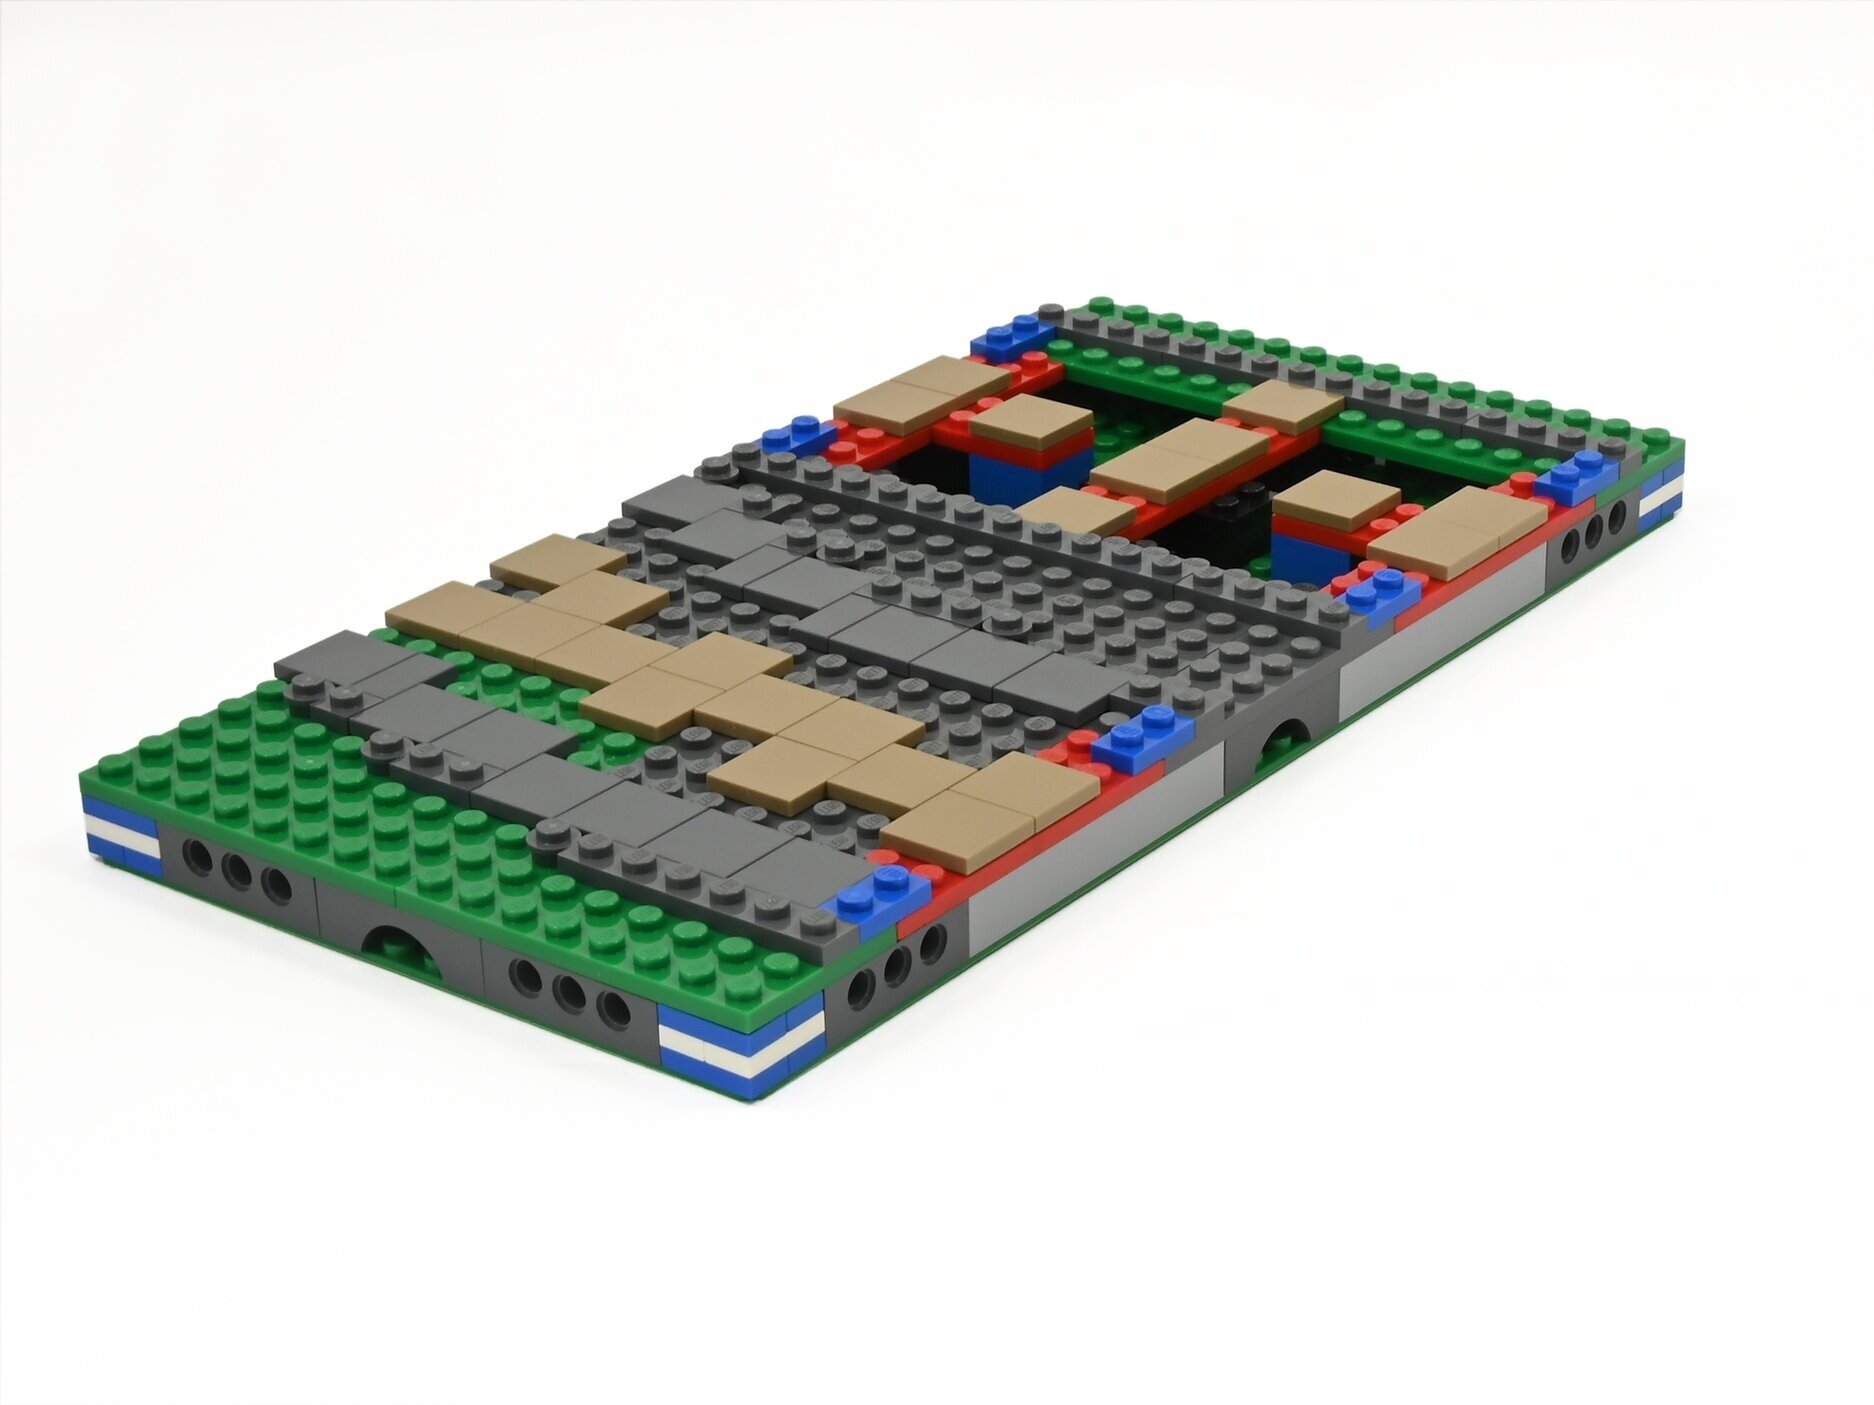
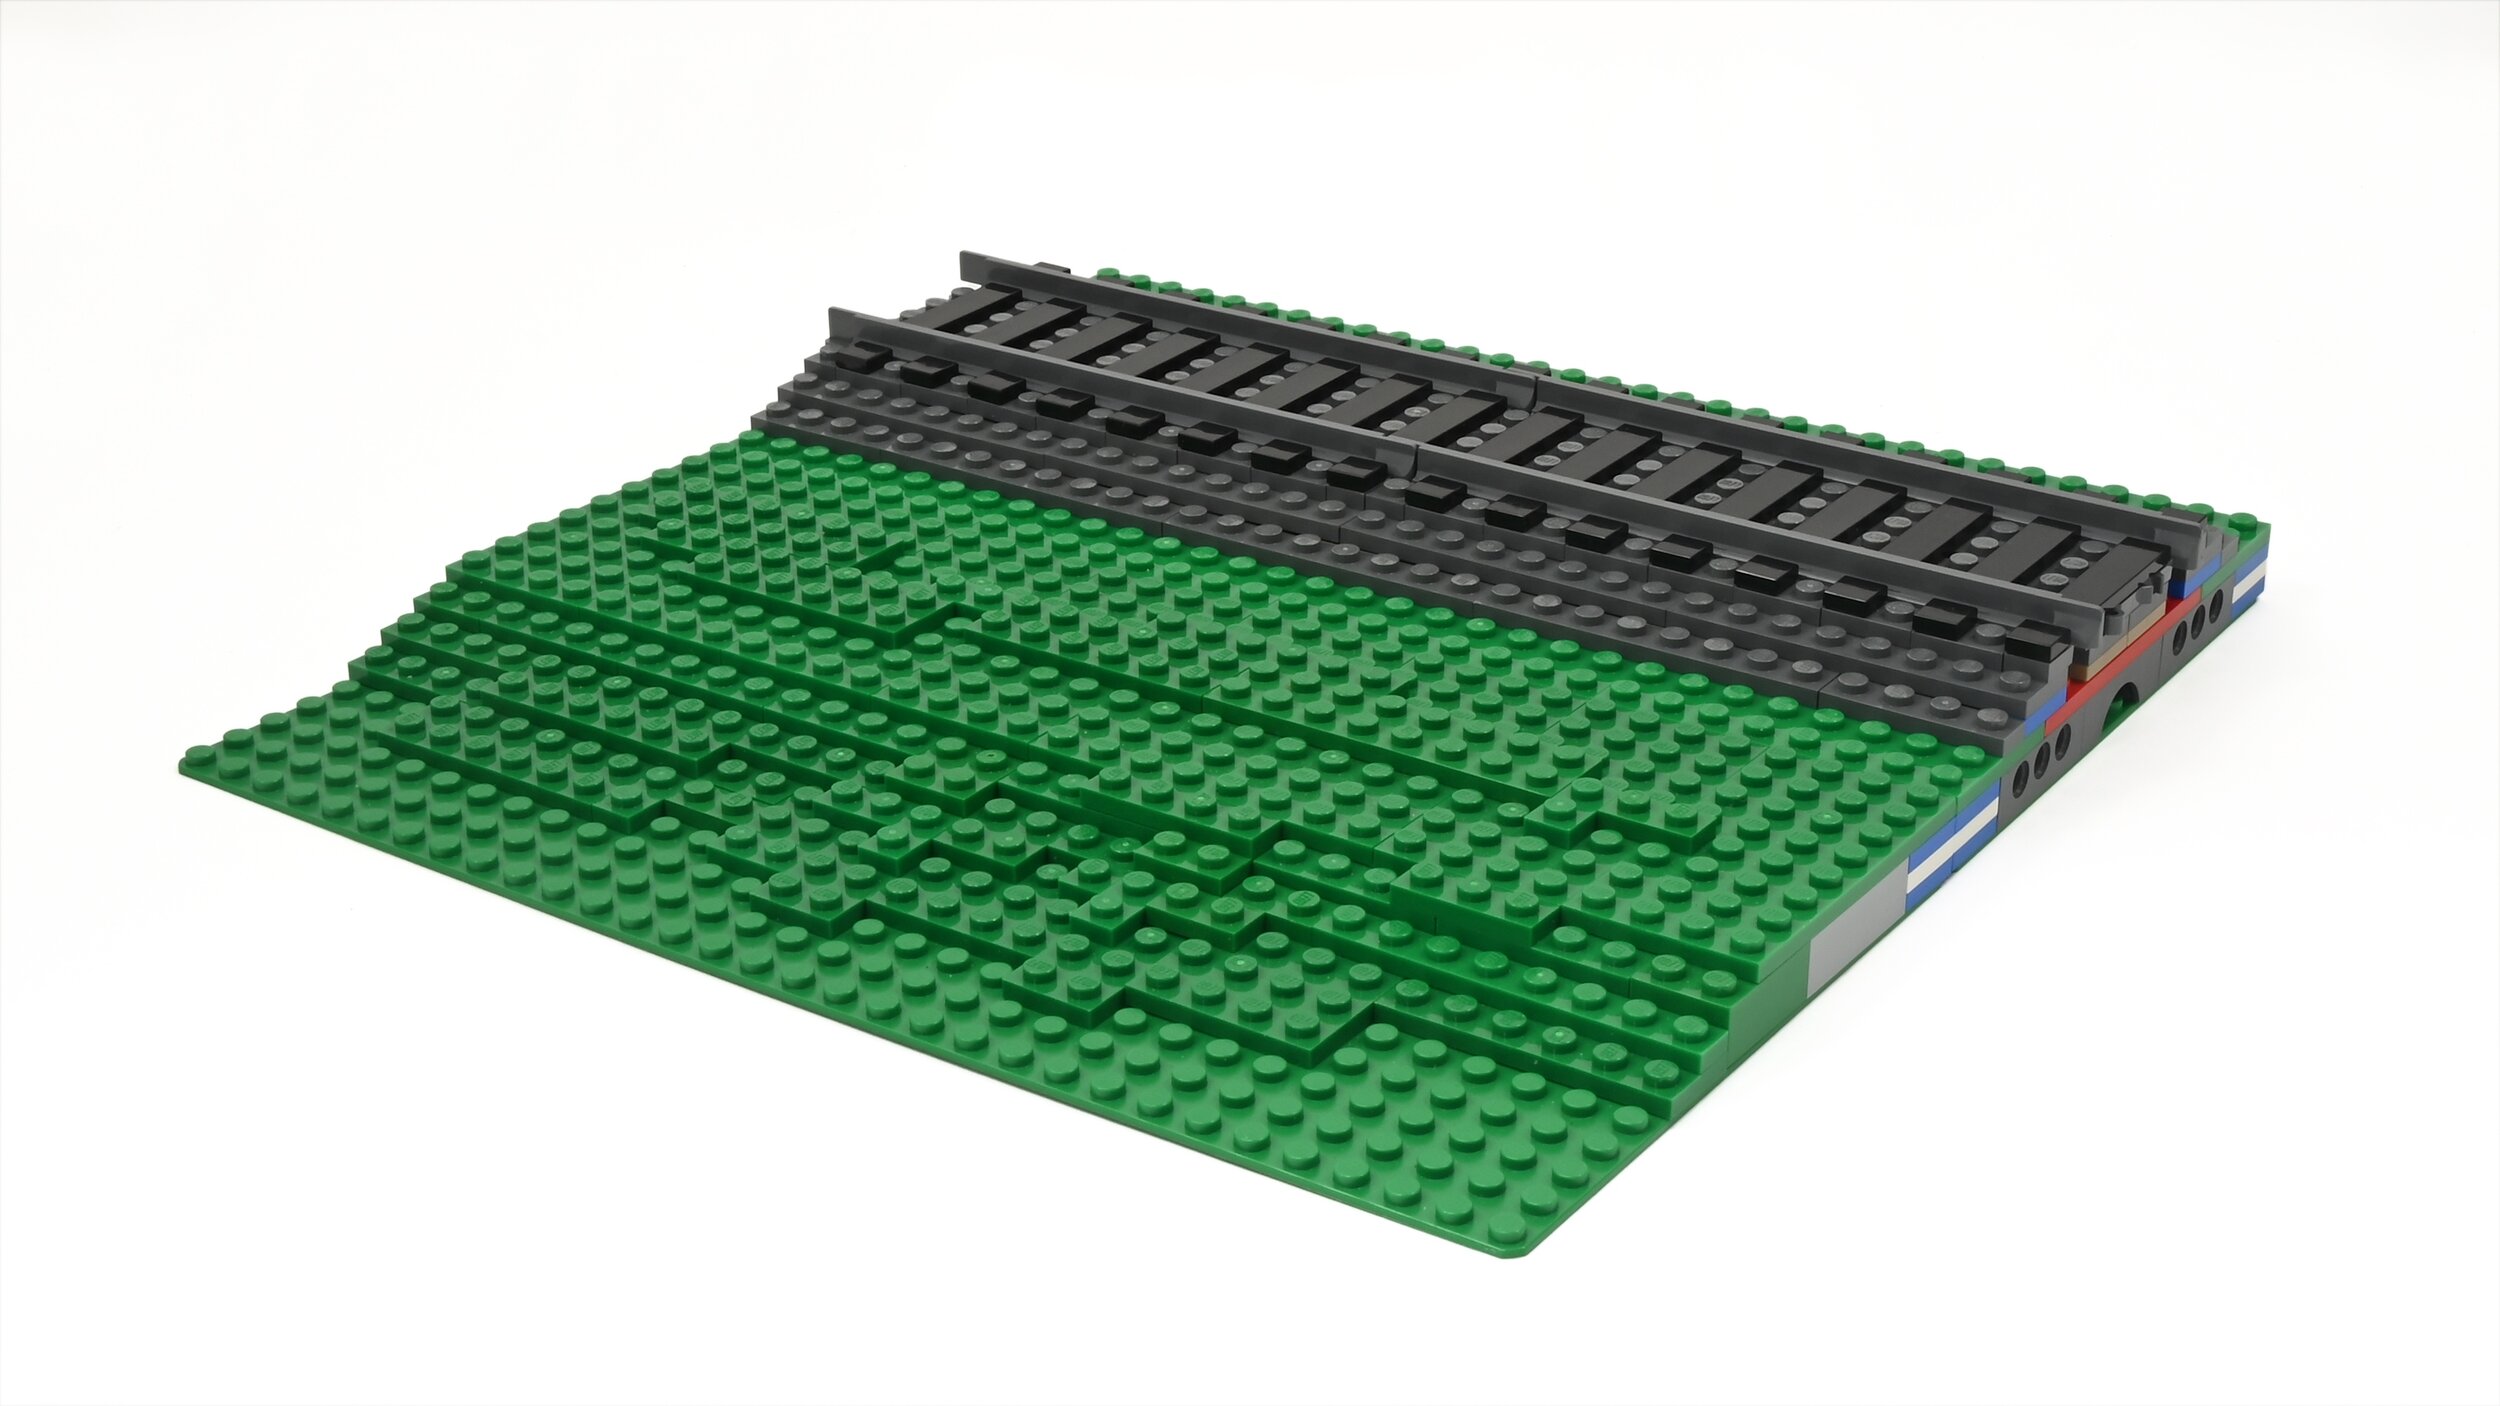
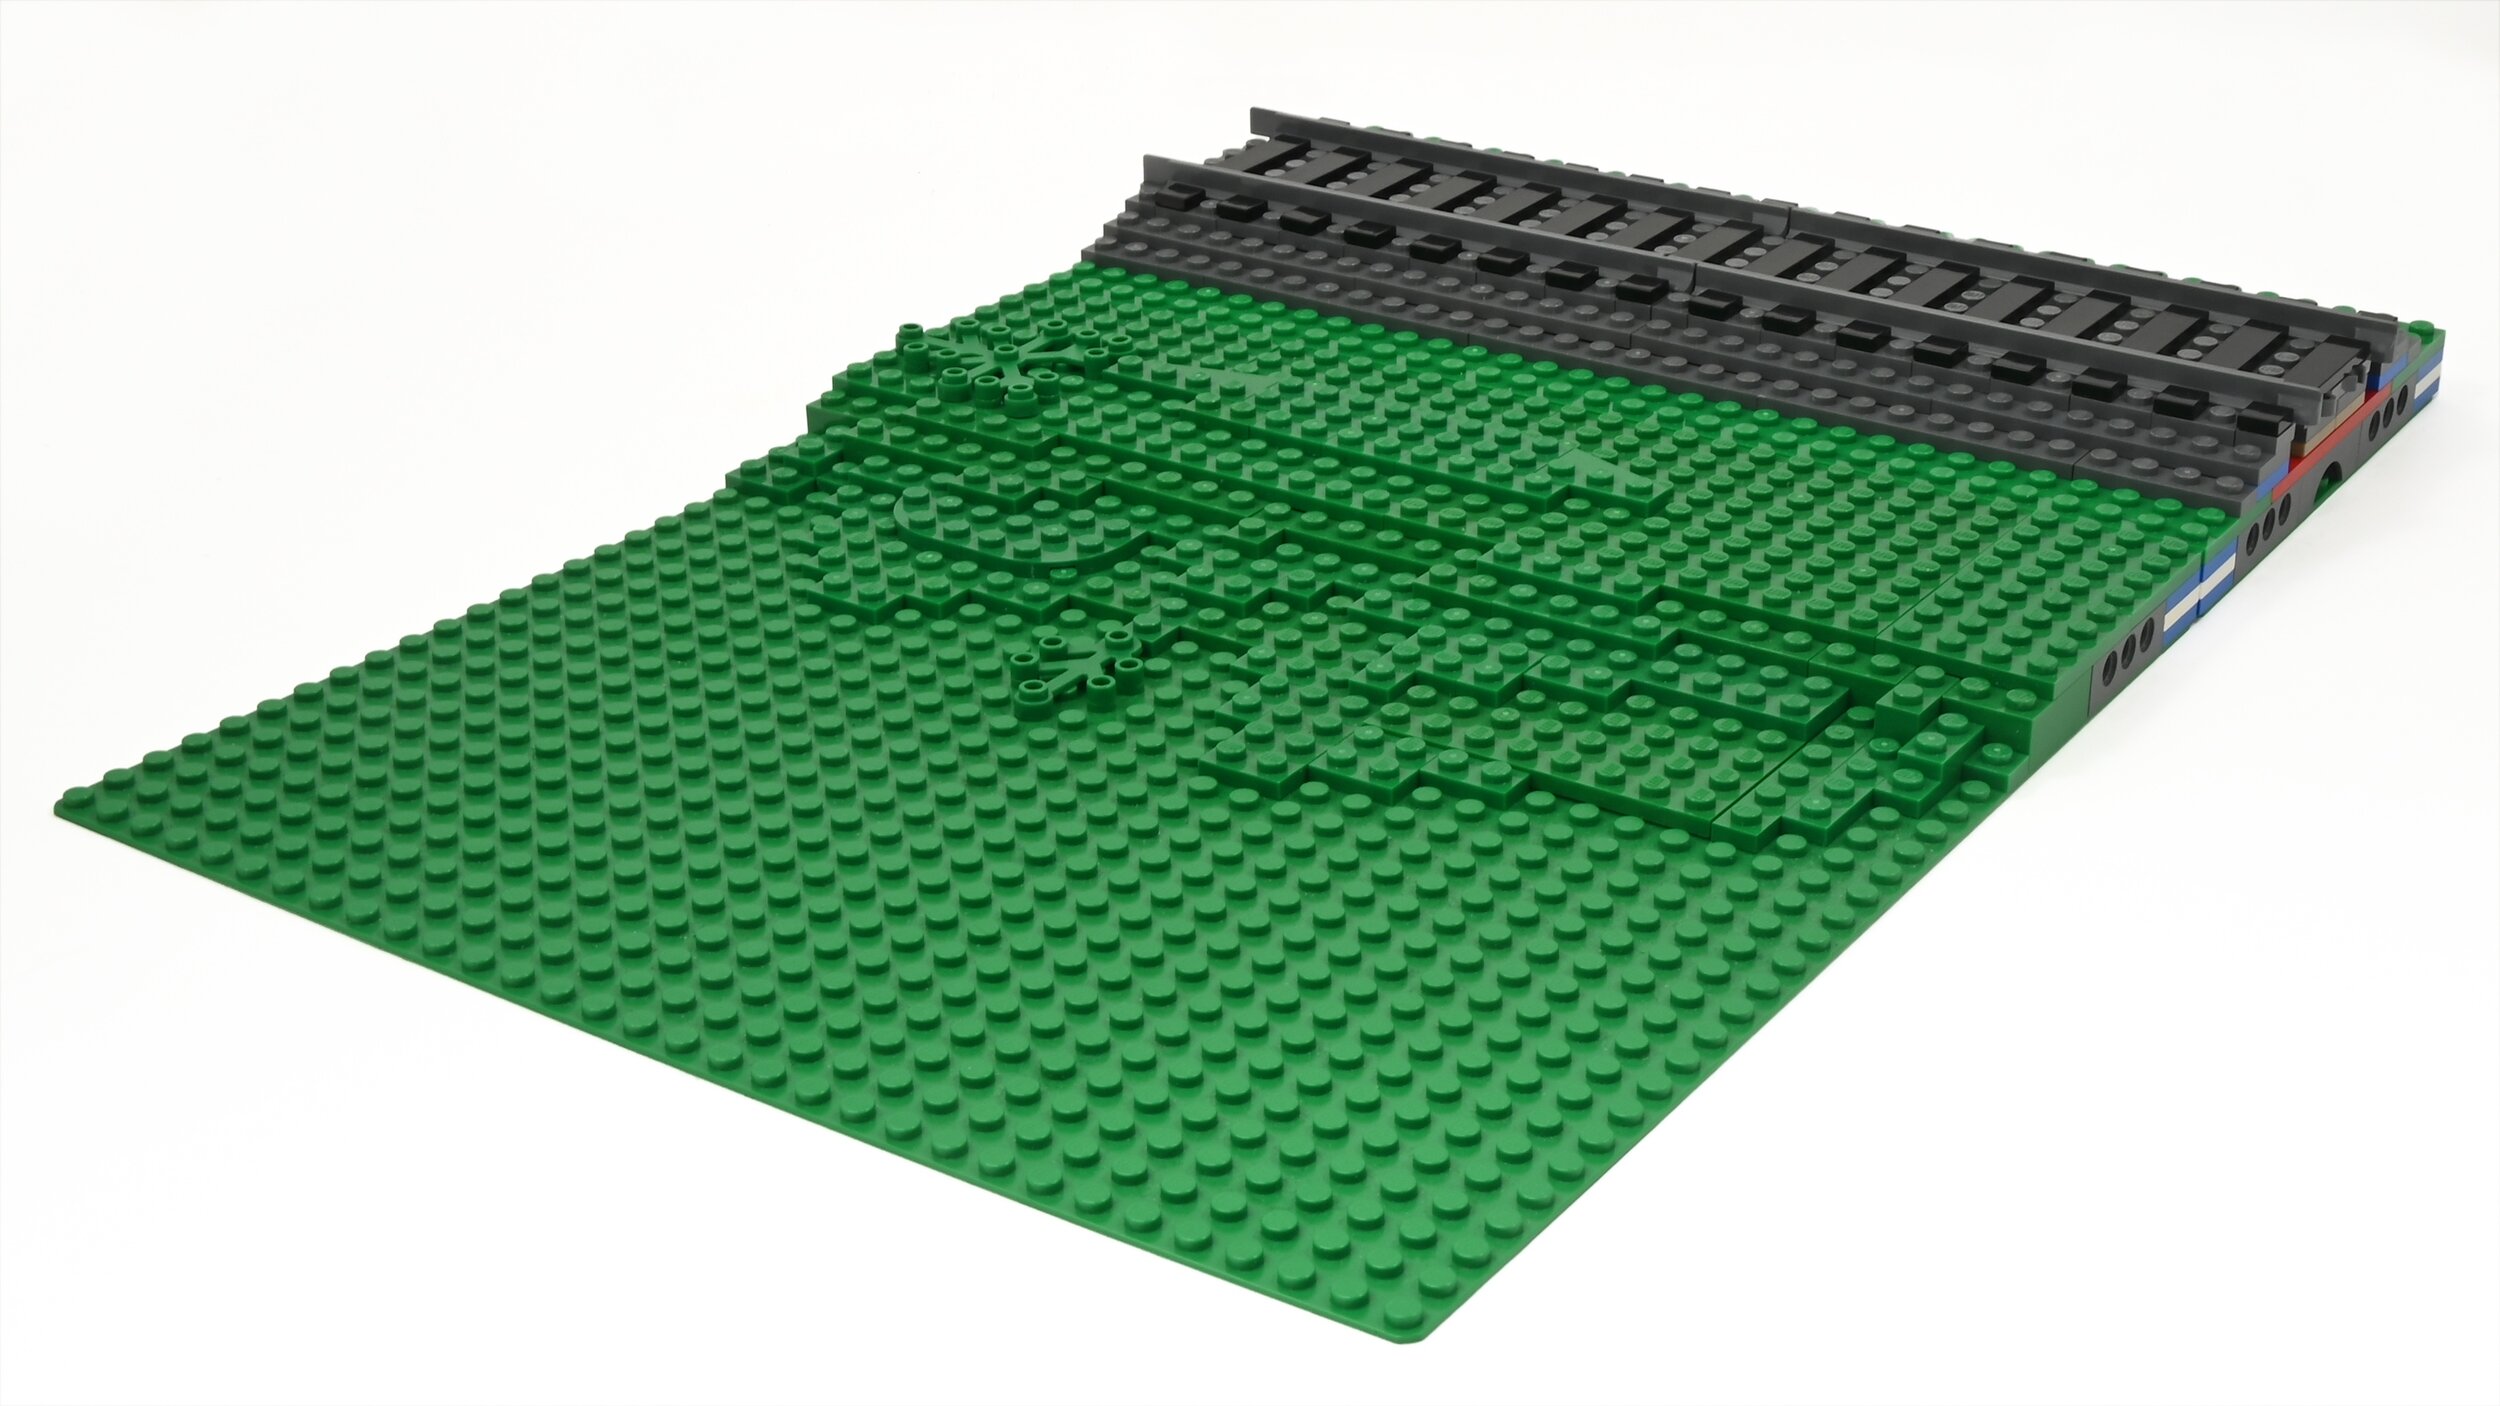
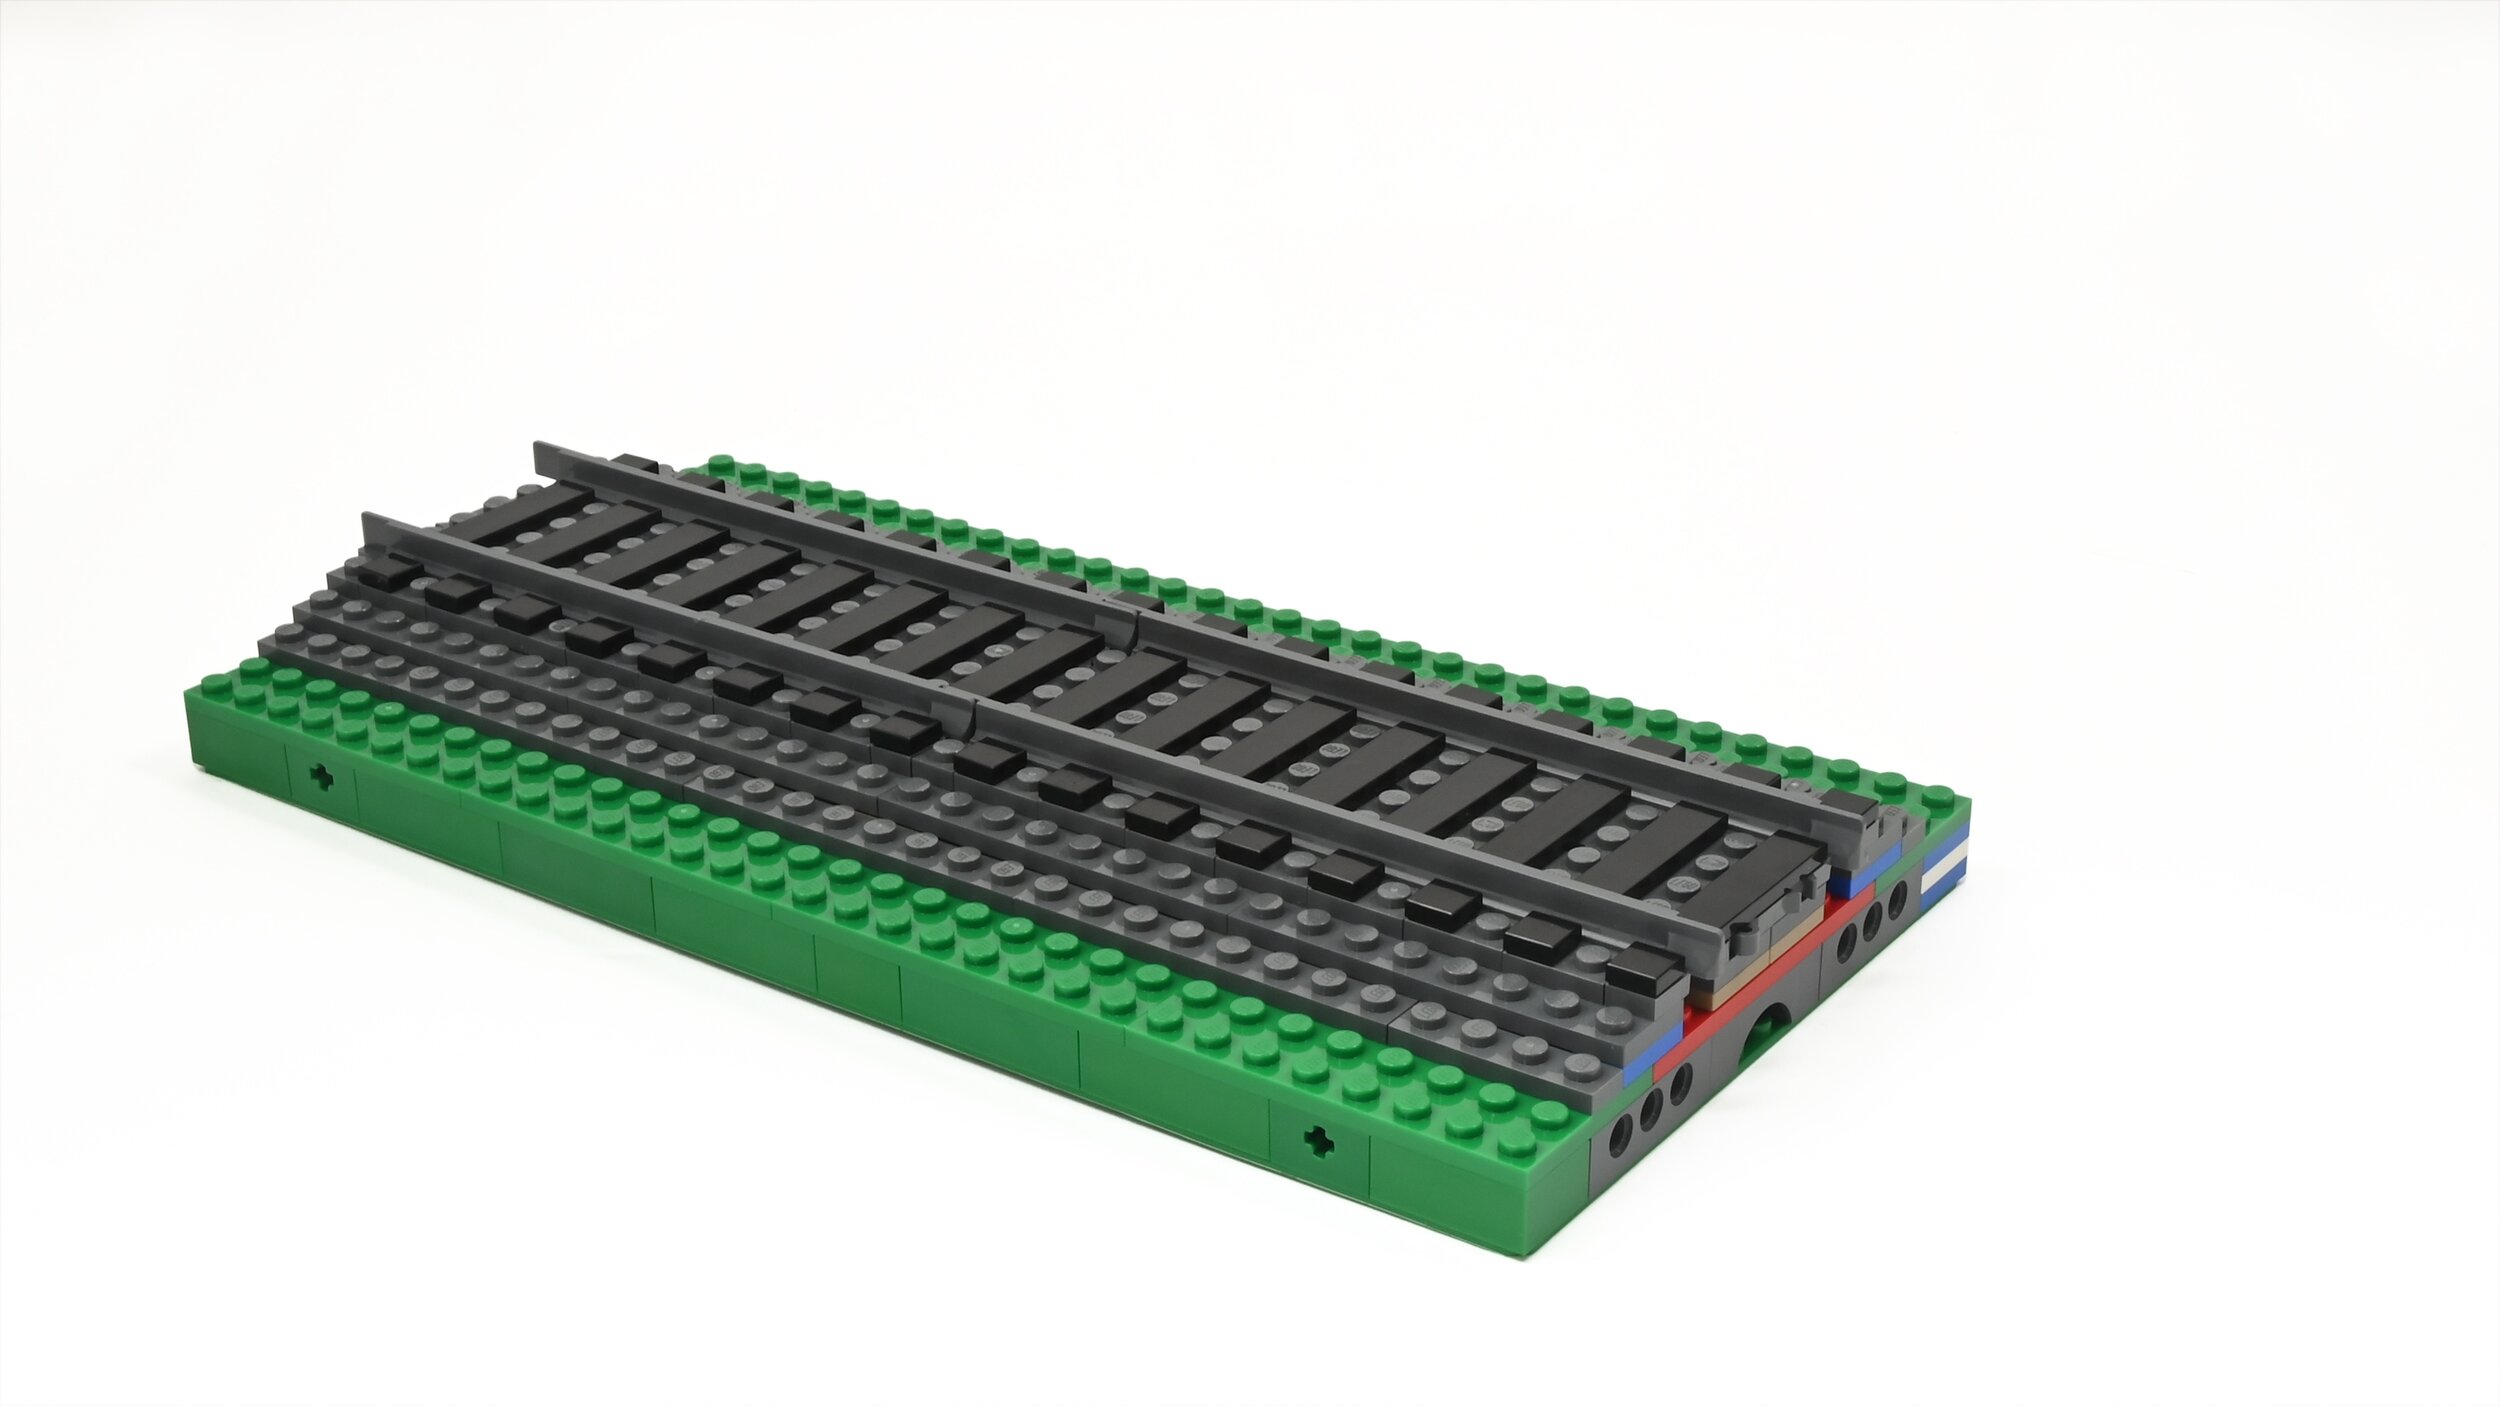
Straight Track MILS Modules
Mounting straight track to a MILS module is relatively easy. MILS BTM modules are adapted to include supporting tiles and plates to mount one or more sections of pre-ballasted track. Since the space under the track is covered, a sparse framework can be used to support the track. This saves the number of parts required, especially large plates in either green, grey, tan, etc.
Ideally, it is useful to have a variety of module sizes to accommodate both single and double track as well as track lengths of either 16 or 32 studs long. When designing a layout, it is often necessary to have modules of different sizes to build different track configurations. Examples of MILS straight track modules are shown below.


Build Your Own
Instructions to build your own MILS compatible train track modules can be freely downloaded from L-Gauge.org.
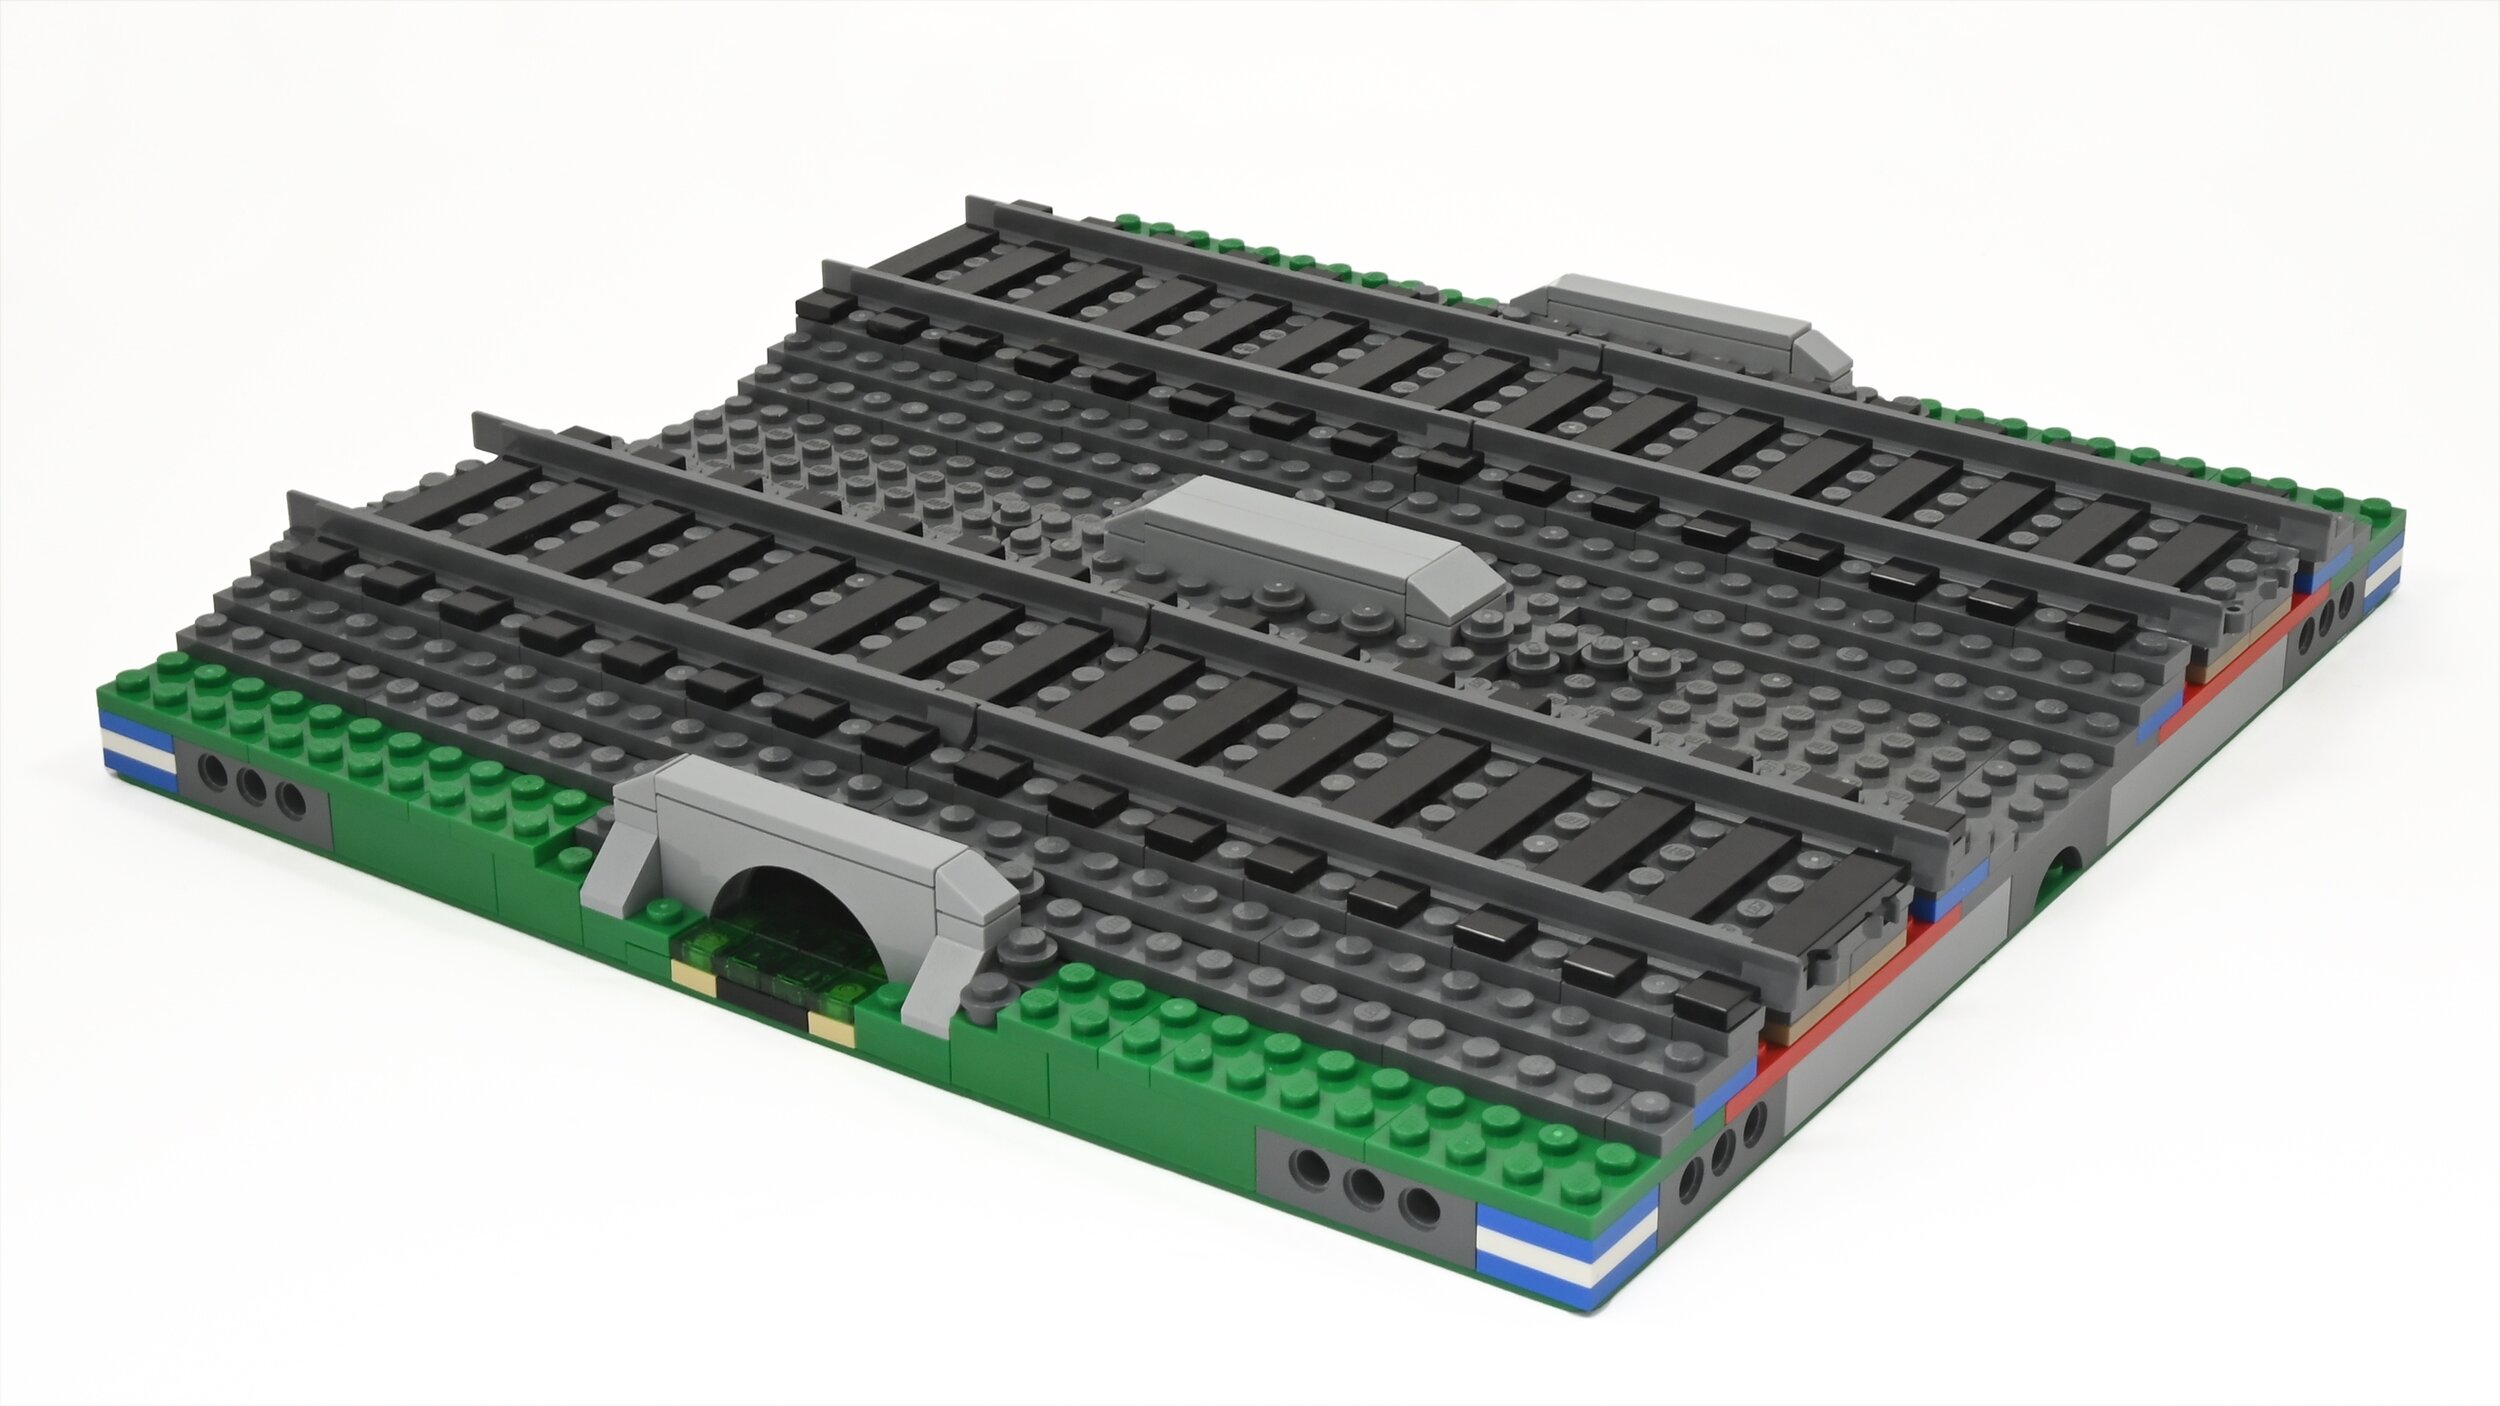
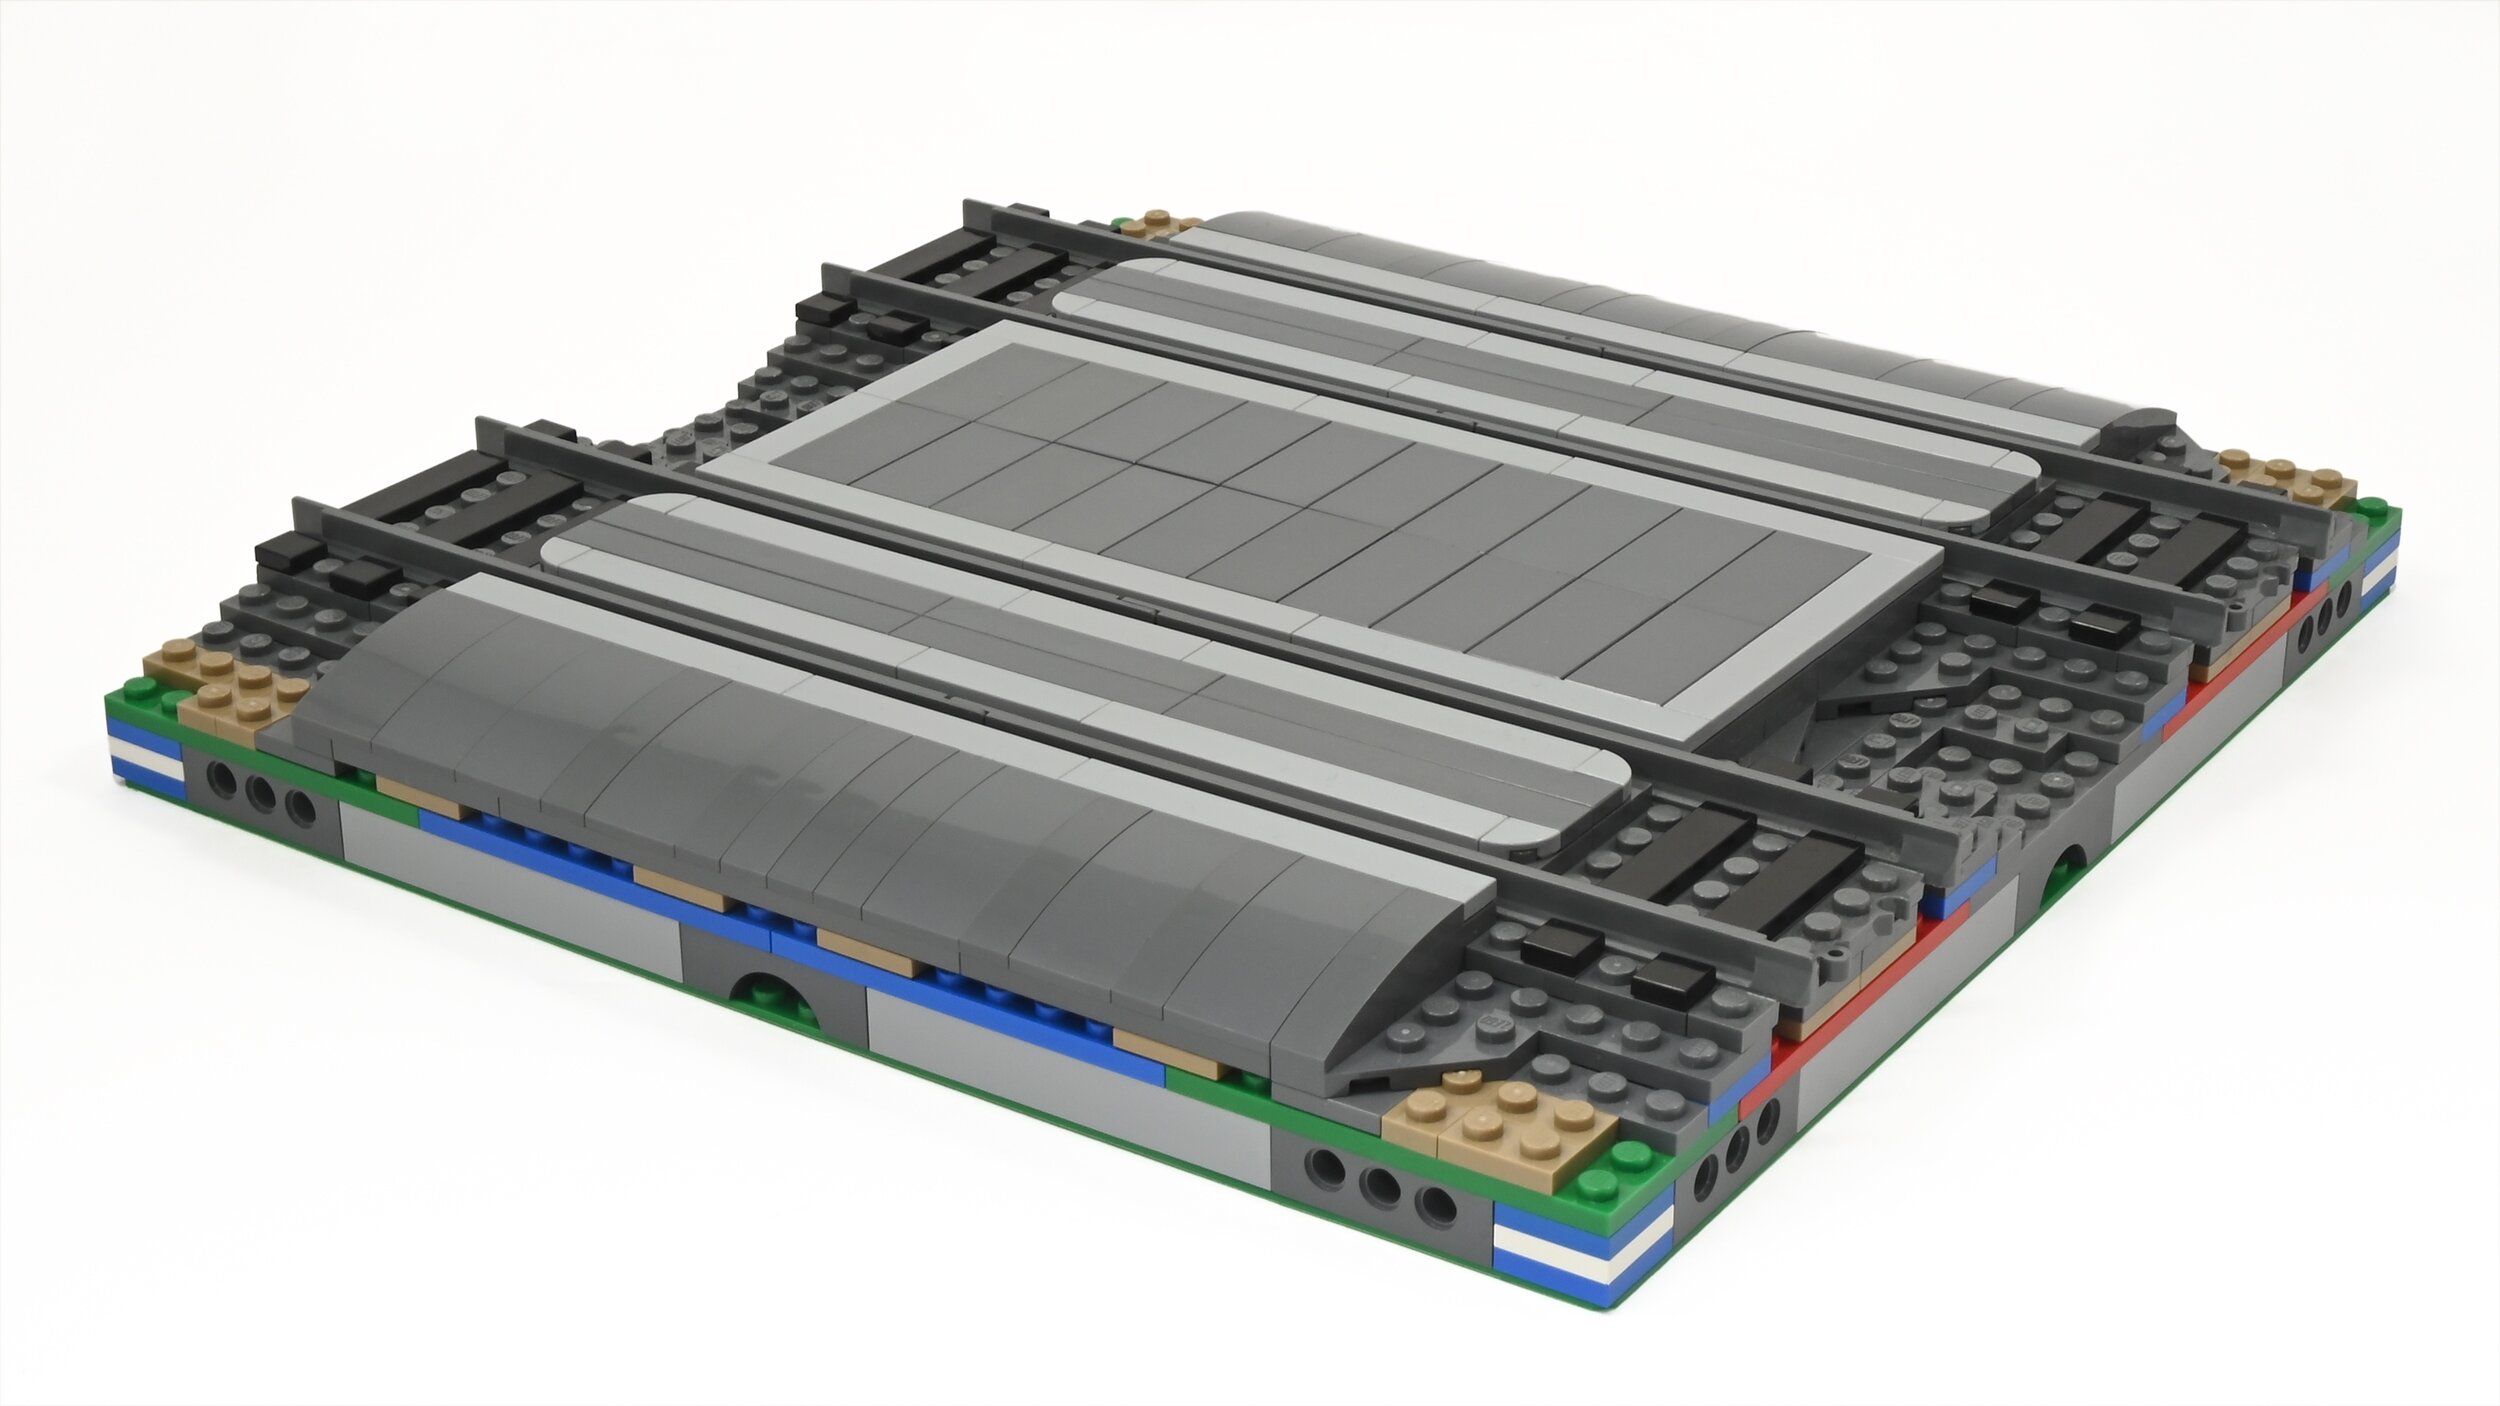
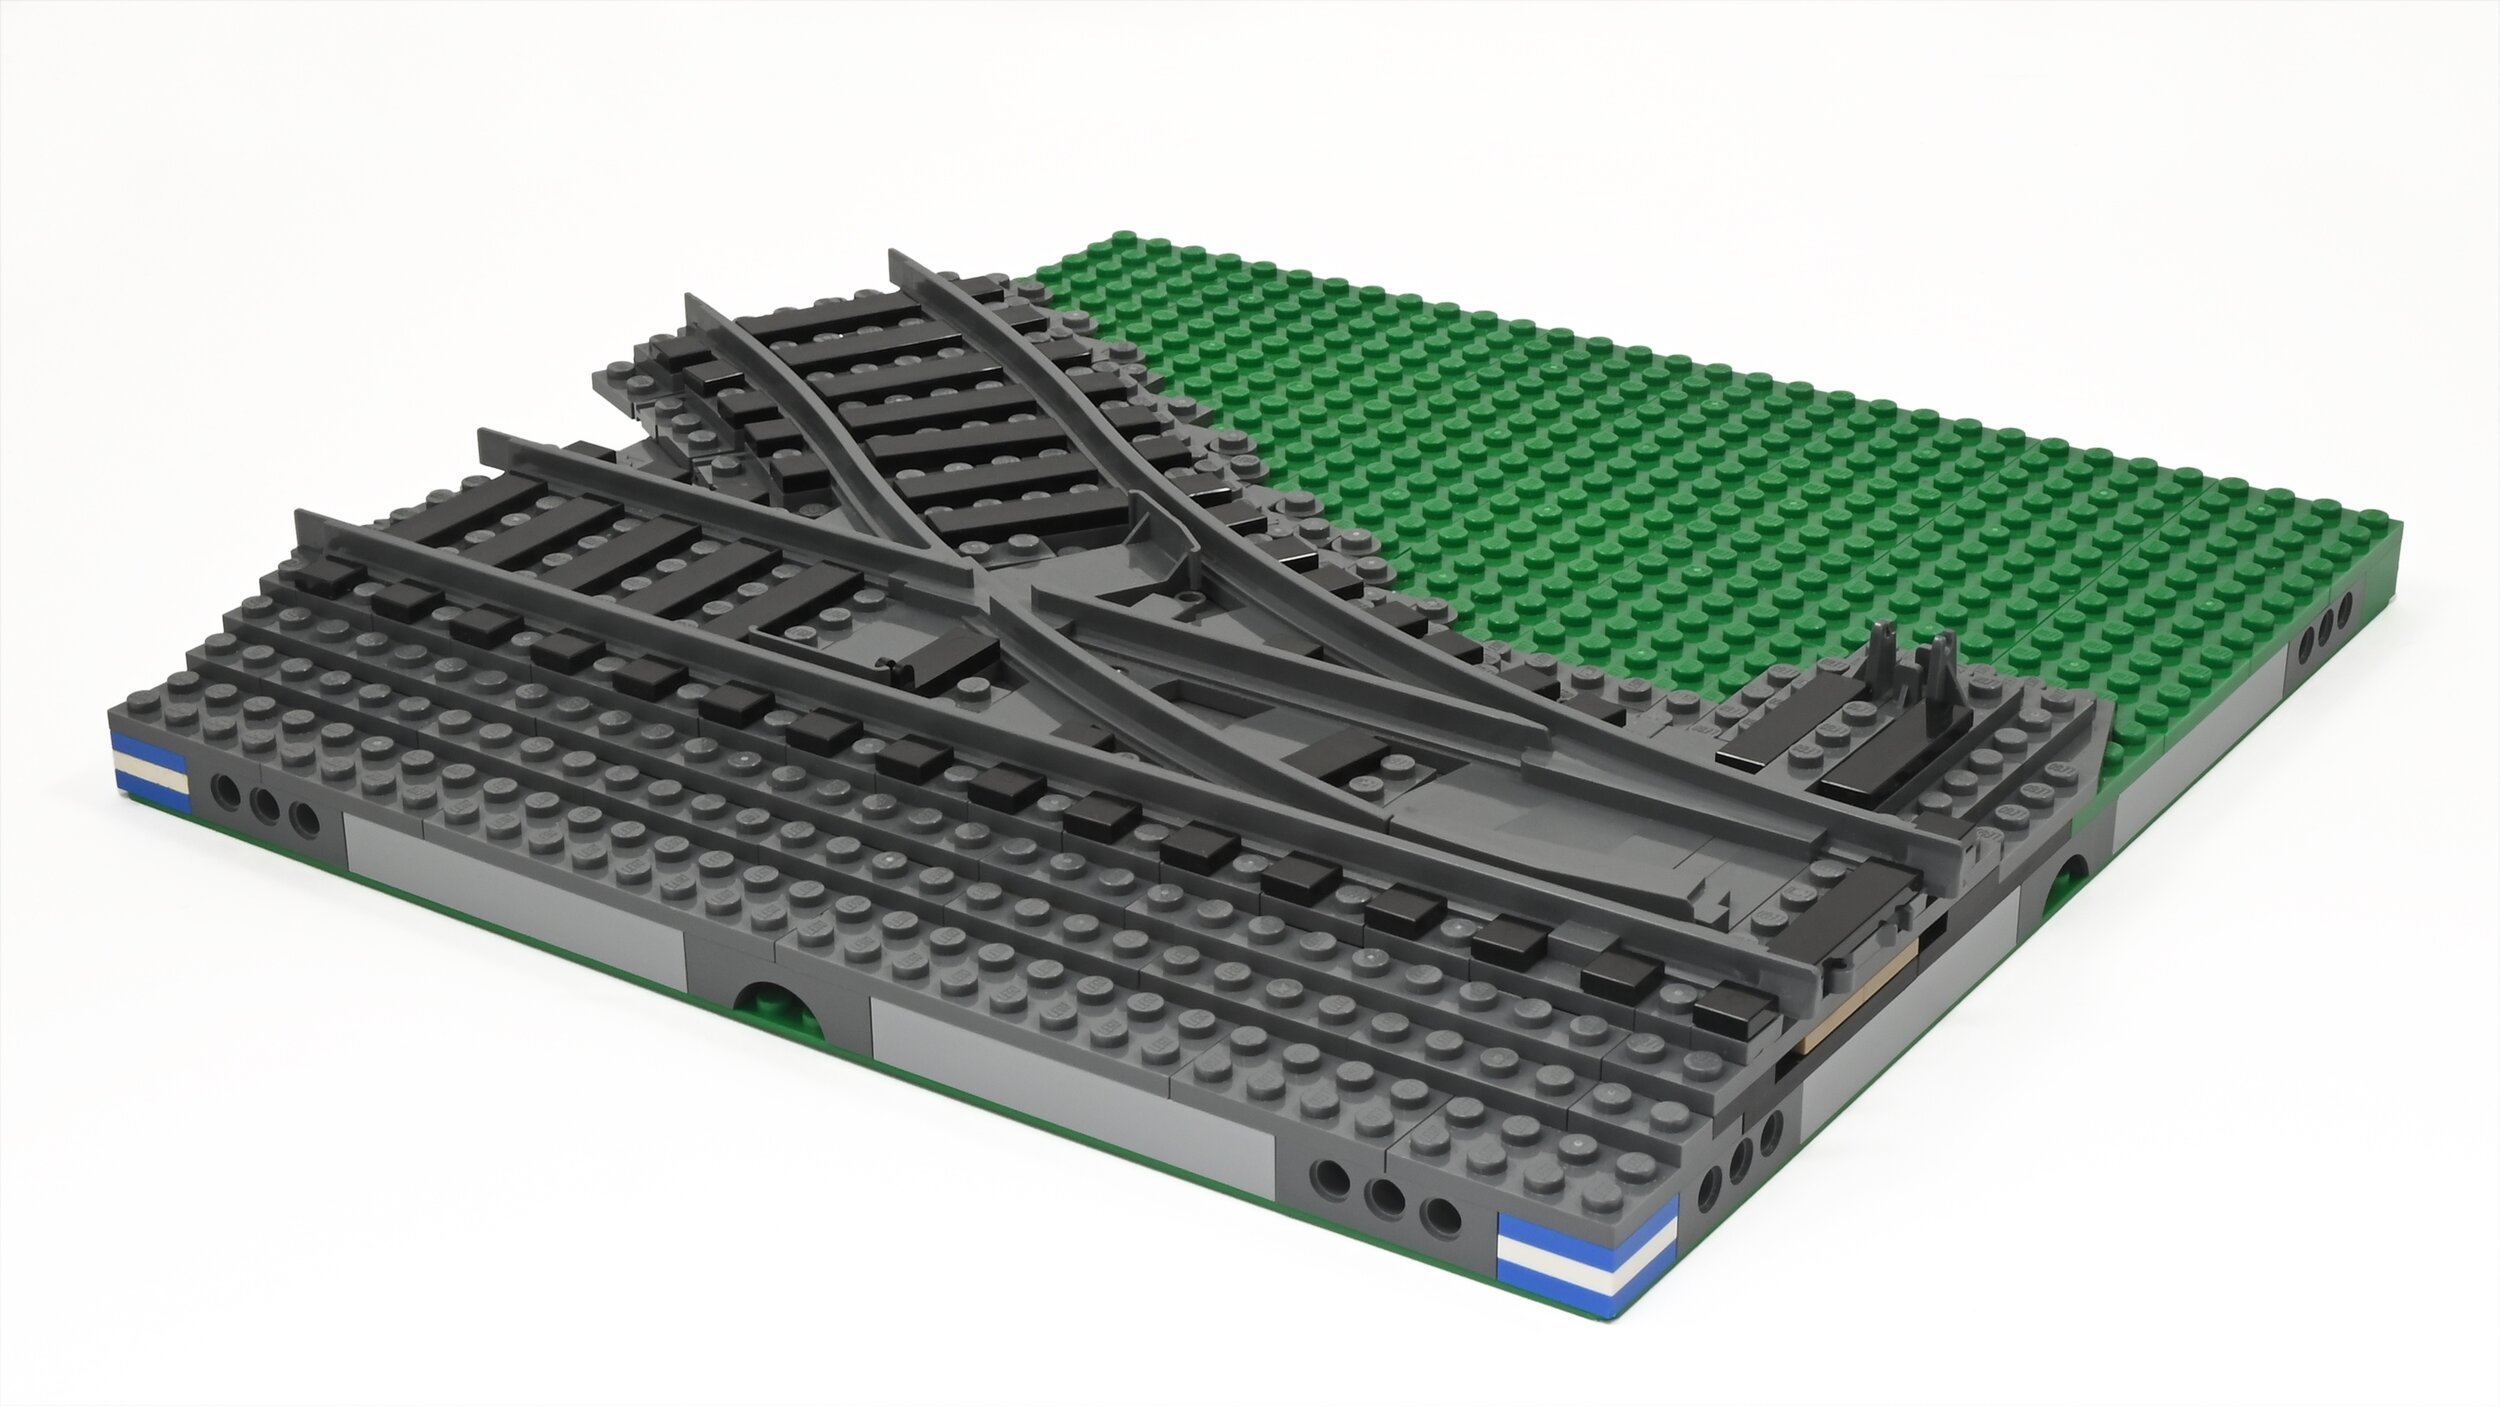
Curve Track MILS Modules
Curve tracks can be mounted to a group of MILS BTM modules which collectively form the mounting substrate for an entire curve section of track (90 deg, 180 deg, etc.). The curve tracks “float” on a bed of tiles with plates along the perimeter representing part of the ballast shoulder. Tile maps for various curve radii can be found at L-Gauge.org.
The illustration below shows a 90 deg section of double track (R104 & R120 radii) mounted to a group of MILS BTM modules with tiles and ballast shoulder-mounted directly on top of the MILS “ground” level plates. I often keep these 90 deg corner groups together as a “set” of modules. Putting together these curve sections is not unlike doing a jigsaw puzzle! One suggestion is to decorate the corner ID section in the same unique way for a “set” of corner modules.

Other MILS Track Modules

The versatility of MILS modules allows us to build many different types of track modules as well as the ability to mix and match modules. Furthermore, the opportunity to add details such as drainage culverts, gutters, troughs, etc. can be rendered easily and realistically since MILS offers 3 plates of elevation below grade.
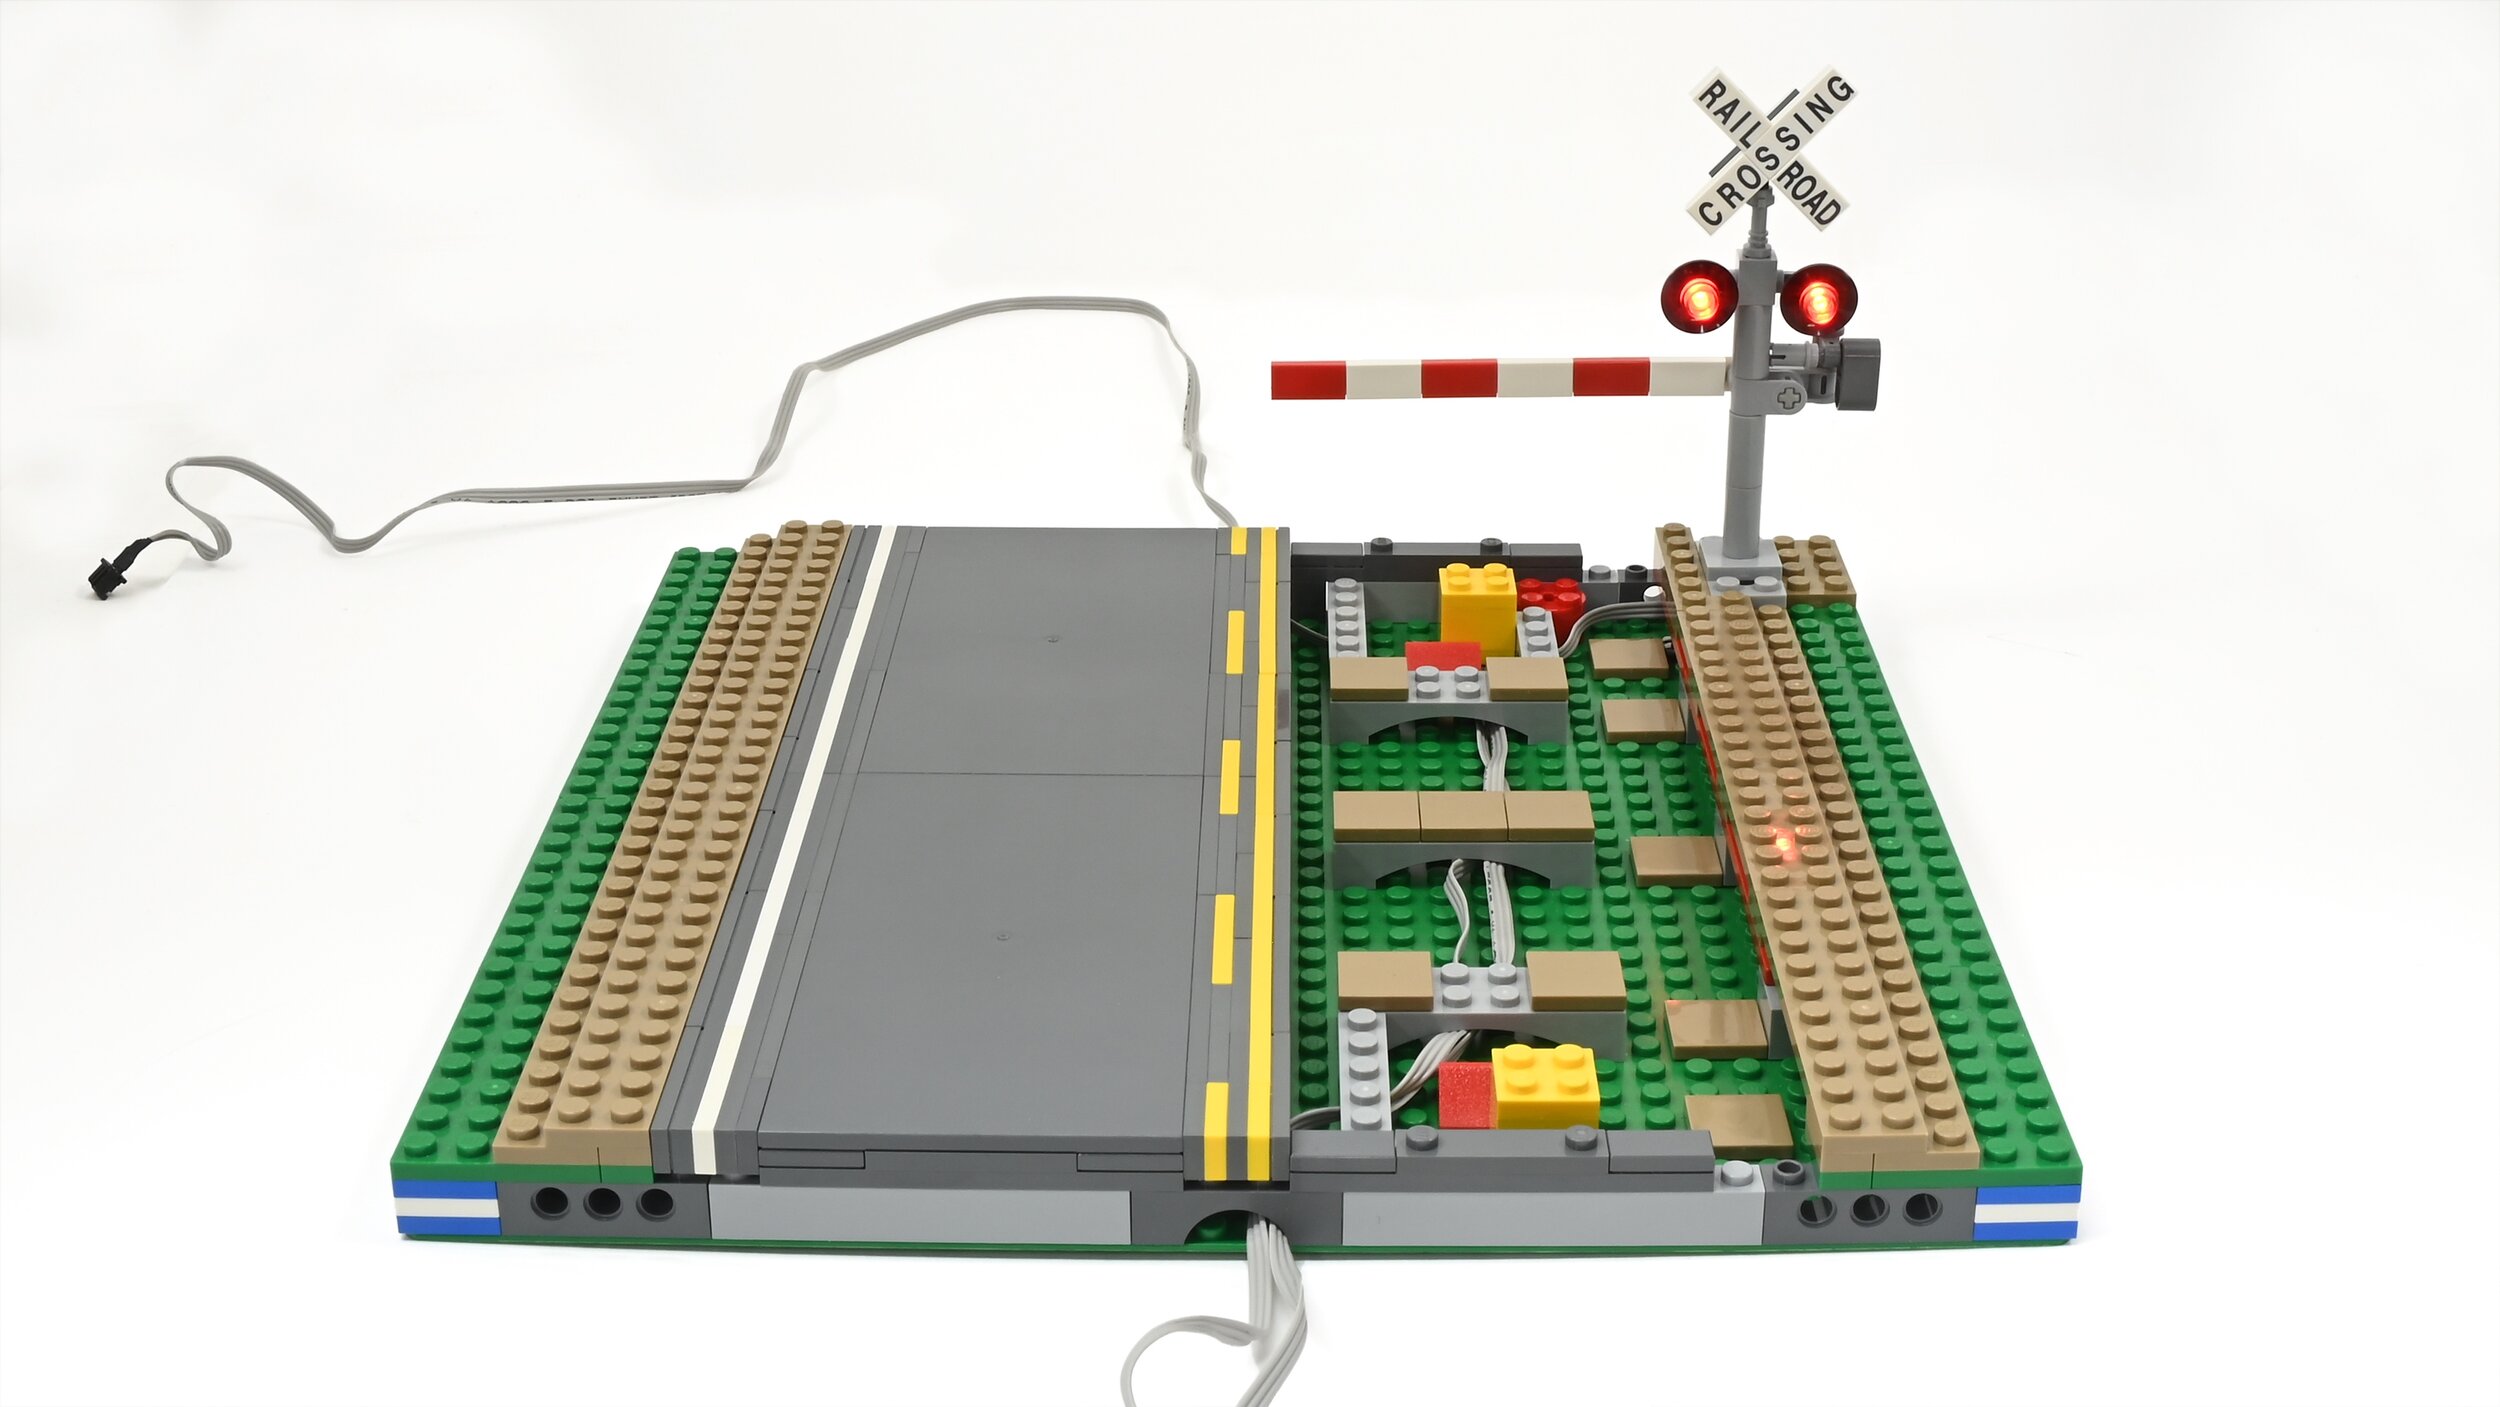
Transition Modules
Shown below is a group of MILS modules that transition train track between the MILS domain and conventional train track at baseplate level. This allows builders to combine MILS train layouts with conventional train layouts and permit interoperability of trains between each domain.

Using Wired Electrical Accessories with MILS
One of the nice incidental benefits of MILS modules is their inherent wire/cable management. This is due to its elevated ground level and the provision of cable pass-through locations on up to all four sides. Internally, wiring can be routed through the module and secured with a variety of LEGO elements, such as arch bricks, clips, curves and slopes.
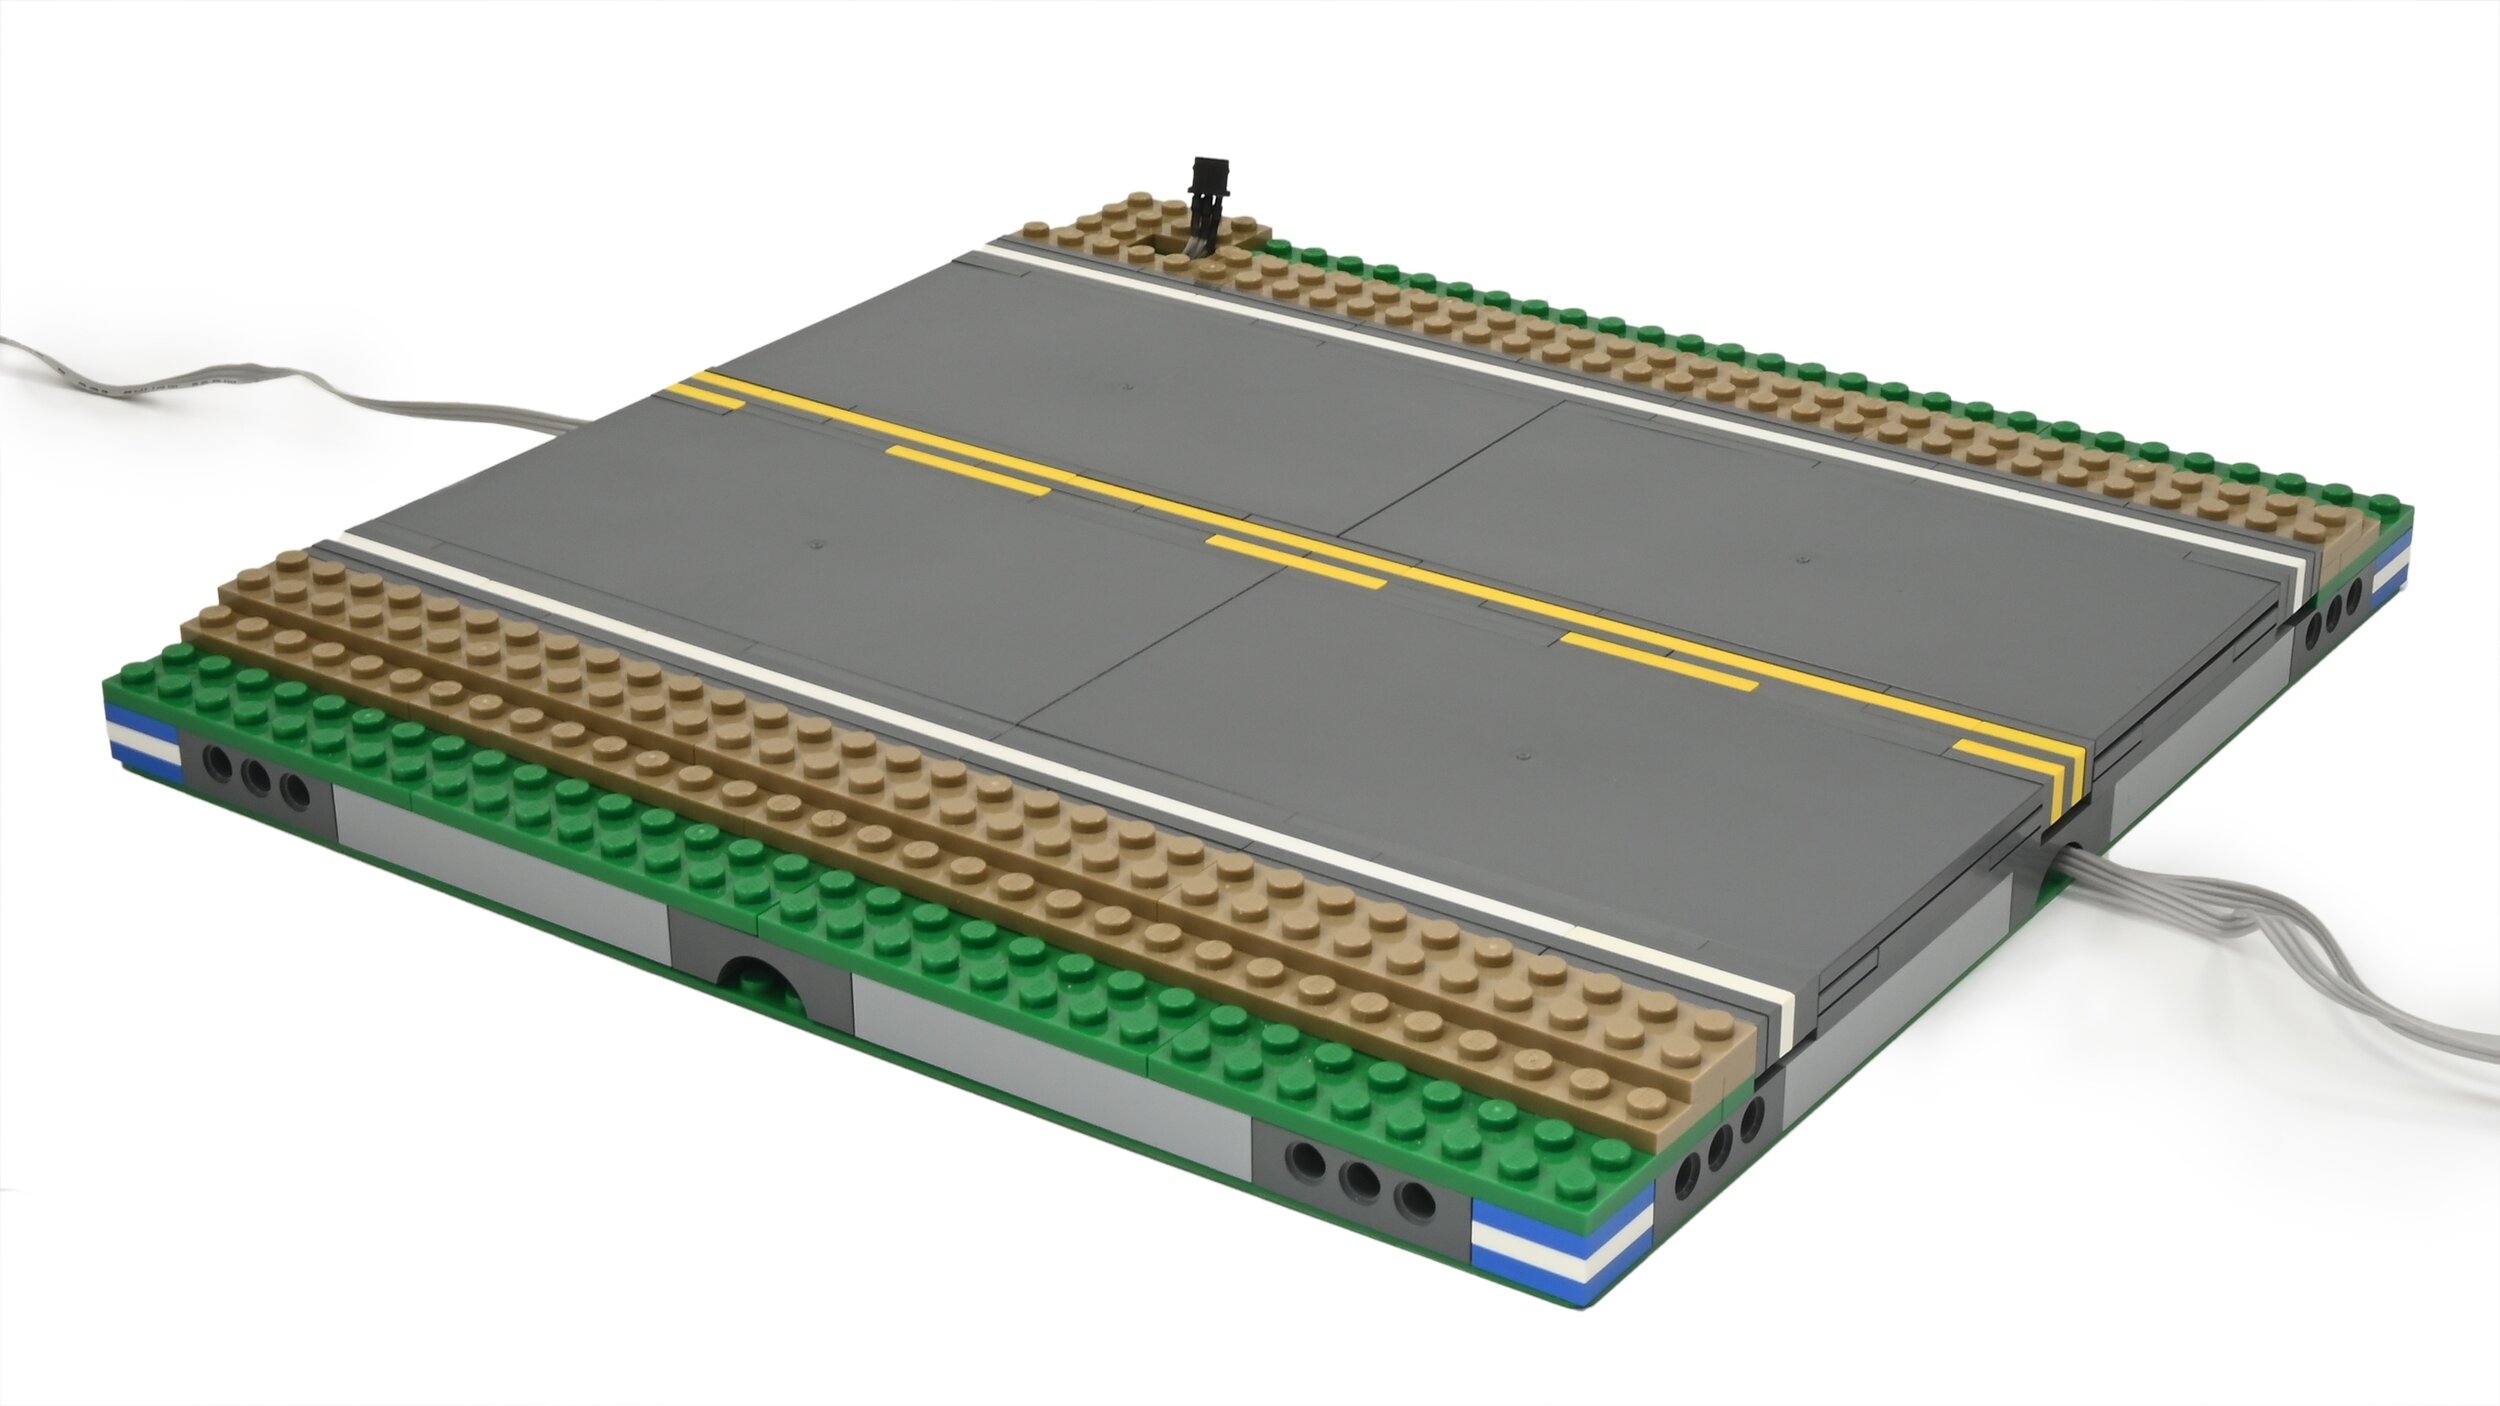
Border / Margin MILS Modules
The “right-of-way” corridor of track can flow anywhere within a layout table footprint. However, I prefer the track corridor to be bordered on each side (especially the “public” viewing side). This results in the track corridor running through the centre of the table footprint. This offers two advantages:
Security/Safety: If train tracks are routed next to the tabletop edge, then trains are vulnerable to falling off of the table onto the floor either due to derailment or due to accidental (or on purpose!) bumping or interference by a viewer.
Aesthetics: Flanking the right-of-way with additional landscape gives the railway greater context with its surroundings and leads the viewer to focus on the trains. Furthermore, a bordered right-of-way can be used as a decorative foreground and background for photographing trains. I often use MILS modules for ad-hoc photography of a locomotive or rolling stock.
The diagram below shows how track corridors can be bordered on the viewing side. This diagram also shows how I like clump MILS modules into groups of either half or full table lengths, i.e. 3x3 or 6x3 MILS modules. In general, I like to group sets of MILS modules by geographic feature, e.g. a 90º corner, a siding or passing loop, a level crossing, a cluster of buildings, etc.
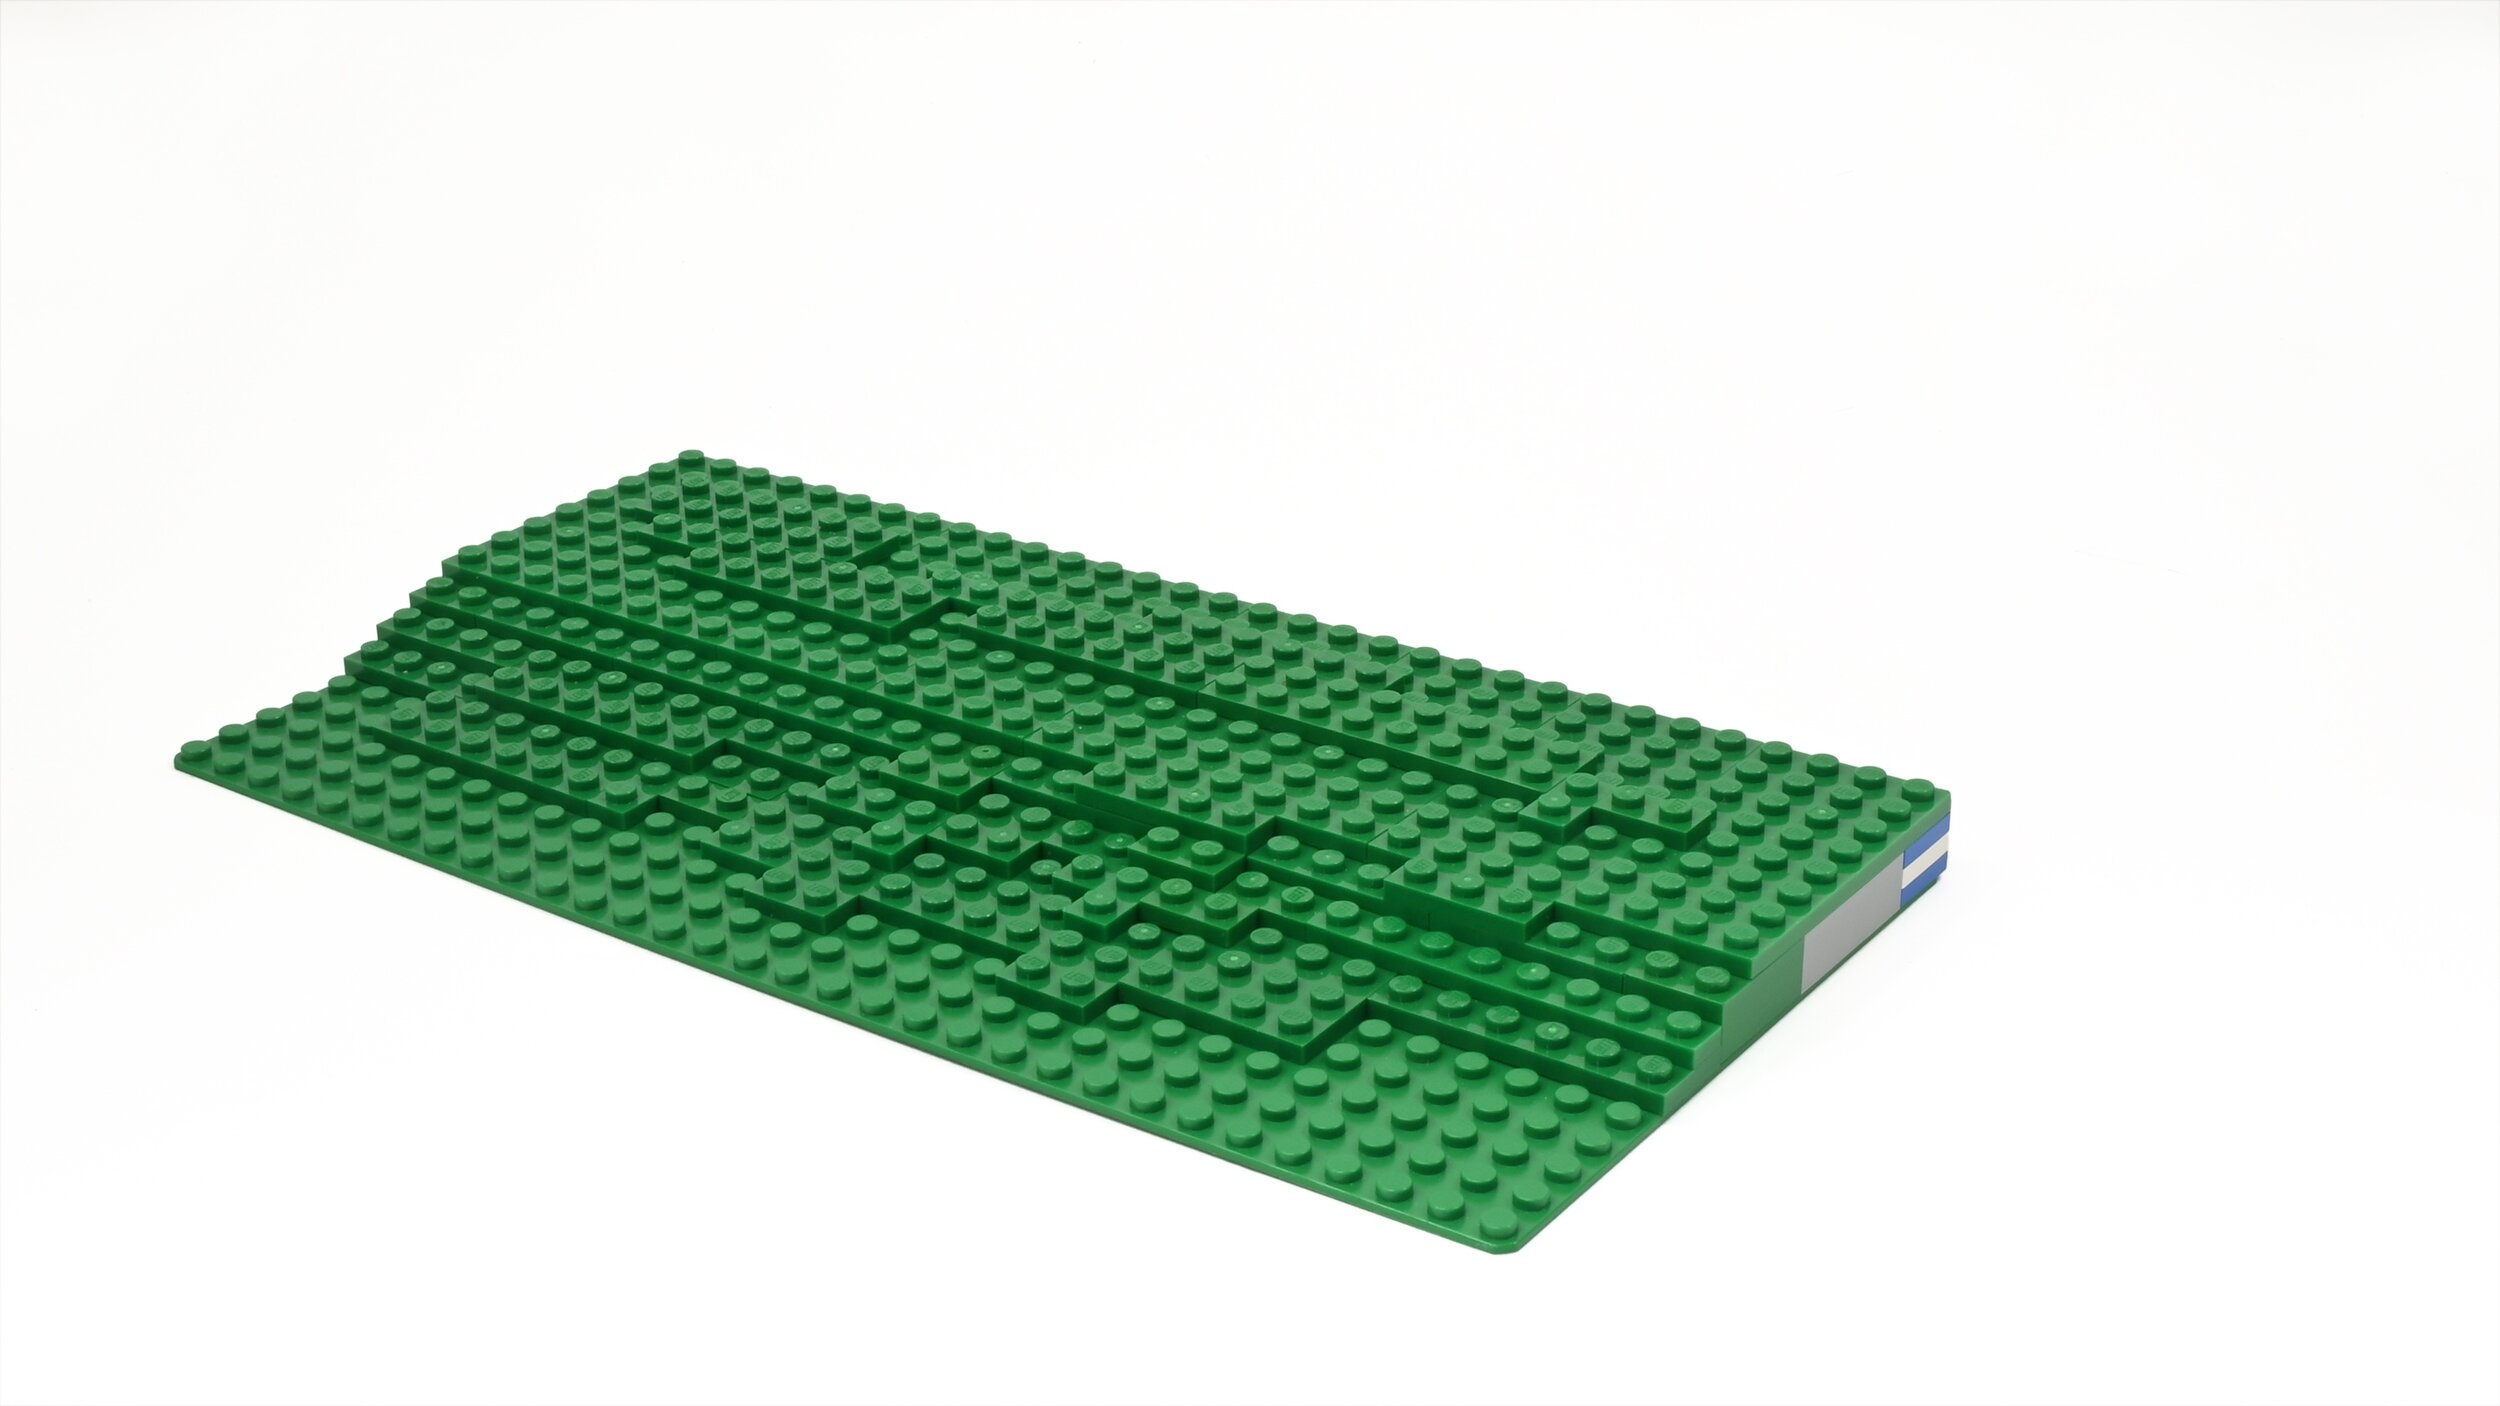
I also group together all of my 16x32 and 32x32 “border” modules together in one box. Usually, these are the last modules to be installed on a layout and I simply walk around the full perimeter of the layout attaching border modules as required.

Examples of border modules are shown below:
Cityscape and Roads
A train layout is more interesting to look at and enjoy when it includes the surrounding landscape. This includes roads, buildings, and infrastructure as well as “natural” terrain. After adapting MILS for the track/railway, I then turned my attention to roadways.
It was clear that modularizing roads as a system was an ideal fit for MILS. I created a system called “MultiRoad”—a MILS compatible roadway system with a versatile system of components that could be adapted to represent any roadway. All the details of MultiRoad are described at L-Gauge.org including downloadable instructions to build your own MultiRoad modules.


Building Tips
After building many 100s of MILS modules, I can share some wisdom that will hopefully assist your attempts in building MILS modules for your layout.
Use the ID Corner - The ID corner sections are really useful for quickly identifying your modules when building collaborative layouts. During the hustle and bustle of setup/teardown at public events, the ability to quickly identify modules saves time and avoids accidental module loss or swaps!
Use “junky” bricks - MILS consumes a large number of parts that are never seen and only serve to support plates and other bricks. Therefore, if you have bricks in your collection which are either damaged, soiled, discoloured, or have an abundance of a particular colour, etc. they can usefully be used as supporting elements. This saves money and gives purpose to elements that might not otherwise be used. Finally, there is a use for all those 2x8 pink plates and 2x2 round pearl gold tiles!
Baseplate colour doesn't matter - Although MILS modules are built on baseplates, they are rarely visible. Therefore, the colour of the baseplate is more or less irrelevant. This is helpful since every baseplate in your collection is useful and suitable for building MILS modules.
Use cross-axle bricks - The MILS standard only specifies interconnections using Technic pins between adjacent modules. However, I have found it is often useful to use 4L Technic axles to connect modules. The axle connections are easier to make since they are more or less self-aligning. Furthermore, the axle connections are somewhat more rigid and resist twisting between modules since they penetrate each module to the depth of 2 studs. To take advantage of connections using either Technic pins or 4L axles, you simply place a 1x2 cross-axle Technic brick behind every 1x4 Technic brick when building a module.

Conclusion
Since I come from a traditional model train background, I’ve had to adapt my model/layout building philosophies to the unique and special features of building train layouts with LEGO. The biggest adaptation was moving away from building permanent layouts on custom tables to the fluid and modular layout building techniques using standards like MILS.
I really have embraced the mindset of building layouts from a system of modules. The advantages of easily building layouts of different shapes and sizes with little to no additional effort cannot be overstated. Admittedly, this benefit does require building a sizeable inventory of MILS modules to become practical—and I am aware of the significant burden of cost this implies. However, this is an investment that can be made gradually over time. The utility of having an inventory of pre-built MILS modules does reward you with ongoing benefits in exchange for this investment. Additionally, if you collaborate with other like-minded layout builders, you can leverage your collective inventory of MILS modules to build large, cohesive, and beautiful layouts.
The paradigm of modular building systems is in some ways a macro version of the entire LEGO system itself. It is therefore not surprising that embracing MILS felt like a natural and logical progression in my layout-building journey.
Other Modular Standards
MILS is by no means the only modular layout or building standard. There are several equally excellent and versatile modular standards worth checking out. Even though I have embraced MILS, I am still interested in other modular systems since they often have features that incorporate into my modules. Some examples include:
Resources
This article serves only as an introduction to possibilities offered by the MILS standard for your next layout. To learn more, the following list of resources will give you more information and hopefully be a source of inspiration.
Original HispaBrick magazine articles:
Ludo Soete’s article in HispaBrick magazine (Issue 029) on using MILS
Best of BrickNerd - Article originally published July 27, 2021.
What has been your experience with the MILS standard? Let us know in the comments below.
Do you want to help BrickNerd continue publishing articles like this one? Become a top patron like Paige Mueller, Rob Klingberg from Brickstuff, John & Joshua Hanlon from Beyond the Brick, Megan Lum, Andy Price, Lukas Kurth from StoneWars, Wayne Tyler, Dan Church, and Roxanne Baxter to show your support, get early access, exclusive swag and more.