LEGO SNOT Basics: Geometry, Techniques and Pitfalls
/SNOT Week continues, even better and booger than ever, as we explore the depths of sideways building. It’s time to start building some SNOT-acular creations!

A SNOT Recap
When AFOLs speak of SNOT, we usually don’t mean the sticky green stuff dripping from kids’ noses into the play brick at a public exhibition. We are mostly referencing how to build LEGO sideways, with SNOT standing for “Studs Not On Top.” In my last article, A Short History of SNOT, we explored the origins of LEGO SNOT. Today, we will take a nerdy deep dive to analyze the geometry of SNOT construction, some basic building techniques and some of the hidden pitfalls you may not be aware of.
SNOT Basics
So how does SNOT work then? The best way to explain is with a visual guide. But first, we need to make sure we speak the same language.
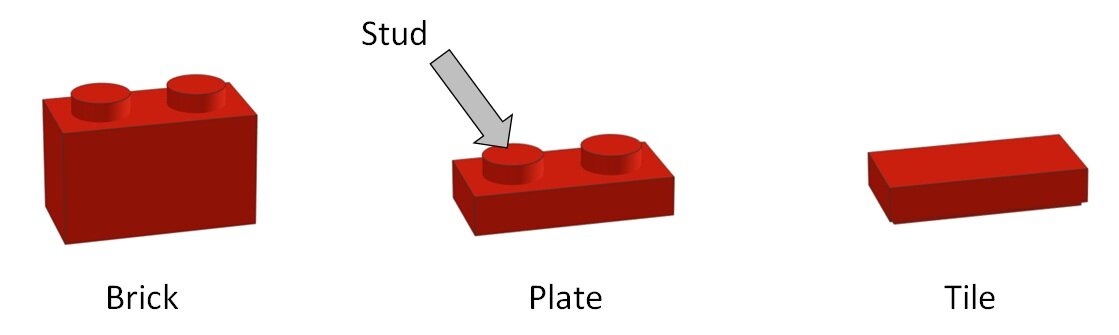
The following elements and their names are what I will refer to for the more common parts. These are bricks, plates and tiles. Bricks and plates have studs on the top. Tiles are smooth on the top.
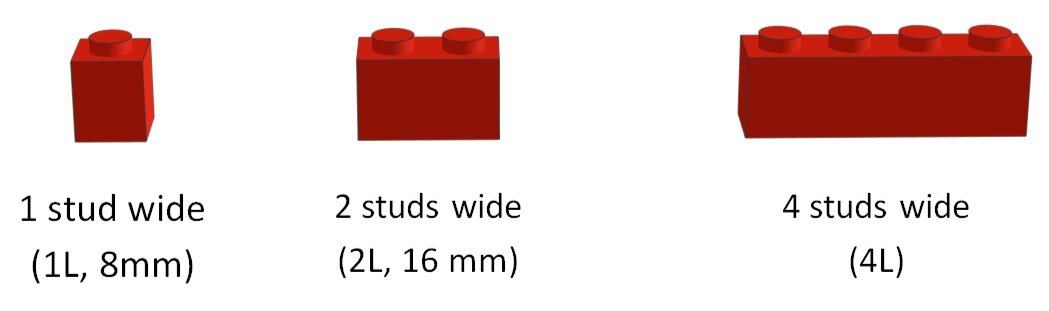
When talking about widths, we measure in stud lengths, hence the abbreviation L.
When talking about height, it is pretty commonly known that a standard LEGO brick has the same height as three stacked plates.
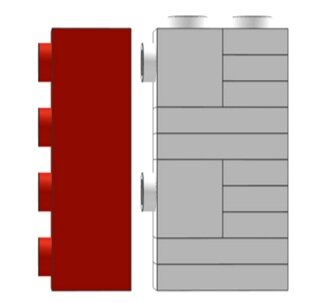
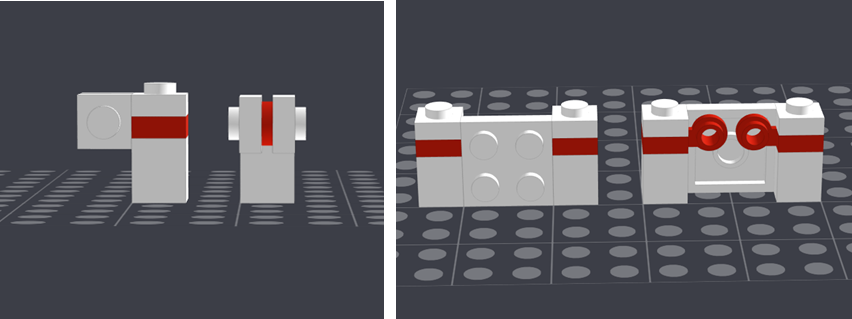
Pretty simple so far, right? Well here is where the math starts getting more complex when we start building with the studs on the side. Welcome to LEGO’s first golden ratio! Otherwise known as the 5:2 rule. The width of two studs is the same as the height of five stacked plates leaving the studs exposed, as seen below.

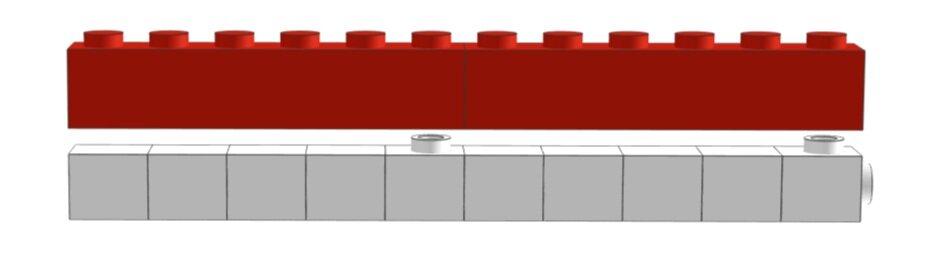
LEGO’s second golden ratio is 6:5. Six studs wide is the same as the height of five stacked bricks, with the stud exposed as seen below.
SNOT Geometry
With these ratios now demonstrated, we can start to have a little fun exploring configurations (and consequences of both the 5:2 and the 6:5 rule. This is where you can start lining up the studs to perfectly connect LEGO both horizontally and sideways.
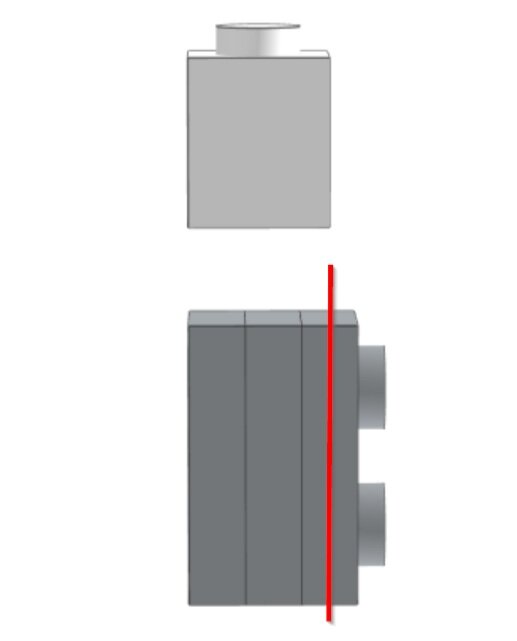
Basic SNOT geometry achieved! Now let’s get into a few more complex ratios by dividing the width of a LEGO stud. Based on our golden ratios, the width of one stud (a 1x1 brick for example) is therefore the same as the height of 2½ stacked plates.
If you only build SNOT structures in increments of two studs, you only need to remember that 2 studs equals 5 plates. Easy! But in many circumstances, you may need to consider ½ plate offsets. The ½ plate dimension occurs in many LEGO elements, but the trick is to know when and how to use them.
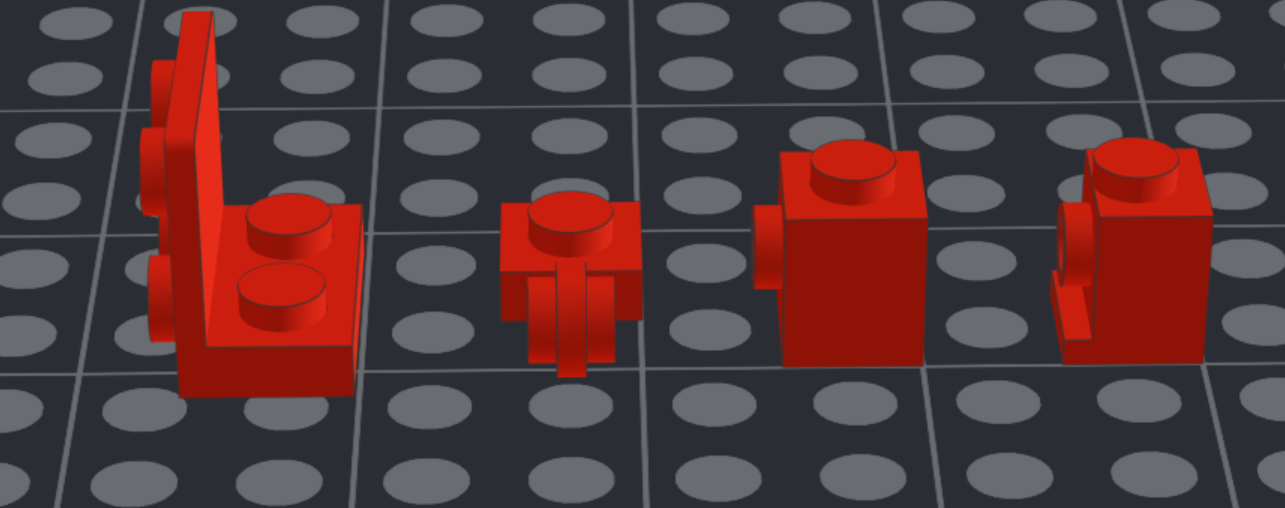
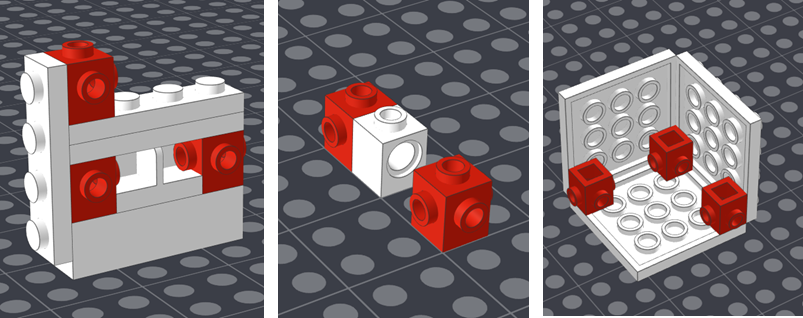
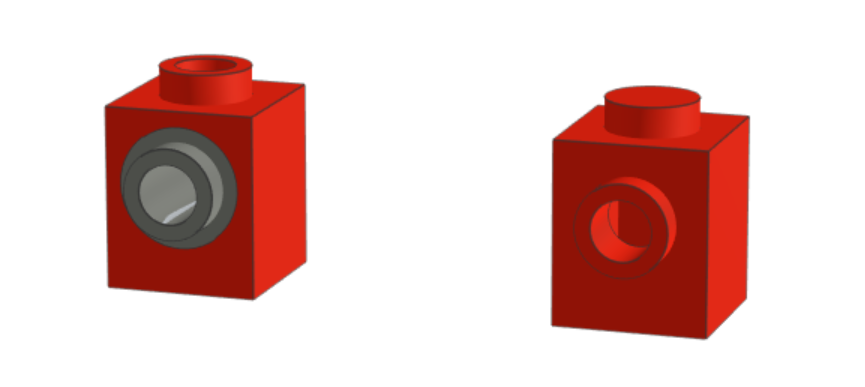
For example in the elements above, ½ plate dimensions are on full display. The thin part of the bracket is ½ plate thick. The thin ring of the modified plate is ½ plate. The 1x1 brick with stud on one side is 2½ plates thick, though the headlight brick is 2 plates thick in its most narrow dimension.
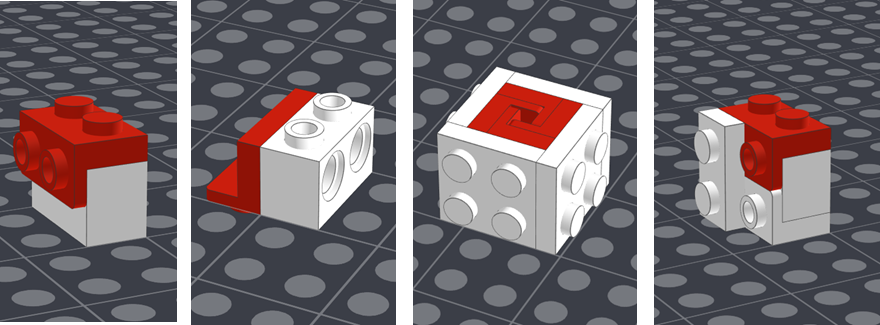
A Visual Glossary of SNOT Elements and Techniques
We’ve talked a lot about the theory of SNOT, but how do you start to build SNOT structures? Let’s apply some of the geometry we have learned and explore some examples of useful SNOT bricks and how to use them. Each section will visually introduce you to an element and some of the ways it can be used to change the direction of the studs.
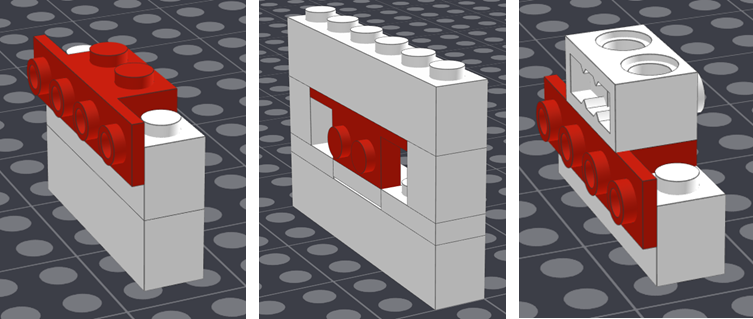
ROCKER BEARING 1X2 (Part 3937)
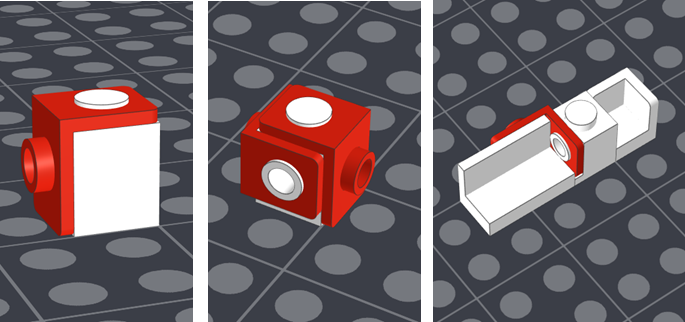
ANGULAR BRICK 1X1 (Part 4070): aka the headlight brick, Erling brick or washing machine
LAMP HOLDER, thin (Part 4081a): Older style and less common
LAMP HOLDER, thick (Part 4081b): Watch out for that ¼ plate offset!

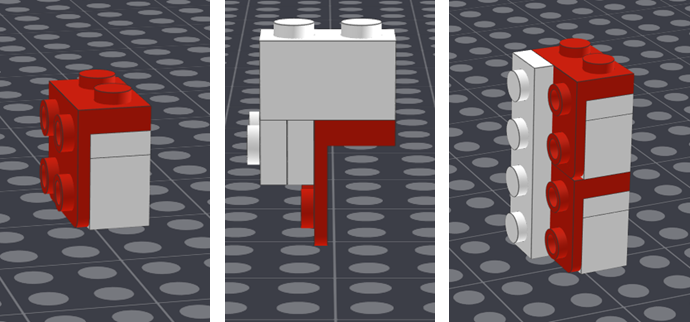
BRICK 1X1 WITH 4 KNOBS (Part 4733): aka the Travis brick
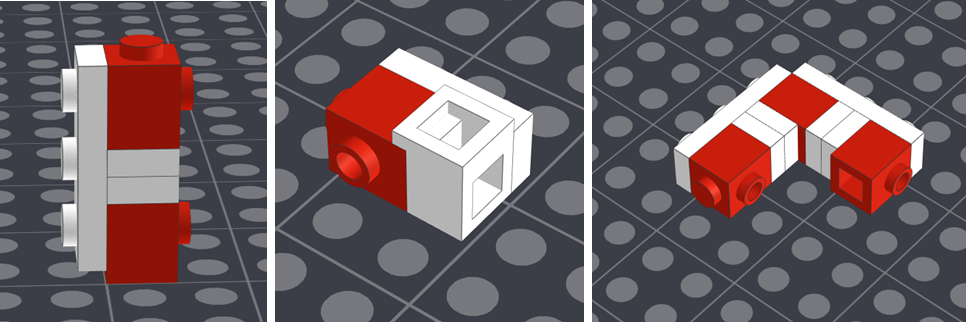
ANGLE PLATE 1X2/1X4, bracket (Part 2436): The thin part of a bracket is ½ plate thick.
MINI FIG. BACK PLATE WITH KNOB, neck bracket (Part 42446)
ANGLE PLATE 1X2 / 2X2, bracket (Part 44728)
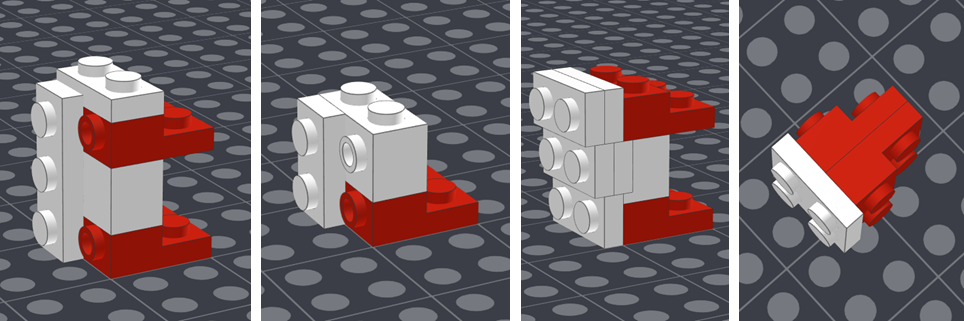
ANGULAR PLATE 1.5 BOTTOM 1X2 2/2, inverted bracket (Part 99207)

BRICK 1X1 WITH 2 KNOBS (Part 47905)
ANGULAR PLATE 1.5 TOP 1X2 ½, bracket (Part 99781)
ANGULAR PLATE 1.5 BOTTOM 1X2 ½, inverted bracket (Part 99780)
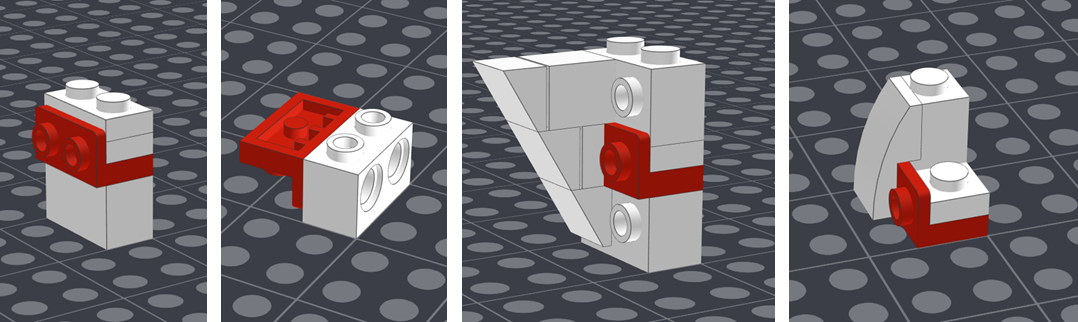
PLATE 2X2X2/3 WITH 2 HORIZONTAL KNOBS (Part 99206)
While the pictured parts above do not represent each and every SNOT brick that LEGO has ever produced, these are the most common. Hopefully you saw a technique that was new to you!
The Pitfalls of SNOT
Let’s get even nerdier now. I’m taking you deeper down this puddle of SNOT! Not every SNOT brick connection works out. Have you heard about LEGO tolerances? Basically, there is a small gap designed between LEGO bricks that is needed to keep the parts from getting stuck to each other when you build with them.
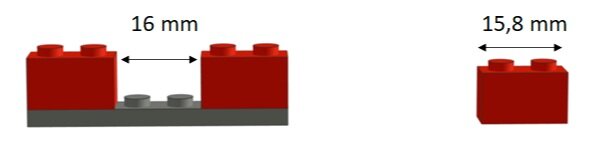
The theoretical space between two bricks separated by two studs is 16mm. The logical conclusion would be that a 1x2 brick would be 16mm wide to fill the gap. Well, actually no, that wouldn’t work. It would actually be too tight a fit. Because of this, there is a 0.1mm tolerance on each side of a brick (or tile or plate). Therefore, a 1x2 brick, as in the example above, is really only 15.8 mm wide. Consequently, the gap in the example above is actually 16.2 mm. This is what makes a technique called “Brick Bending” possible seen in this video tutorial:
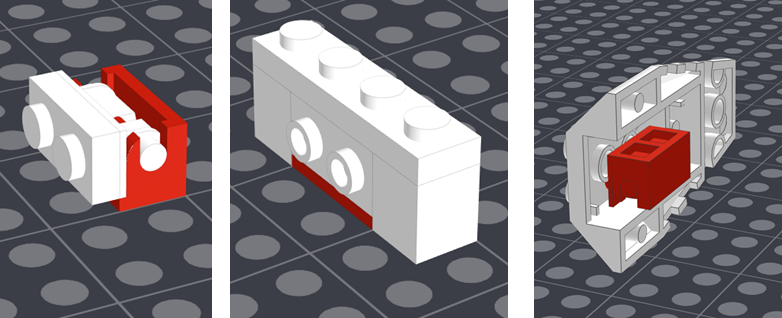
However, LEGO tolerances can cause some annoyance when SNOTing. The tolerances only work sideways. There are no tolerances from the bottom up. That would be weird if you think about it because LEGO bricks are made to stack. So when you combine certain SNOT elements in specific ways you run into trouble. Here is an example with brackets:
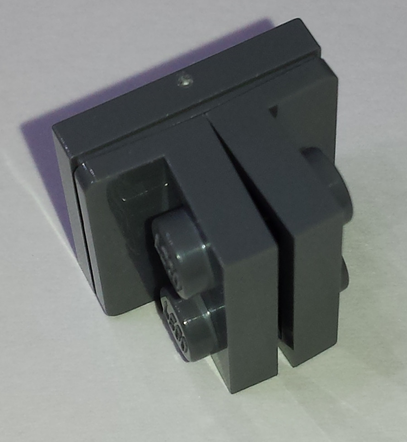
However much you want them to, there is simply not enough room to connect brackets like this. You can force them together but it will stress the elements. Here is another example:
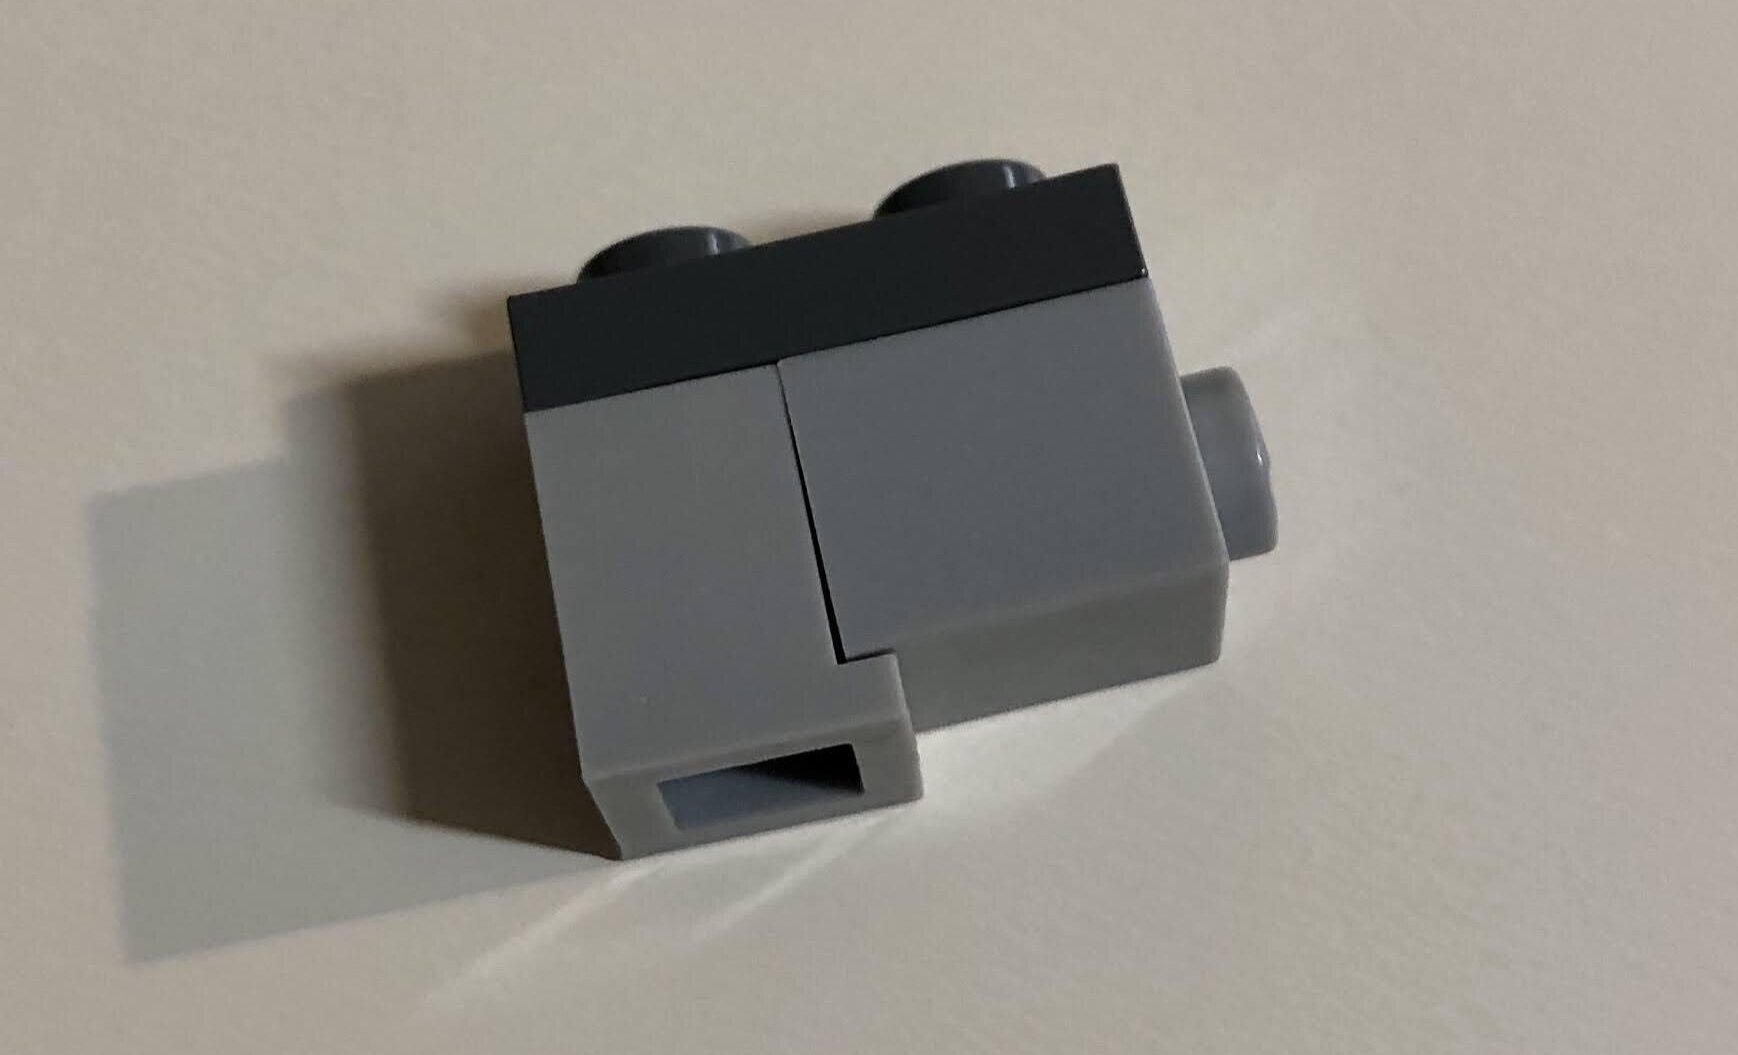
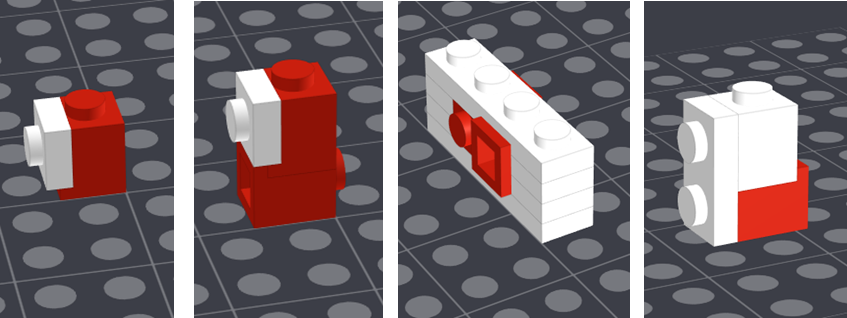
This is a headlight brick (4070) connected to a 1x1 SNOT brick (87087) with a 1x2 plate connecting both exposed studs. You can see a gap forming. This assembly actually causes stress on the elements.
But wait, shouldn’t this (at least in part) be corrected by the 0.1mm tolerance of the headlight brick? Good question! The answer in this case is no. The headlight brick is designed to be exactly two plates thick in its shortest dimension, so it is curious in the fact that it doesn’t have a 0.1mm tolerance!
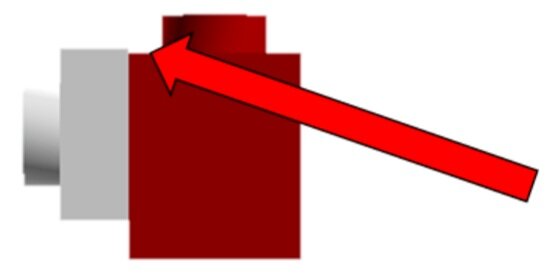
Sorry, but no. The center of a technic hole is actually 0.1 mm higher than the center of the stud on the 1x1 SNOT brick. This is because there needs to be enough room for an entire LEGO stud to attach to the underside of the technic brick. Annoying! (Perhaps if you could shave off the “LEGO” logo on the tops of the studs the hole would be 0.1mm lower!?)
That said, many AFOL builders use the connection anyway because the perceived stress is very small. I have only had issues with this technique when I try to connect studs in the Technic hole while building in LEGO Digital Designer. When I build with real bricks, I don’t think about it.
But LEGO designers build with different rules. That 0.1mm offset gives a little extra headache to LEGO designers, I’m sure. For example, if they need to use Technic bricks and half pins in a set for some reason, they need to use the same technique for the whole structure so that the offset is constant throughout the entire model. This is why there are so many 1x1 Technic bricks in LEGO’s Architecture set 21028 New York City. As you can see below from the instructions, because the assembly in step 9 requires Technic bricks, the SNOTed surface of the entire section of that section of the building needs to be attached with Technic bricks:

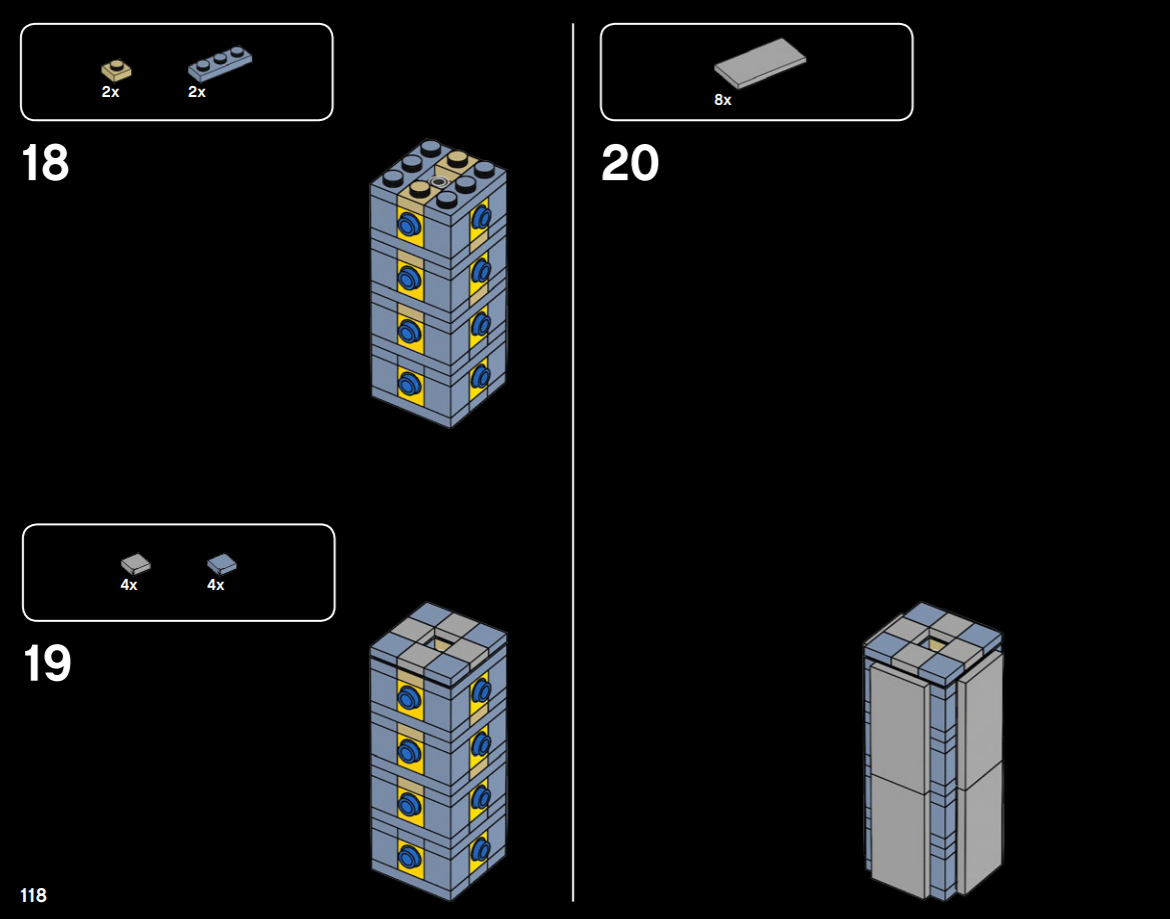
That means a whole lot of Technic half pins, and all because one Technic brick was used at the base to stabilize and strengthen that center column element. I guess the increased part count made that set more desirable? At least it served as an example of the difference of Technic SNOT.
So there you have it: the basics of SNOT geometry, a visual glossary of elements and techniques, and a brief summary of some SNOT hang-ups you should be aware of. We’ll leave the lesson there for today, but in the next part of this series, we will start to analyze some more advanced SNOT techniques and implementations. Until then, class dismissed!
Best of BrickNerd - Article originally published March 18, 2021.
What are some other SNOT techniques you have seen in LEGO sets? Leave your thoughts in the comments below.
Do you want to help BrickNerd continue publishing articles like this one? Become a top patron like Charlie Stephens, Marc & Liz Puleo, Paige Mueller, Rob Klingberg from Brickstuff, John & Joshua Hanlon from Beyond the Brick, Megan Lum, Andy Price, Lukas Kurth from StoneWars, Wayne Tyler, Monica Innis, Dan Church, and Roxanne Baxter to show your support, get early access, exclusive swag and more.