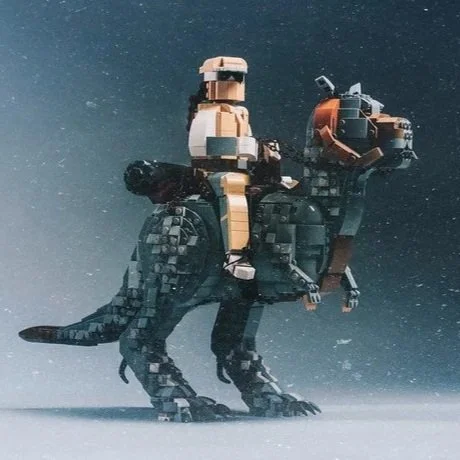
We'll Fix It In Post: How to Edit Photos to Make MOCs Pop
/Today’s guest article comes from BrickNerd patron Wayne Tyler. We’ve featured Wayne’s work numerous times and always marvel at how he improves photography from LEGO conventions. Today he shares the secrets behind his editing process.
From So-So to Stunning
I spent many years working as a videographer in broadcast television and commercial video. "We'll fix it in post." was often remarked by directors when they didn't get exactly what they wanted or were running out of time on a production shoot.
Have you ever returned from a LEGO event where you took scads of pictures of the amazing MOCs but when you look at them on your computer monitors, they just don't look as impressive as when you saw them? I'm going to take you through my process of taking those so-so photos and making them look stunning.
I'll show you how I got from this:
to this:
All you will need is a photo editing program (that allows layers & masking and has filters) and time. Be warned, this is time intensive.
Focusing on What Matters
My process starts with a Canon 6D DSLR camera, but you can use a smartphone or a small point-and-shoot camera. The Canon saves images in RAW format, but any photo format will work equally as well.
The first step, after transferring your photos to a computer is to make your picture look as good as possible. That means you might need to adjust the color or brightness or contrast of an image. I usually use Photoshop on a PC, but I have also edited images using the Artstudio Pro app on my iPad. The screengrabs I'll be showing here are from Photoshop.
There are three steps I use to get a photo to look as good as possible.
When bringing a RAW image into Photoshop, it opens up the Camera Raw window where you can make adjustments before bringing the photo into Photoshop. The photo editing software you use may not have these built-in tools, but you still will be able to make the same kind of adjustments.
If you are unfamiliar with photo file formats, a RAW image basically stores the information that comes off a camera's sensor without, or minimally, modifying it. When a camera saves jpg images, there is some image processing that is done on the camera itself as it saves the picture. This automated process is built into the camera and you may or may not have access to changing the parameters of the image processing. You will need to look at your camera's instruction manual.
The first step I use is to correct for any distortion a lens might introduce to the picture. Smartphones and point-and-shoot cameras usually have a fixed lens so the manufacturer can build the lens compensation into the onboard image processing software.
Next, I zoom into the picture and adjust its sharpness or fuzziness. You can do this by using the sharpening or blurring filters in your editing software.
The "Sharpening Only" image shows much more defined edges between objects in the picture, however, if you look closely, it has also added unwanted noise. By adjusting the Detail parameters, you try to find the balance between crisp edges and smooth color.
When using blurring and sharpening filters to do the same thing, try some of the different types of blur and sharpen filters. You may have to experiment to find the right combination of the two. For example, it may be that a surface blur works better than a gaussian blur or an edge sharpen works better than a normal sharpen.
The last step of sharpening is to enhance the clarity. This is just a fancy way of saying you should adjust the brightness and contrast in the image. Push the brightness a little bit and make the dark areas just a little darker. This helps the picture to "pop".
Adjusting the bright and dark areas of a picture is part of the Color Correction step in the previous image. Along with the lights and darks, also adjust the saturation of the colors and the tint of the colors. Most photo editing programs have a white balance function. Use it to make sure the whites in your image are actually white and not the greenish white you get from fluorescent light or the bluish white you get from some arena lighting.
When you are done, your picture should look crisp, bright and colorful, not fuzzy, drab and muddy.
Making the MOC Pop
Now that the picture is ready, you need to decide on how you want to feature the MOC in the photo. There are many ways to make the MOC pop. Do you just want to blur out the background and make it just slightly darker?
Do you want to blur it out and make it REALLY dark?
Do you want to get rid of the background and have the MOC over white?
Or go with a full black and white blurred background?
No matter what you decide, the process is the same. It has two parts. First, create the background and second, create a mask for the featured MOC.
Blurring the Background
For the background of "Welcome to Neverland" I decided to keep the color, but blur it out and make it somewhat darker. This is a five-step process.
In my process, the first step—the color correction—takes place in the Camera Raw window. When I've finished with those adjustments, the image then opens up in the main Photoshop window. The first thing to do is save the file! I sometimes make adjustments I cannot undo. The second thing I do is make a duplicate of the image on a new layer. That way I can modify the picture and still have the unaltered version in the file.
I blur the image enough that it starts to turn into color shapes instead of recognizable objects. Next, I wanted to cover up the table skirts and the extra table to the side of the MOC because they're very distracting… even when blurred.
On a new layer, I create two black shapes that cover the table skirts and the table, then blur those shapes and reduce the opacity so a little of the detail from the underlying image can show through. This mutes the distraction of the skirts and extra table but doesn't introduce another distraction of two solid black triangles.
On another new layer, I fill it entirely layer black and then reduce the opacity. This darkens the whole image and produces the background for your picture.
So far, the process has taken an image, made it look as good as possible, and then degraded it so the surrounding area looks lousy. You don't want the background to look great because that would detract from the MOC.
Mask Up
The final step is where it gets very time intensive. You need to create a mask for the MOC that hides everything except the MOC itself. Masking, just like using masking tape when painting a wall, essentially protects that area from being changed and lets the original phone shine through.
There are a couple of ways to do this. One uses a vector-based shape and the other uses a raster-based shape. I'm terrible at creating vector shapes, so I use the raster approach. To me, it's like painting. The trade-off is that the vector approach gives you very clean lines at the edges of the mask. The raster approach will always be fuzzier and less hard-edged. Several photographers I know swear by the vector approach.
When I create a mask, I start with a mask that reveals everything in the image. Then I paint out the portions I don't want to appear. This means zooming in to areas where there is a lot of detail against the background. If you are dealing with a MOC that has a lot of detail against a background, you may have your work cut out for you.
As I mask out the background, I'm constantly switching between being able to see the background and seeing only the MOC. That way I make sure that parts of the background are not included in the MOC and parts of the MOC haven't been masked. Also, as I zoom in and out of areas to work on details, I'm also changing the size and the softness of the masking brush.
Stacking the Layers
Once the MOC is isolated using the mask, then all the layers are assembled to create the final image. The picture below shows the order of the layers, the lowest layer being at the bottom of the stack.
Layer 1 – Original color corrected image (doesn't appear in the final image, but is used as reference during the process)
Layer 2 – Blurred version of Layer 1
Layer 3 – The semi-transparent black triangles muting the table skirts and table to the side
Layer 4 – The semi-transparent black layer muting the entire background
Layer 5 Mask – The mask for the Layer 5
Layer 5 – A copy of Layer 1 (but with the background masked out by the Layer 5 Mask)
In the image below the upper set of pictures show what the layer looks like on its own. The lower set of pictures shows what the image looks like after that layer has been added.
The last step is to add text on top of the image to show at which LEGO event the photo was taken, the name of the MOC and who built it. Crediting MOCs is essential!
On average it takes me about half a day to go from the original photo from the camera to having a final image that gets posted online. Here is the whole process condensed into a 10-second GIF!
Hopefully this guide helps get the photos that your MOCs deserve, especially the bigger ones that you might only ever see displayed completely on a convention hall table under white neon lights. Even without a photo studio, following this process will help your photos pop and help showcase your creative work in the best light possible.
Best of BrickNerd - Article originally published May 27, 2022.
What other tricks do you use to make your MOC photos pop? Leave your thoughts in the comments below.
Do you want to help BrickNerd continue publishing articles like this one? Become a top patron like Marc & Liz Puleo, Paige Mueller, Rob Klingberg from Brickstuff, John & Joshua Hanlon from Beyond the Brick, Megan Lum, Andy Price, Lukas Kurth from StoneWars, Wayne Tyler, Dan Church, and Roxanne Baxter to show your support, get early access, exclusive swag and more.


