How to Build a LEGO Cottage in the Most Illegal Way Possible
/Best of BrickNerd: Weekend Highlight — Article originally published August 2, 2021.
The term “illegal building techniques” seems to always stir up some rather confusing and slightly aggressive feelings in the AFOL community (at least online), so let me start by stating the following. No, there are no LEGO police that will arrest you if you build using illegal techniques (well I mean there are, but they are super-tiny and can’t really do anything to you… being minifigures and all).
Yes, it is your LEGO and you can do pretty much whatever you want with it. The term illegal refers to rules that LEGO themselves (or rather, their designers) have to comply with when constructing sets. The reason being to not design something that would cause stress to the pieces and thus making them break. So now that we got that out of the way, let’s get into the fun stuff!

Illegal Techniques
I’ve always loved using techniques that expand what you are able to do with LEGO pieces, so naturally, I quite frequently use illegal techniques in my builds in order to achieve a certain look or shape. This does mean that taking your MOCs to a convention is almost always horribly nerve-wracking… but that’s a story for another day.
The use of illegal techniques seems to be a bit more common in the castle genre, at least that’s the feeling I get when browsing through those types of builds on Flickr. The reason for it might be that it’s almost impossible to get a “realistic look” of an old wall or something similar using standard techniques. Whatever the reason, it often leads to some really spectacular builds. Castle also seems to be a genre in which new techniques spread rather quickly so there is always something new to discover and try out.
I recently built a medieval fantasy cottage, in which the goal was more to try out different techniques than anything else. Some of the techniques I came up with myself during the build and others have been “borrowed/stolen” (there really is a theme in this article…) from other builders in the community. In terms of giving credit for a specific technique, I do apologize in advance for not doing so but in all honesty, I have no idea who came up with them. And at this point, there are so many variations of similar techniques that it would be almost impossible to say with certainty who invented what. So instead try to look at this as a collection of examples of what can be done to achieve a certain shape or structure.
A Door Doesn’t Need to Open
First off, every build needs a door. Most often it seems to be one of the last things you add, but in this particular case it was actually what started the whole build. I have a small collection of Modulex parts that I was able to purchase the last time I was in Skaerbaek and I figured it might be fun to use some of them for a door. Modulex is a great, older system perfectly square that was released by LEGO to help architects a while back, but it can also be a bit frustrating as there is a limited amount of ways to connect them with regular LEGO pieces. This picture by Ryan Howerter is great if you want examples of how to integrate Modulex into your builds.
Below you can see the door and also get an idea of how it’s held in place (spoiler alert, it’s not stable…)
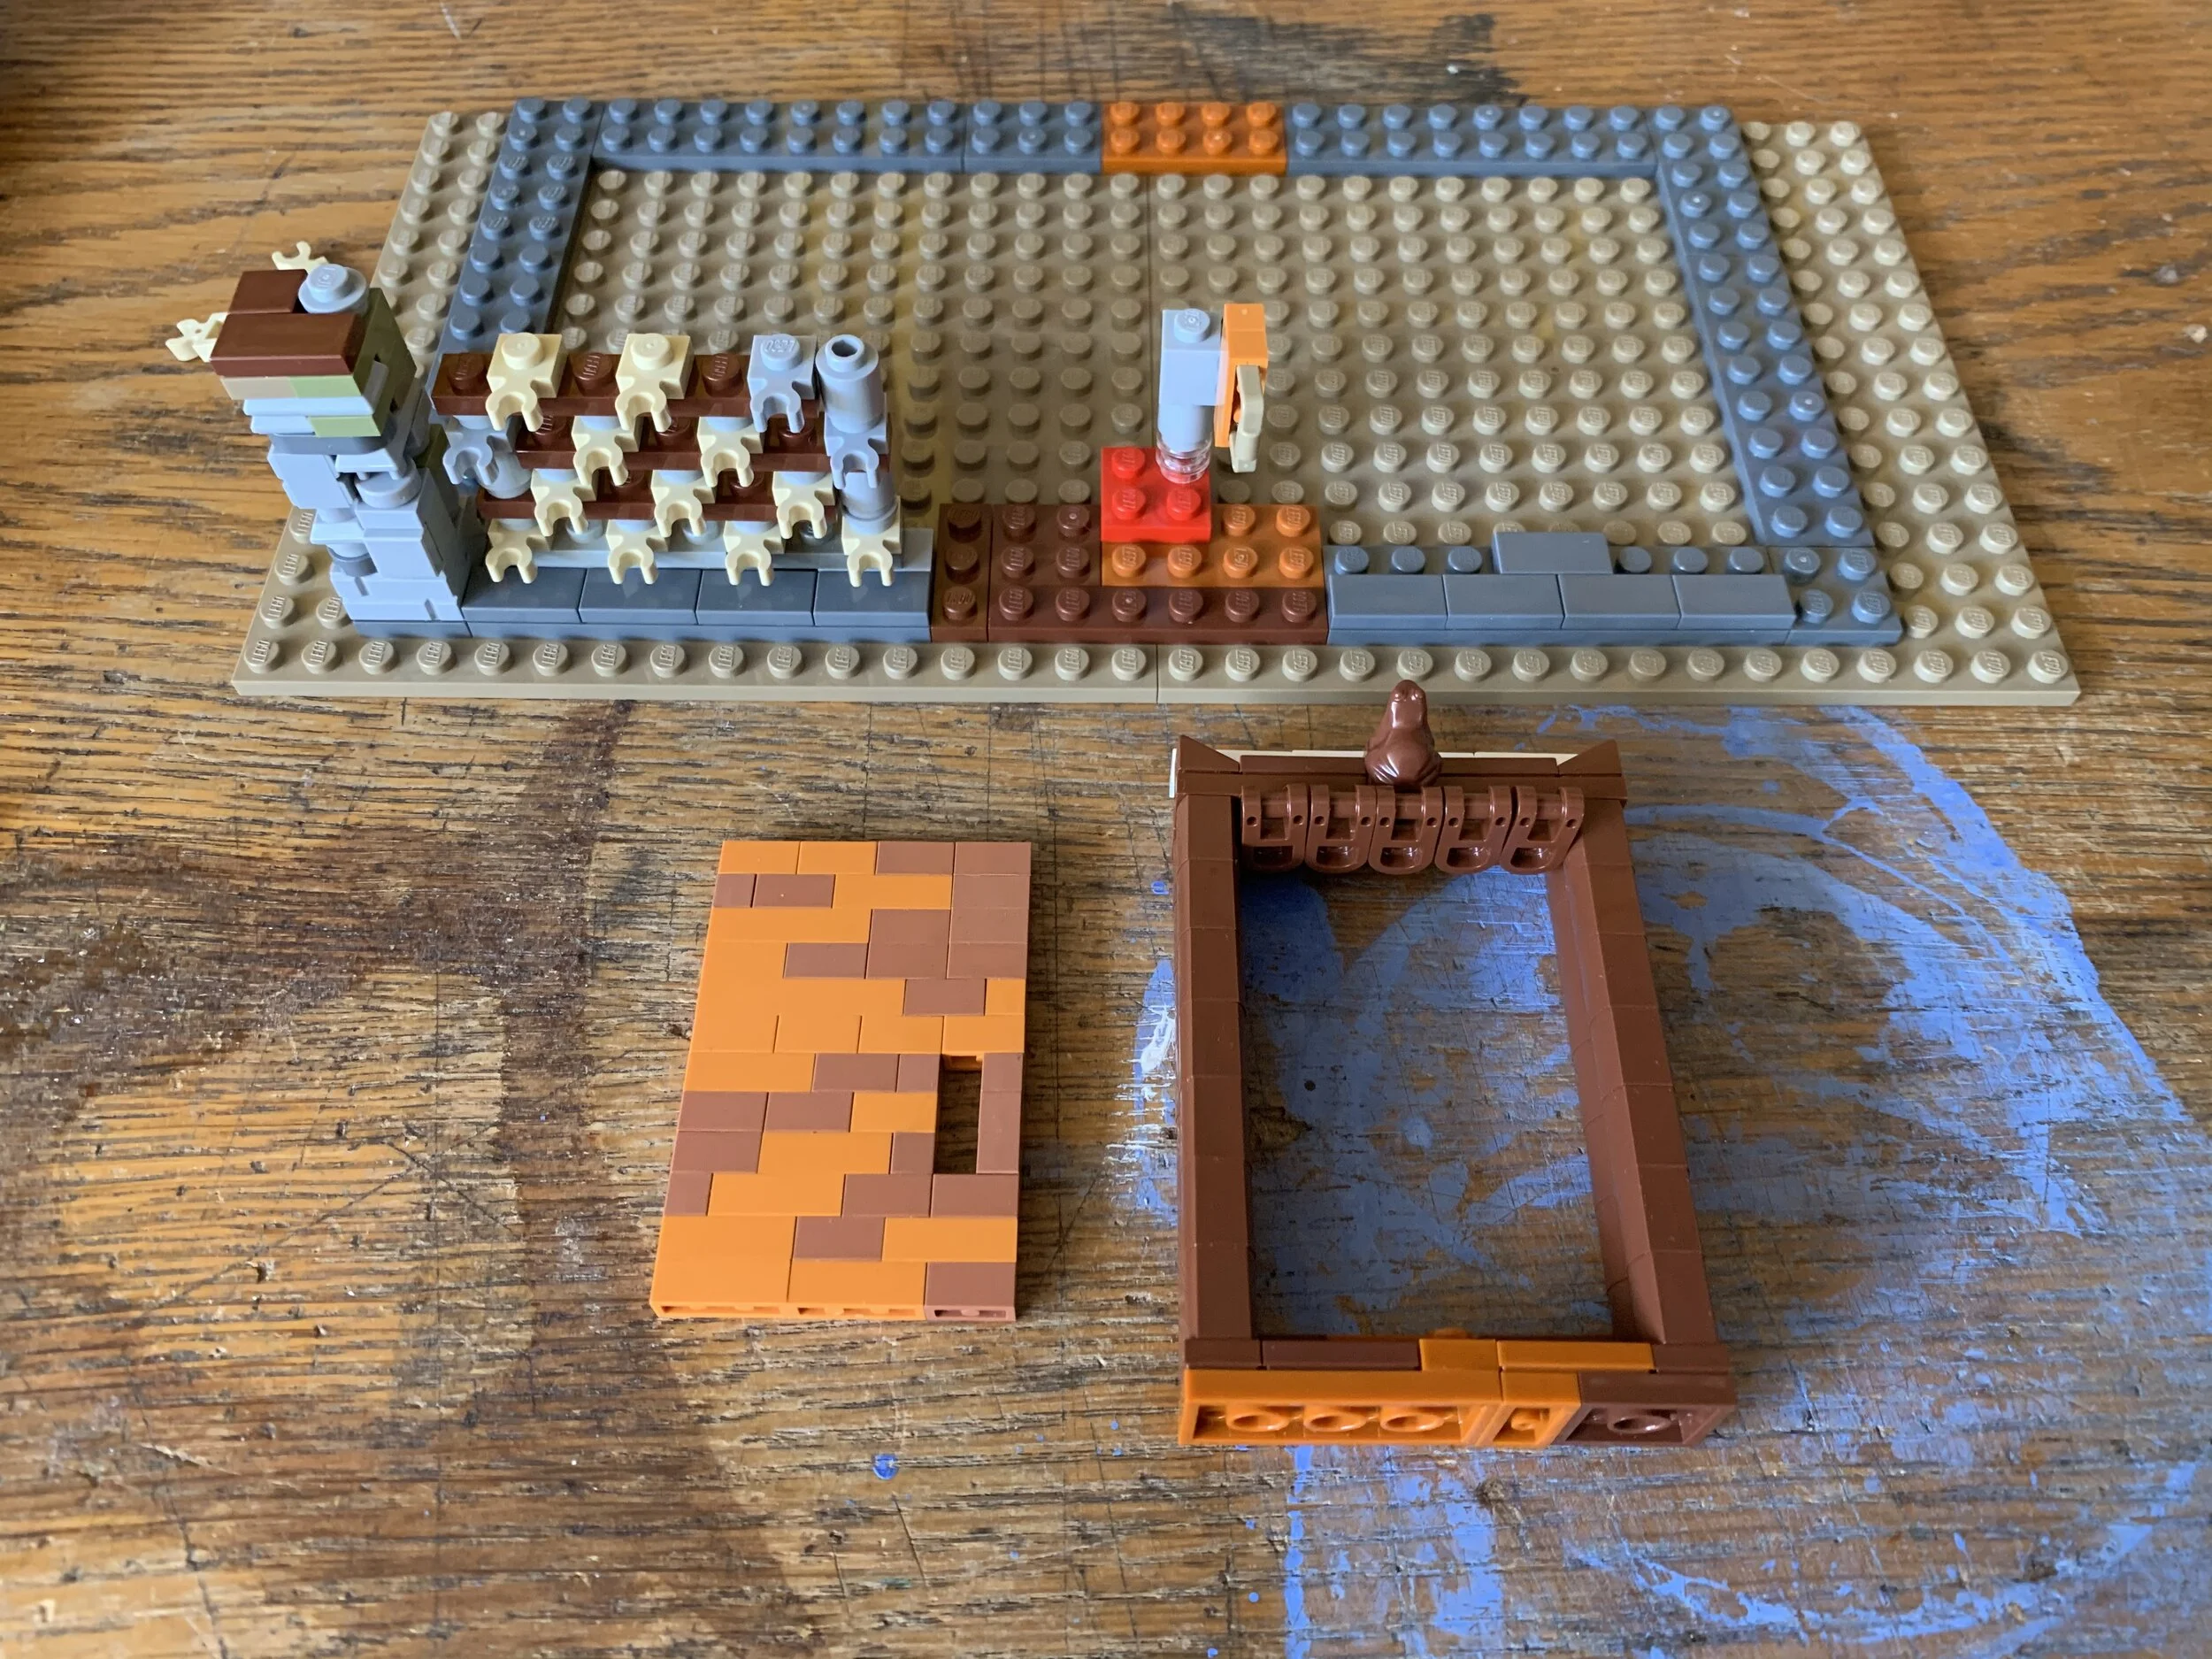
Modulex door and first draft for the doorframe
The doorhandle and also the structure that holds the door in place
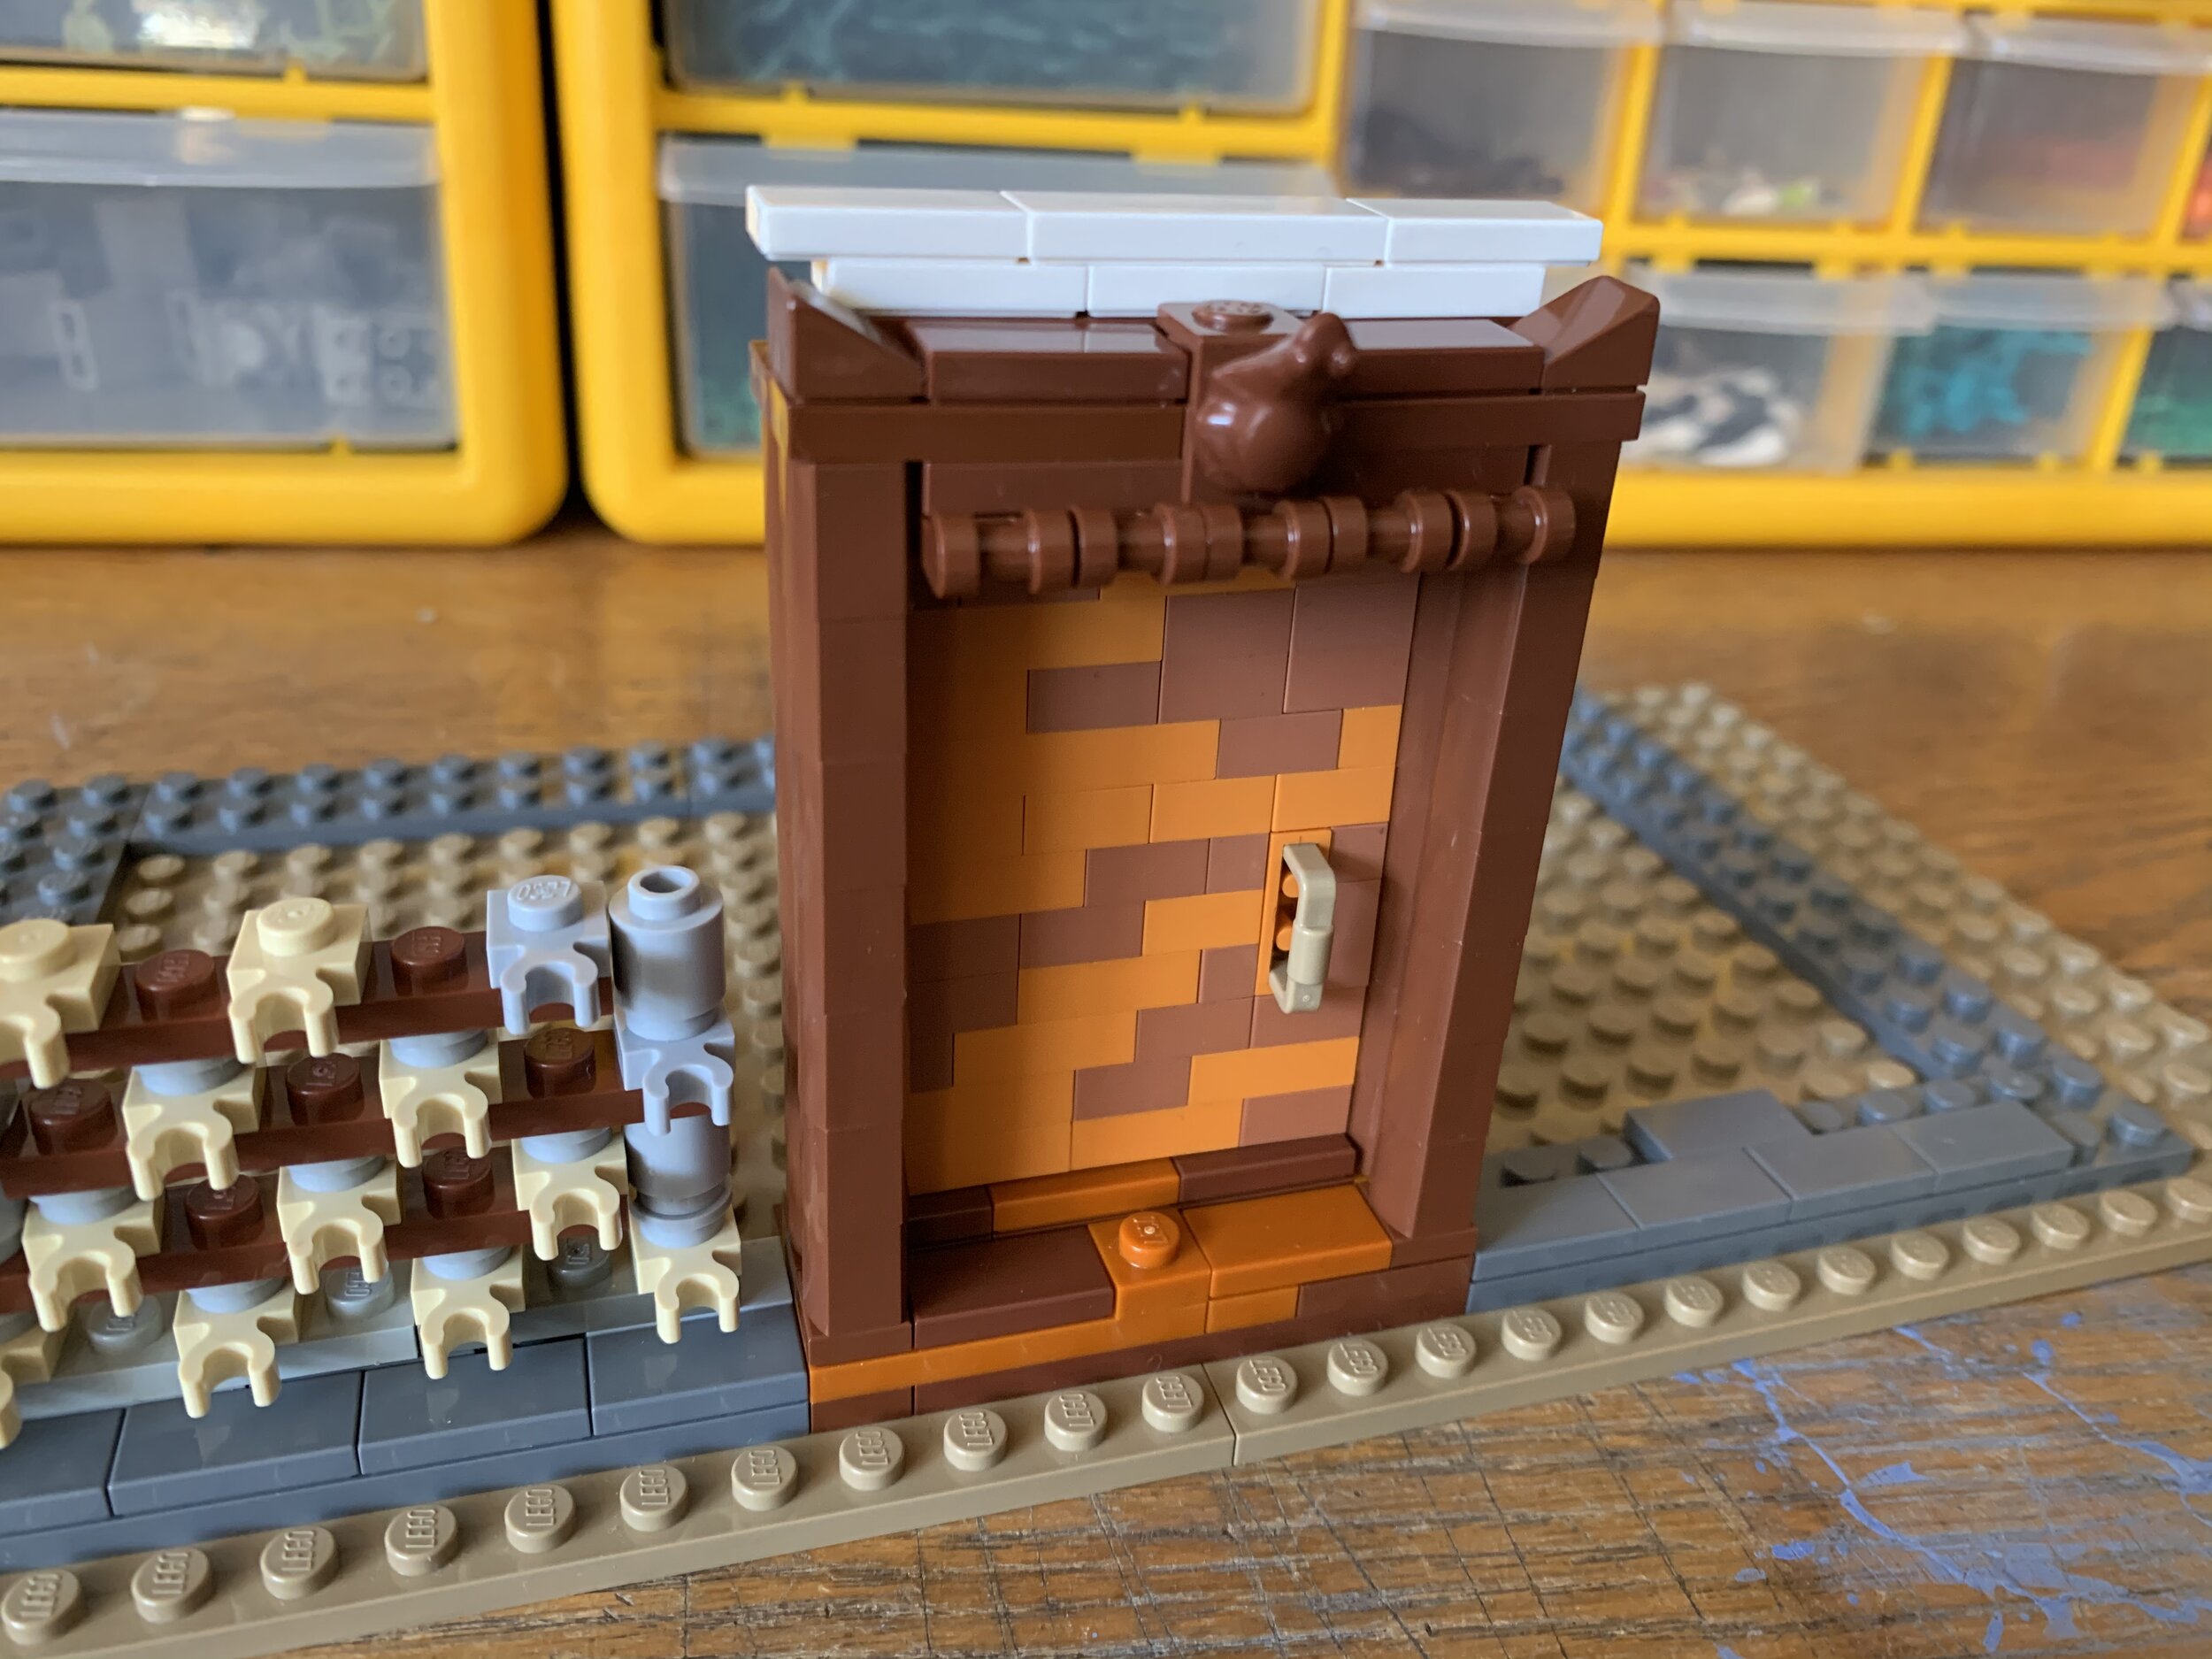
Finished door in its proper place
Parts-Intensive Walls
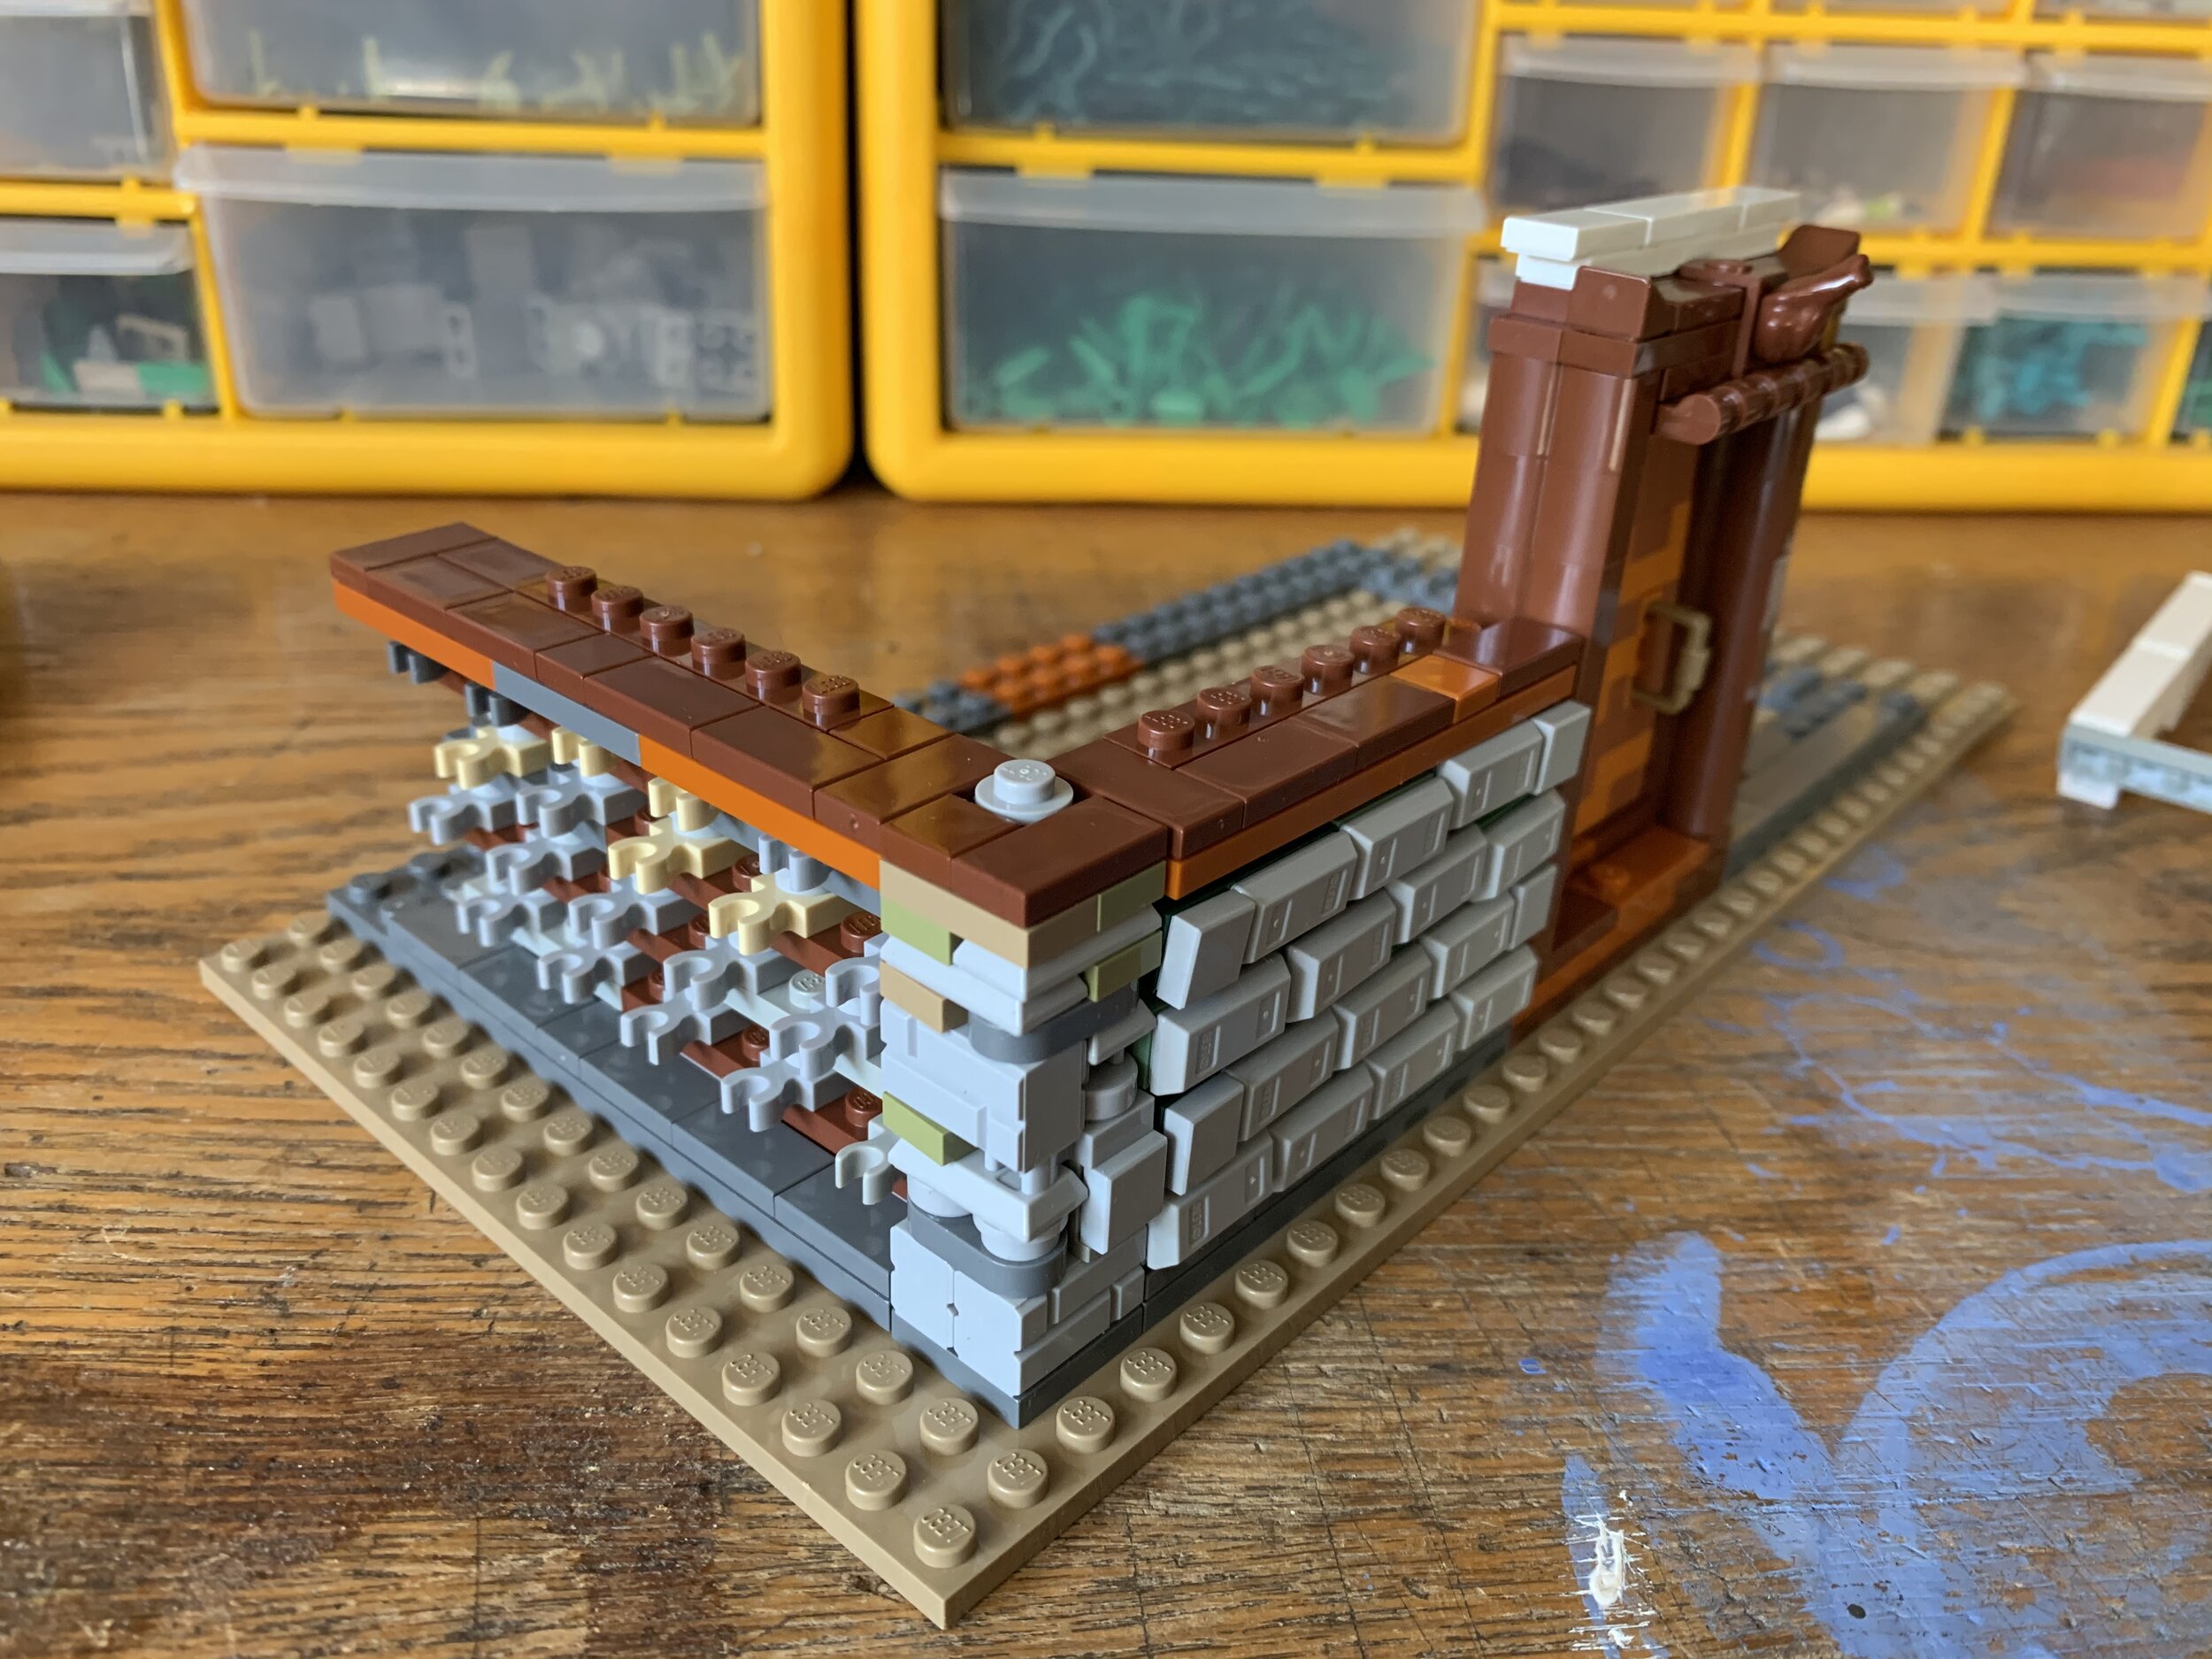
After finishing the door I thought it would be a bit boring to just make a door, so I started making one of the least parts-saving walls in recent history. Why you may ask? Well mostly because I had a bunch of 1x1 plates with clips and quite a few ingots laying around. I noticed that the clips actually hold the little tube at the back of a plate in a fairly stable way (well, as stable as an illegal technique may allow) and thus I had my initial wall-technique for the lower section of the cottage. I’m sure this technique has been used in some way, shape, or form by other builders before, but regardless, it was fun to tinker away trying to get the math to add up in a way that covered everything.
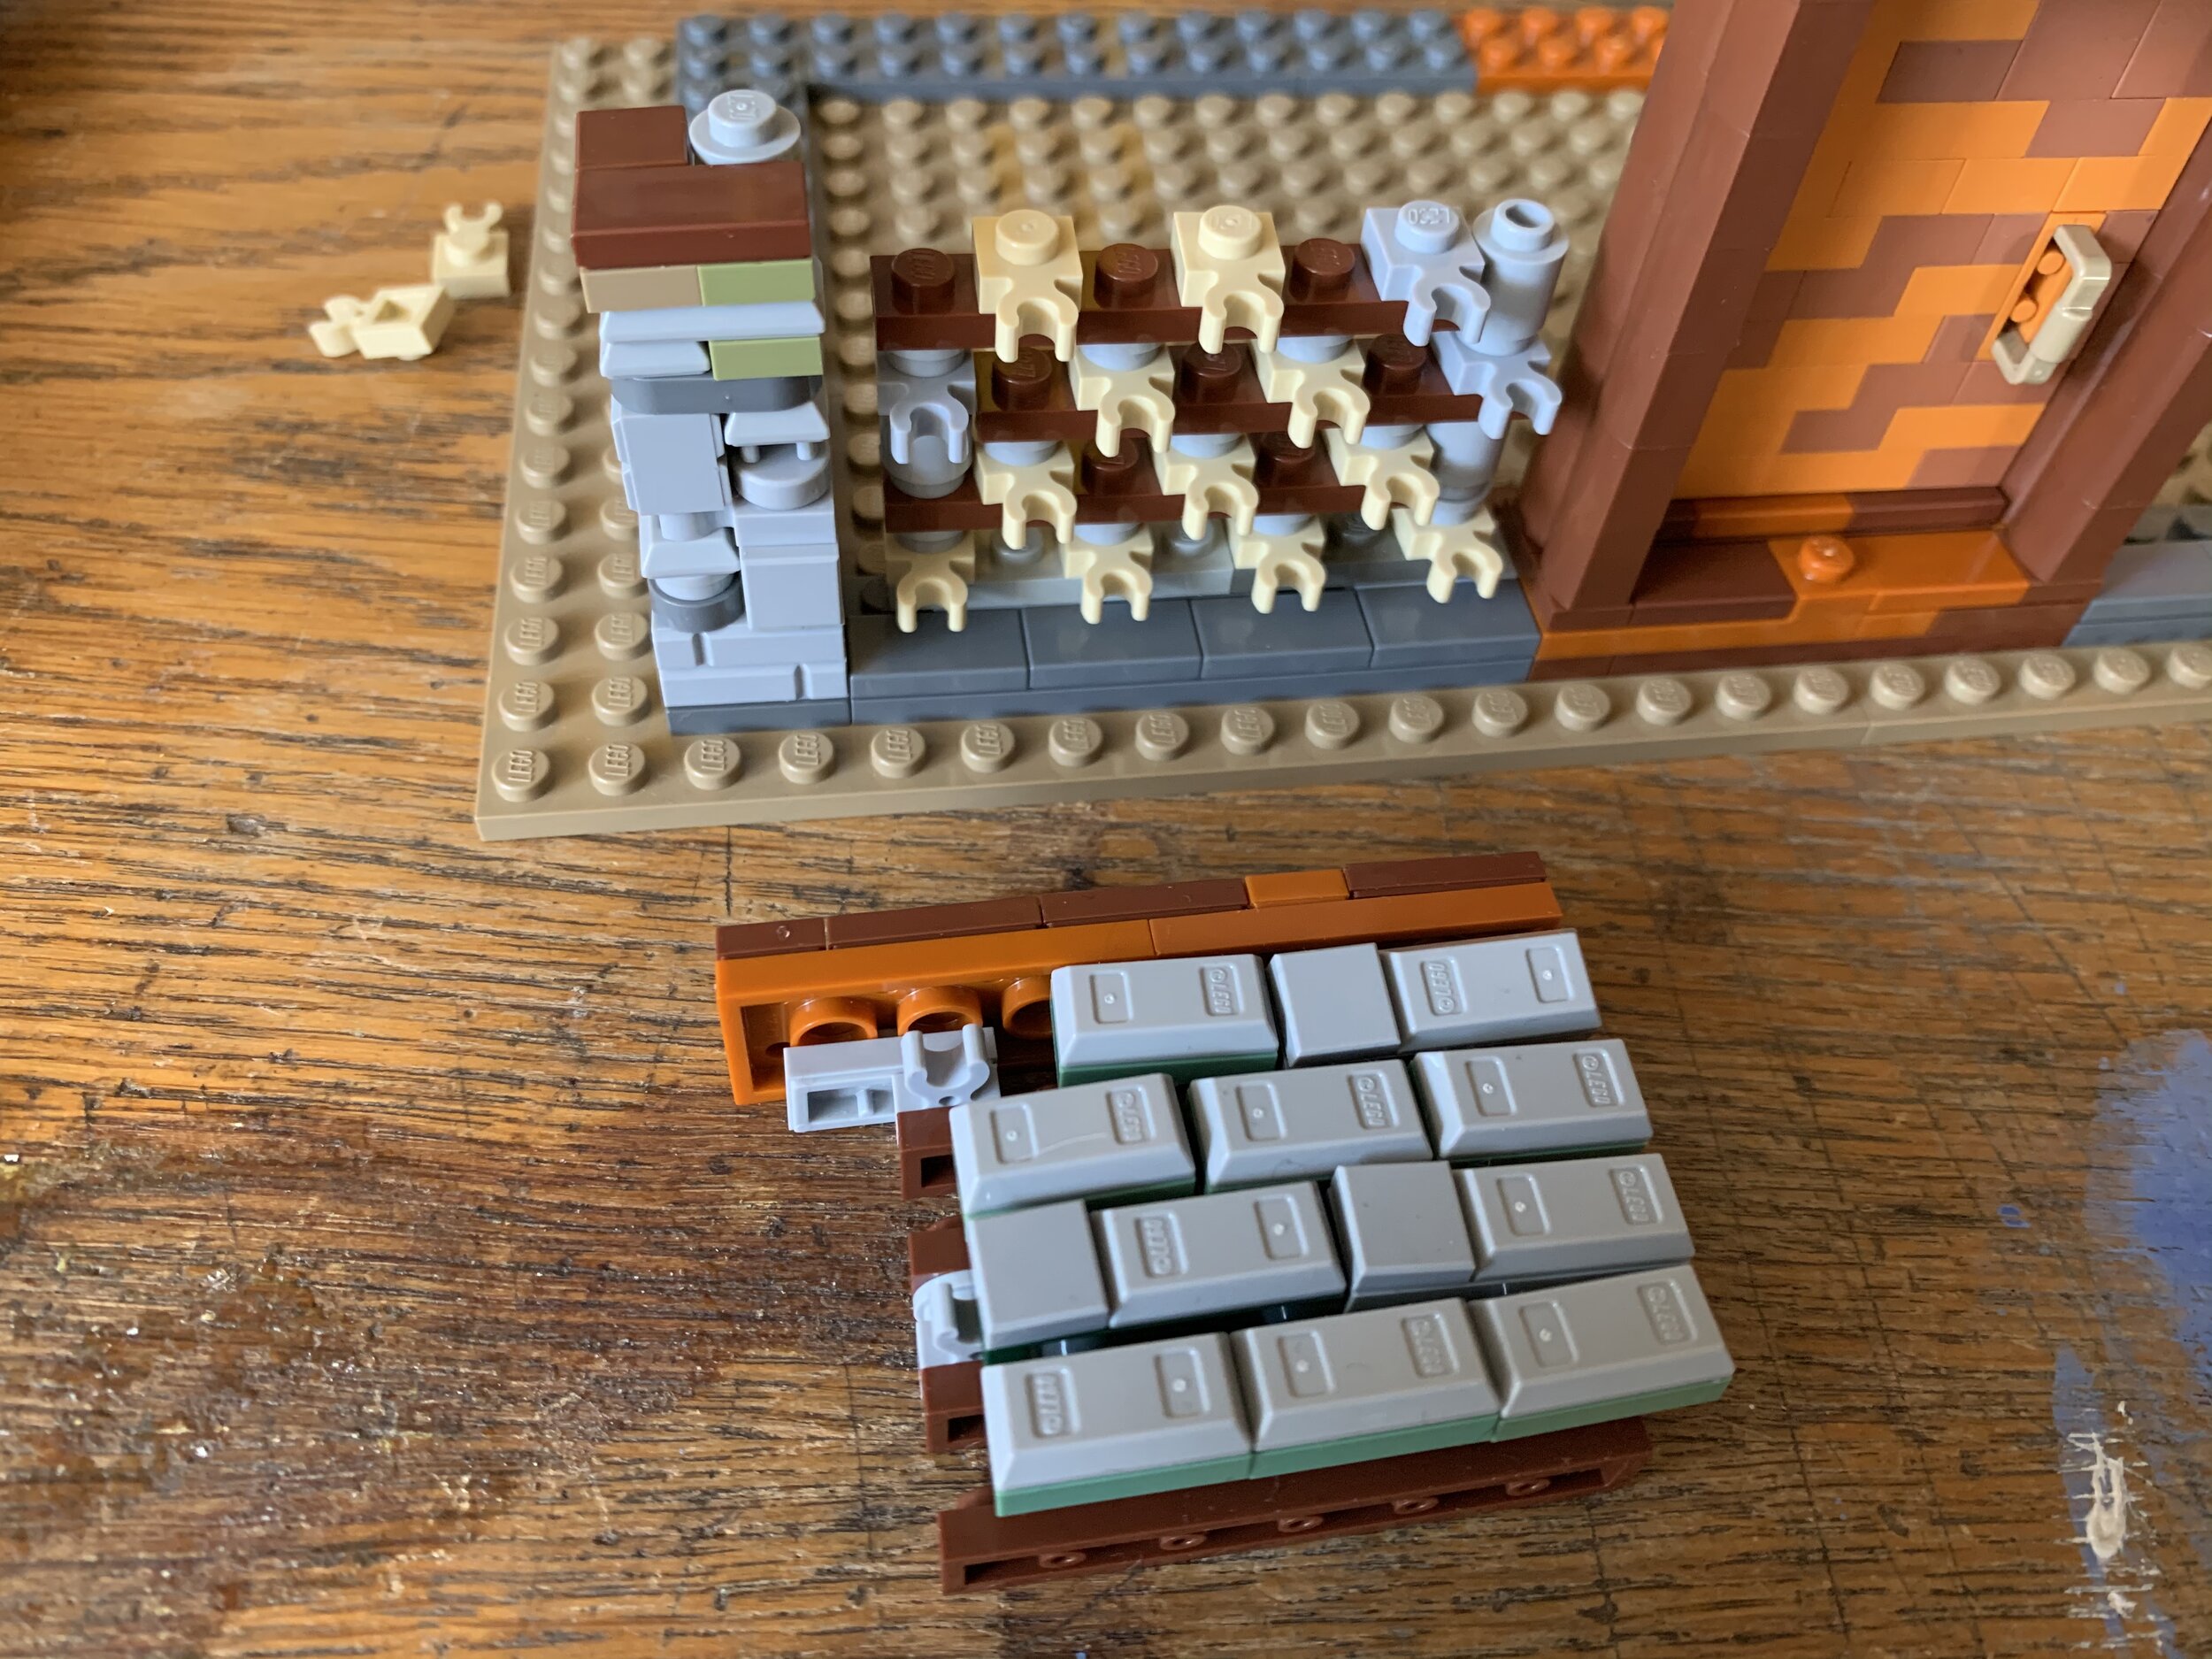
1x2 and 1x3 plates behind the ingots and tiles make up the conection points

How the clips and plates are connected
To make it sturdier and change up the look a bit, I decided to make standard stacked pillars in the corners instead of using this technique all the way around. The brown sections with tiles and plates on top act as a starting point for the upper walls.

Greebly Walls, the Sequel
After finishing the base of the cottage it was time to start with the upper walls. There are a great number of ways to get structure in a facade, one of my personal favourites is adding 1x2 tiles that are ever so slightly offset. It makes the inside of the build look like a train wreck, but who looks inside a cottage anyway?
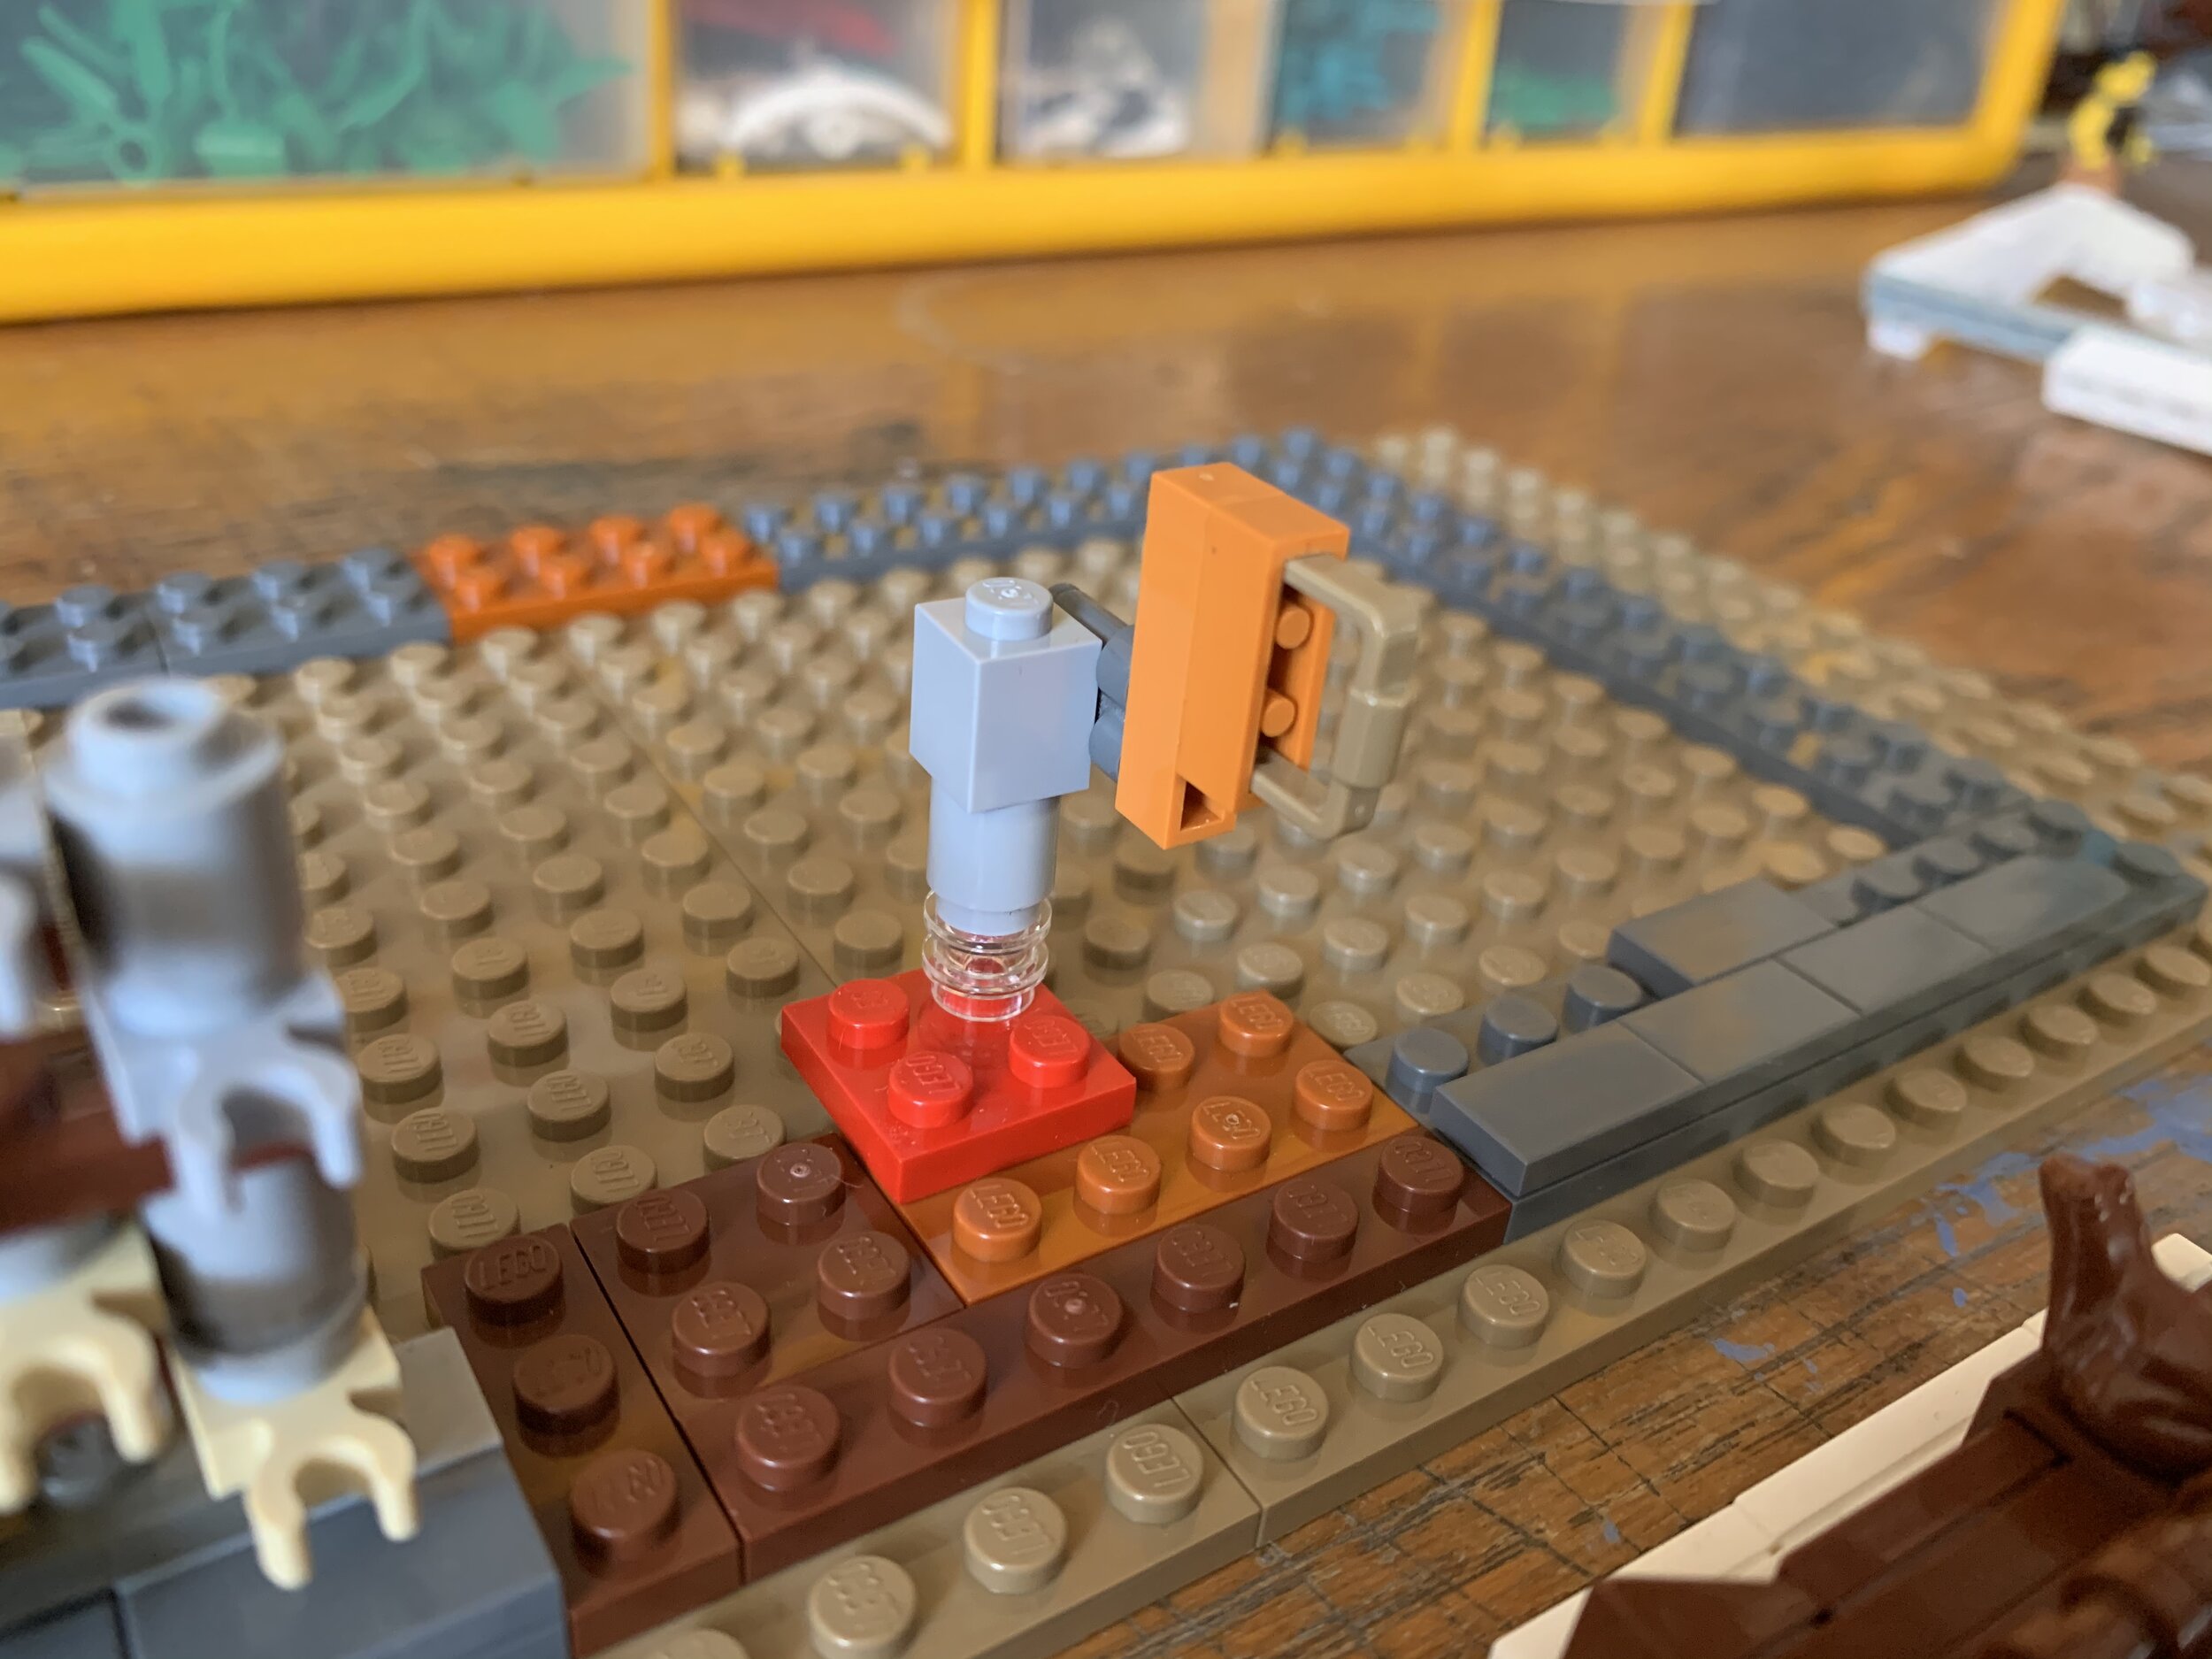
Another way that makes a wall look a bit more interesting is switching the direction in which you use the bricks for some sections. This does require a bit of thinking, in terms of the proportions of the bricks, if you want everything to add up in the end. There are a few ways to achieve this in a smooth way, the most common probably being to use bricks with studs on the side. This technique for example allows you to make round windows using one arch right-side-up and the other one upside down. As I ended up making a frame with bricks/tiles to hold the window together, the whole section became a bit bigger than expected but it does illustrate how you can use it to create some interesting structure.
A different (and probably better) technique to hold the arches together is to use the clips (shown above for the base of the cottage) attached to the arches and then connect them with a bar on each side. Something I realized after I had already finished that section… you live and you learn right?

A look inside the cottage which reveals that there are always two sides to a story…or in this case, a wall…

Trying out the overall shape to find one that seemed to fit.

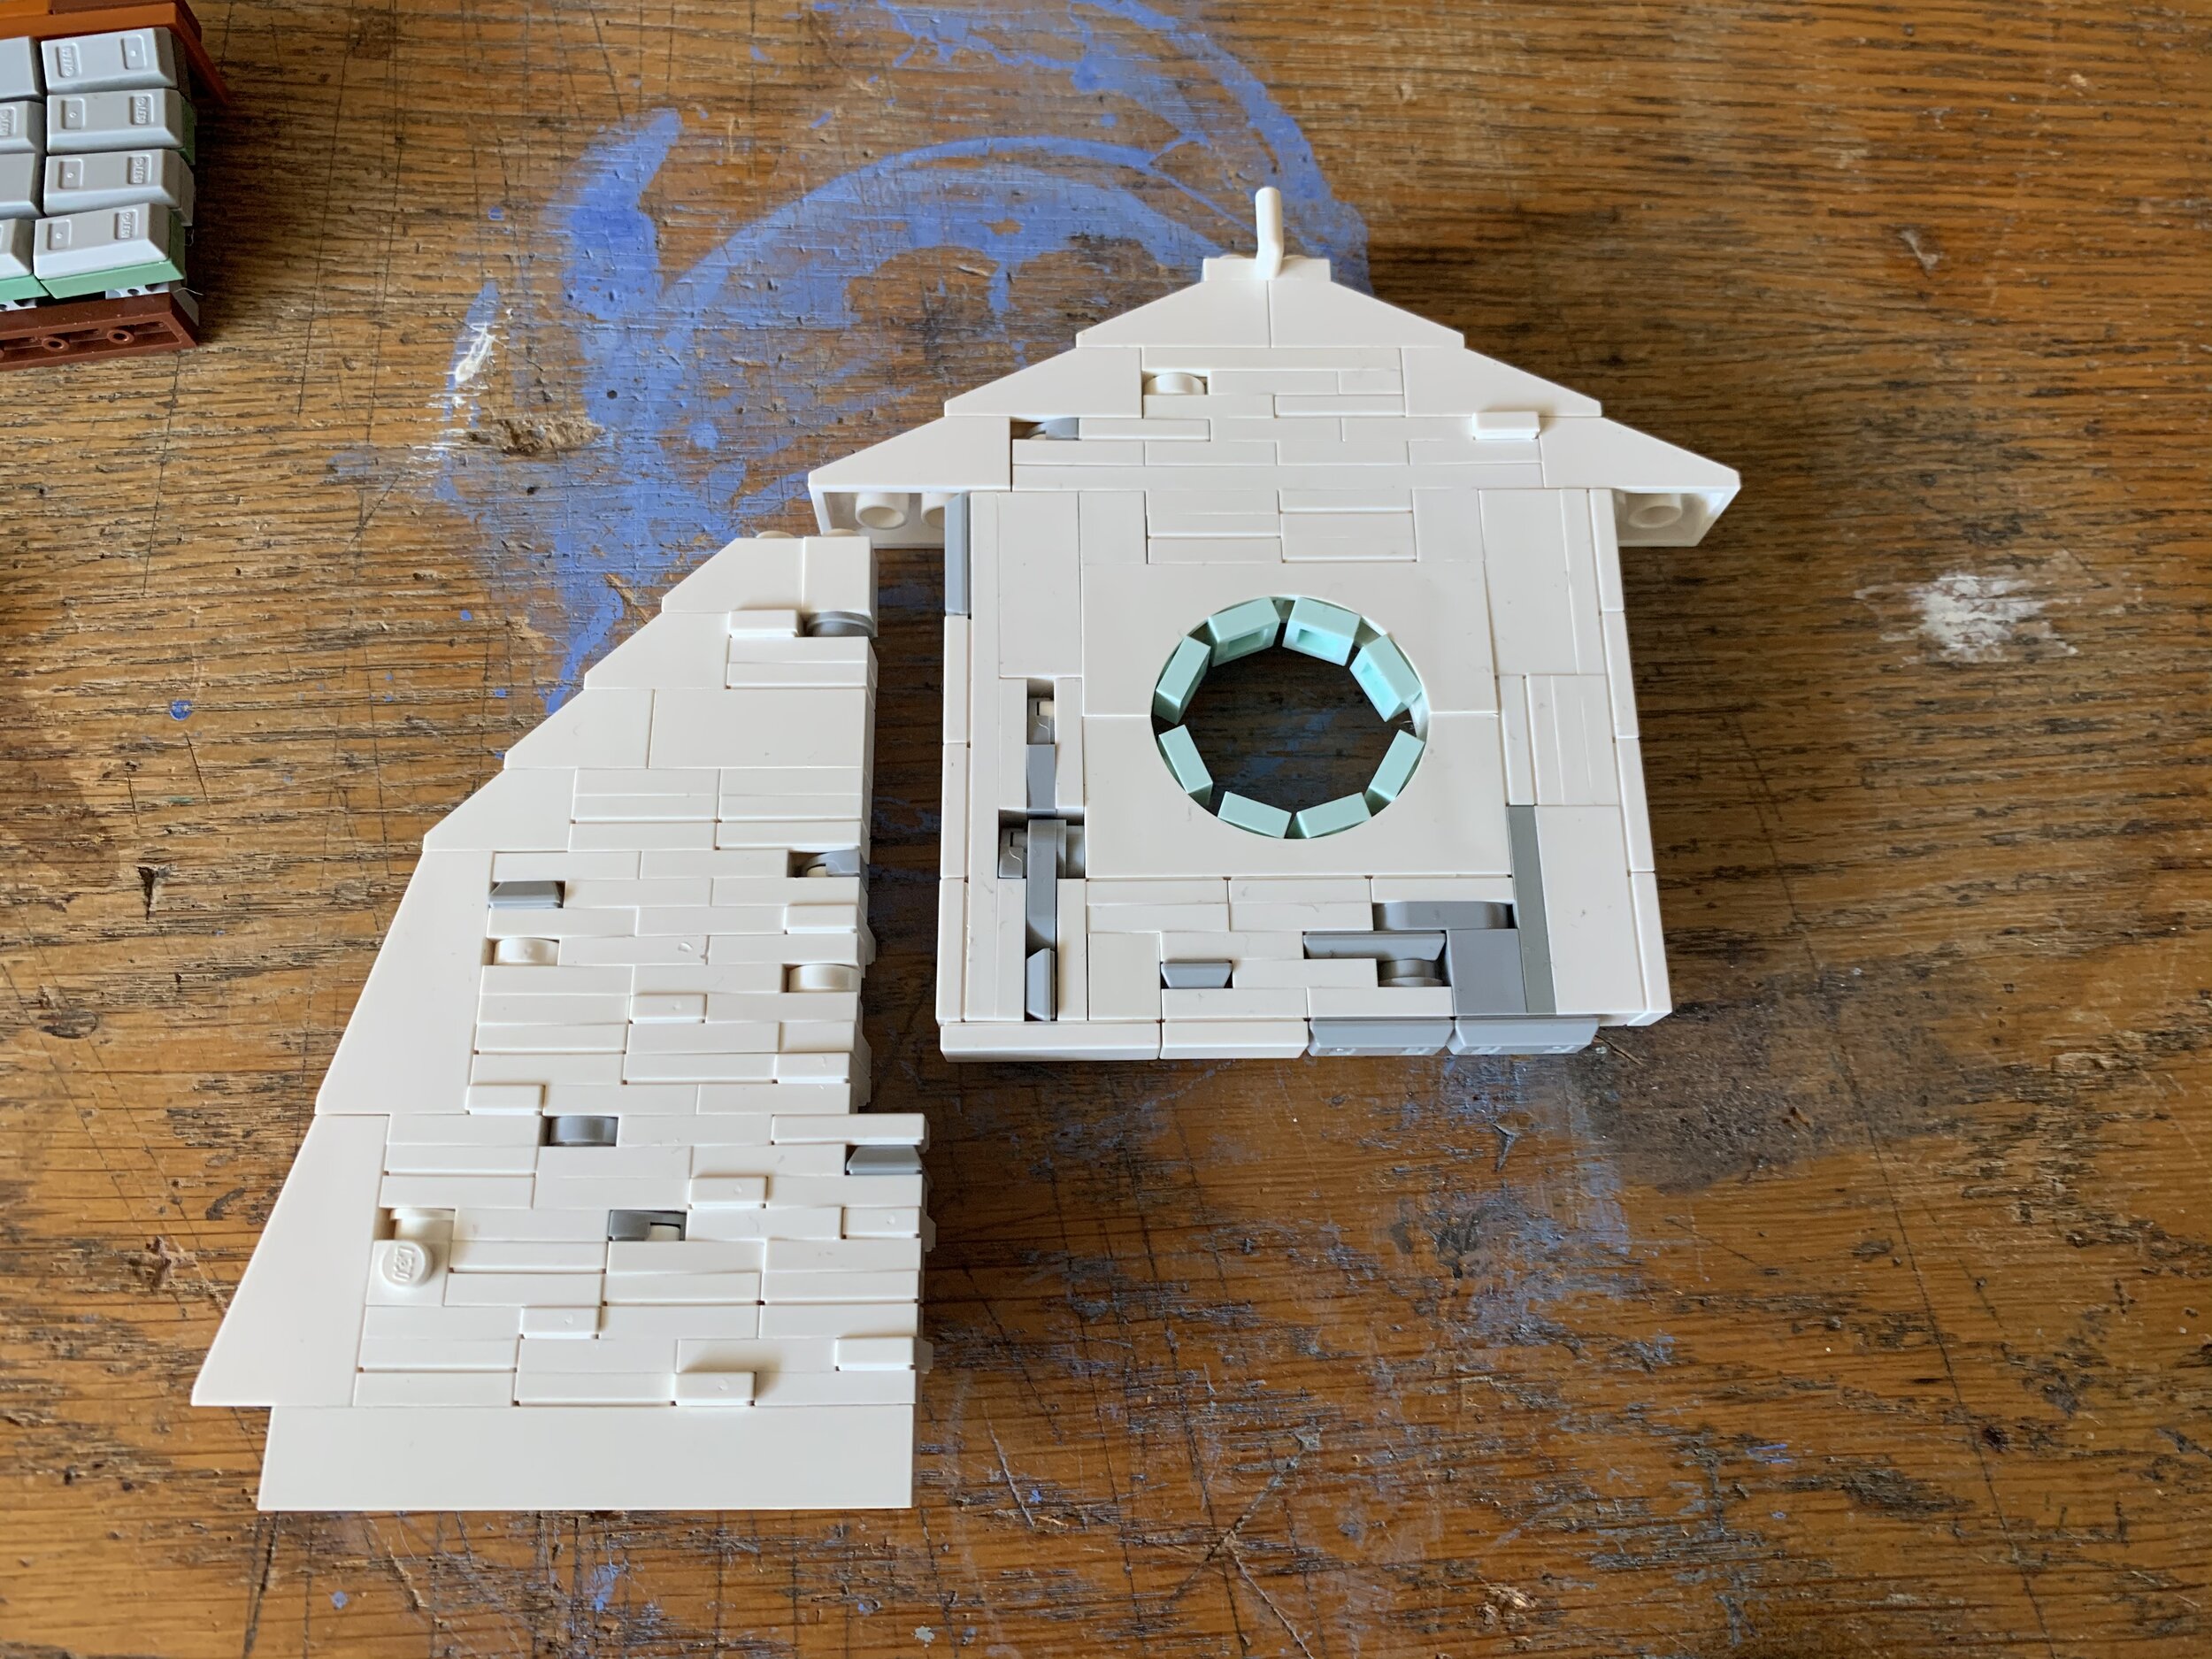
Raising the Roof

Half-way through building the lower section and starting on the upper walls, I did a first version of the roof just to see what it would look like. I find that it helps to build sections to get an idea of what works and what doesn’t. Otherwise you run the risk of finishing the entire house and then when you add the roof you realize the proportions are off or something like that.

Here you can see what the front facade looks like after I finally got everything to fit. If you’re paying really close attention you can see that the math is slightly off which leaves a bit of a crack between the window-section and the rest. But that’s one of the best parts of building an old cottage, it’s supposed to be a bit worn, right?

To get the roof in place I decided to make that separate from the rest of the house and then just lay it on top. Therefore, I added a central beam for support at the top. This also adds some stability which was dearly needed at this point…
Having the basic structure of the roof already done, the next part was figuring out which colours to use and also how to give that part some interesting structure. This leads us to another one of my favourite techniques, the “half-connected-1x2-tile.“ This is a very simple but somewhat patience-trying technique which basically means that you only connect the 1x2 tile to one underlying stud instead of two. The key to get it to look “right“ is probably remembering to start each row one stud off compared to the adjacent one. Just don’t push them down too firmly.

A look at the inside of the roof shows a very basic structure with three sections that are held together with hinges. On the two longer sides there are some 1x1 bricks with studs on the side that enable one to cover the sides of the roof for a more cohesive look.

Topping it Off
Every cottage needs a decent chimney right?
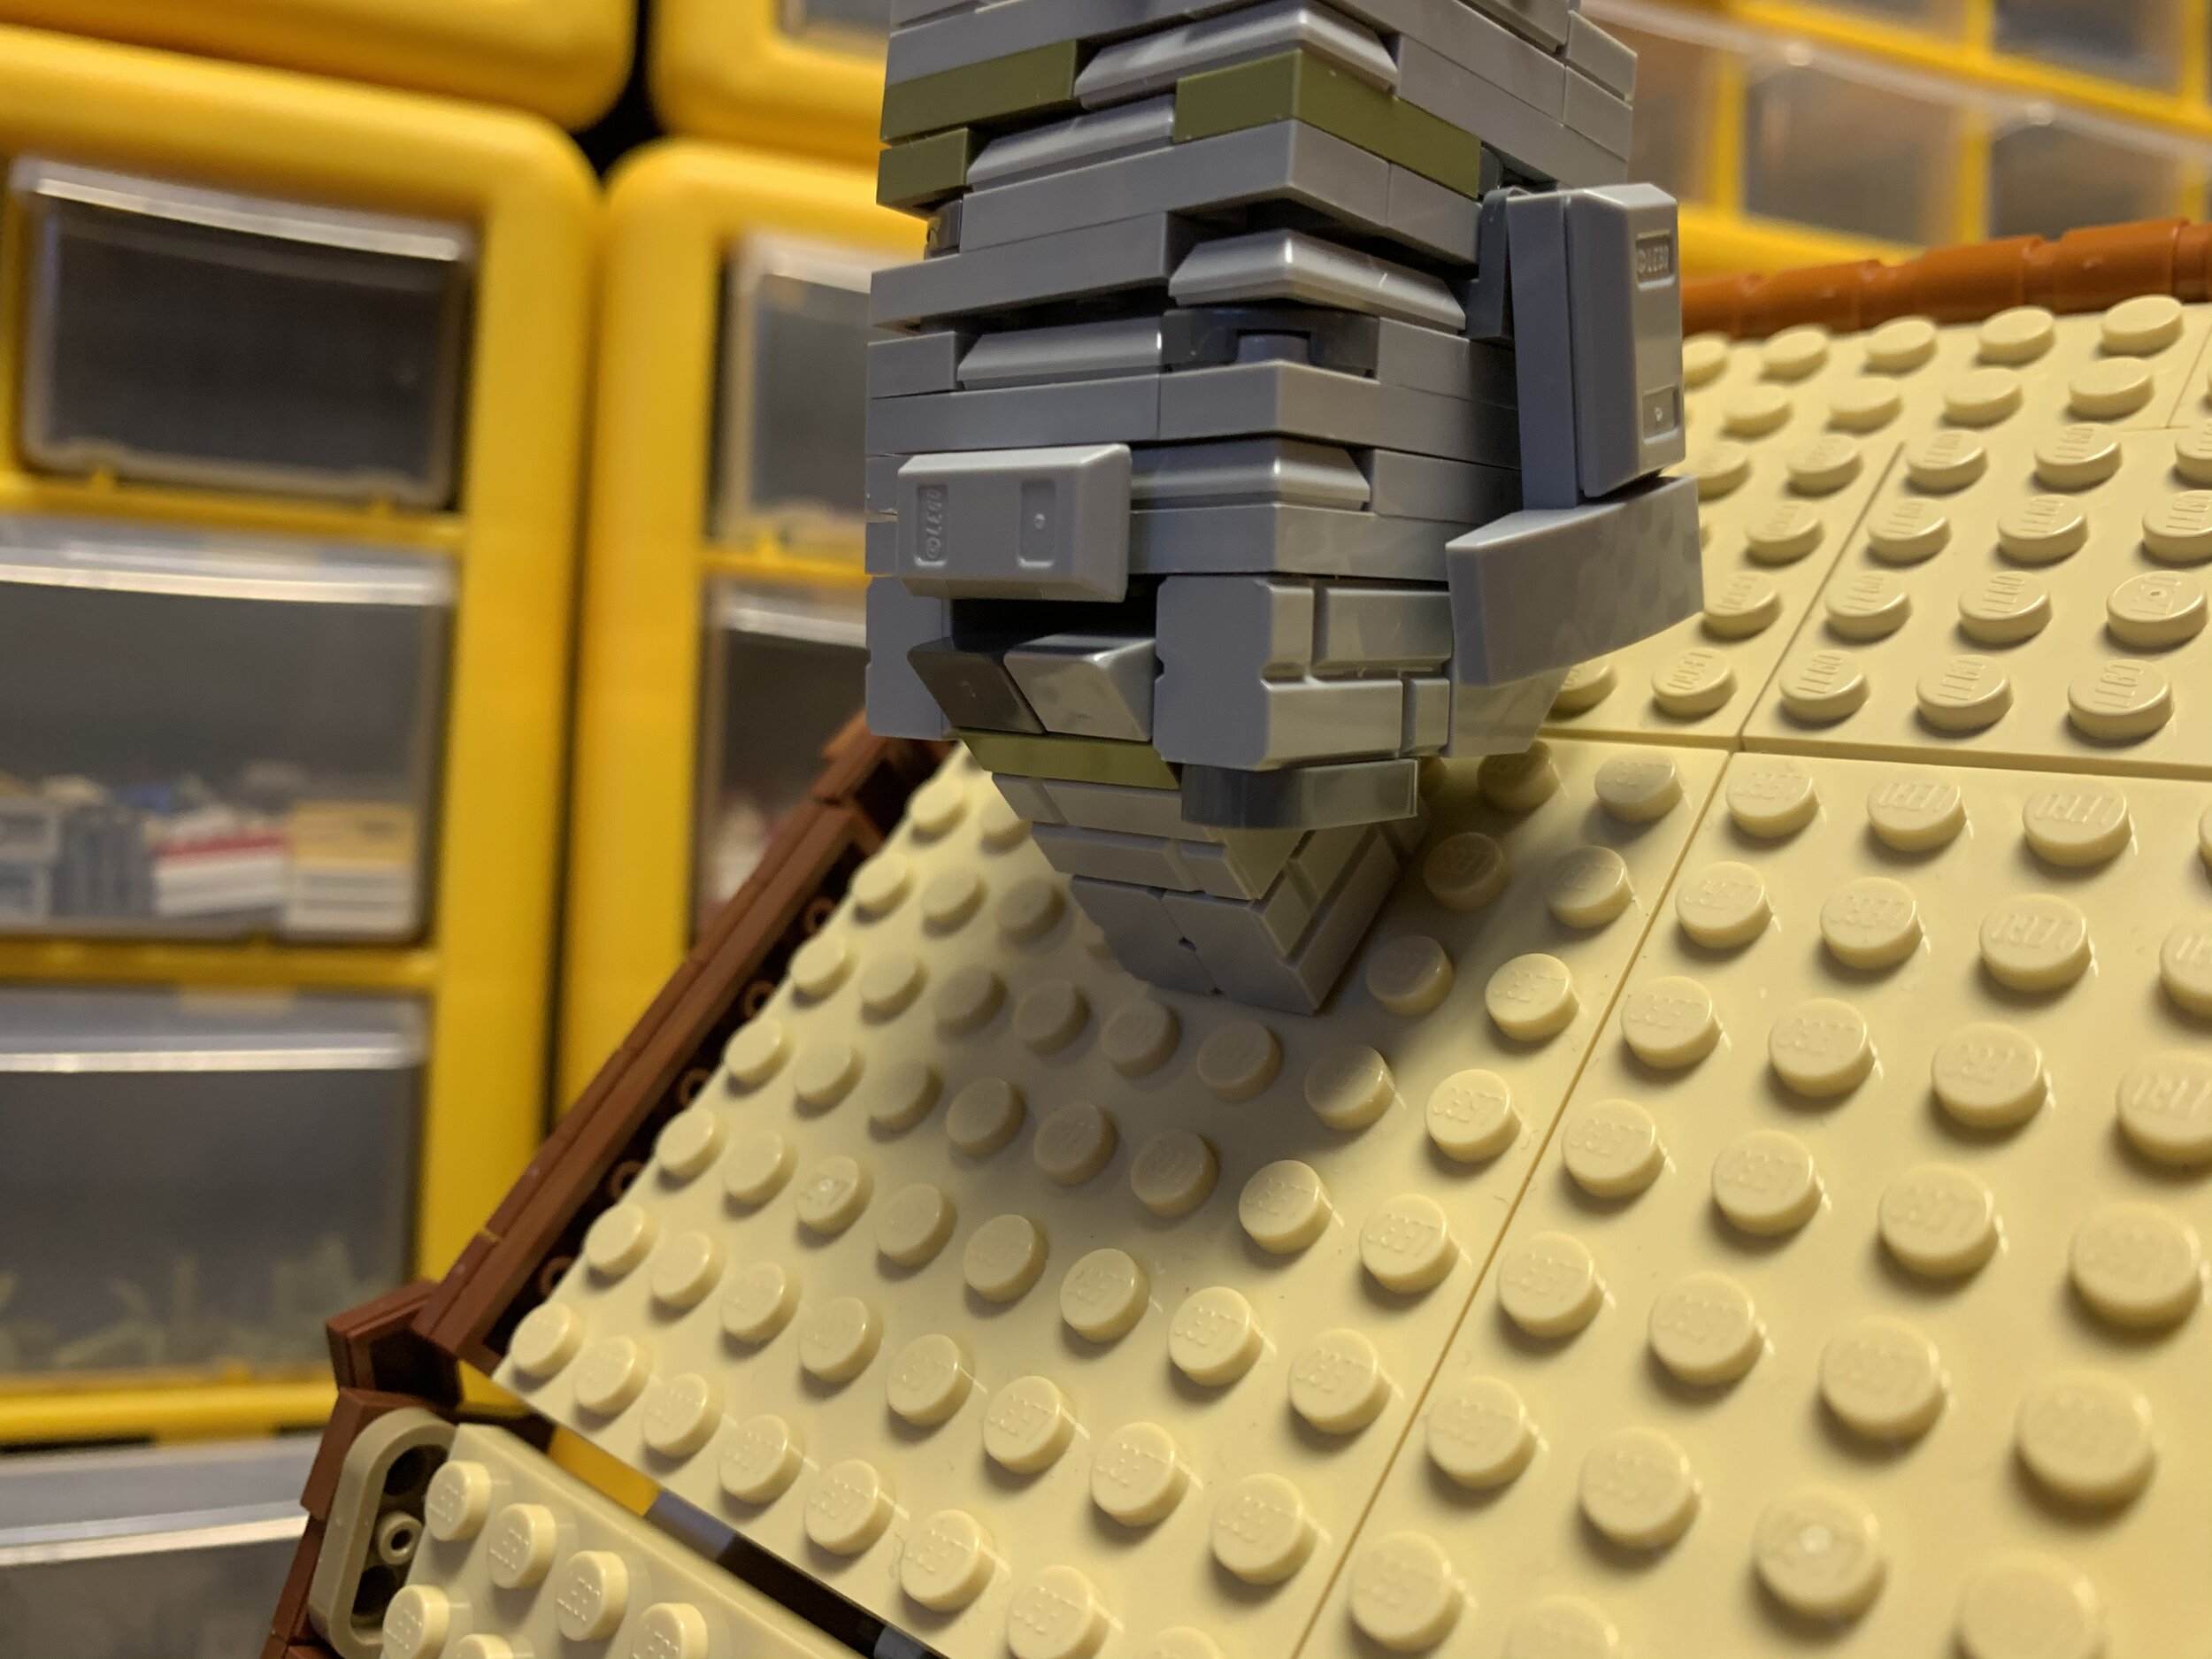
The first attempt at a chimney was…not super-successful… So I decided to keep adding pieces until it matched the overall look I was going for.

When in doubt, add more pieces!
Also, the ice cream pieces make for great smoke. The connections between them are again not very stable, but the fact that it’s even possible to connect them at all still surprises me.

With the roof halfway finished, the two halves are connected with hinges and then just rest on top of the beam inside the cottage. The gap is then covered by simply laying a bunch of 1x1 round bricks at the top. To keep them from sliding off I attached a round 2x2 tile on each end so sort of a half-hearted attempt at “trapping.”
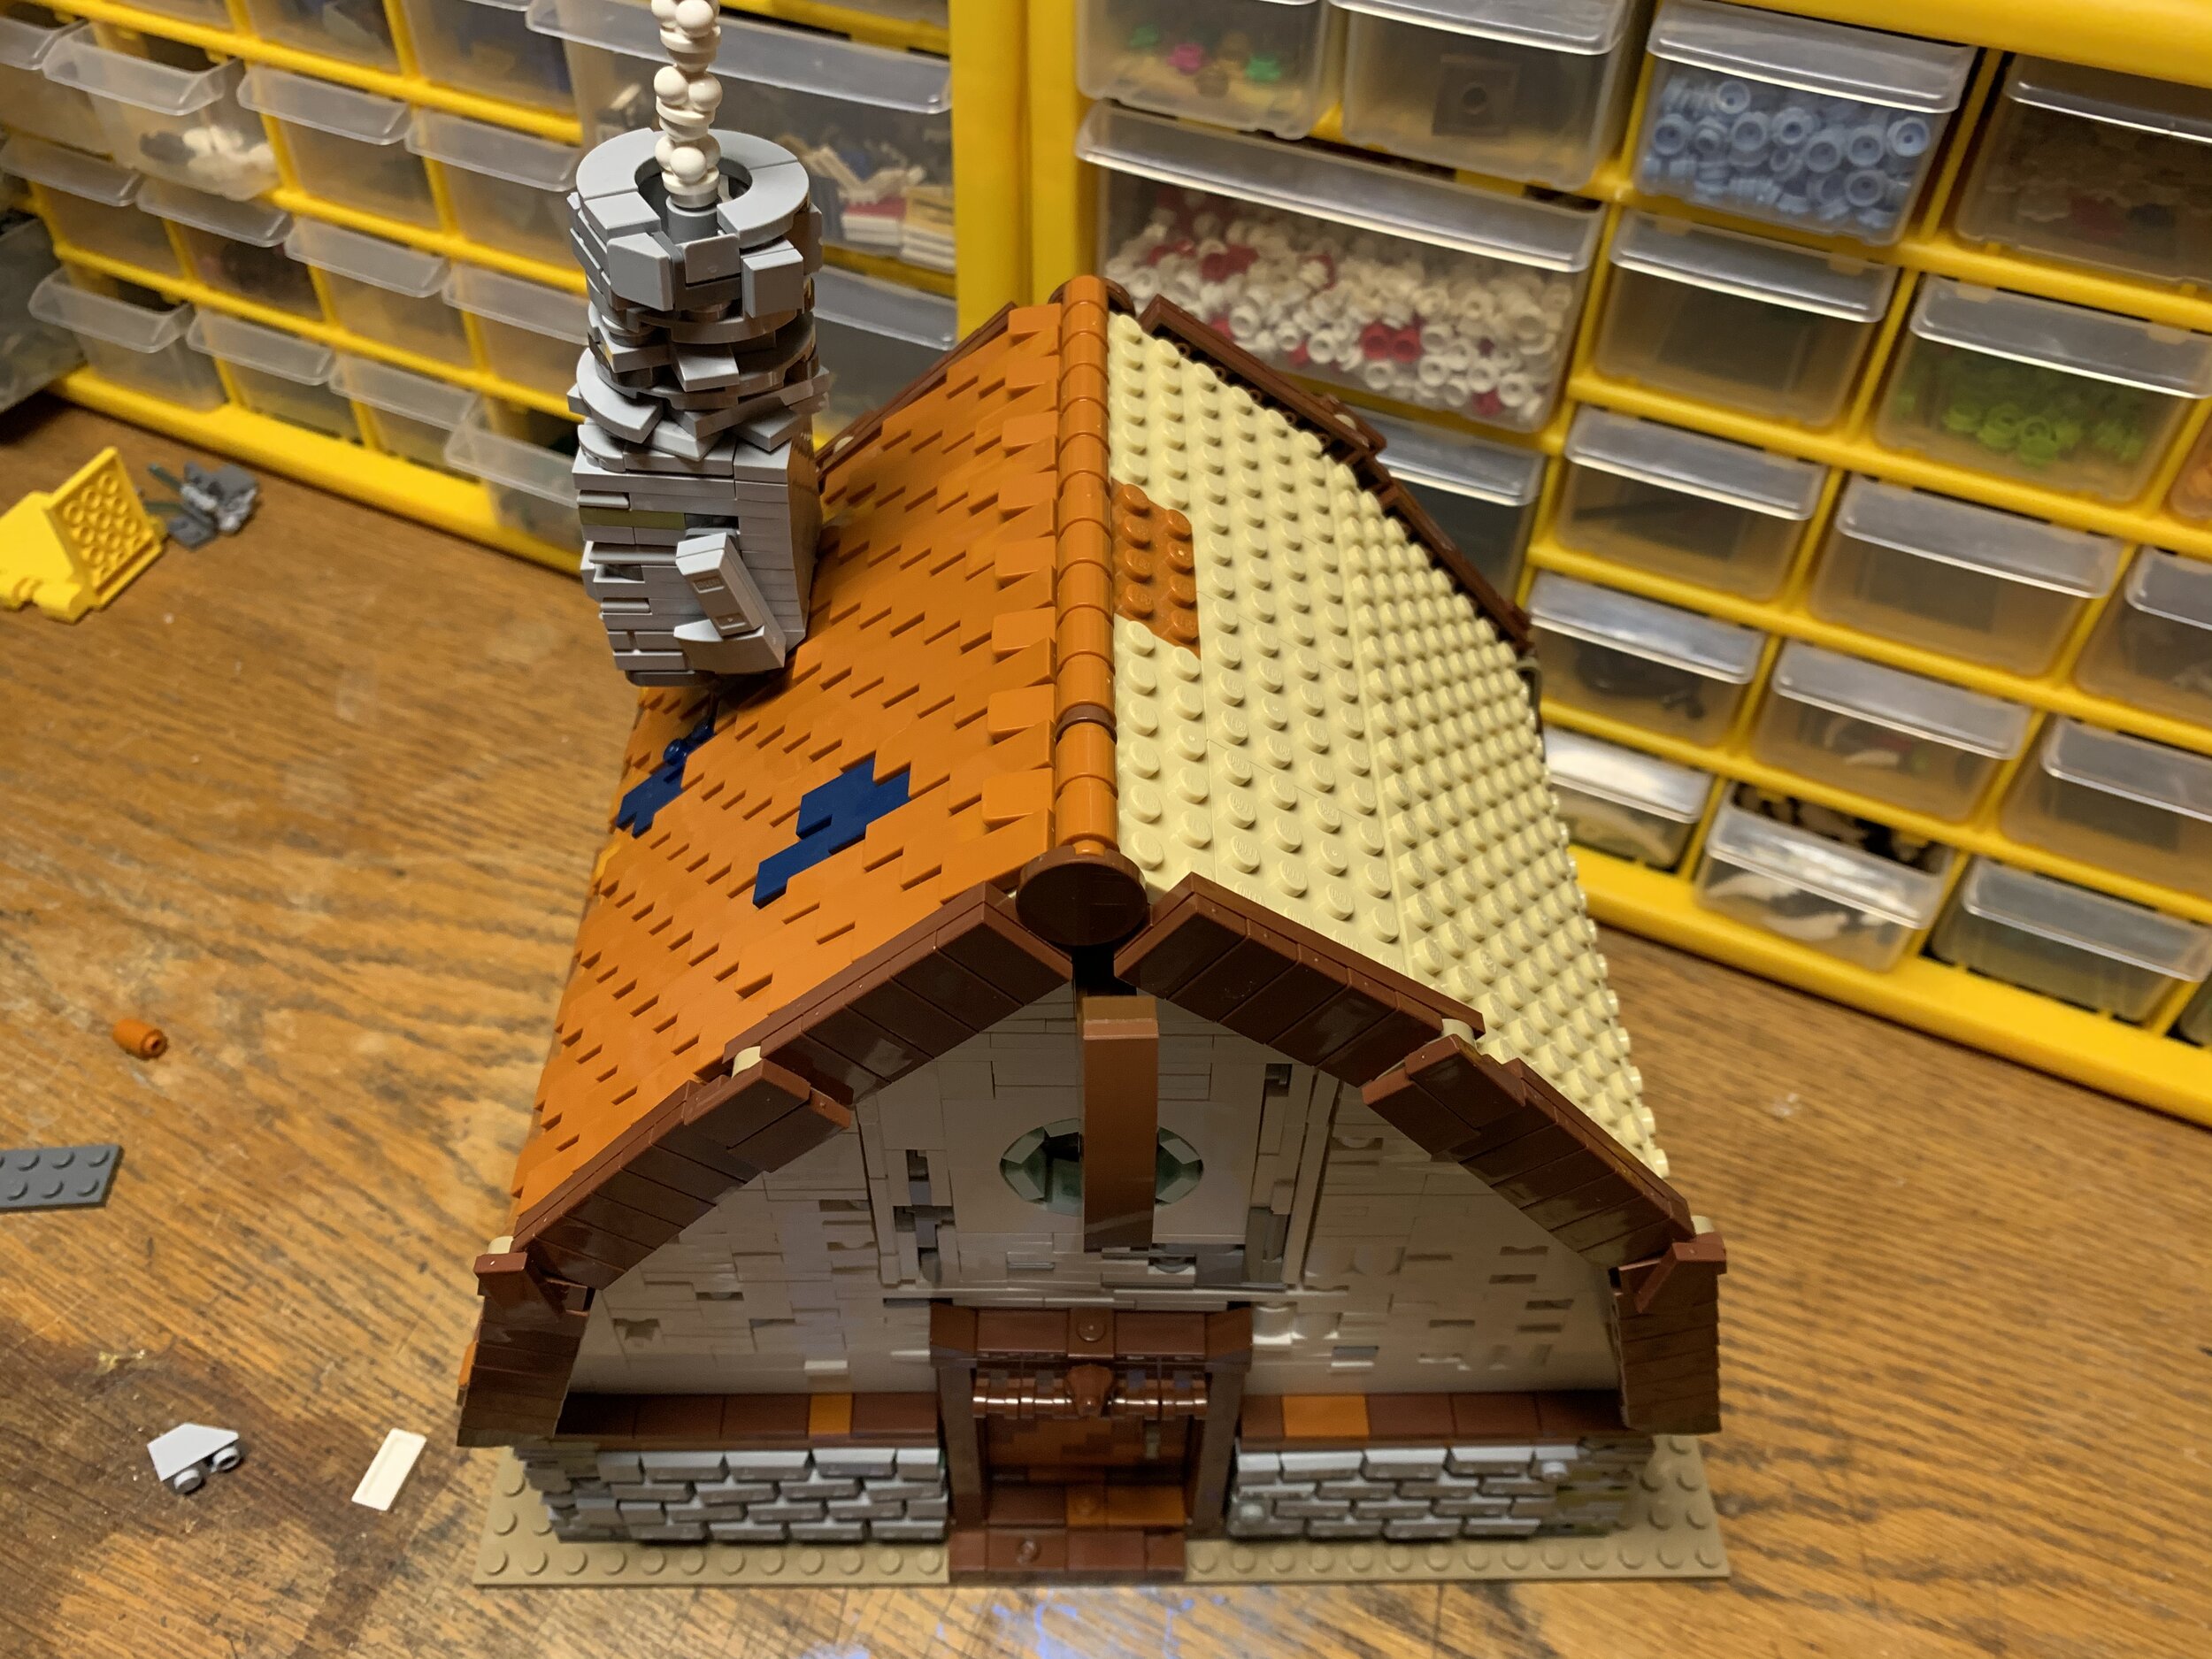
As you can see above, the roof-tiles are off by one stud for each row. I’ve found that cheeseslopes are the best way to cover the studs that are left bare when you’ve attached all the 1x2 tiles. I’ve tried with 1x1 tiles but that’s a bit much even for me…
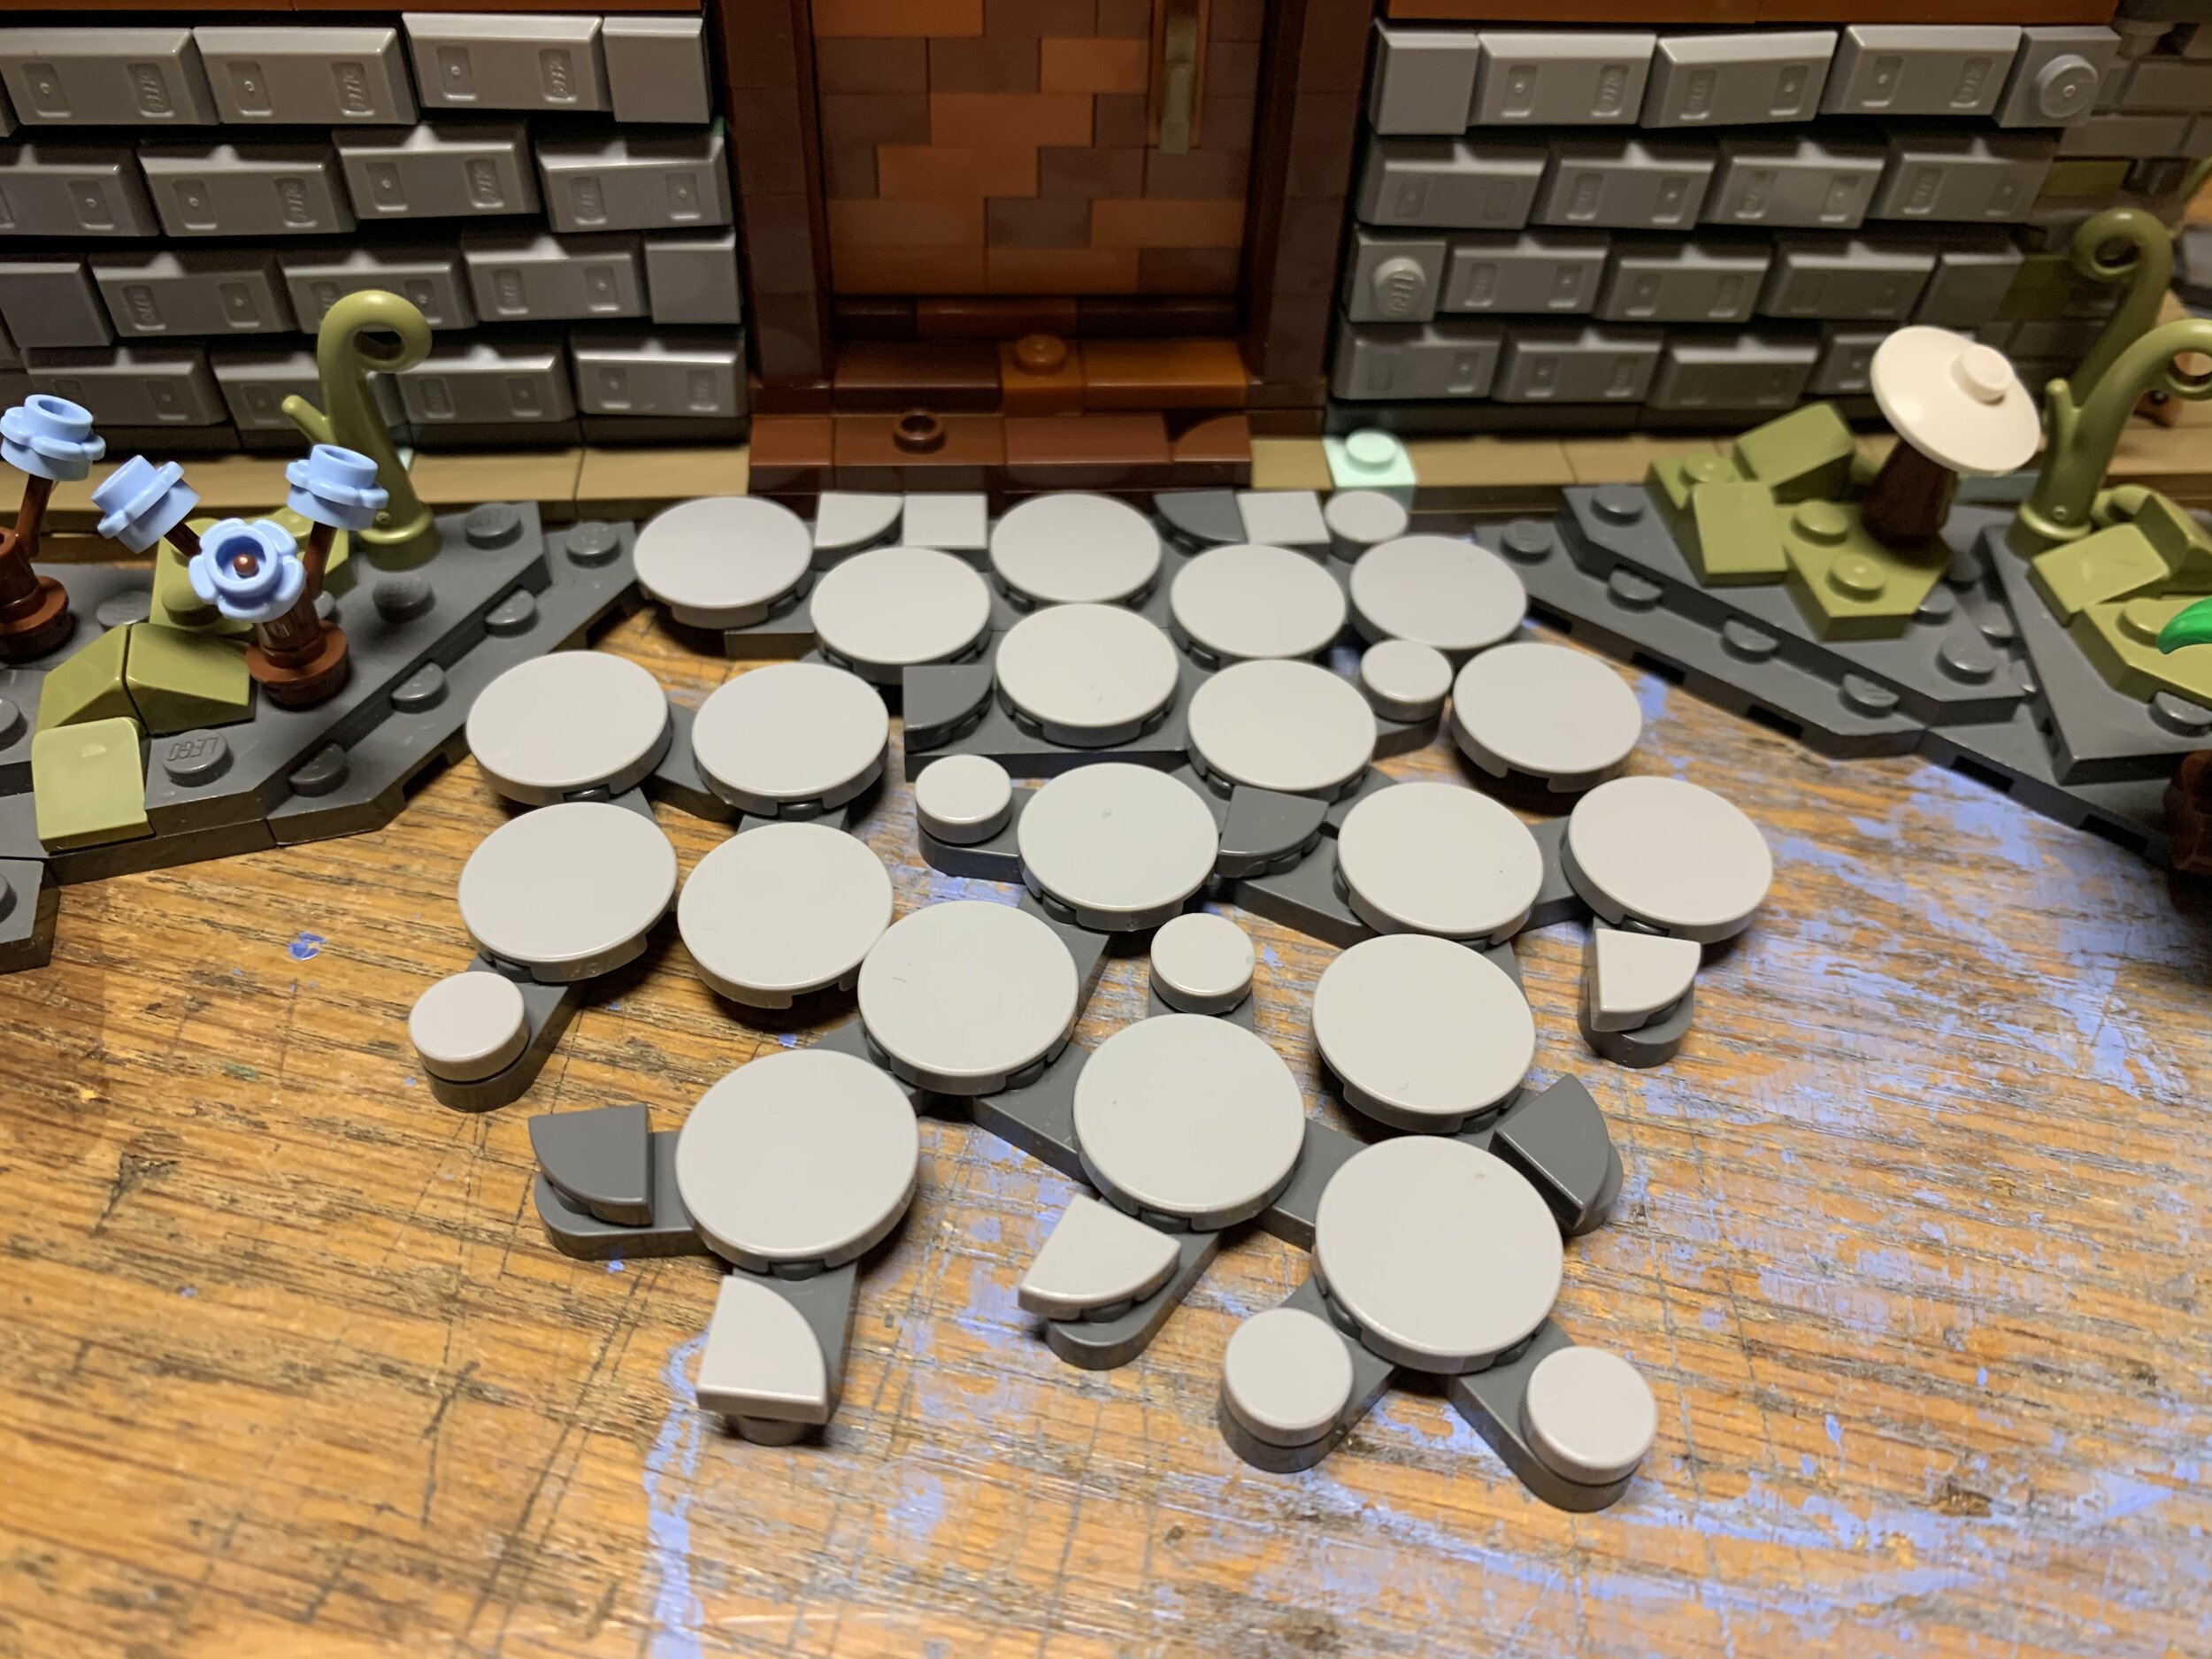
Foliage, Details and Rockwork
After finishing the cottage, I decided to add a bit more stuff to give it a decent surrounding.

Some rockwork with studs in different directions and also some foliage and mushrooms.
Also gave the entrance a bit more love with a stone pathway. This path technique has been used by Ralf Langer previously and using the 1x2 tiles with rounded edges, so it’s pretty easy to connect everything and still give it an organic look.

At this point I was pretty happy with the overall look but I had too much fun so I just kept adding stuff to see what I could come up with.
Like a brick-built rabbit and some more mushrooms! The rabbit took waaay too long to get right. Building animals at this scale was a lot harder than I imagined…


Every fantasy cottage needs a lot of mushrooms and you can never go wrong with a snail!
There are a number of builders who have made brick-built birds, something I felt that I had to try as well. It’s actually pretty crazy how many LEGO pieces (specifically minifig accessories) can be used to make pretty decent-looking birds when you attach a minifig hand as the beak.


I also had to add a deer. The design is obviously based on the (perfect) one Grantmaster came up with about two years ago, and that a lot of builders have used since. I tried to make it a little bigger than his version to fit with the other animals I had made. Finally, I added some bigger trees (but I’ll leave that tutorial for a later time).
A Final Look
Below is a shot of the finished thing one more time (no one wants to scroll all the way up to the top of the page right?) to show how it all came together in the end. Hopefully, this article gives you some inspiration to try some of the techniques yourself. Or even better, come up with some new ones to share with the community!
And feel free to add a comment if you know who came up with a specific technique that’s been mentioned in this article as I for one would love to know. Thanks a lot for having a look!

What additional illegal LEGO techniques do you use while building? Leave your thoughts in the comments below.
Do you want to help BrickNerd continue publishing articles like this one? Become a top patron like Charlie Stephens, Marc & Liz Puleo, Paige Mueller, Rob Klingberg from Brickstuff, John & Joshua Hanlon from Beyond the Brick, Megan Lum, and Andy Price to show your support, get early access, exclusive swag and more.