Meaningful Modding: Winterizing the A-Frame Cabin
/Best of BrickNerd - Article originally published February 6, 2023.
I occasionally get asked how to start building MOCs by budding AFOLs. One of my go-to responses is to get two copies of a LEGO set that they enjoy and try combining them and expanding the model into something new. That way, they are already familiar with the building style, techniques and colors and have an easier way to ease into building their own original creations.
Another way to get your feet wet is to modify an existing set to customize it to your liking. Go ahead, build an extra floor of the modular, swap the colors of that car to your favorite, or add a feature or two that push the set from good to great in your mind. This practice is commonly known as “modding” or modifying a set to make it even better than ever.
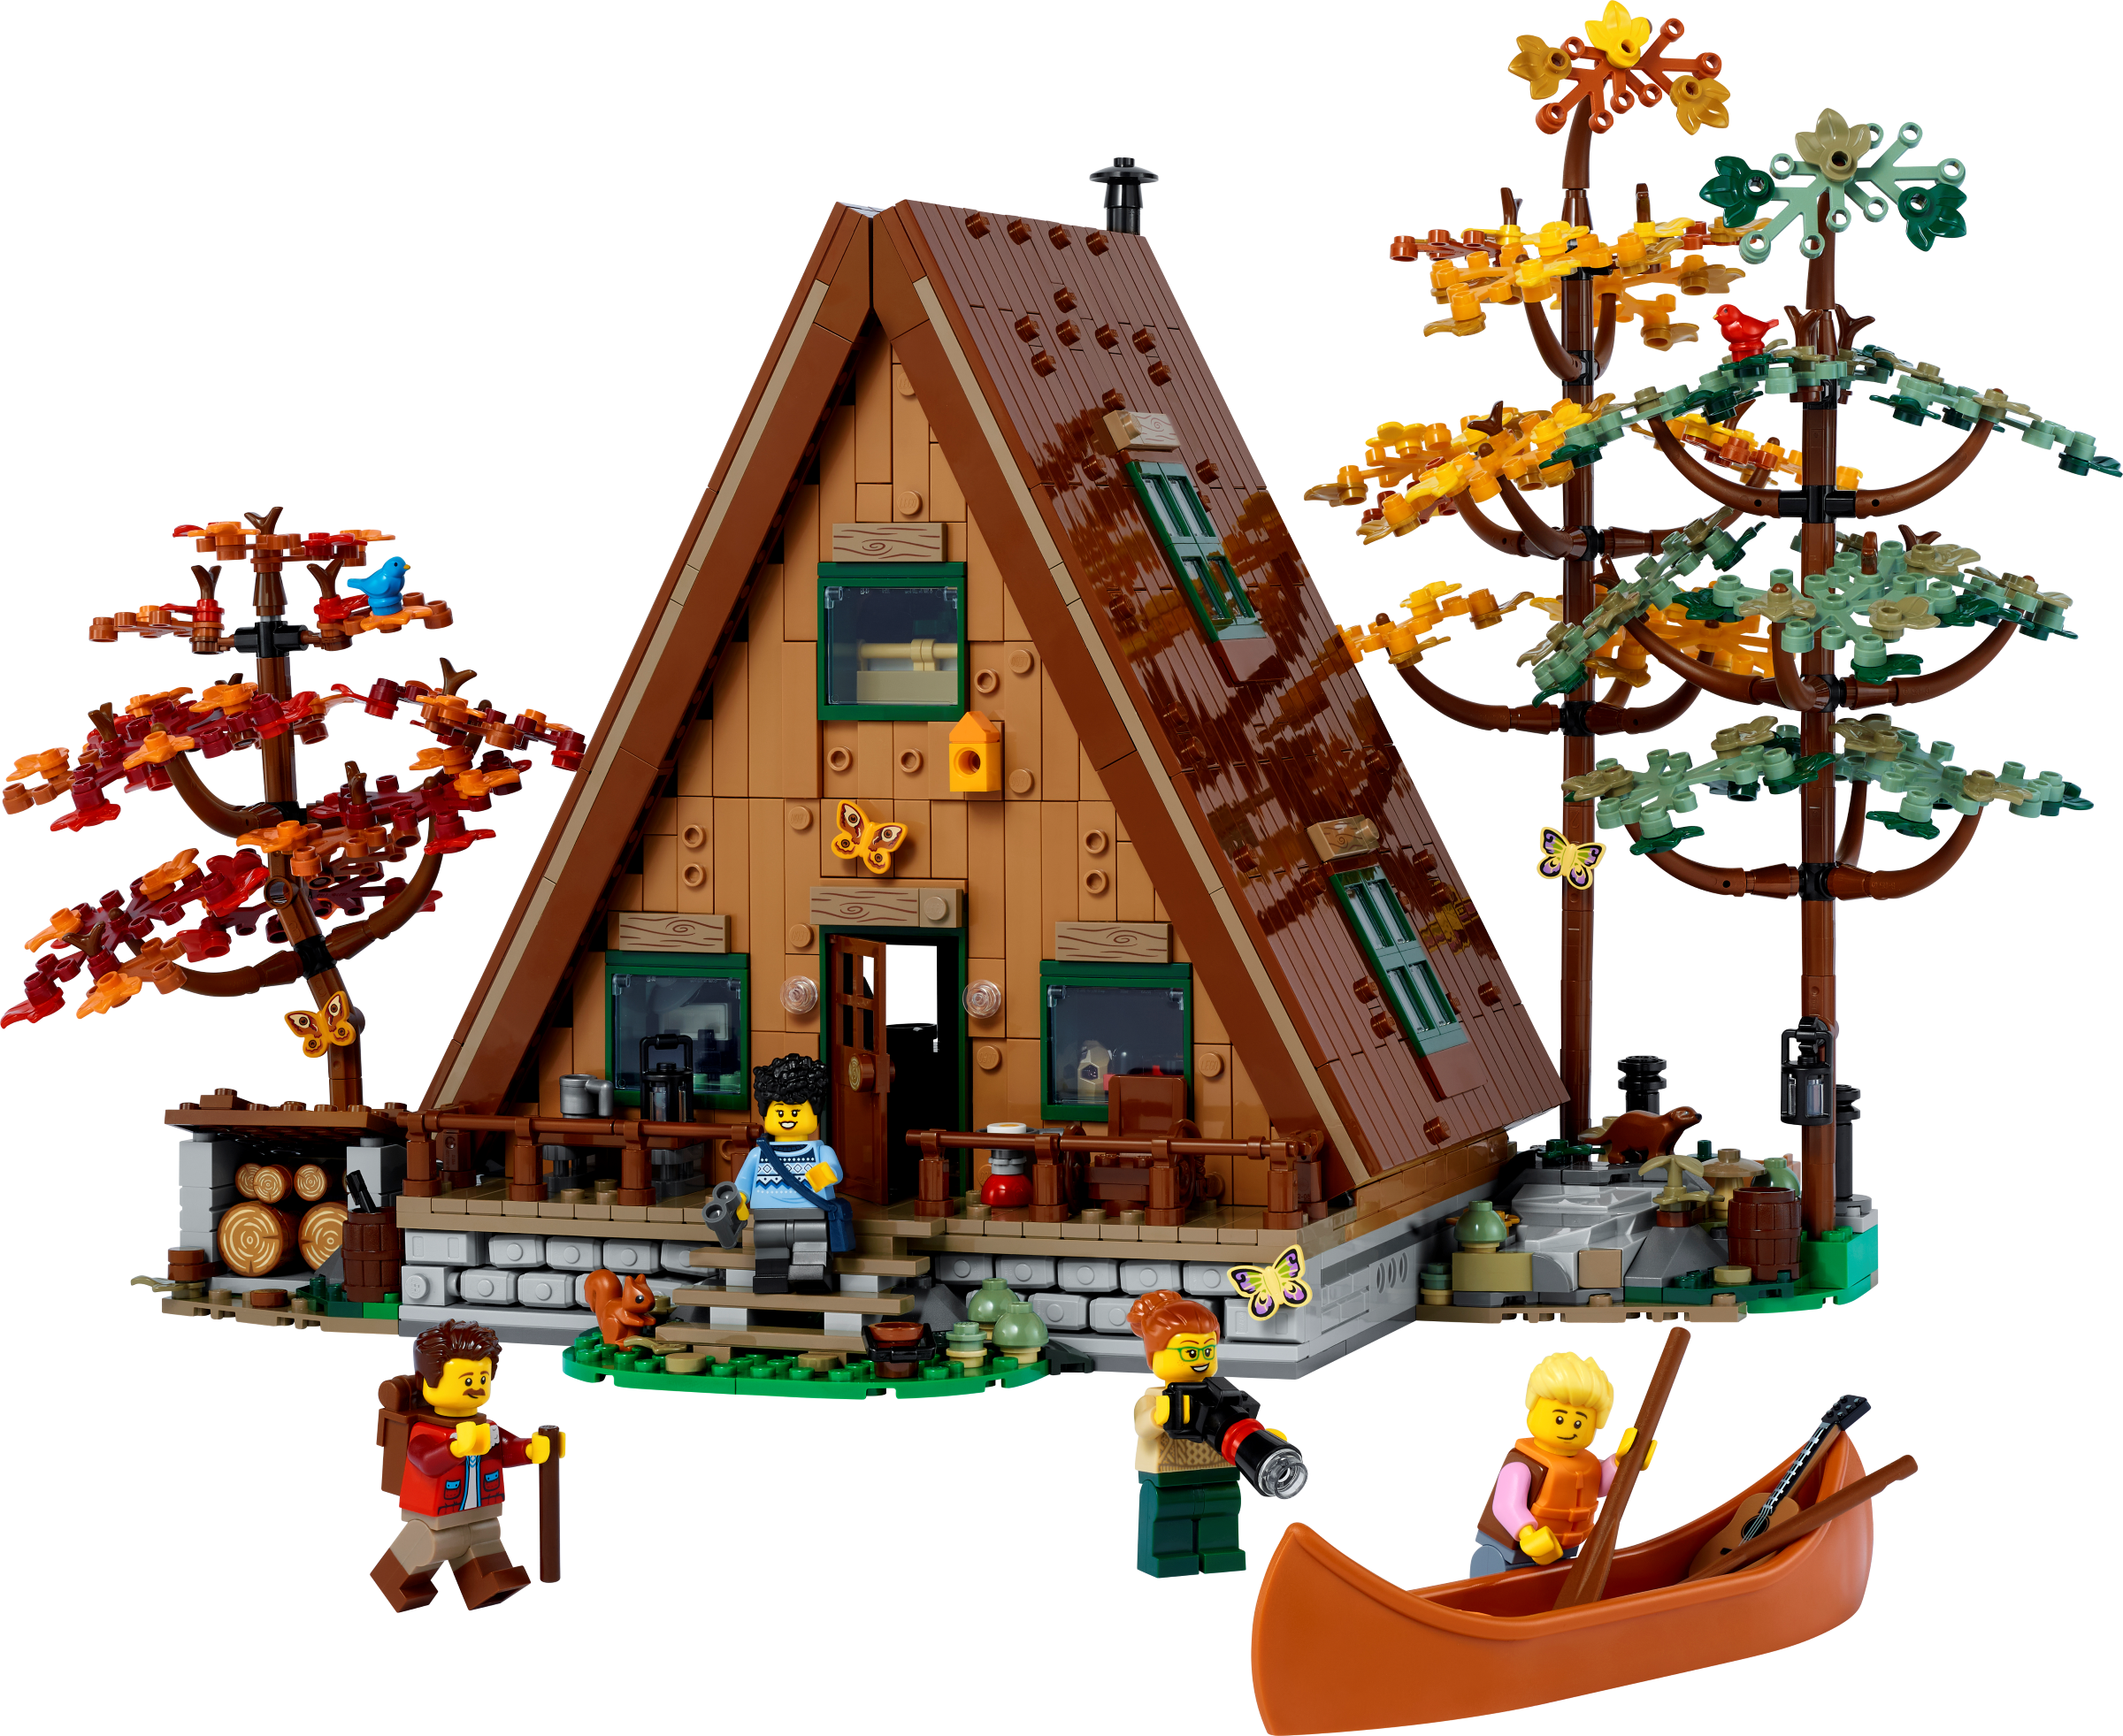
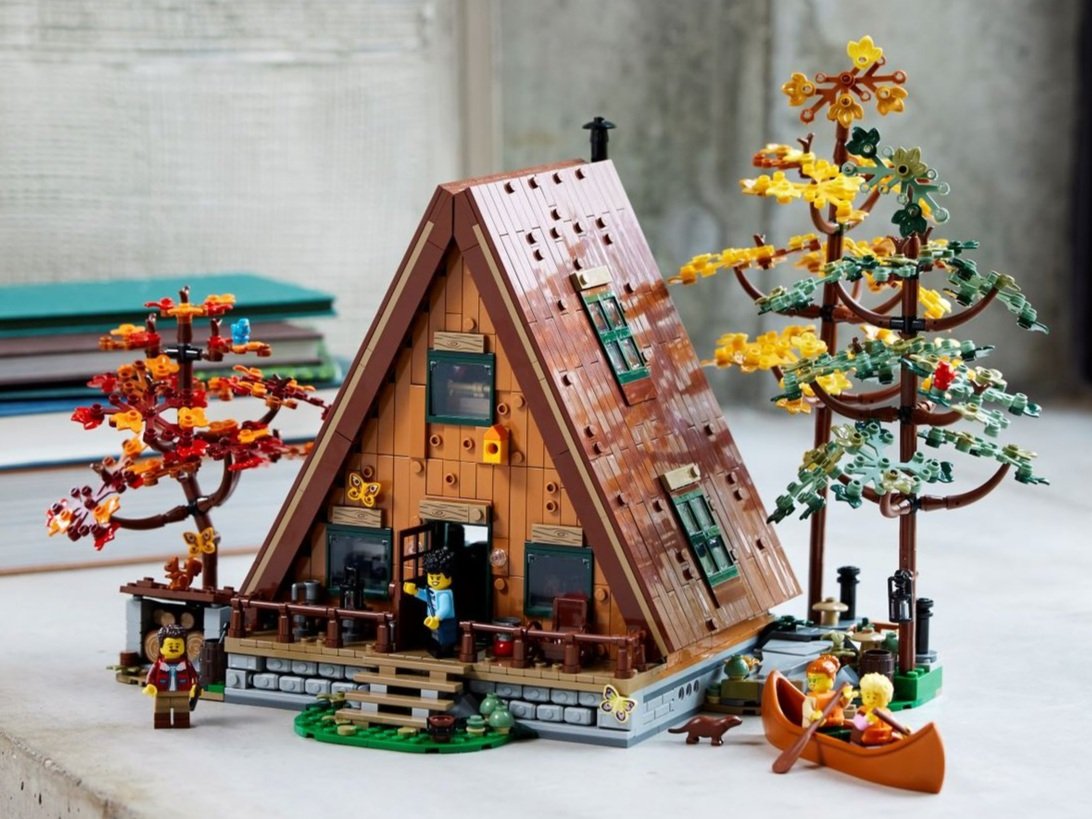
With the release of the LEGO Ideas 21338 A-Frame Cabin, I knew that the set was ripe for modding and wanted to try my hand at adjusting it to my liking. In the side-by-side photos below, you can see the original submission from Andrea Lattanzio (Norton74) and the final model that was produced by LEGO. I feel the LEGO designers nailed the overall feel of the cabin but there are a few areas I think could be improved.
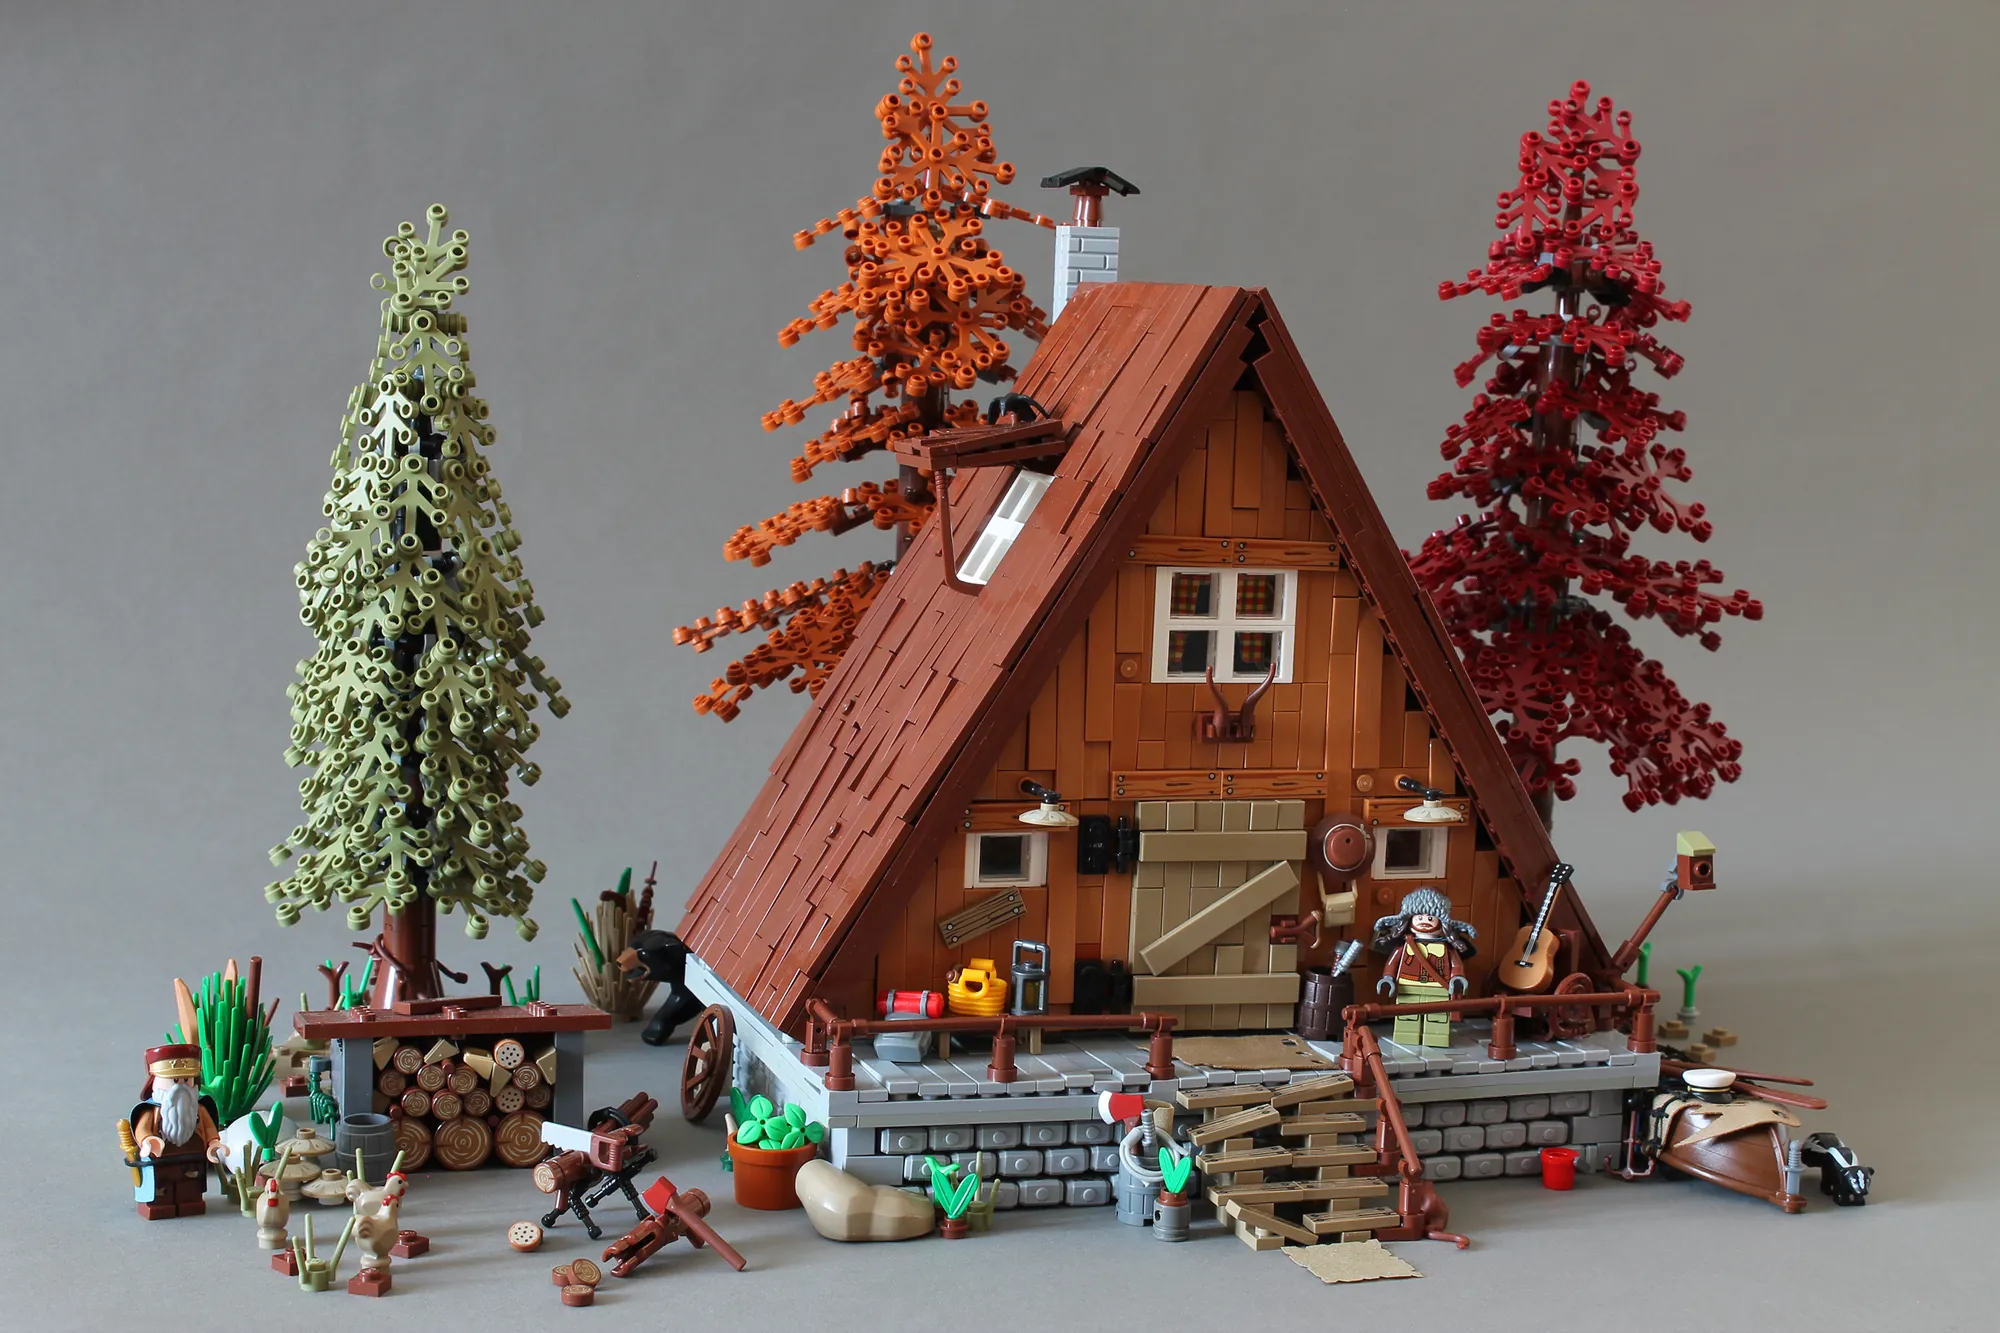
It is fitting that Andrea’s set is the one I want to experiment with modding because he so often mods his own creations again and again, showcasing the model in different seasons, sporting decorations for various holidays, and adjusting the colors to see what pops. So let’s follow his example and start modding.
Constructing the Cabin
In order to modify the cabin, first I needed to build it! I won’t go through a play-by-play—there are many other LEGO review sites and channels that do that spectacularly. But I will call out a few things that caught my attention.
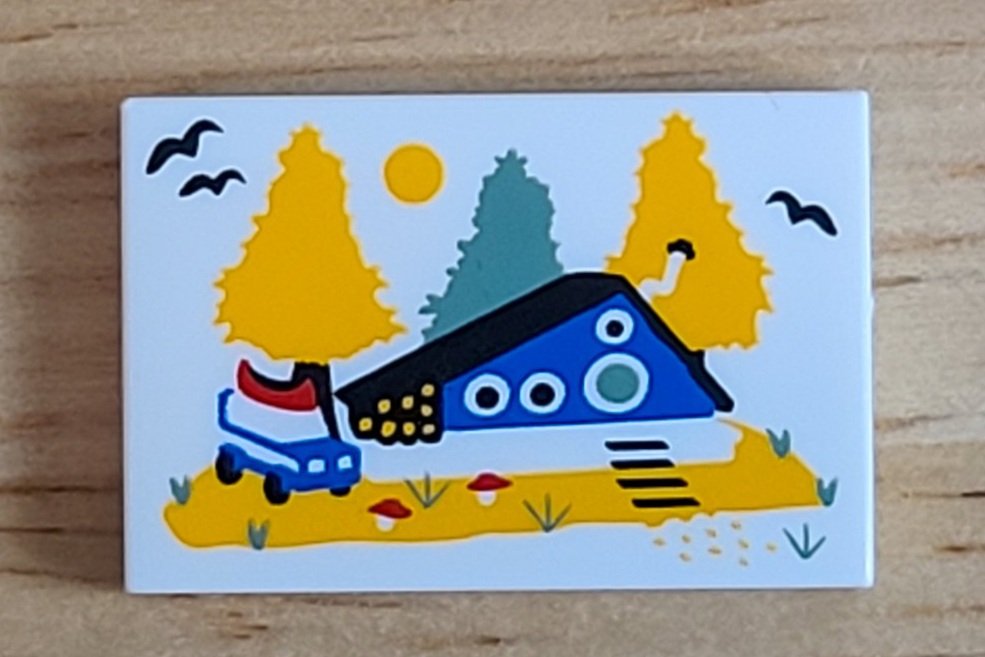
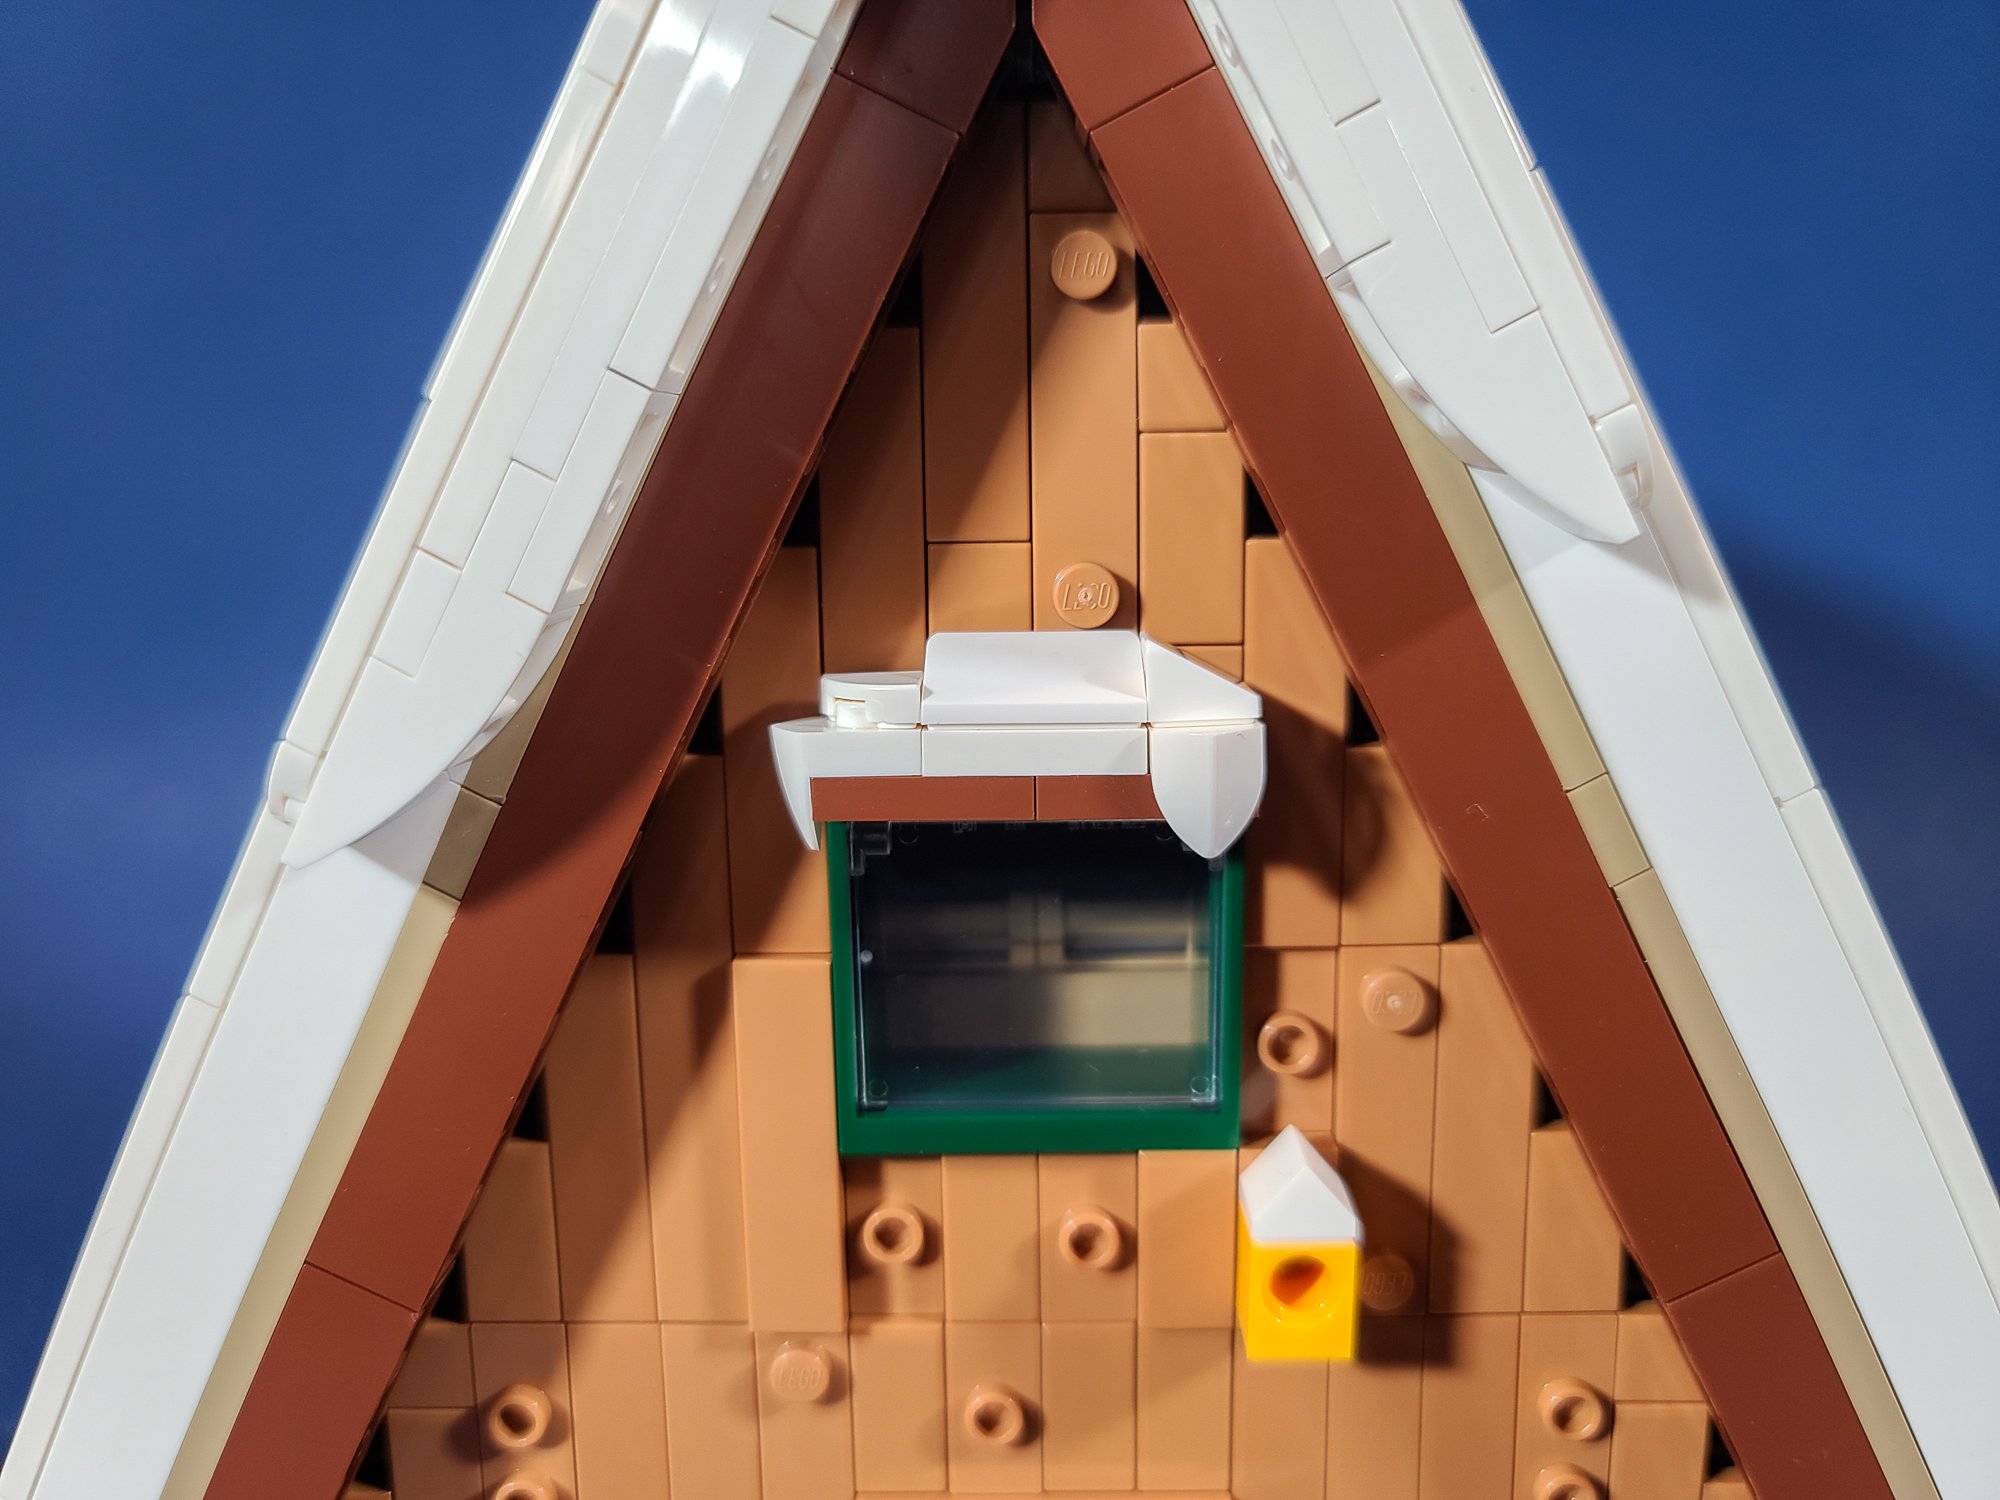
First up, the graphic design of the set is exquisite. The hand-drawn instruction covers are really spectacular and a trend that I hope continues. Front and back, there are lovely drawings to discover. In addition to the printed moth and butterfly elements, the set also includes one very special printed tile.
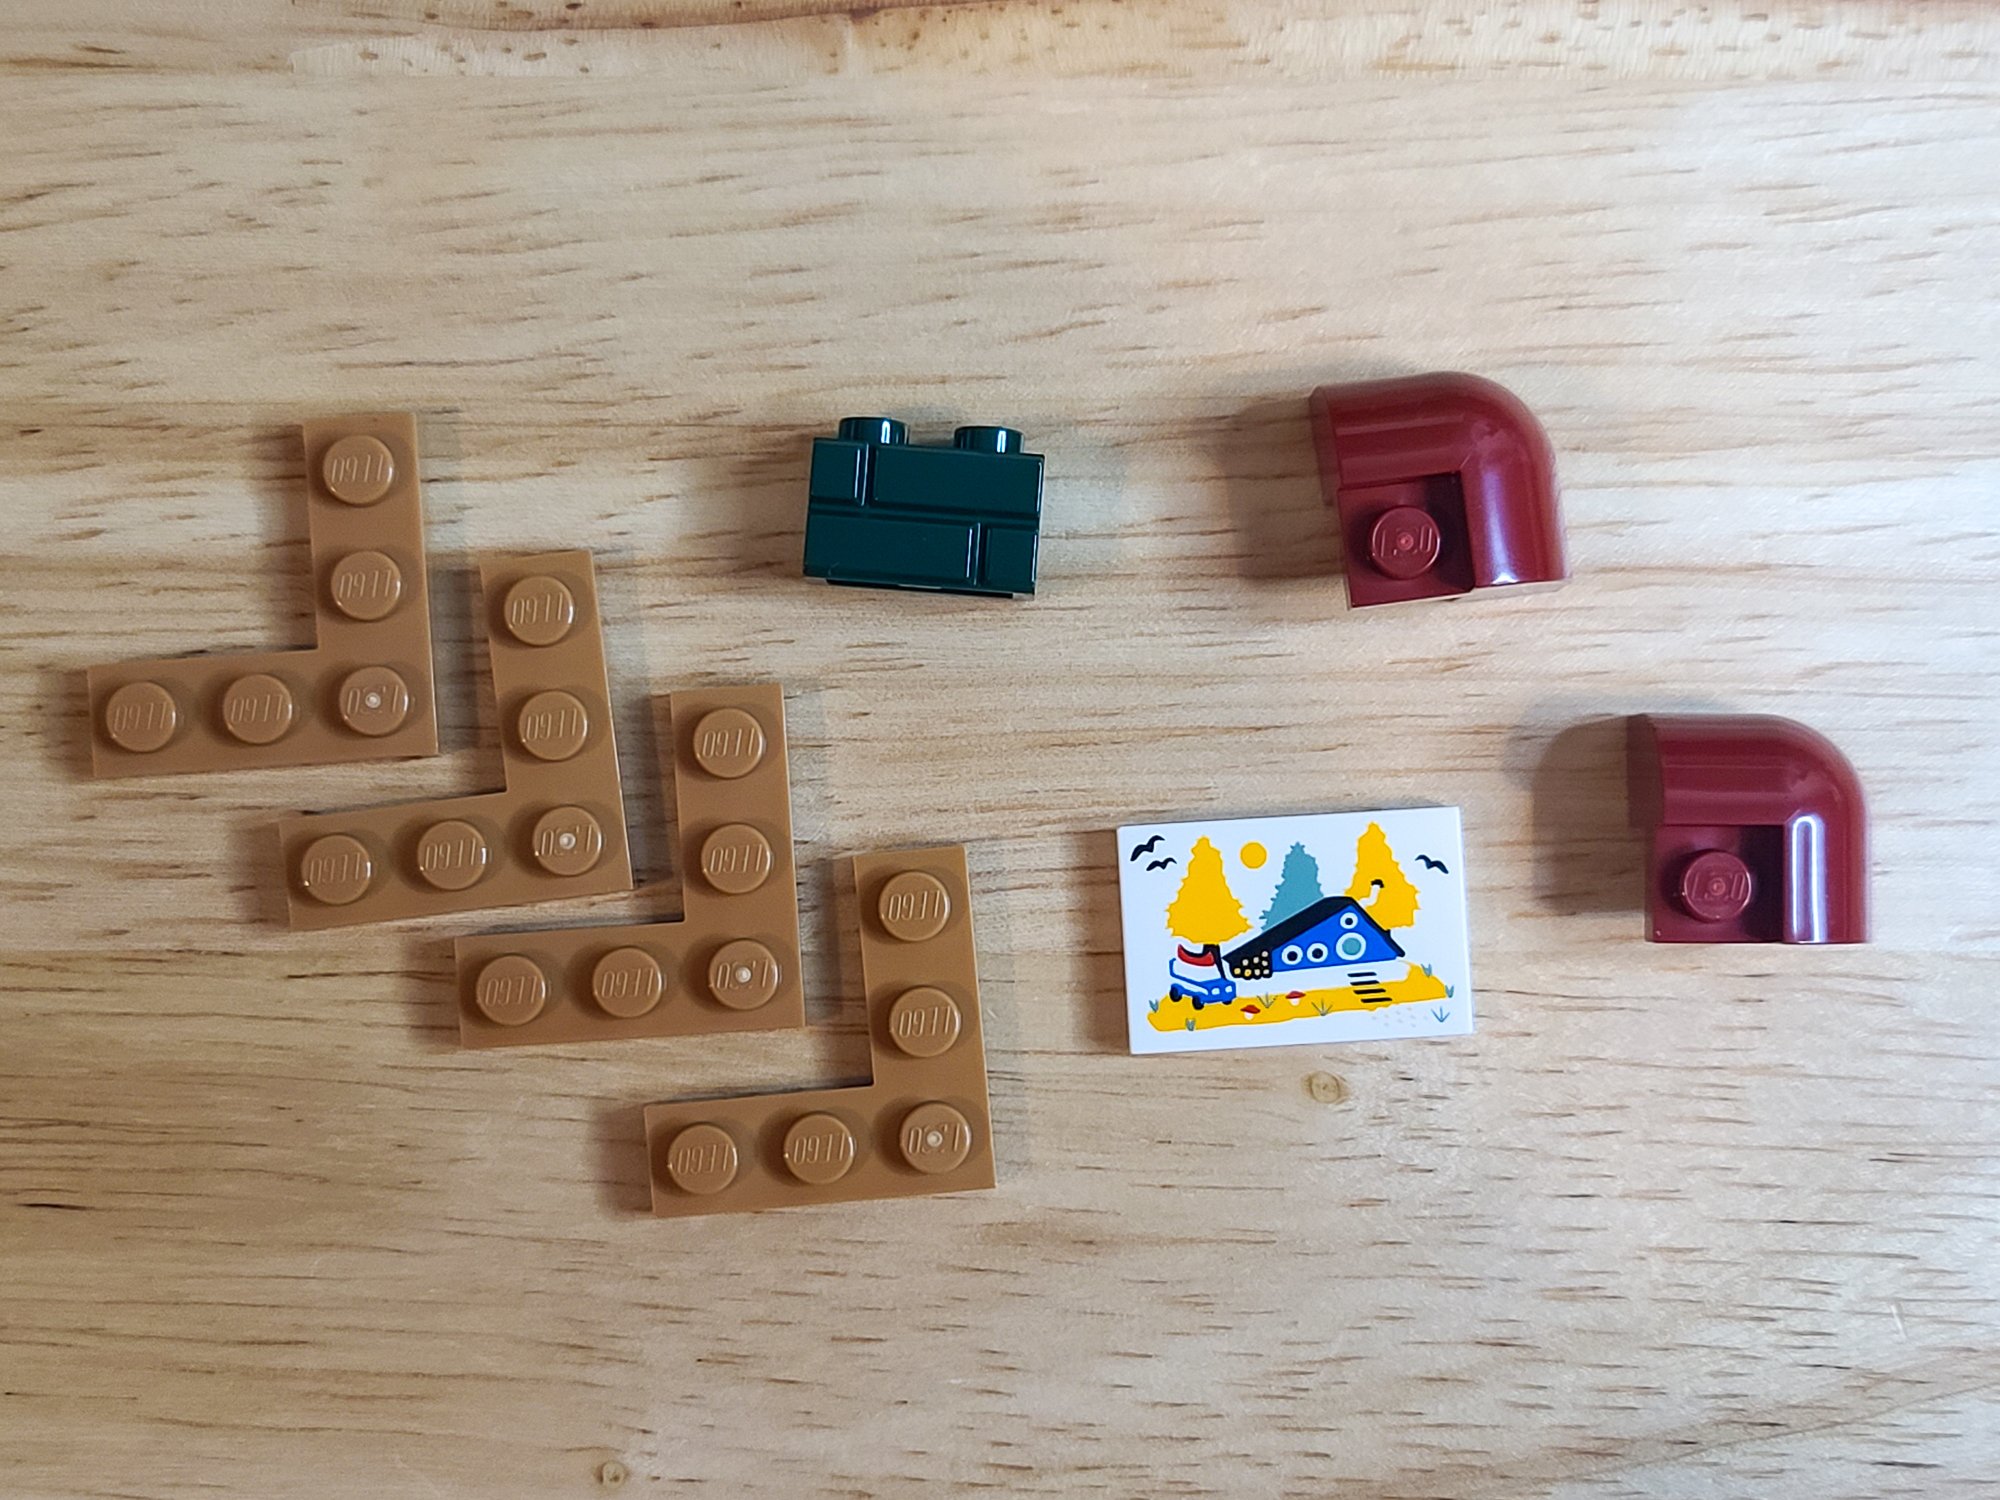
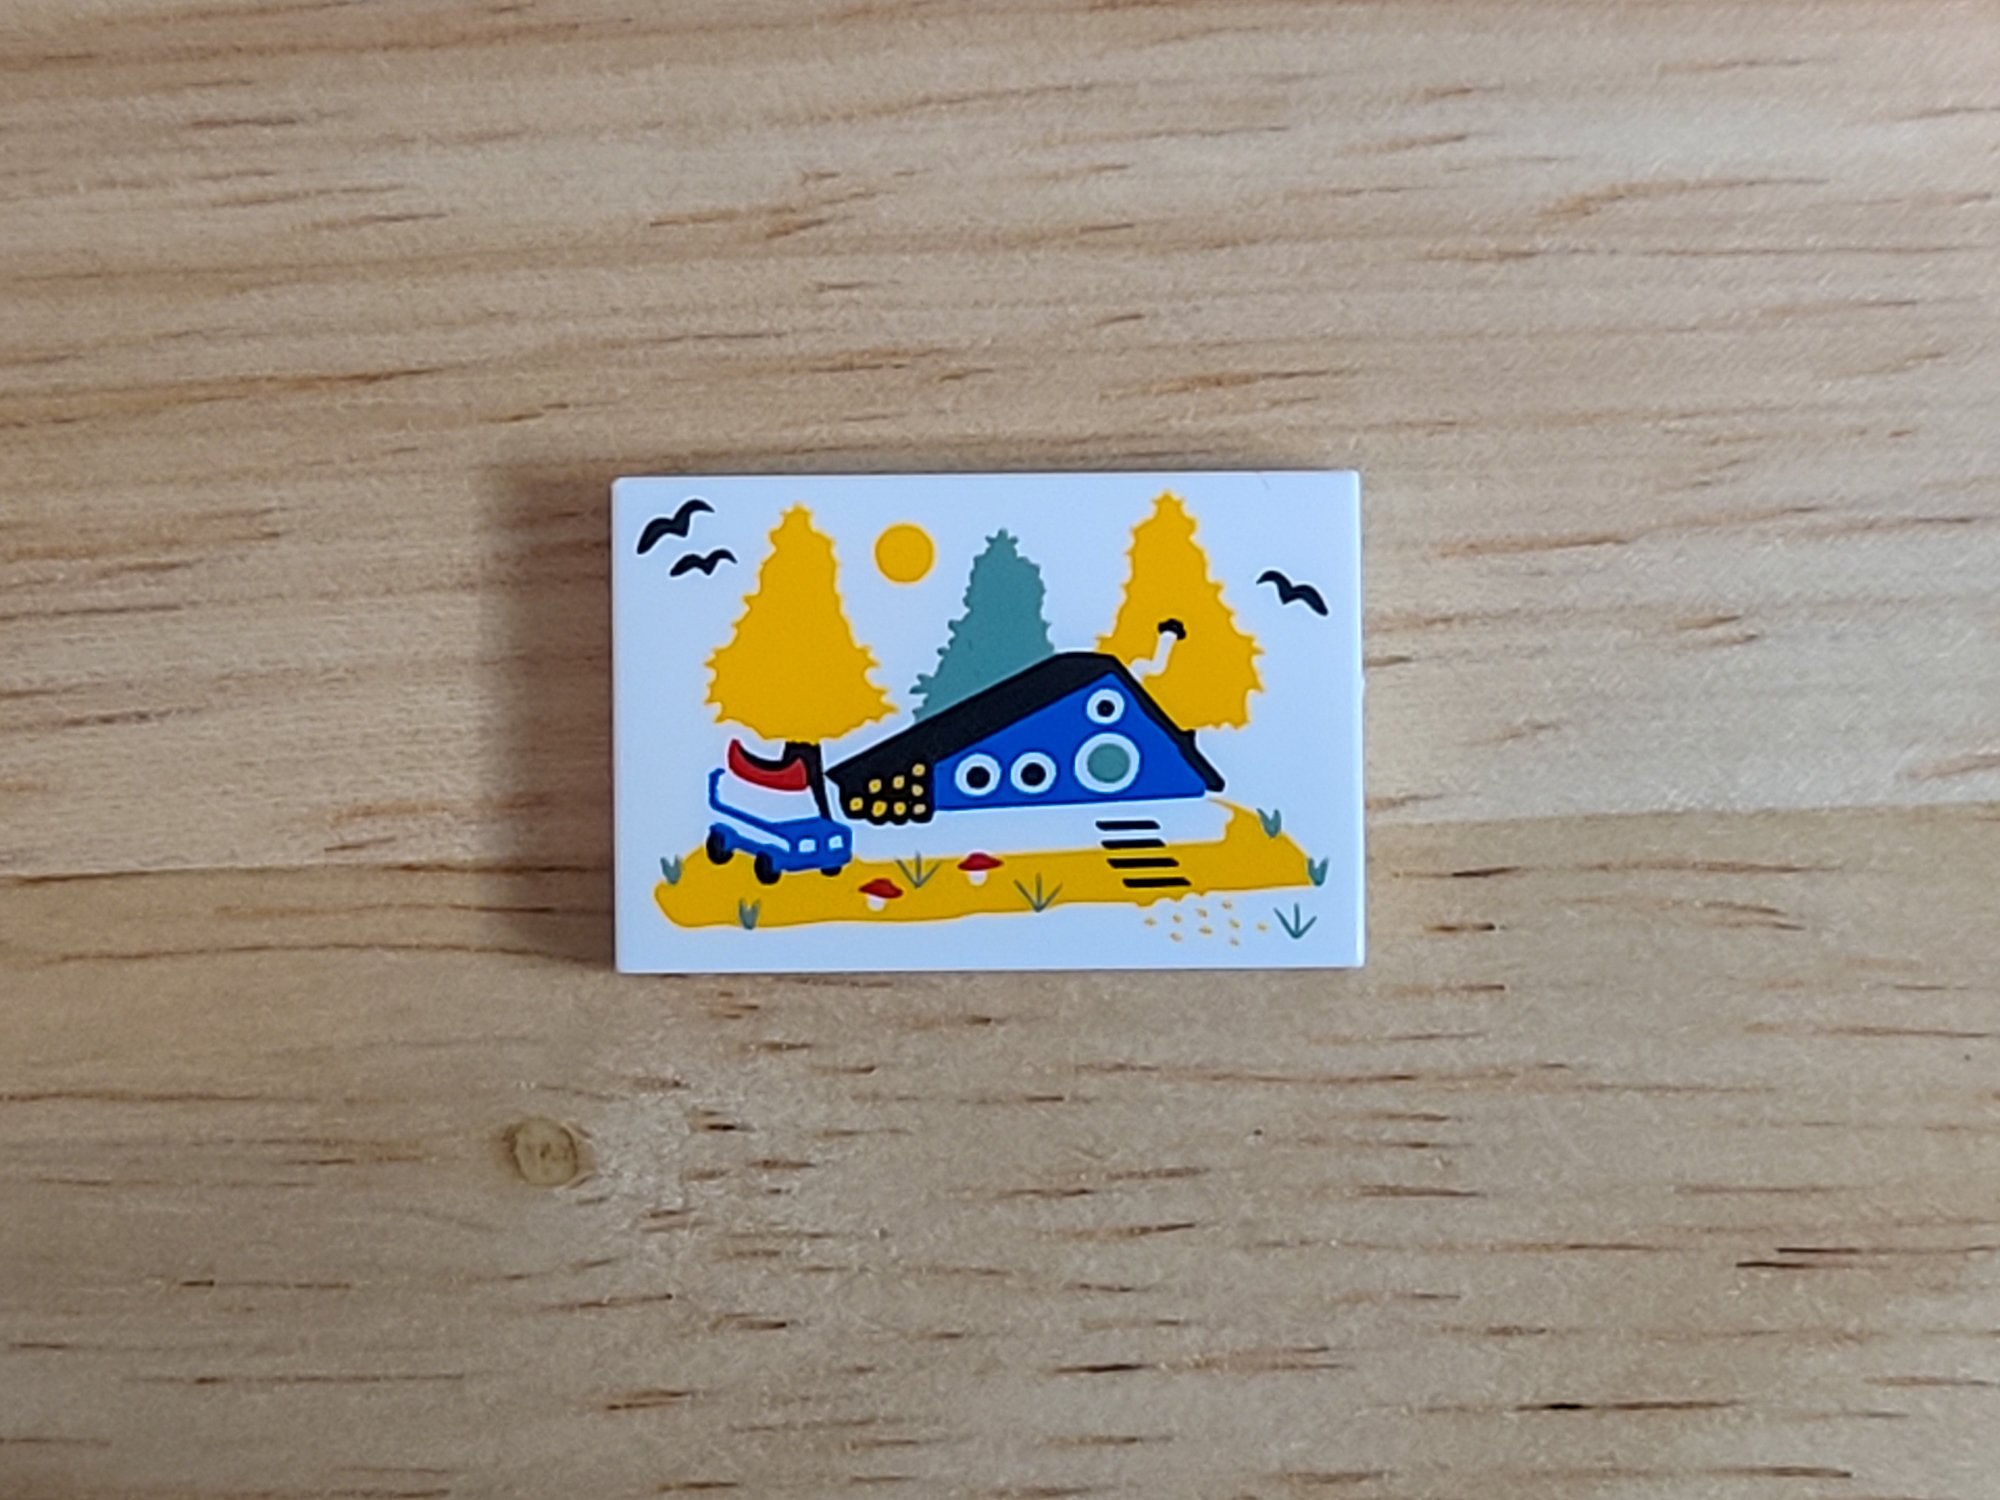
I believe this is the first time that a LEGO set contains a printed tile depicting a MOC! And it isn’t just any MOC. Longtime readers of BrickNerd will recognize this blue cottage as a MOC we highlighted two years ago, a fitting tribute to fan designer Andrea Lattanzio (and another example of the fantastic graphic design of this set).
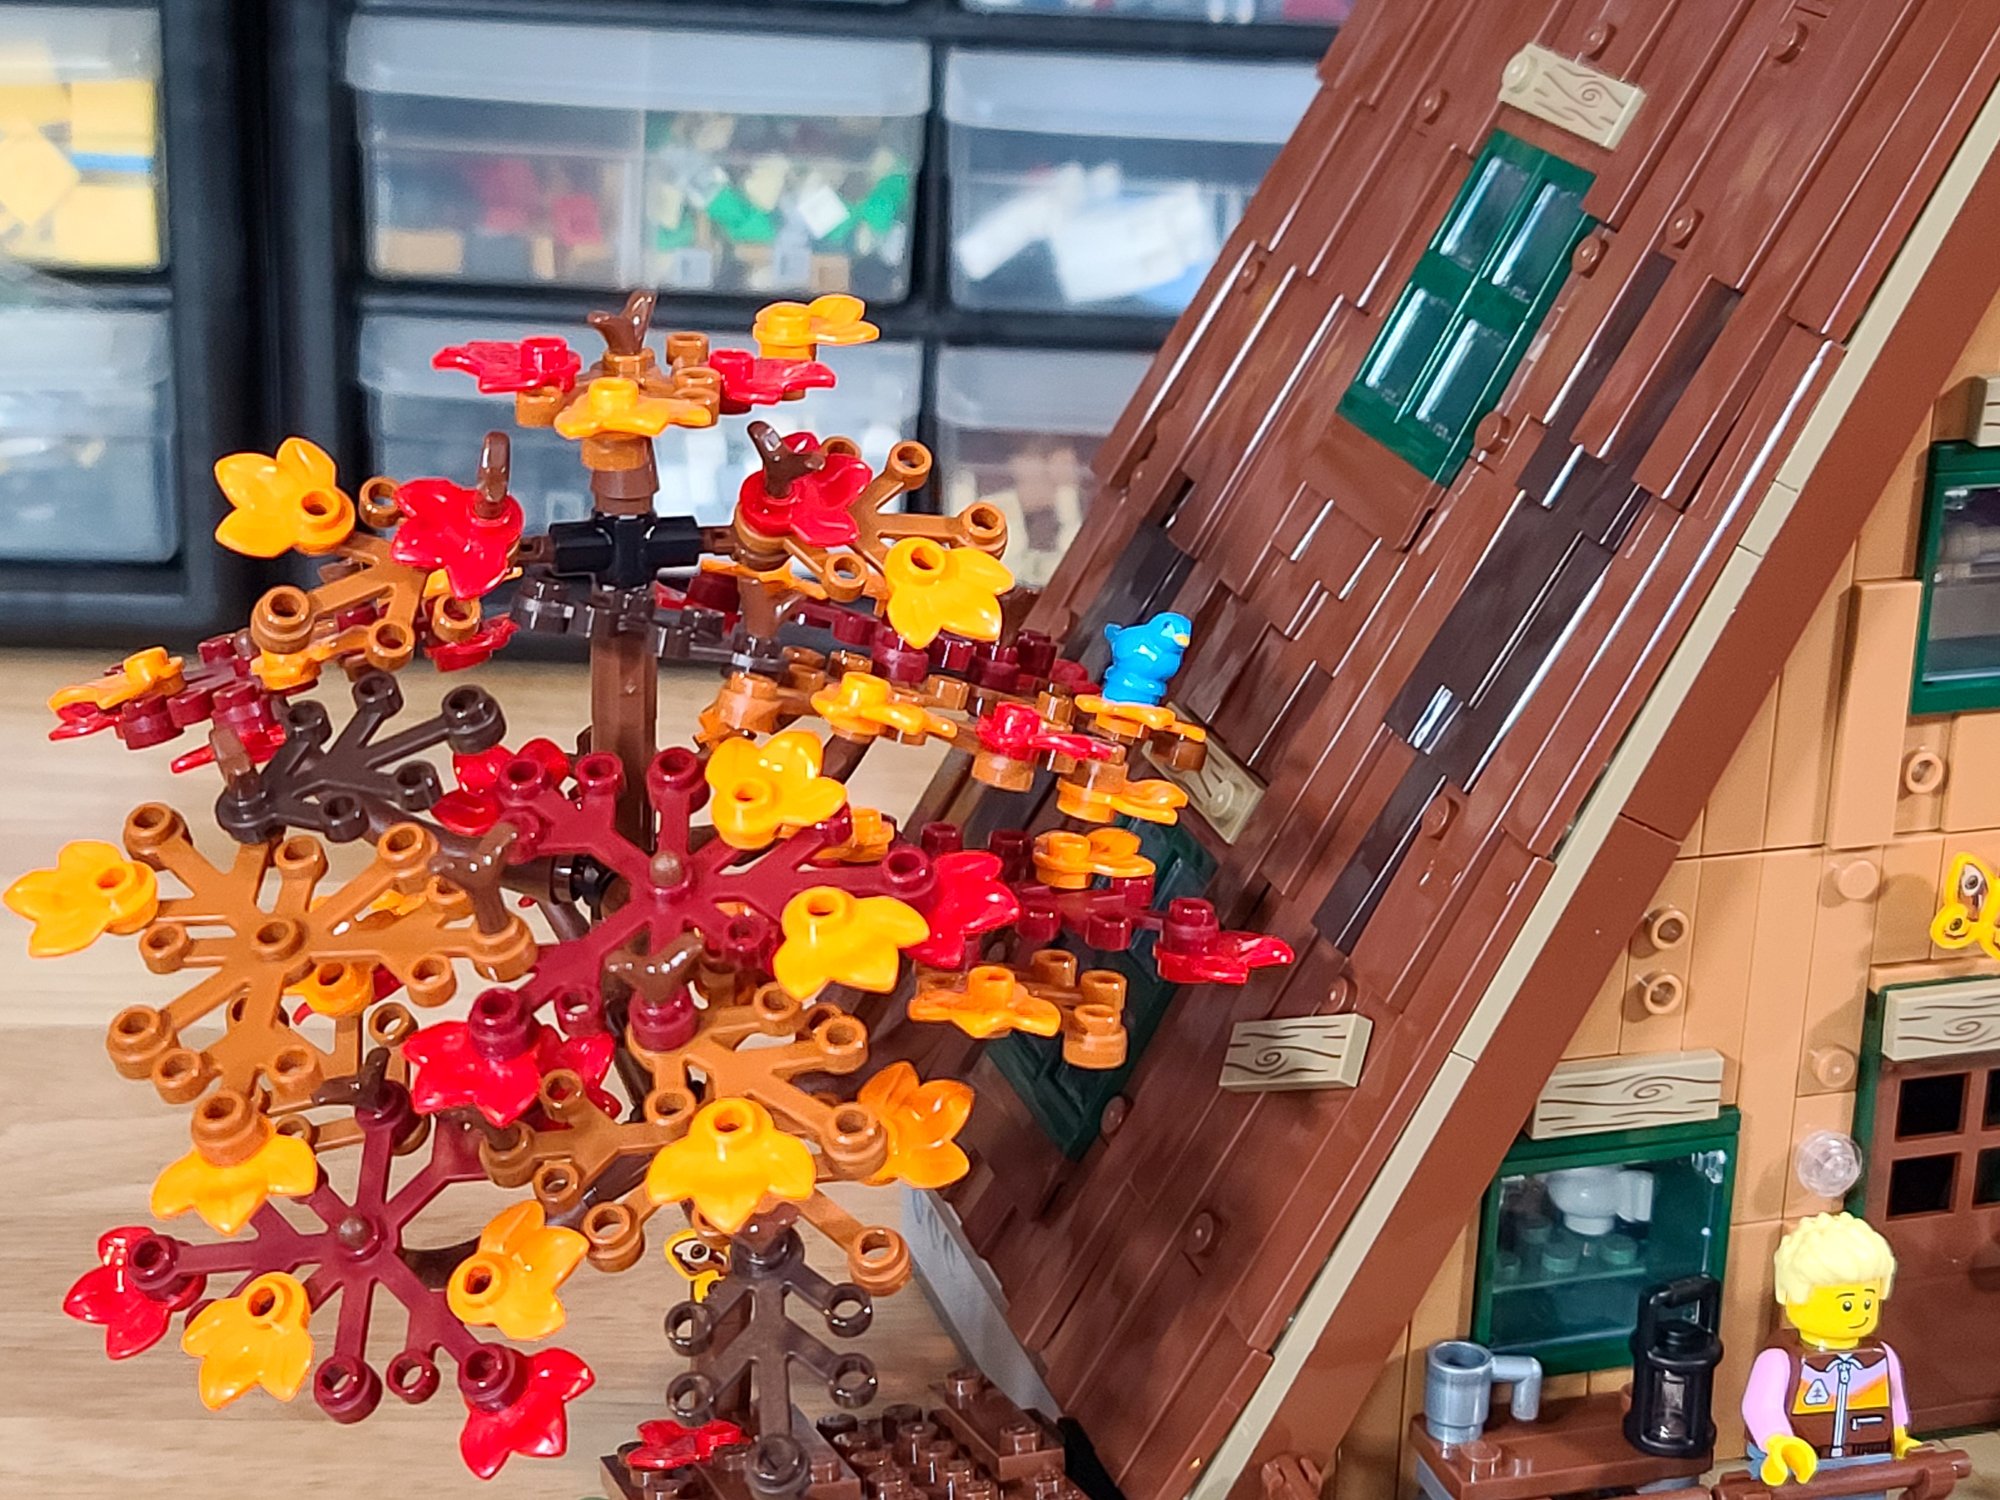
People who know my building style will tell you that I love foliage. I try to collect as many foliage elements in as many colors as possible to make my builds seem as real as possible. I was delighted to see SO MANY new and different colors of foliage included in this set. (I think it is perhaps the set that holds the record for most colors of plant pieces ever!)
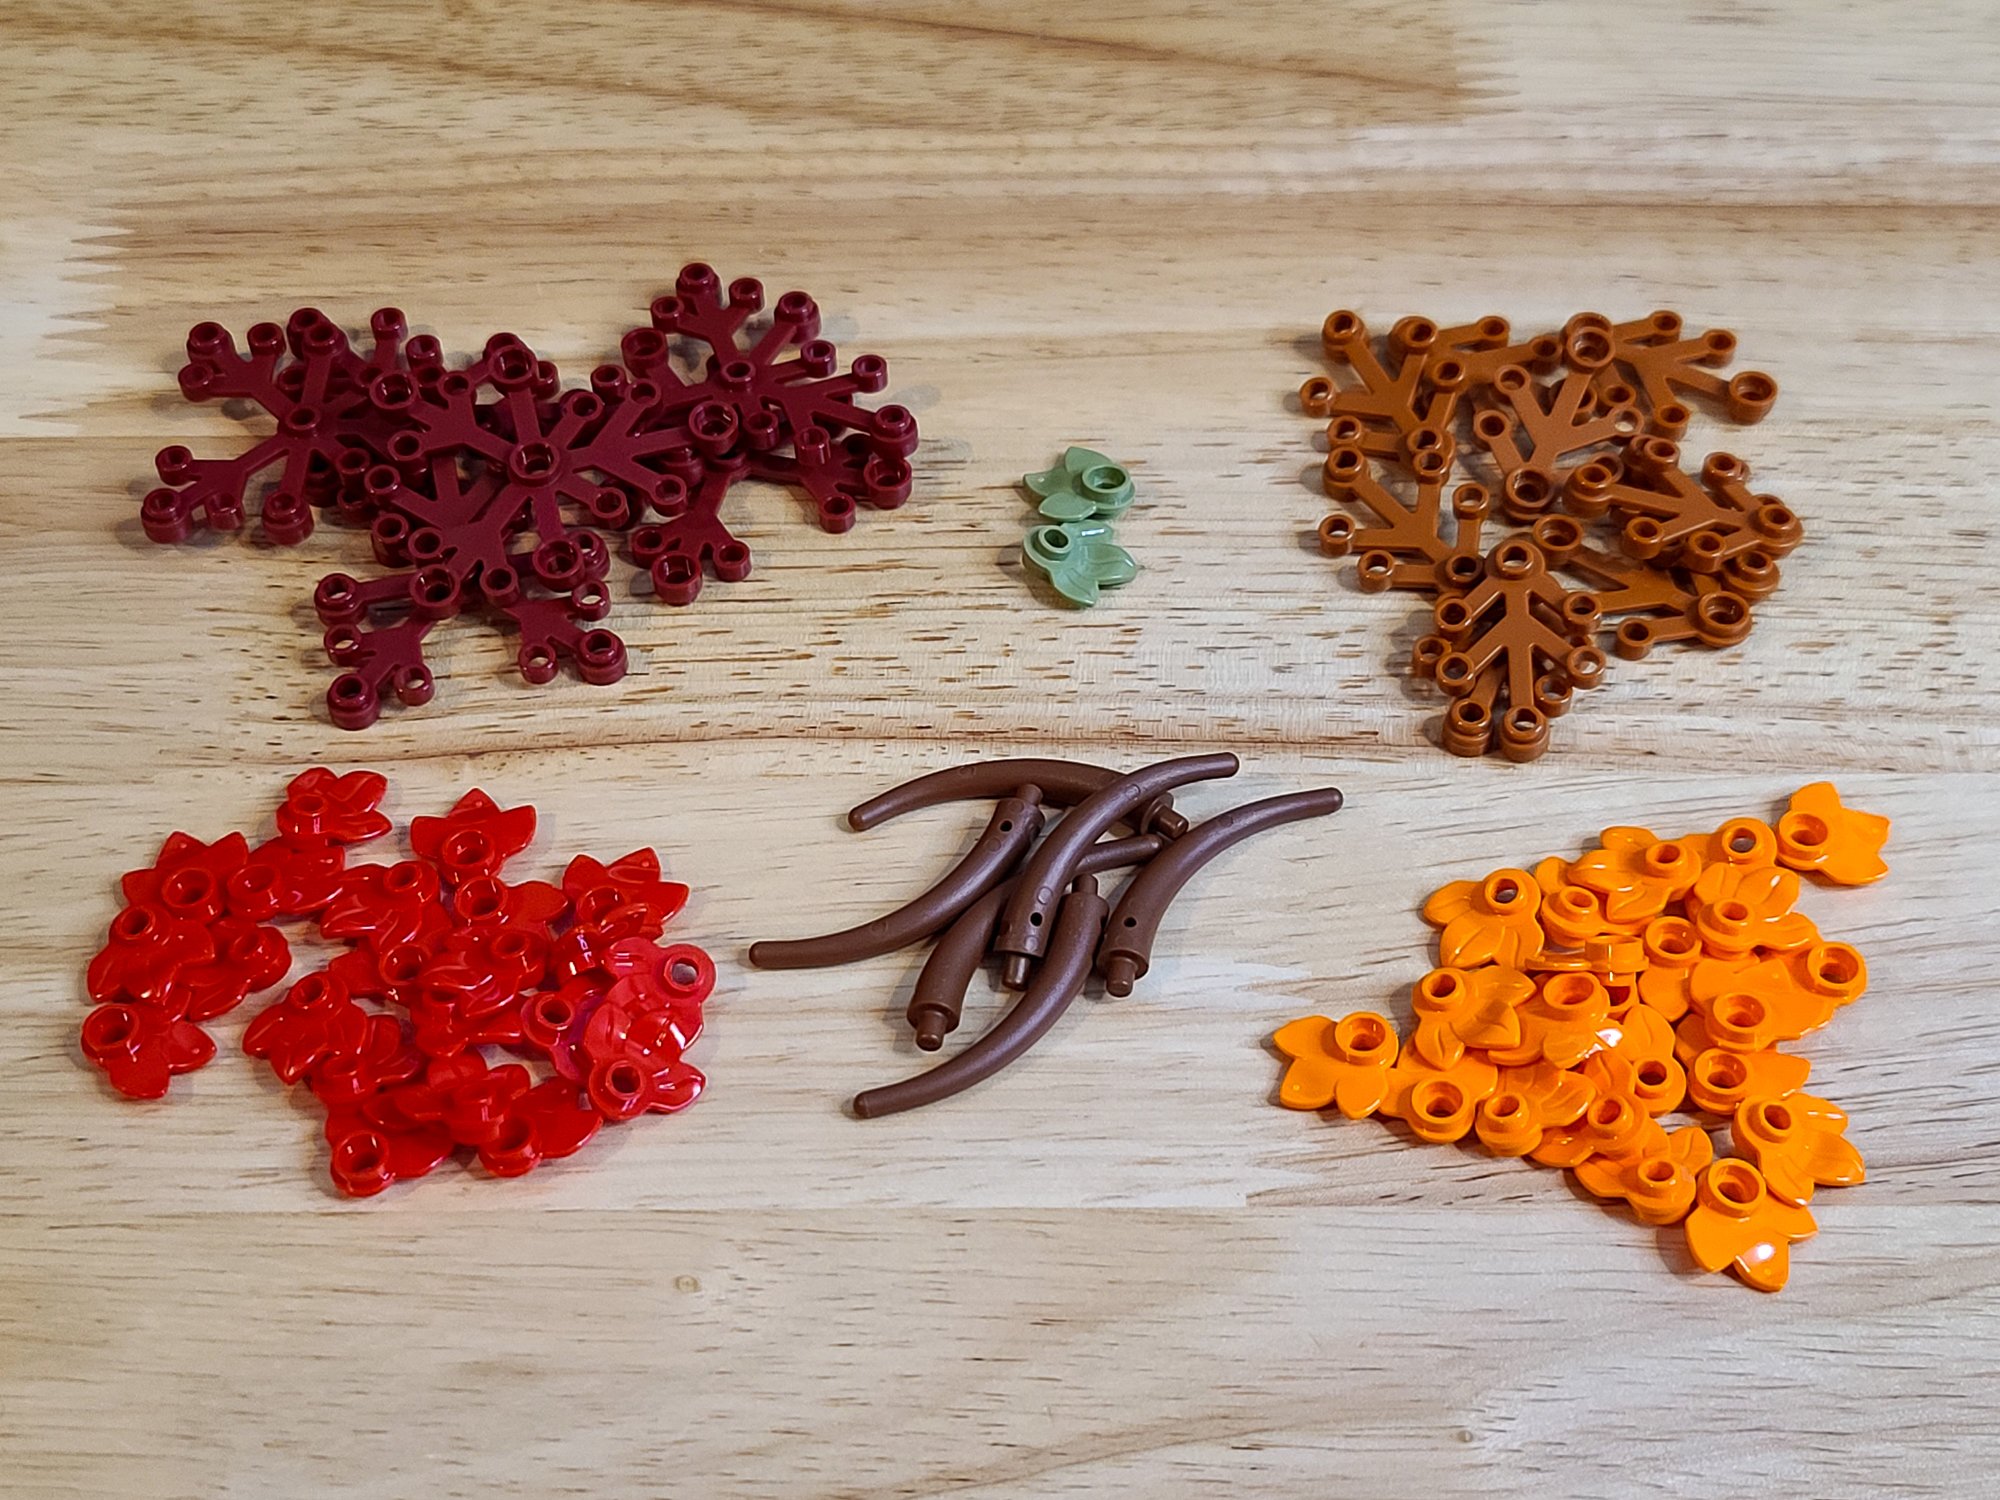
I respect the choices of the designer to keep true to the original fan design of the cabin by having each tree be a different color palette. The color adds a needed pop of brightness and, dare I say, whimsy to the set. However, in order to create trees that are strong enough to pass LEGO’s stringent building standards, the lush trees had to be converted into a more skeletal form. The trees work when the set is being viewed from above at an angle, but from straight on, they can feel a bit thin. (Do any of you sense a bit of foreshadowing here?)
Finally, I unfortunately have to say that this set continues the sad decline of quality of certain injection points on 1x1 clips—the same parts that were incredibly abundant in the Eiffel Tower (um, I mean… the UCS Christmas Tree). Luckily in this set, the gashes are not visible, but this batch even had bits of plastic hanging off the sides that you can see below.

Overall, the A-Frame Cabin is a delight to build, crammed full of detail, interesting angles, and smart building techniques that constantly surprise you throughout the build. The cabin certainly feels like the spiritual successor to the Ideas Tree House and is a set that I would not hesitate to add to my collection had this copy not been provided by LEGO.
That said, there are a few areas where the set could improve, and rather than complain about what could have been, let’s roll up our sleeves and see what we can do to take the cabin to the next level by modding it to our liking.
Using What You Have
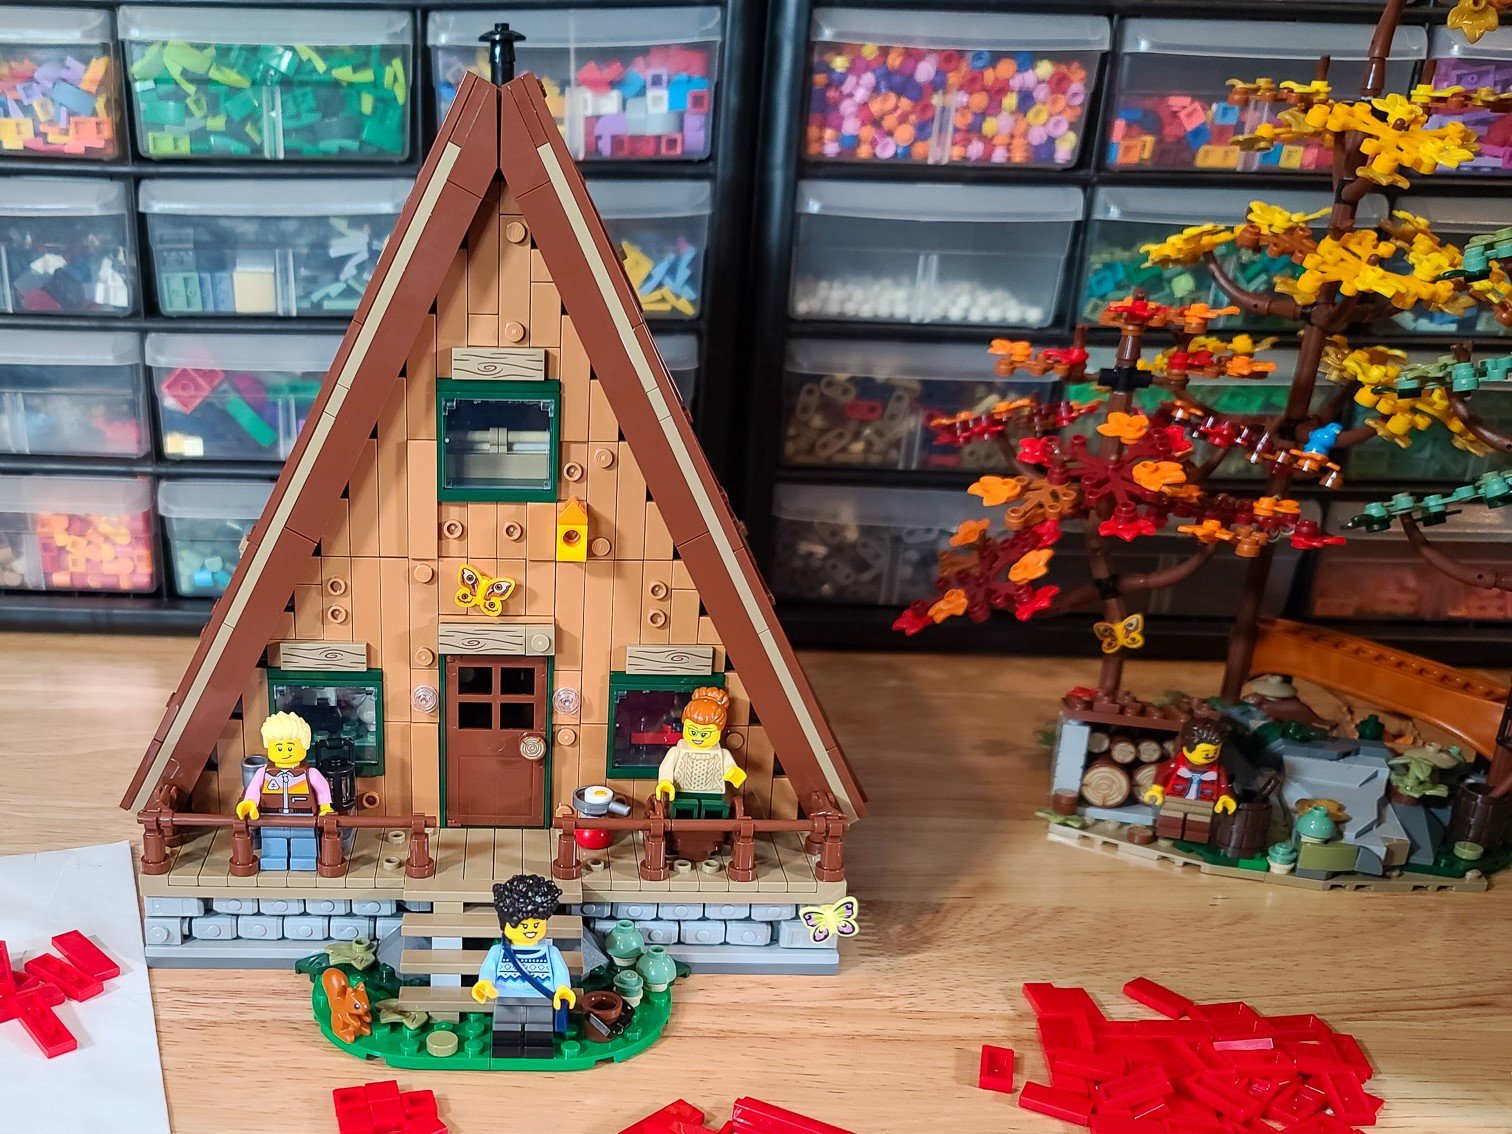
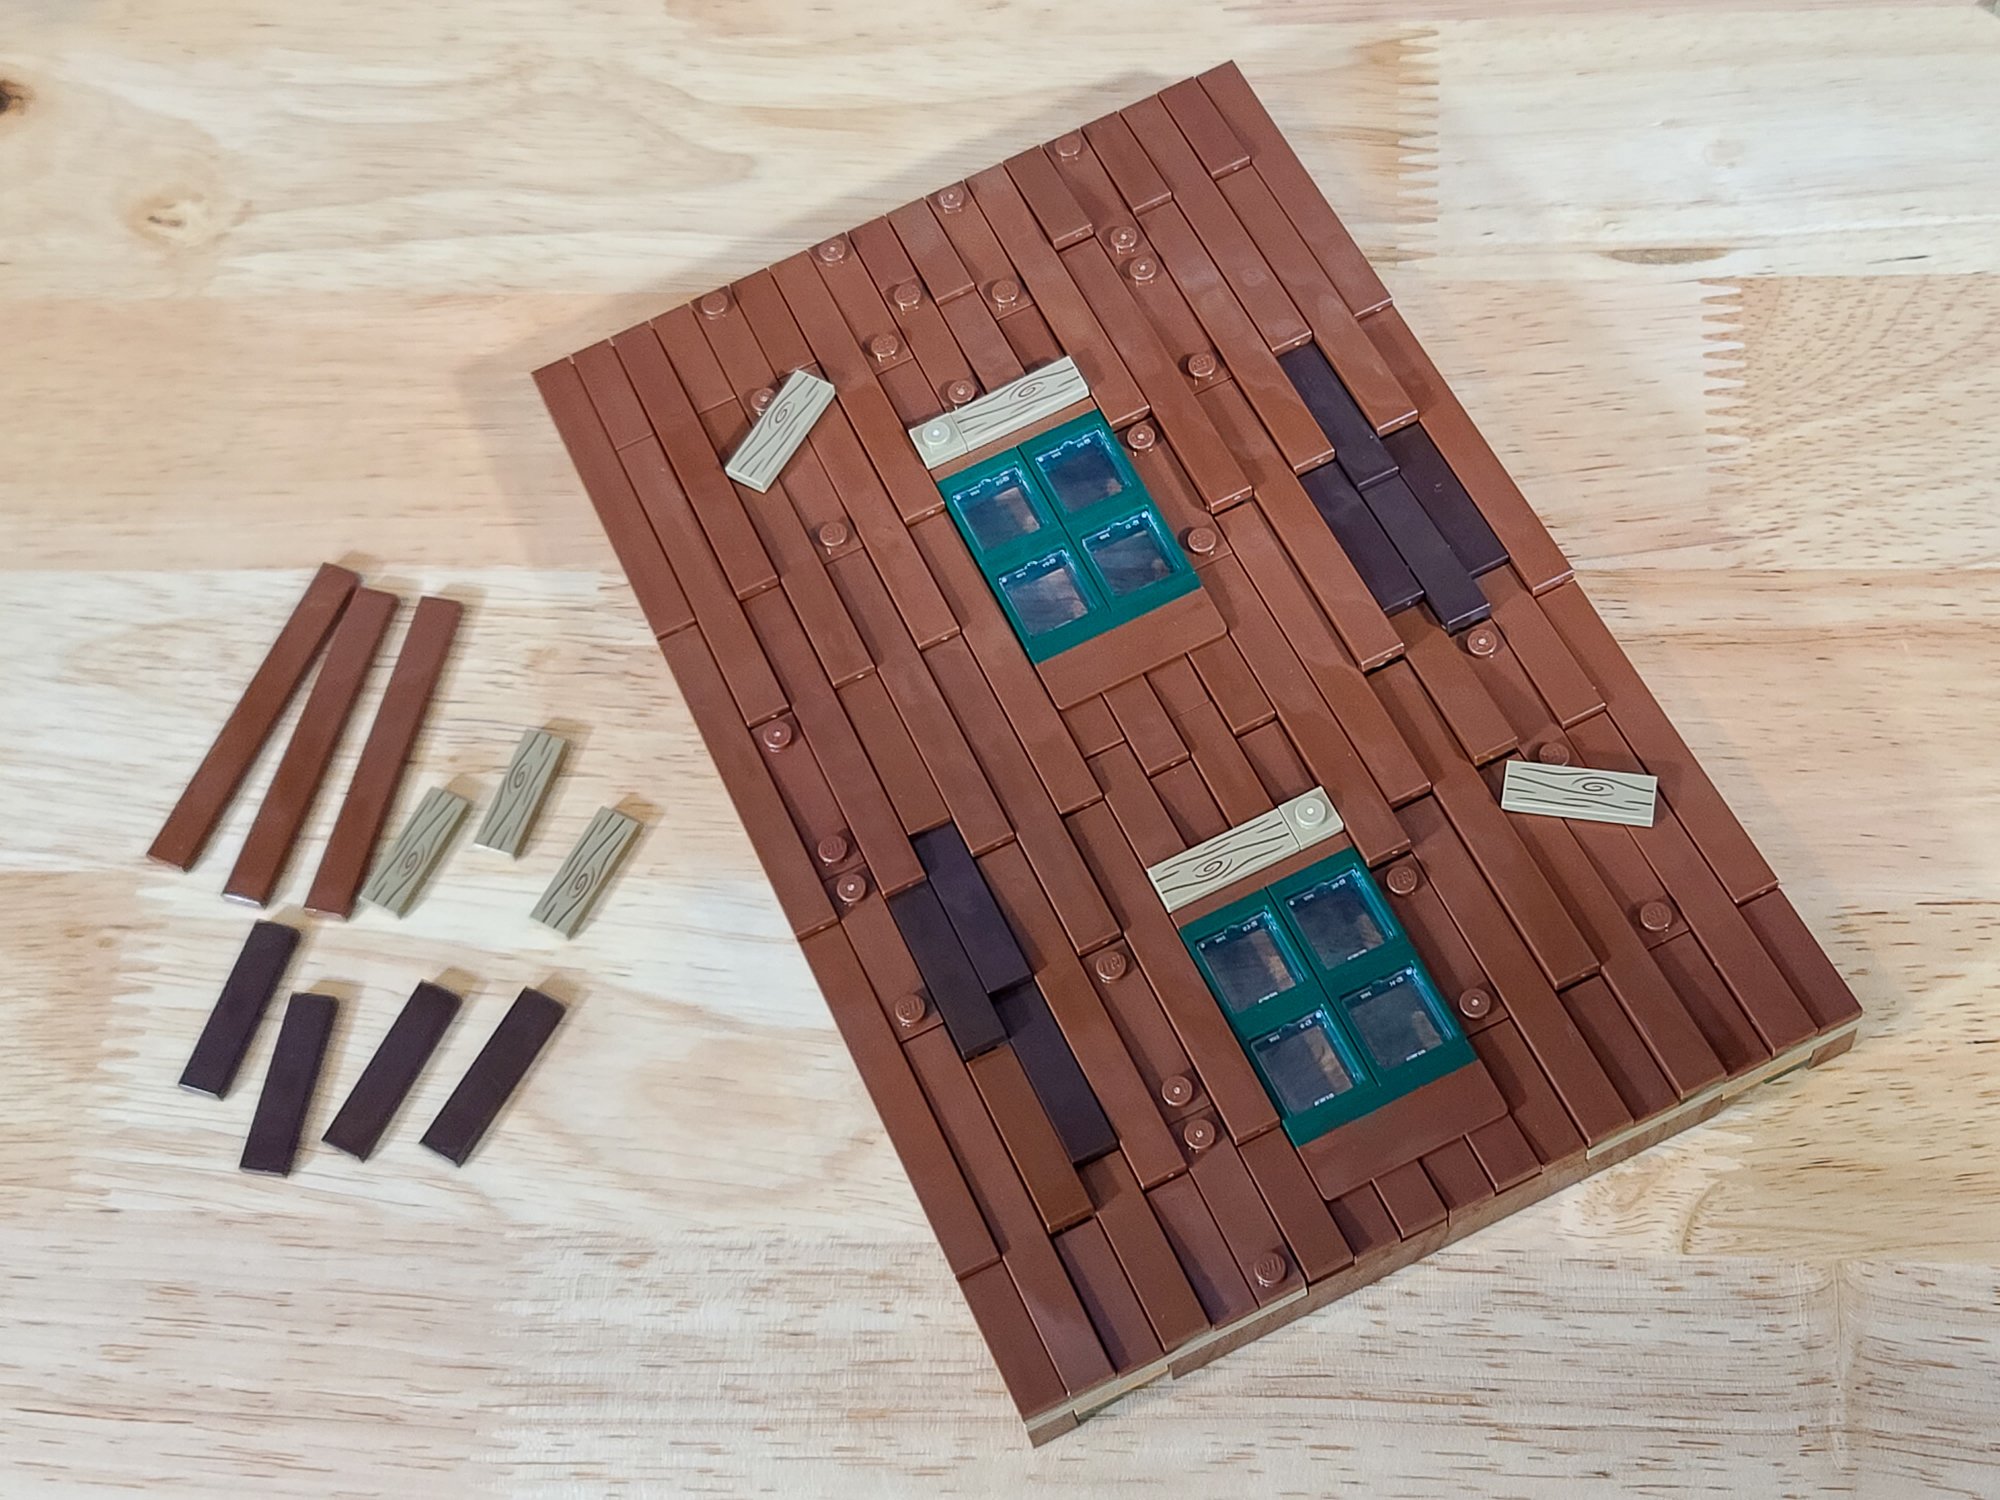
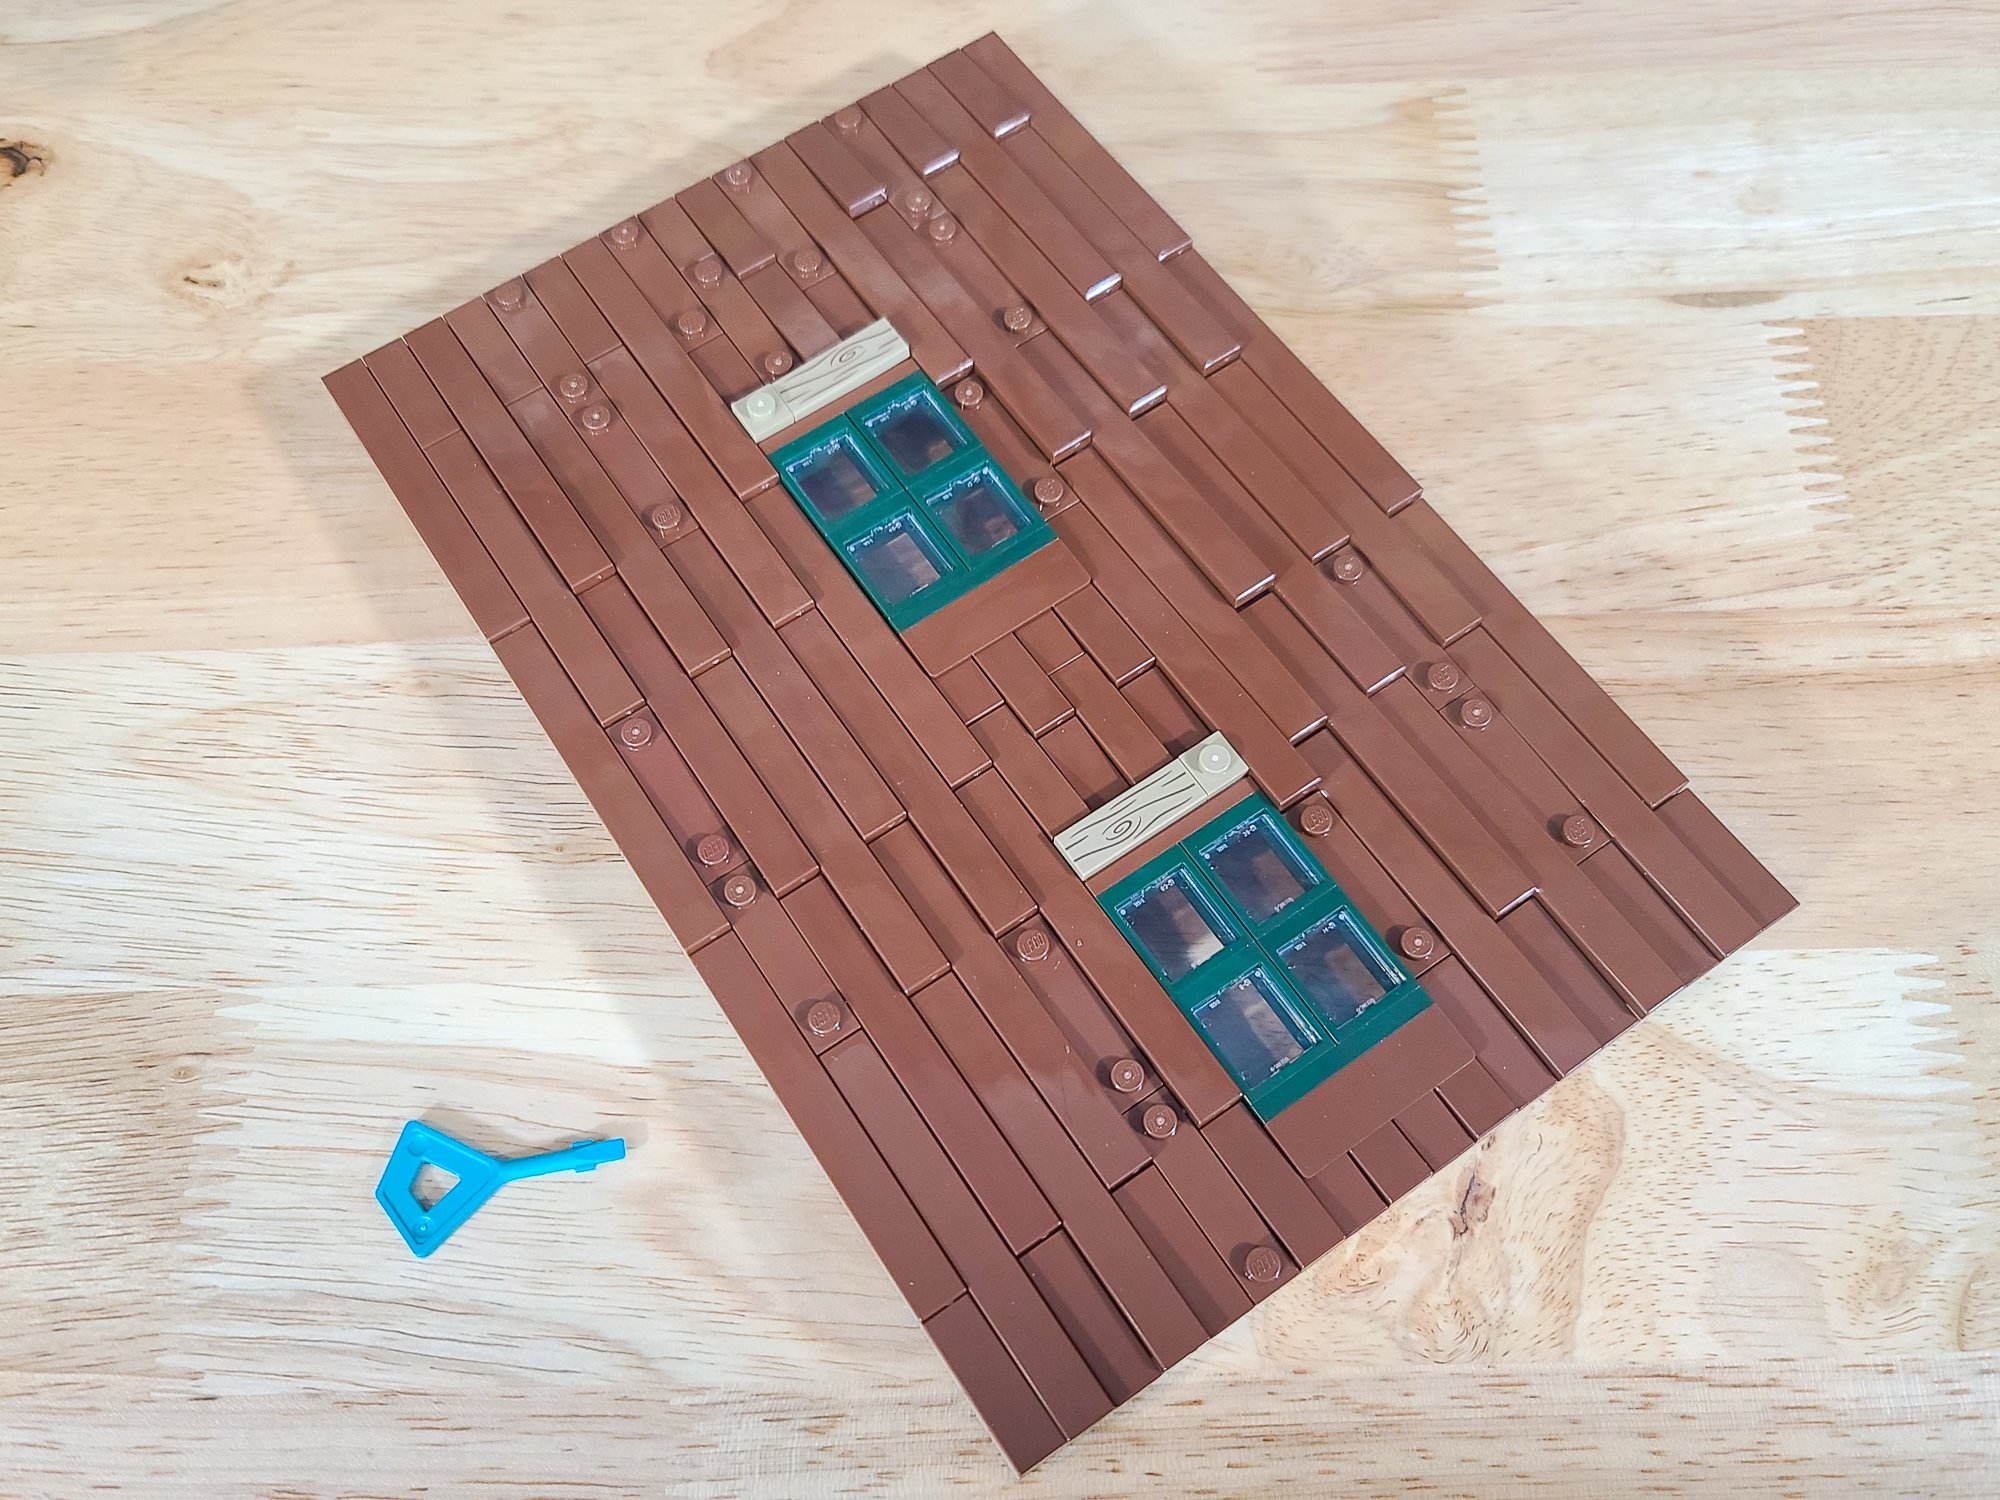
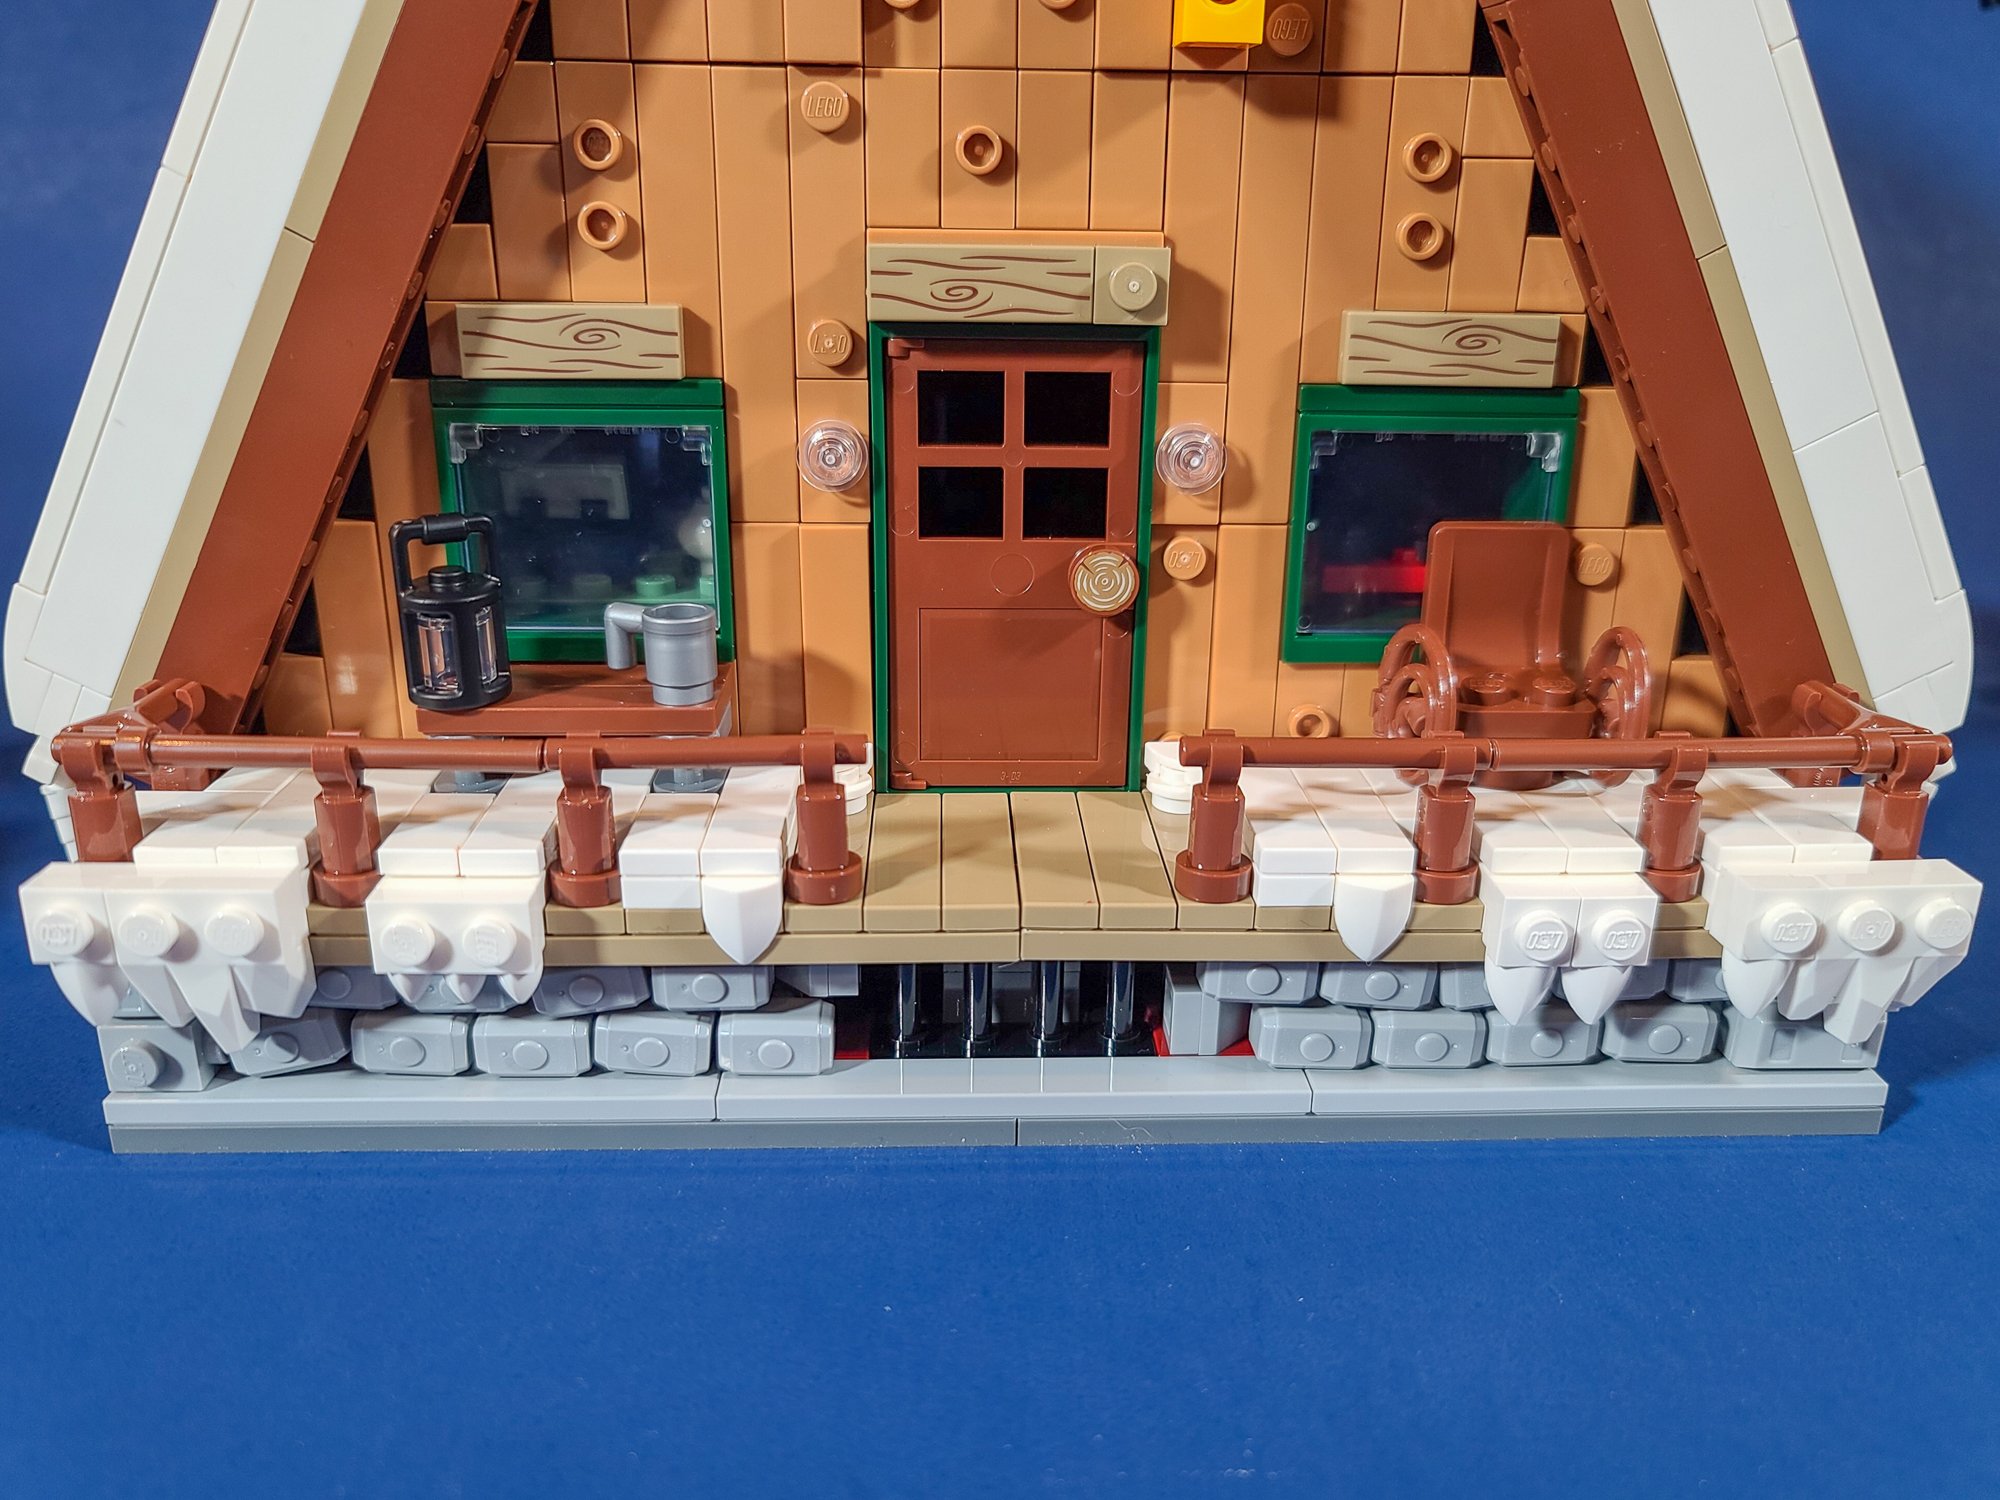
For the first modification, I will only use the pieces that LEGO provides in the set. From the original submission, you can see that not all the tiles were pushed down to create more of a textured and weathered look. This is a longstanding AFOL technique to convey more realism in MOCs (and one that LEGO views as illegal since the studs are not all engaged).
There are a few places on the cabin that could benefit from a little wear and tear. The designers incorporated the randomness in the front and back walls using quite a bit of clever SNOT work, but the realism can extend to the front porch too. If you can overcome any feelings of OCD, you can make the hammers not align perfectly or make the steps and wood planks a bit more crooked to heighten the sense of realism.

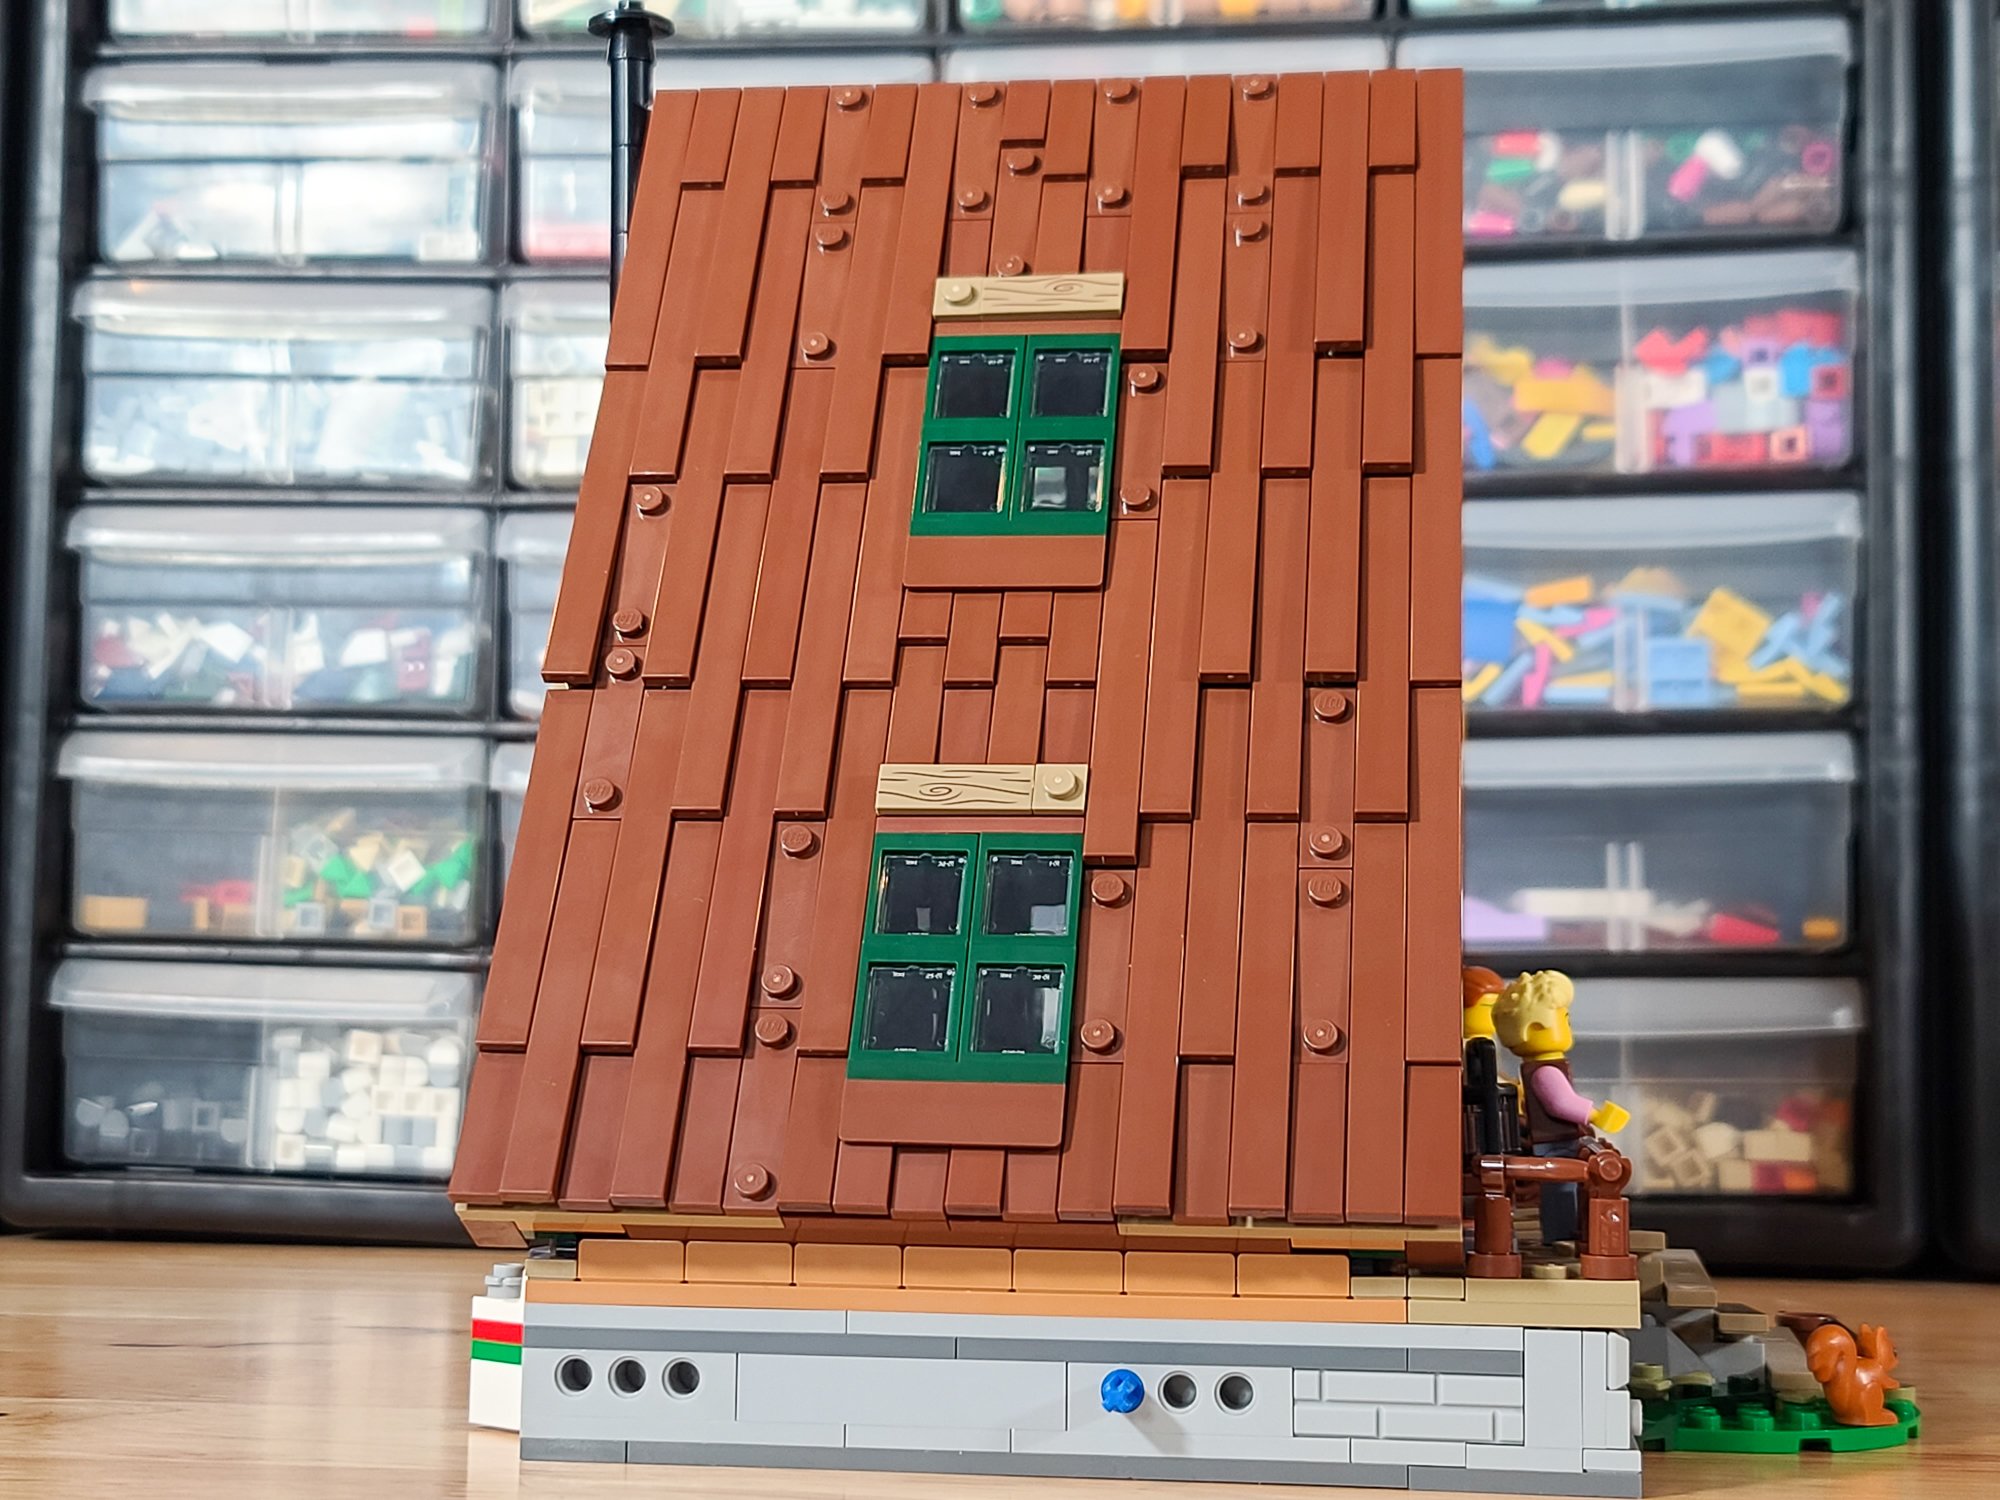
That texturing technique extends to both sides of the roof as well, using the tip of your finger to only engage one or two studs of the 1x8 tiles that make up the wooden planks. When we were chatting with the LEGO designers about this set, they mentioned that builders didn’t necessarily have to push all the tiles down… though they wouldn’t be able to explicitly tell them—think of how complicated the instructions would be! But I can confirm, the roof looks spectacular if you break the rules a bit and add a bit more texture.
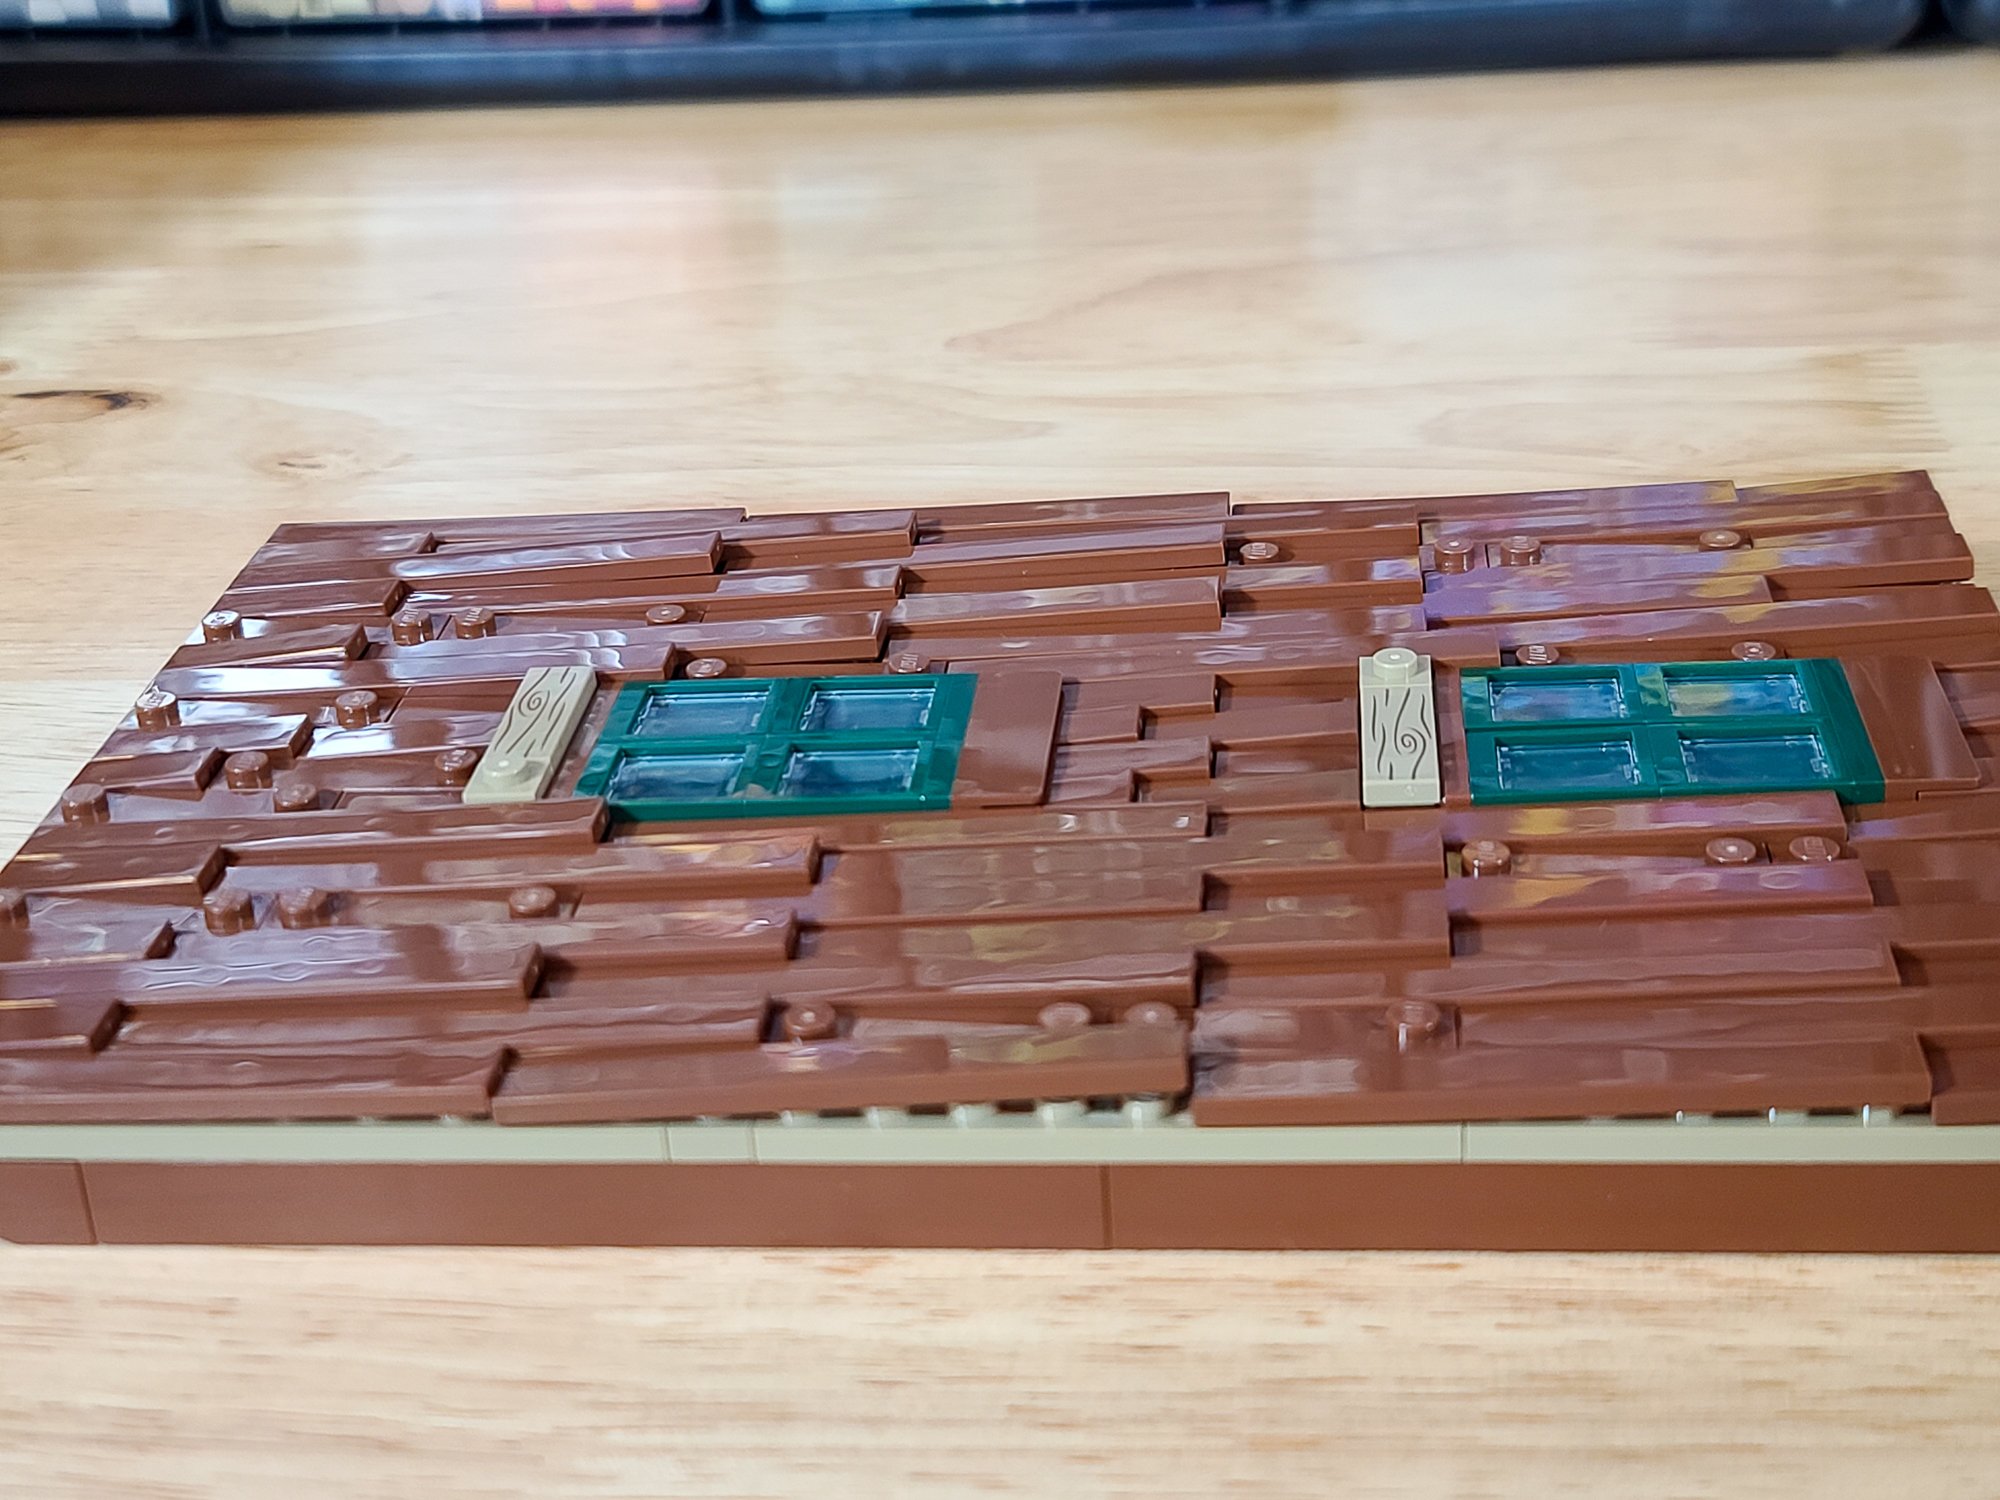
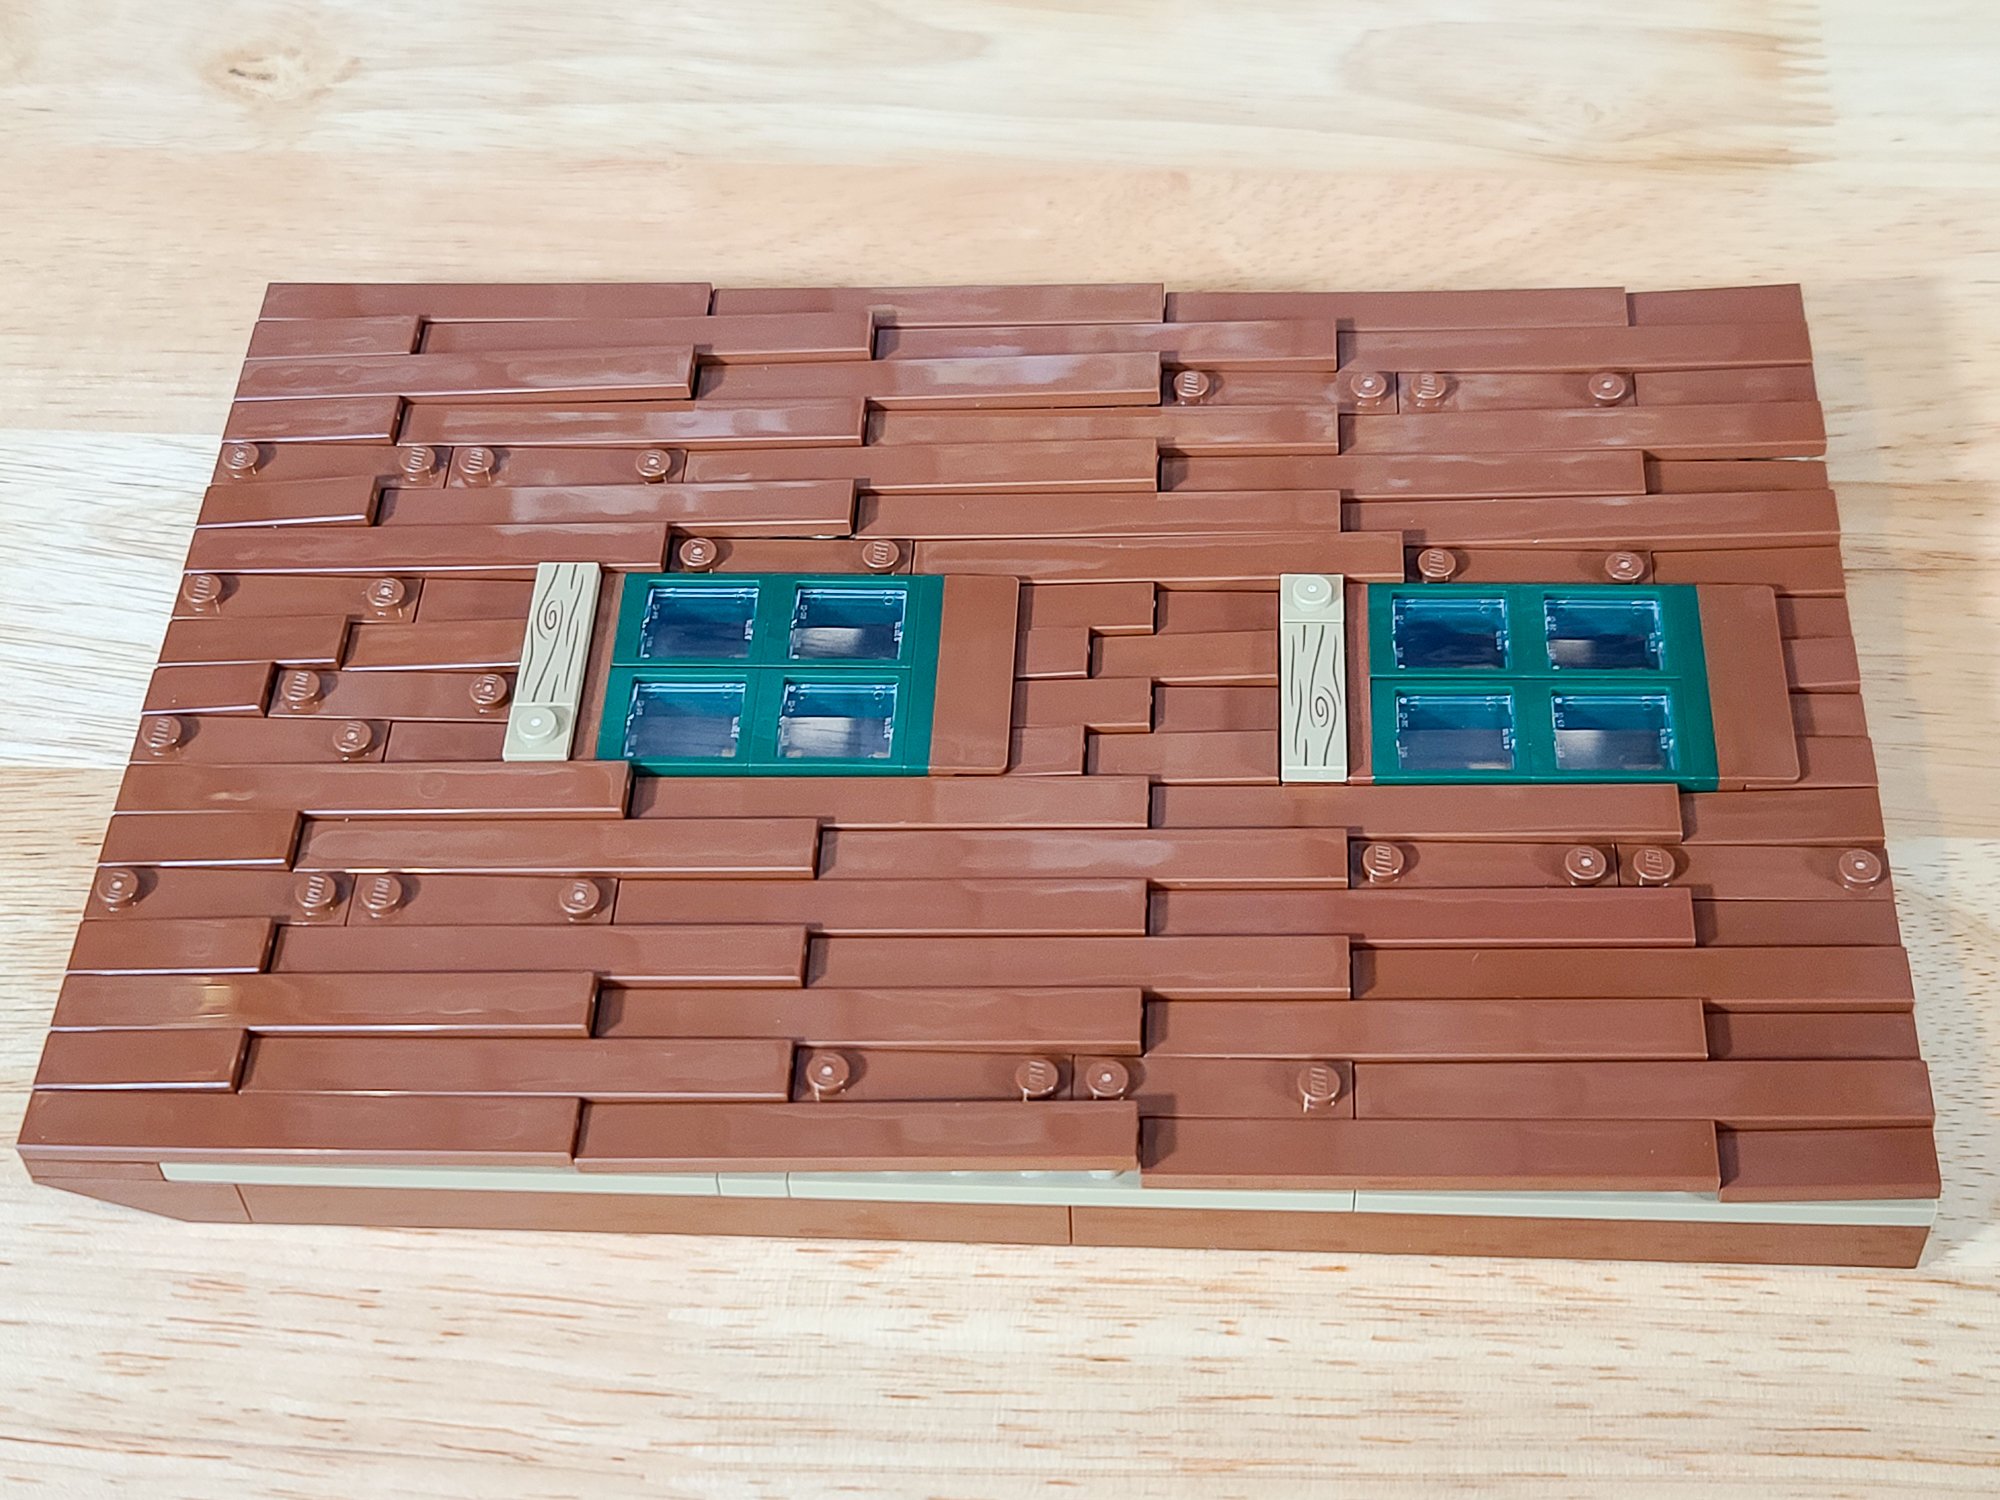
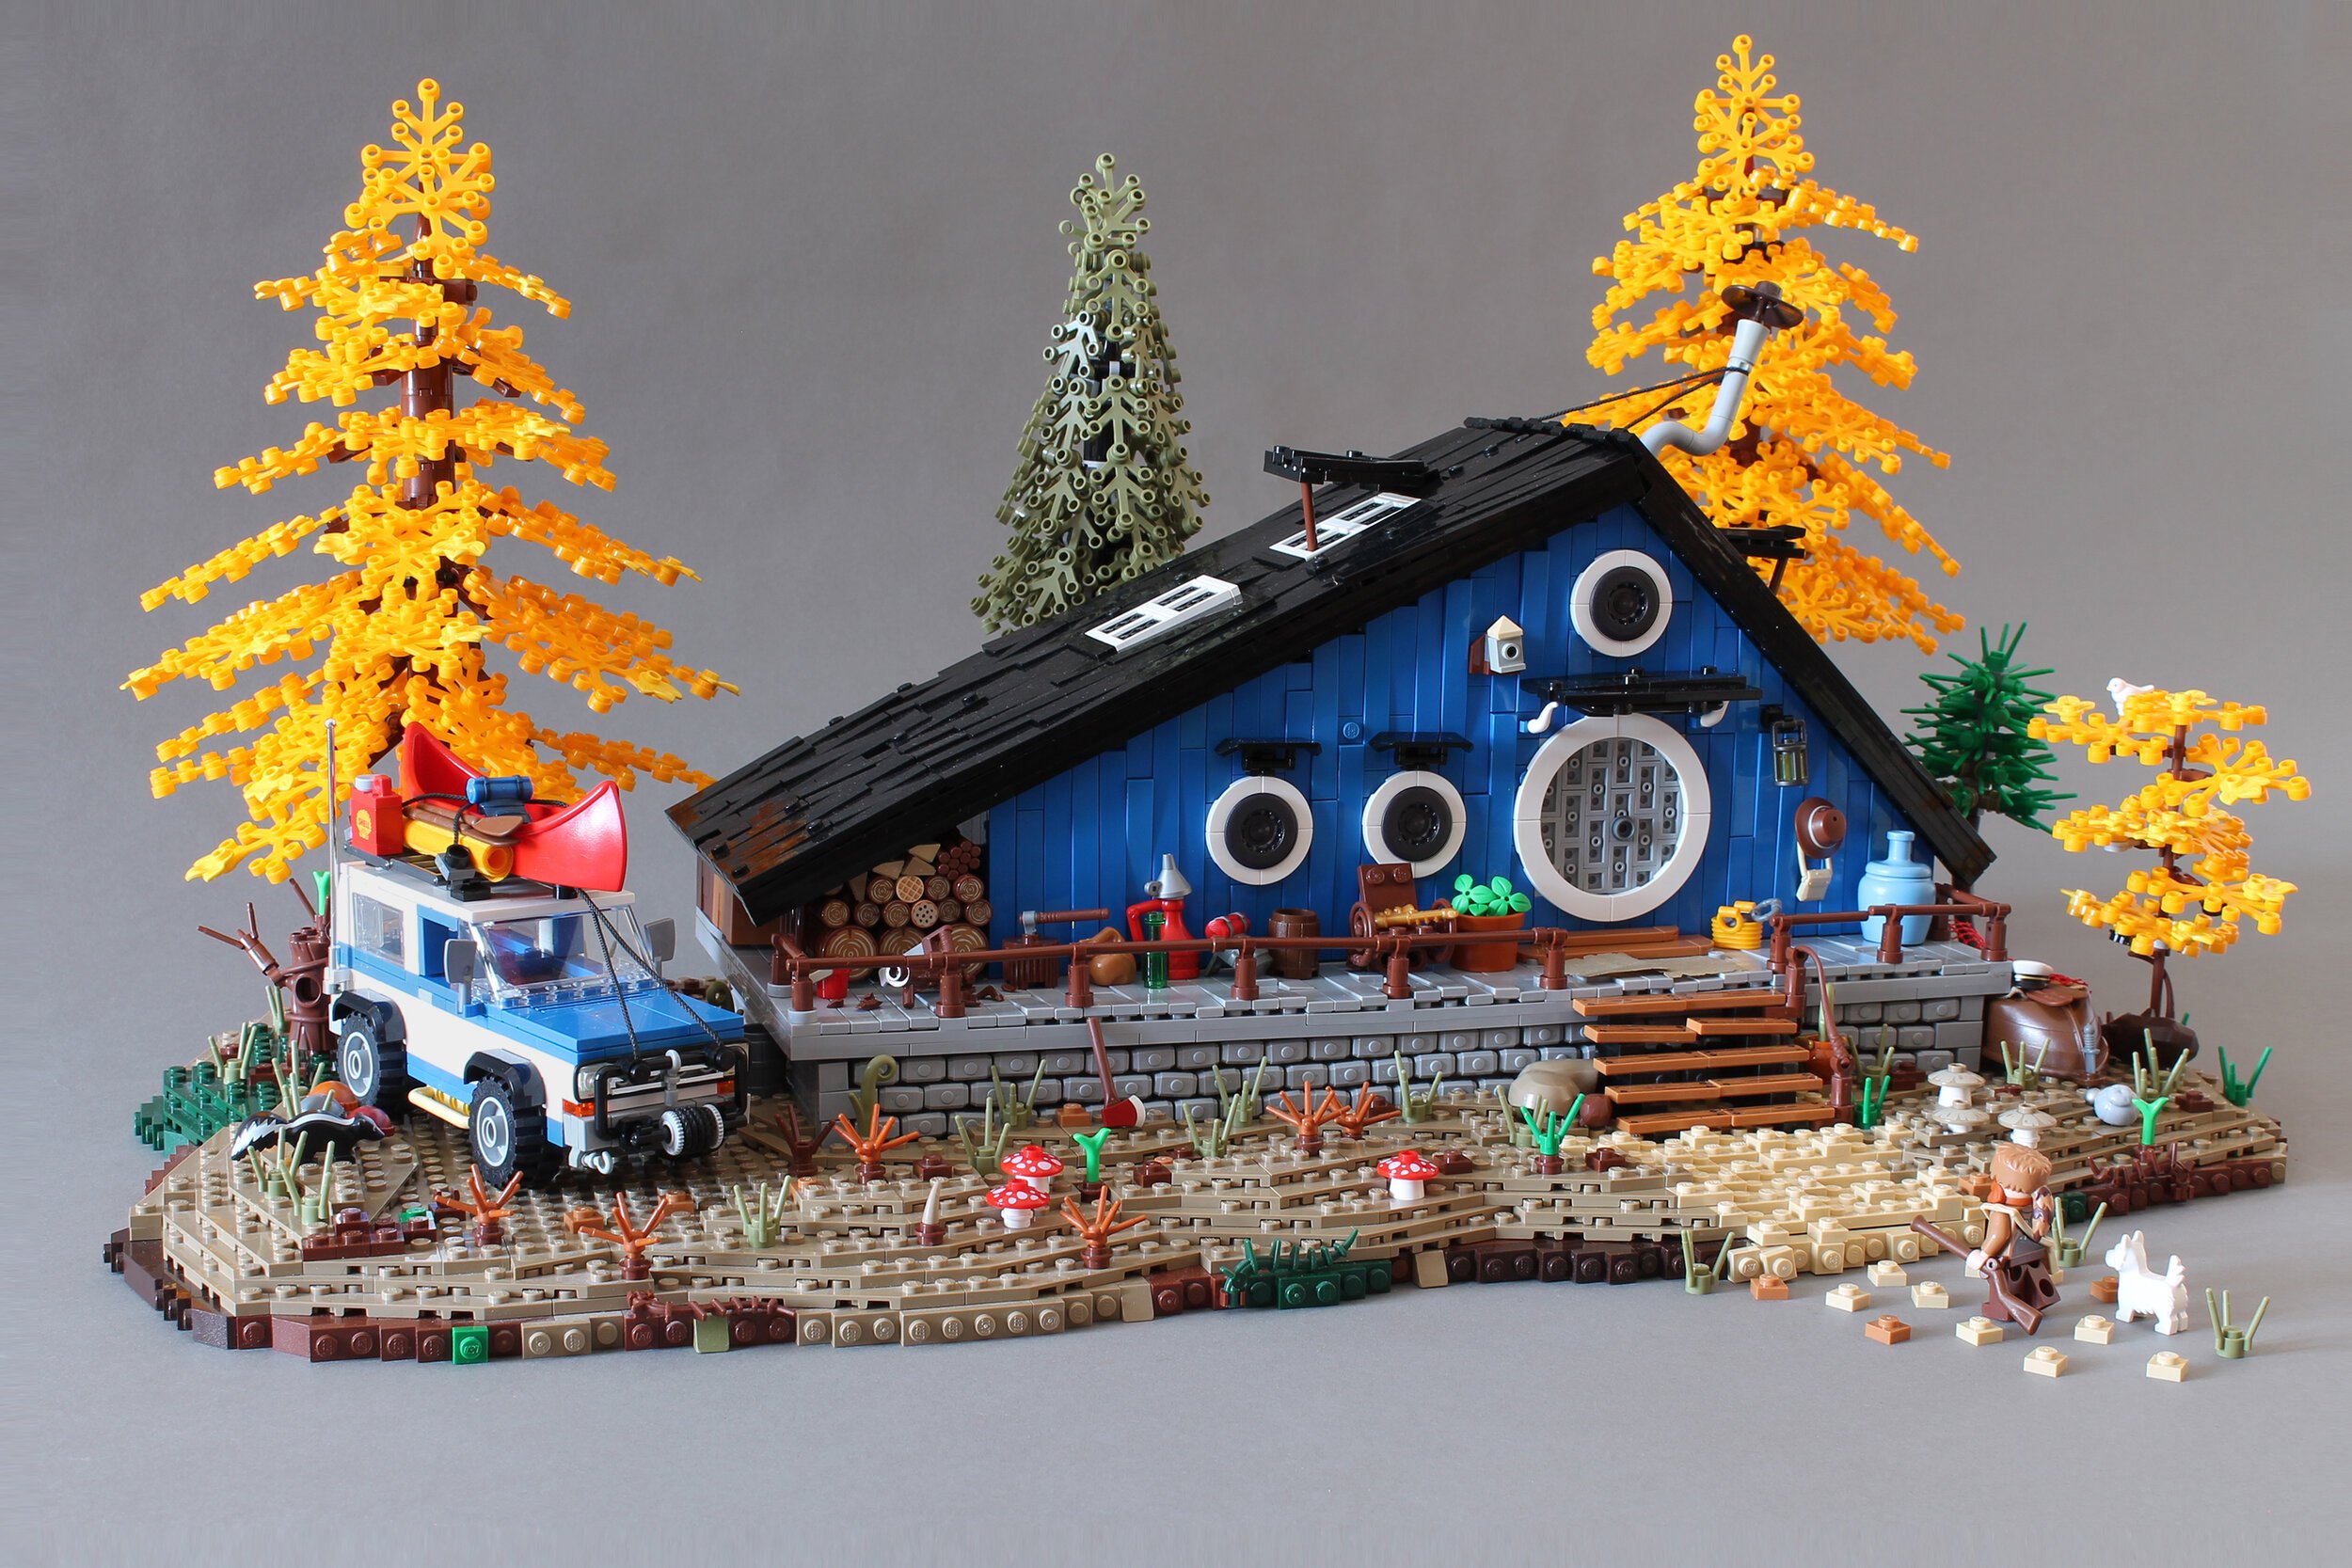
Here you can see the final look of the modified cabin using only what comes in the set. Already the cabin is looking a bit more realistic with a few rockwork imperfections and rickety wood planks for texture. (I hope the minifigs watch their step, though!)

Adding A Few Extra Pieces
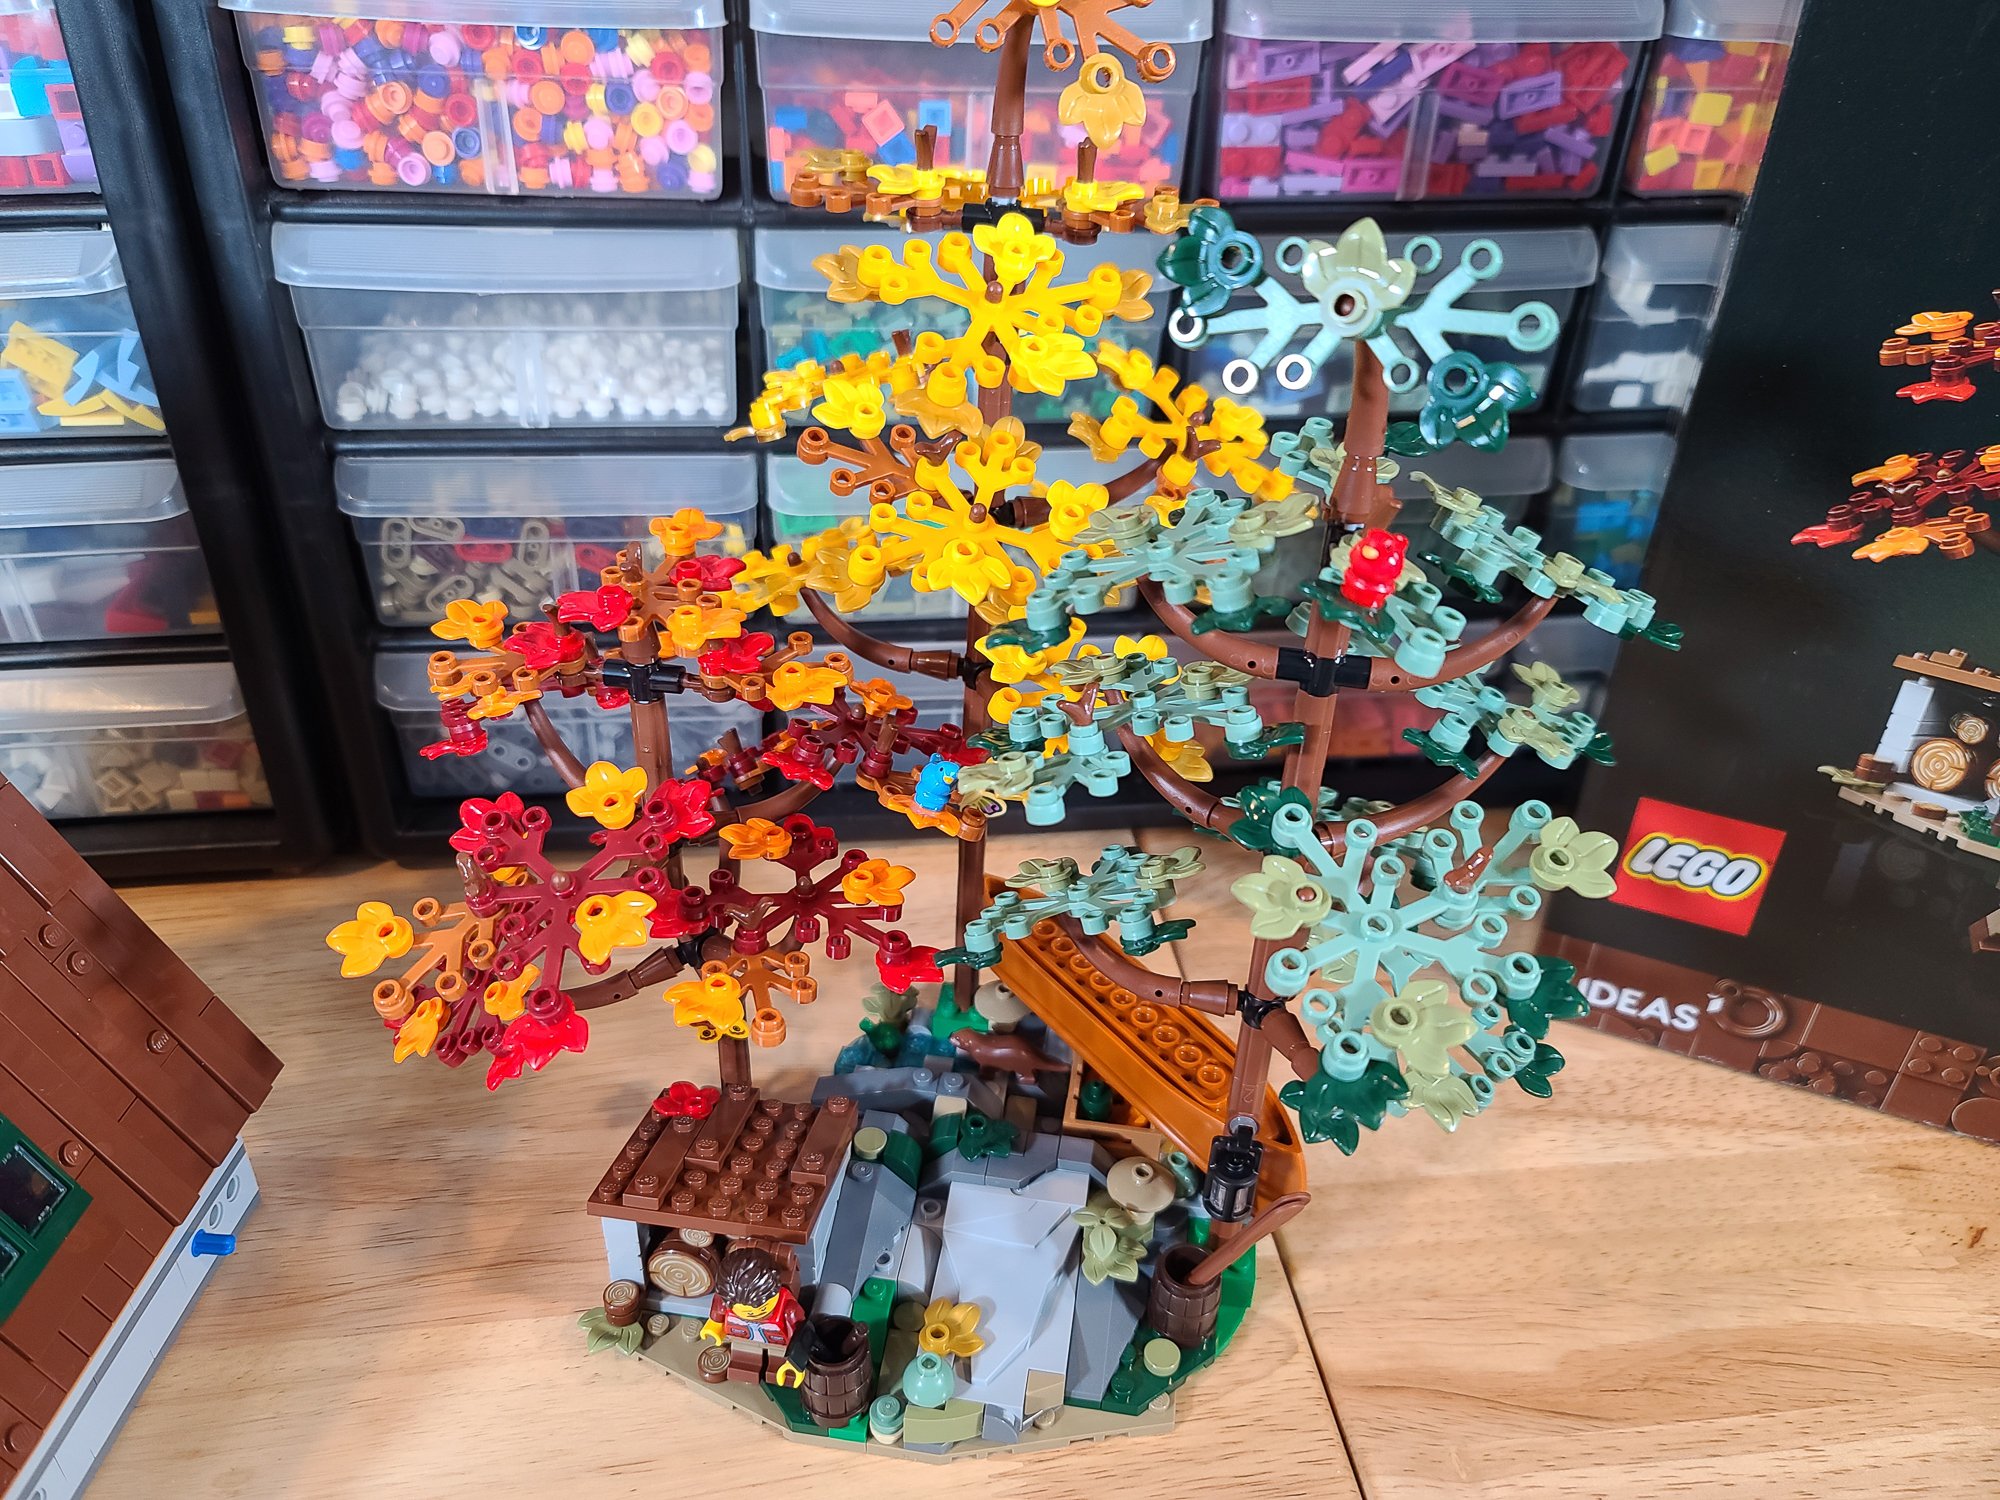
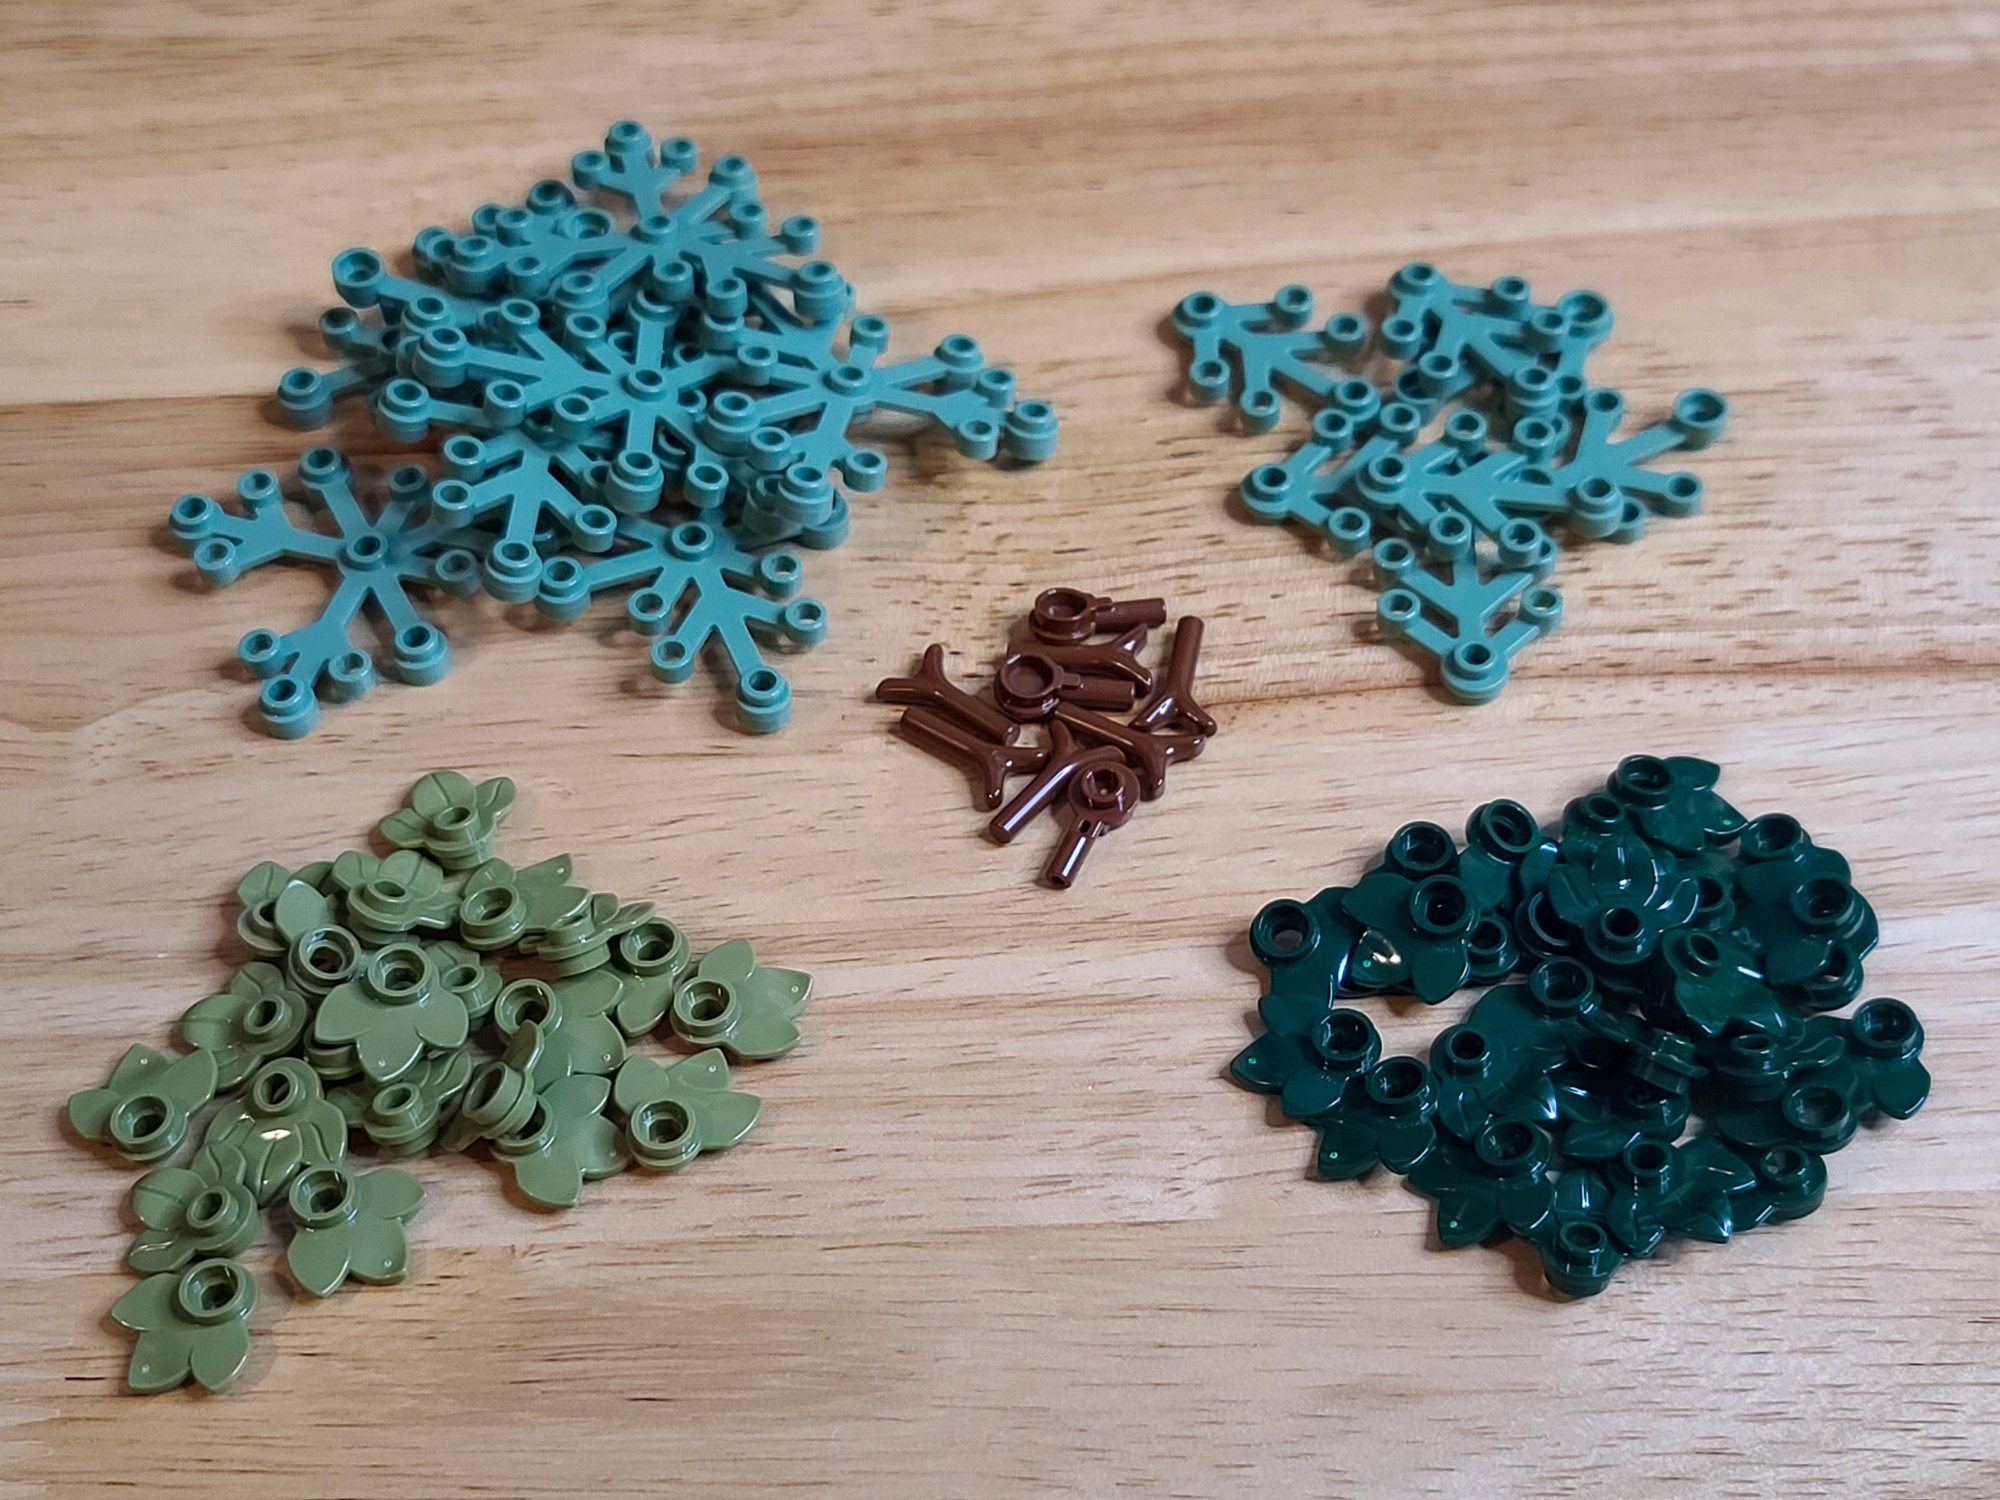
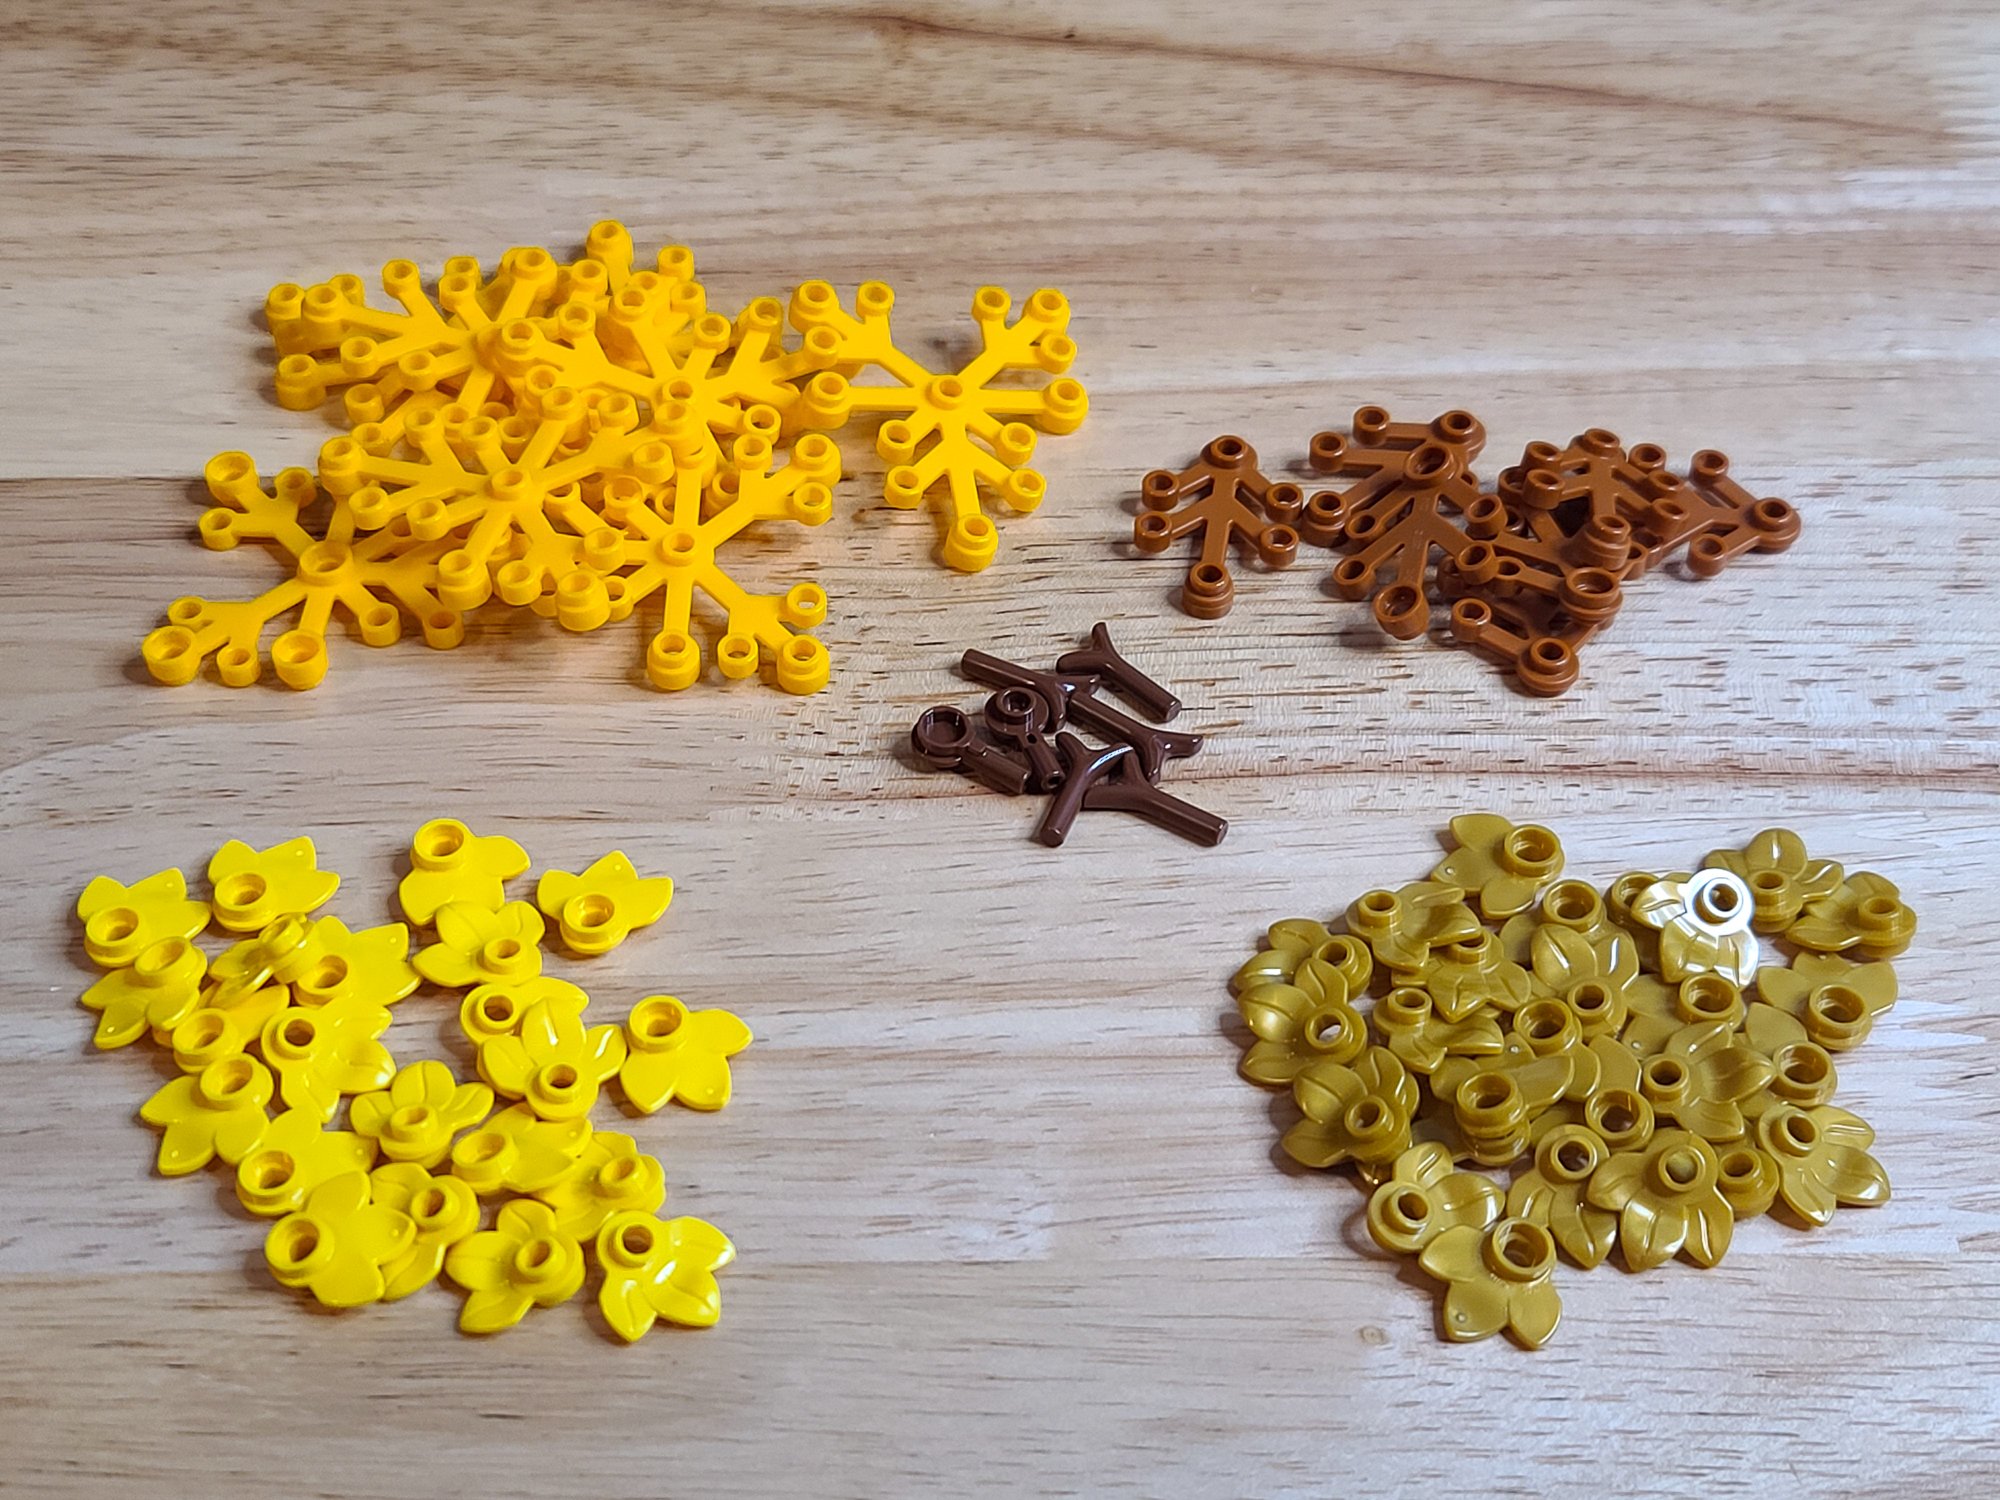
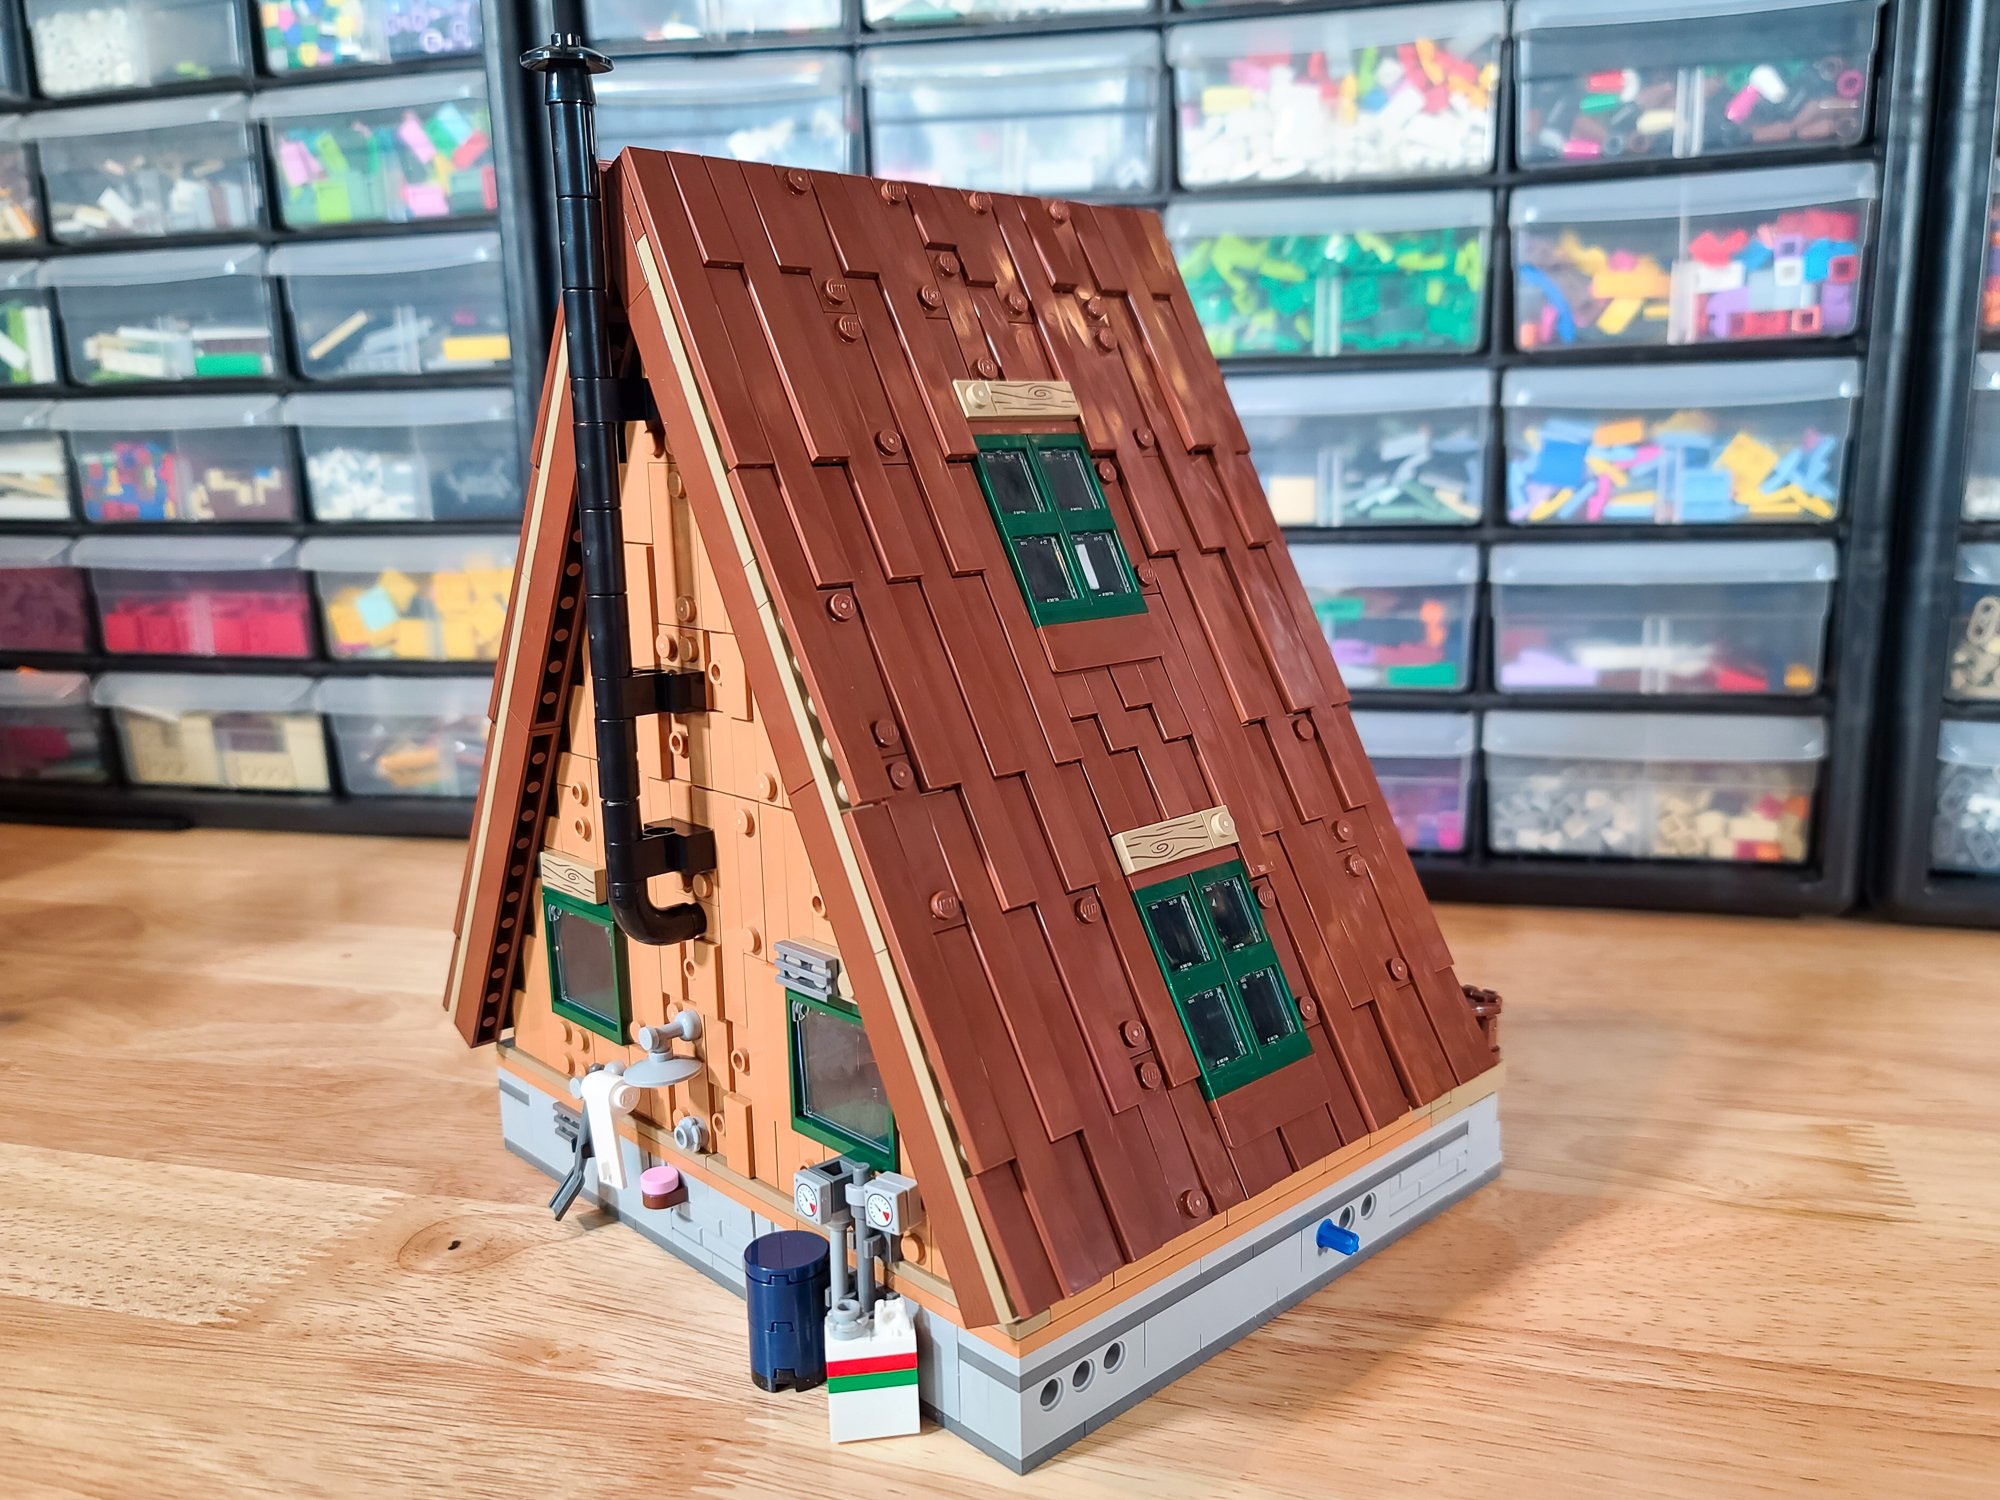
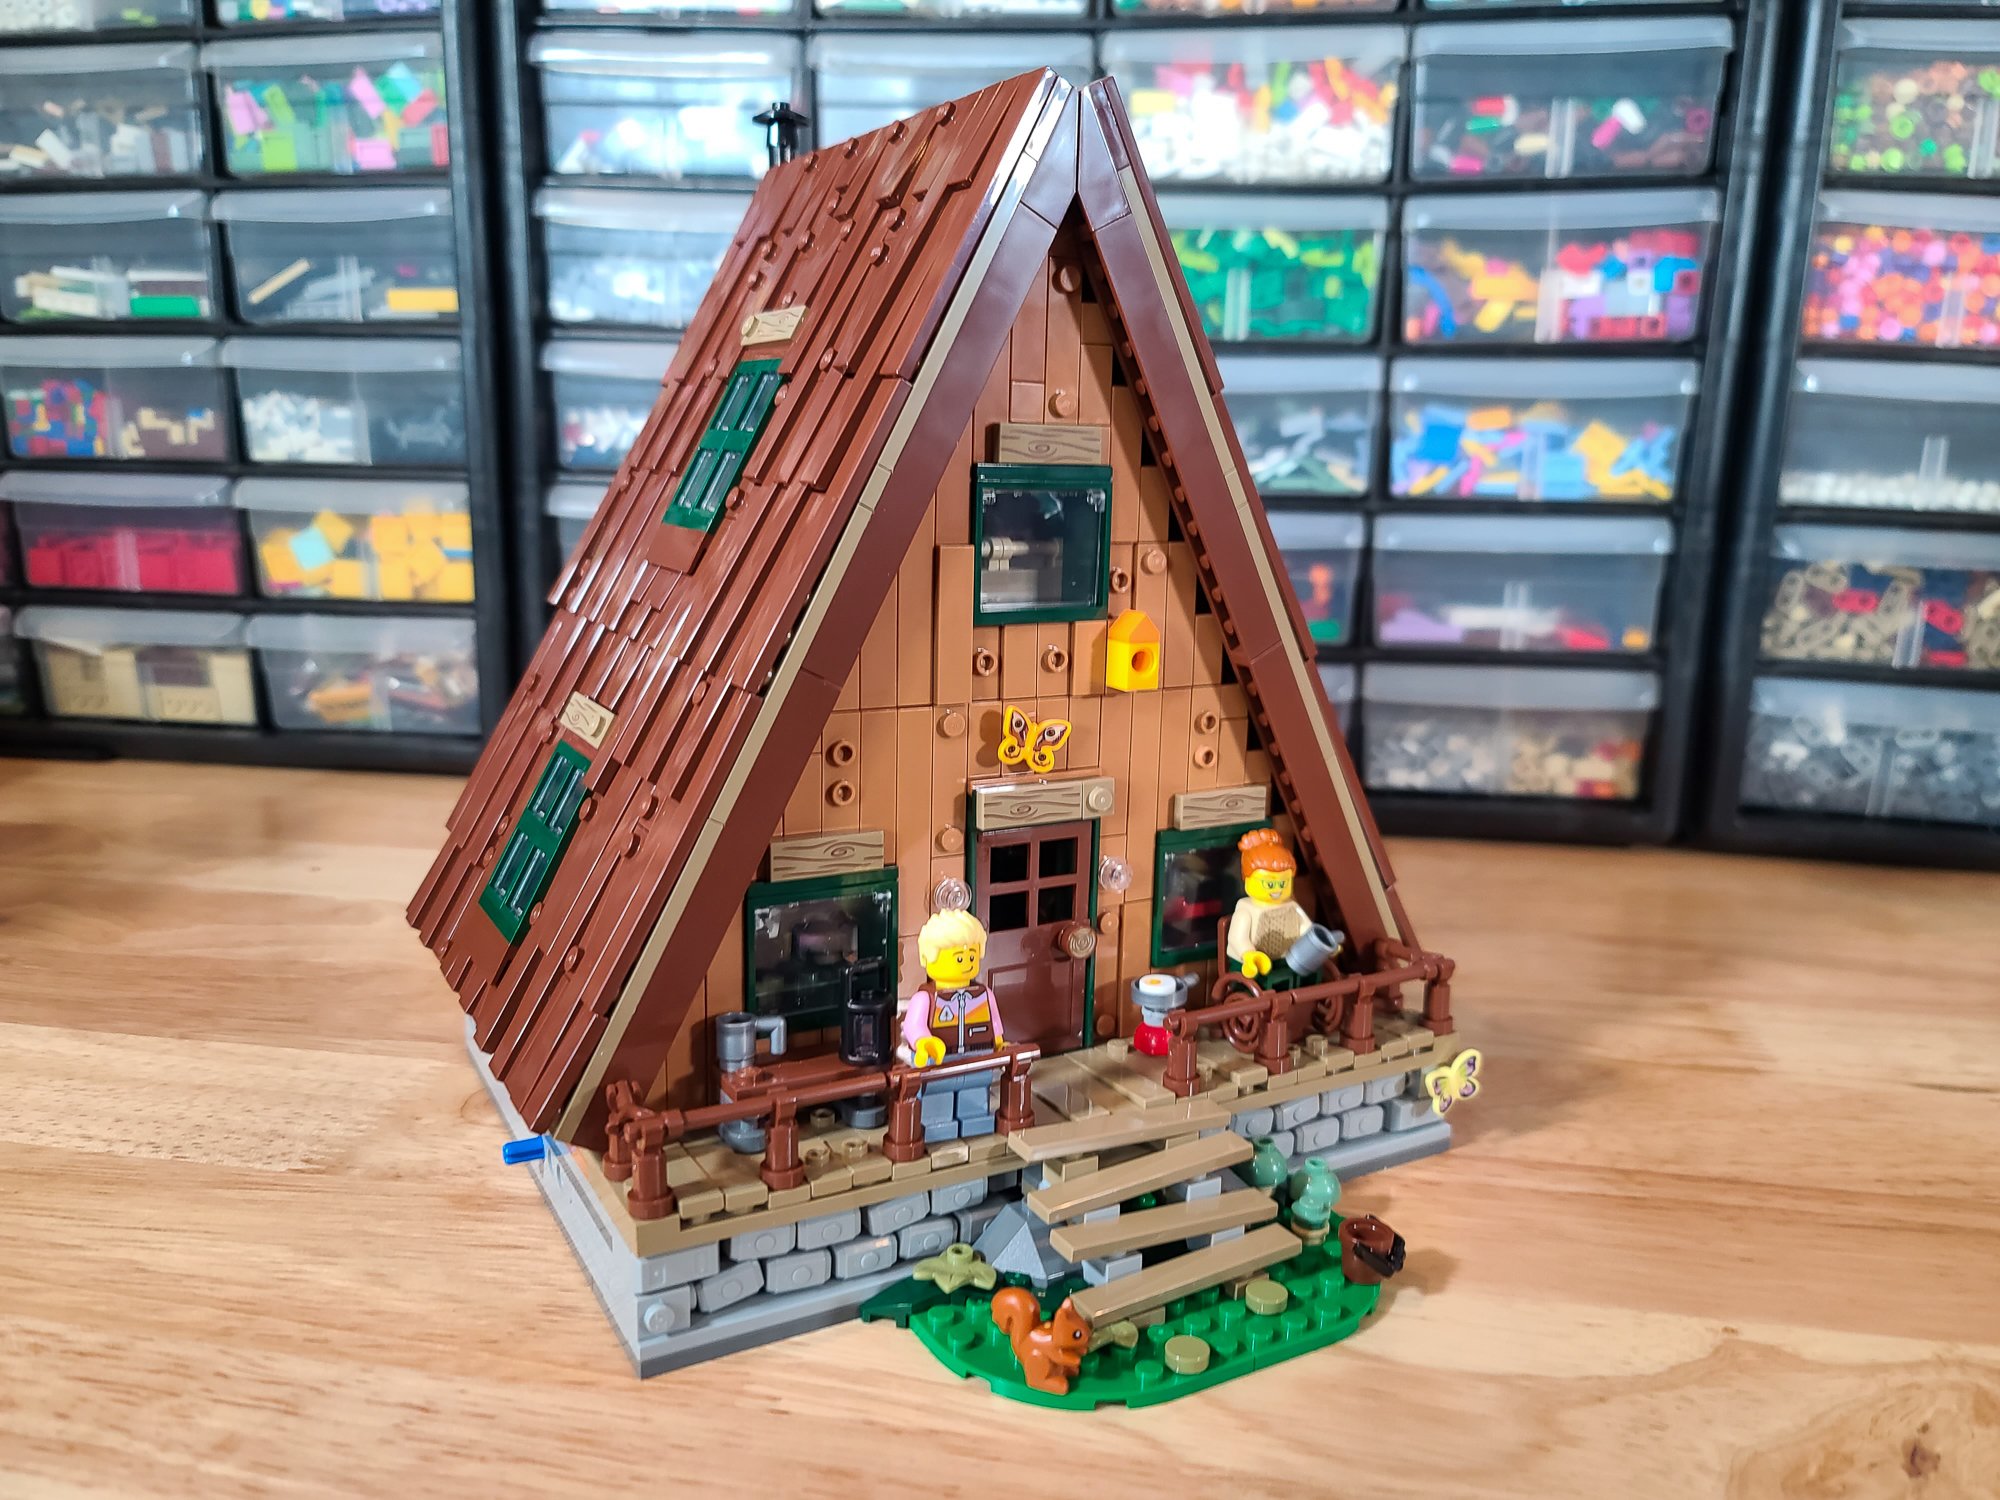
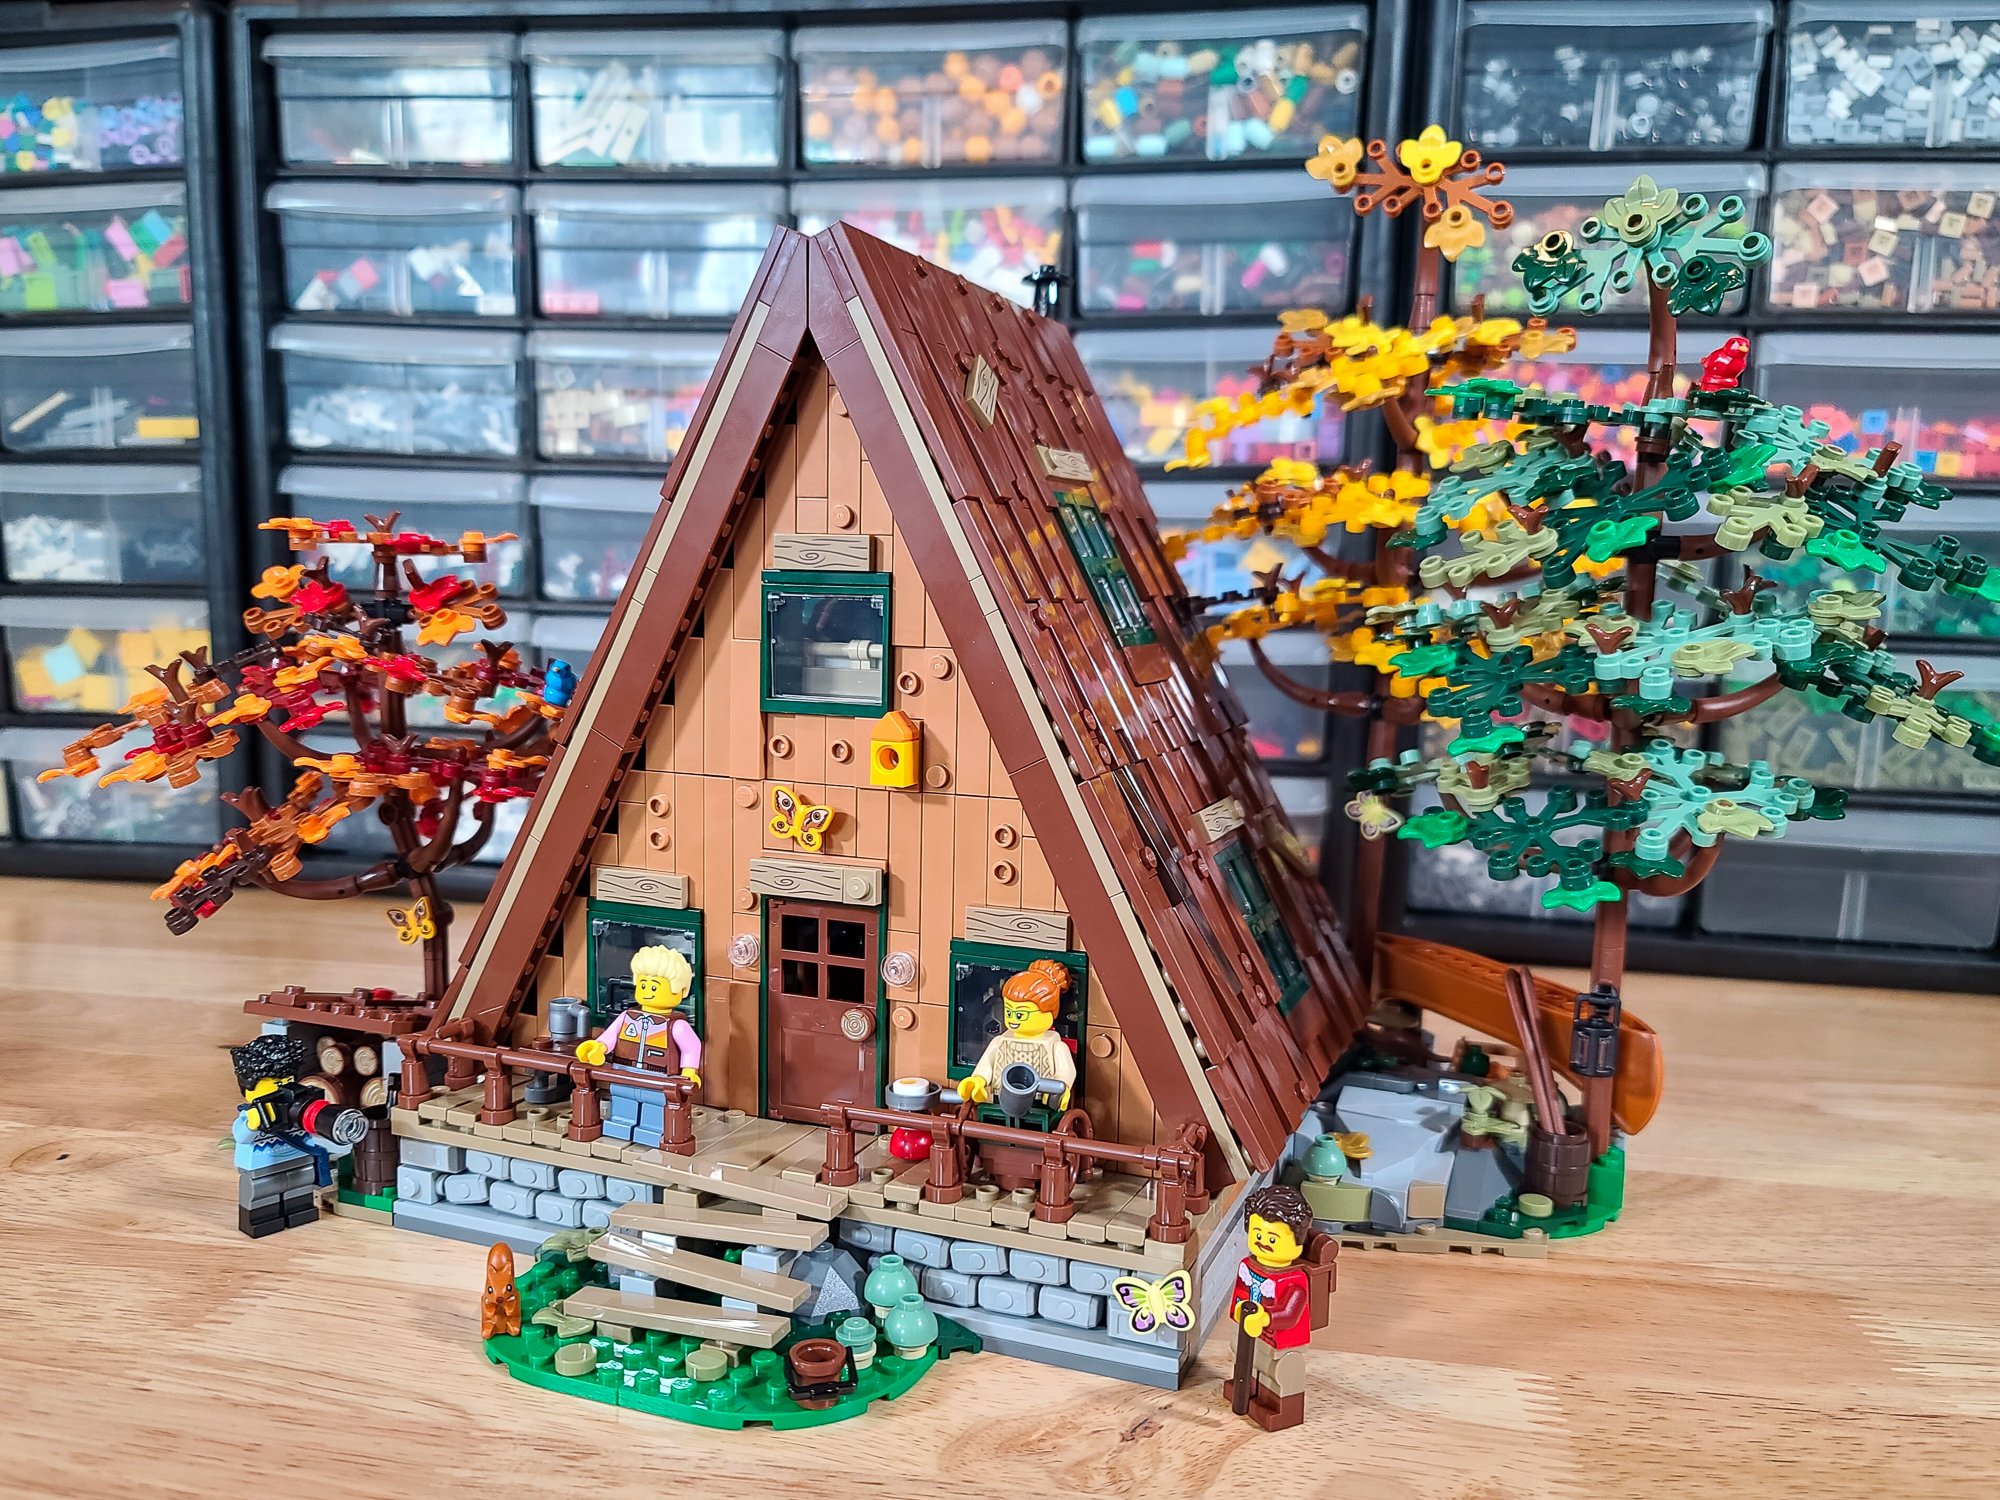
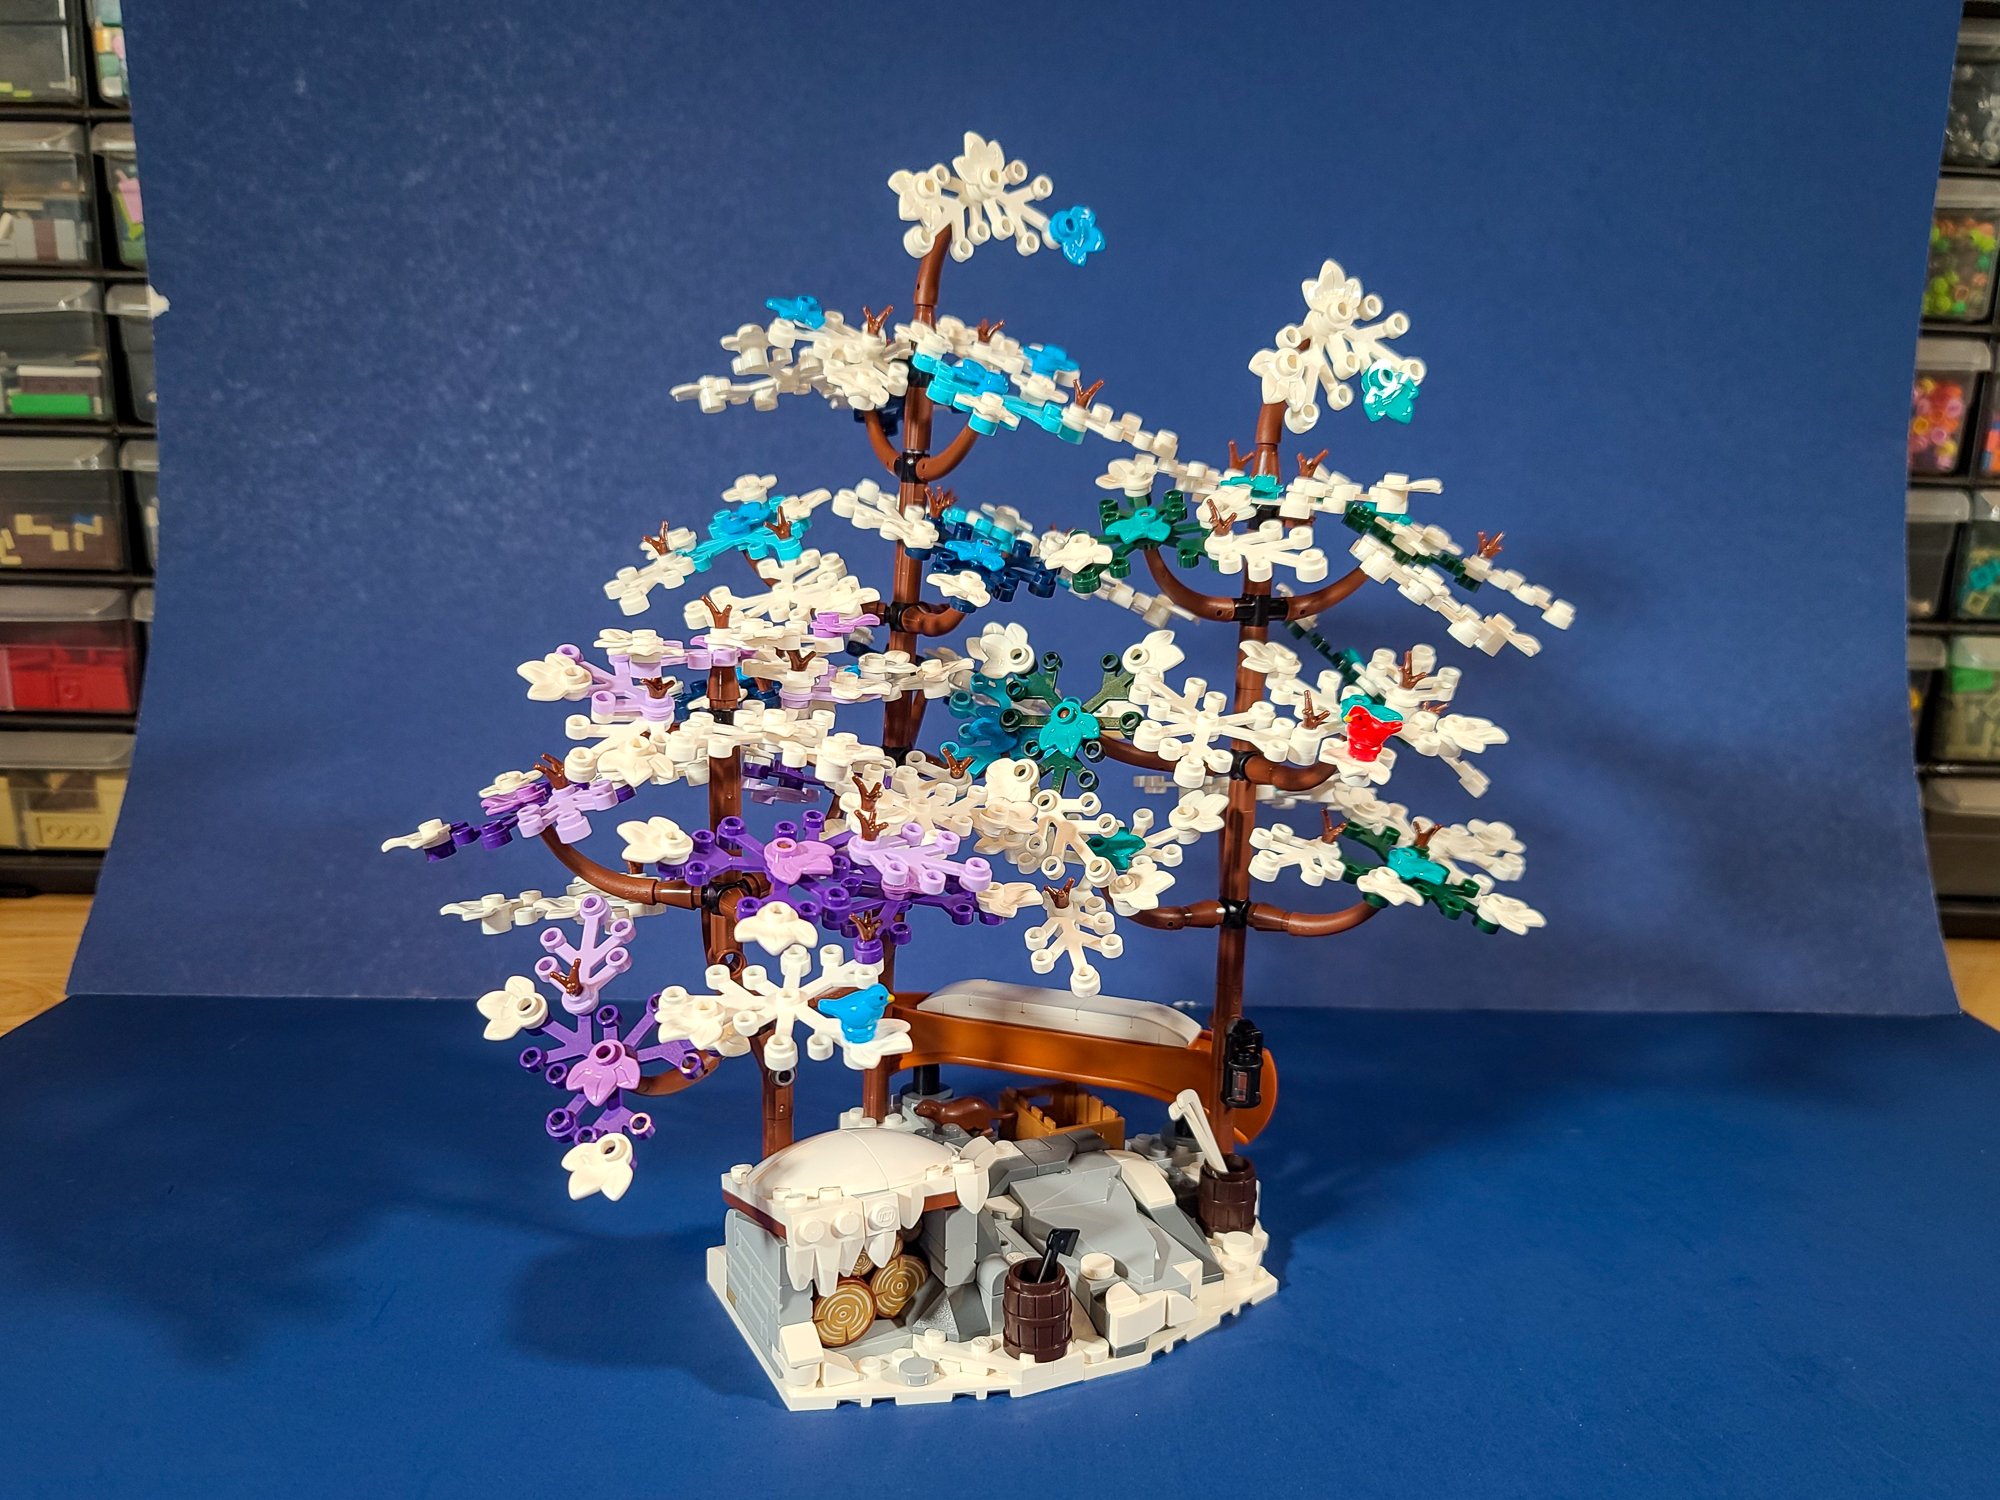
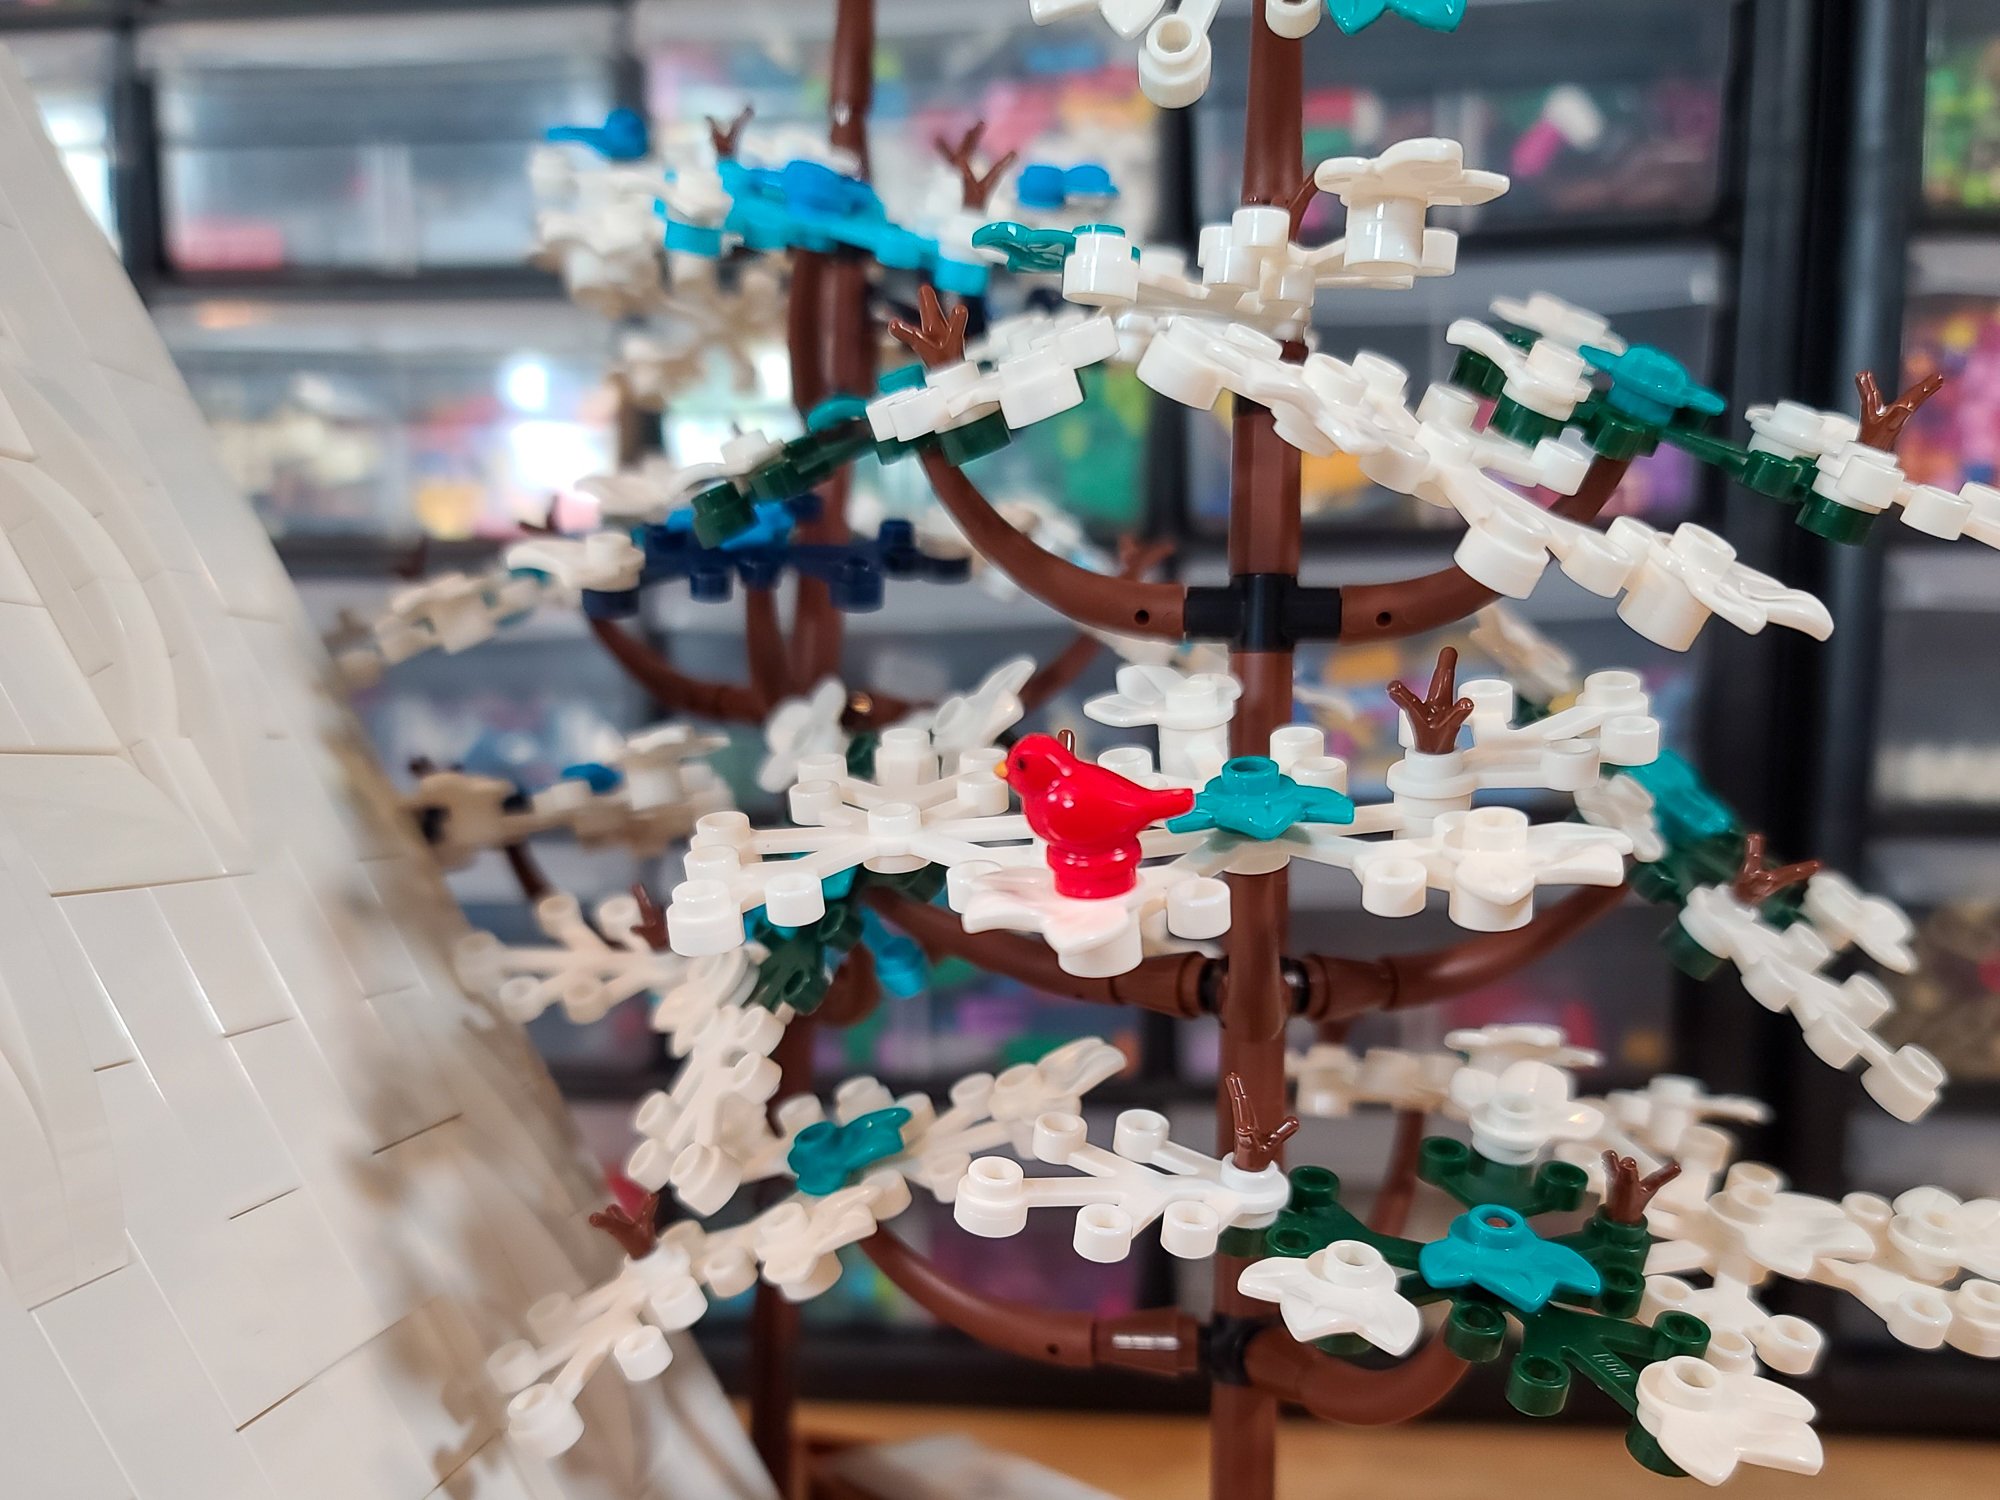
For my second mod of the cabin, I wanted to add even more realism and address two of the early criticisms of the set: that the foliage was a bit too thin and that the roof’s color was too consistent. First off, I took the foliage pattern established in the design language of the set and created more branches so I could fill out the trees more. I wanted to stay true to the colors of the trees in the set so I carefully decided to extend the branches in more muted tones.
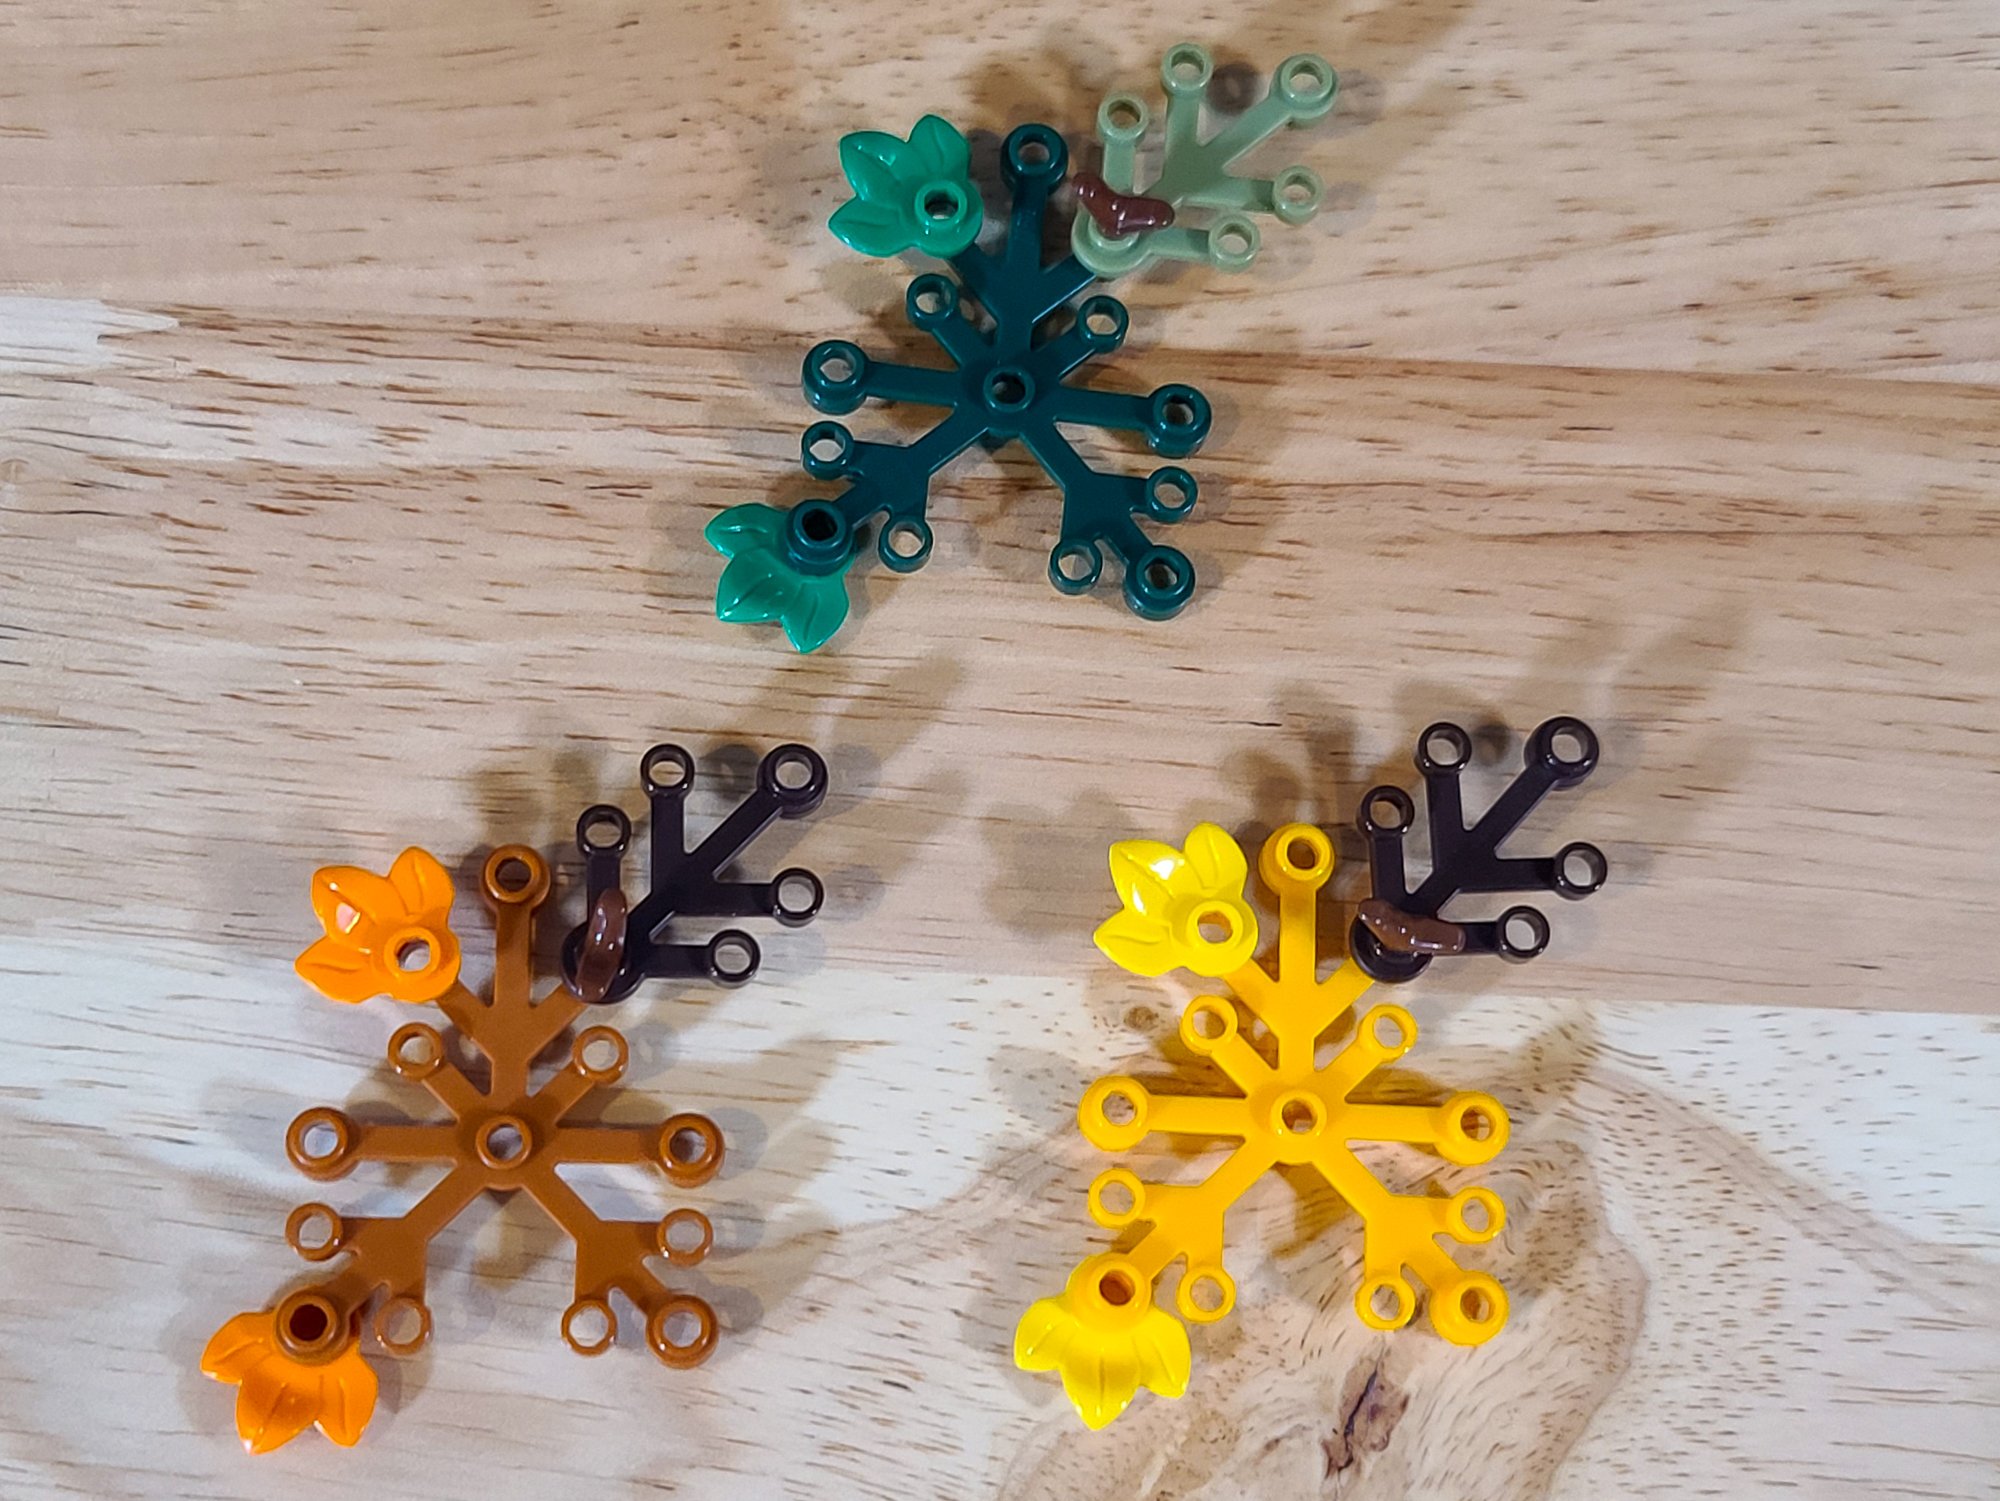
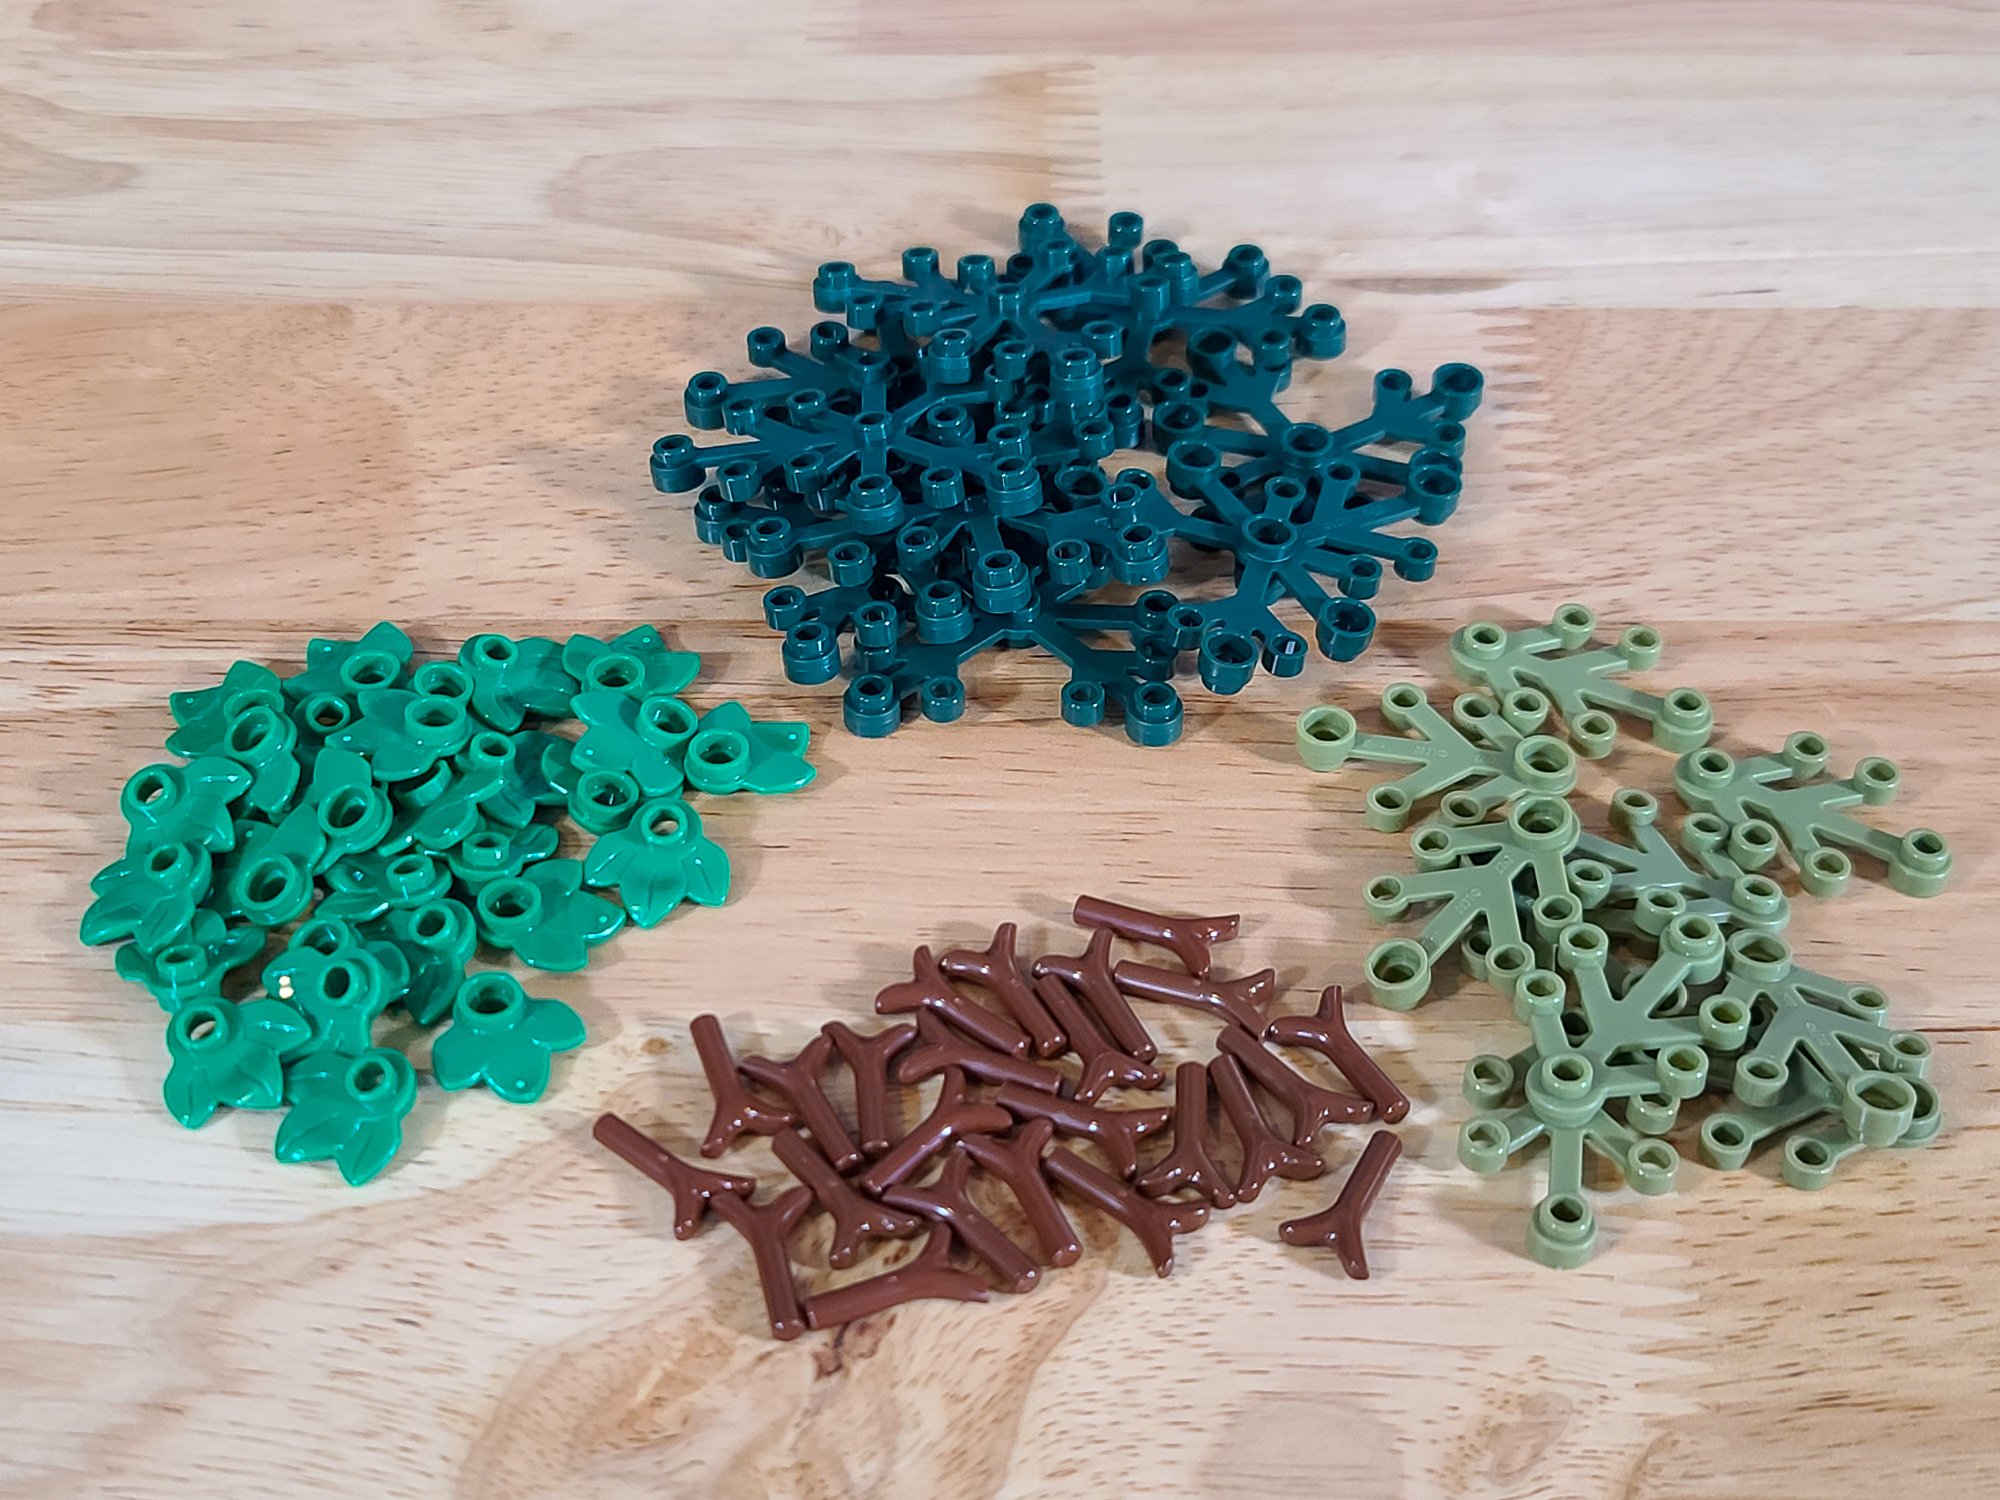
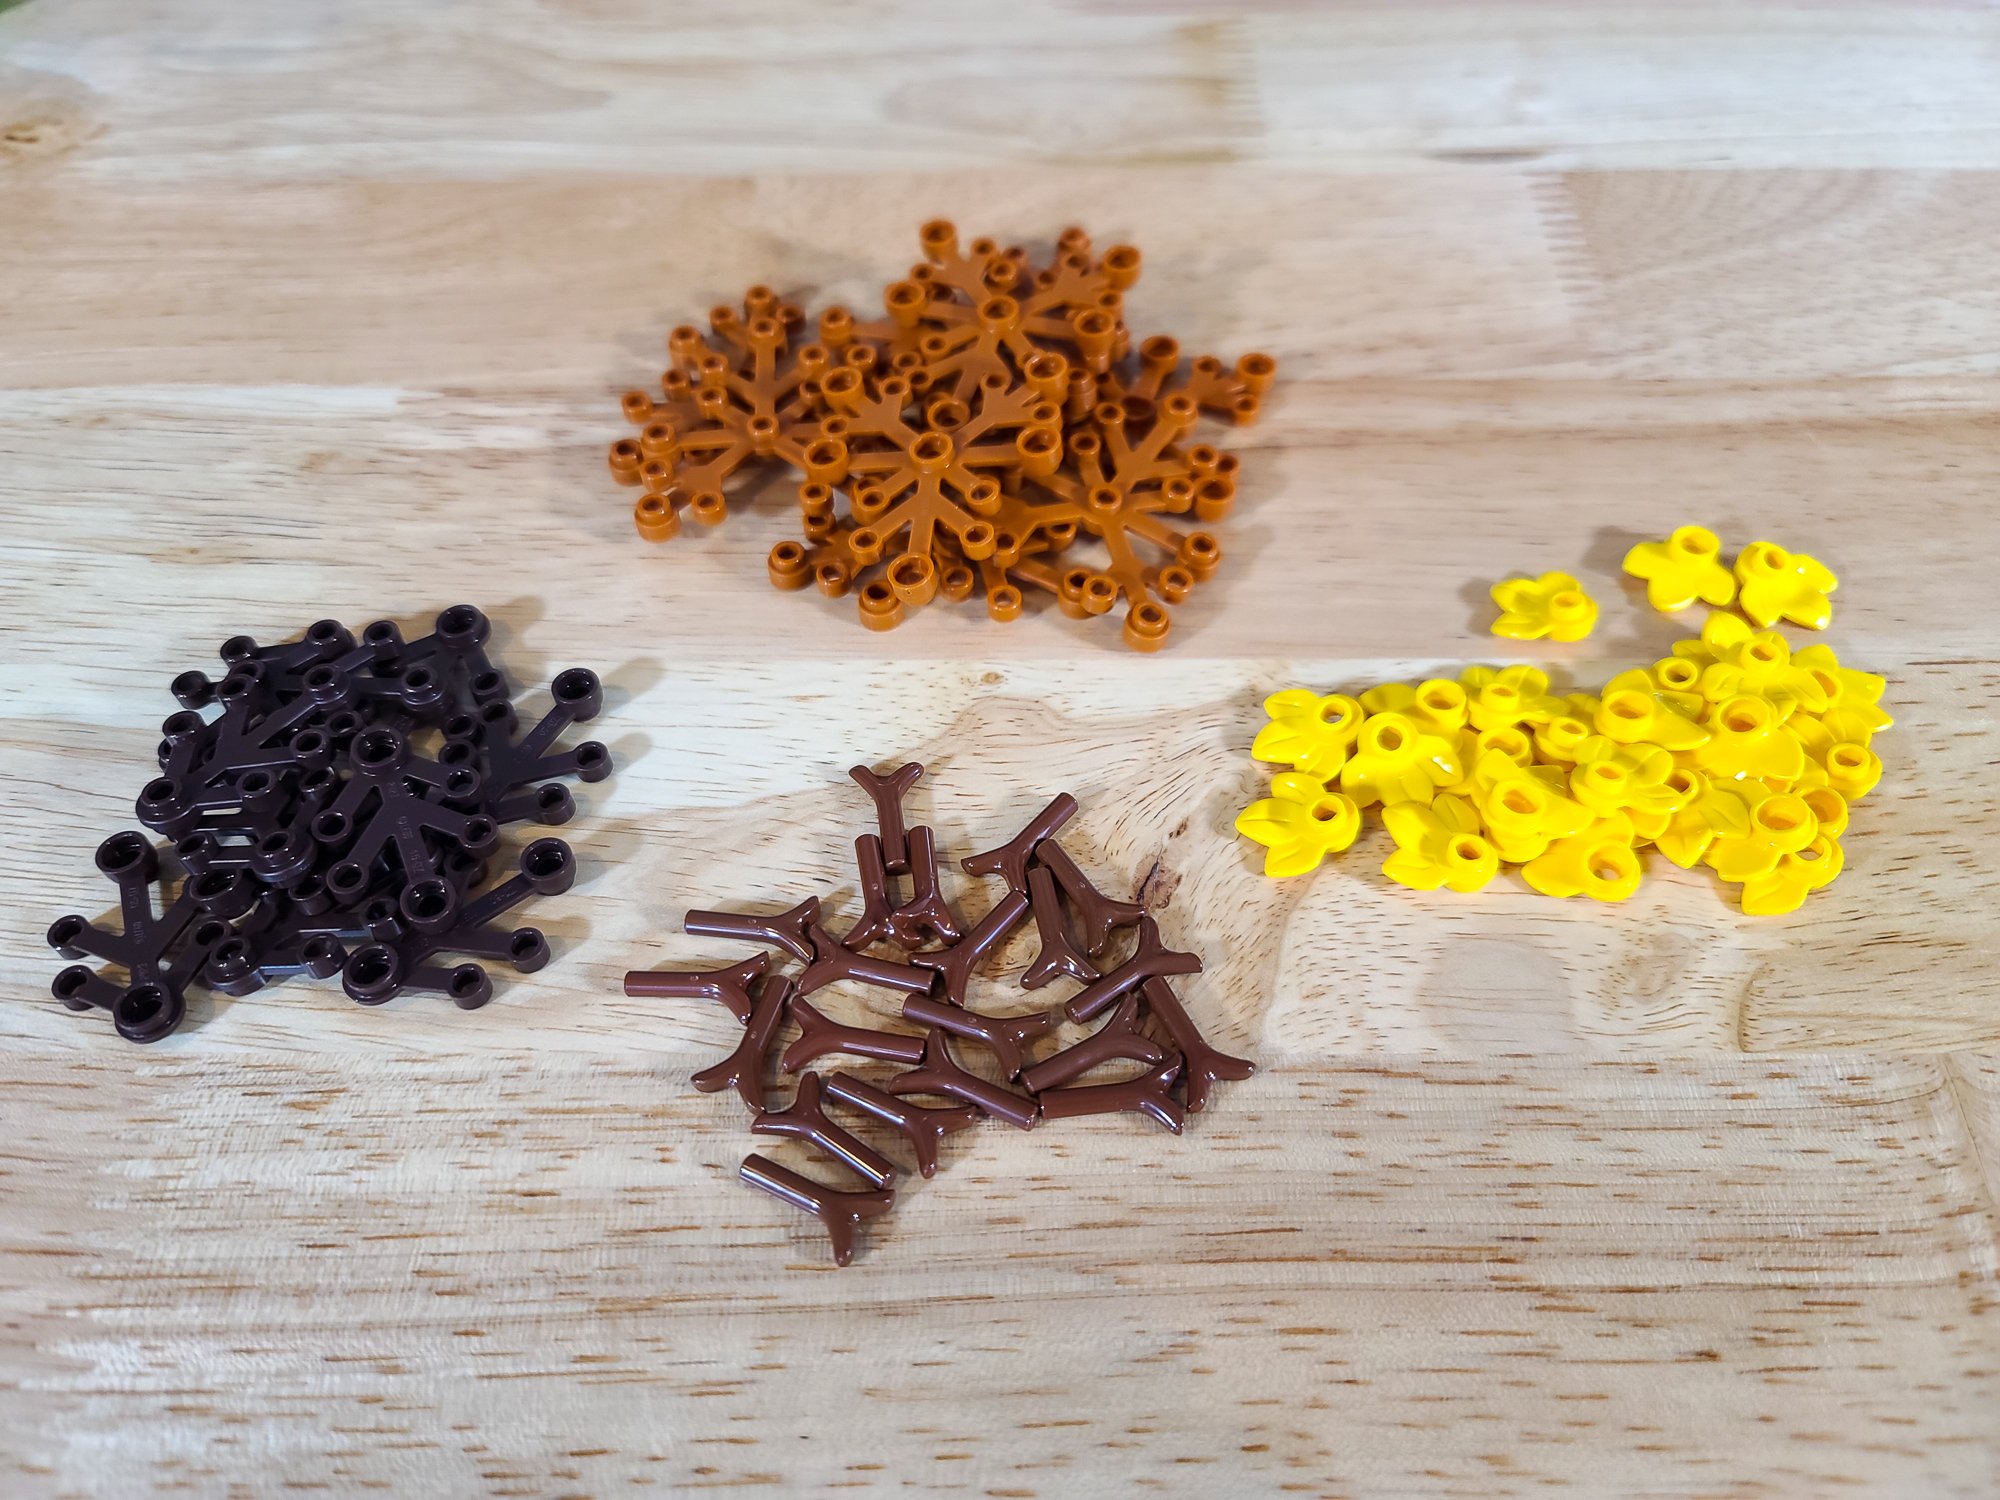
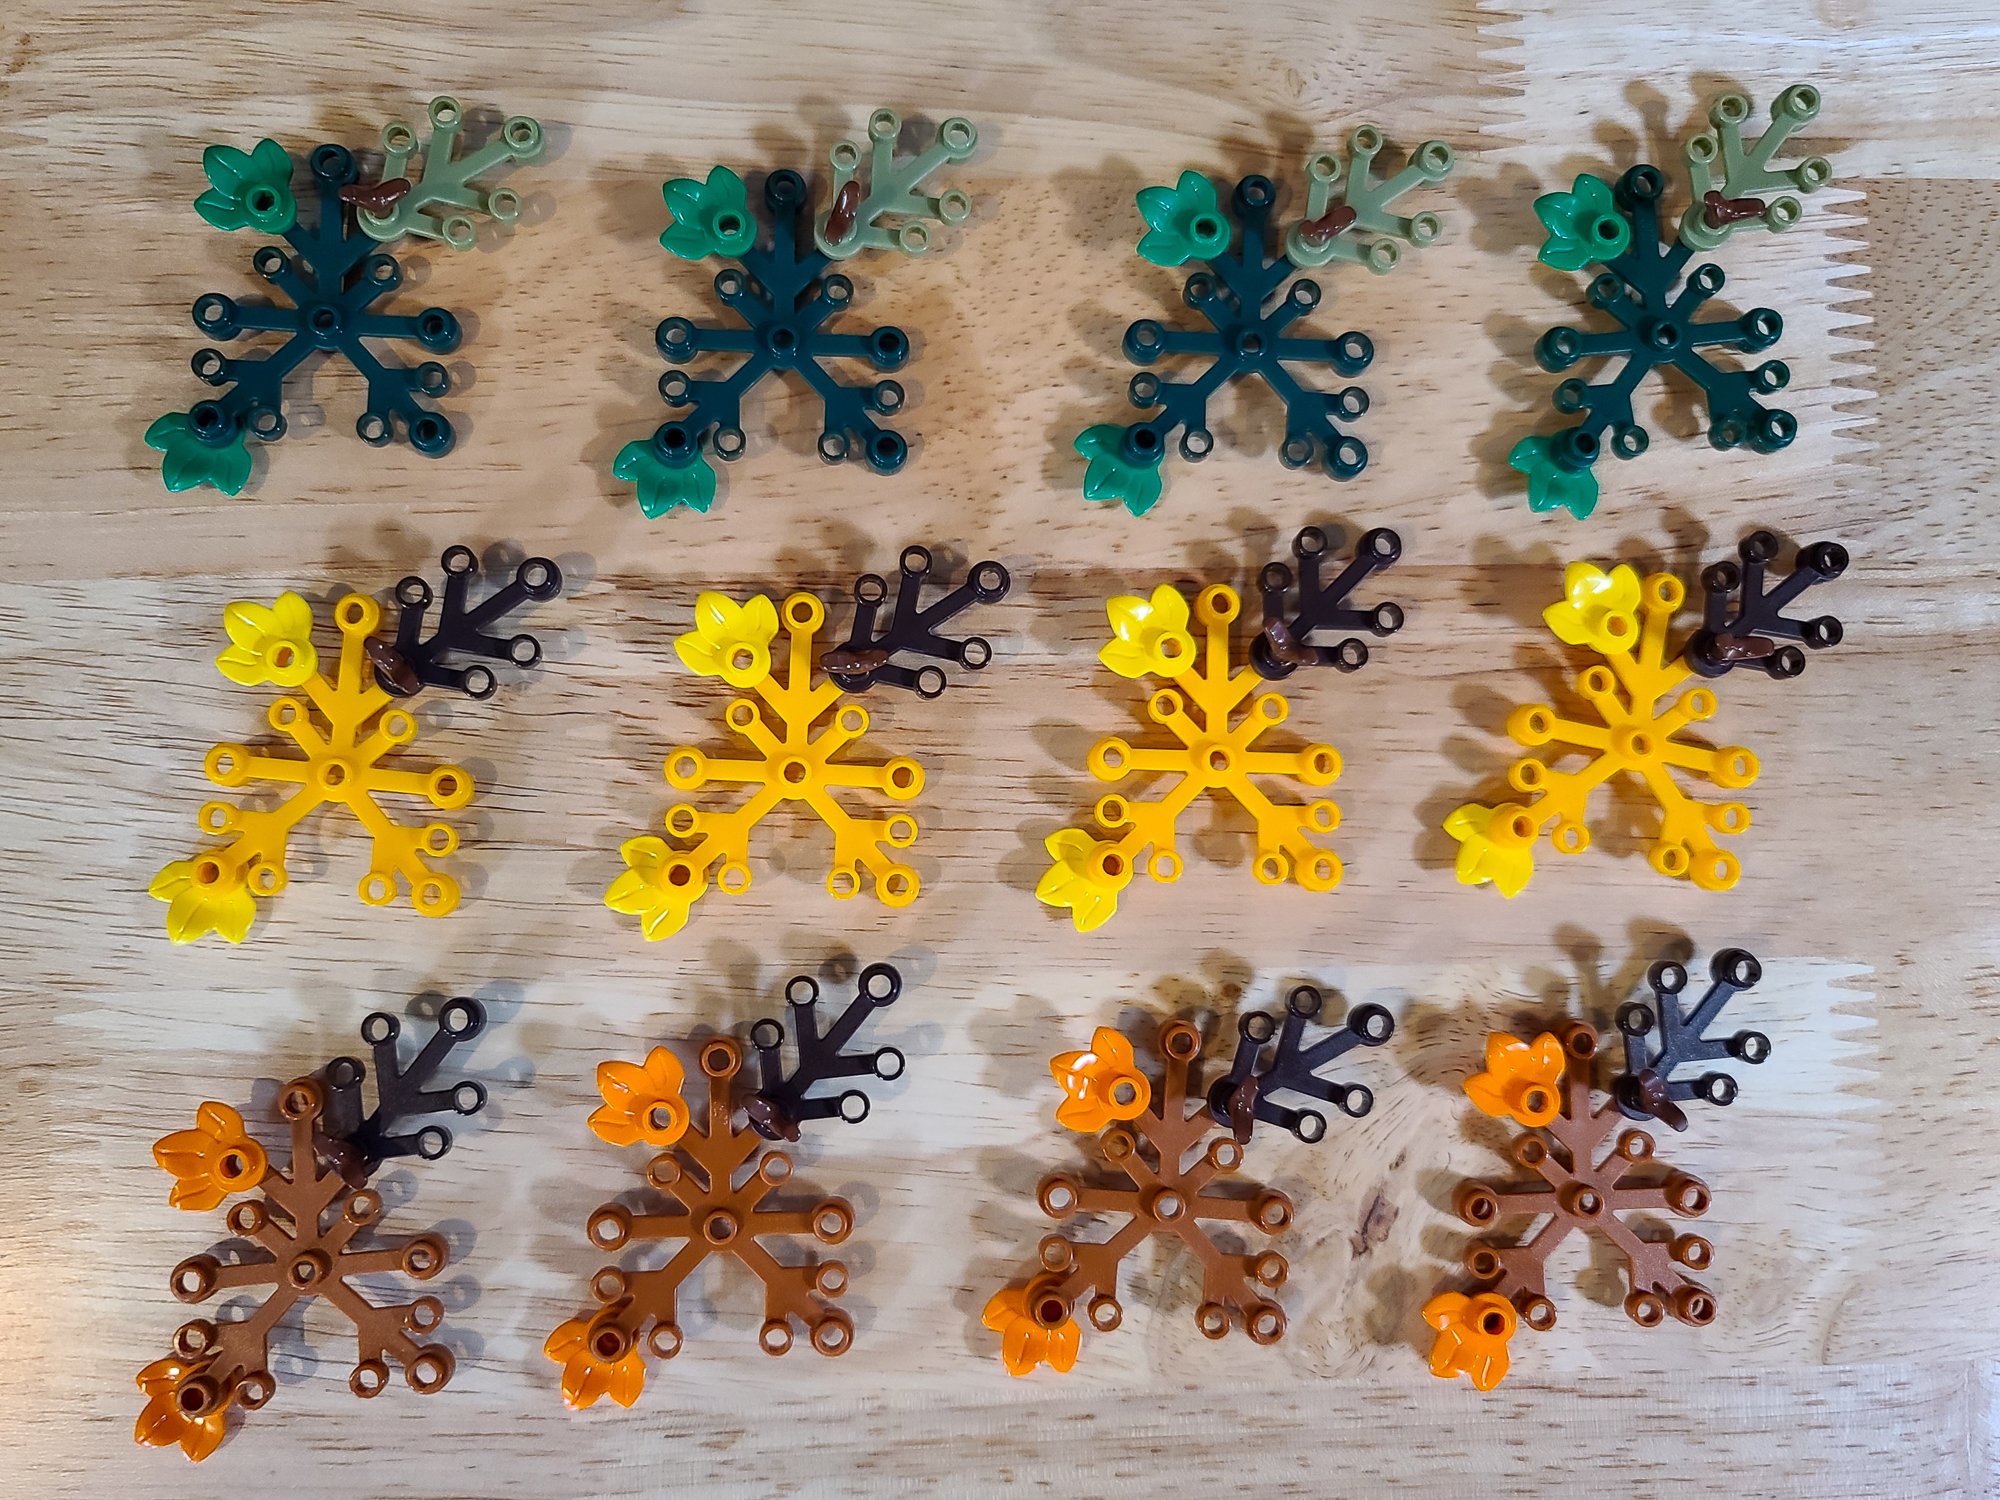
I connected each new section using a twig element to run through the studs on each foliage leaf. I only added four or five more leaf sections to each tree with some purposeful angling and positioning, but as you can see below, the difference is stunning! You can no longer see the skeletal frames, and the trees feel lush and more natural. If I could only recommend one modification of this set, it would be to enhance the trees.

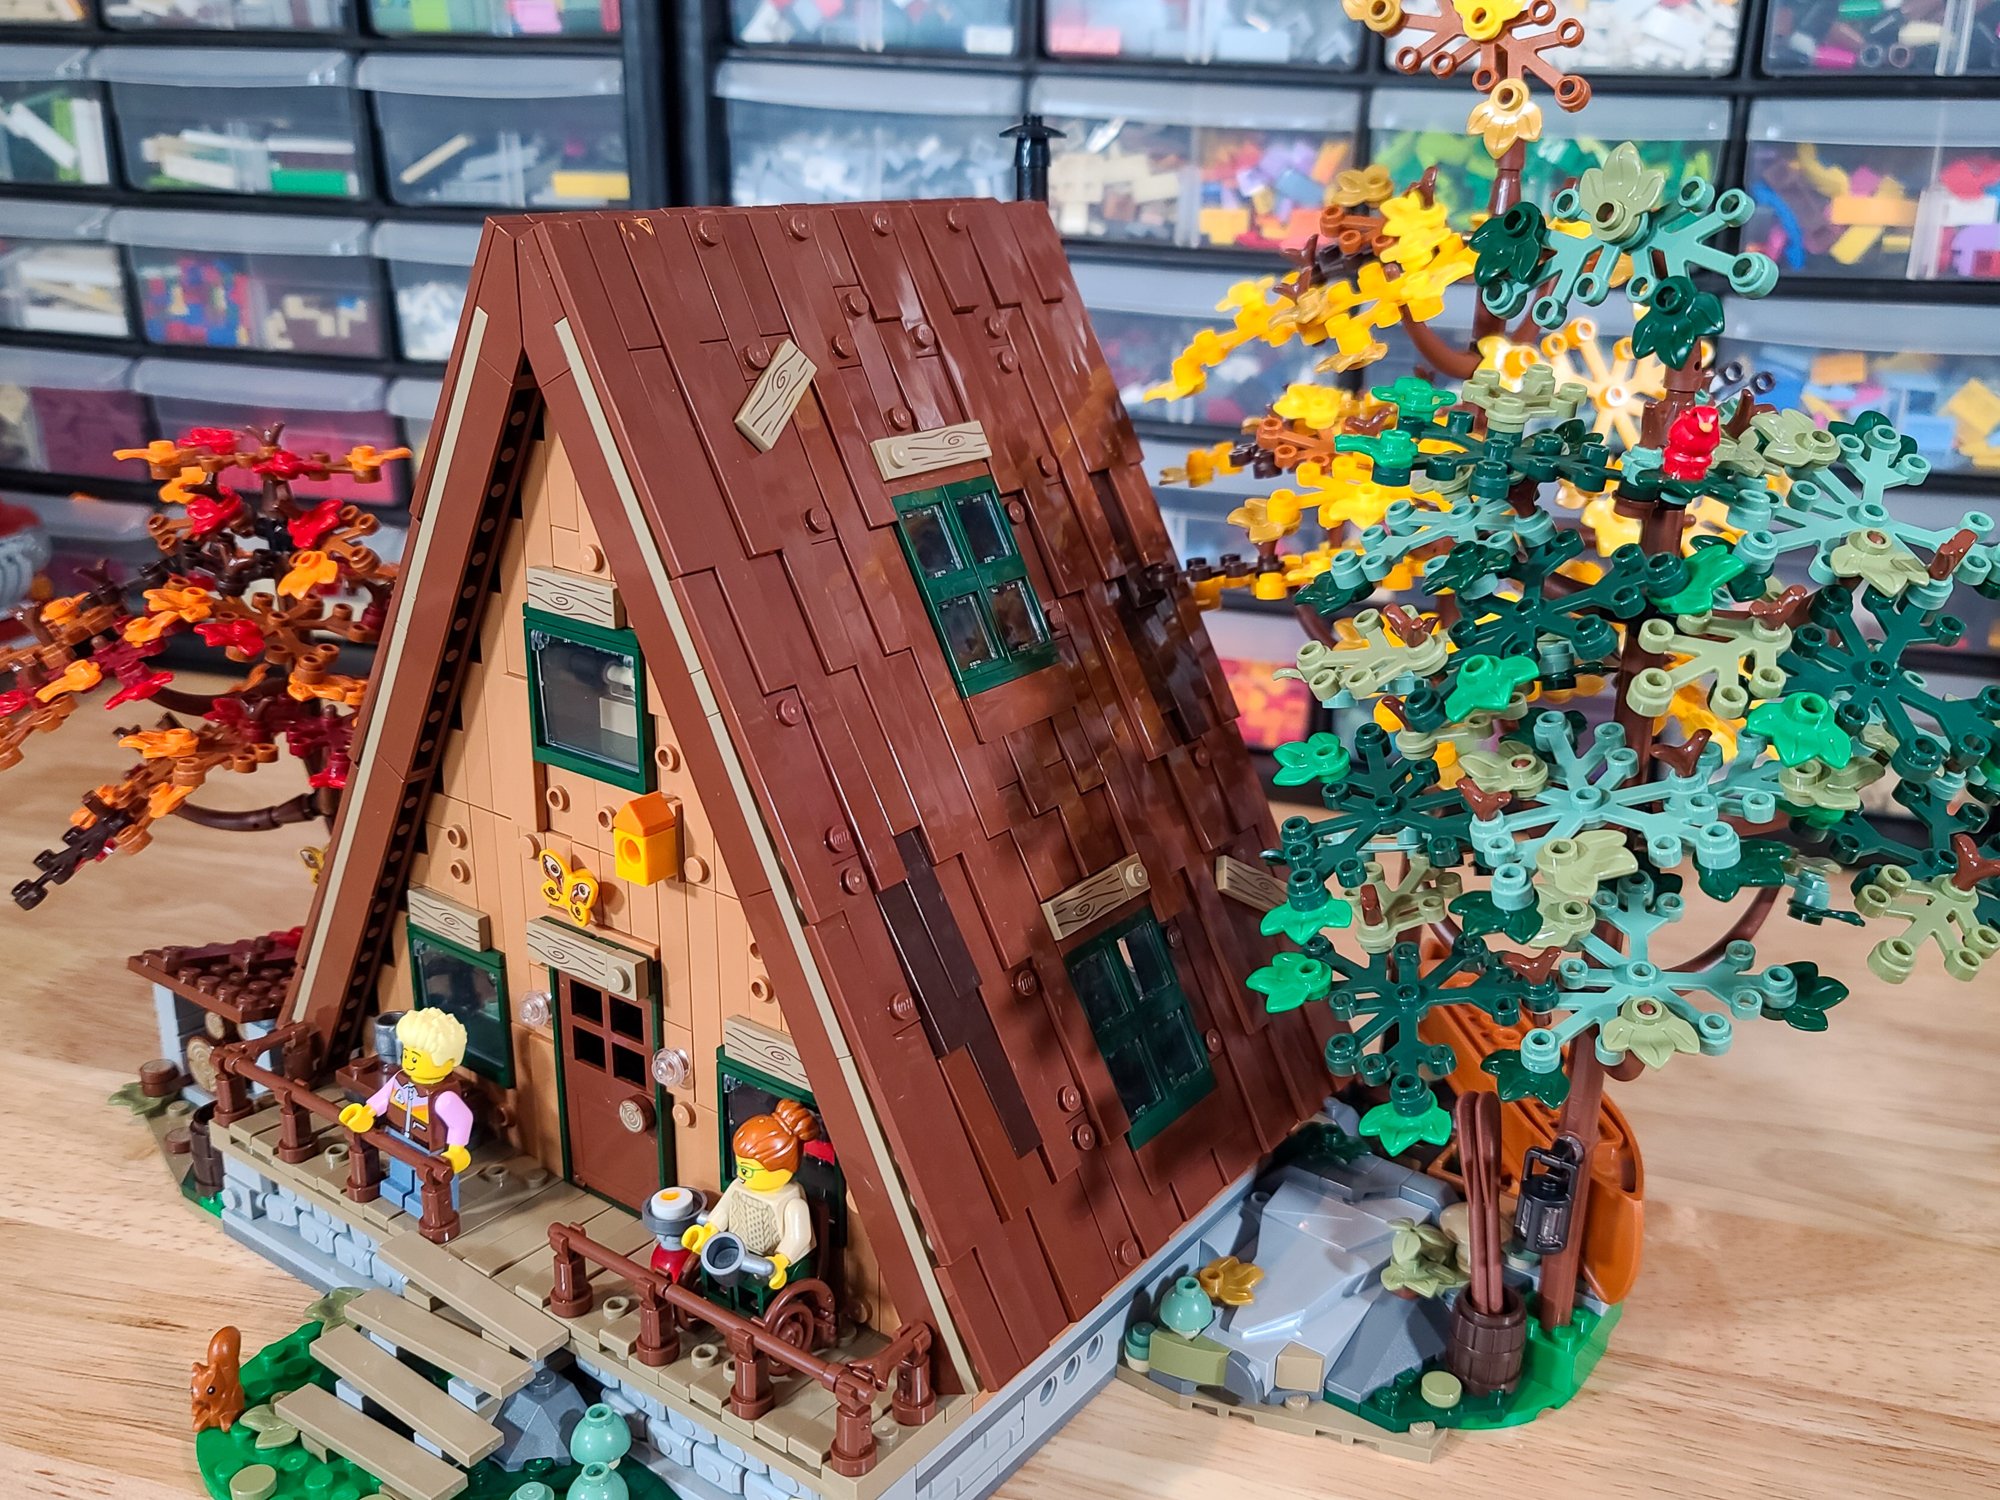
Next up was the roof. I selected two areas on each panel and replaced several brown 1x8 tiles with some dark brown tiles I had available instead. I also added a few more printed wood tile planks to represent hasty patch jobs on the roof—a feature also in the original MOC that was submitted to LEGO ideas. I tried out more color variations with tan, dark tan, dark orange, dark green, dark grey, and nougat tiles, but too many colors started to make the roof look thatched rather than wooden and the singular patches of dark brown really enhanced the look the most in my opinion.
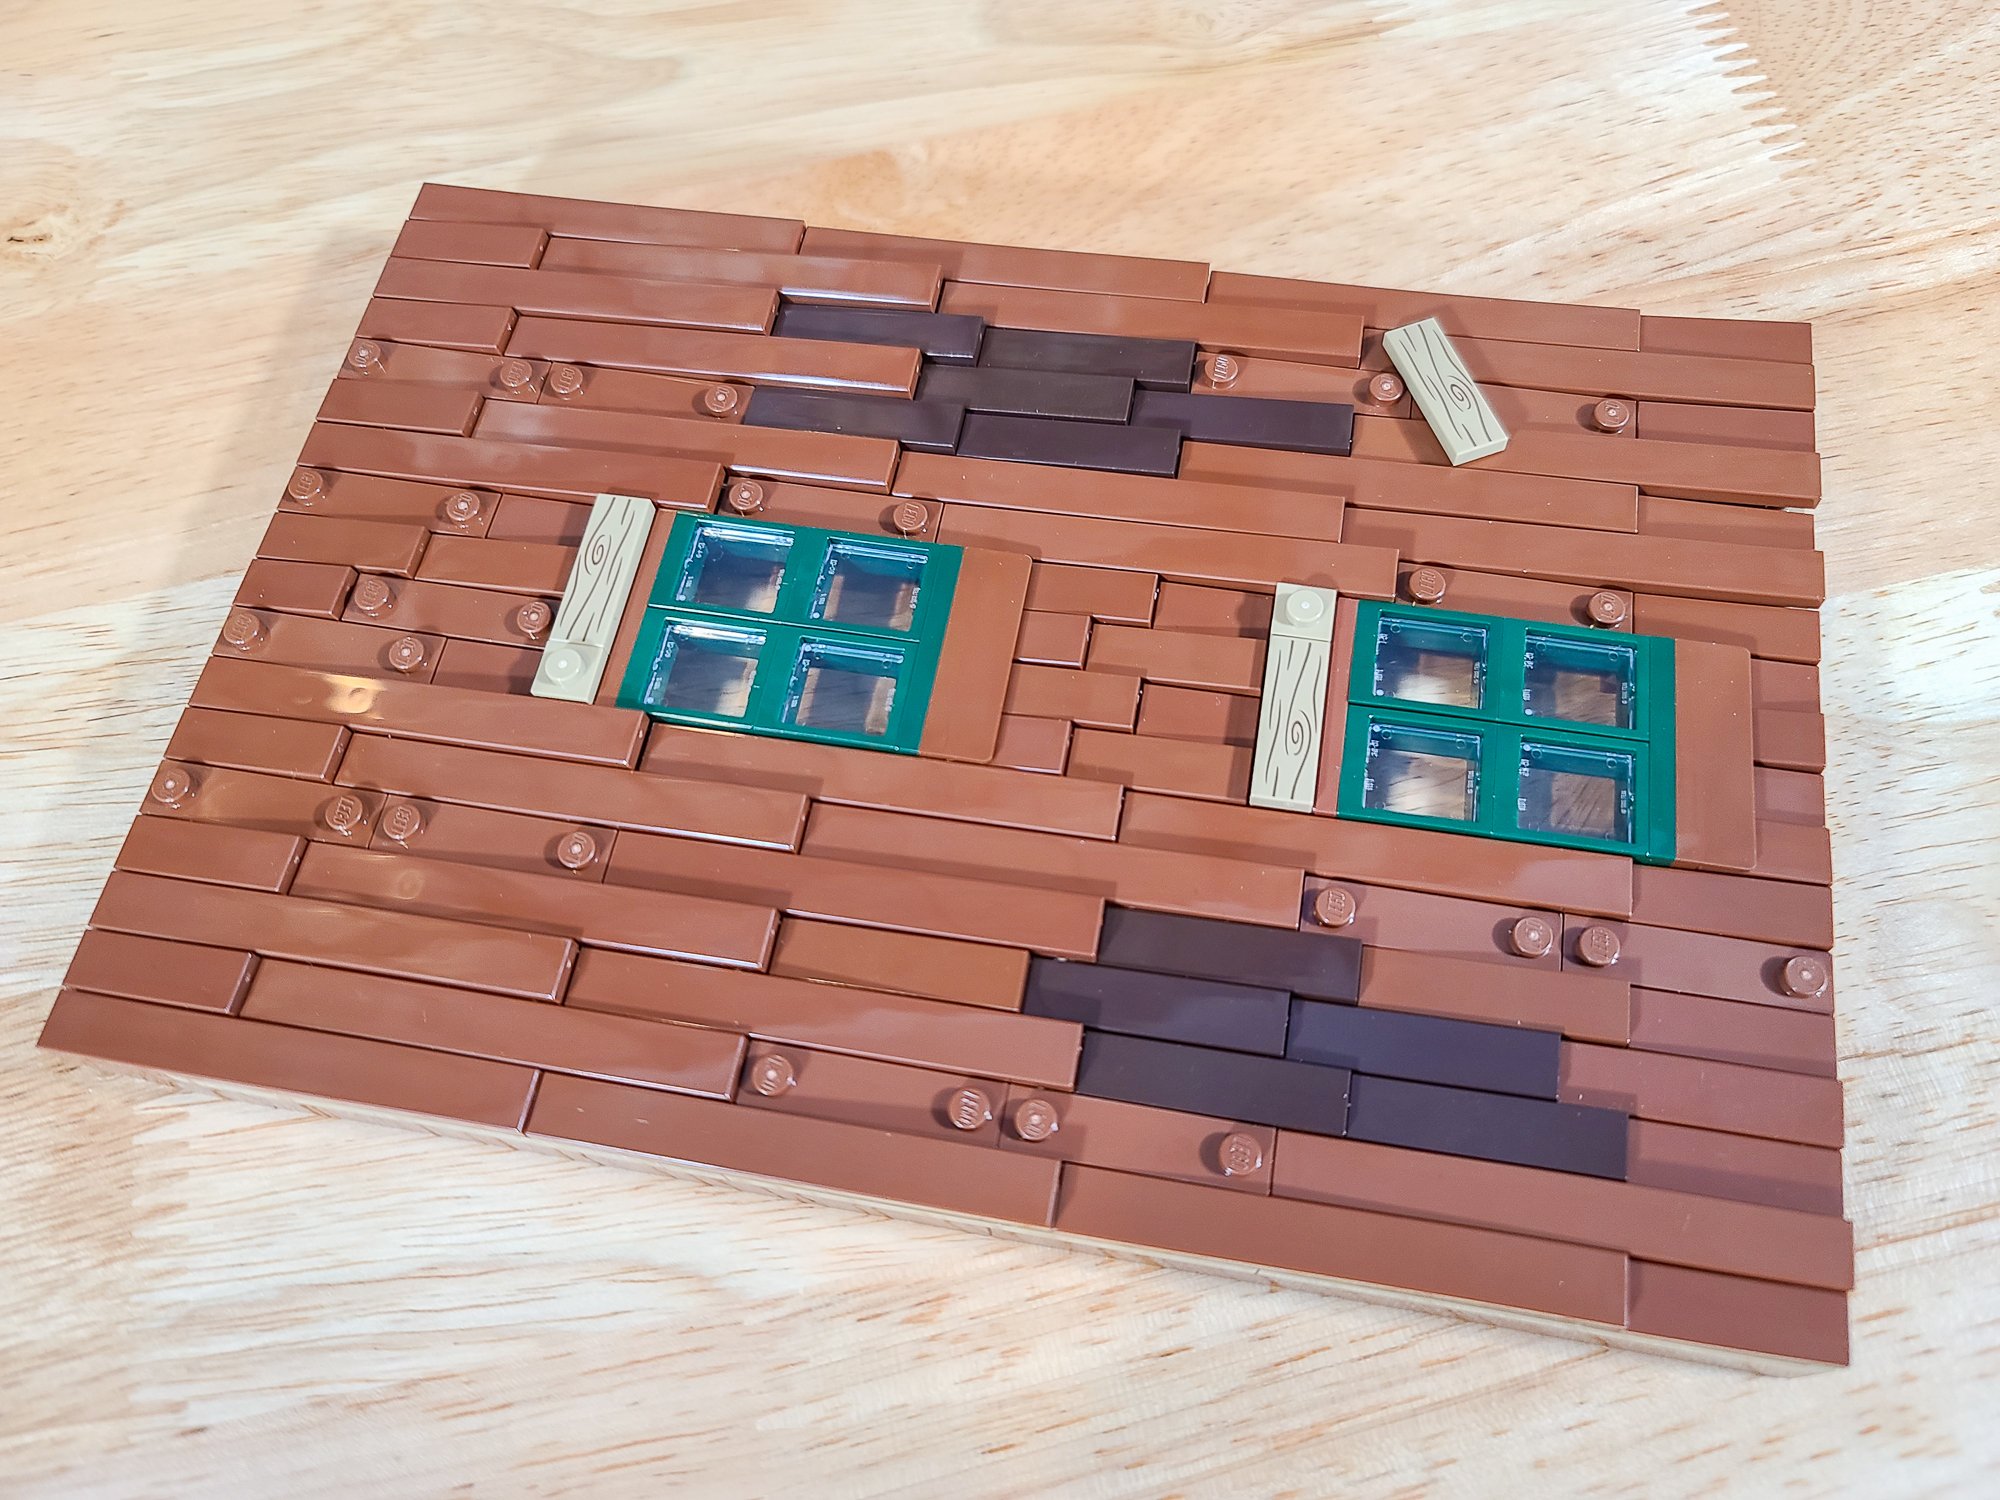
What you see below is perhaps the best expression of the LEGO Ideas A-Frame Cabin without altering it past the point of recognition. The modifications adding texture, more foliage, and a bit more weathering take this set from a 10 to an 11. If I didn’t explore any further mods, this would be the point where I would be immensely satisfied with this build and display the set with pride in my collection.

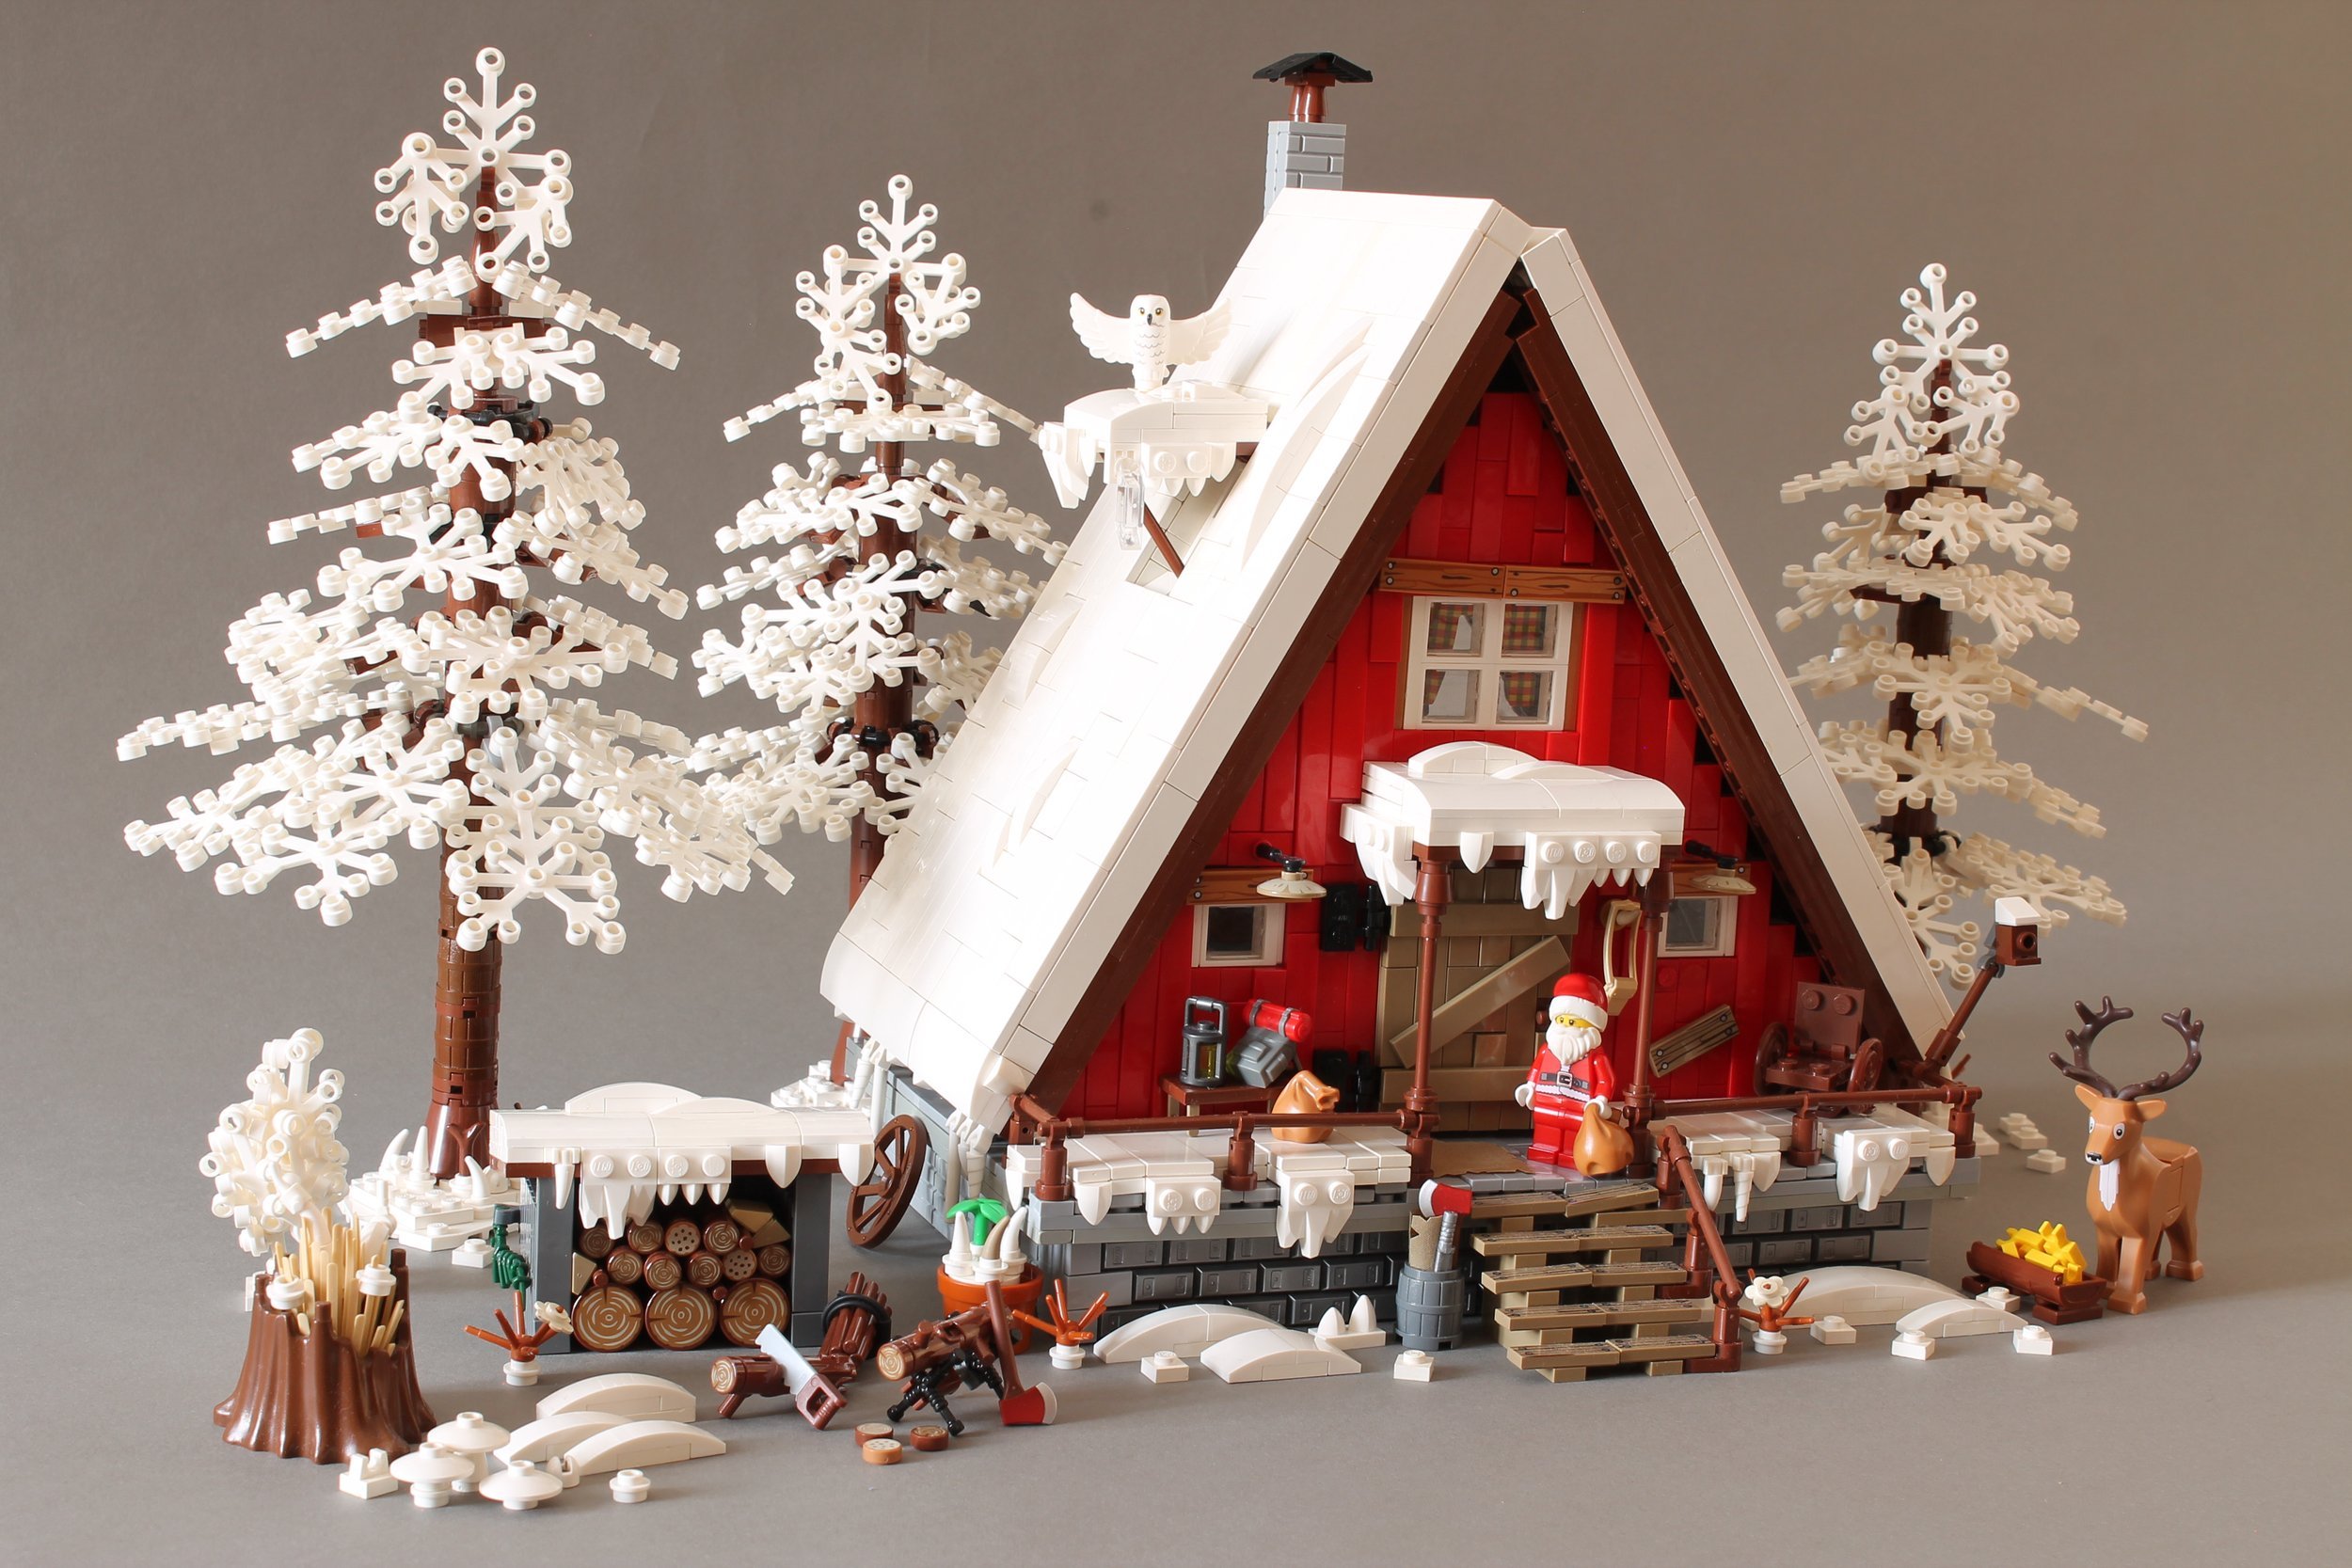
Winterizing the Cabin
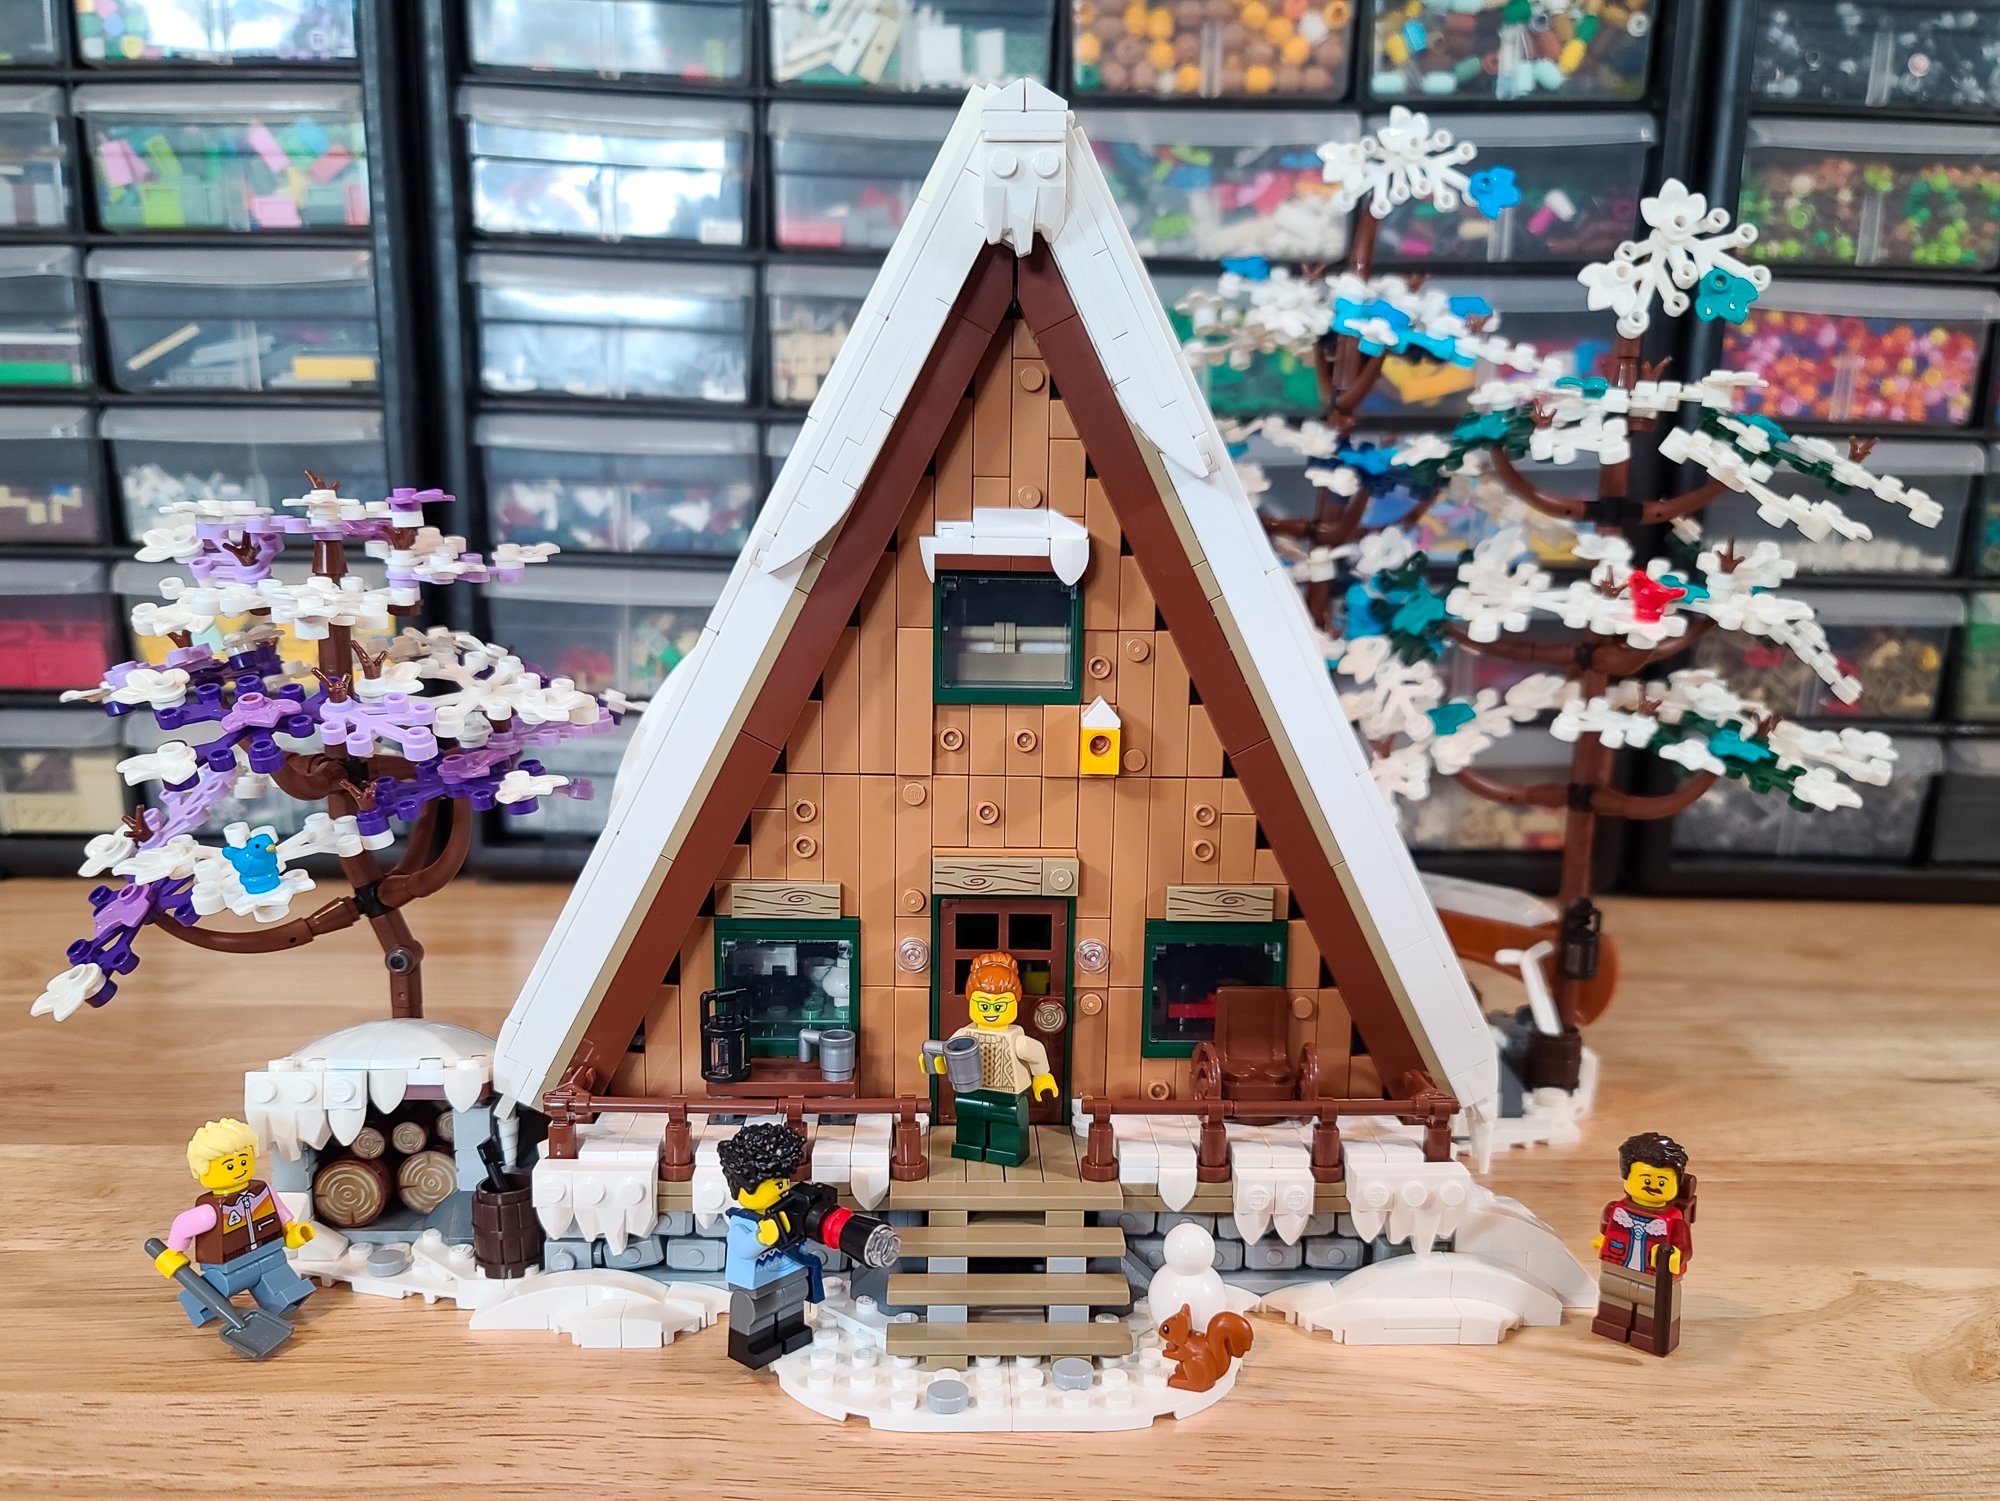
But I really wanted a wintery cabin, so I let it snow! I suspect many fans of the LEGO Winter Village line see this set as having a lot of winterizing potential, so I wanted to see what was possible, inspired by the many mods already built by Andrea who modded his original submission several times.
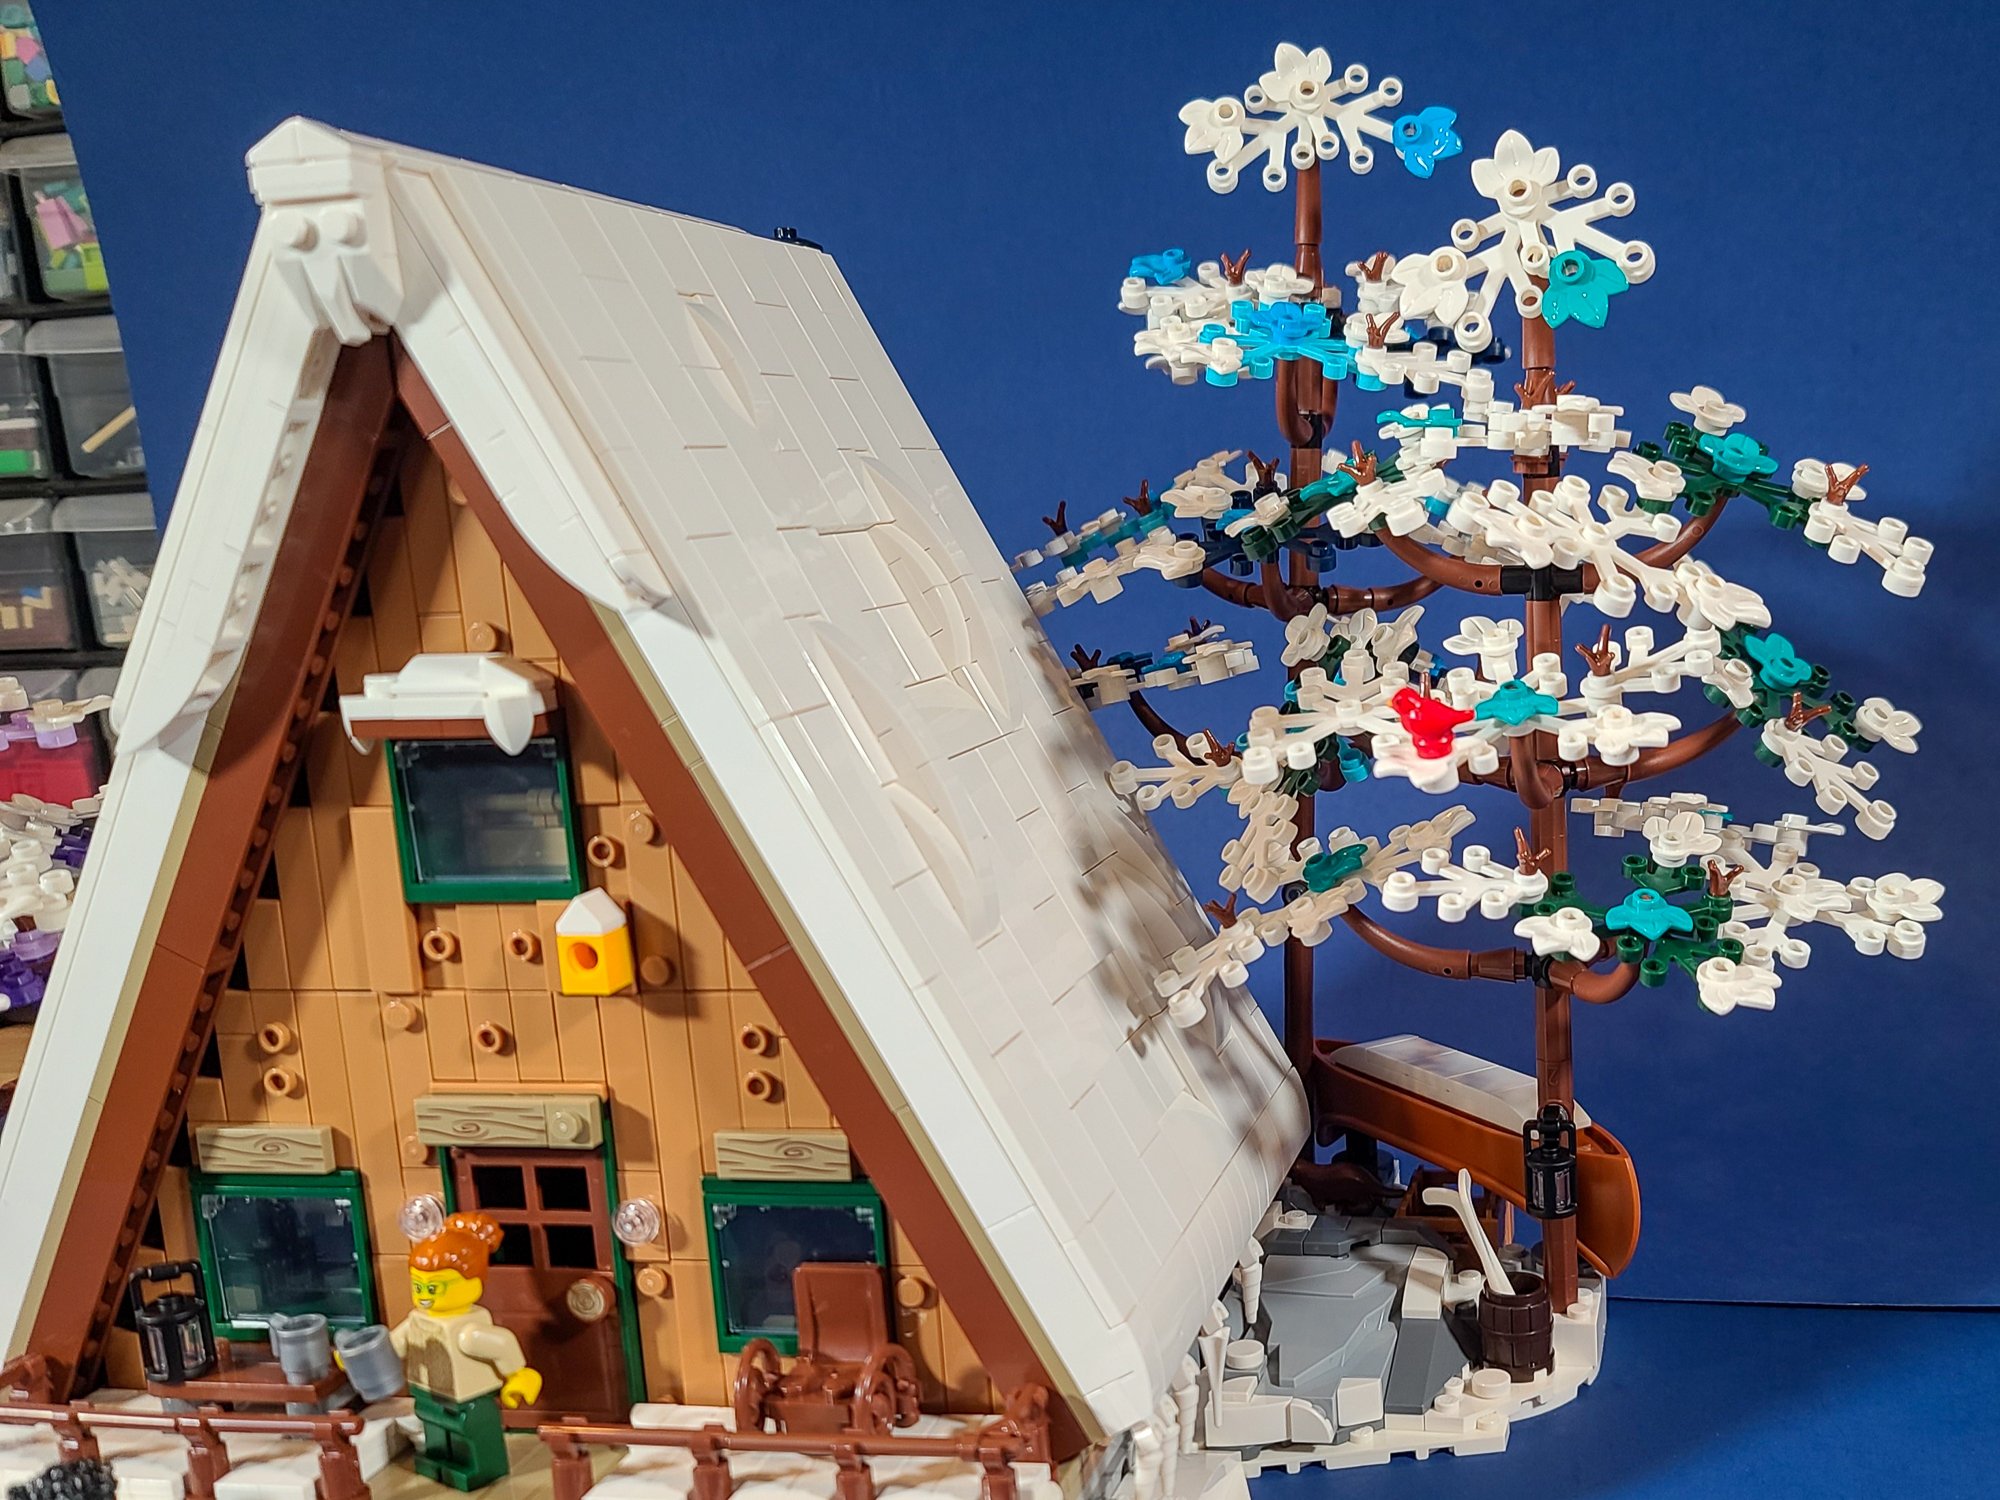
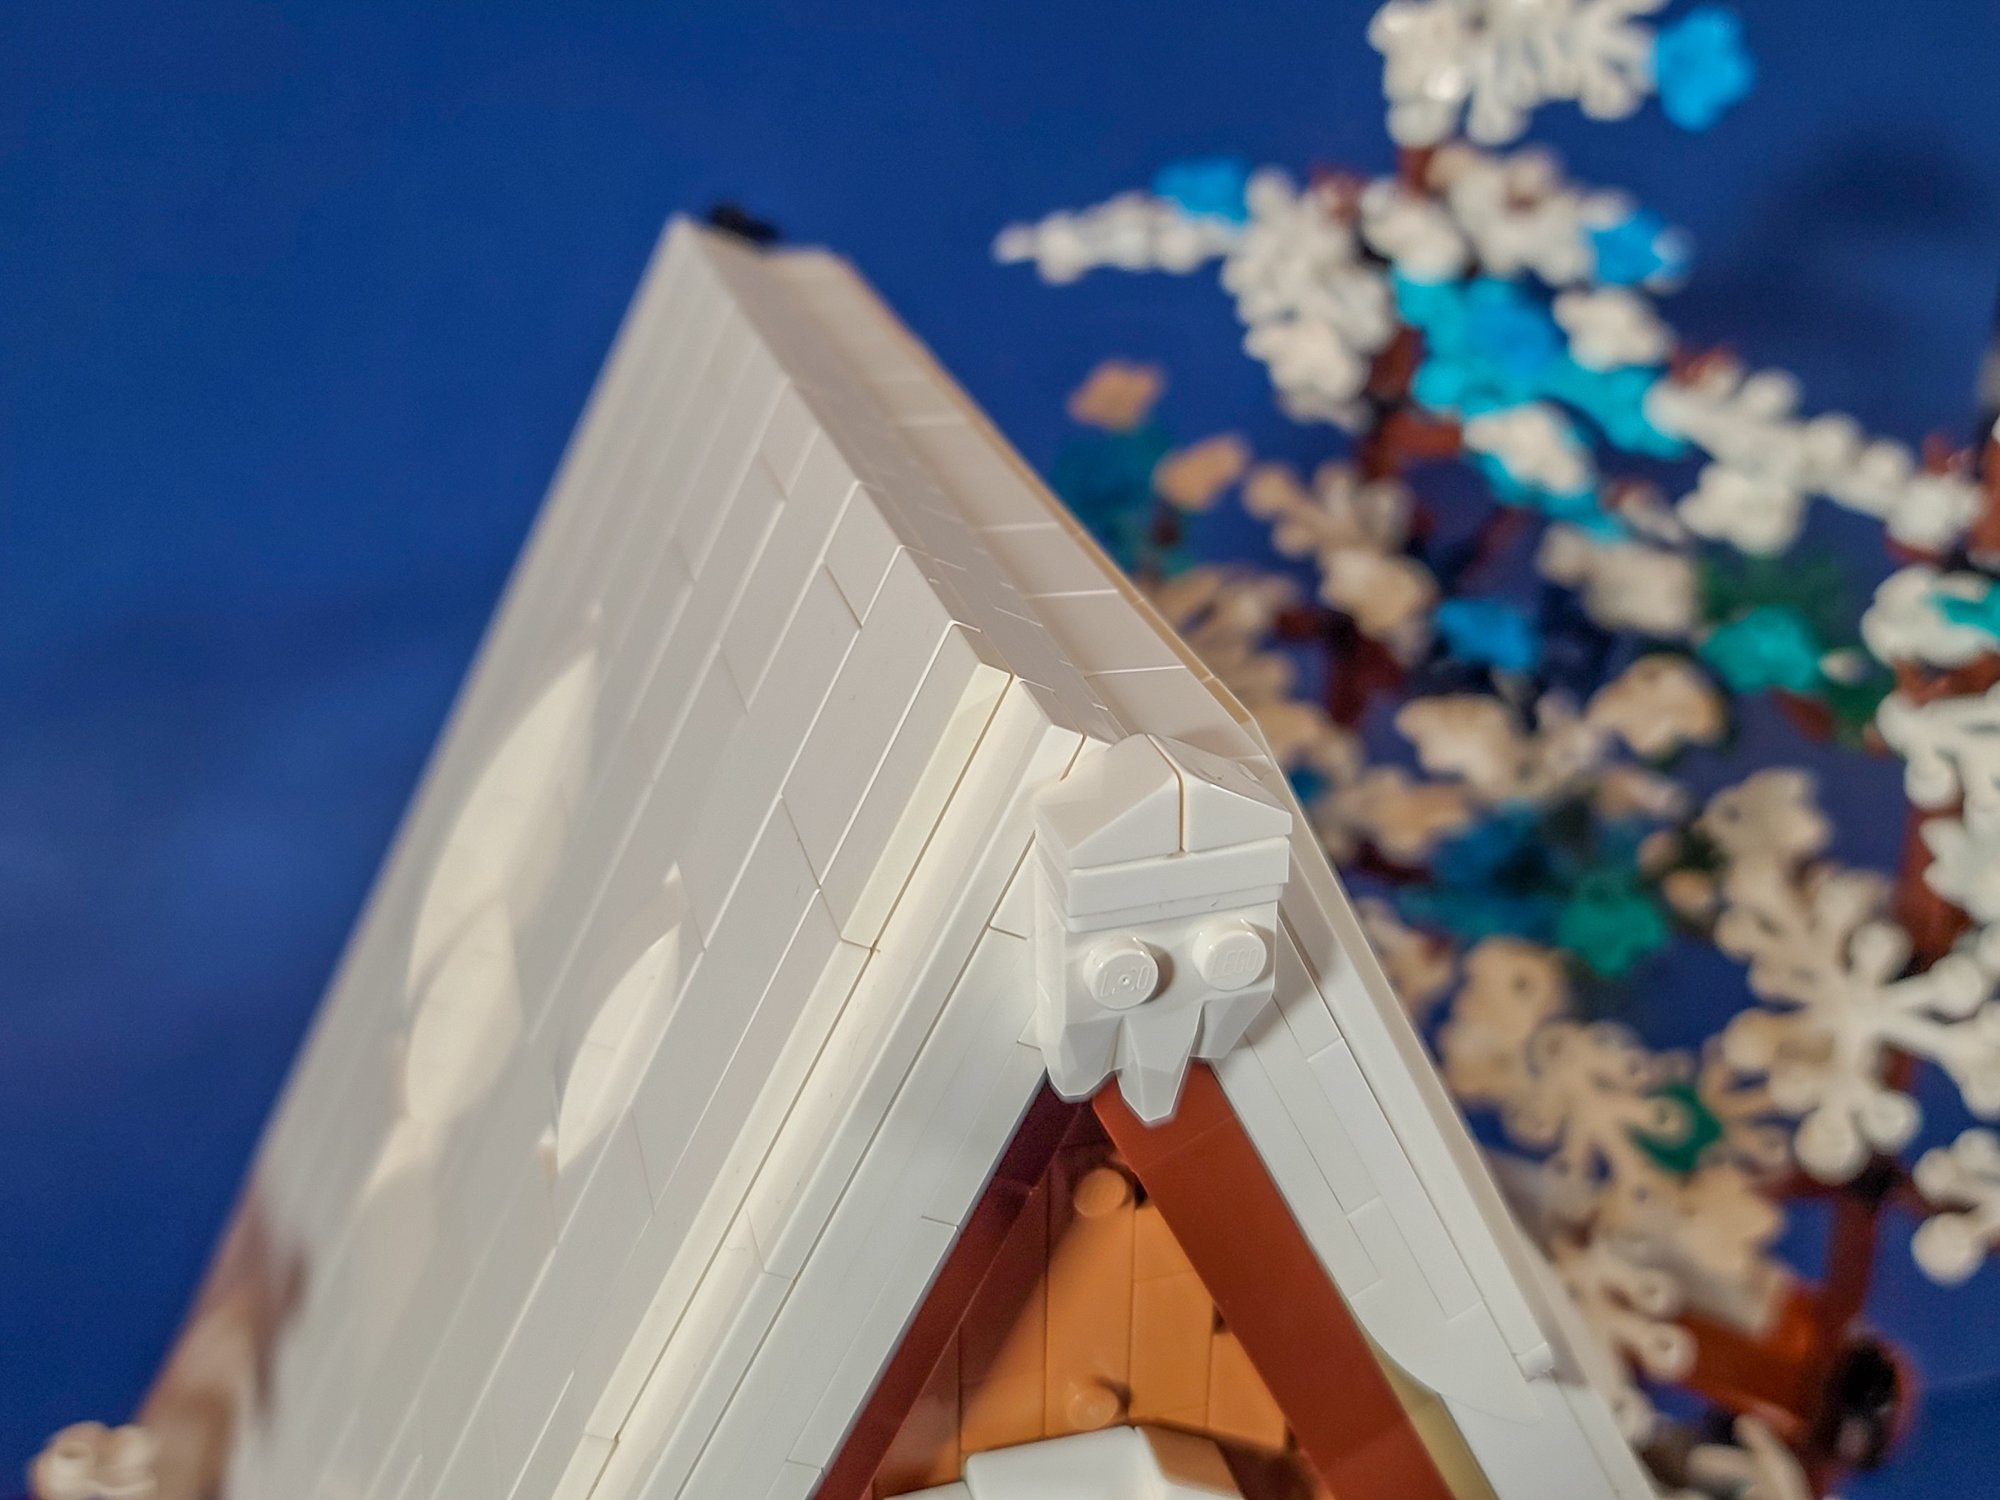
After taking off all the roof tiles I had worked so hard on, I built up a layer of white brick to represent snow, using curved slopes to show some of the variations in depth. I also tried to show where the windows would be by making the snow thinner in those areas. I also copied Andrea’s technique of adding horizontal white clips and attaching unicorn horns to them, then angling them down like icicles. I was a little worried that the added weight on the roof might make them sag because they are only held in place by resting on a few cheese slopes, so I was pleasantly surprised when they held firm.

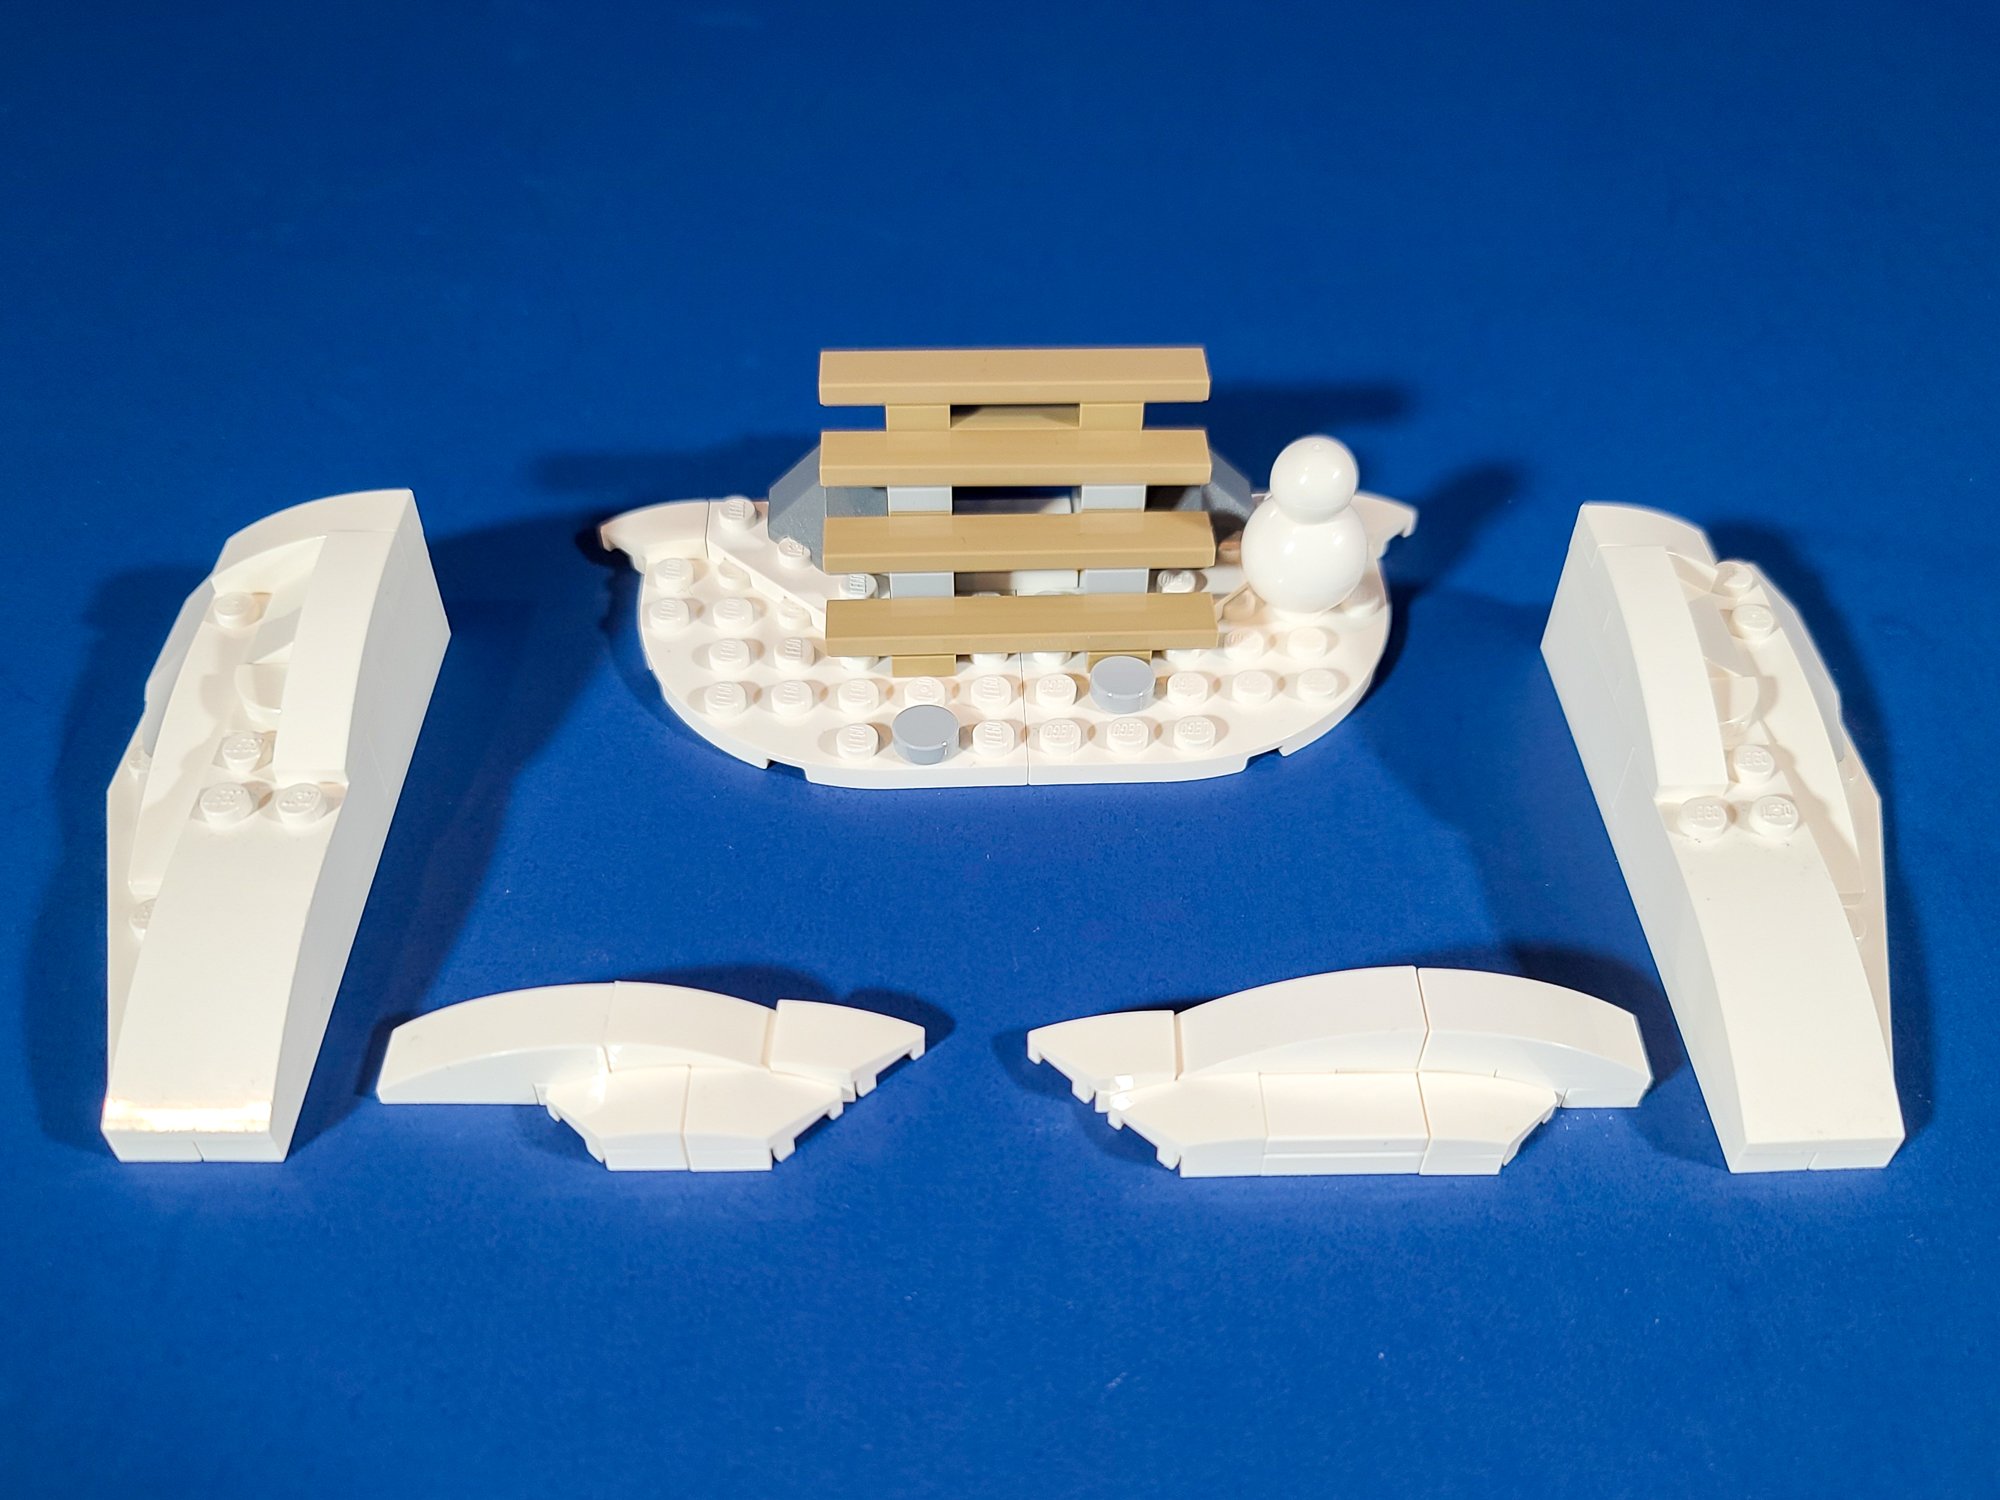
After experimenting with the roofline to hide any gaps, I also built a small overhang on the top window to add a bit more variety in snow accumulation. To wrap up the main section, I also created a few modular snowbanks that could be placed anywhere along the sides of the cabin to represent the piles of snow sliding off the sides of the roof.
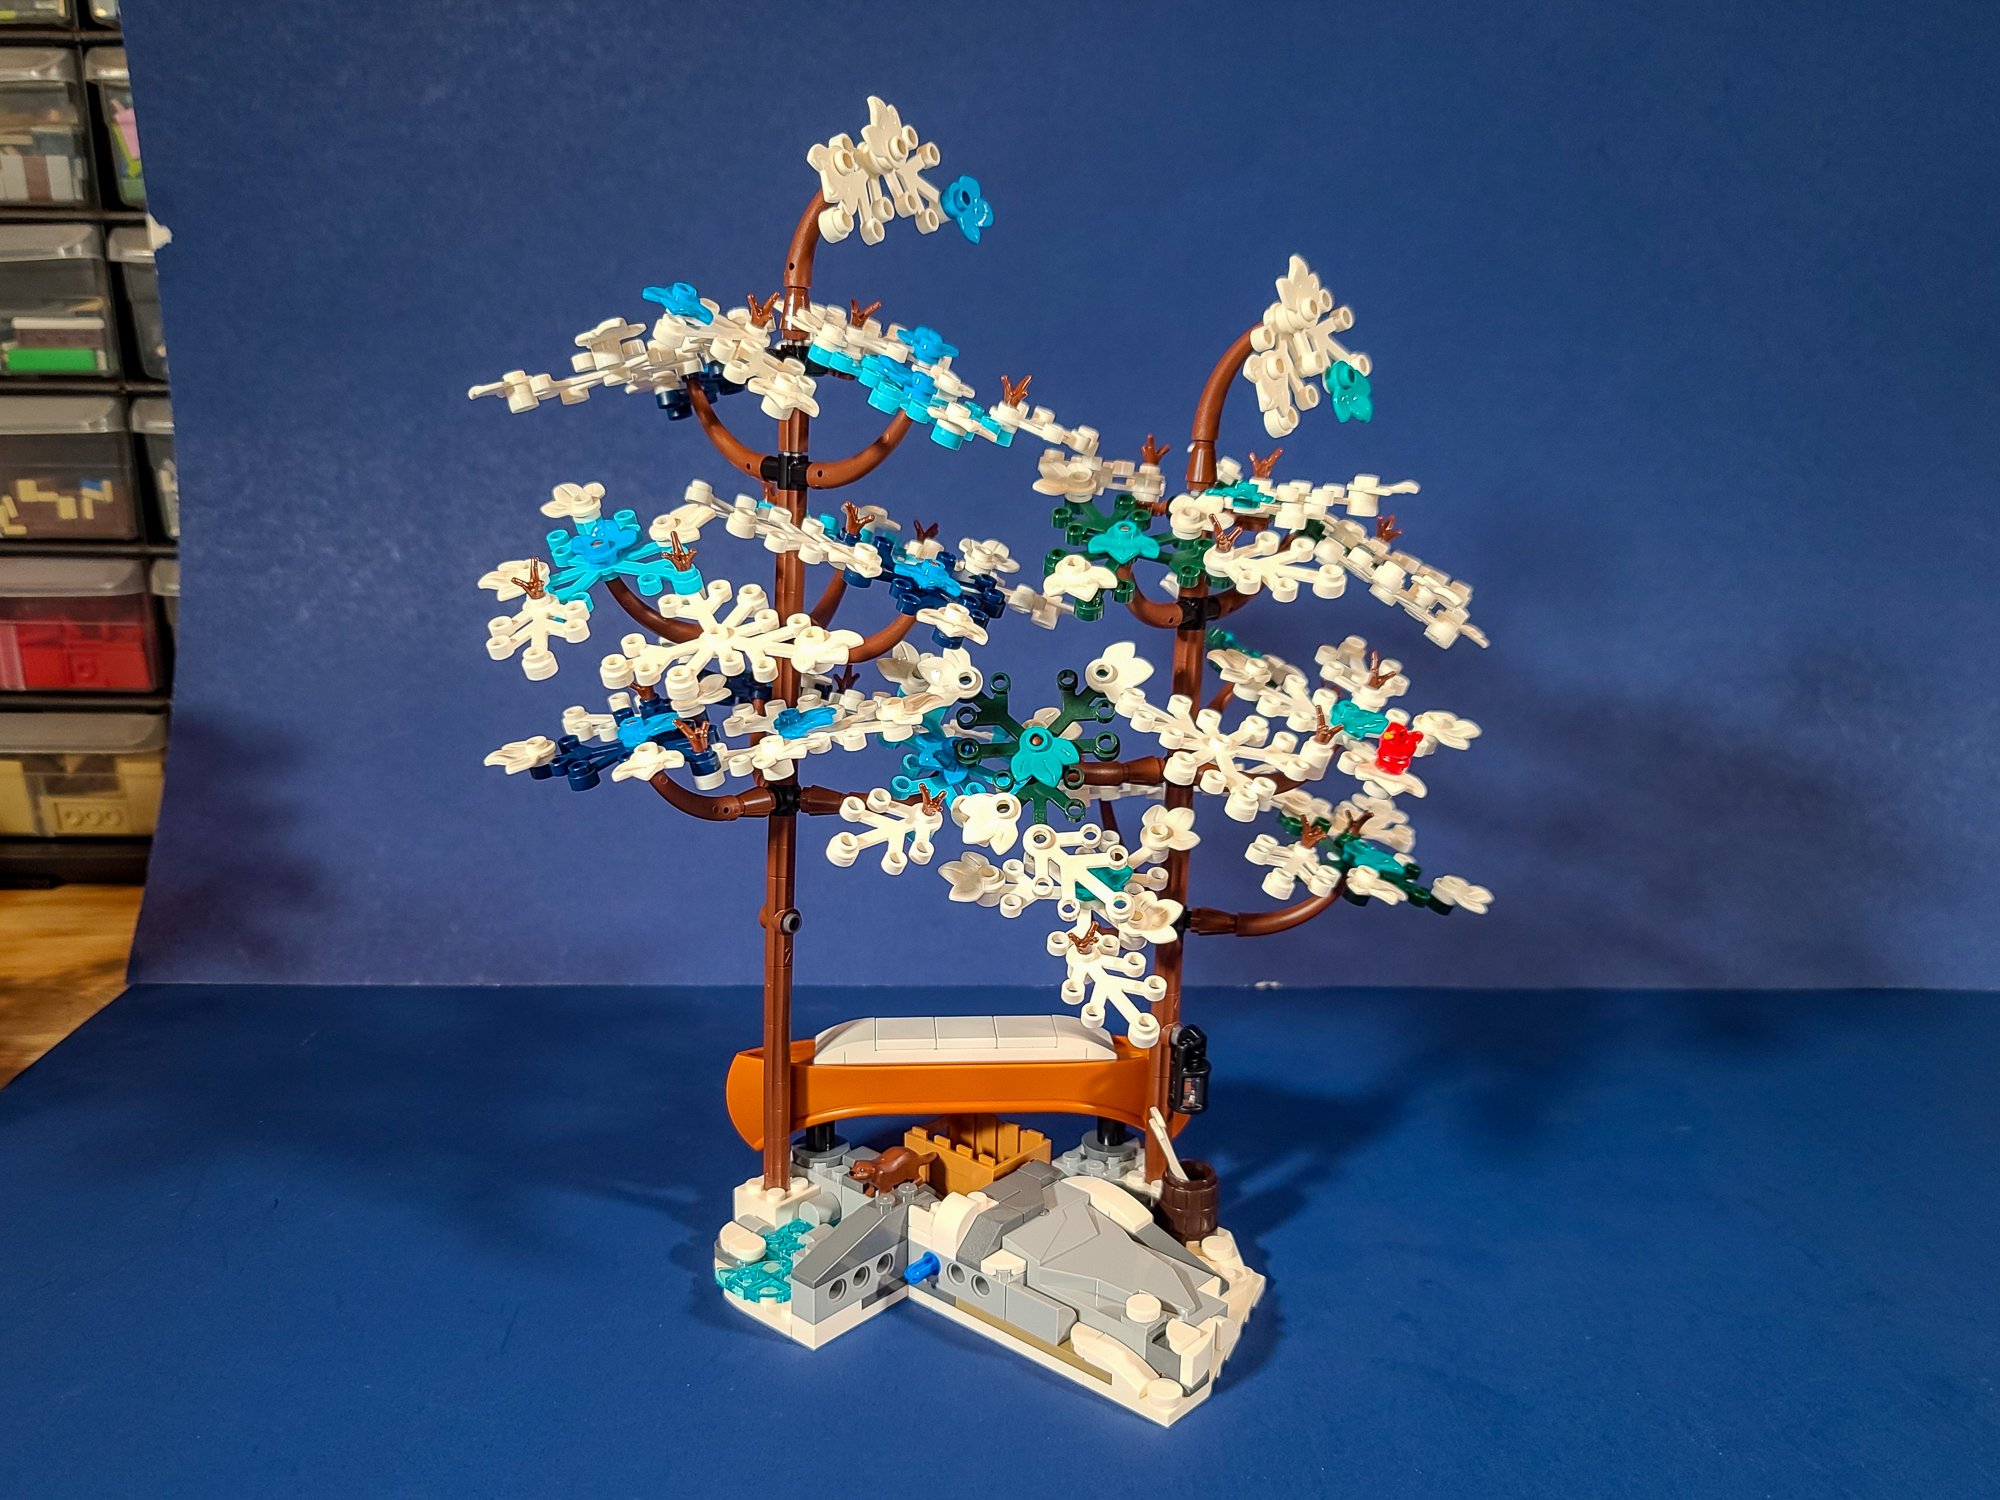
I then turned my attention to the forested side builds. I first color-swapped many of the dark tan and green plates on each base to be white—a feat that took a bit more surgical skill than I expected without having to completely take apart each section and start from scratch. I then build up snow accumulation on the woodshed and upsidedown kayak to add a little more character.
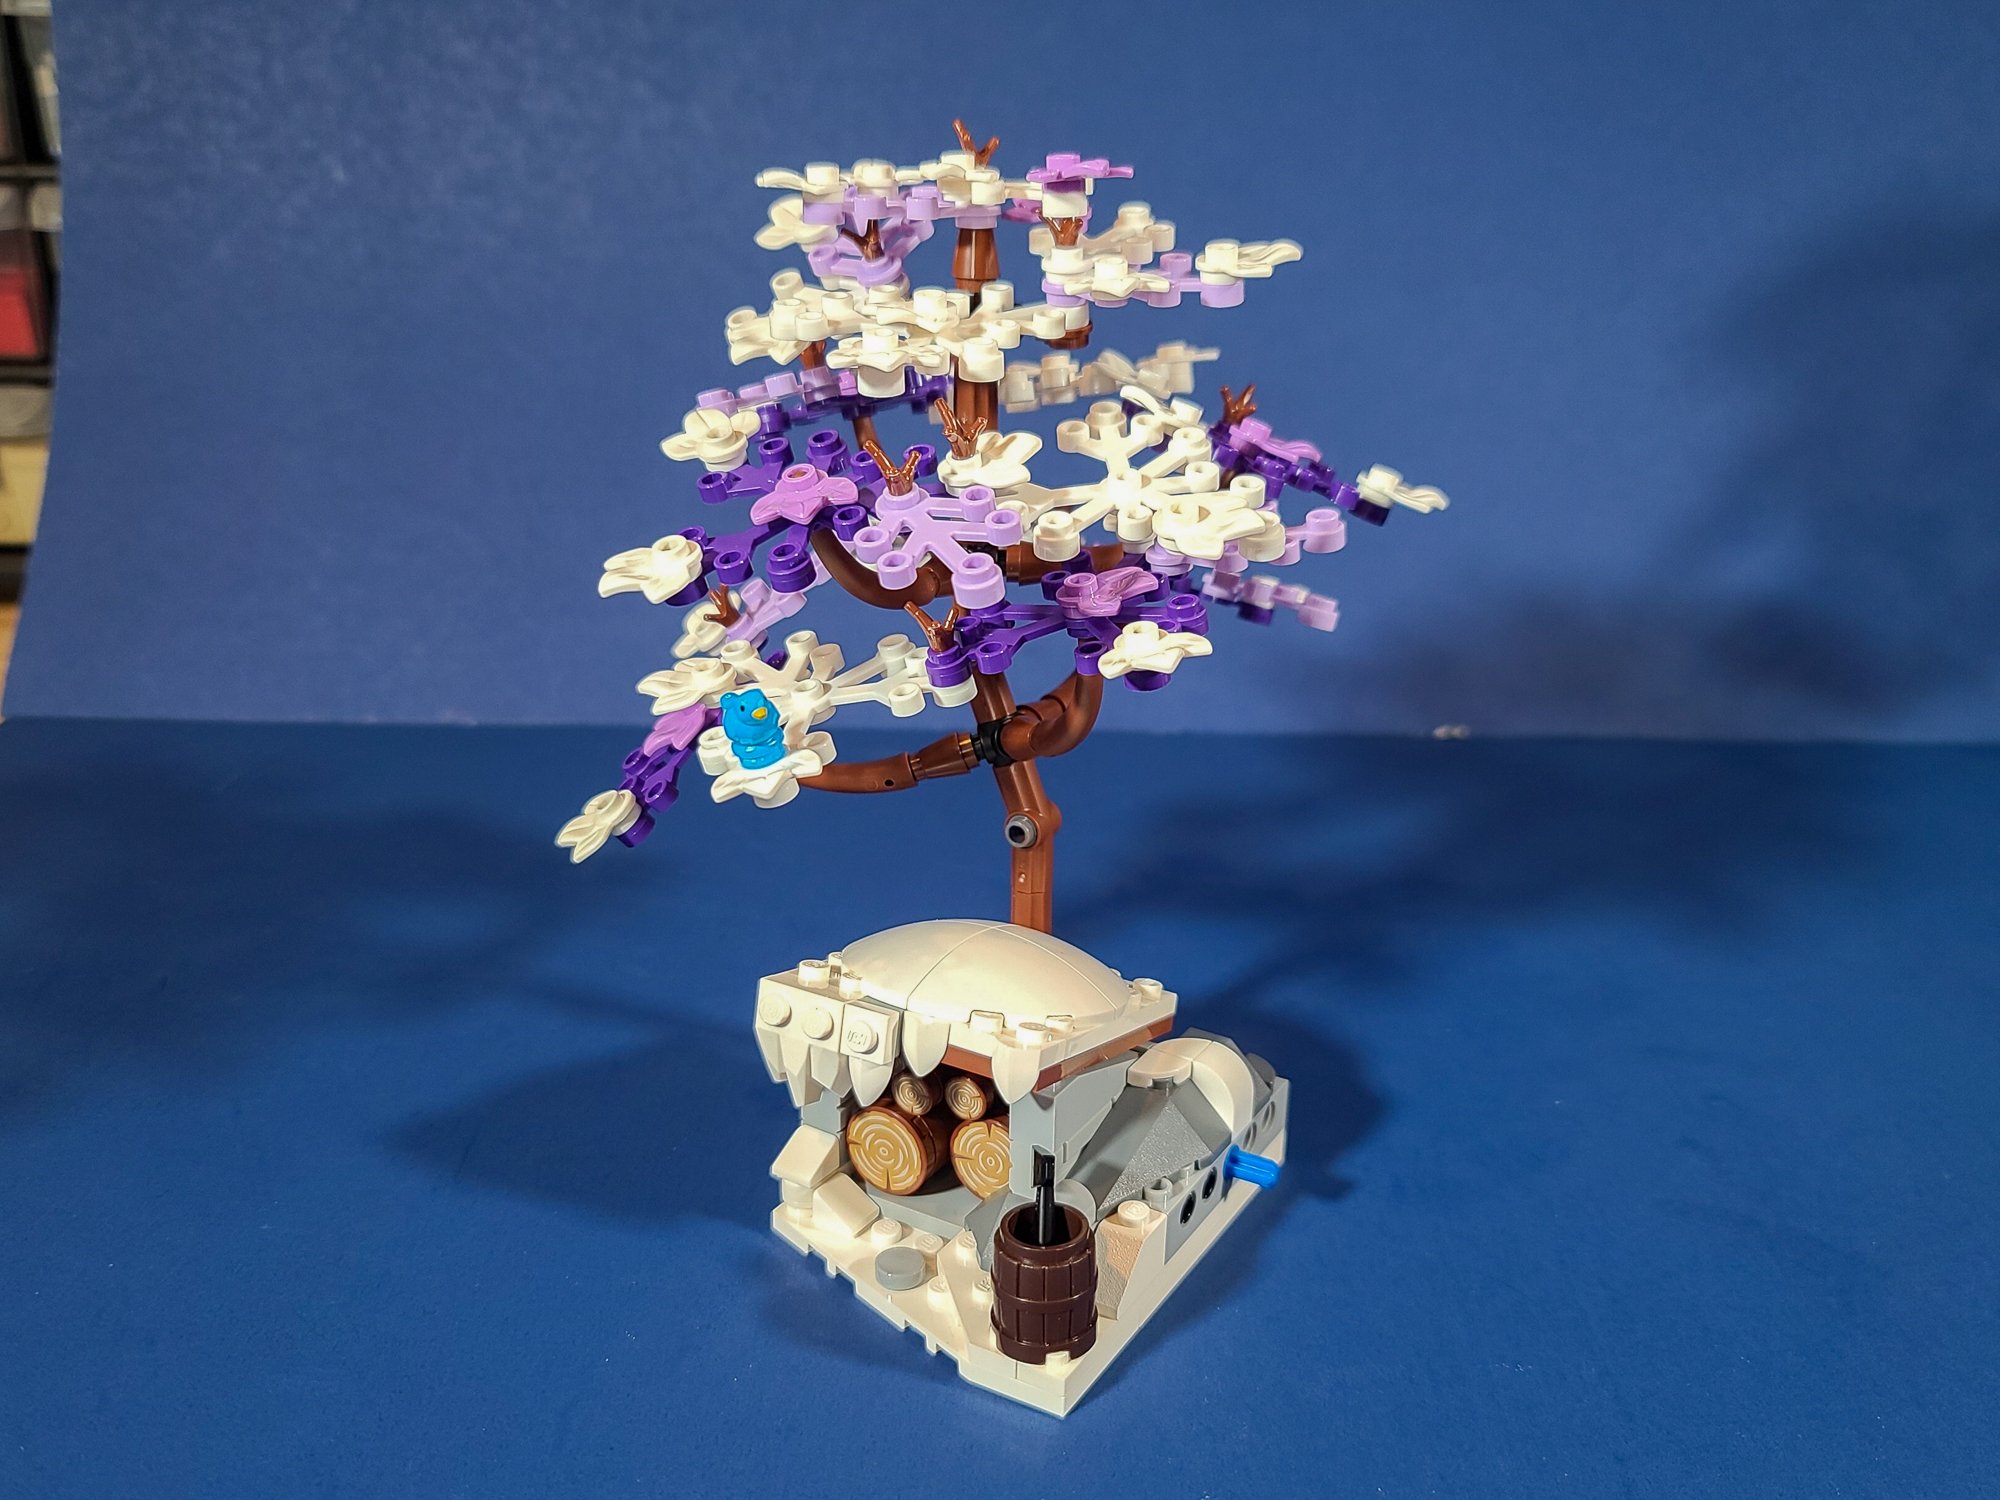
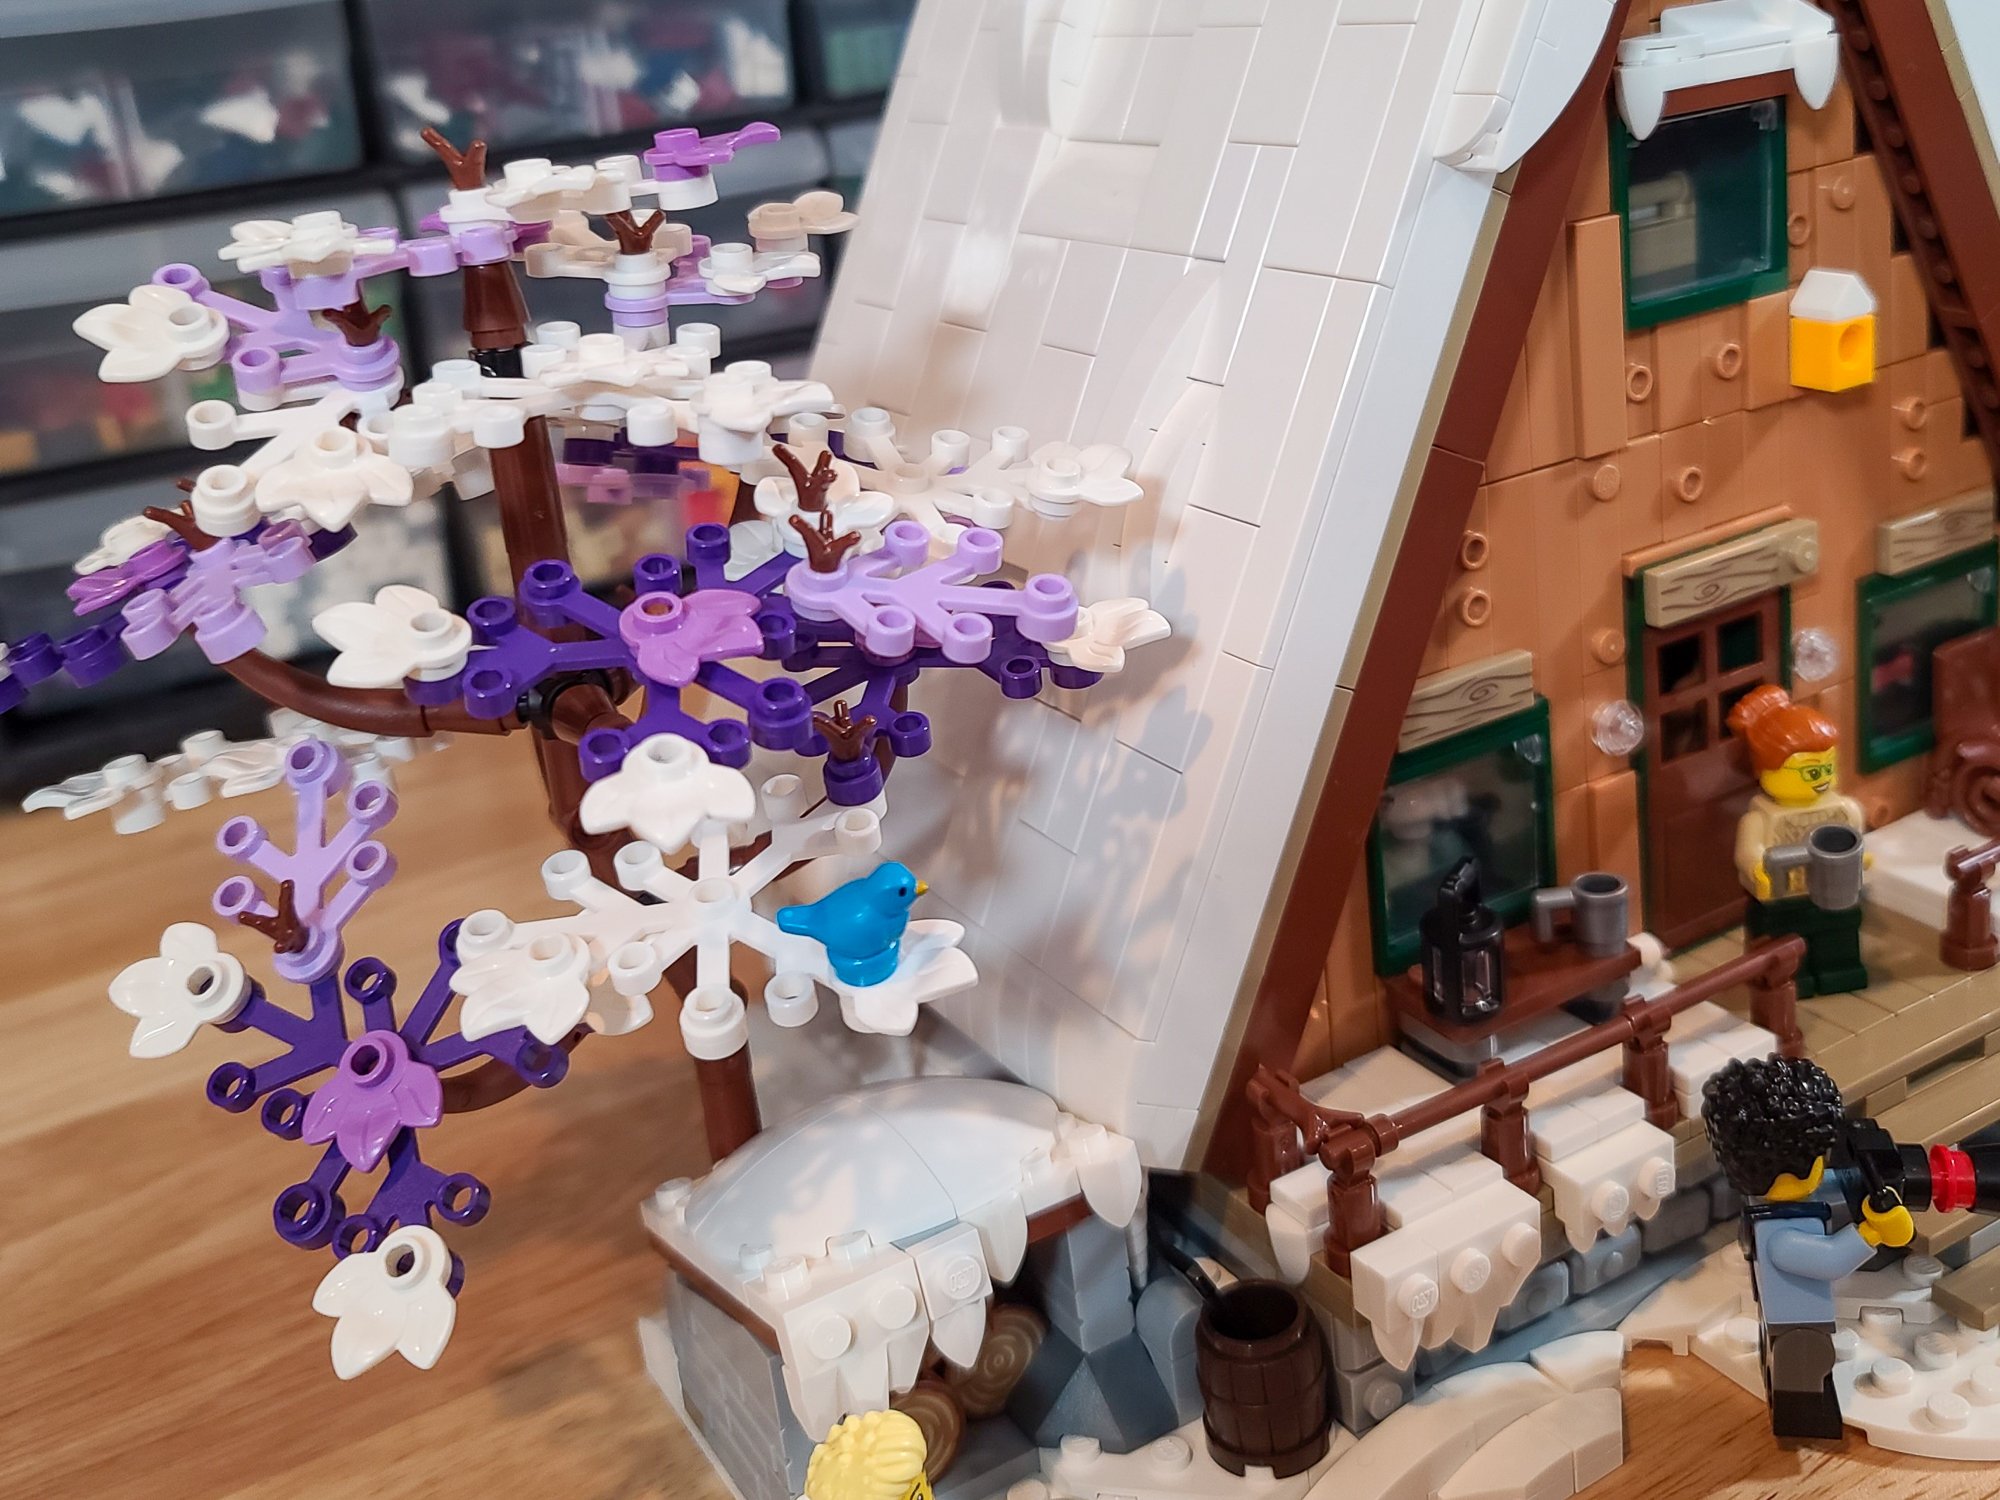
The trees obviously needed to be changed to mostly white foliage, but I wanted to maintain a little bit of the color blocking that I enjoyed in the original build so much. I decided that each tree would have a different color palette of purple, blue and green. I experimented with the colors of foliage I had on hand and determined that adding a dark and light accent color to each white tree really did the trick and looked like it belonged in the original set. (I also love how the birds’ colors pop out more against the white leaves—just like the cardinals and bluejays in my snowy backyard!)
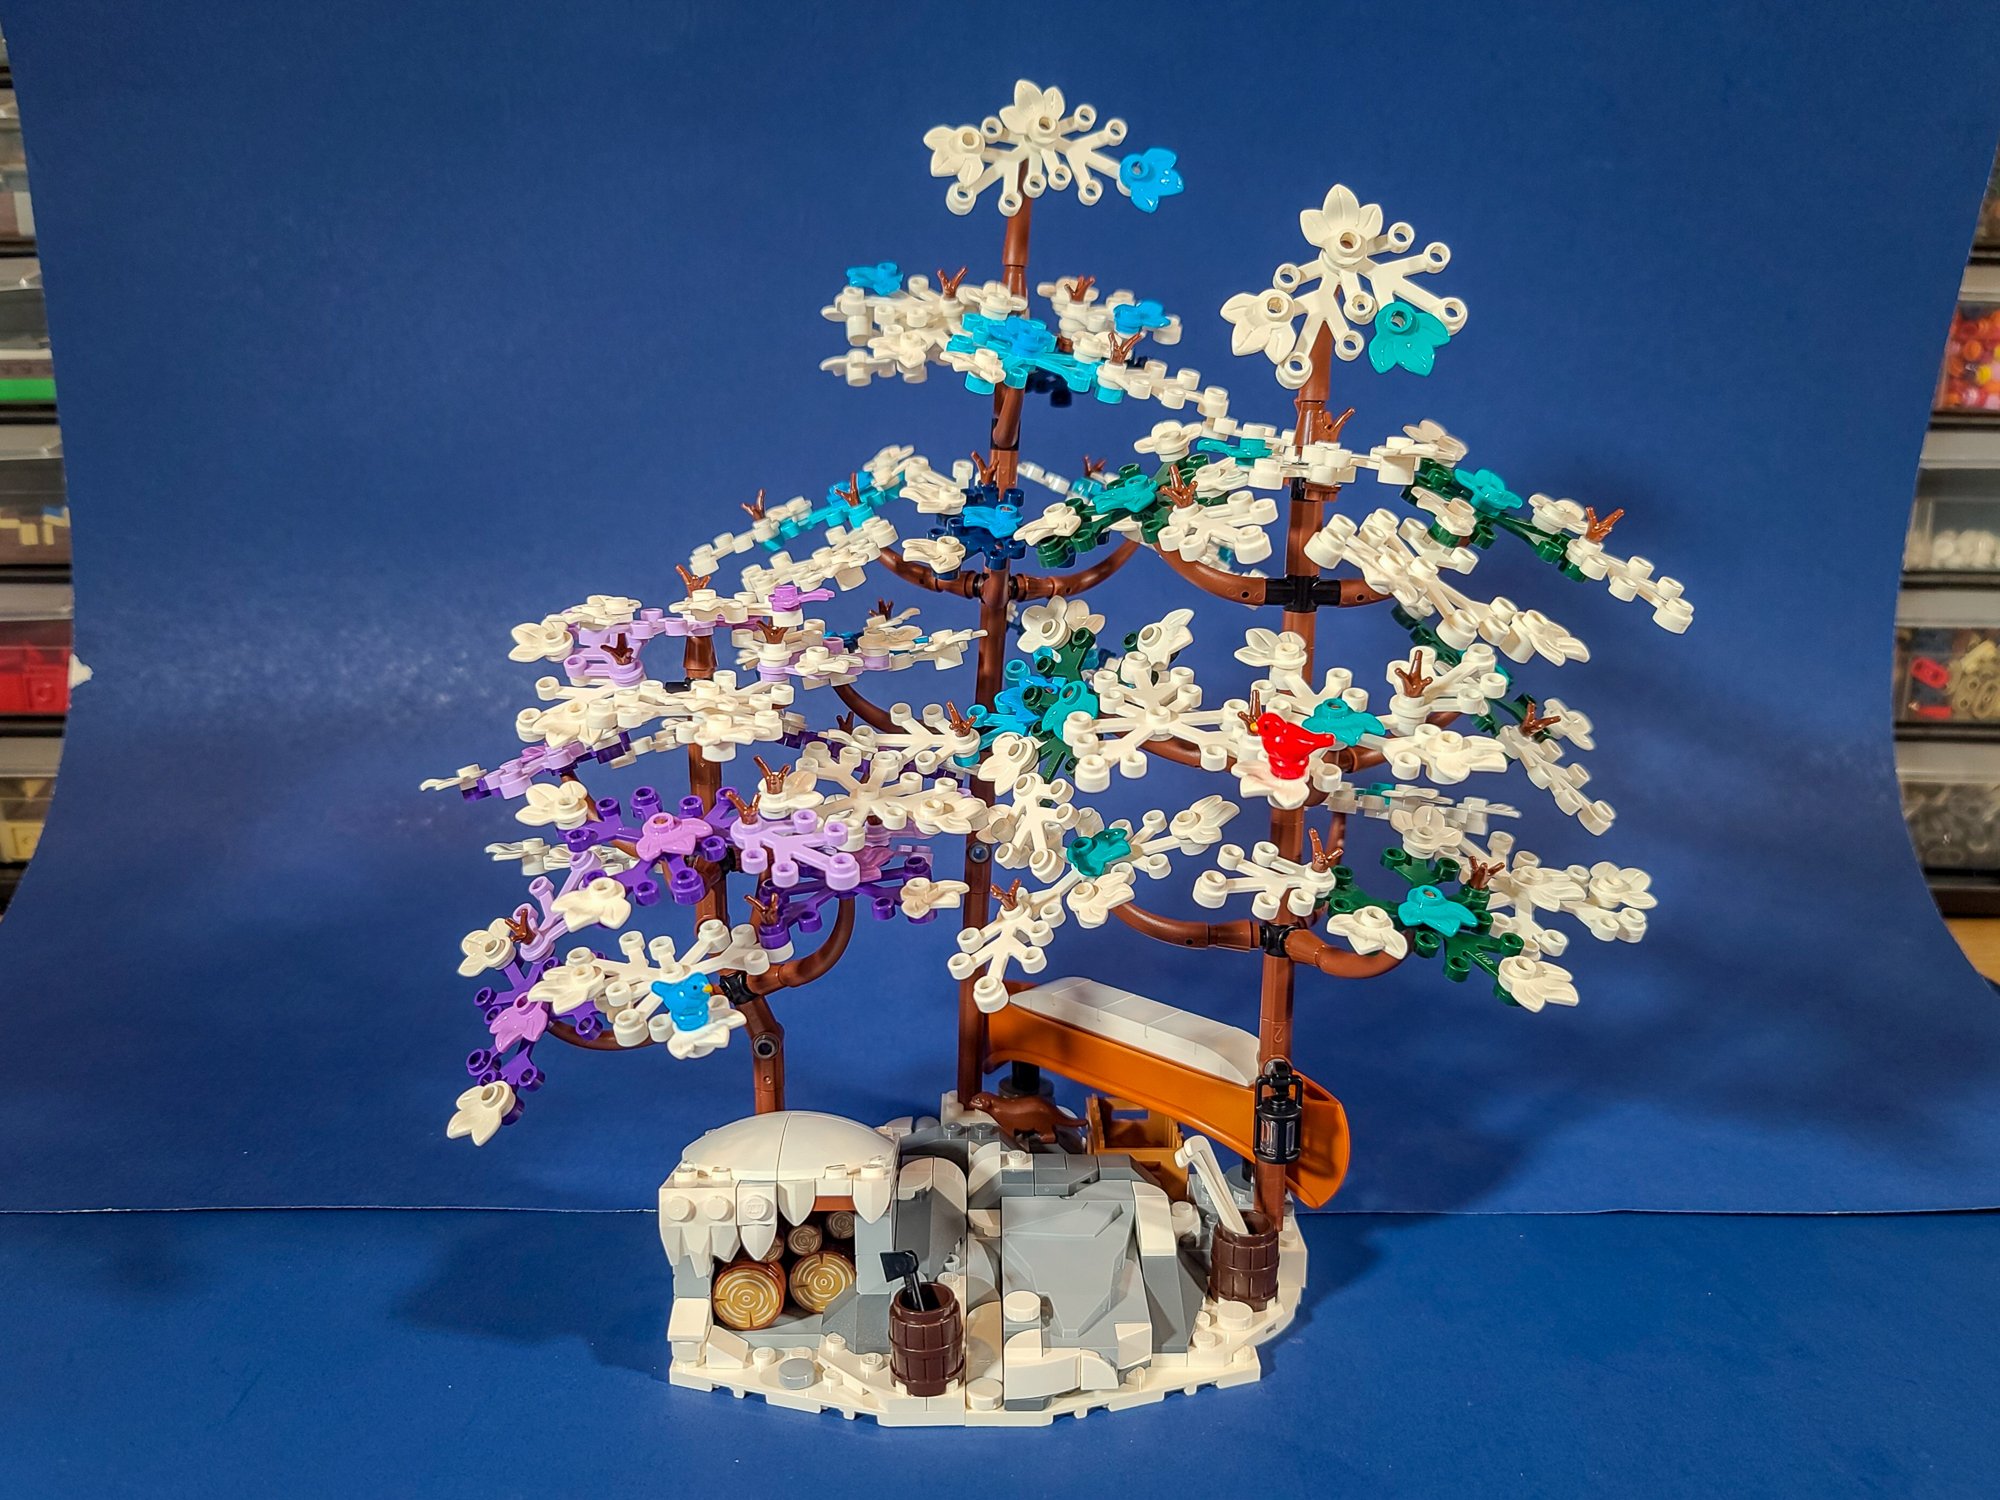
As you can see, I also broke out a few pieces of dark blue poster paper because the white was not photographing that well against the transparent drawers of LEGO in my build area. Altogether, the cabin looks like it was meant to be in my winter village! (The angle of the cabin’s roof matches the more angular rooves of many LEGO Winter Village sets too.) I was also happy that the minifigures’ outfits seem to be both perfect for a hike in the summertime or appropriately bundled up for the winter—another win for the graphic designers.
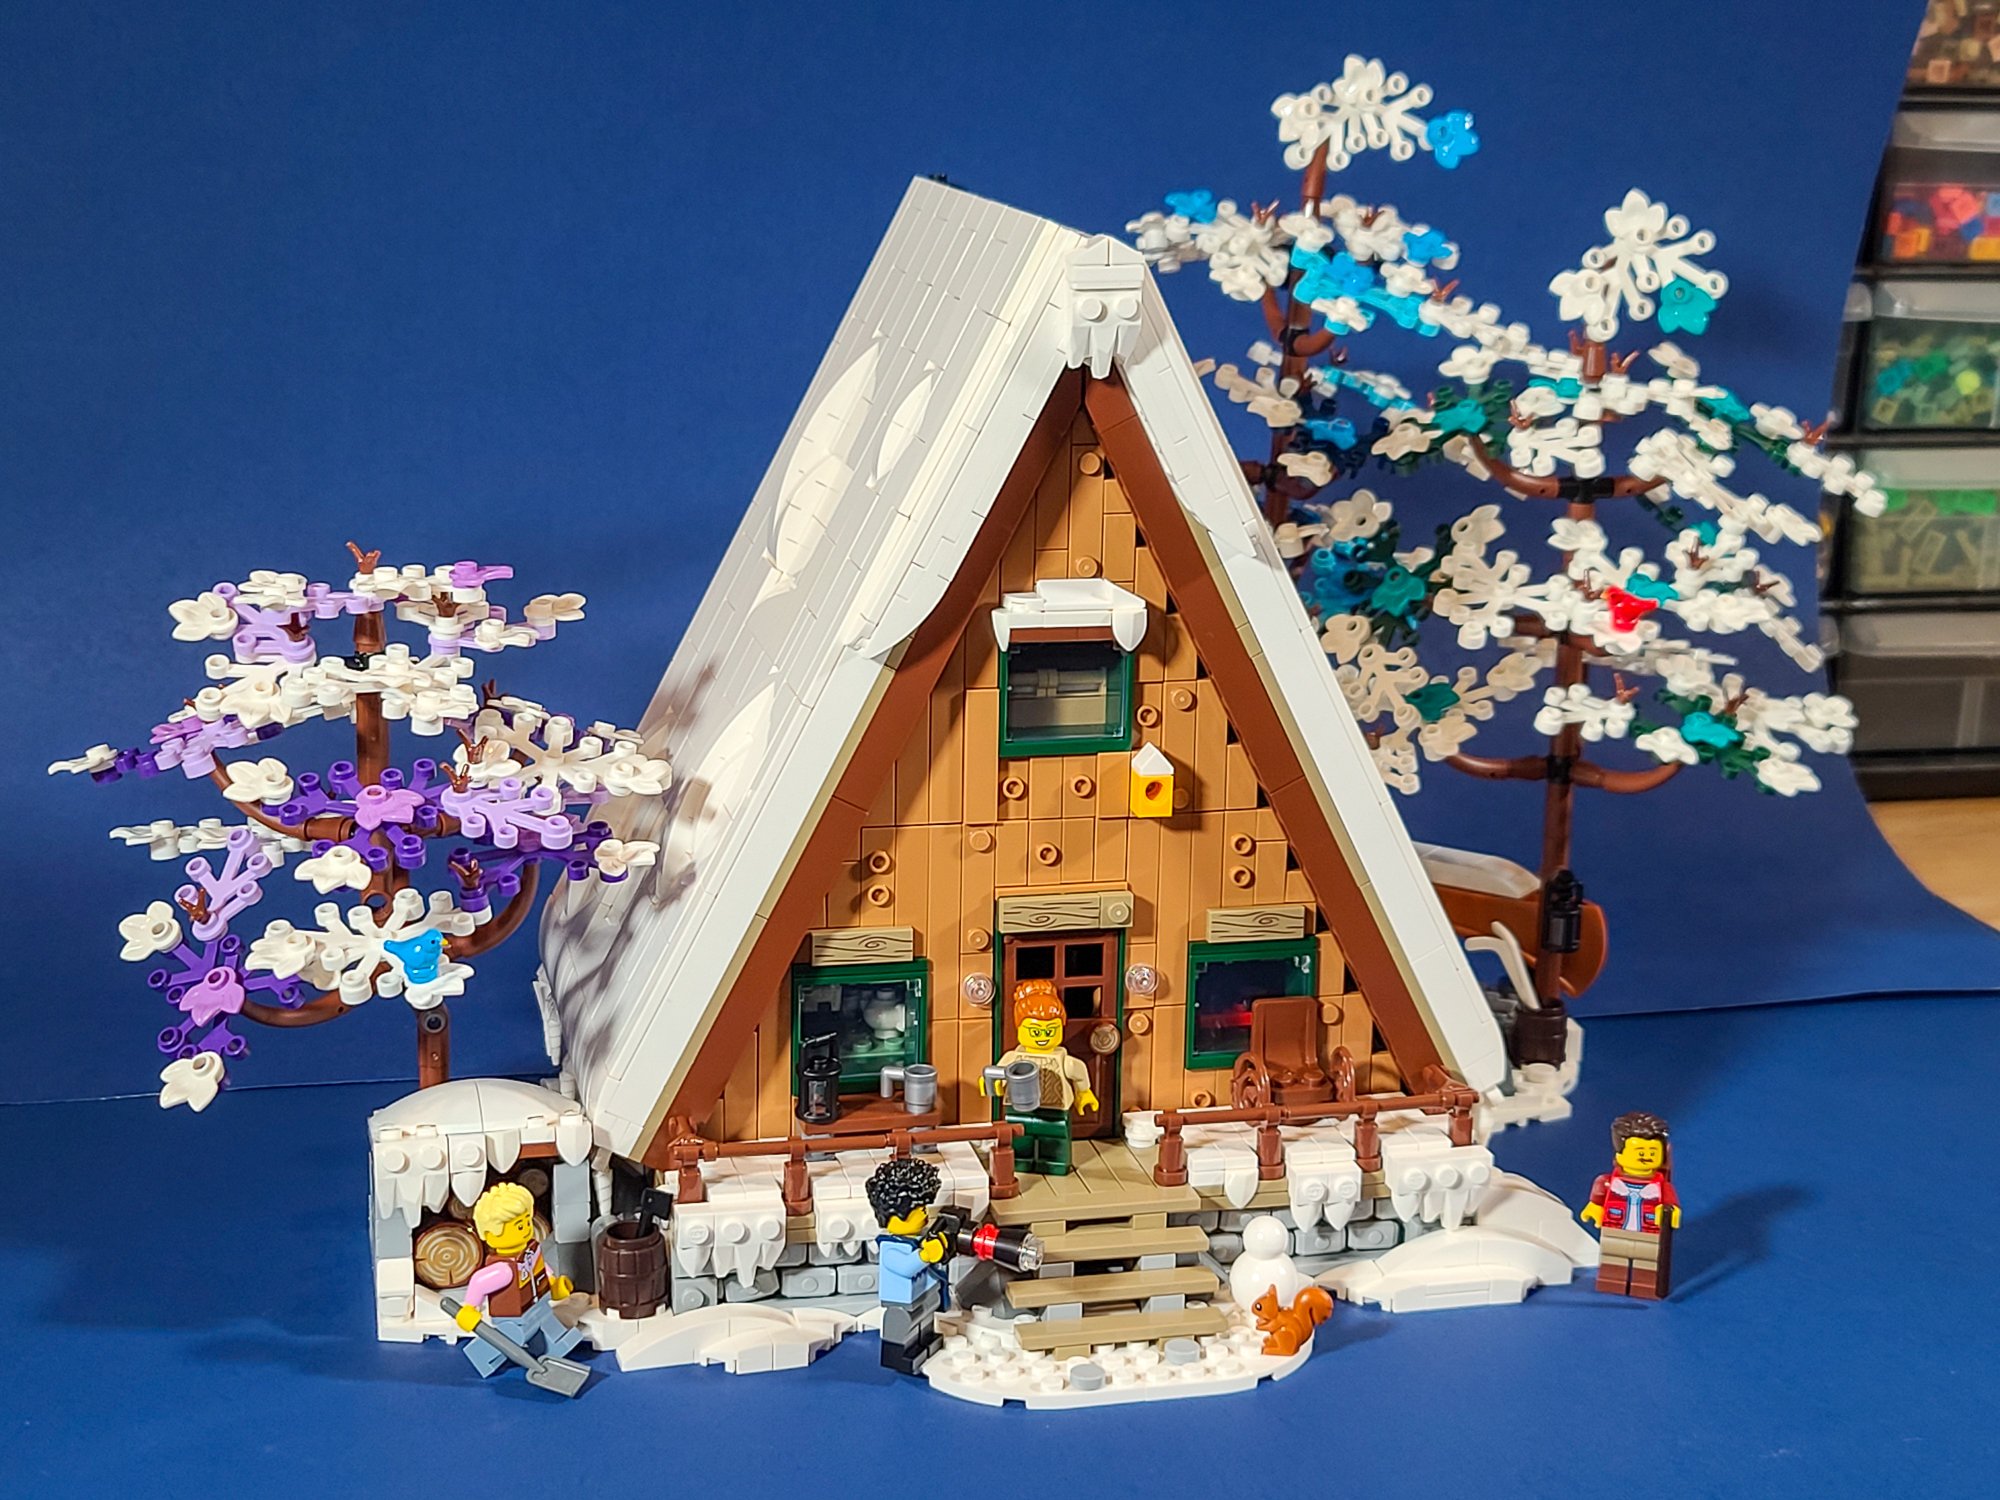
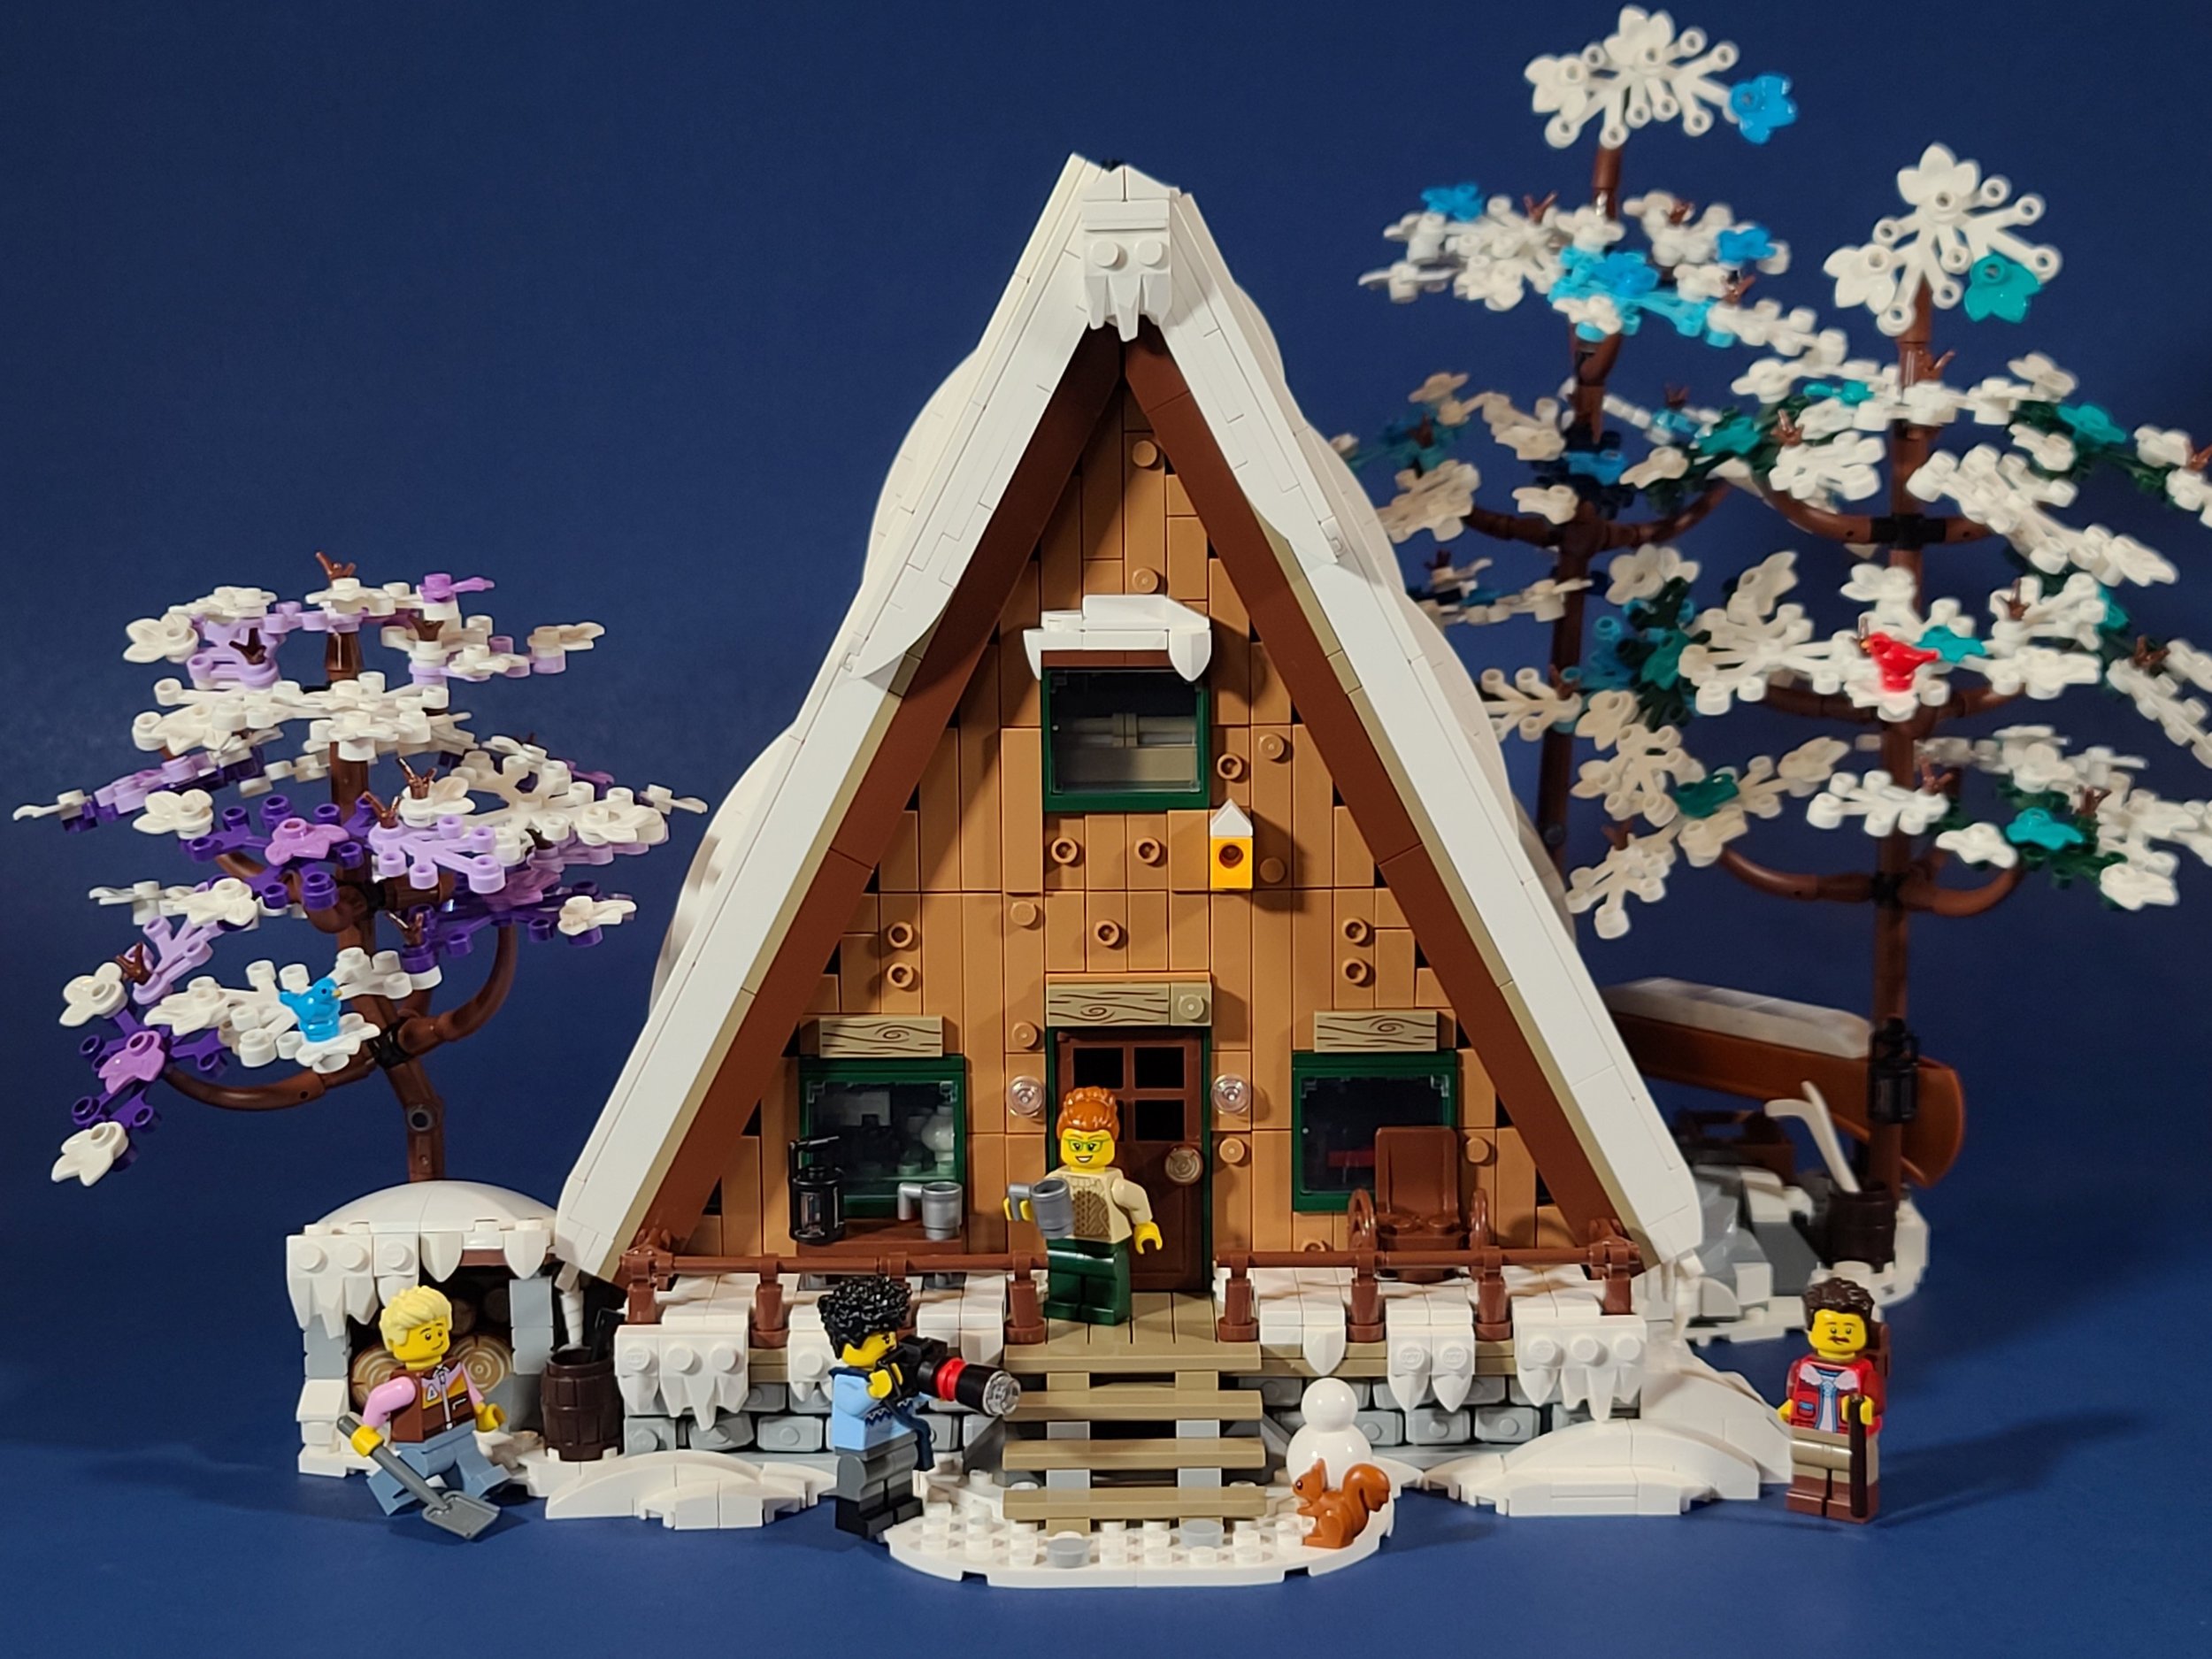
I can’t wait to display the snowy cabin with the rest of my winter village next year. It is slightly taller than the other sets in the product line, but placed far enough away in a more wooded area, it could blend in. The winter cabin also works as a standalone piece and could inspire a whole snowy campground!
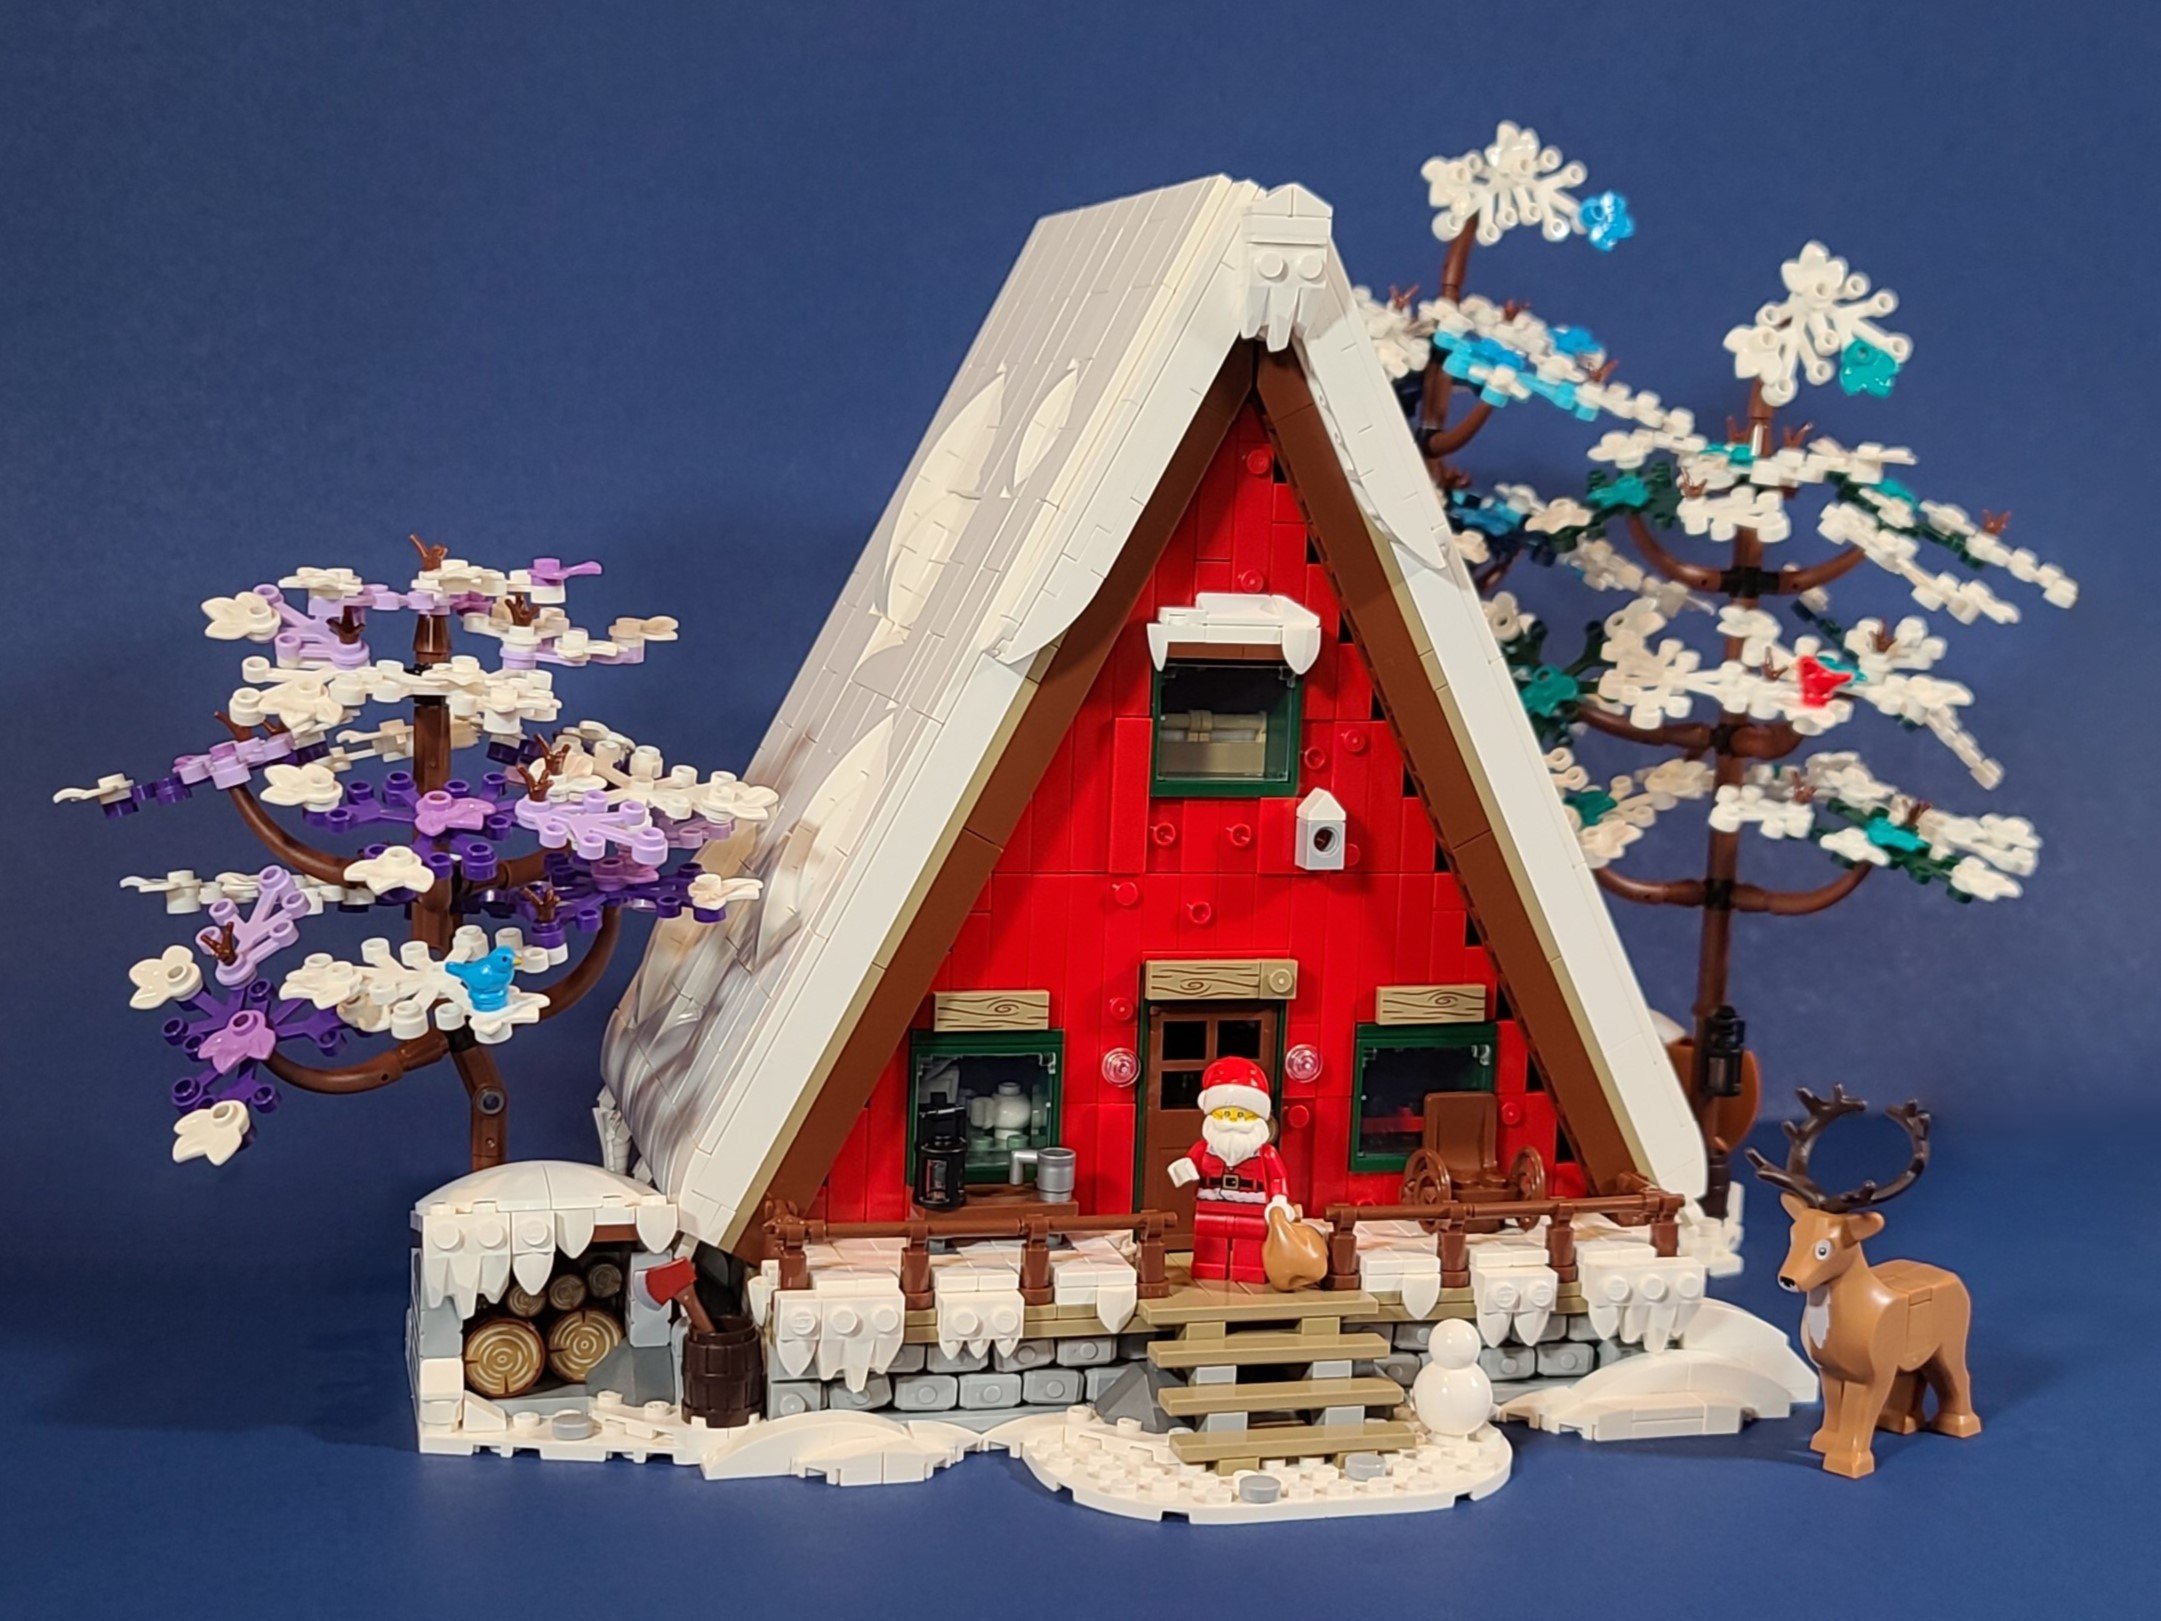
Santa’s Retreat
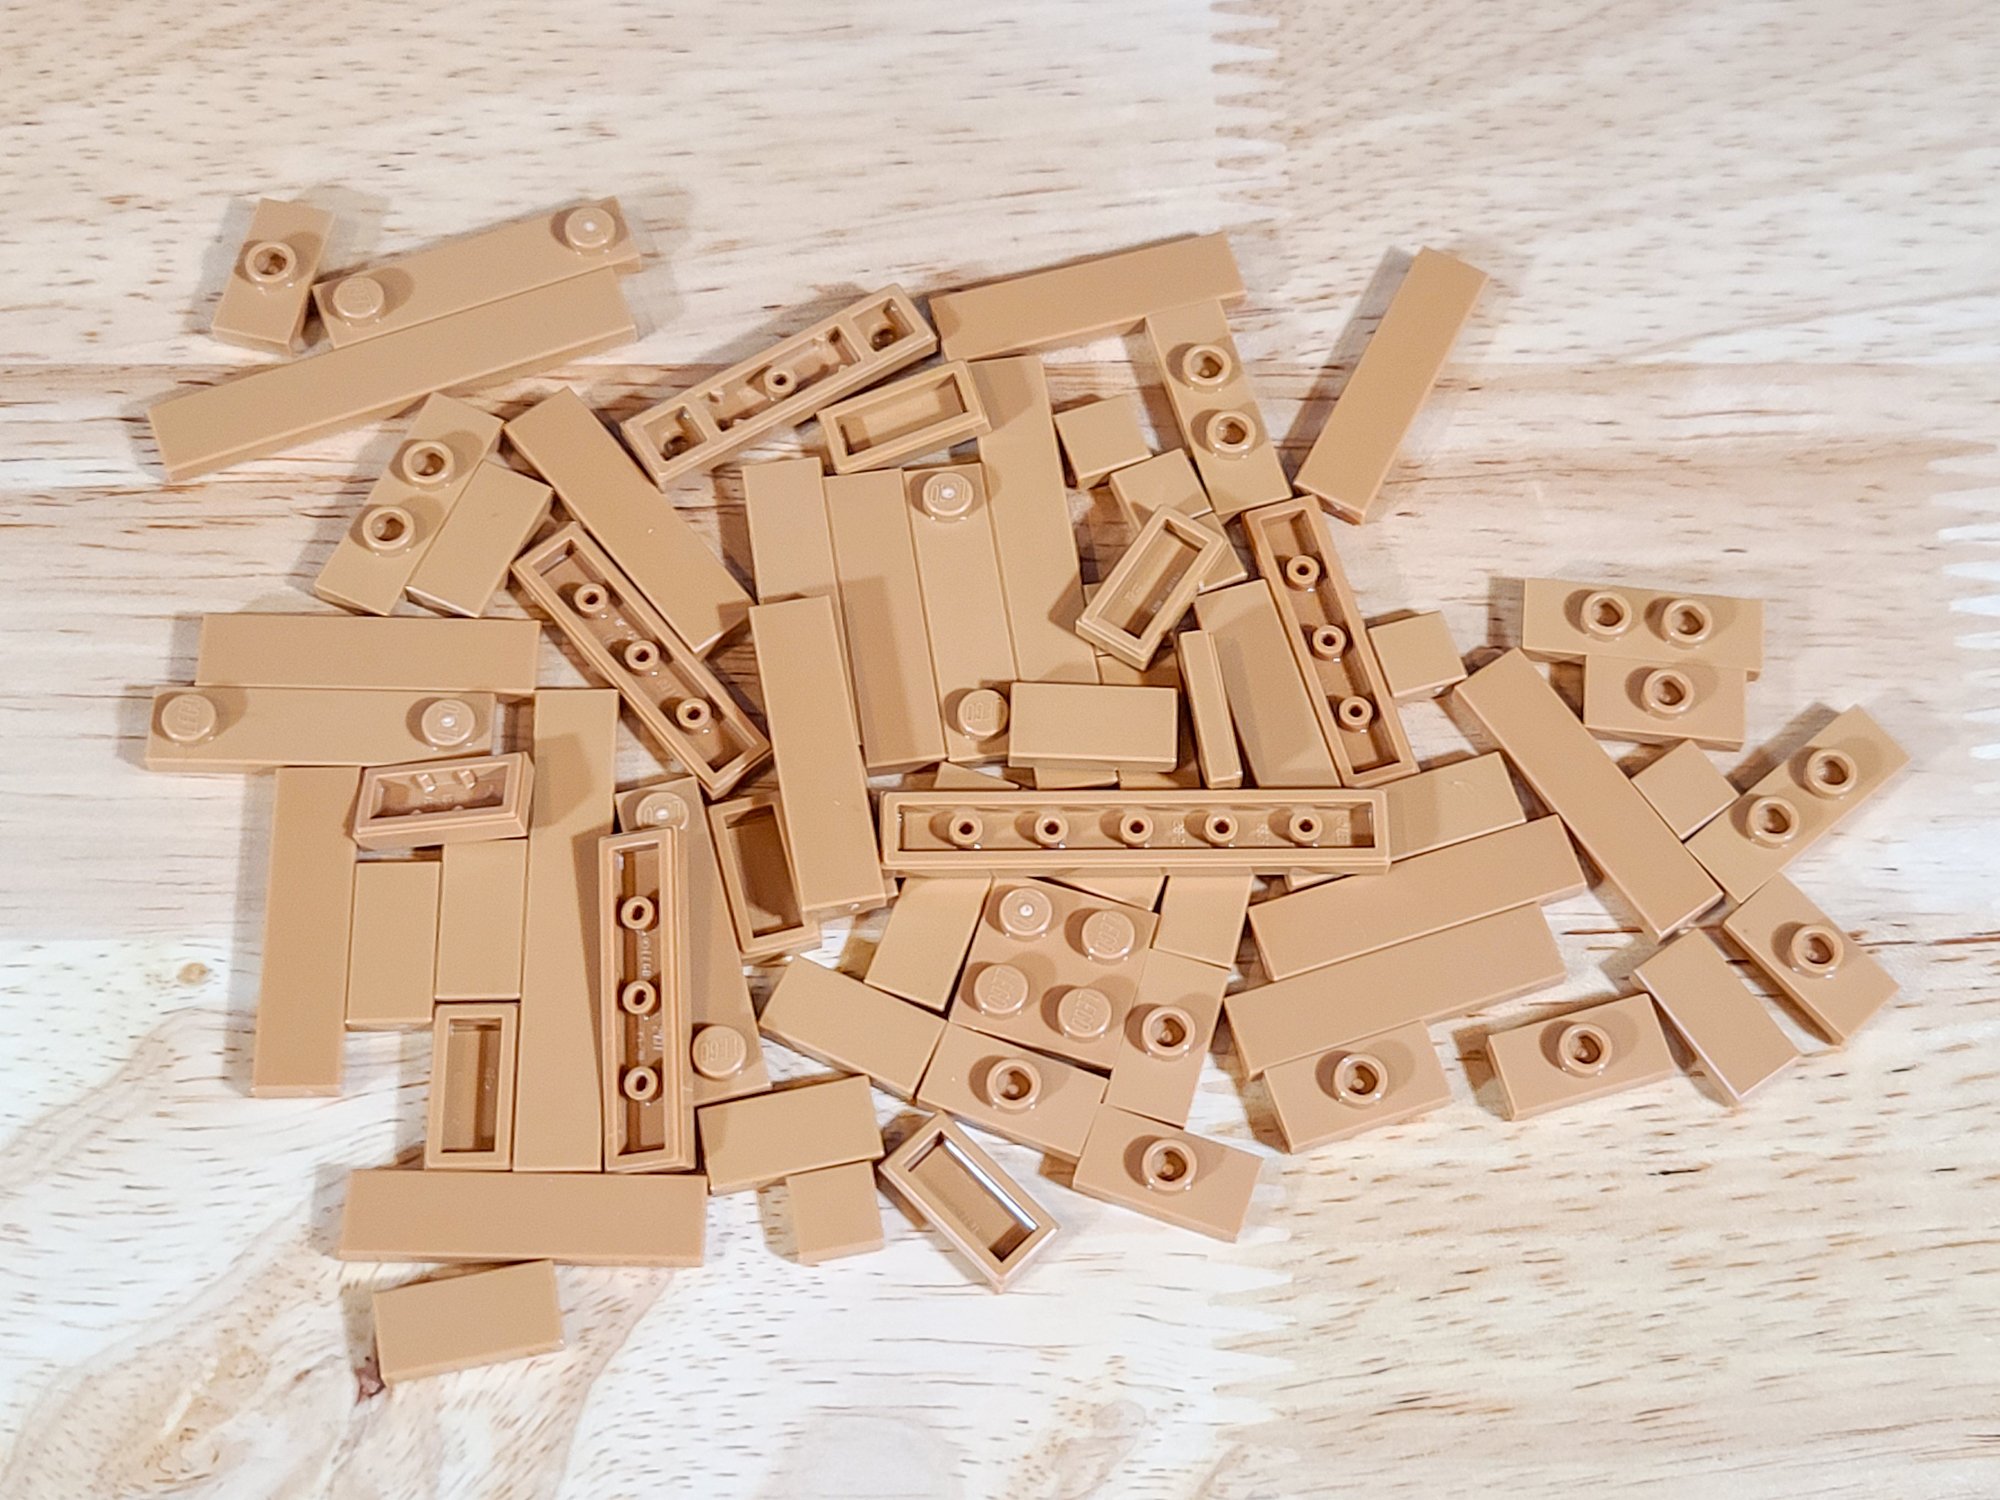
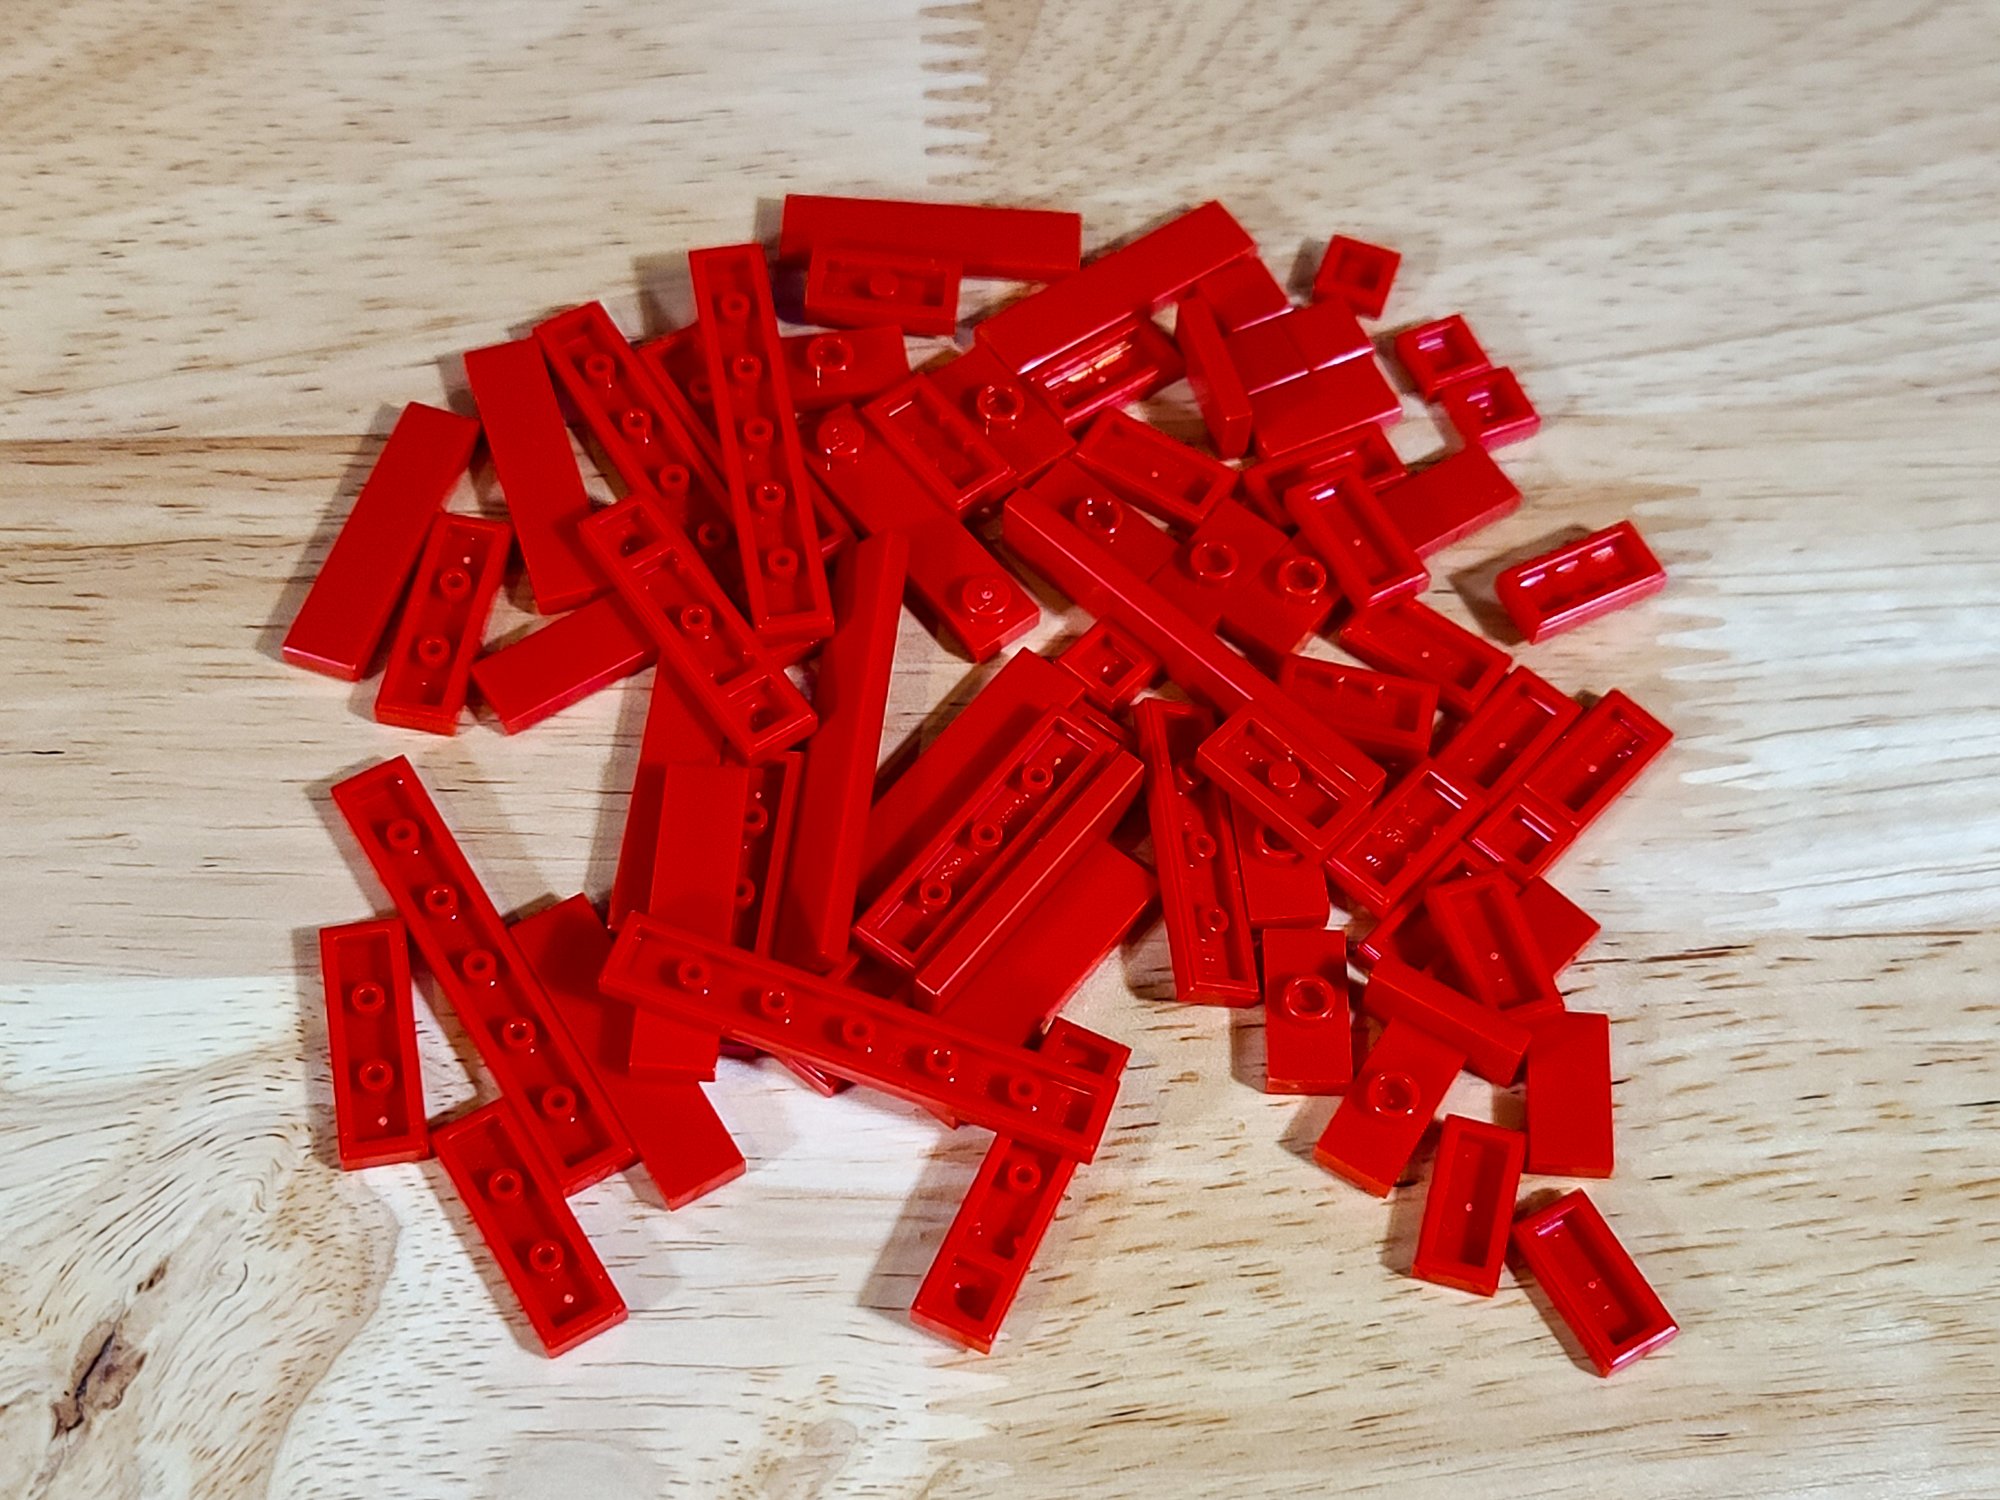
For my last modification, I wanted to honor one of Andrea’s original cabin mods—switching the siding to red and making it a snowy retreat for Santa. I carefully took off the sides of the roof and started replacing all the medium nougat tiles with red ones from my parts collection.
What resulted was a striking cabin bursting with color that exuded feelings of the holidays with the red walls and dark green windows and door. I also swapped the color of the birdhouse from bright light orange to light grey to not clash as much.
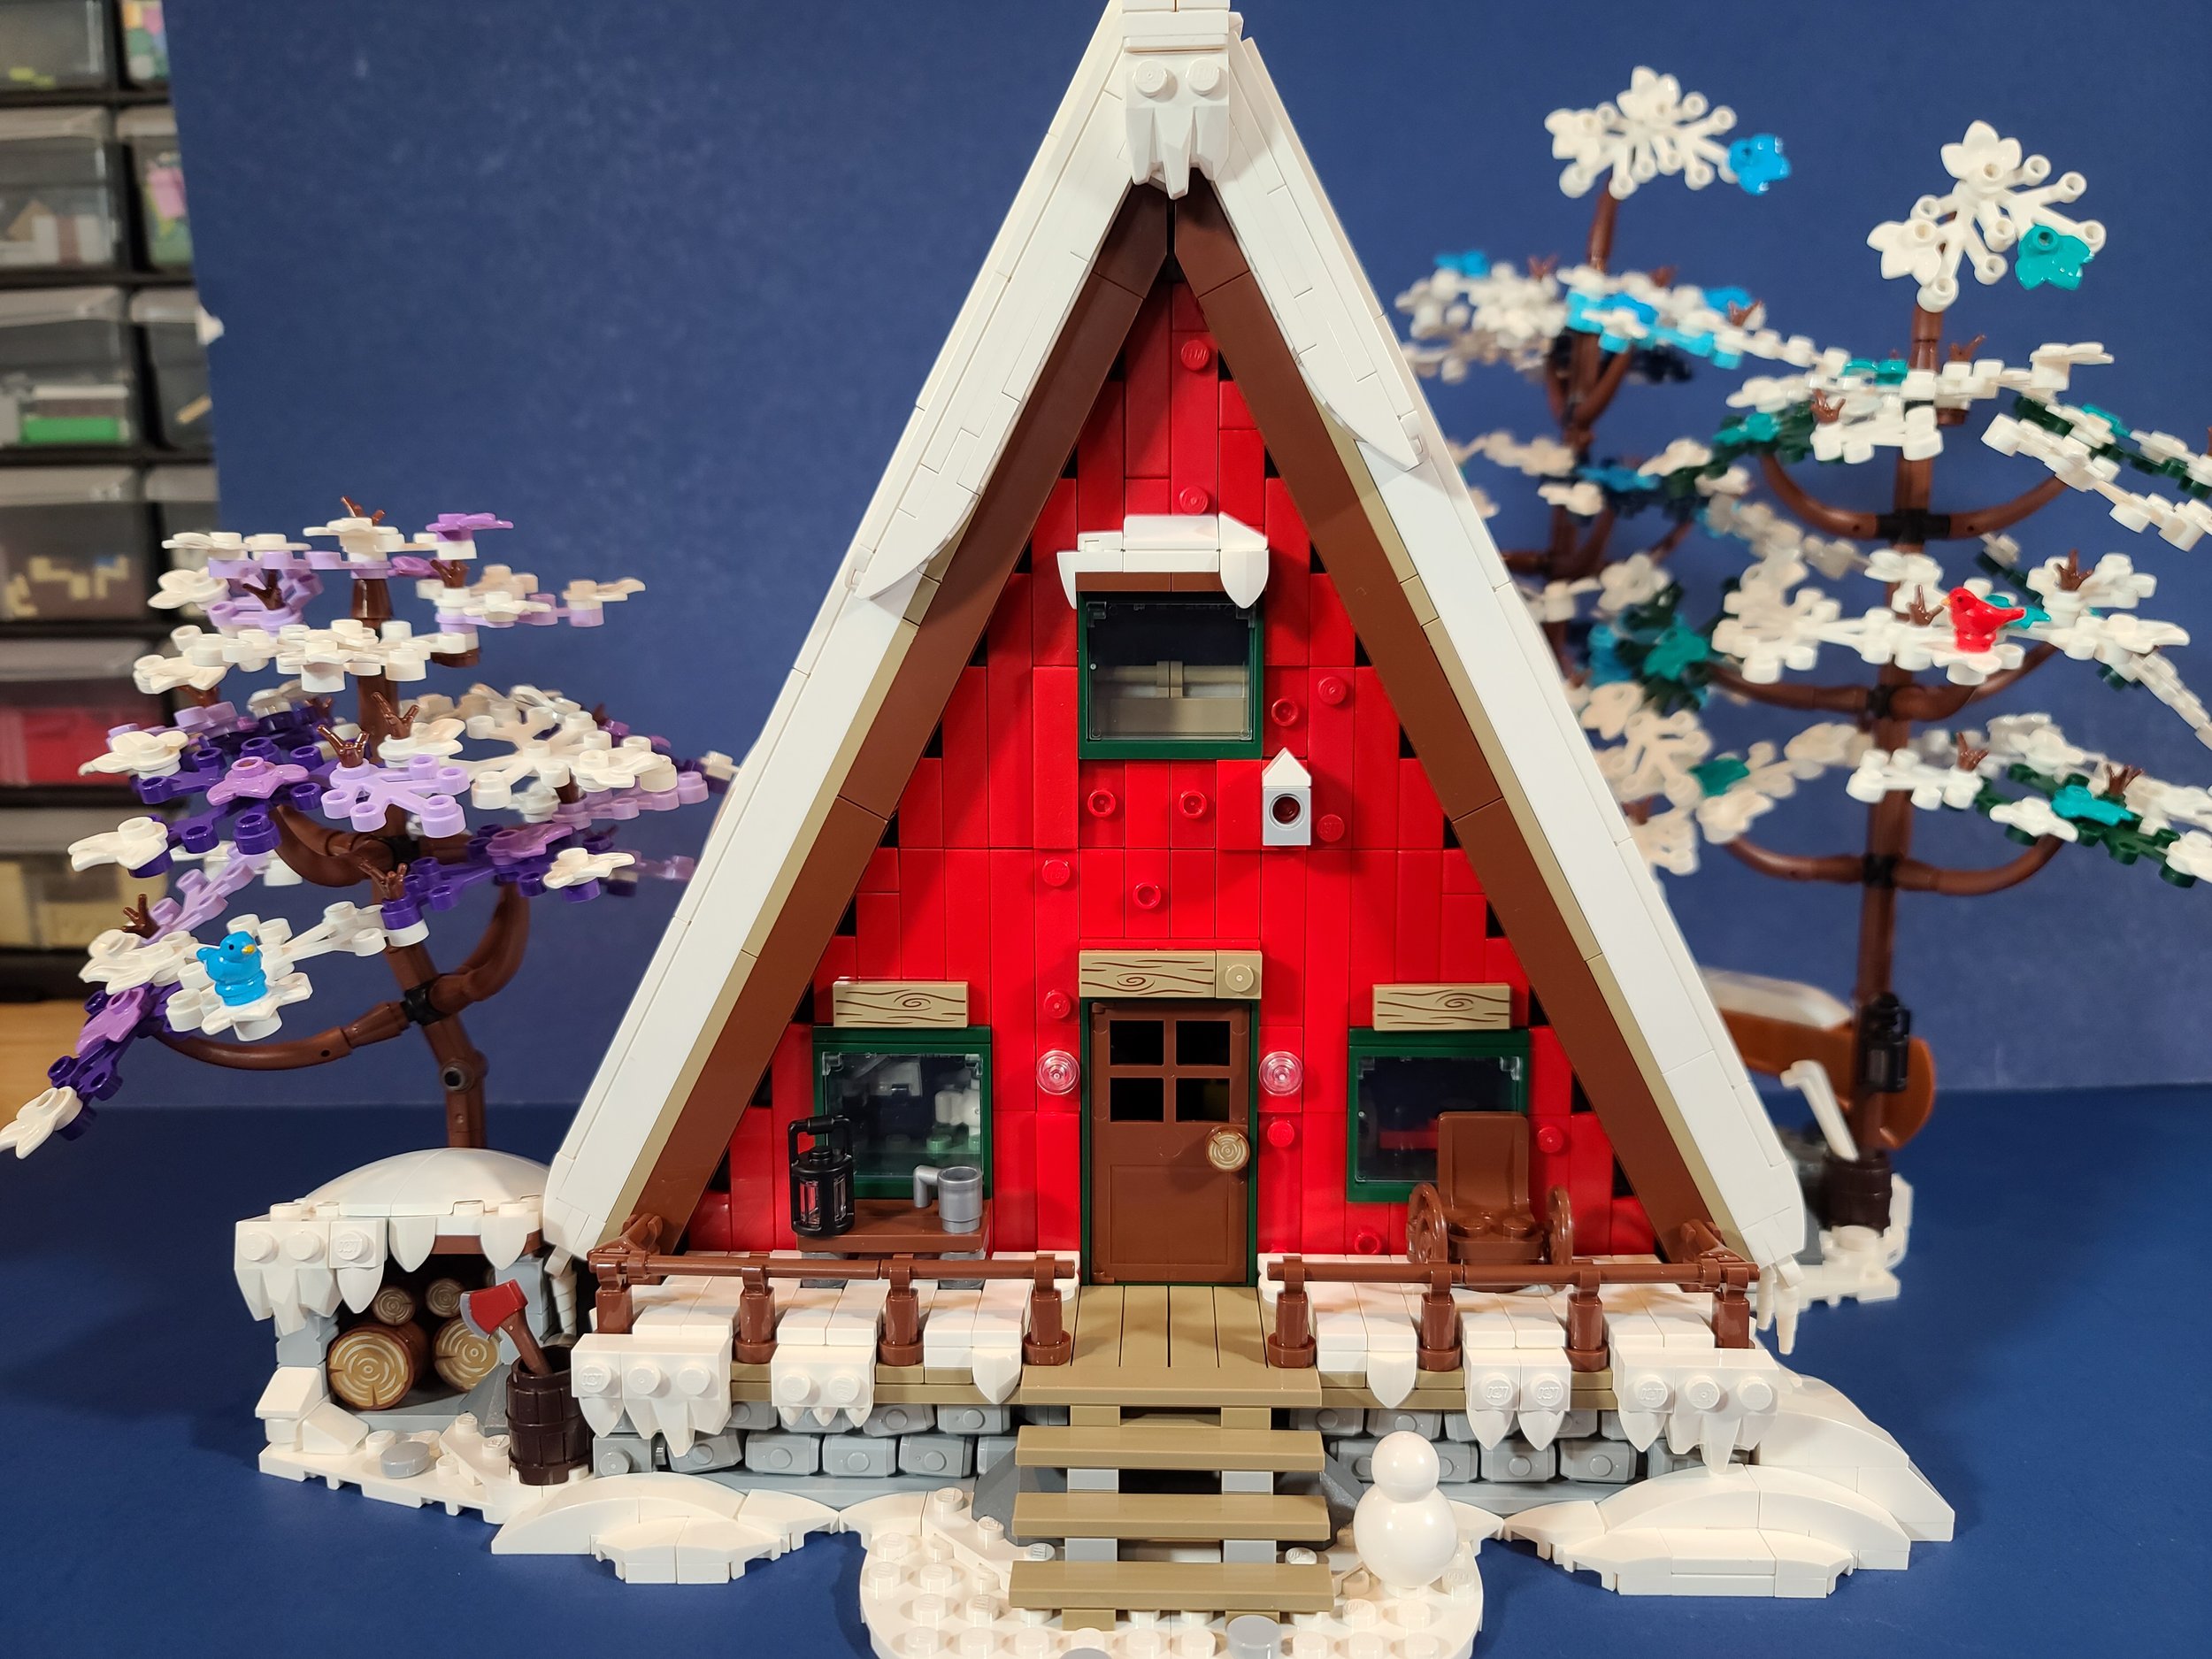
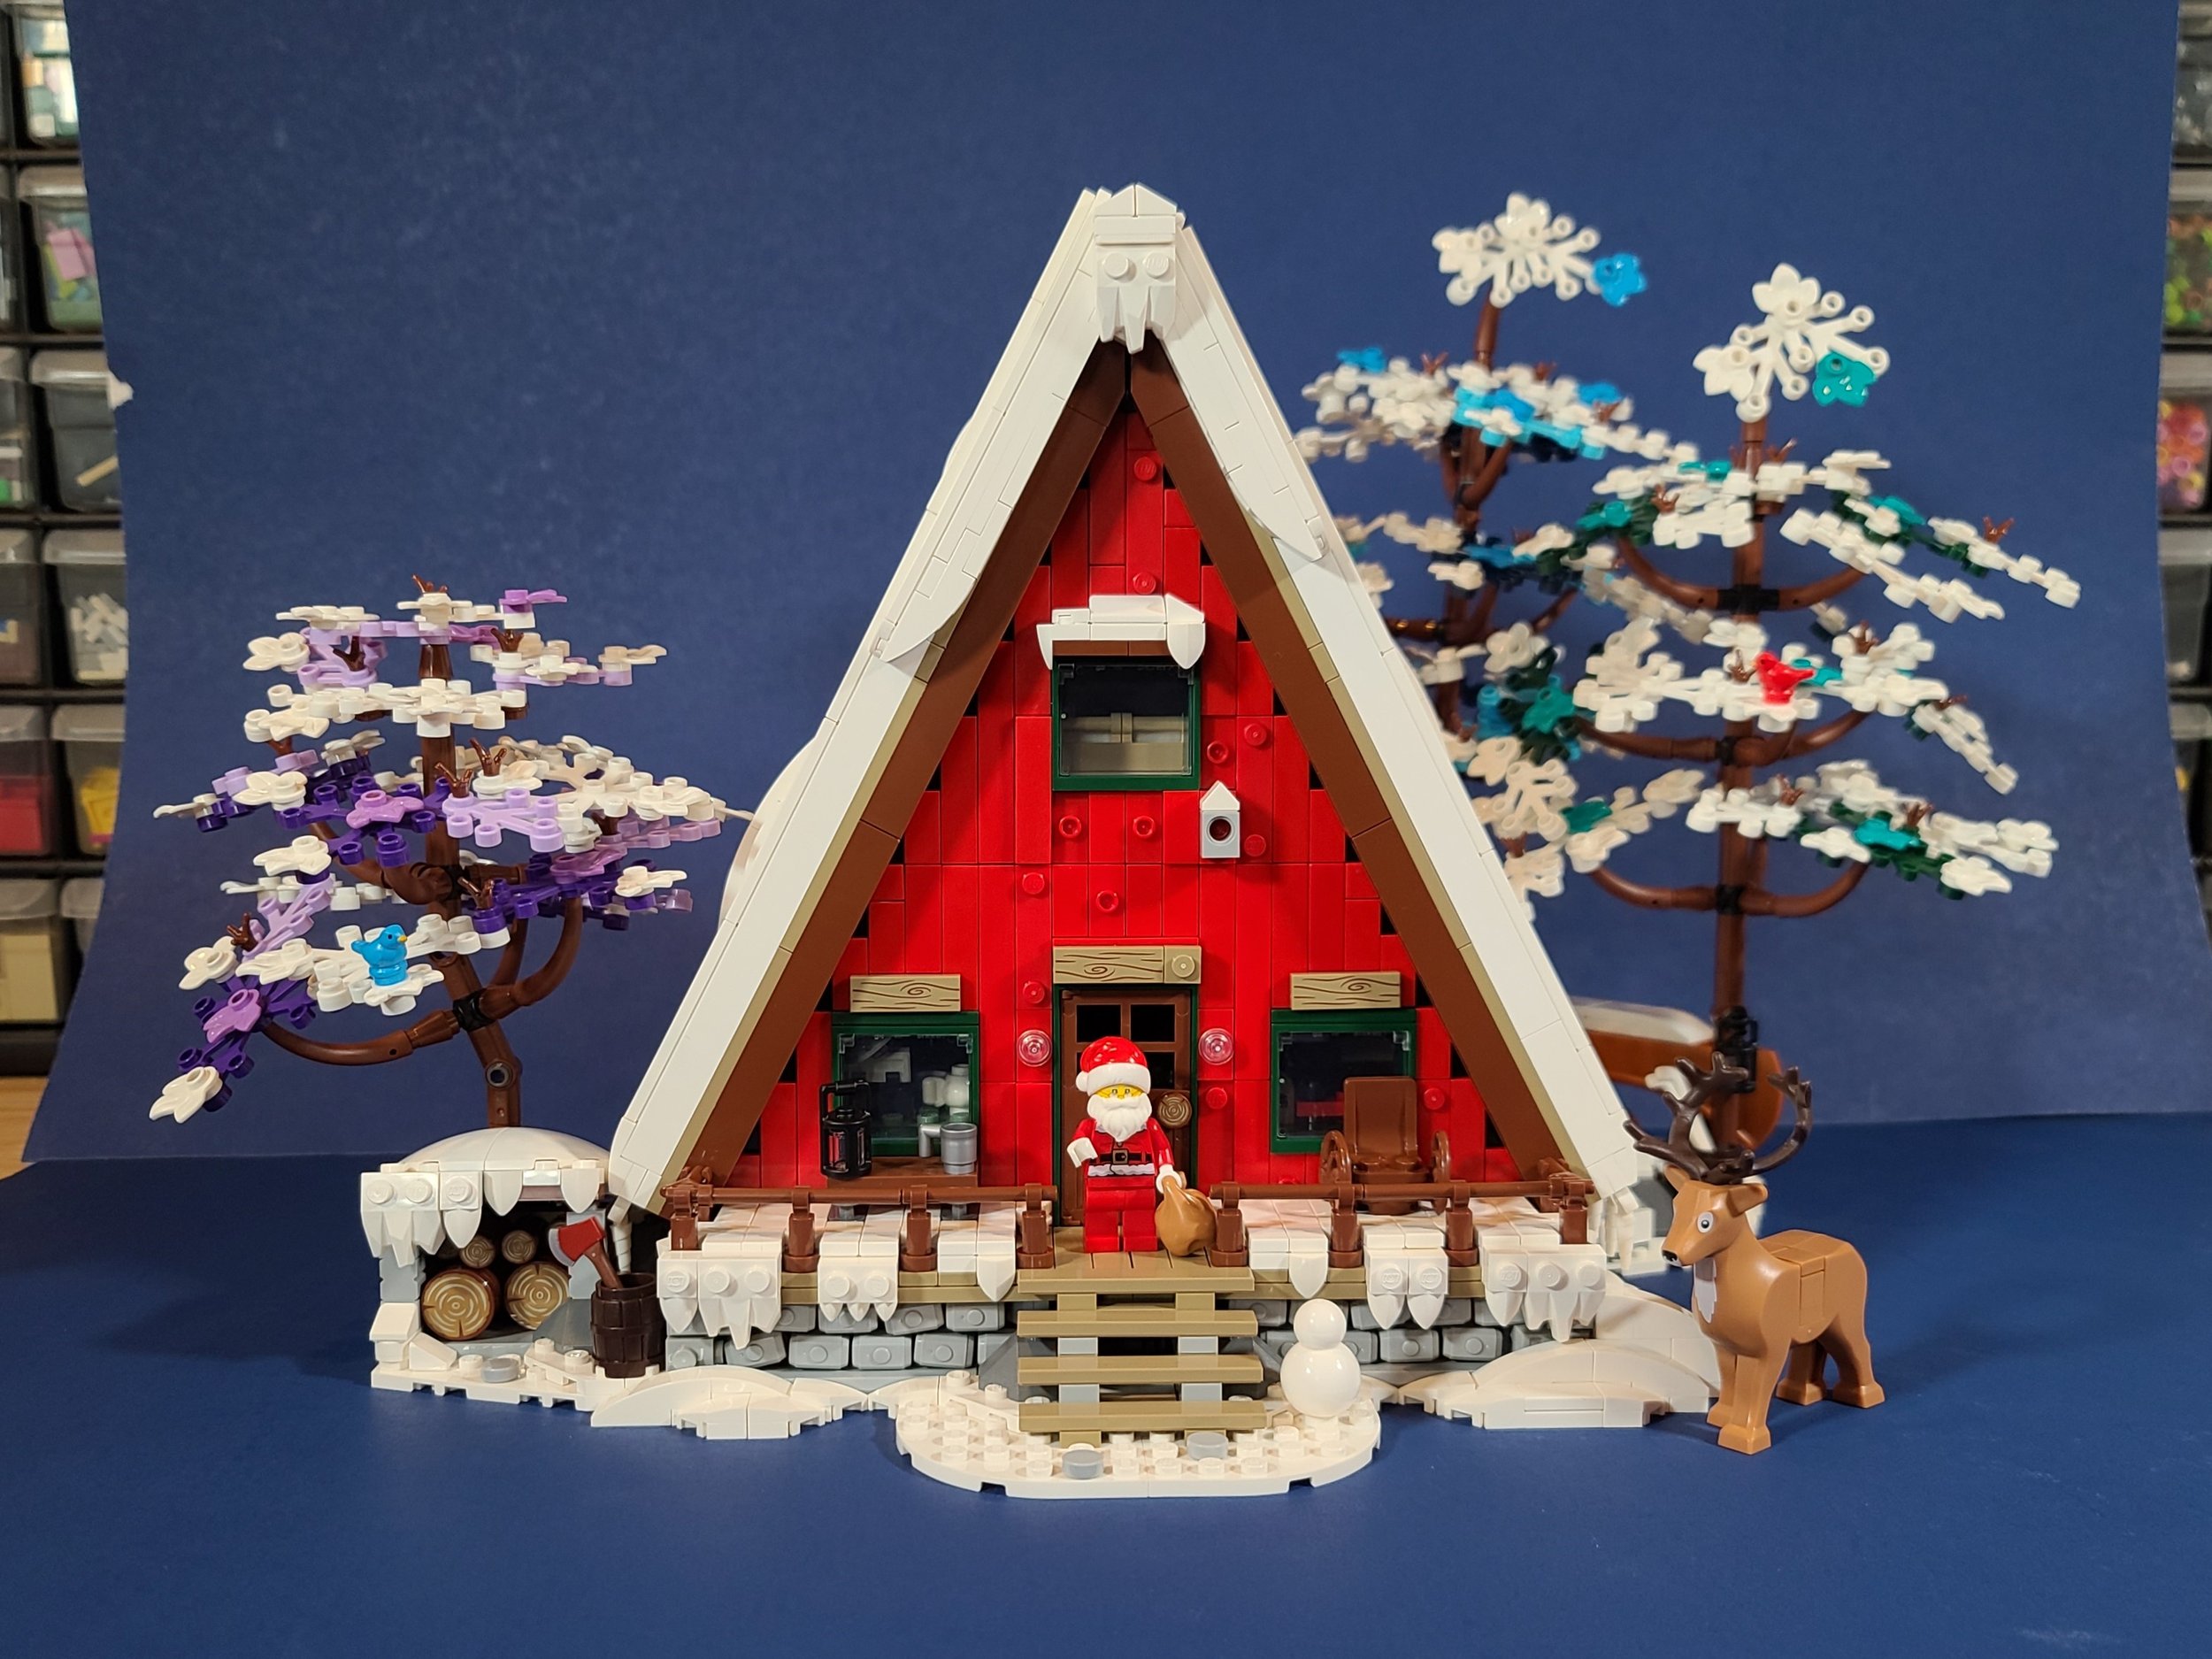
I think I ended up with a fitting tribute to Andrea’s original Santa cabin mod, keeping the best parts of the MOC and the best parts of the set. Here you can see a side-by-side version of the two cabins and decide for yourself.
Meaningful Modding

I reached out to Andrea (who is a frequent guest contributor on BrickNerd) and showed him my four mods of his cabin. His reply made all the effort even more worthwhile:
“It's just insane! I love it! You're the first one building the alt version of the set. Love the foliage, the snowy roof, and the roof with my ‘illegal’ style. It's A-mazing!”
Hopefully this exercise in modding shows that no matter the set—and no matter the perceived flaws or places you wish the designers did something differently—you can always make a model your own by modifying it.
DISCLAIMER: This set was provided to BrickNerd by The LEGO Group. Any opinions expressed in this article are those of the author.
Which of the four A-Frame Cabin mods was your favorite? What additional modifications would you consider? Leave your thoughts in the comments below.
Do you want to help BrickNerd continue publishing articles like this one? Become a top patron like Charlie Stephens, Marc & Liz Puleo, Paige Mueller, Rob Klingberg from Brickstuff, John & Joshua Hanlon from Beyond the Brick, Megan Lum, Andy Price, Lukas Kurth from StoneWars, Wayne Tyler, Monica Innis, Dan Church, and Roxanne Baxter to show your support, get early access, exclusive swag and more.