The Conversation Piece #19: How to Choose the Right Backdrop for Your MOC
/
“The Conversation Piece” is a monthly BrickNerd series about creativity and building with LEGO authored by our friends over at the Builder Improvement Initiative (BII), a Discord-based community that helps LEGO builders of all levels get better at their craft through knowledge-sharing and constructive feedback.
Have a question you would like us to consider for a future article? You can submit it here. Enjoy!
Presentation Styles for LEGO MOCs
So you’ve built a LEGO model! Congratulations! Now it’s time to share it with all of your friends! Unless you’re only planning to display it in your home to show your dinner guests or take it to a convention, you’ll have to take photos of it.

Even if you don’t have a social media presence, photos of your builds are handy when texting friends, talking about what you do on a first date, sharing your new build in the #finished-mocs channel in the BII Discord server, scrapbooking or reminiscing about a build once the LEGO bricks inevitably rejoin the rest of your collection!
But what’s the best way to display your models? The evergreen answer is “it depends.” In this article, we’ll explore different presentation styles, when they work well and how to use them to show off your MOCs to your friends and the world!
The White Void
Photographing your model against a featureless white void was more popular in the 2000s. A curved sheet of white cardstock or fabric is usually enough to create the effect and present your LEGO model in its purest form. This can be useful when you want the bricks to be the focus, as there is nothing in the background to add to or detract from the model. BrickNerd and Brickset are among the many sites that have published articles on how to achieve this effect.
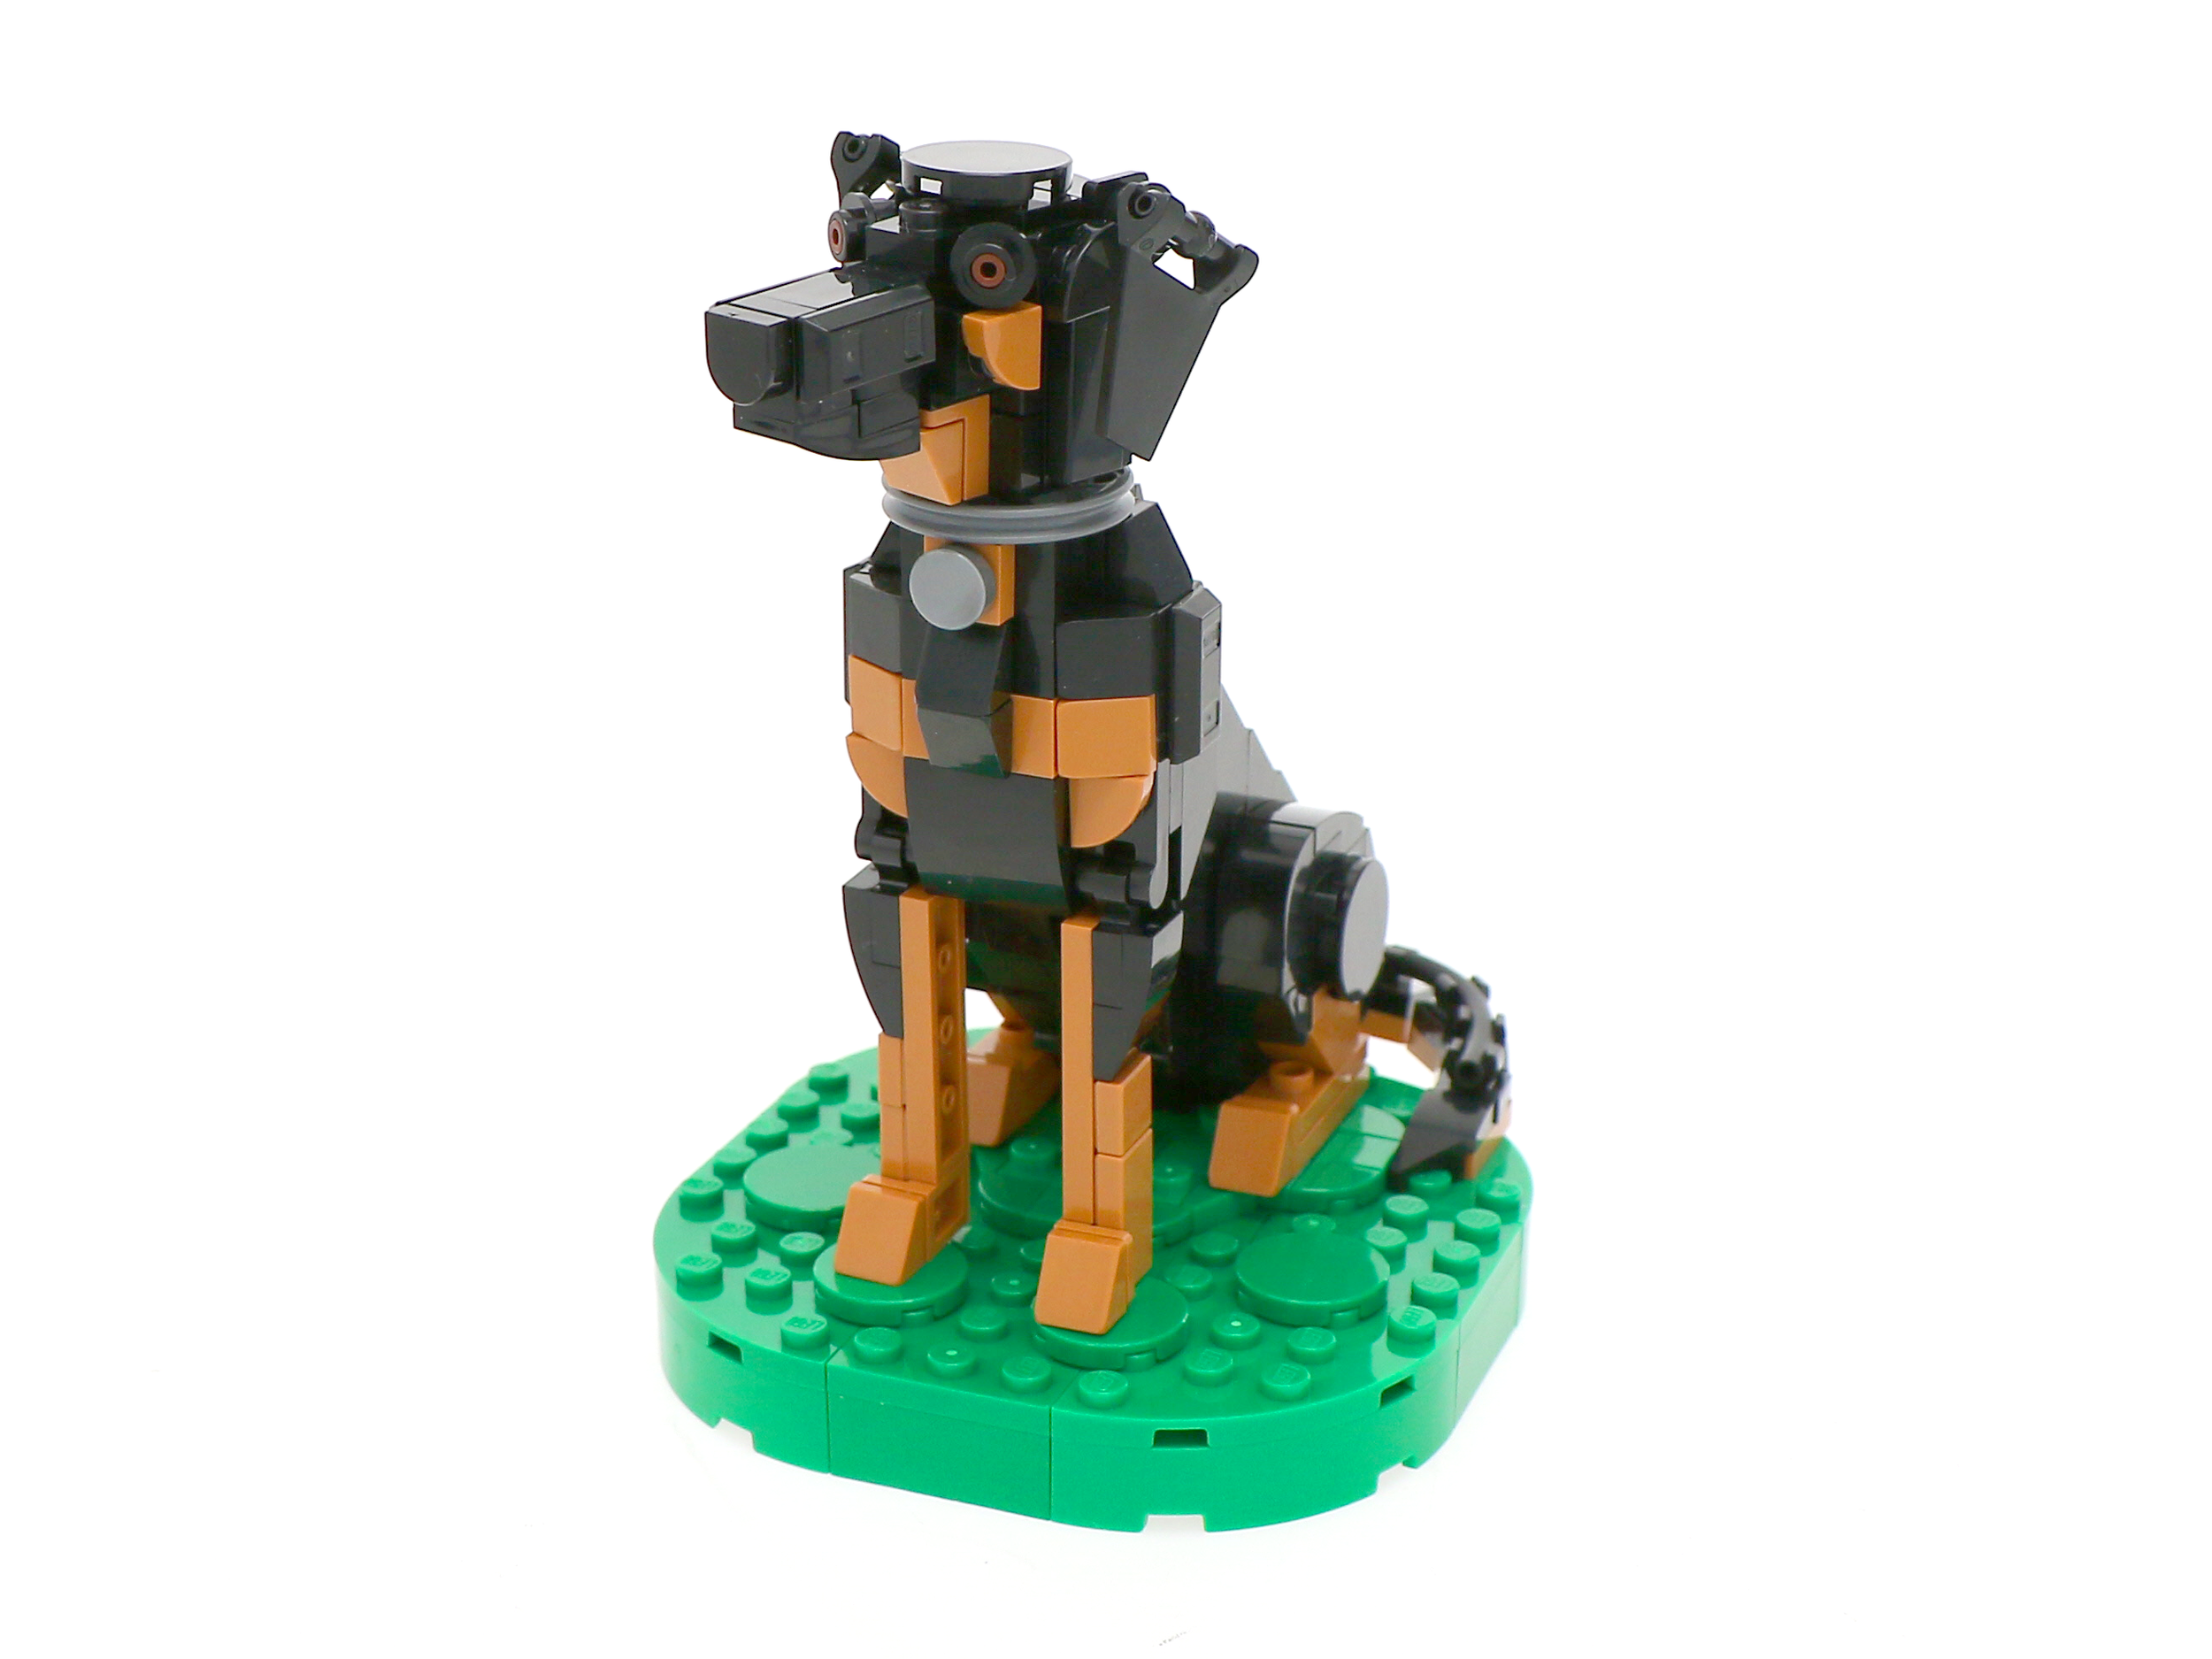
“Denver” by Paul Friesen
Depending on your lighting setup and camera exposure, the shadows of your model and the slight gradient of your backdrop may still be visible. If you have access to a professional lightbox with a translucent surface, subtle light from below the model can help lighten or eliminate shadows on the underside without washing out highlights elsewhere.
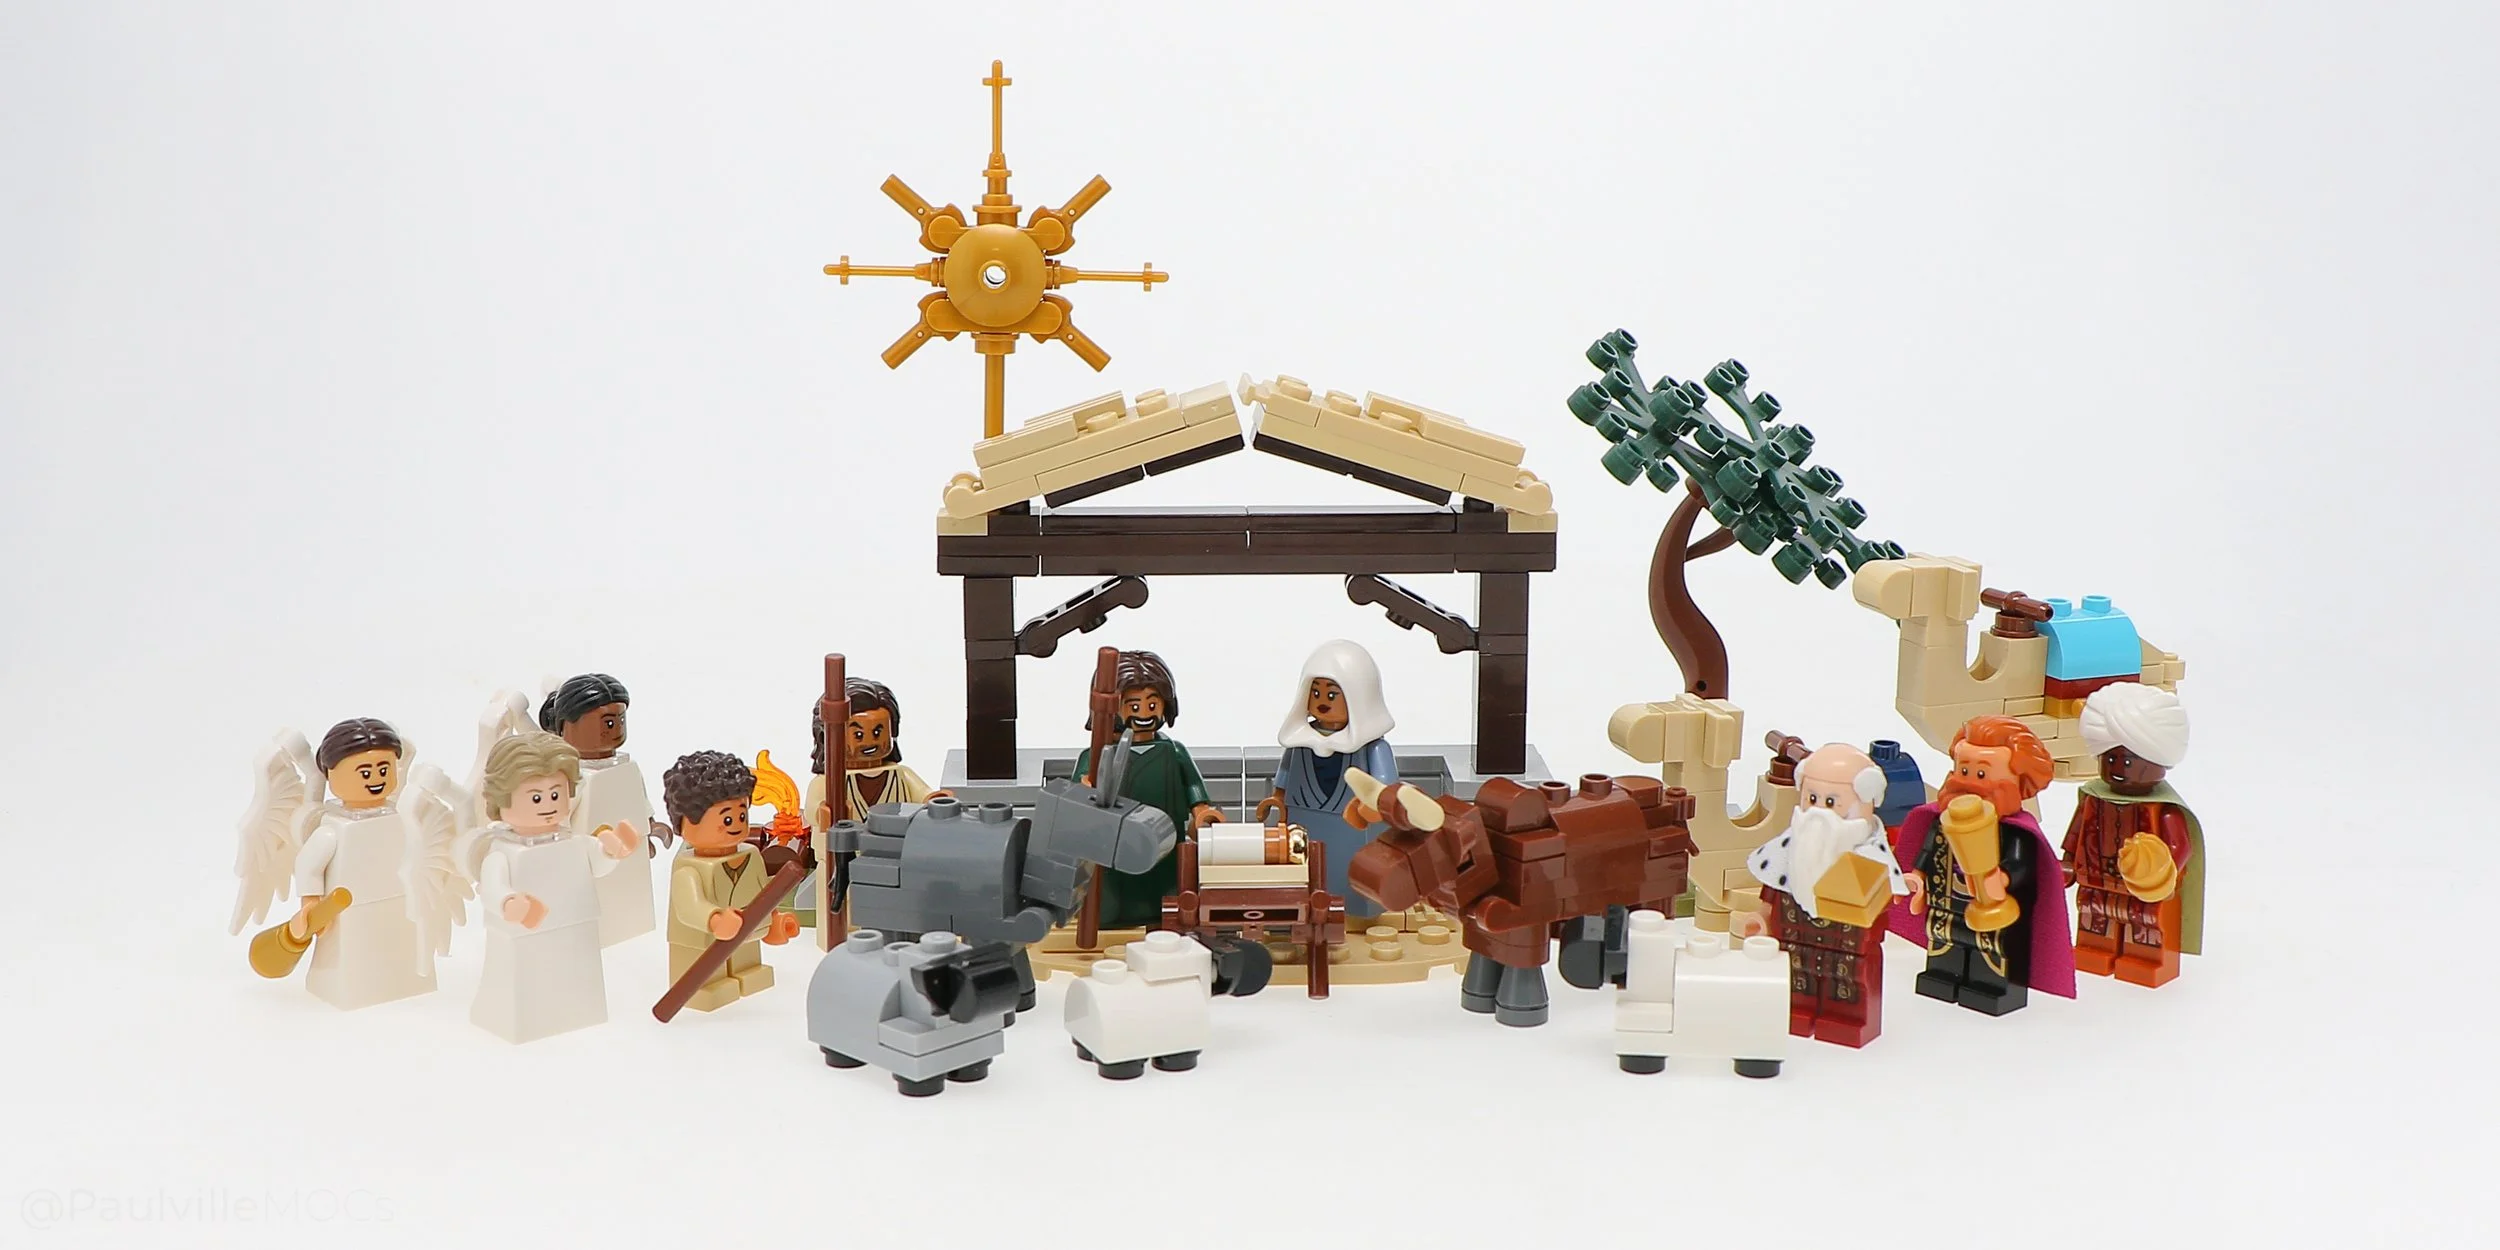
“Nativity Scene” by Paul Friesen
You can also remove the background entirely, shadows and all, replacing it with pure white. While time-consuming, this presentation method can imitate LEGO product renders. Aaron Newman, long before working for LEGO, created entire product lines styled after LEGO sets. His photos exemplify the white void style!
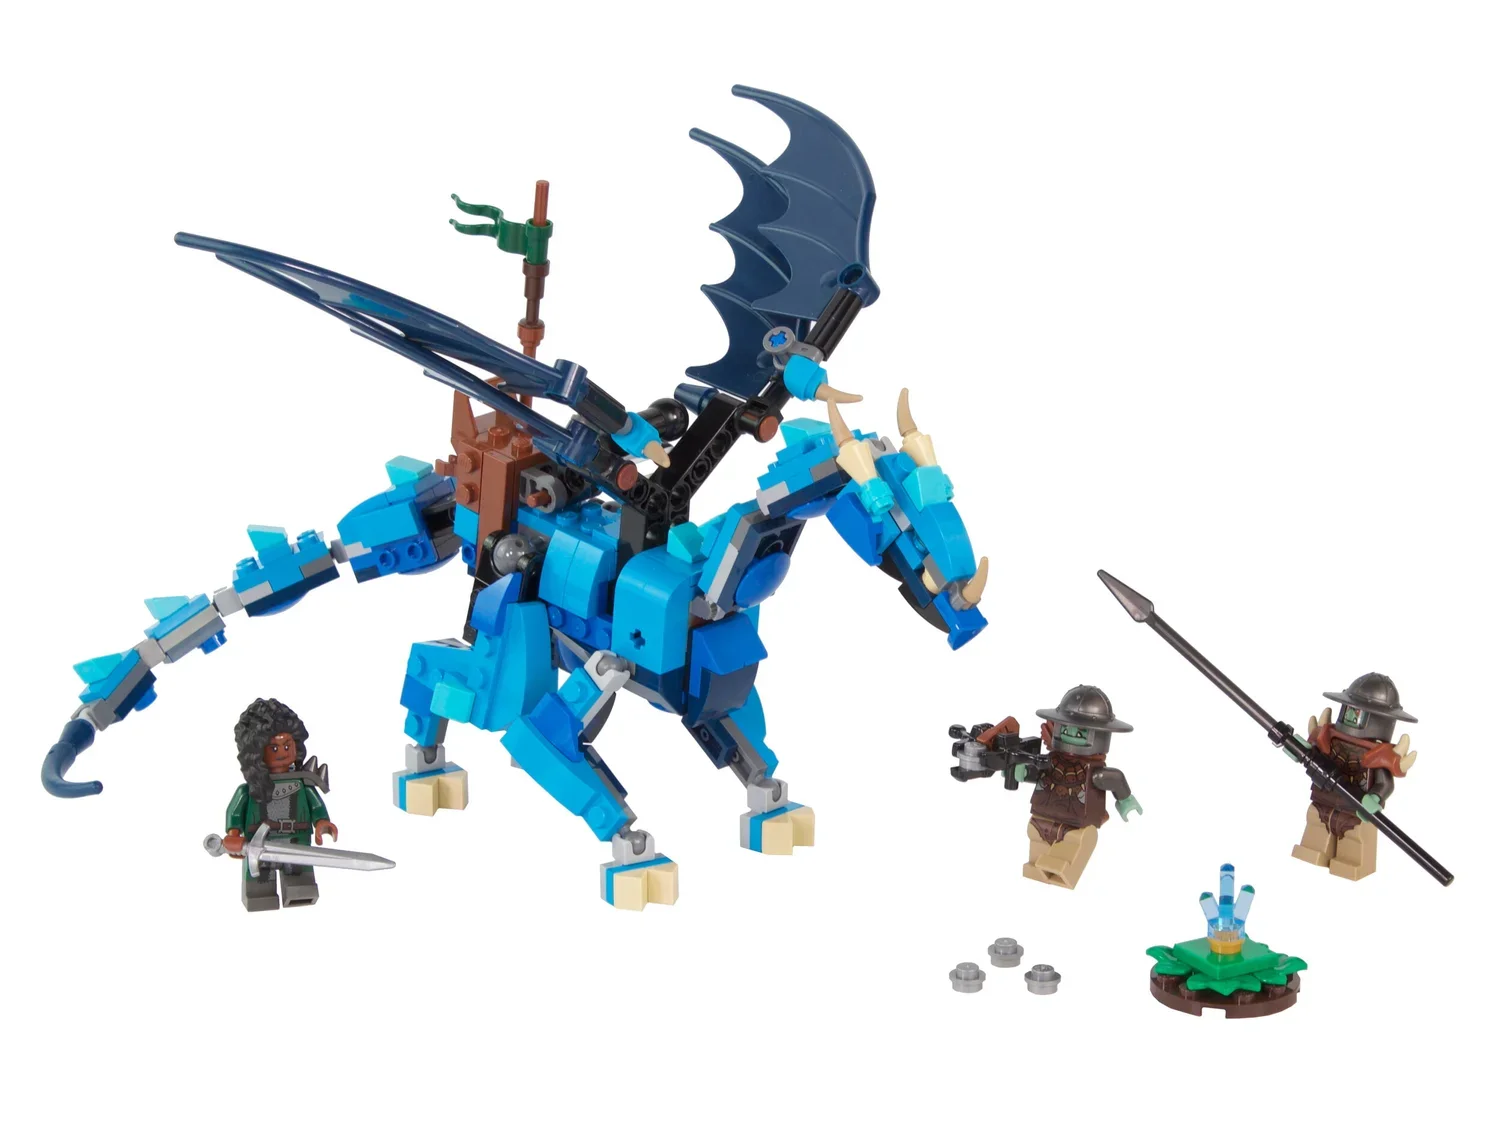
“Bevyr the Swift” by Aaron Newman
One downside of this method can be the lack of contrast. For example, the white angels and sheep in the nativity scene above start to disappear into the white background. That lack of contrast can make it harder for your MOC to stand out. For more on how contrast draws the eye, see Conversation Piece #17.
Solid Color
The simplest way to avoid elements blending into the background, as with the angels and sheep, is by choosing a different solid color! It can be helpful to select a background color early in your build process, so you can consider it part of the model’s color scheme. (For more about color schemes, see Conversation Piece #5.) A colored backdrop can help imply a setting, such as the forest behind Sloth Kid or the sea behind the research vessel below.

“Sloth Kid” by Paul Friesen
A colored background can also make a monochrome build more eye-catching in a scrolling feed like Instagram’s. For example, the black BMW below could be easy to scroll past on a white background, but the mint green background helps it stand out. When choosing a color, look back at your reference photos to see what colors typically surround your subject. The green background here was inspired by a photograph of the real car against a mint green brick wall.
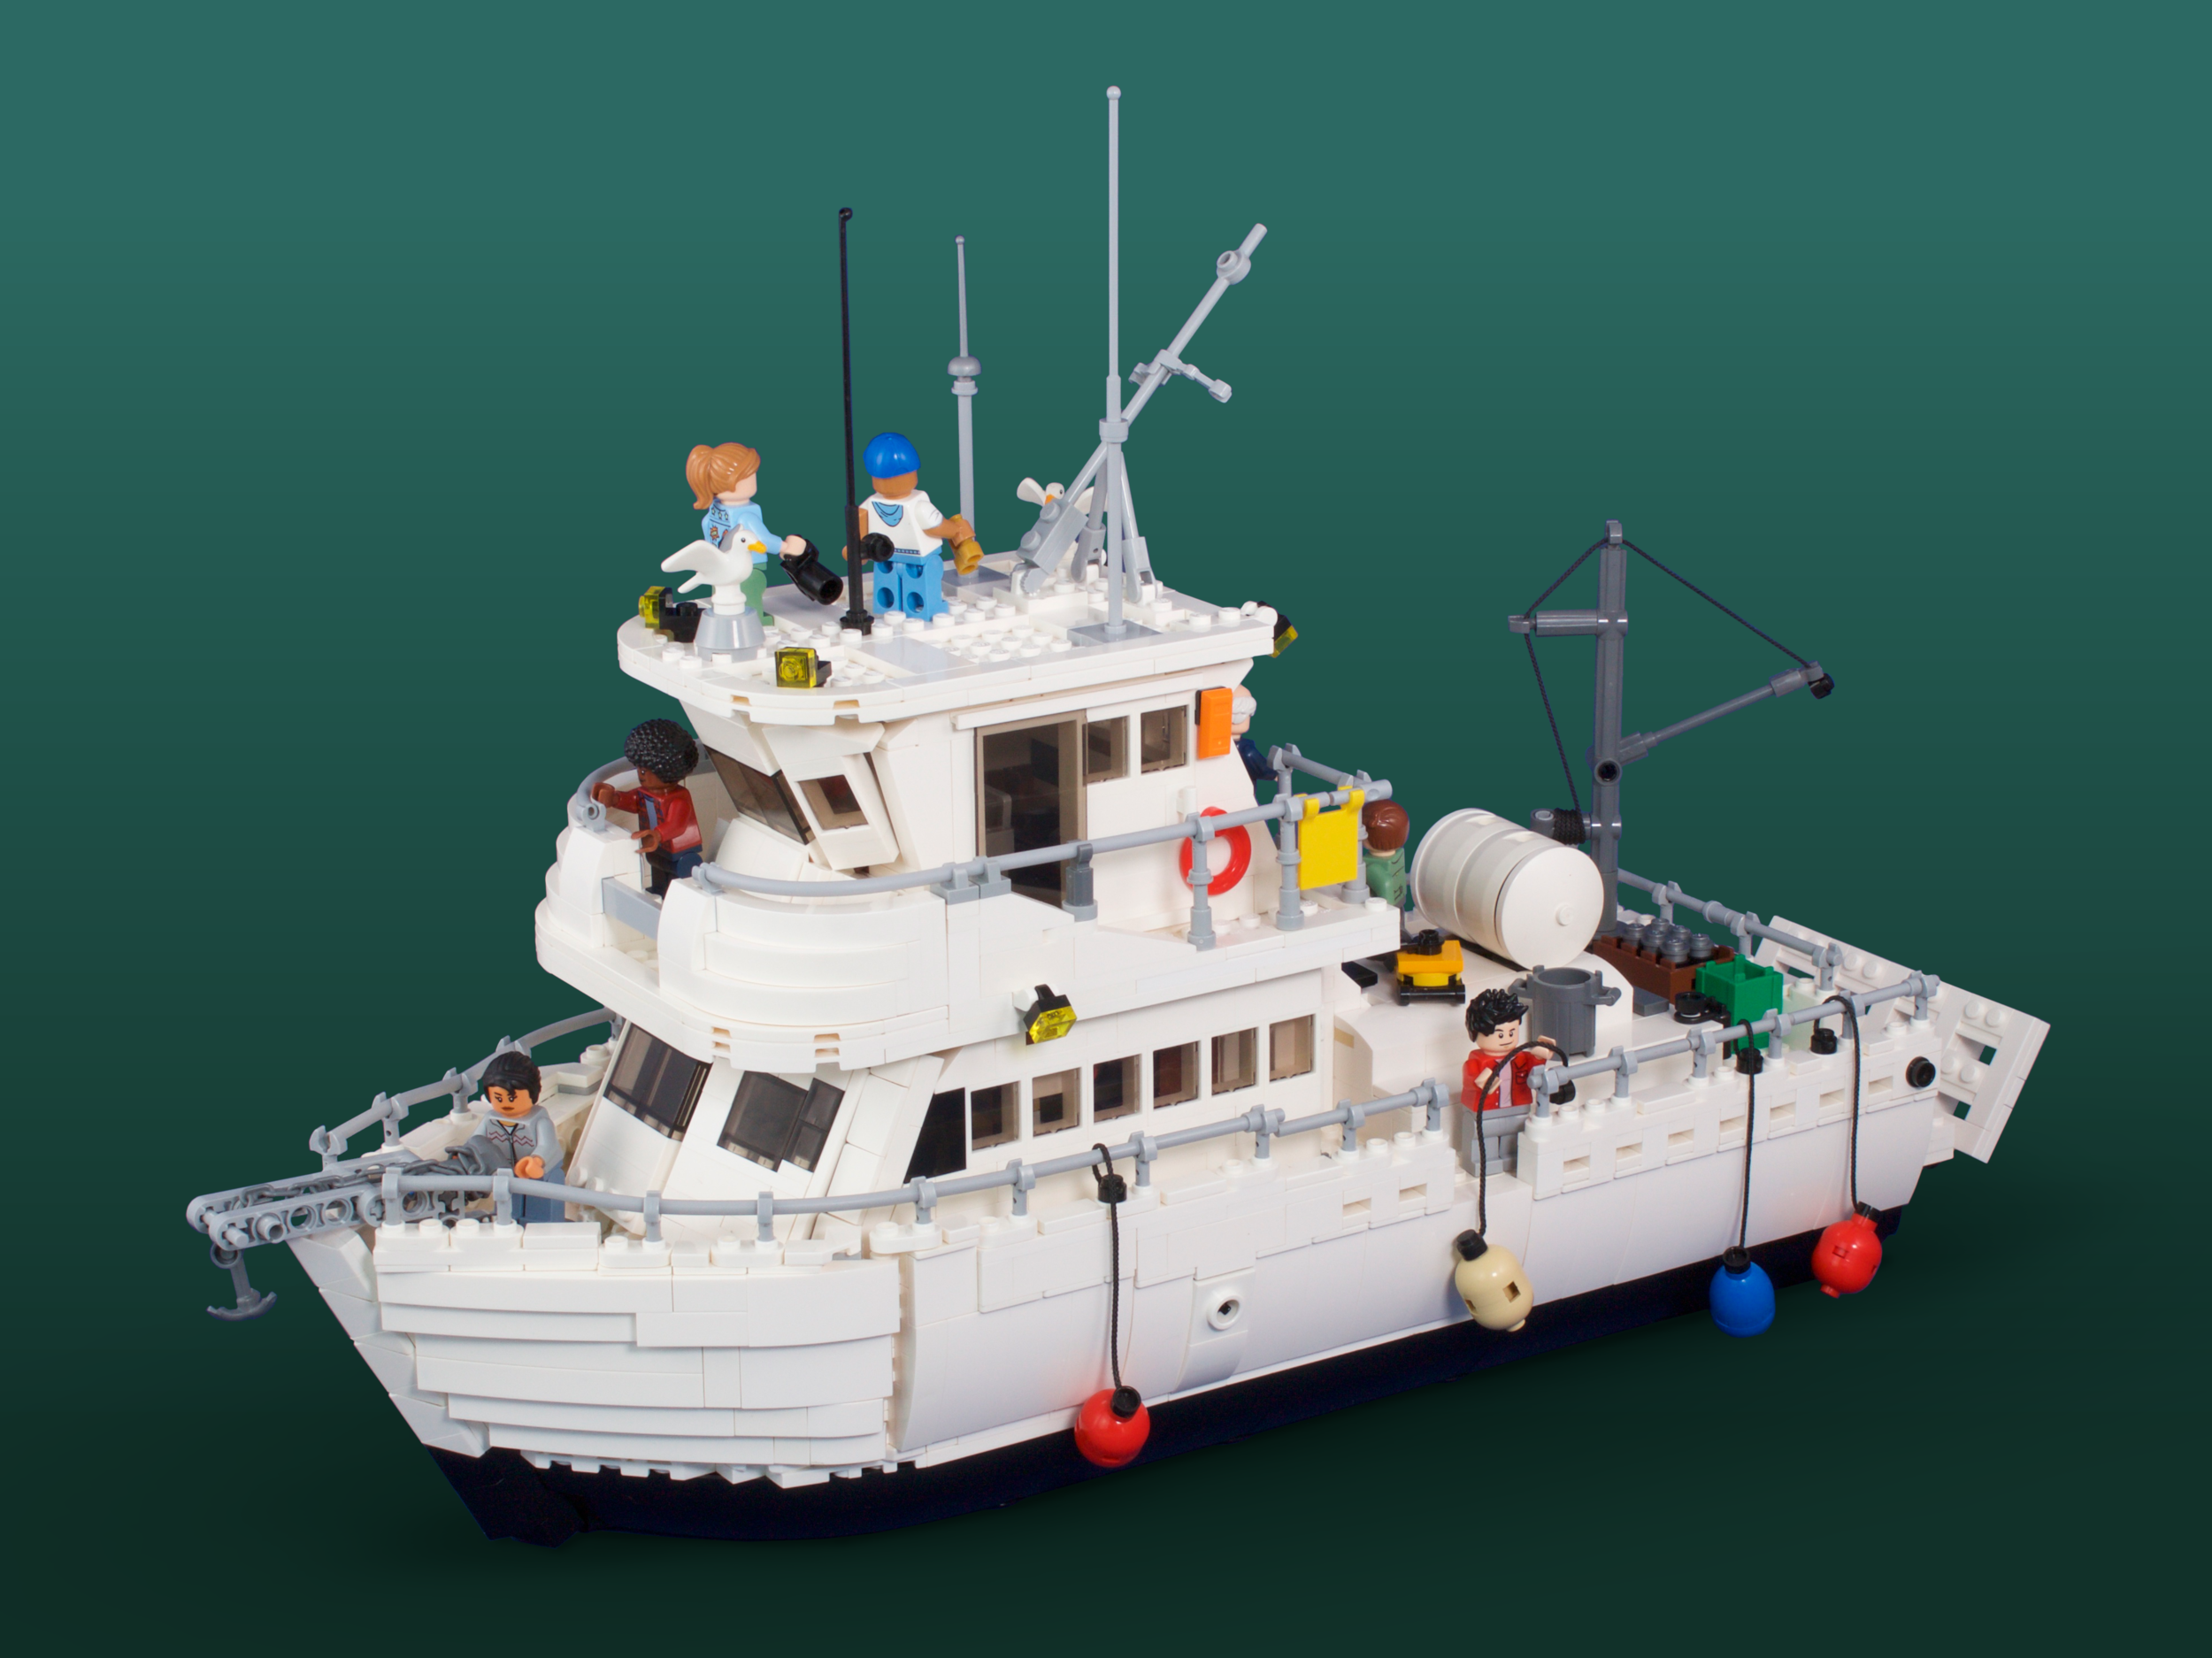
“Research Vessel” by Aaron Newman
You can use colored cardstock behind your model when photographing it, or photograph it against a neutral color and change the color (or replace the background entirely) afterward when editing. Beware of changing the color too significantly in editing, as the background color (particularly bright colors) can still be seen reflected in the glossy surfaces of most LEGO bricks!
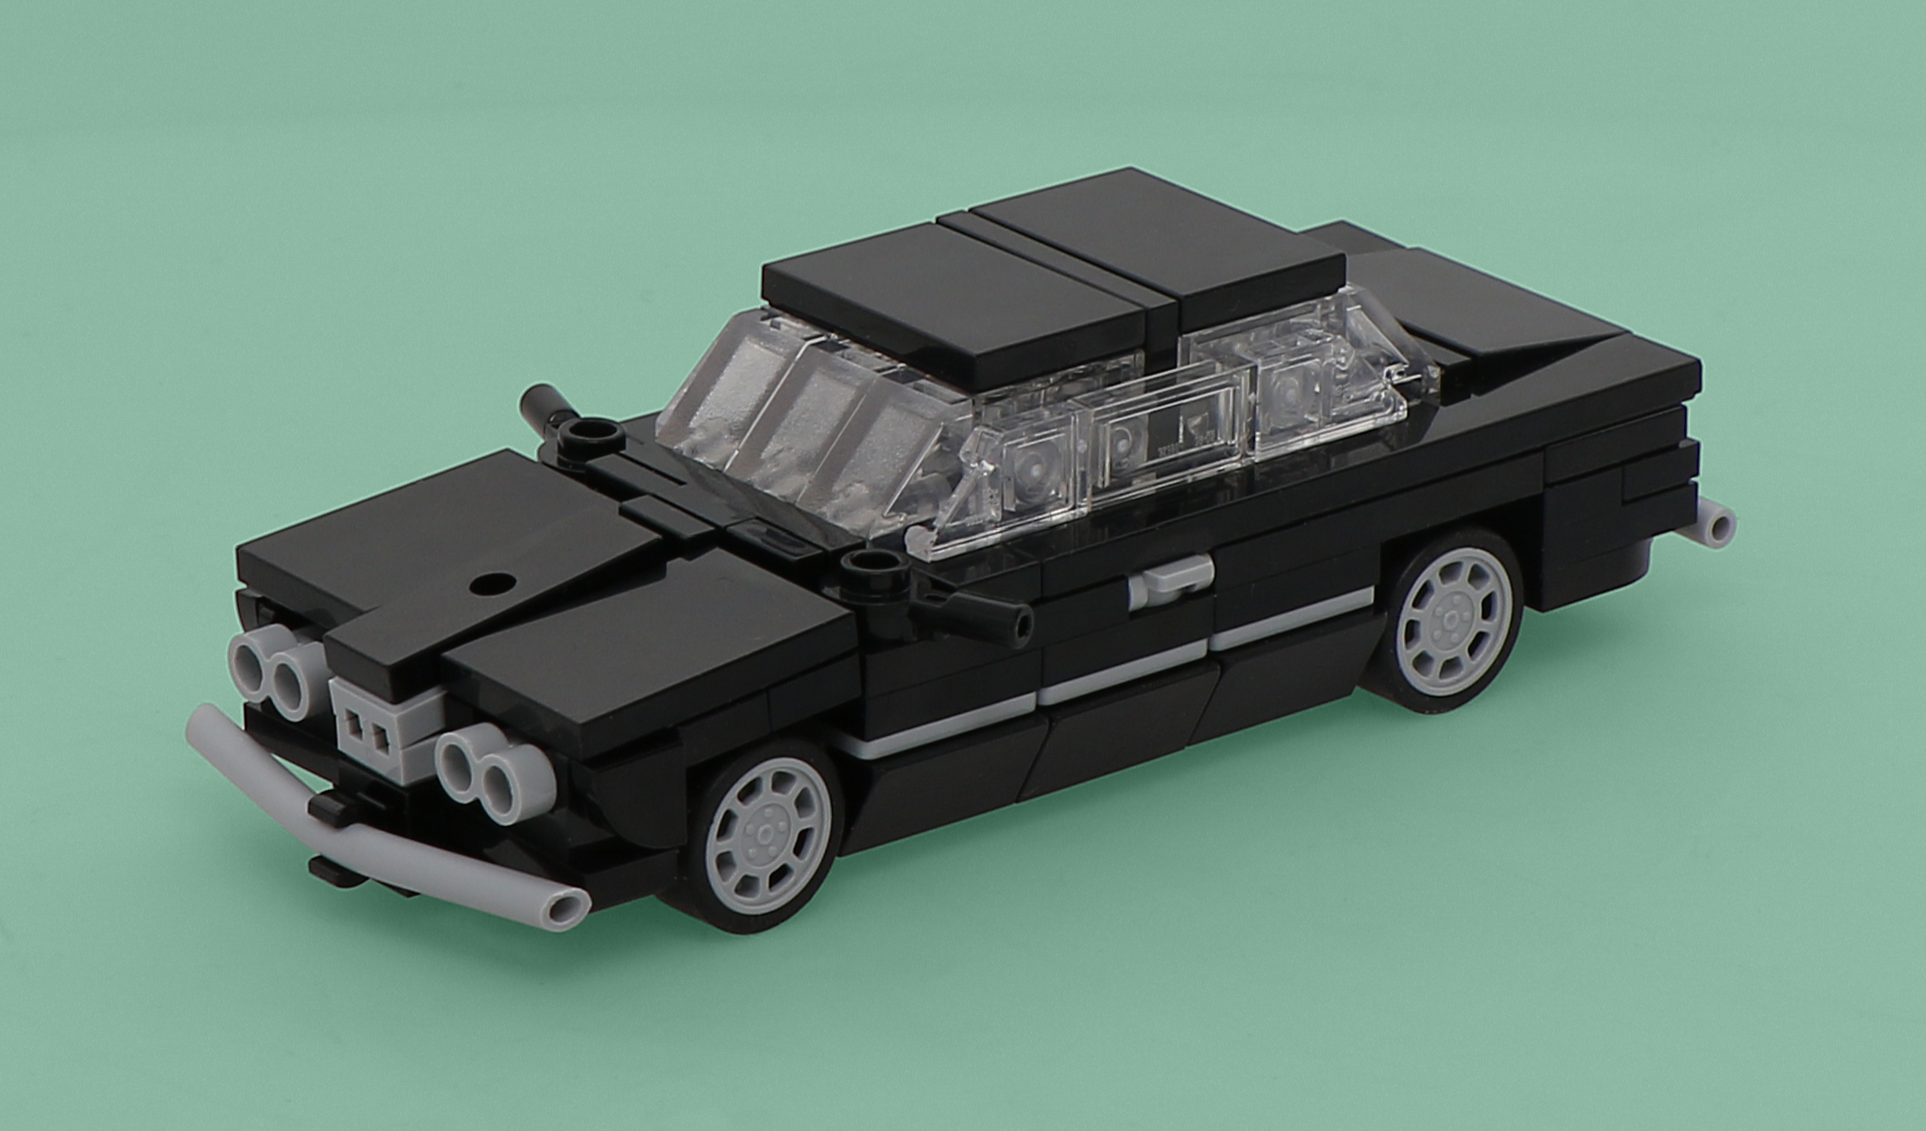
“Classic BMW” by Paul Friesen
If you choose to replace the background entirely when editing, Jonas Kramm, in a must-watch series on the build process for this icy castle, recommends adding a little noise to the background to make it feel less artificial. Noise introduces slight, random variations in pixel color.
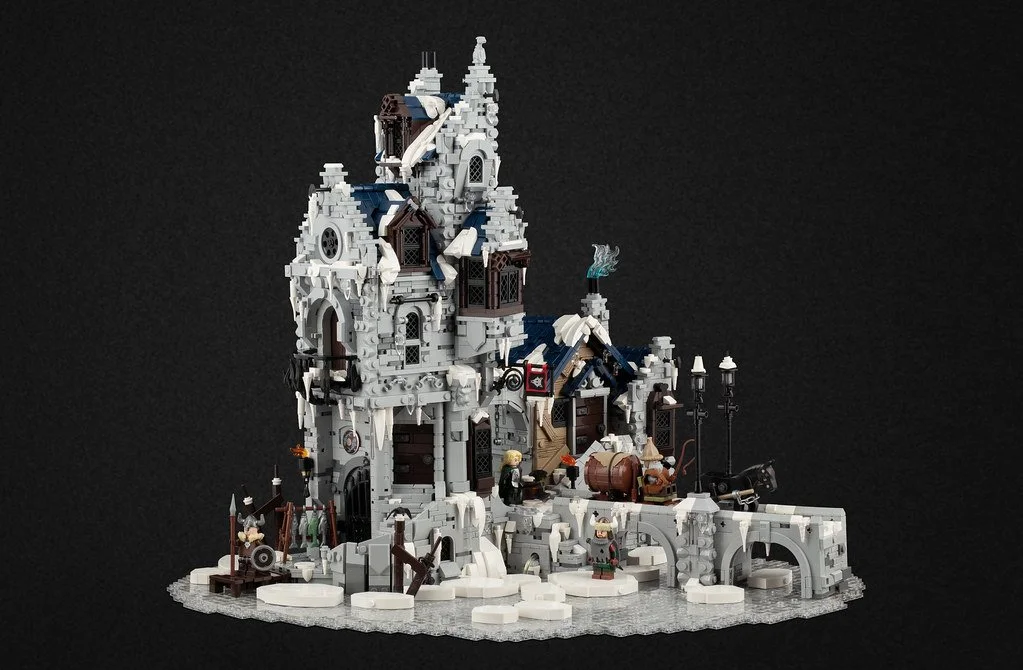
“Wolfholm” by Jonas Kramm
The same considerations of color, contrast, and noise apply when using a gradient background, as seen in the research vessel above.
Vector Background
If you want to add more visual interest to your background but don’t want your build to get lost in the setting, consider using a vector pattern! Vector artwork is saved as a set of mathematically defined lines and curves rather than as a grid of pixels.

“Space School Bus” by Tyler Clites
This style is characterized by crisp shapes, often two slightly different shades of the same color. That’s enough to suggest a horizon line, a texture or a setting, like the grass above. This is a great way to communicate the scale of your design, regardless of the size of the model itself. Free vector patterns are available online, or you can use shape and spline tools in your editing software of choice to draw your own!

“Egg to the Future” by Markus Rollbühler
LEGO has made similar backgrounds using vectors with gradients in their box art. These designs are more complex but retain a simplified geometric style that pairs well with the sharp edges of LEGO bricks.
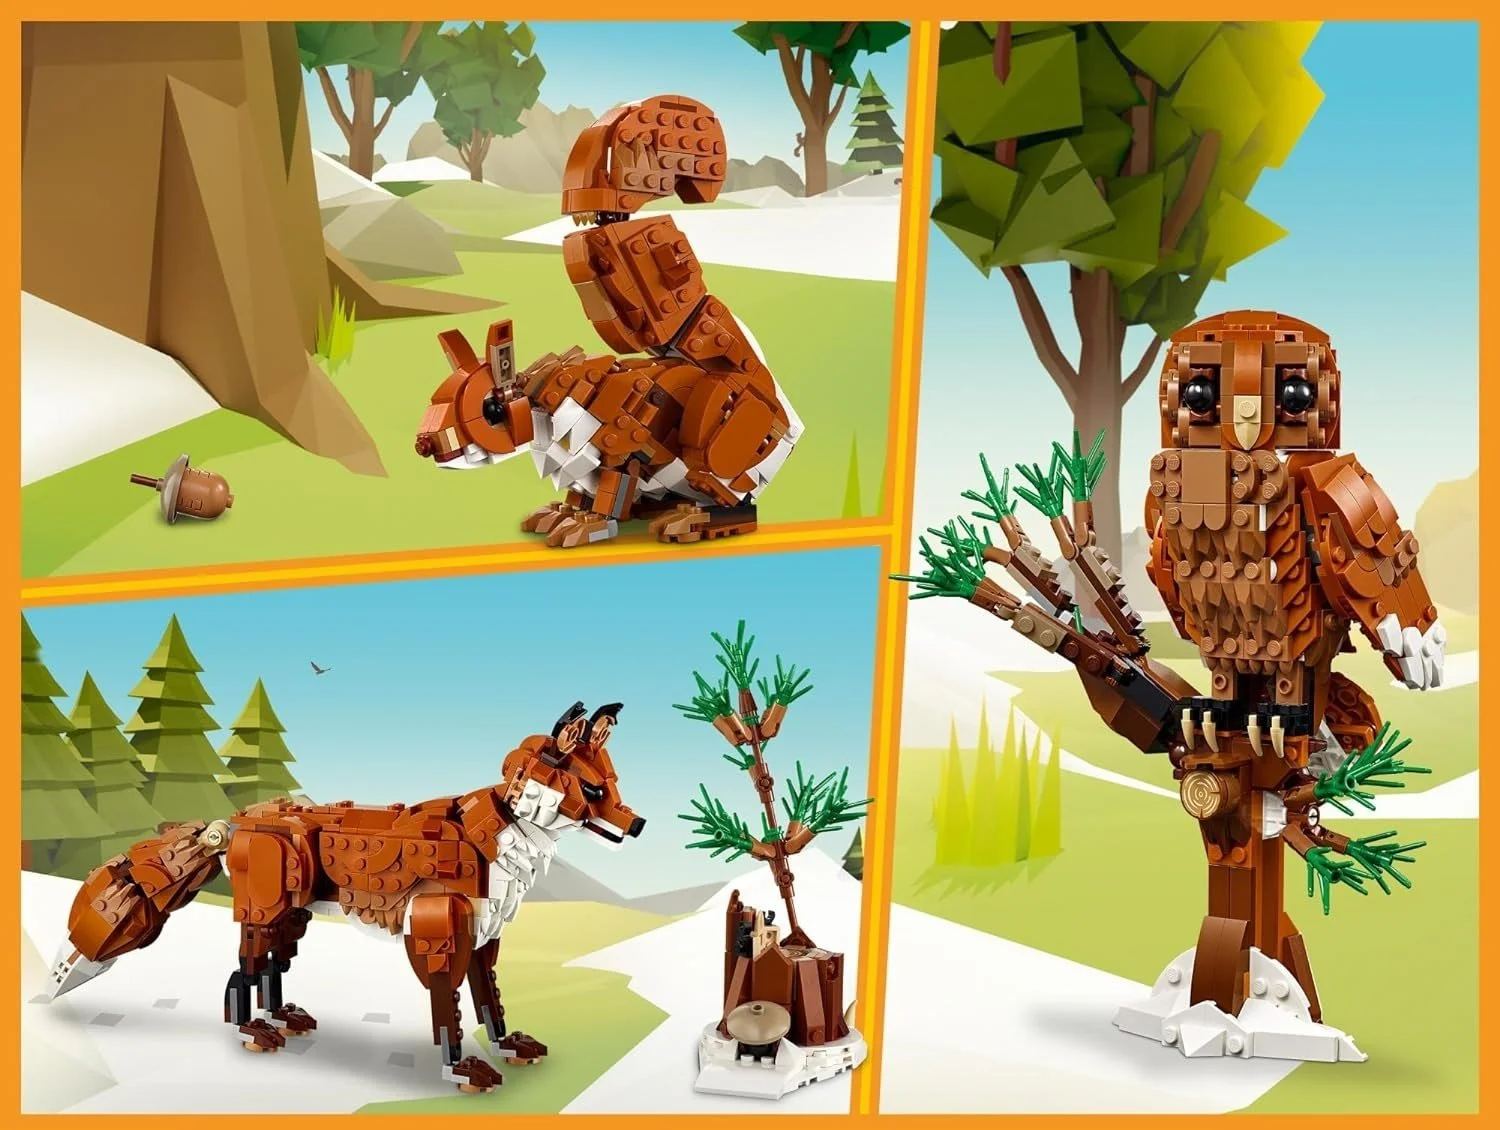
“Forest Animals: Red Fox” by LEGO
Detailed Background
A more recent trend is to build a digital environment around your model with photo-editing tools. In the scene above, the brick-built clouds in the foreground seamlessly blend with clouds added to the background during the editing process.
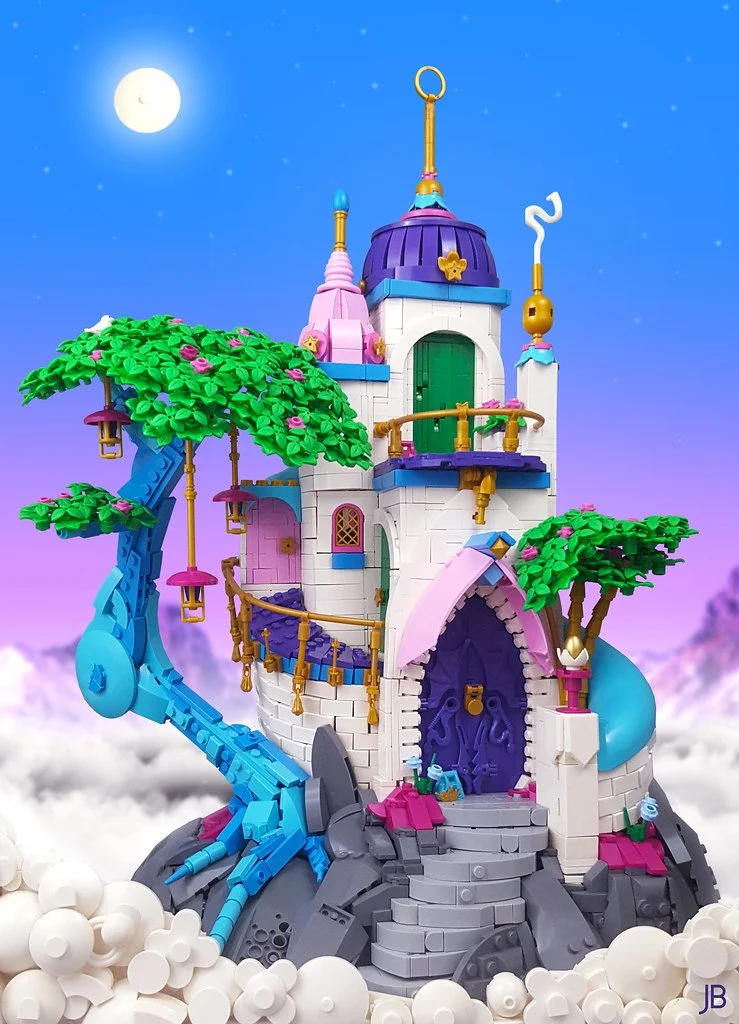
“Citadel of Sweet Dreams” by Jente Bijl
The backgrounds in this style are often made by editing together existing artwork and stock photos. If you take this approach, be sure to credit the artists or photographers! You can further blend the builds into the digital world by adding foreground elements, such as fog or the blades of grass above.

“Queen Amelia” by Eann McCurdy
Outdoor Textures
If you want detailed backgrounds but don’t want to edit them in, consider what textures you might have around your neighborhood!
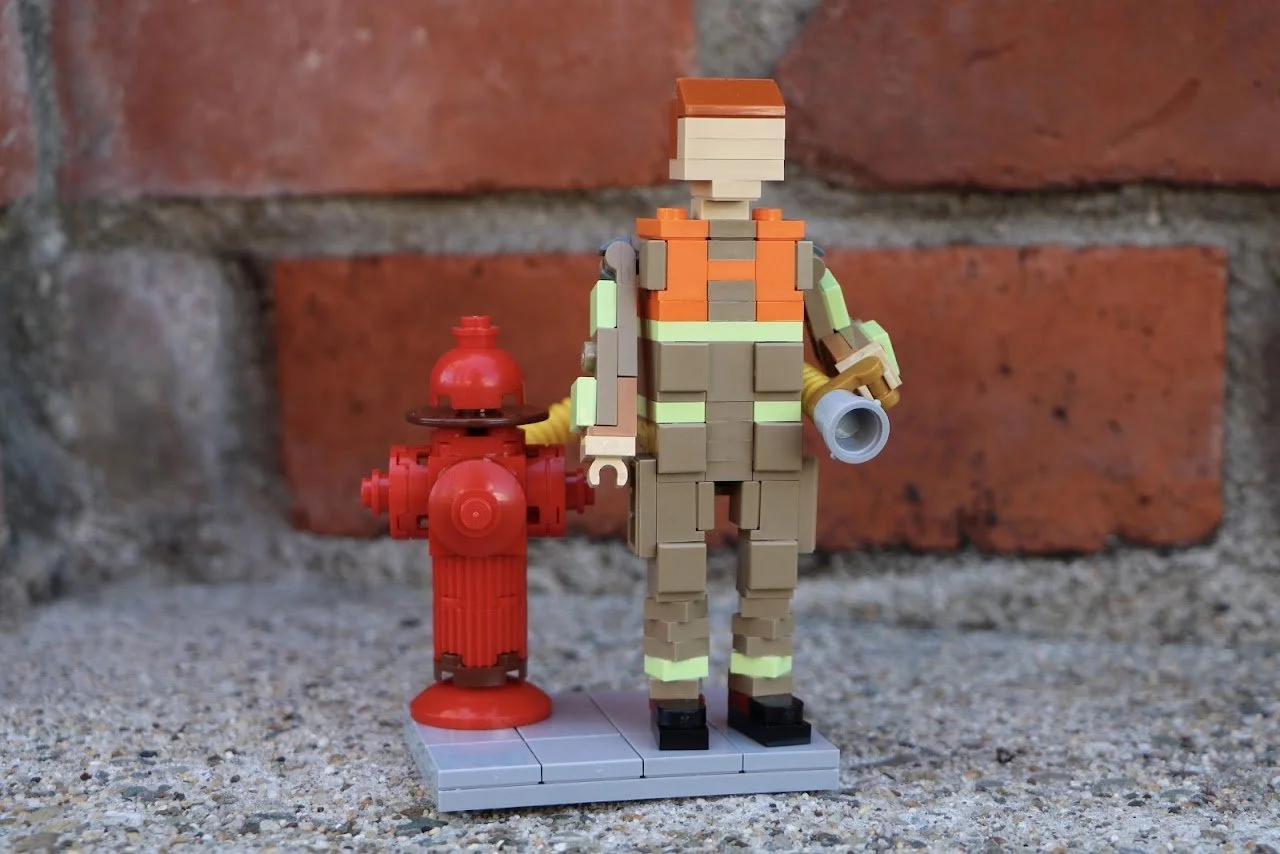
“Junior Firefighter” by Paul Friesen
A bright, overcast day can give you soft, even lighting, eliminating another layer of technical difficulty. Physical textures also provide a frame of reference for a model’s size that a solid backdrop can hide.

“Animatronic T-Rex” by Paul Friesen
An industrial or mechanical model might work against concrete, while a cozier model might look at home against wood. If you’re willing to get your builds dirty, you can even photograph them in the dirt or grass!

“Hermit Crab” by Paul Friesen
Build Table
Finally, like a painter sharing a photo of their painting on the easel, you can present your LEGO model in the very place you built it! This style can feel more effortless and more connected to the medium, with drawers of LEGO bricks visible in the background. Despite the casual feel, you’ll still want enough contrast between the build and the backdrop.

“Iron Man Mark 1” by hachiroku24
With the Iron Man model above, the parts drawers behind it are out of focus and more dimly lit. Sorting parts by type can also help spread out bright, distracting colors. This is also a great way to show off your investment in Akro-Mils drawers!
Conclusion
When deciding how to present your LEGO model in a single snapshot, consider what you want the photo to achieve. Do you want the photo to highlight or obscure its LEGO-ness? Do you want to communicate the scale of the design or its physical size? Do you want it to exist within a setting or stand alone? Is the photo itself a piece of art, or is it a photo of a piece of art?
These are broad categories, and there are plenty of other ways to present a LEGO model in a photo. As the examples above show, even within the same category, builders can take very different approaches to presenting their work. Join us in a future installment to see how a few of our builders edit their photos and pick up some tools and techniques for getting the look you want!
Written by Paul Friesen in collaboration with Julian Collins.
What’s your favorite way to photograph a LEGO build? Let us know in the comments below!
Do you want to help BrickNerd continue publishing articles like this one? Become a top patron like Paige Mueller, Rob Klingberg from Brickstuff, John & Joshua Hanlon from Beyond the Brick, Megan Lum, Andy Price, Lukas Kurth from StoneWars, Wayne Tyler, Dan Church, Roxanne Baxter, and Marci Hollingsworth to show your support, get early access, exclusive swag and more.