Shock and Alt-Build: Leveling Up LEGO Pikachu
/Today’s guest article comes from Zane Houston, a math teacher and builder from Colorado known for his impressive Pokémon MOCs. After taking on LEGO Pokémon’s original starter trio, he now returns to see whether Pikachu can be rebuilt using only the elements included in the official set.
Returning to the Launch Wave
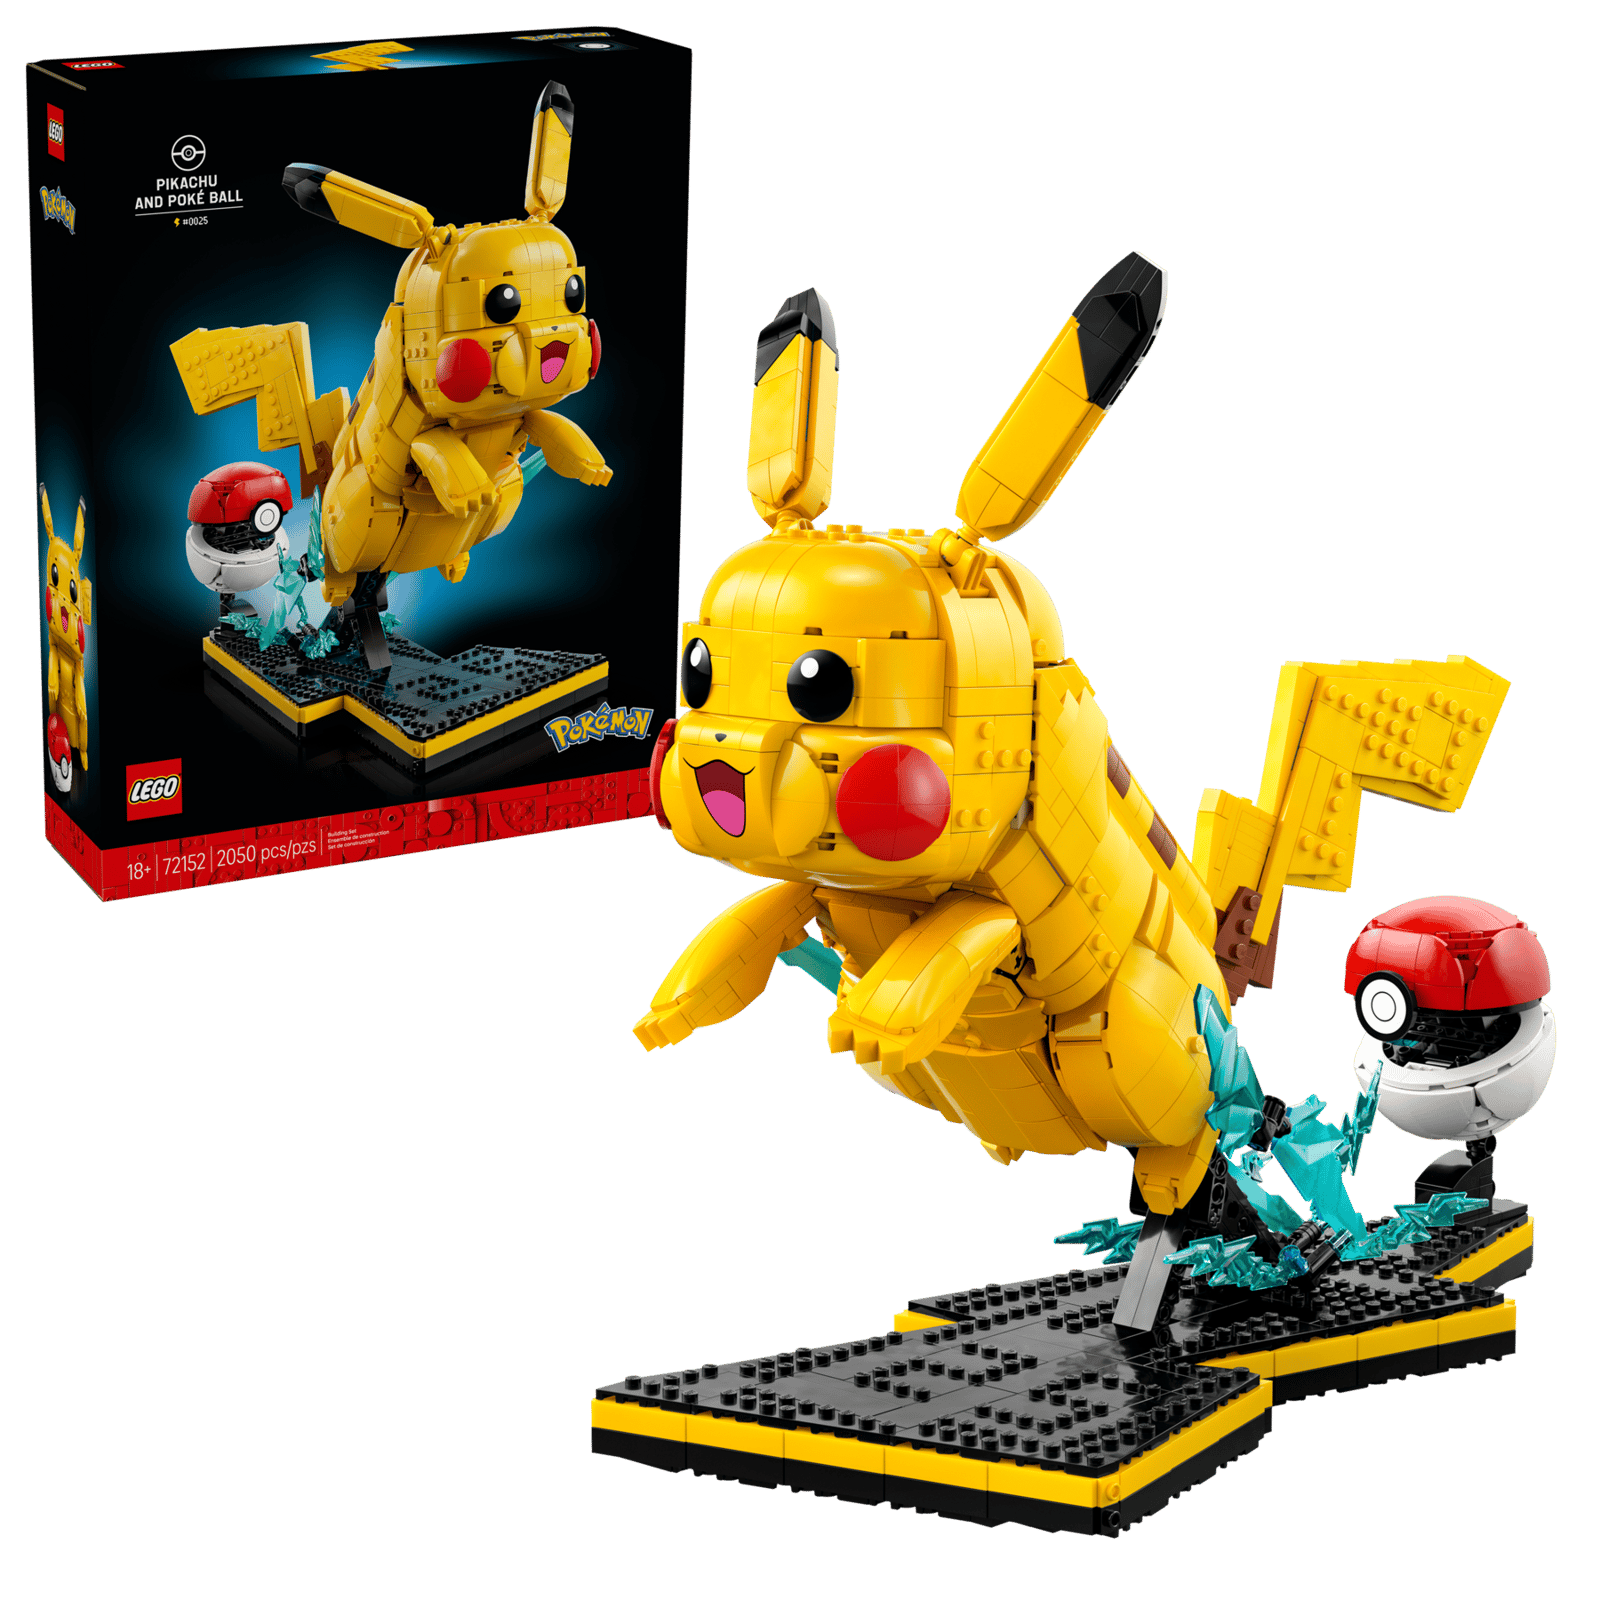
A lot has happened since the first LEGO Pokémon sets arrived in February. The theme has expanded beyond its original adult display models with a full wave of Smart Play sets, which Dan Ko explored and remixed in yesterday’s article. But one set from that original wave still deserves another look: LEGO Pokémon 72152 Pikachu and Poké Ball.
Pikachu was an obvious choice for LEGO Pokémon’s debut, but reactions to the $200 model were mixed. Its proportions and facial features left some fans disappointed, myself included. BrickNerd invited me to see whether I could rebuild the little electric mouse using only the 2,050 elements included in the set. Before taking Pikachu apart, however, I want to briefly look at two brighter spots from that original launch: 72151 Eevee and the limited GWP 40911 Mini Pokémon Center.
Teleporting to the Nearest Pokémon Center
Let’s start with 40911 Mini Pokémon Center, the sleeper of the original LEGO Pokémon launch. The set was offered as a limited Insiders reward gift with purchase and is no longer available, but it is too charming to ignore. (It may come back from time to time.)
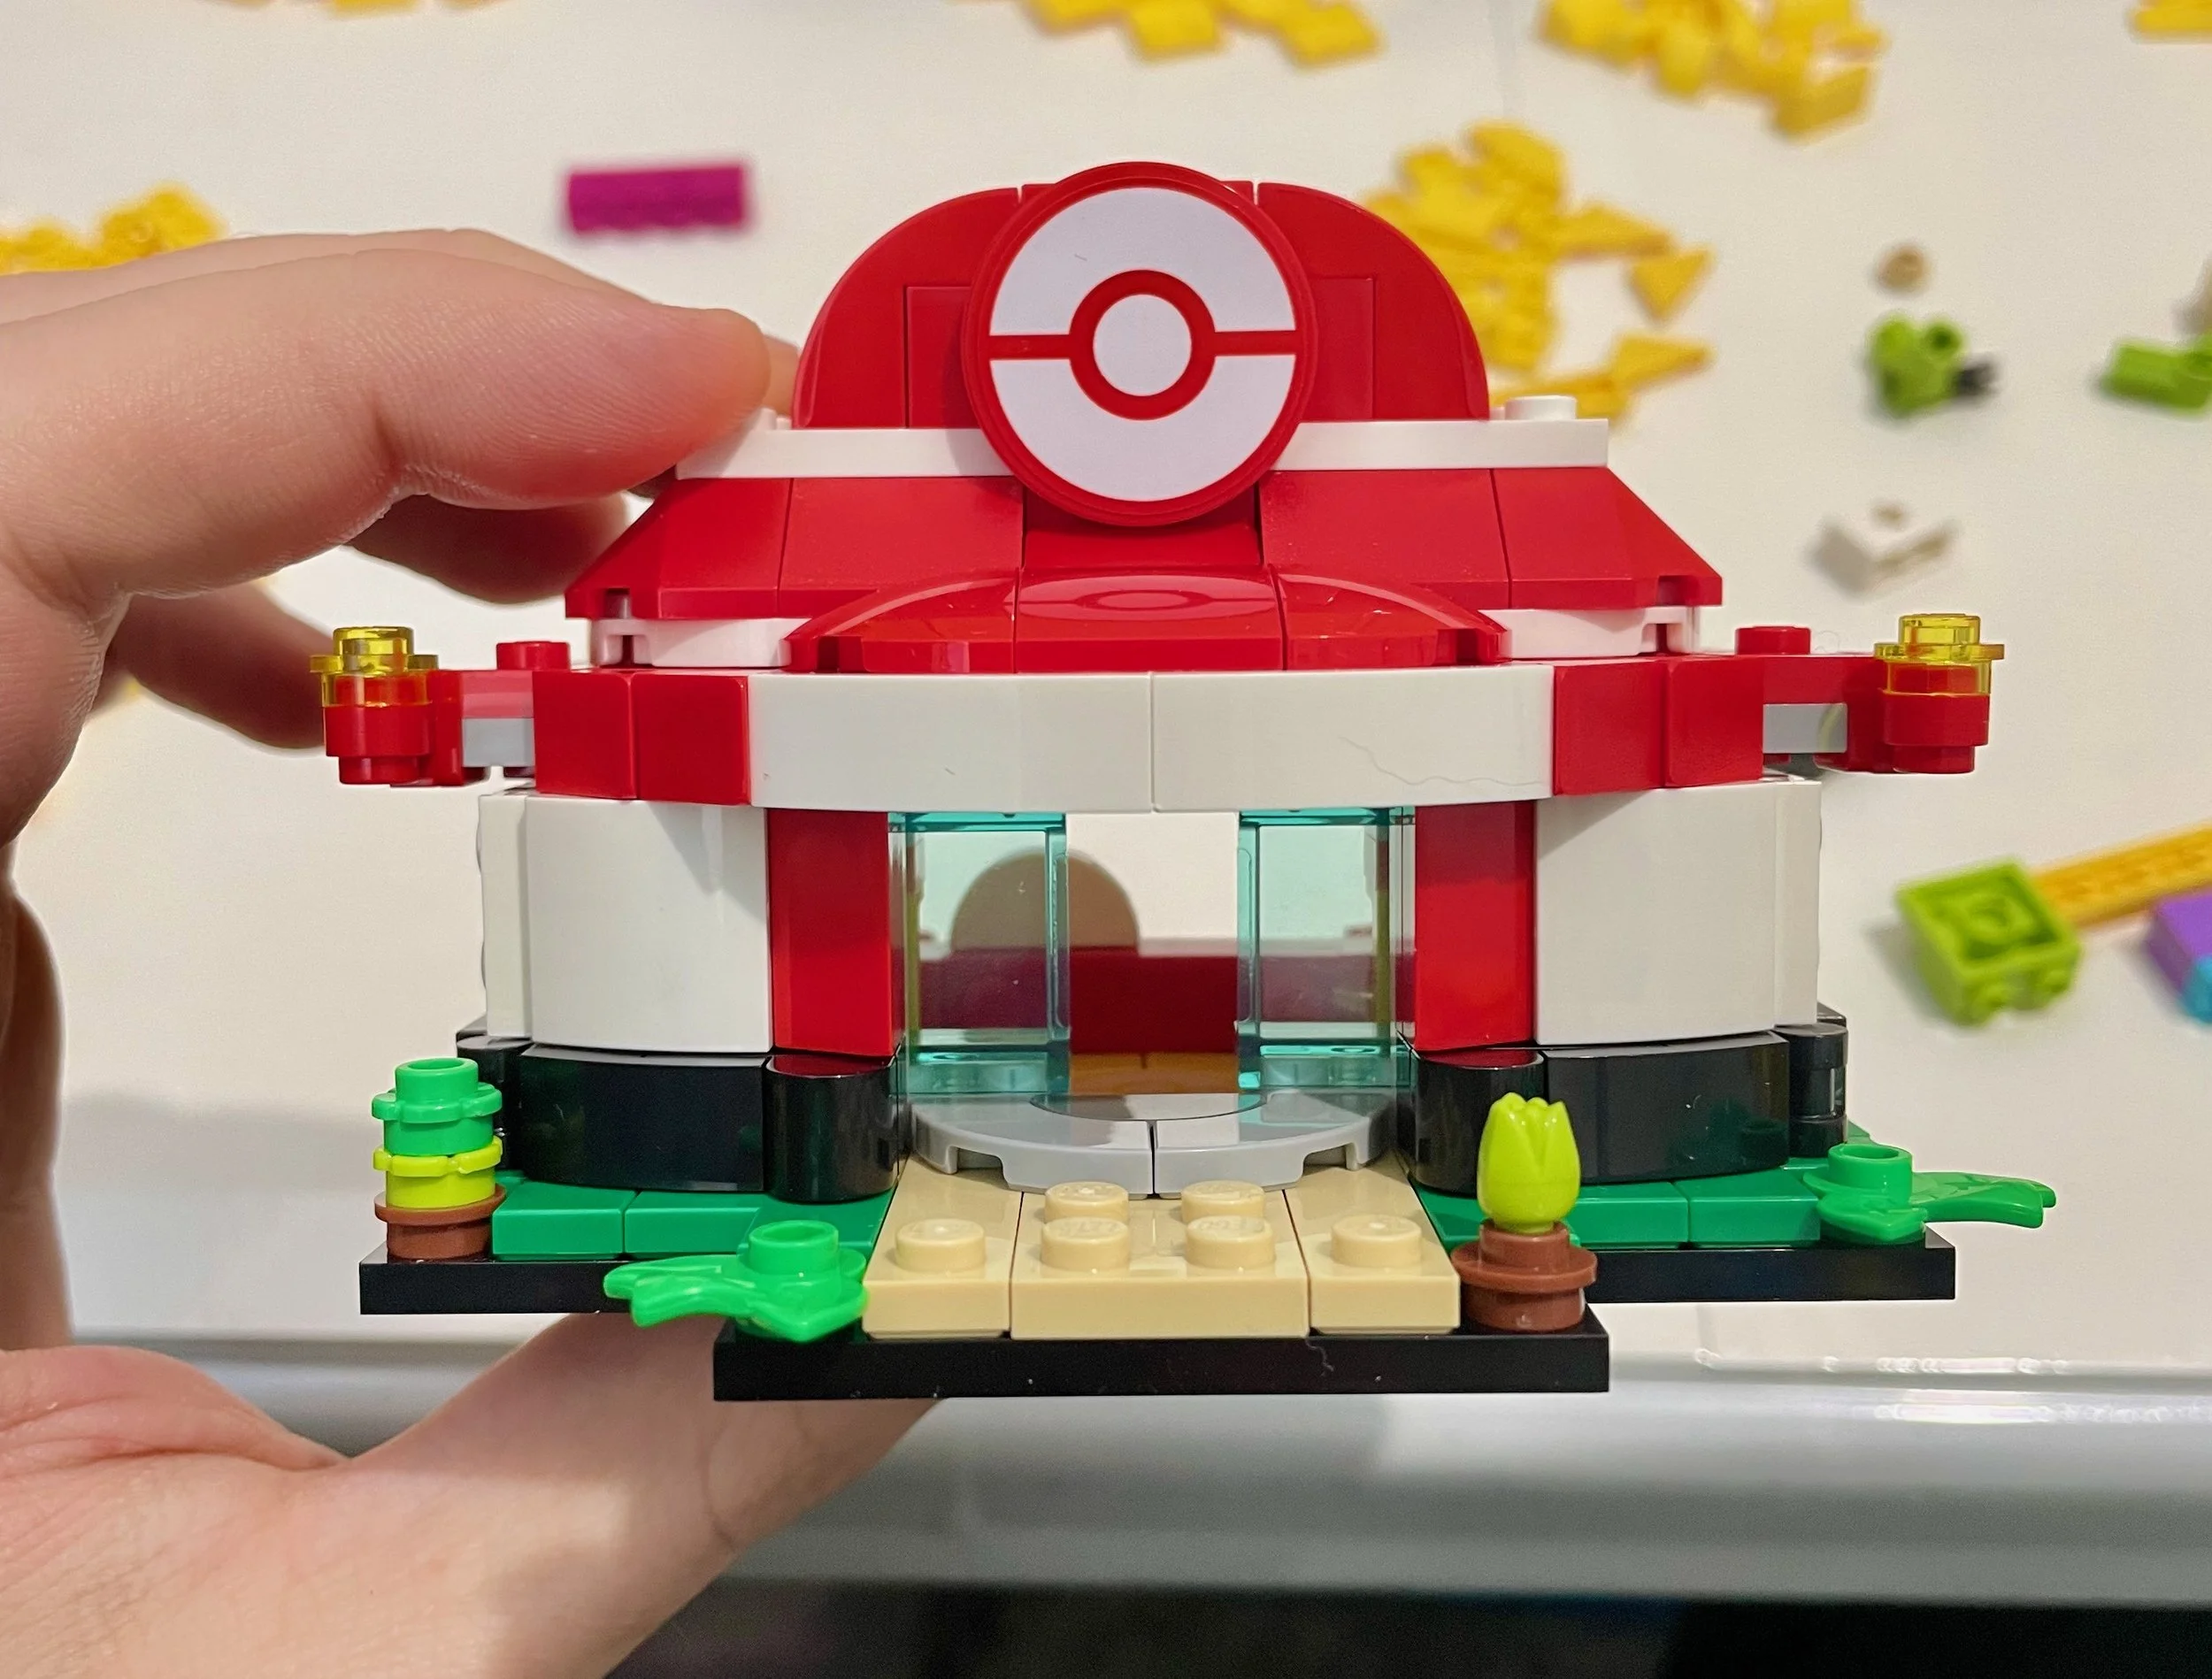
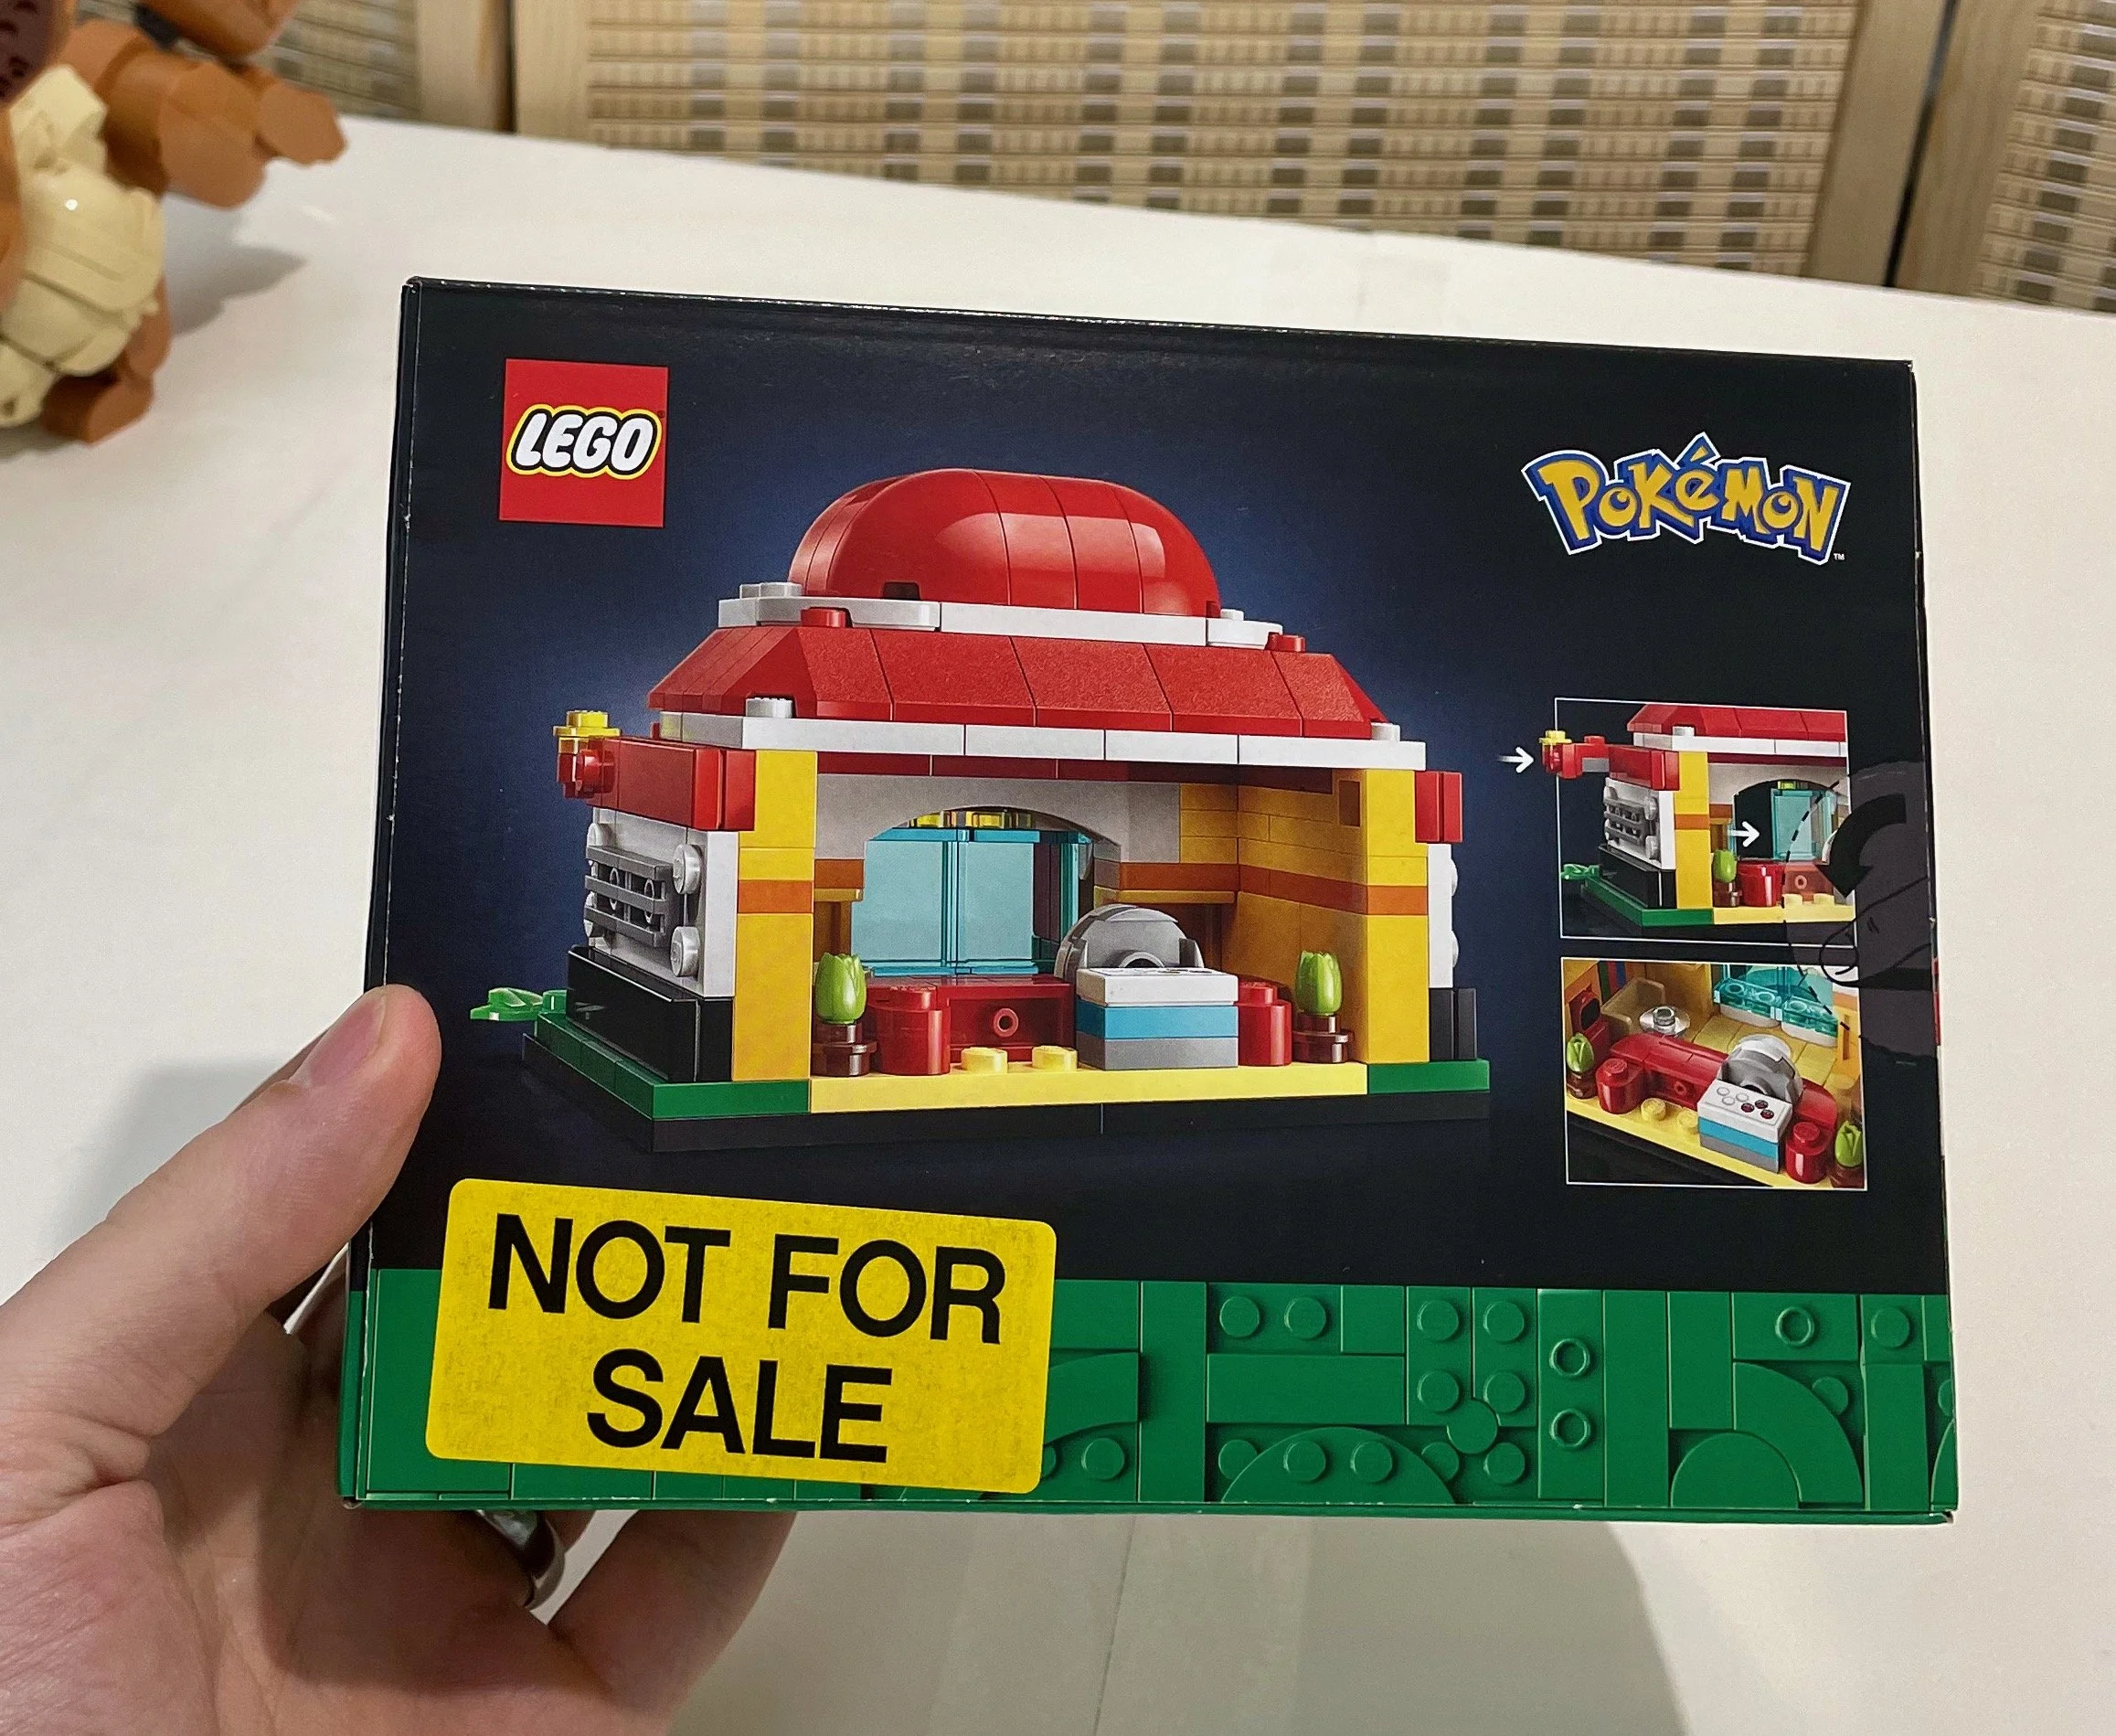
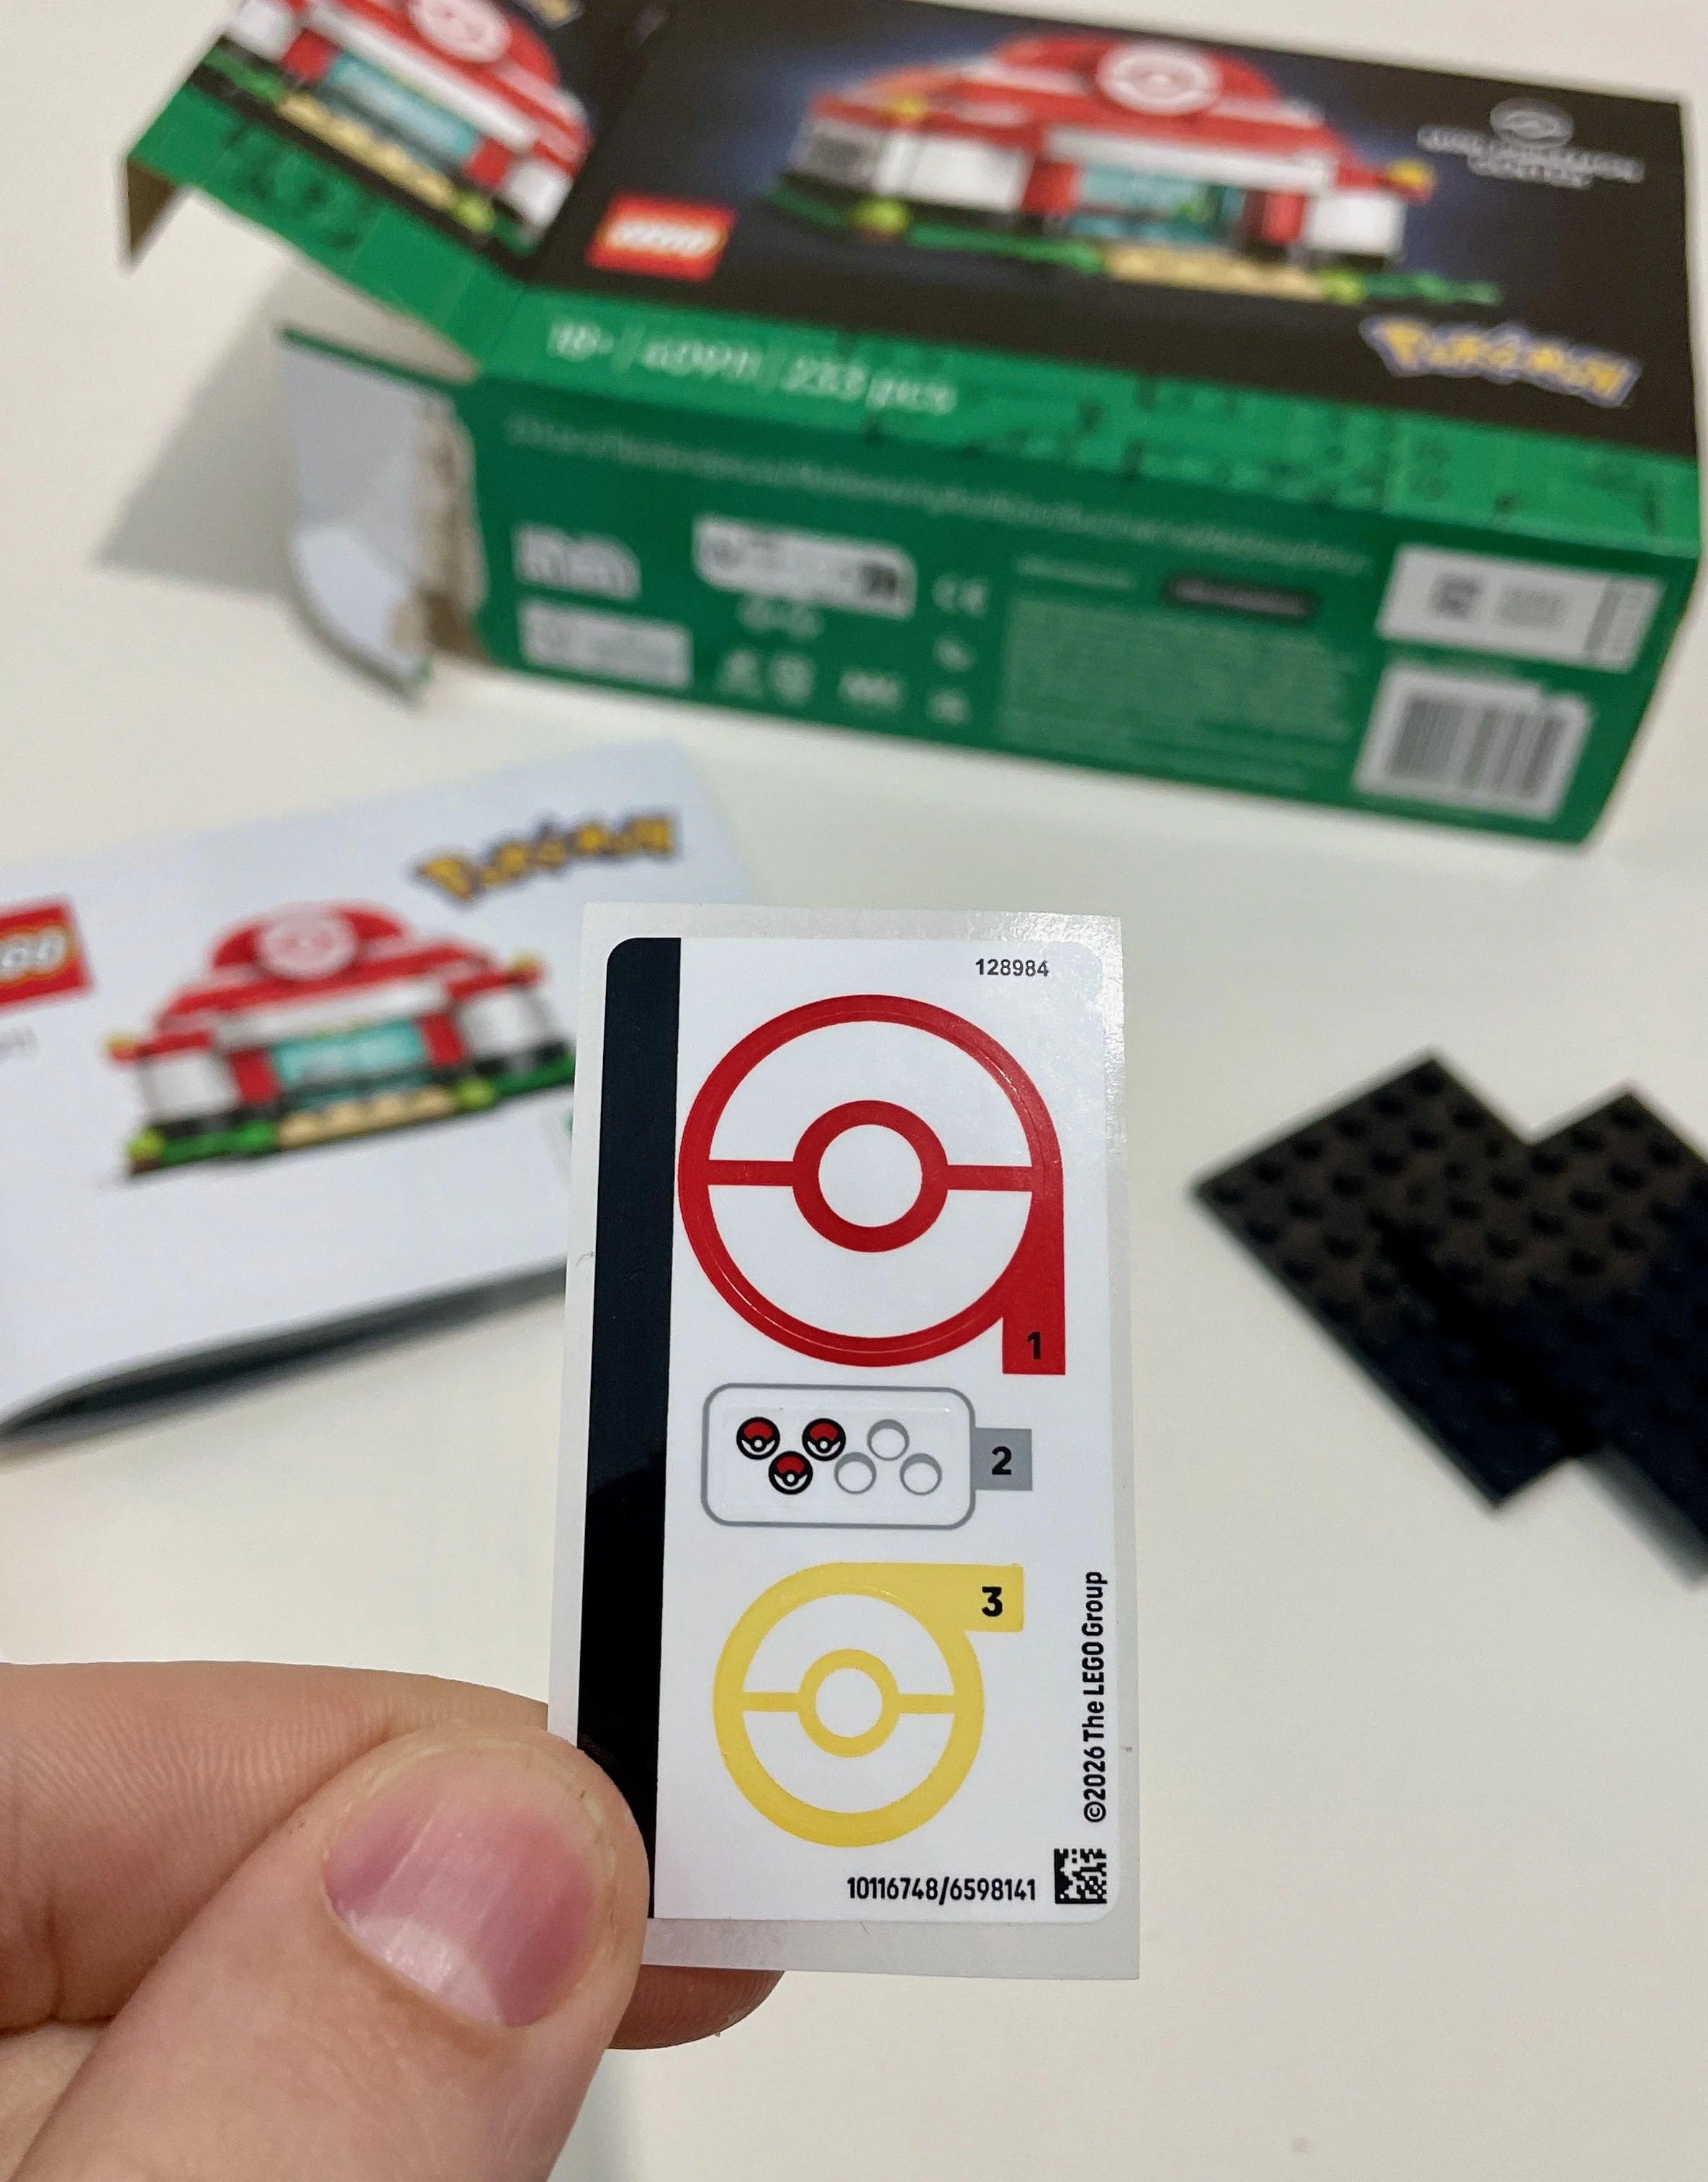
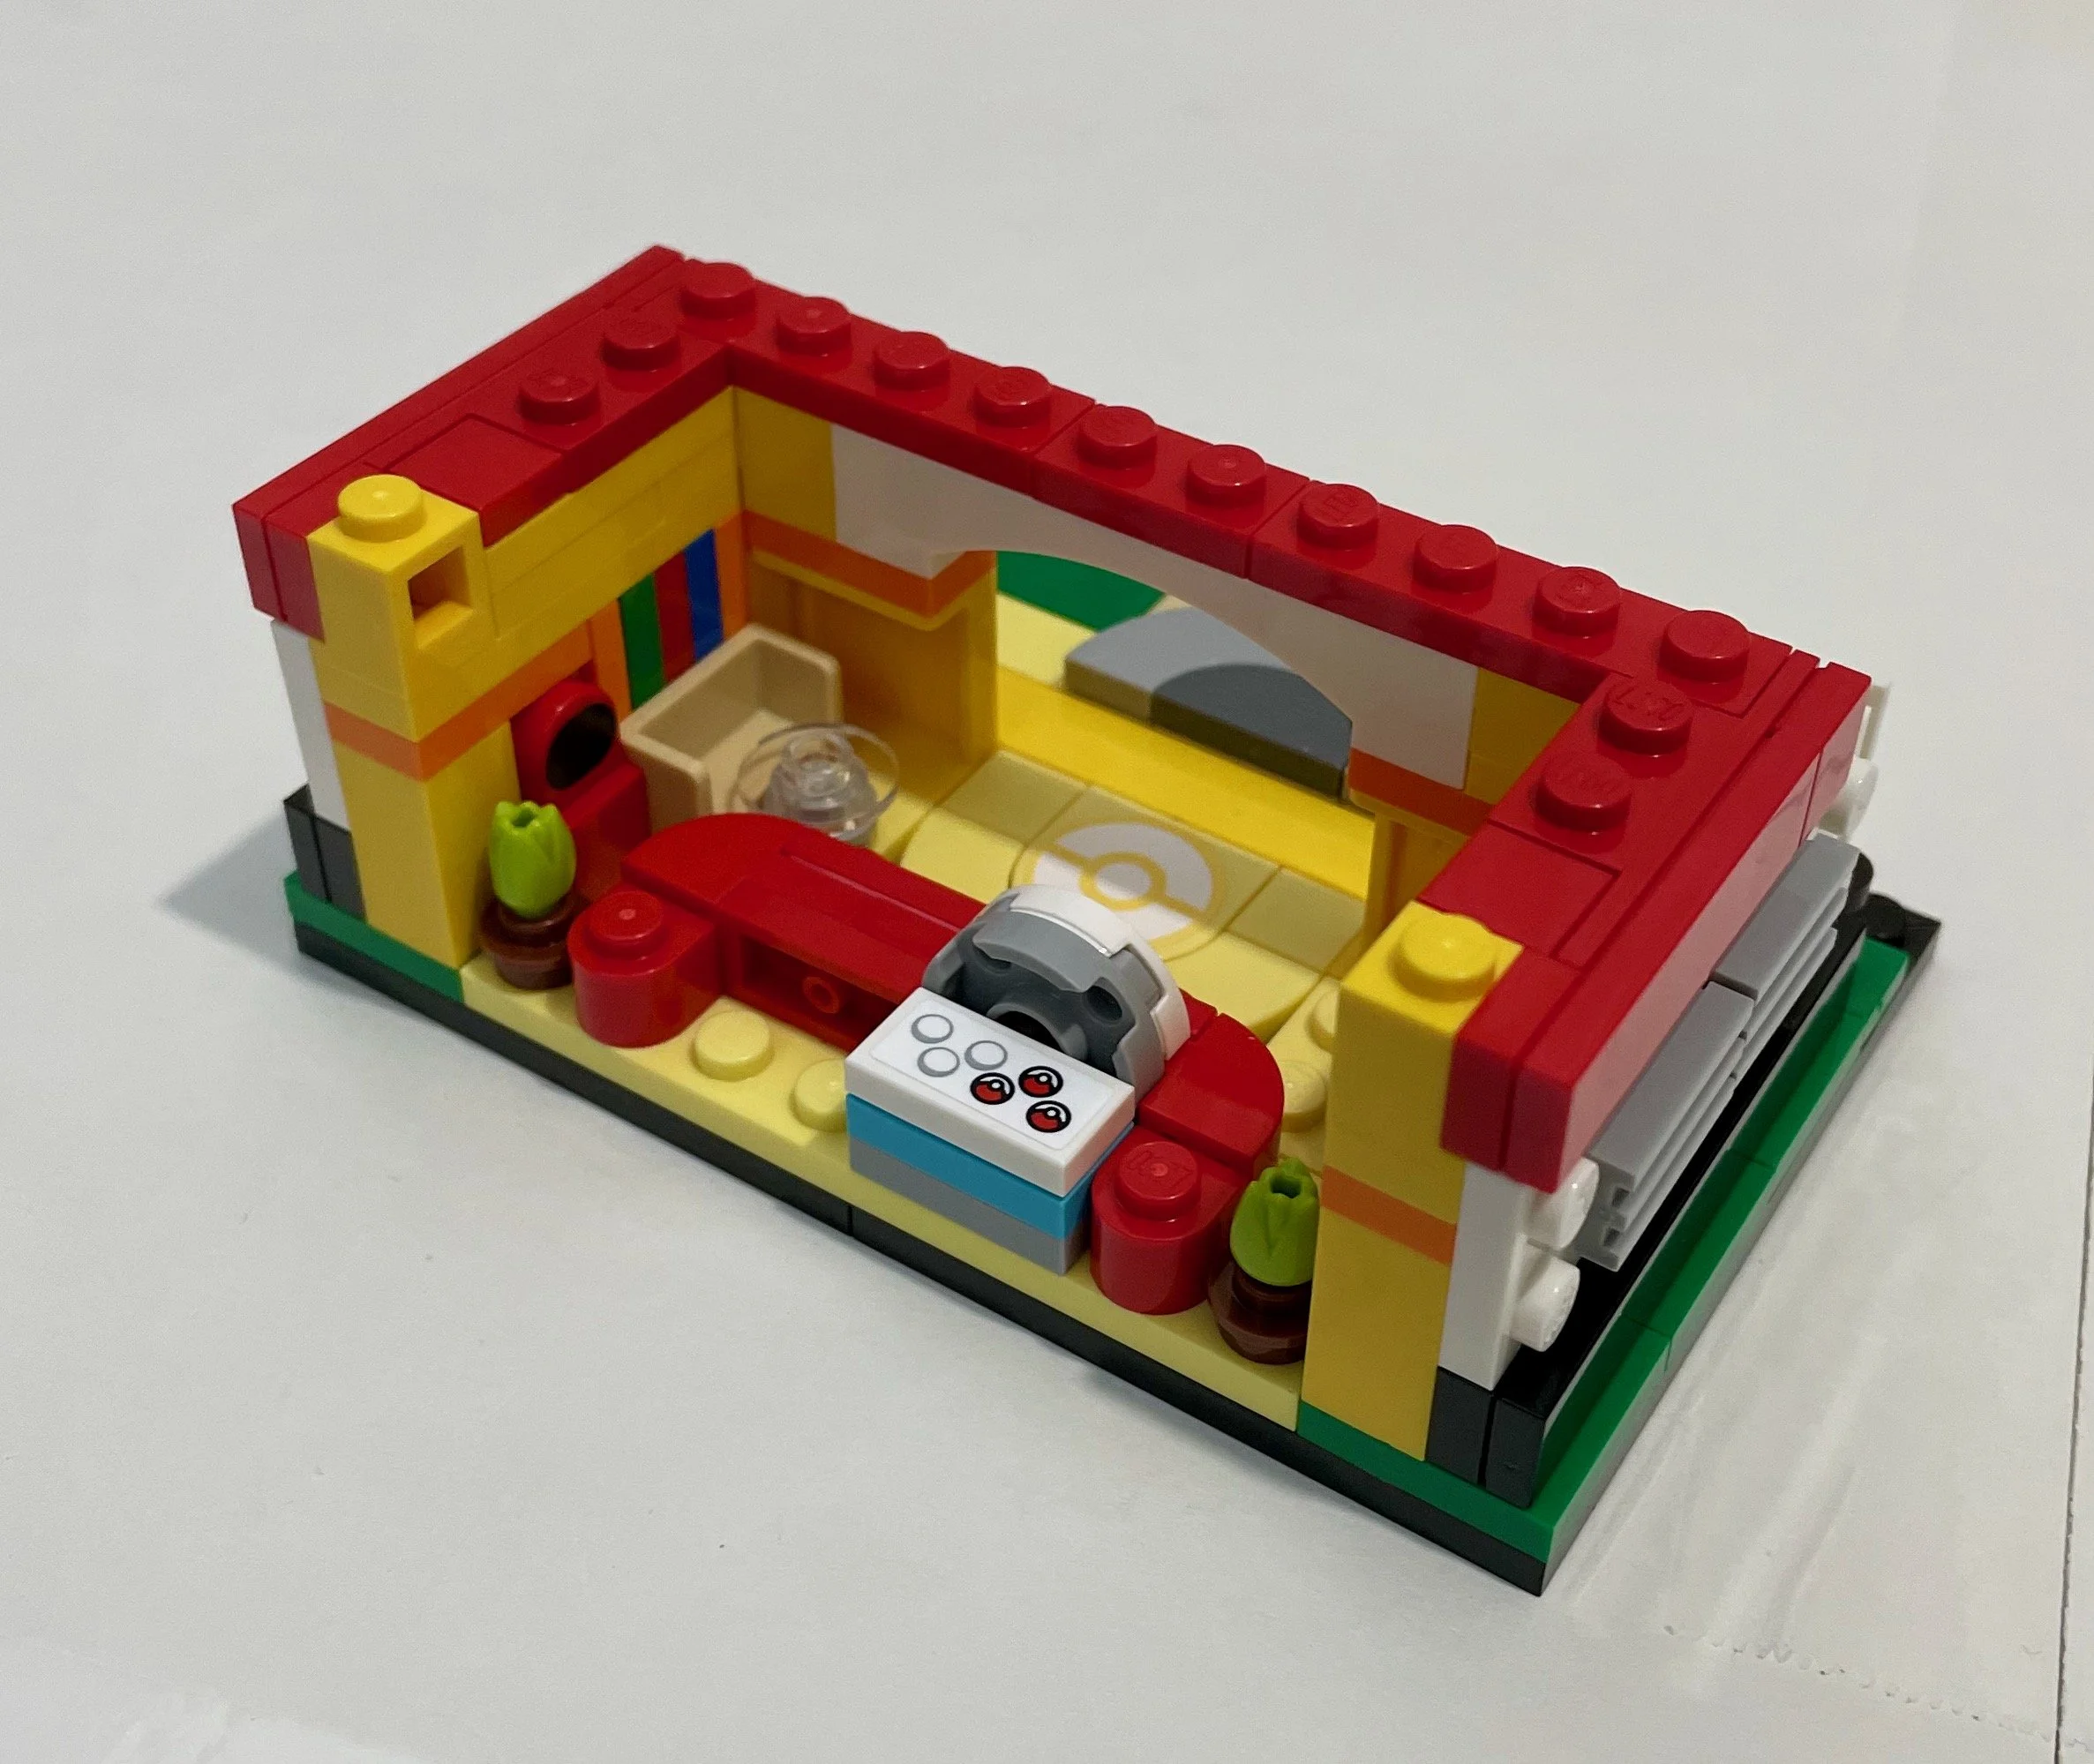
Unlike the three large display sets, which relied entirely on printed elements, the Mini Pokémon Center includes stickers. In this case, that isn’t a disappointment. Getting official Poké Ball stickers is a huge win in my book. The interior is also surprisingly detailed for its microscale size, and there is even a play feature with sliding glass doors!
I 100% guarantee this will inspire fans to recreate microscale towns from the Pokémon video games. Even though the limited set is no longer available, the Pokémon Center offers plenty of inspiration for anyone looking to build an entire brick-built region.
Receiving Eevee
Of the three large display sets that launched LEGO Pokémon in February, 72151 Eevee received perhaps the most enthusiasm, and rightfully so.
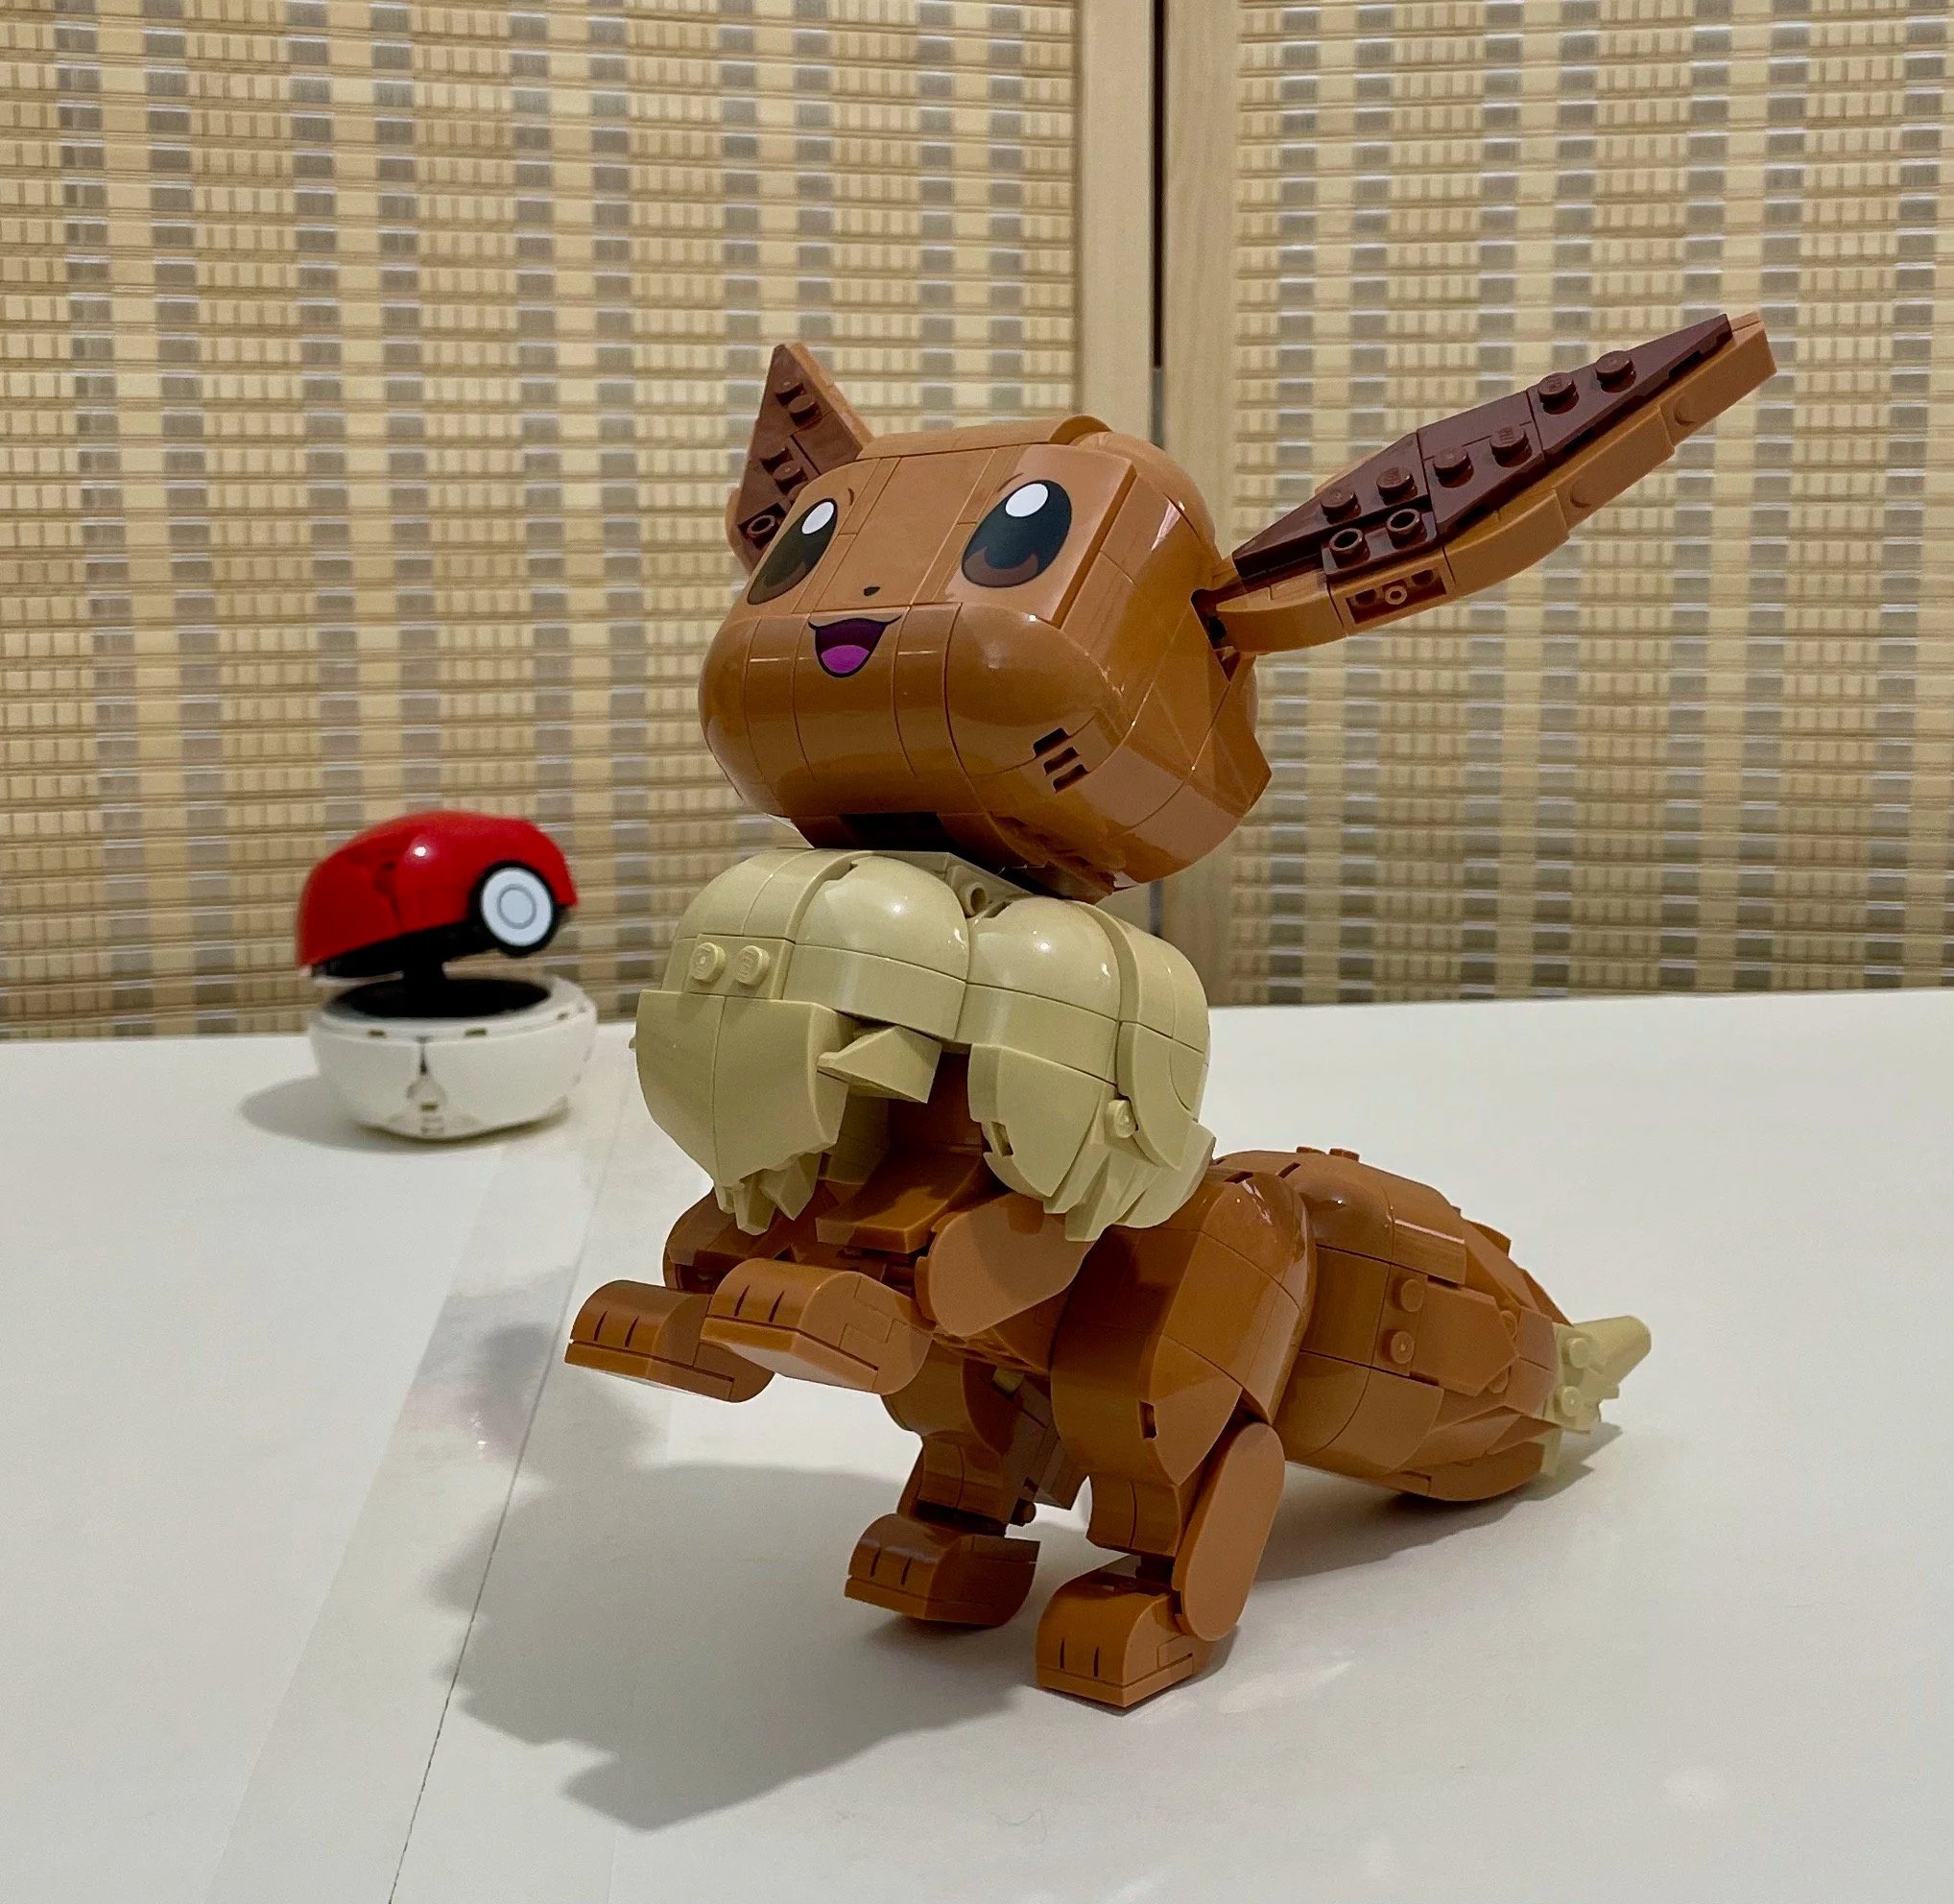
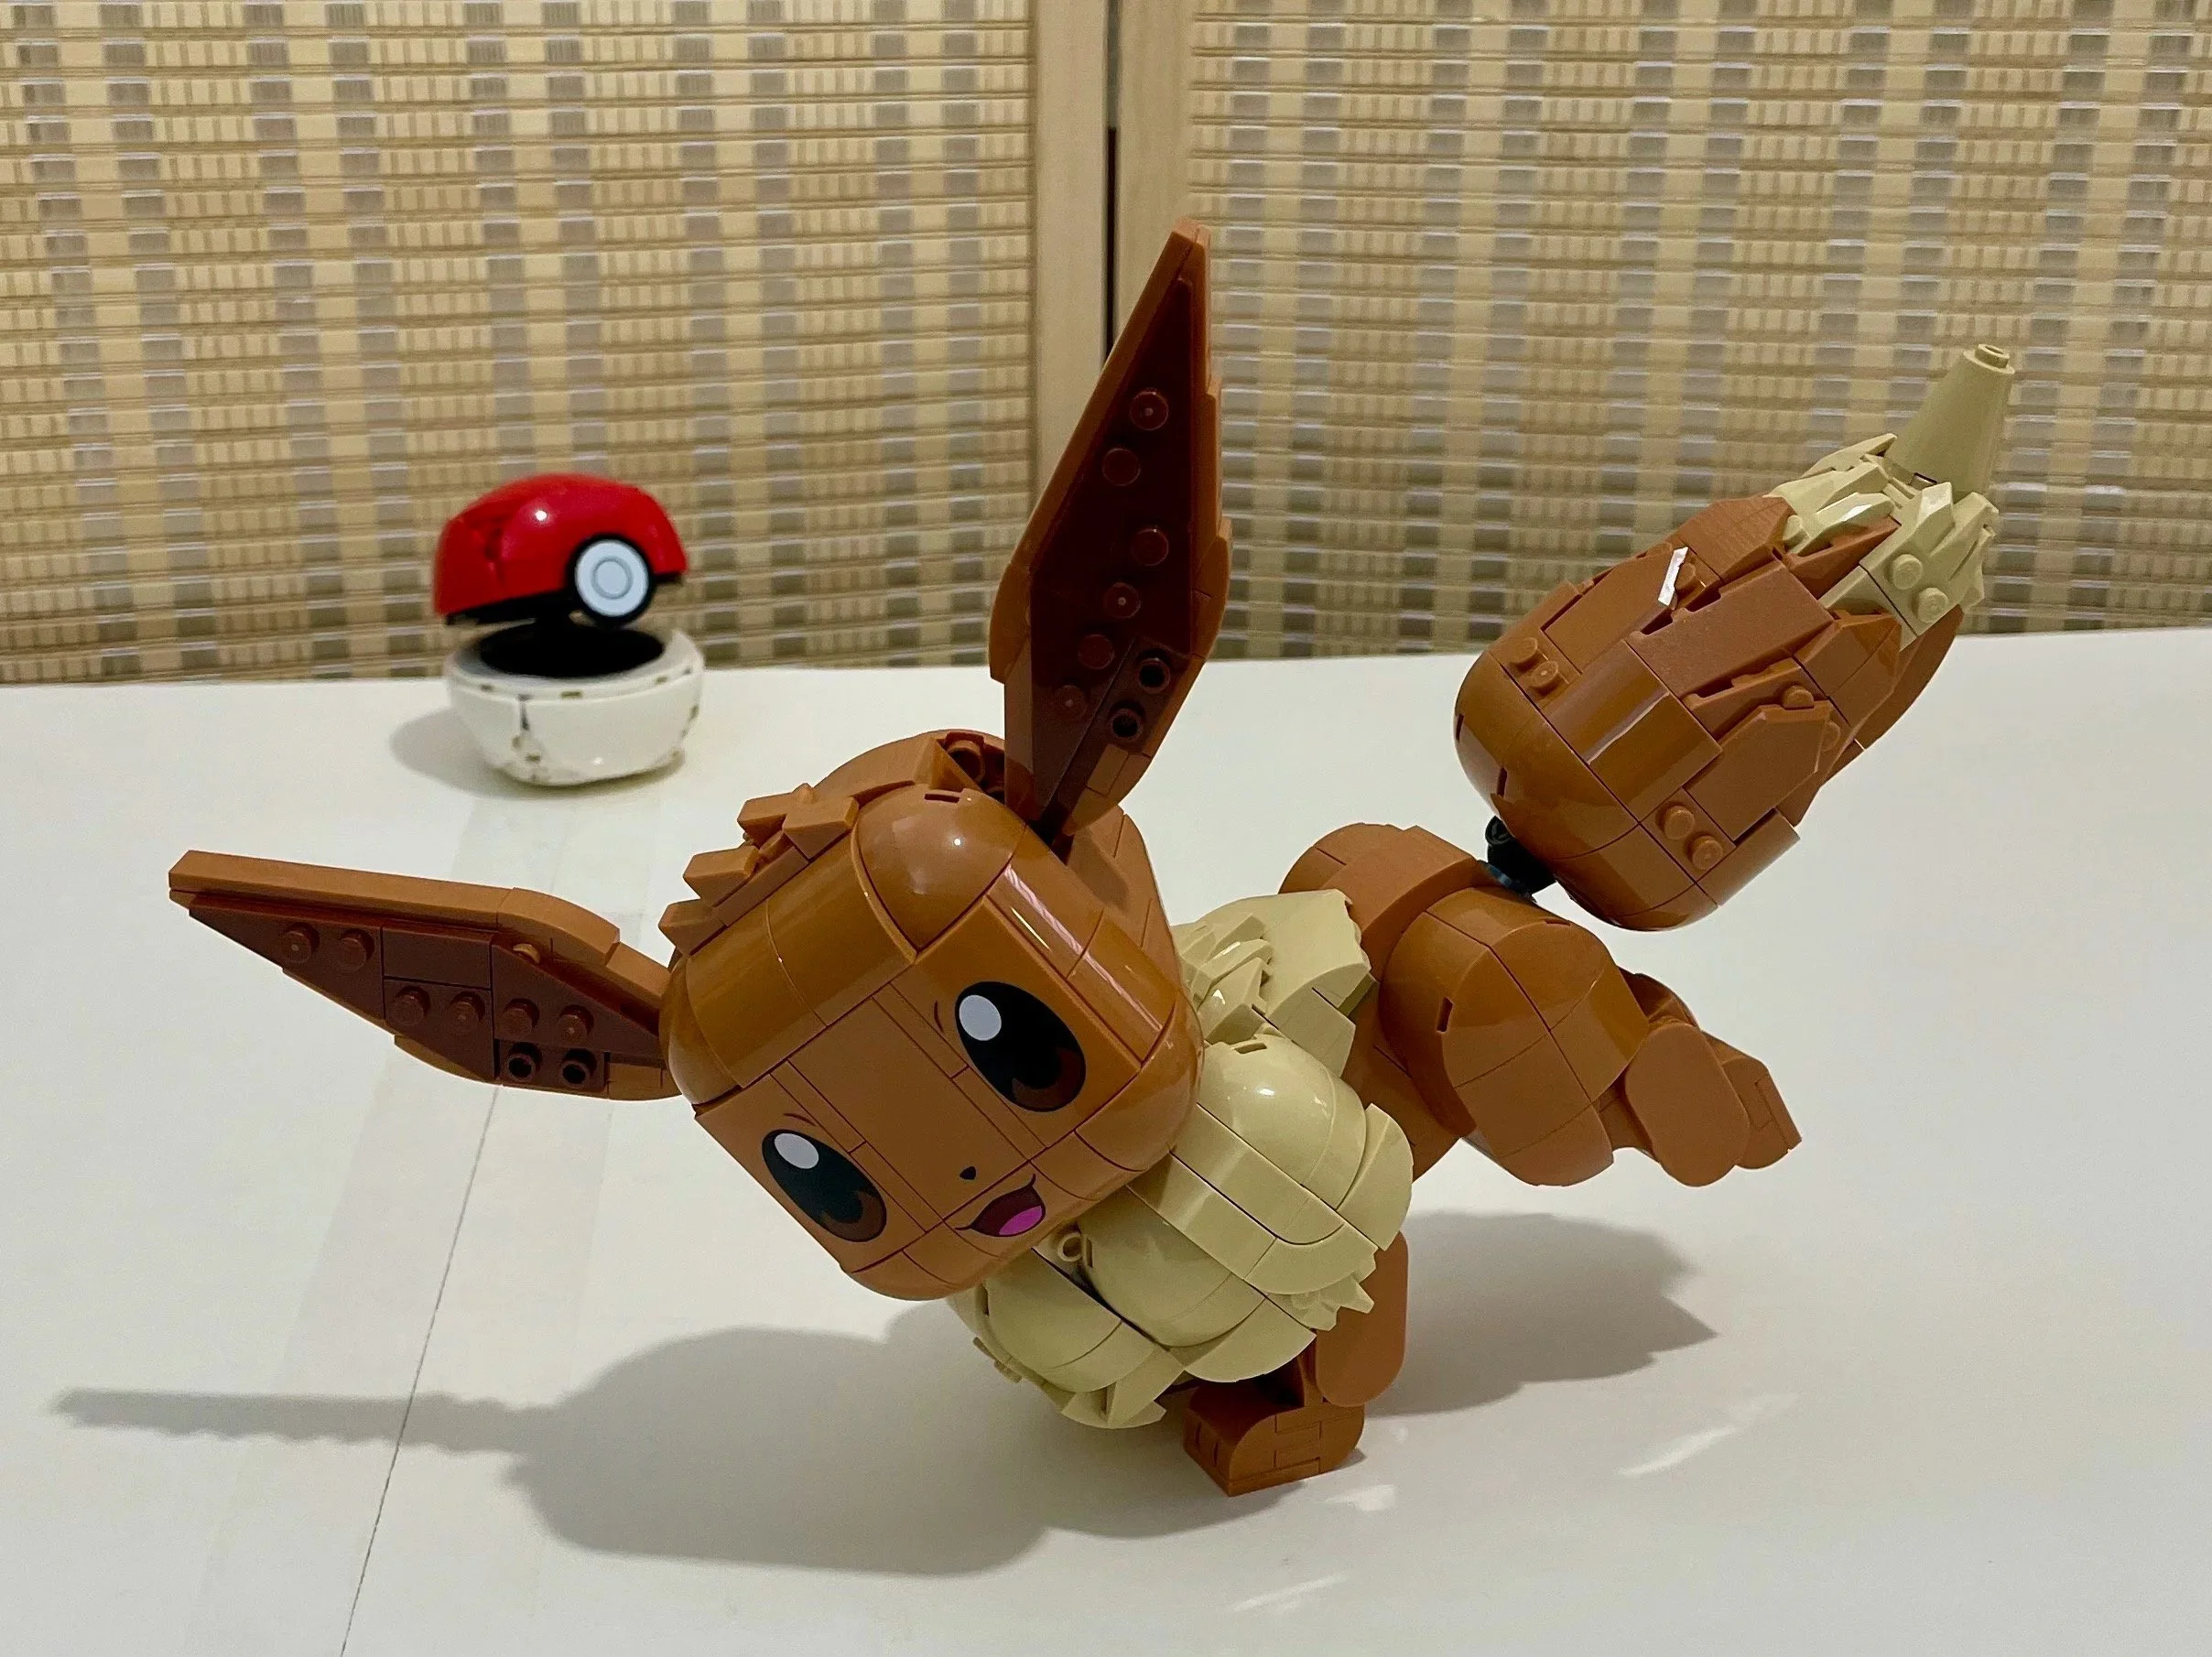
You’re only getting 587 pieces and no minifigures for the $60 USD price tag, but the set is pretty close to perfect. Eevee is the most accurate to the source Pokémon of the original display models. (To be fair, Eevee has a boxy head that translates quite well into brick form.) It feels polished and complete, something I cannot say about its pricier counterparts. It also has the only Easter egg from the original wave that I found worth noting, an area where I think the designers missed opportunities in the other sets.
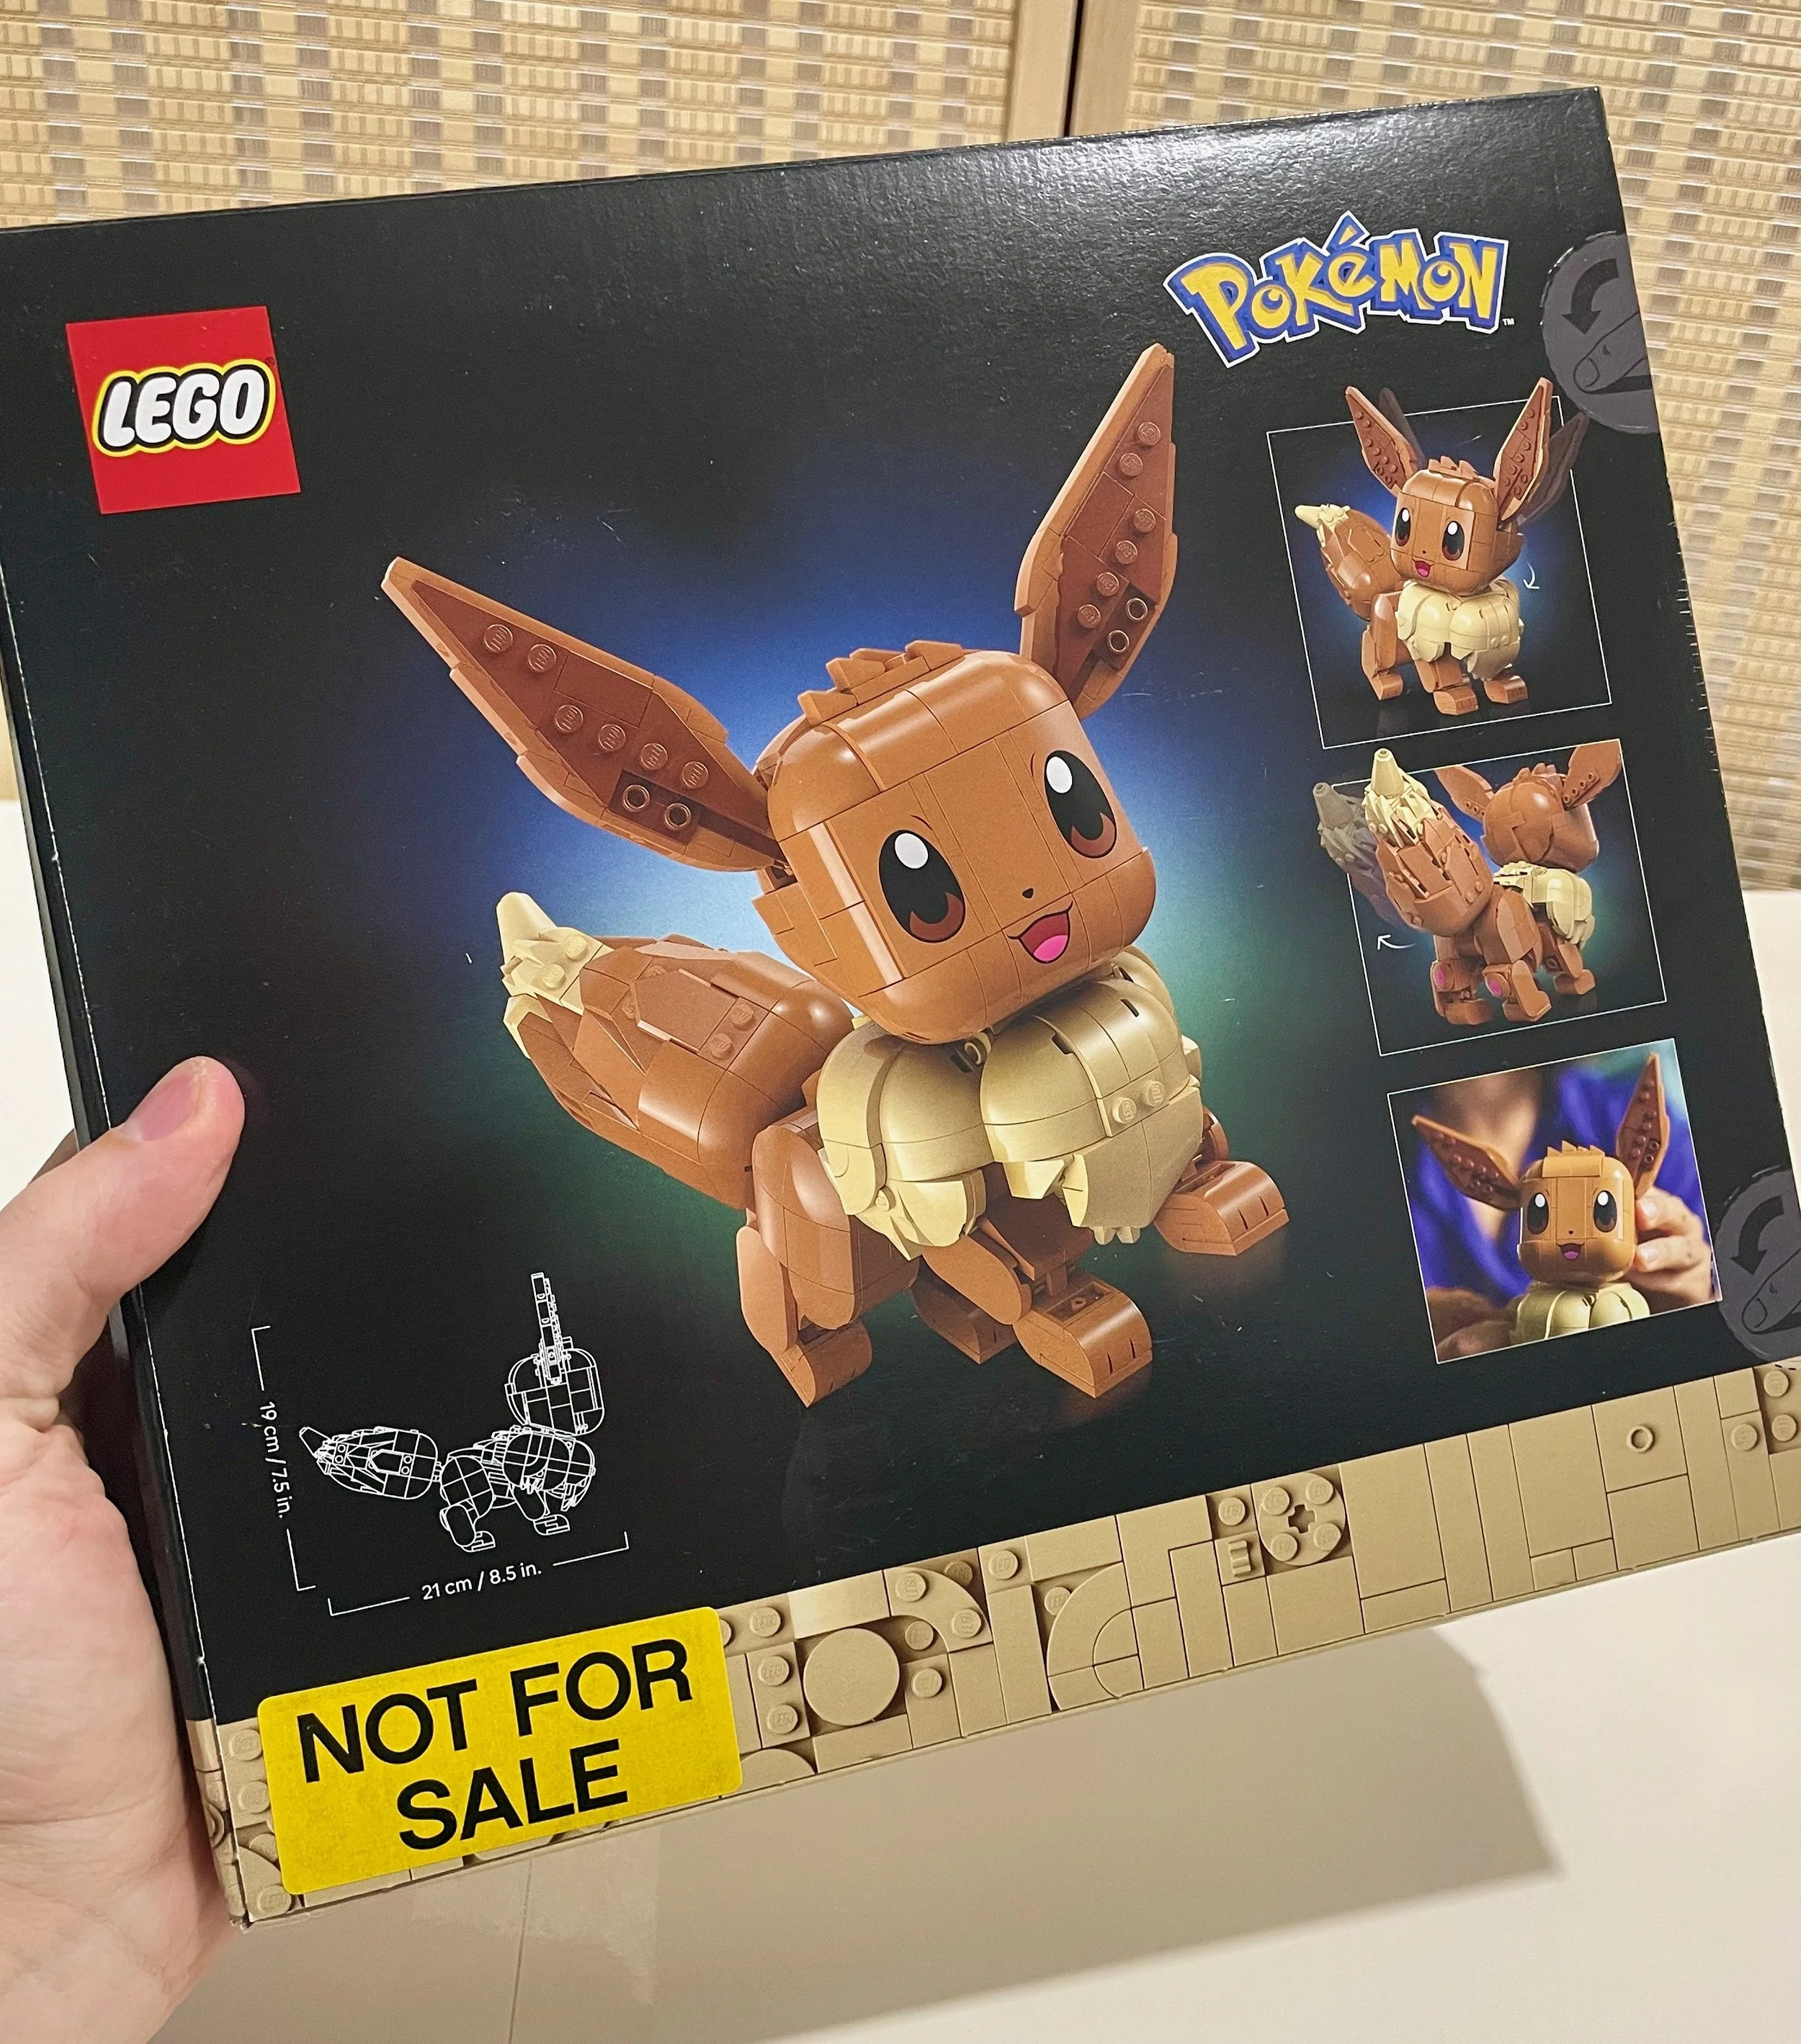

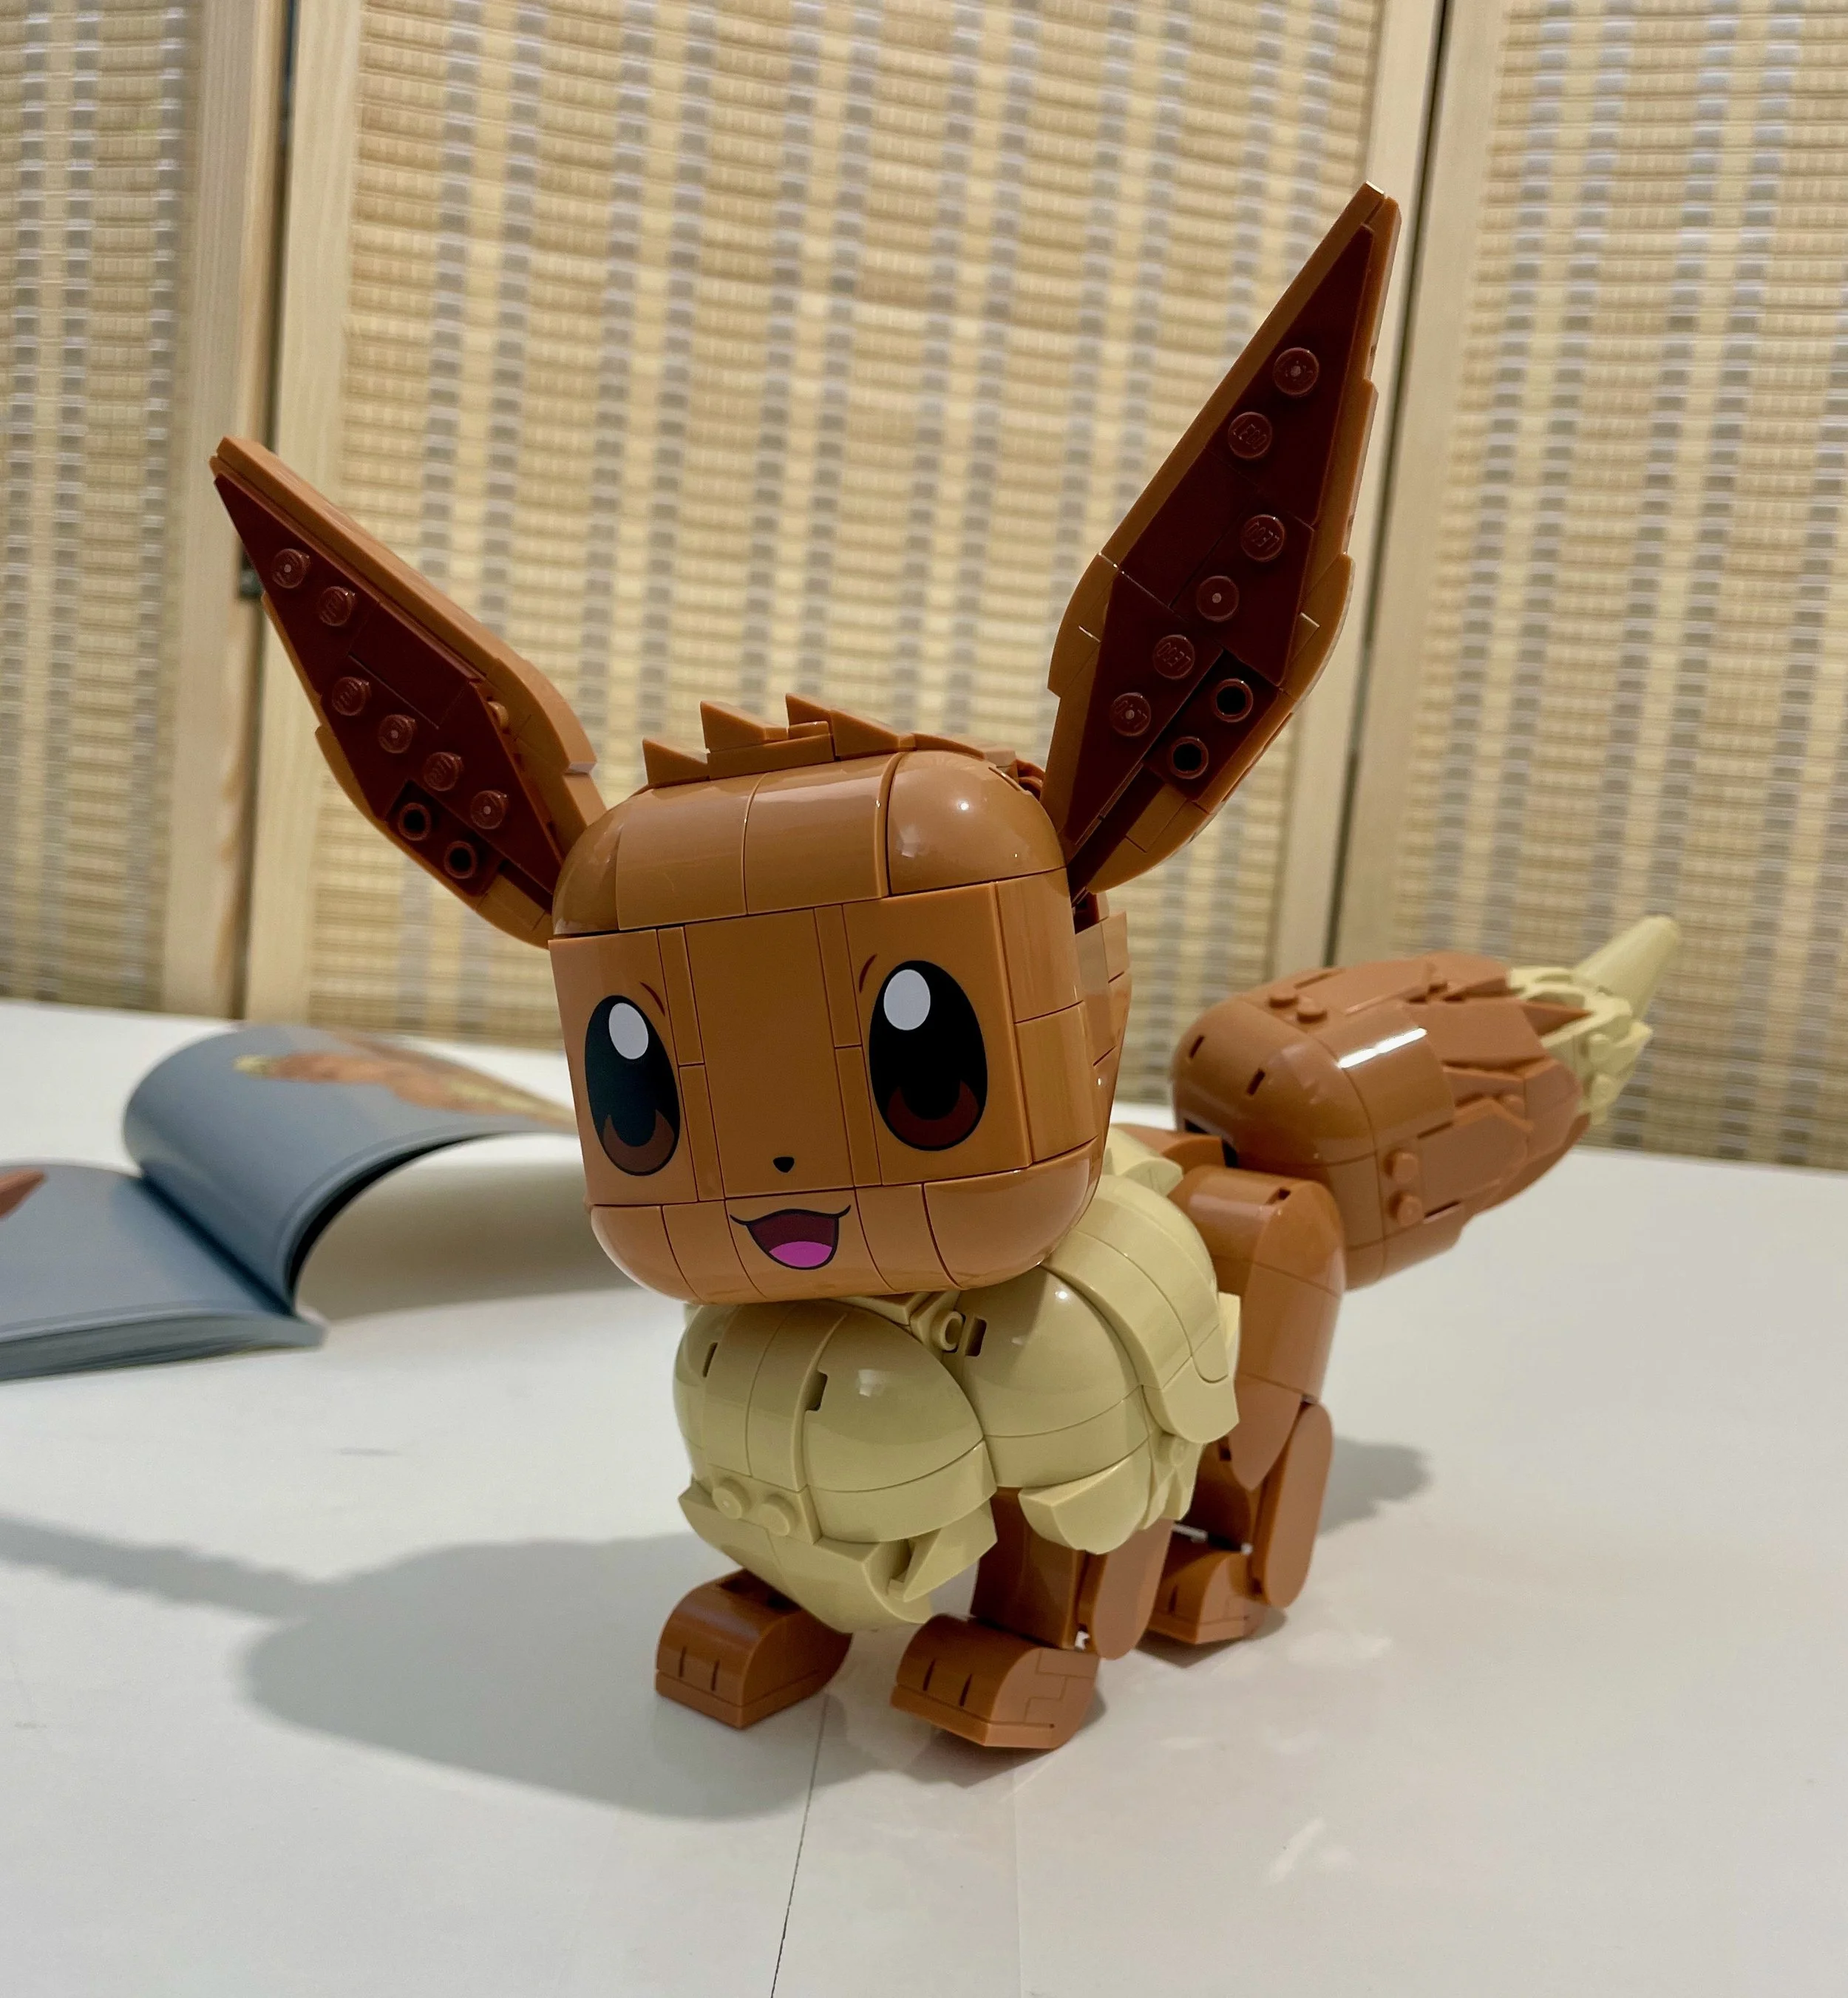
Eevee is extremely posable for an official model. It can balance on its back legs or front legs, move its head and tail, and settle into a cute sitting pose. I don’t know whether all of that versatility was intentional or partly a happy accident resulting from good design principles, but either way, this is the most playful and well-built set from the original launch.
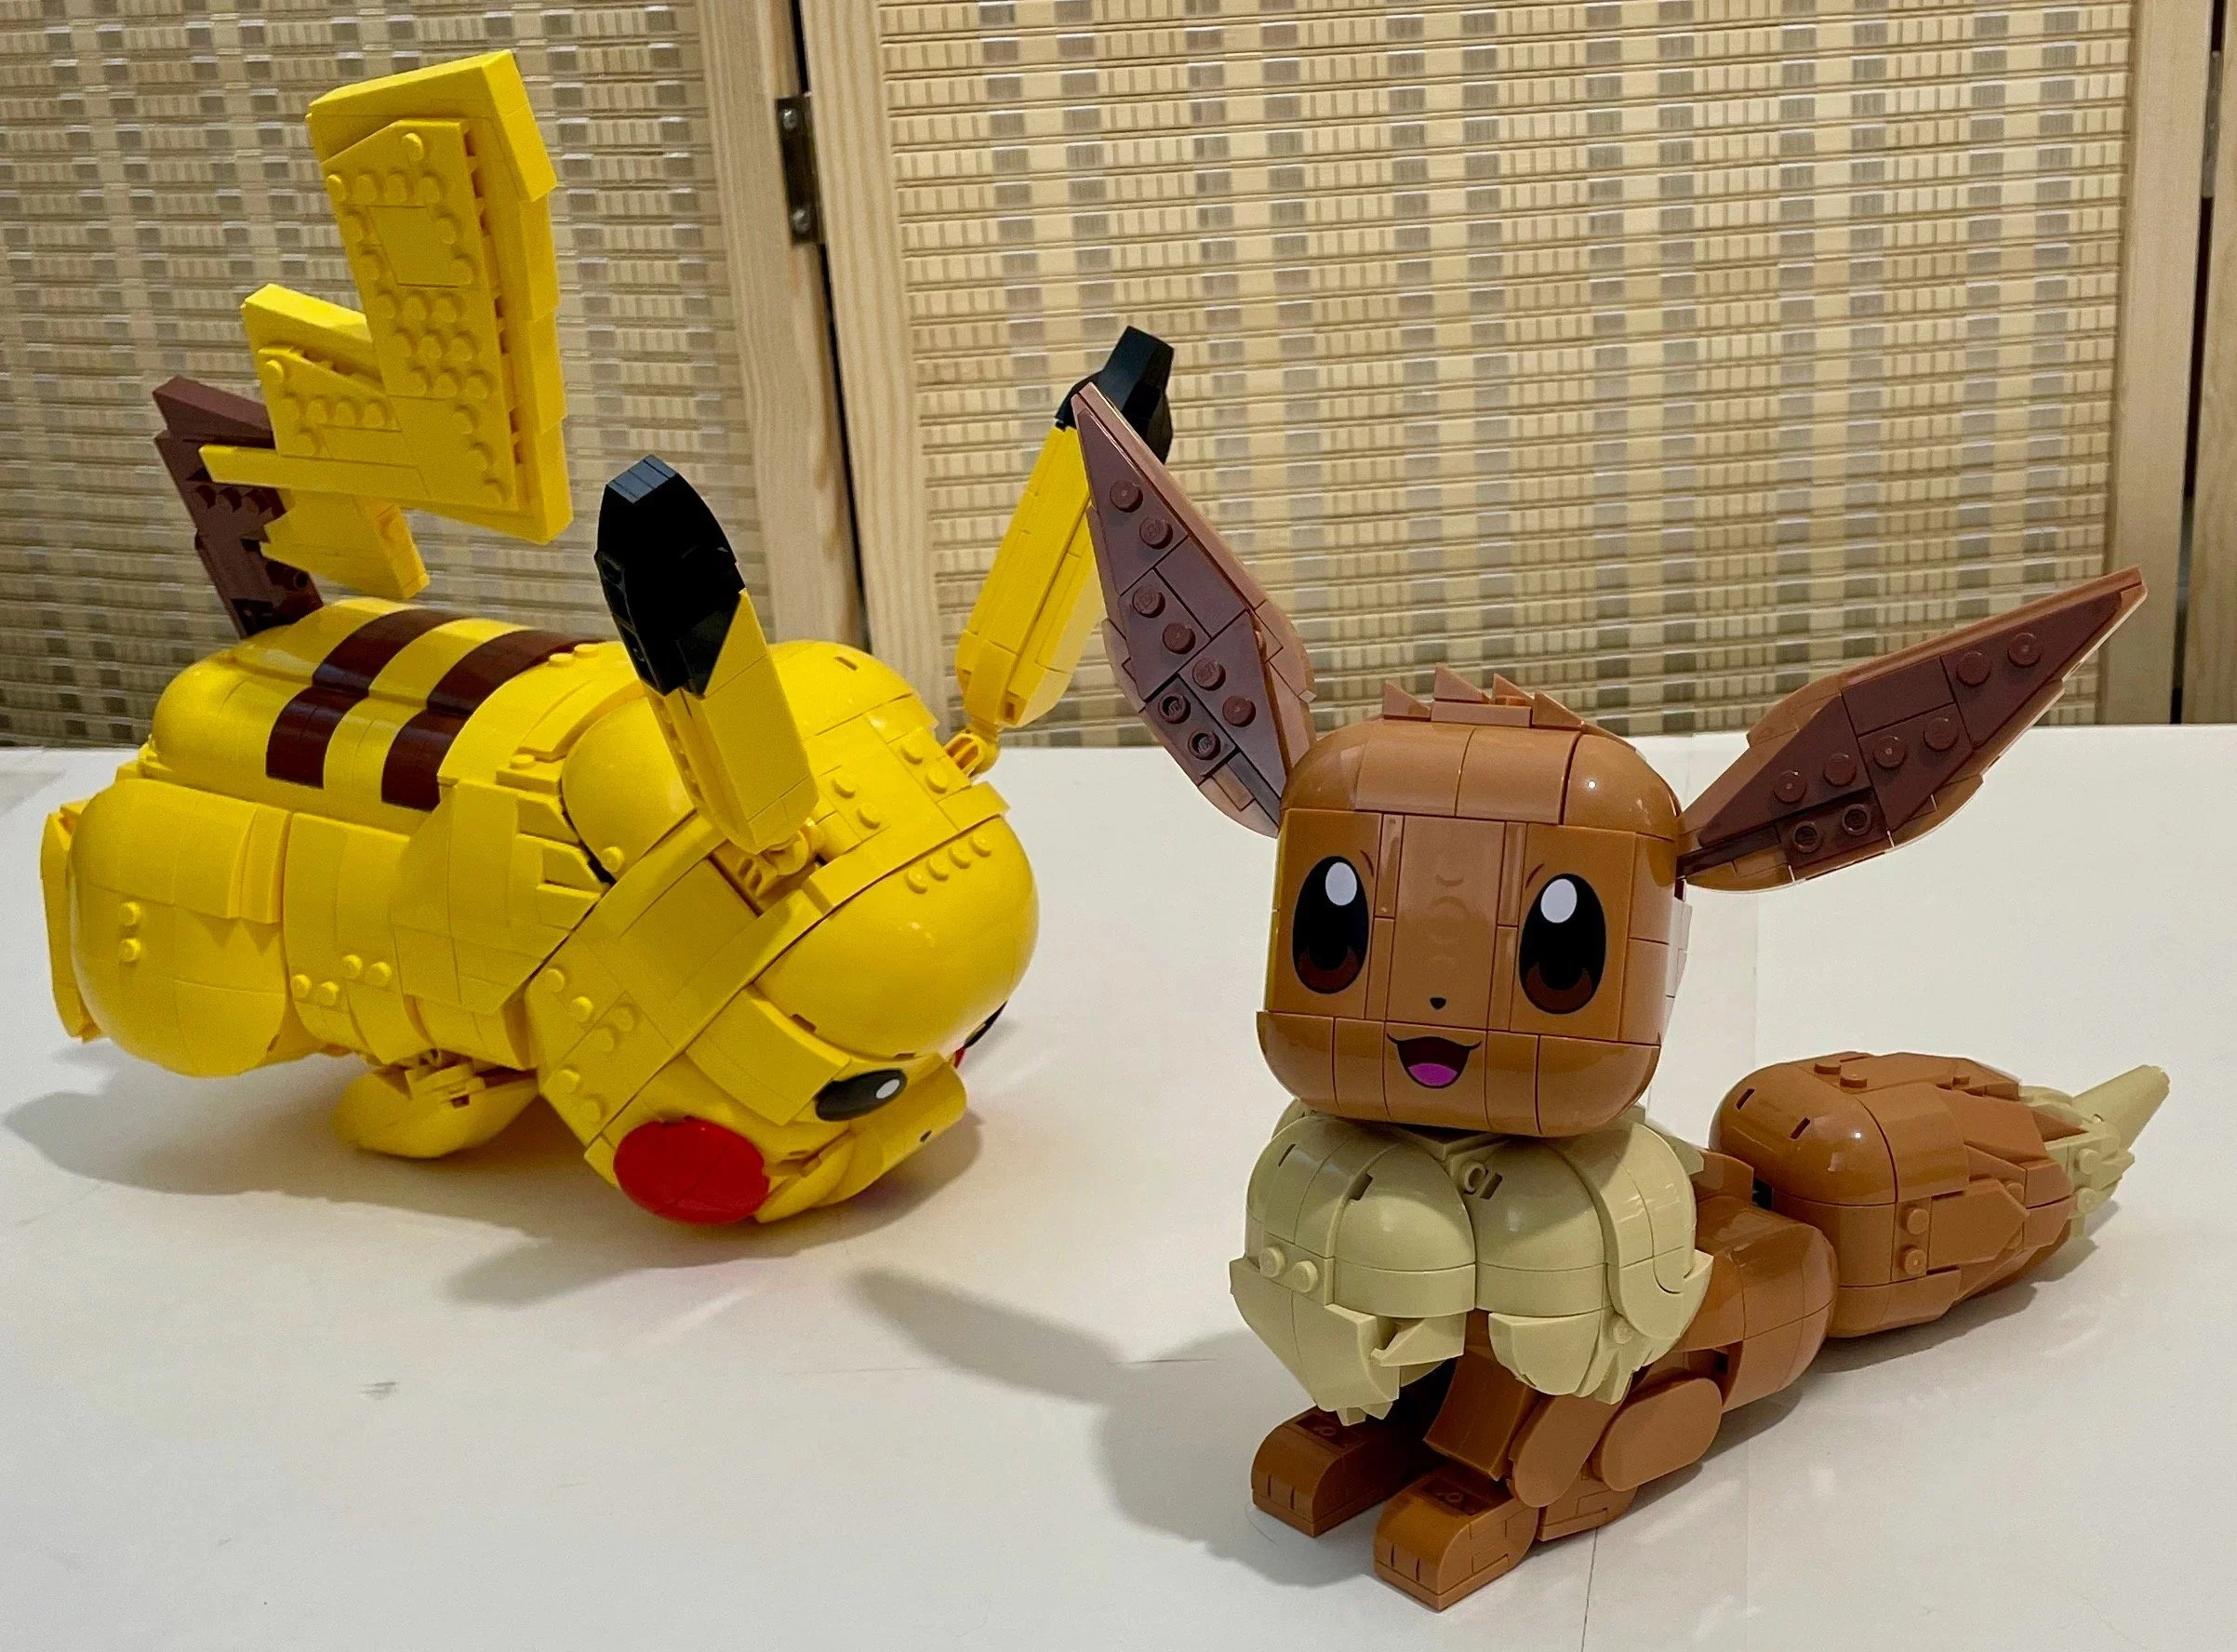
Based on its size and lack of accessories alone, this honestly feels more like a $40 Creator set. Still, there isn’t a stud out of place, and it remains the easiest of the original LEGO Pokémon sets to recommend.
Let’s Go, Pikachu!
On to the main attraction. LEGO Pokémon 72152 Pikachu and Poké Ball comes with 2,050 pieces and retails for $200 USD. That is a bold price for what should be the most desirable set from the original launch. Had Pikachu been as polished as Eevee and closer to $60, I think it would have flown off shelves, but I digress…
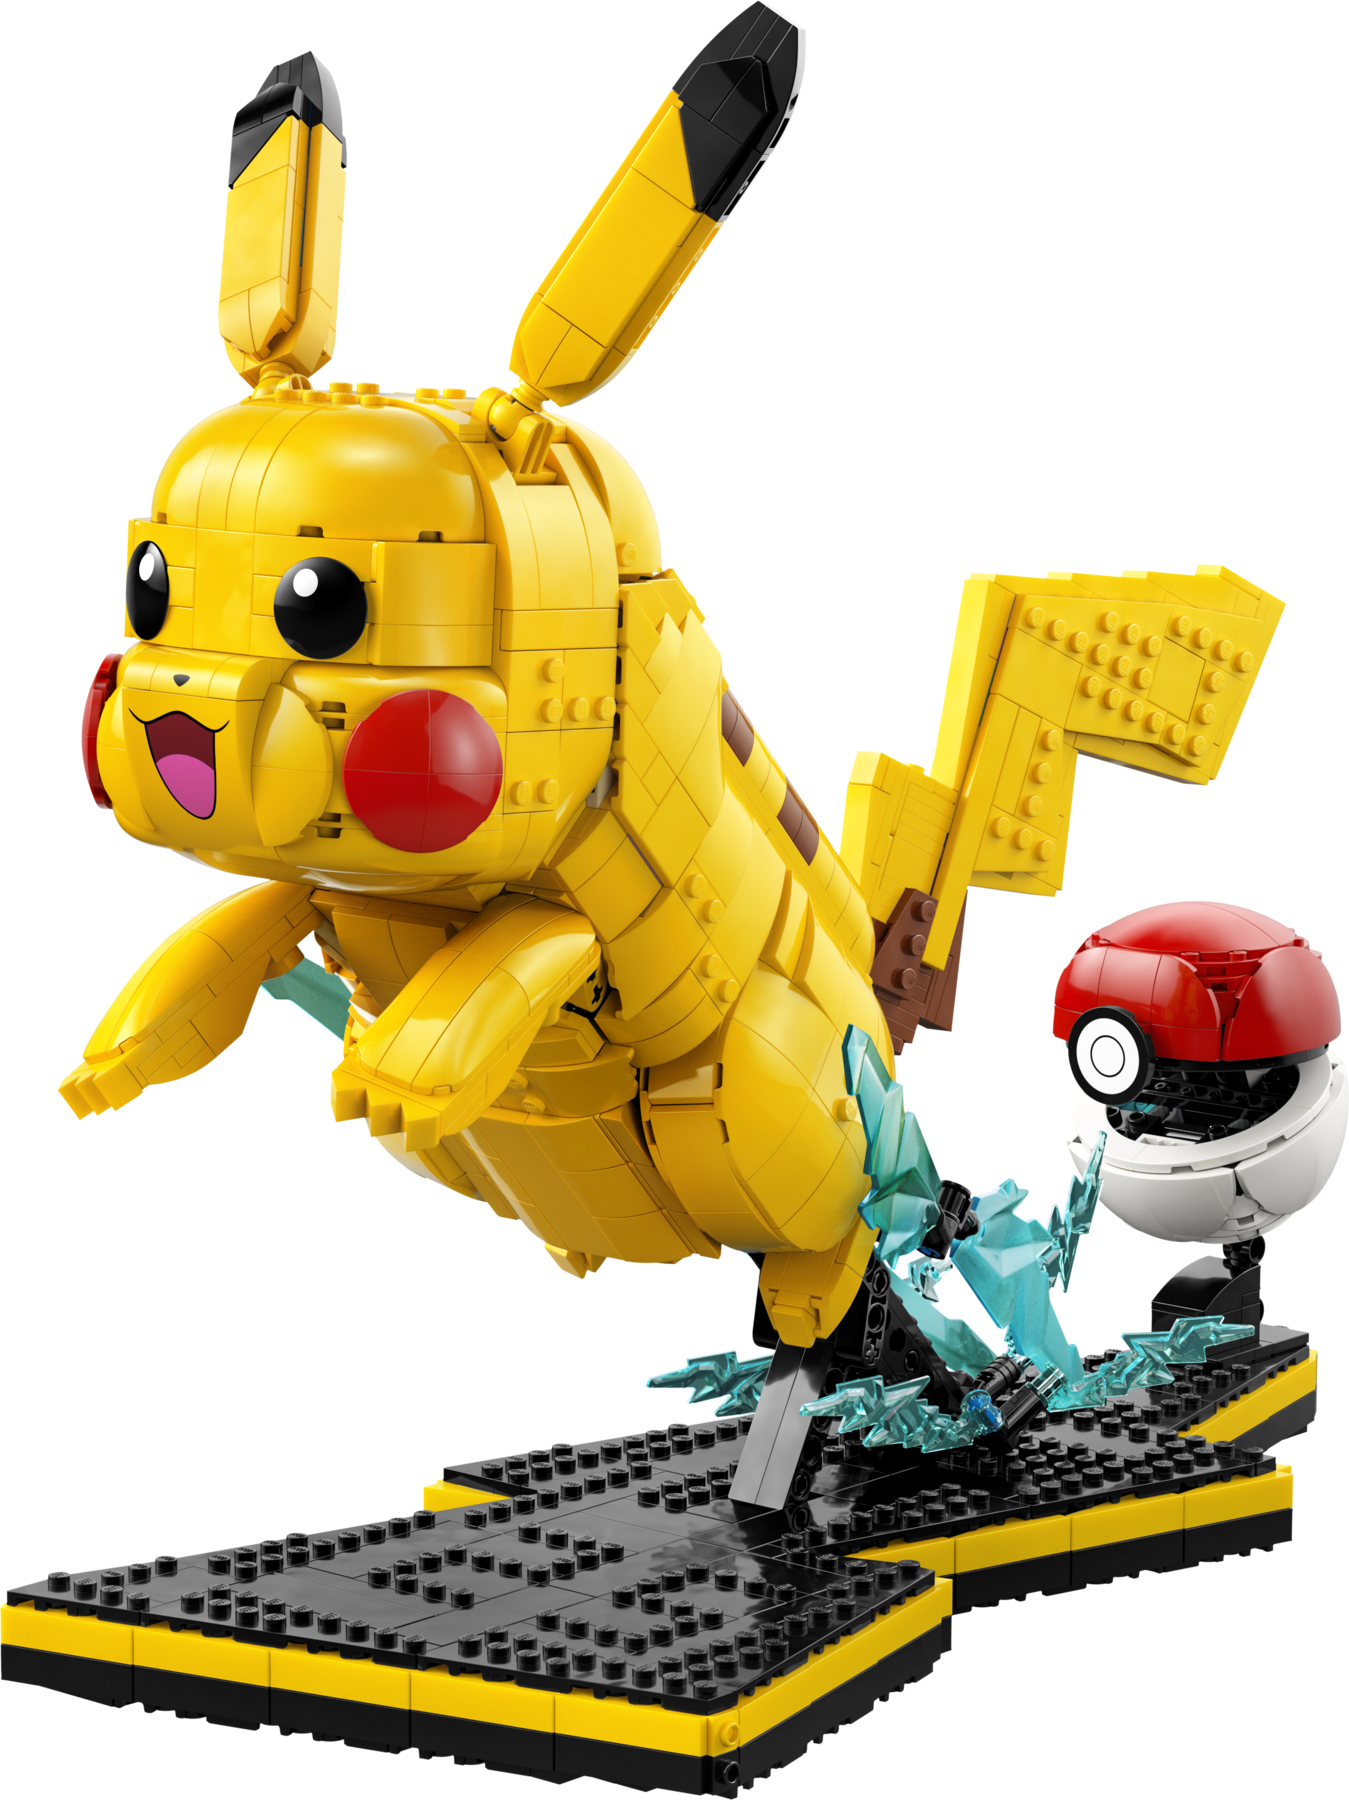
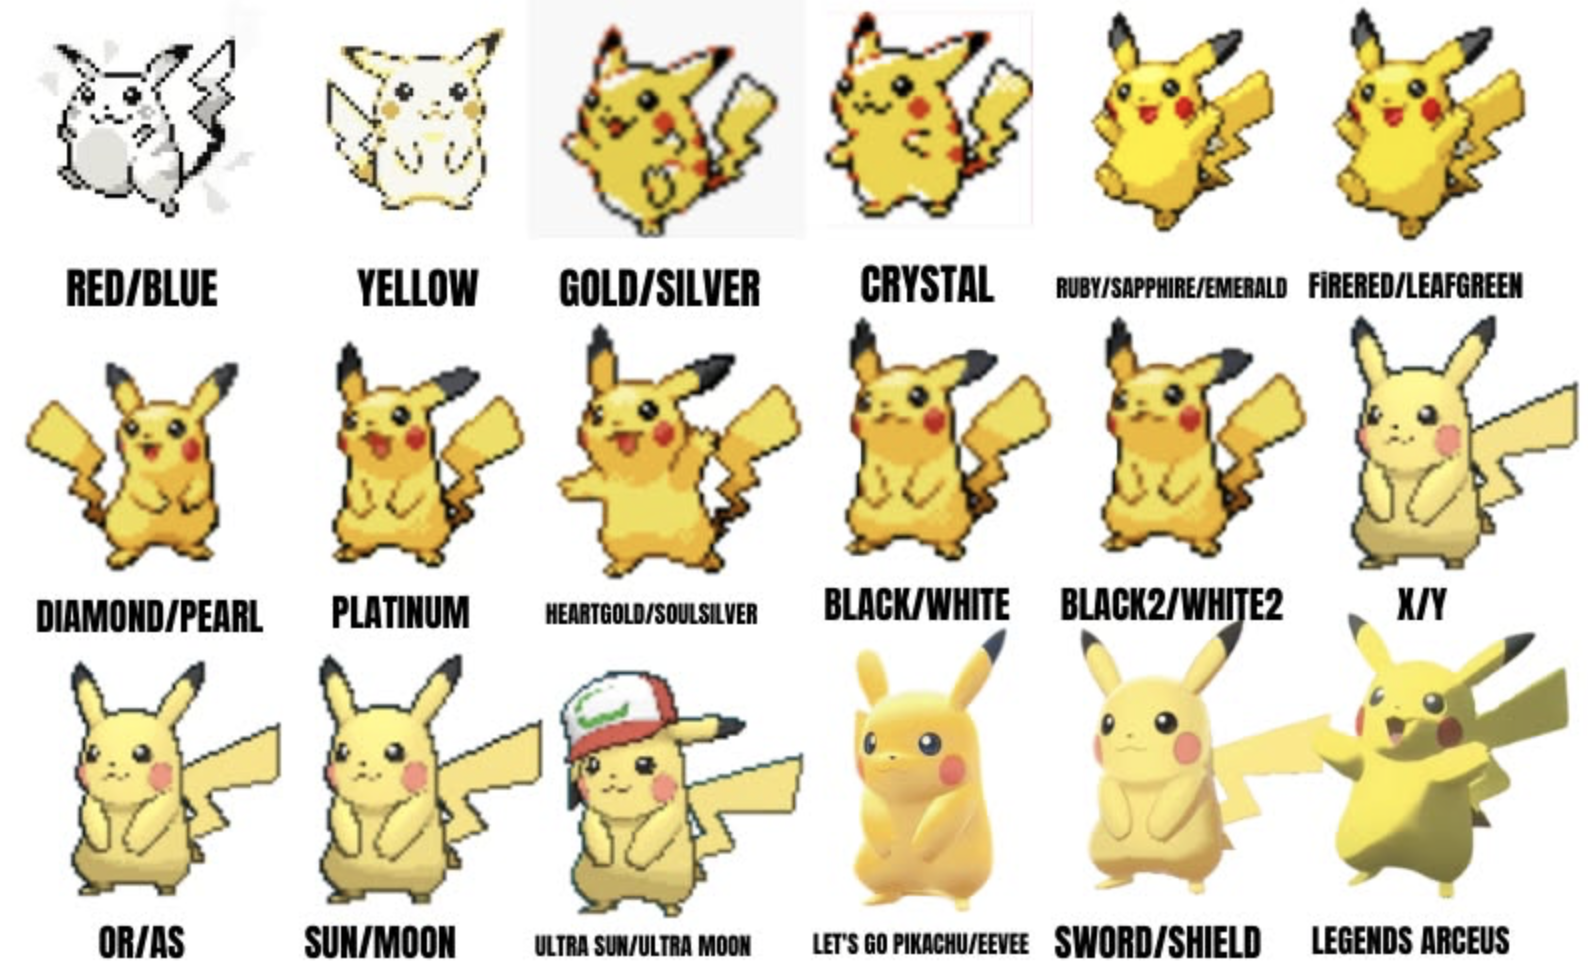
Let’s start with the model’s accuracy to the source material. Pikachu’s design has changed several times over the years, so there isn’t one definitive way to capture its features. Still, the LEGO version doesn’t quite match the qualities of any of them.
Some of Pikachu’s key facial characteristics have been around since the third generation of Pokémon games. As seen in the picture below, its features are scrunched into the lower half of its face, the bottom of its eyes extends down to the level of its red cheeks, and it often has a “Mr. Angry Eyes” look during battle. Pikachu also has stubby little arms that widen closer to its body. That would have been difficult to capture with movable appendages, but the official model still feels off.
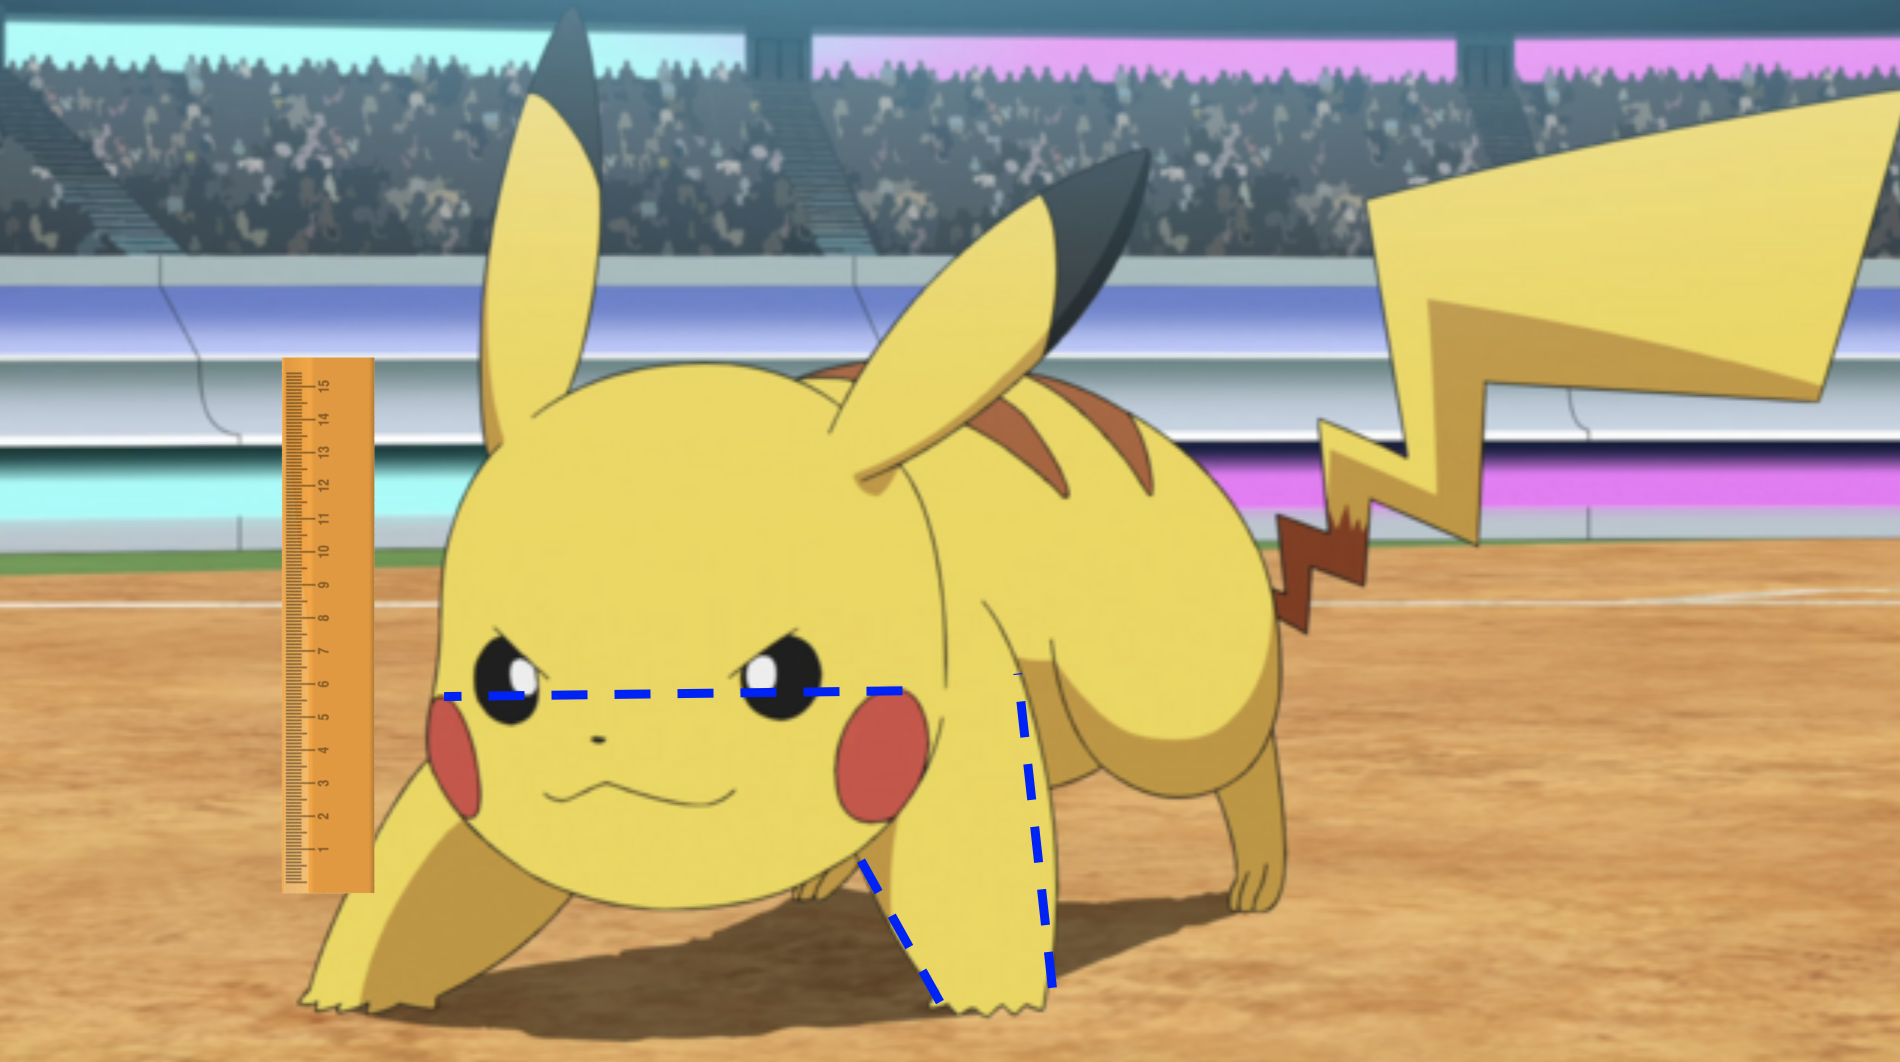
From the side, Pikachu has a subtle but distinct upturned nose, while its head takes up about half the size of its entire body.

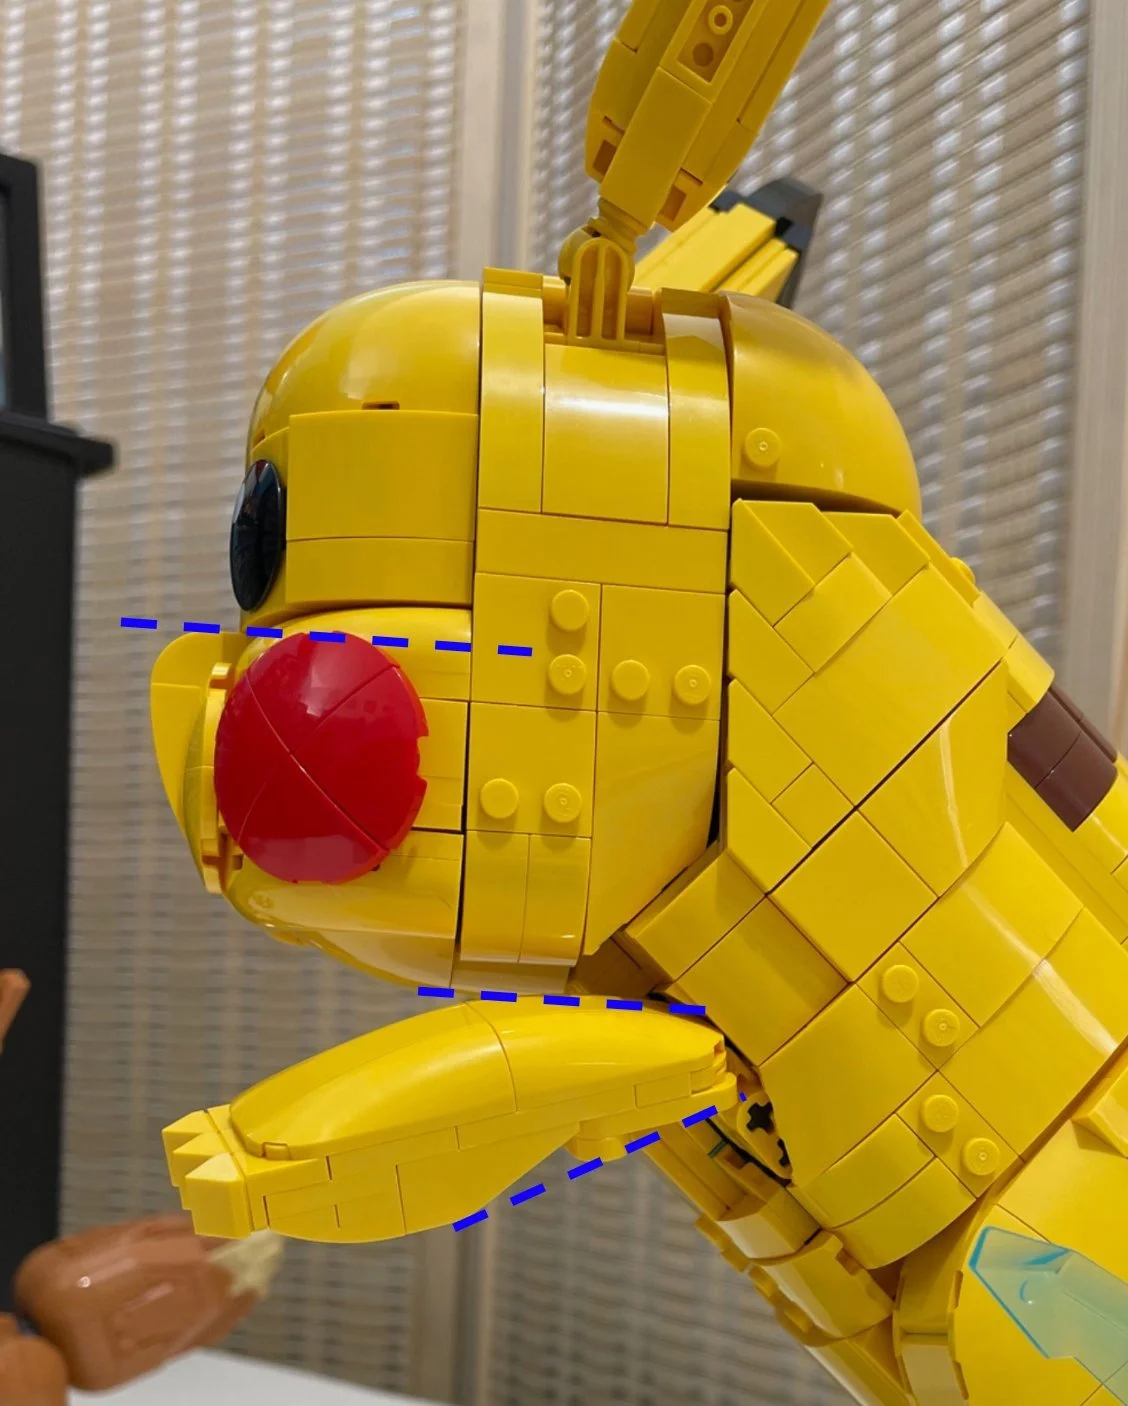
The LEGO version has eyes that sit far too high, a disappointing concave nose, and thin little arms with only one plane of movement. When the only thing you can say is “PEEKA PEEE,” it is important to communicate through facial expressions and body language.
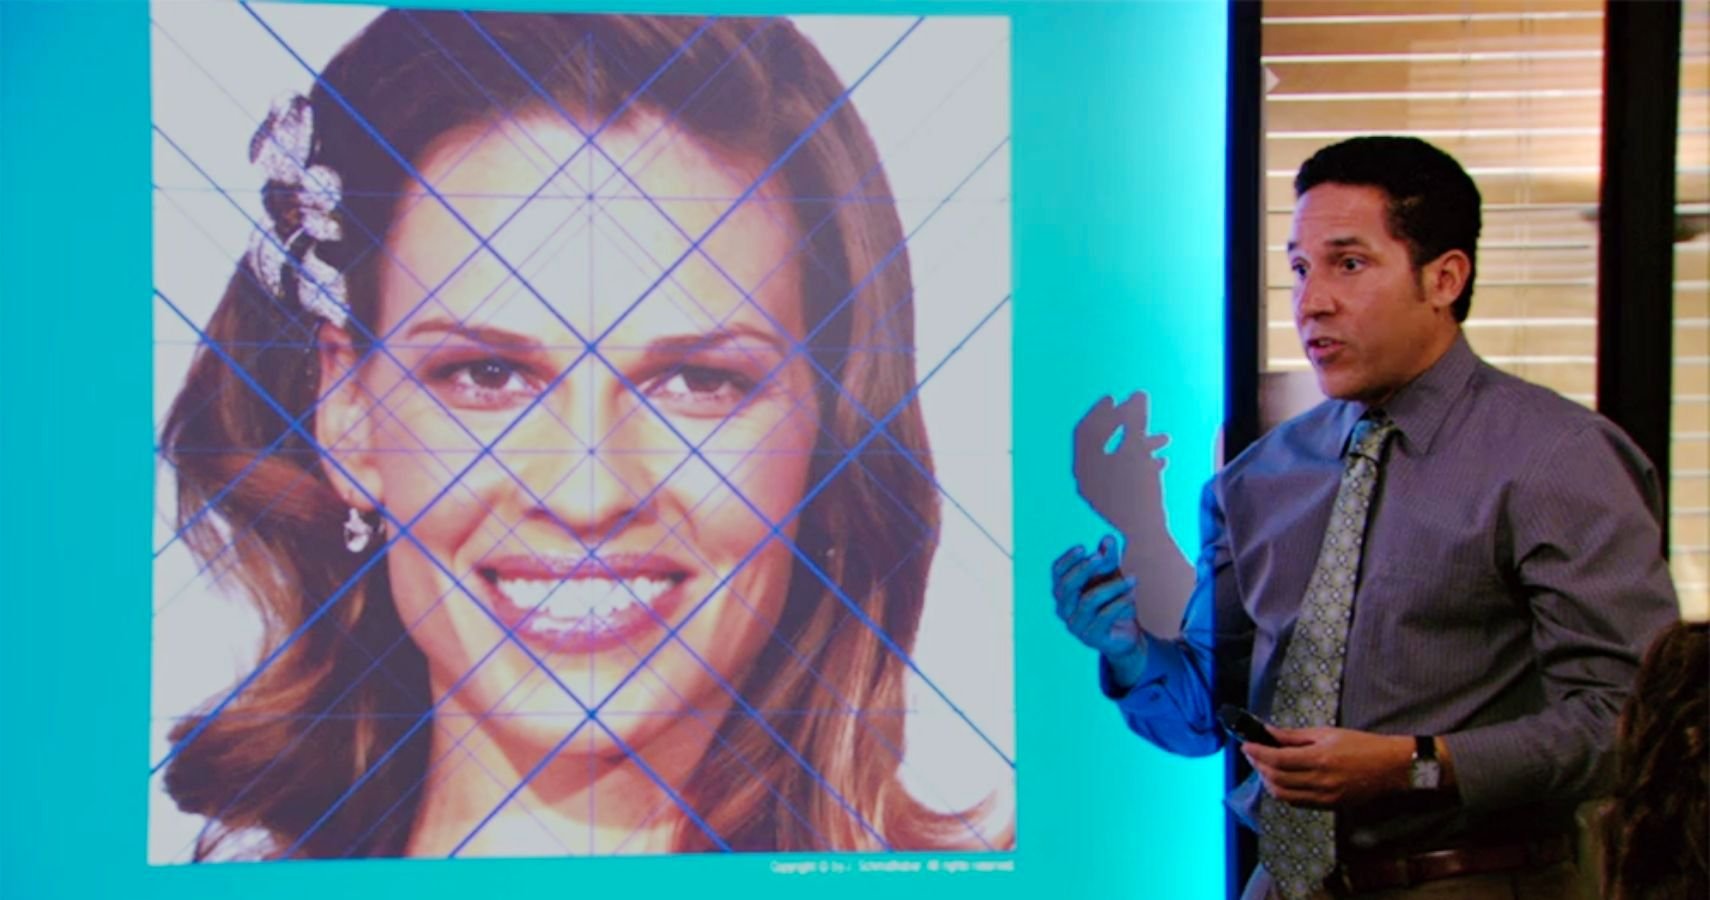
“Prince Family Paper,” The Office, Season 5, Episode 15.
I know I sound like Oscar Martinez from The Office, analyzing facial symmetry to argue that Hilary Swank is hot, but these details are important to selling the personality Pikachu displays in the anime.
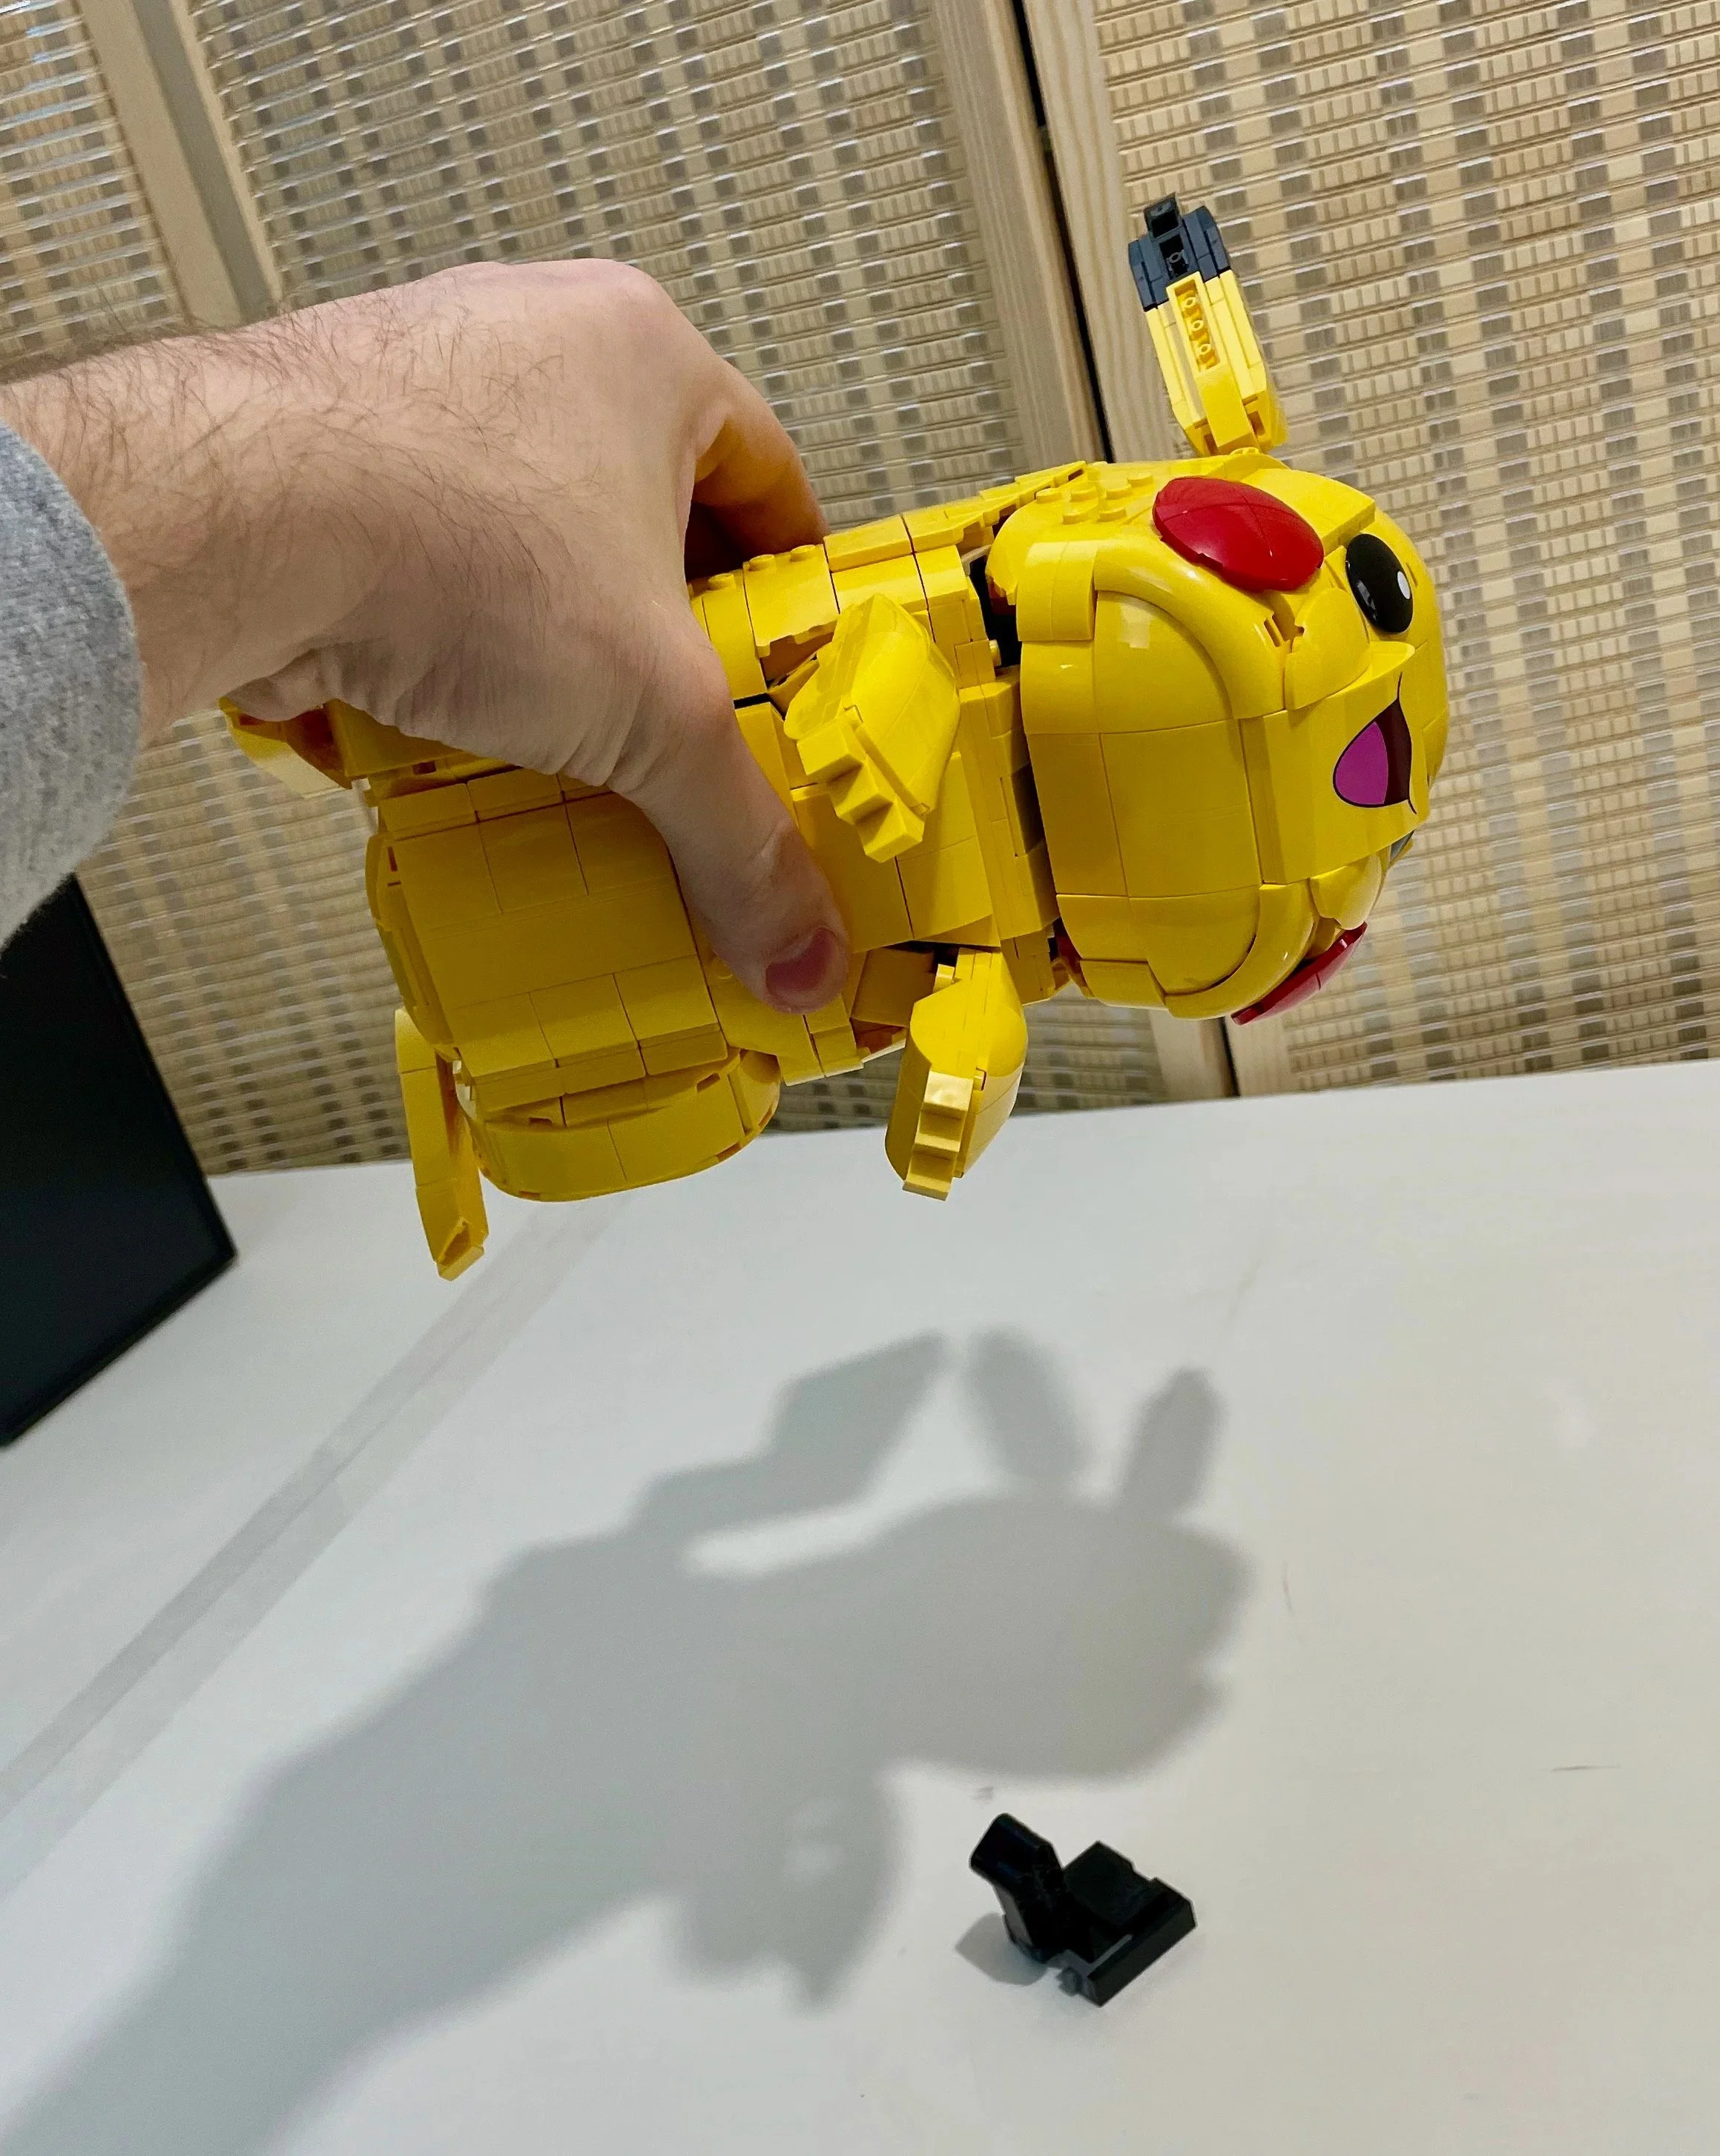
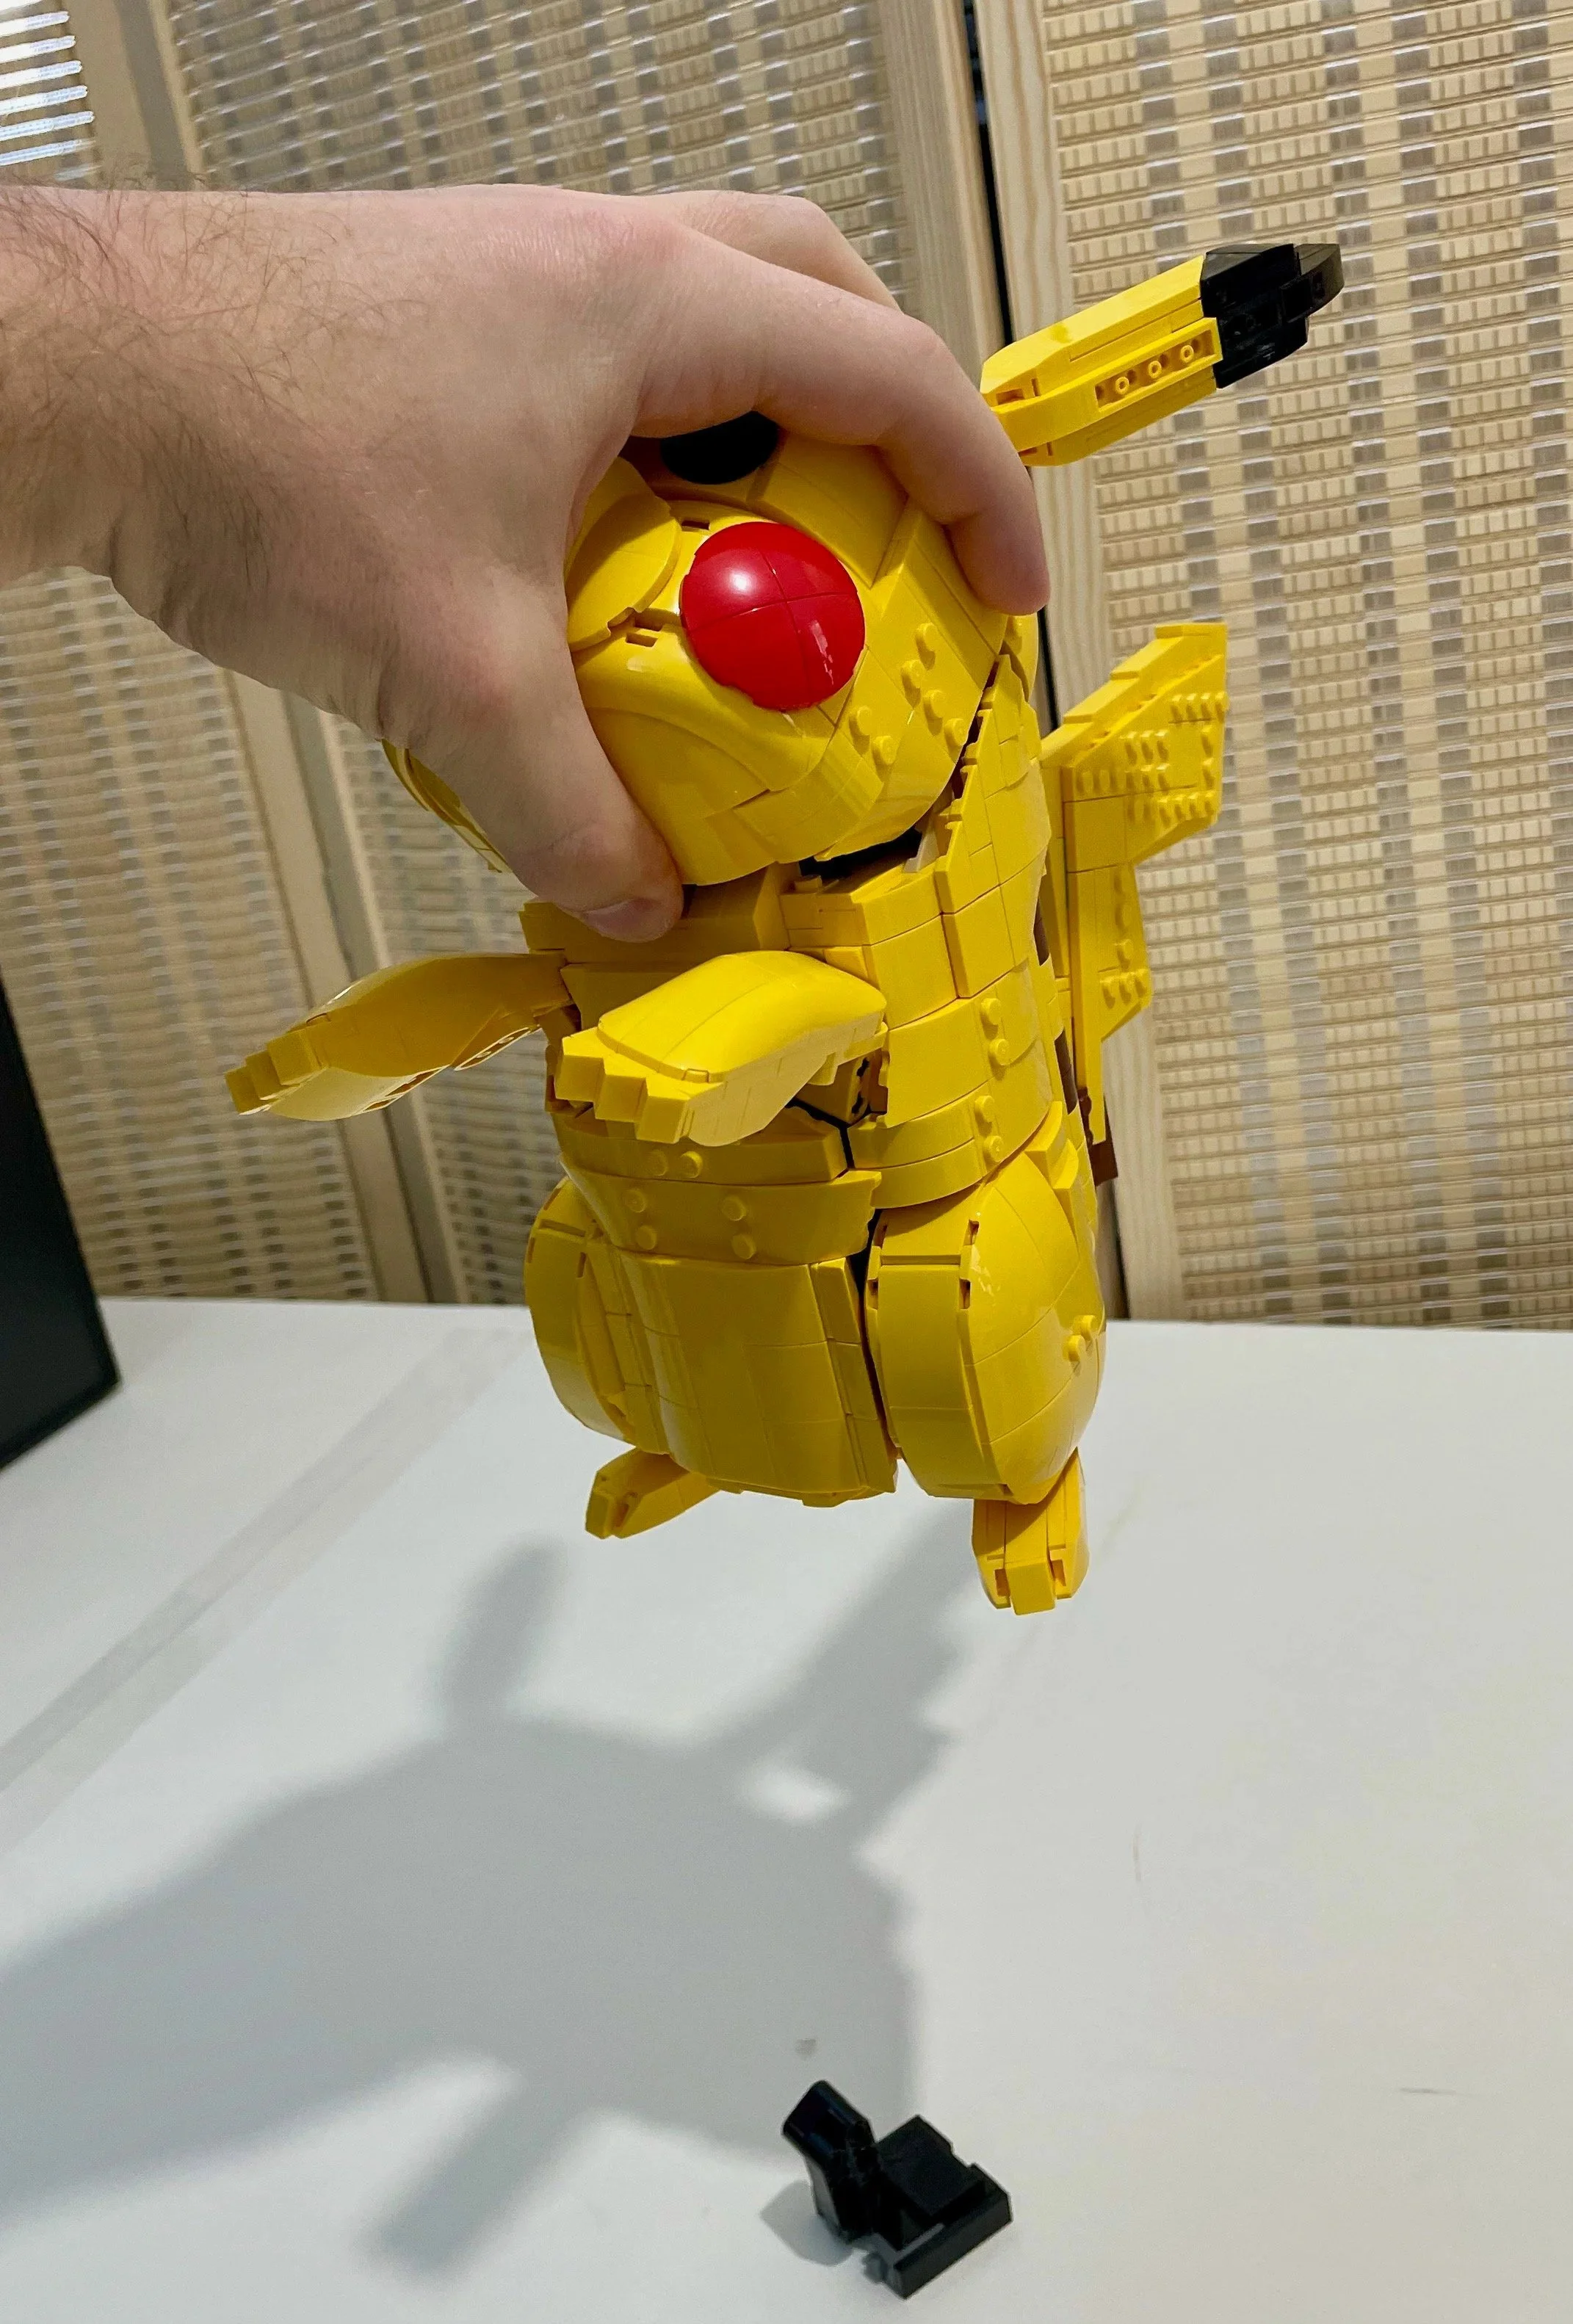
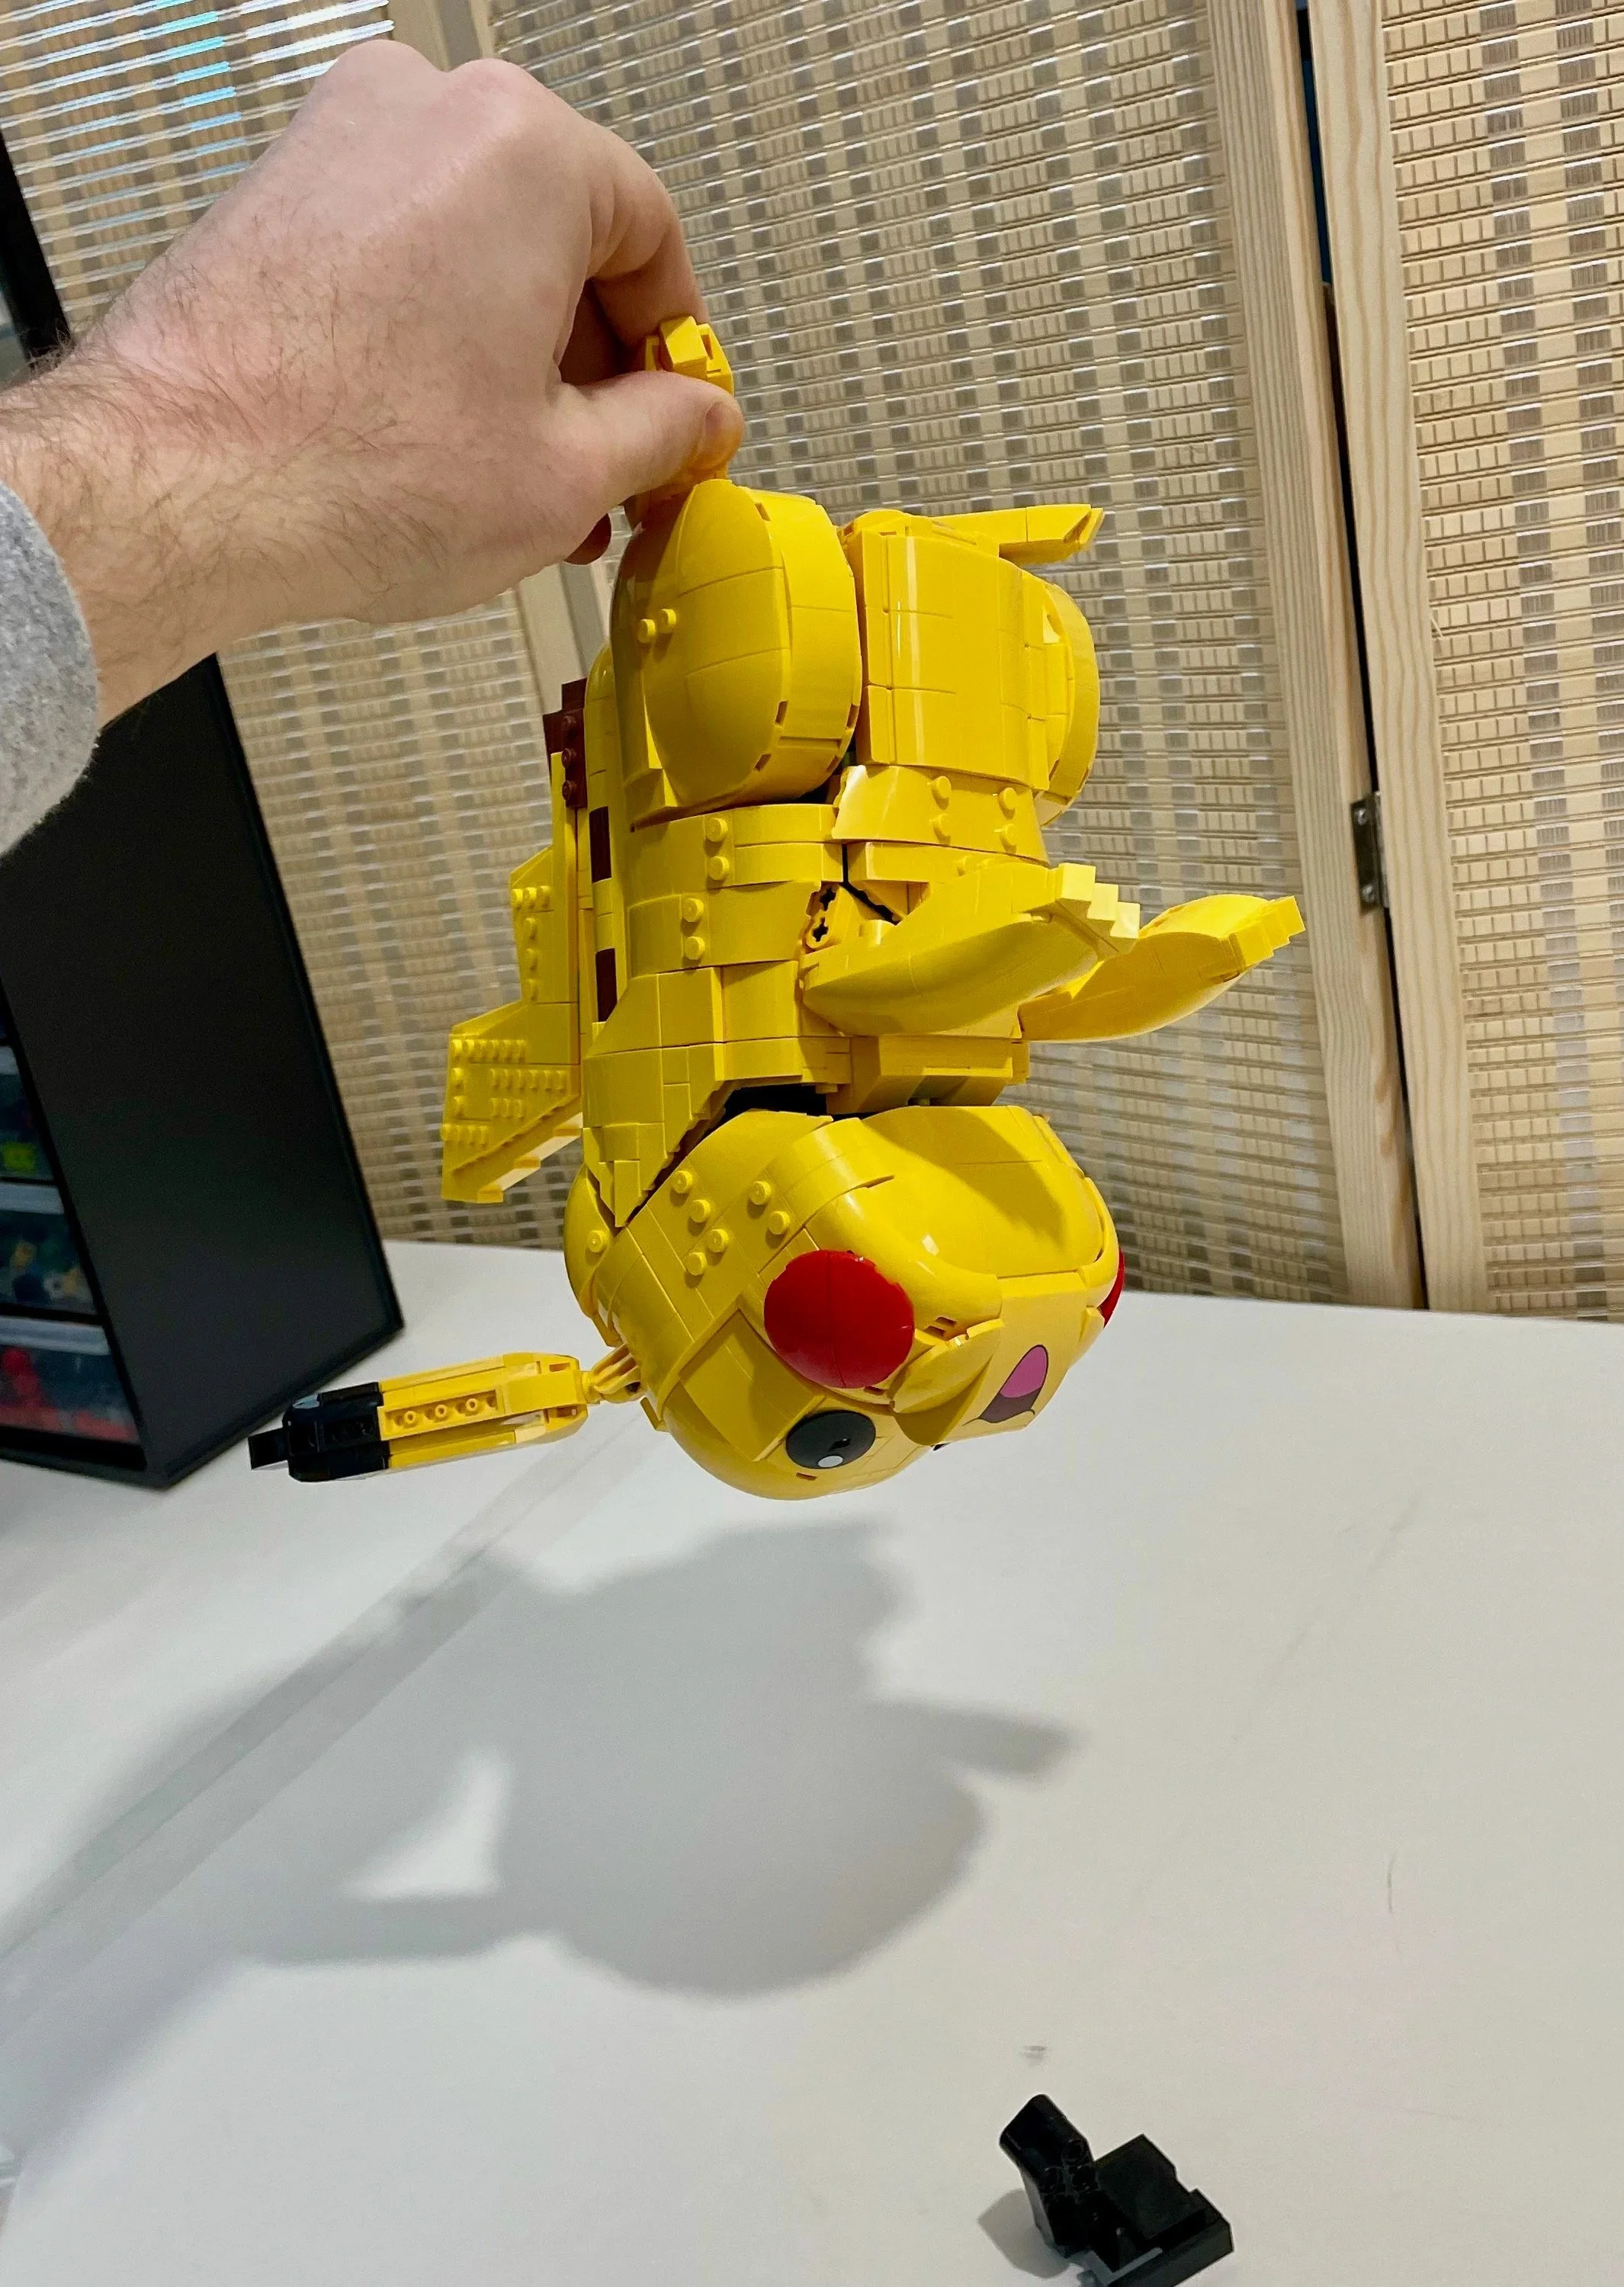
Honestly, the main thing I liked about Pikachu’s construction was its extensive use of SNOT bricks and brackets, which keep the model remarkably sturdy. No matter how you pick it up, it stays together.
EV Training an Alternate Build
I’ve made a few PokéMOCs in my day in different scales and styles, including one gritty Pikachu, but in those cases, I had the freedom to use any LEGO elements and building style I wanted.
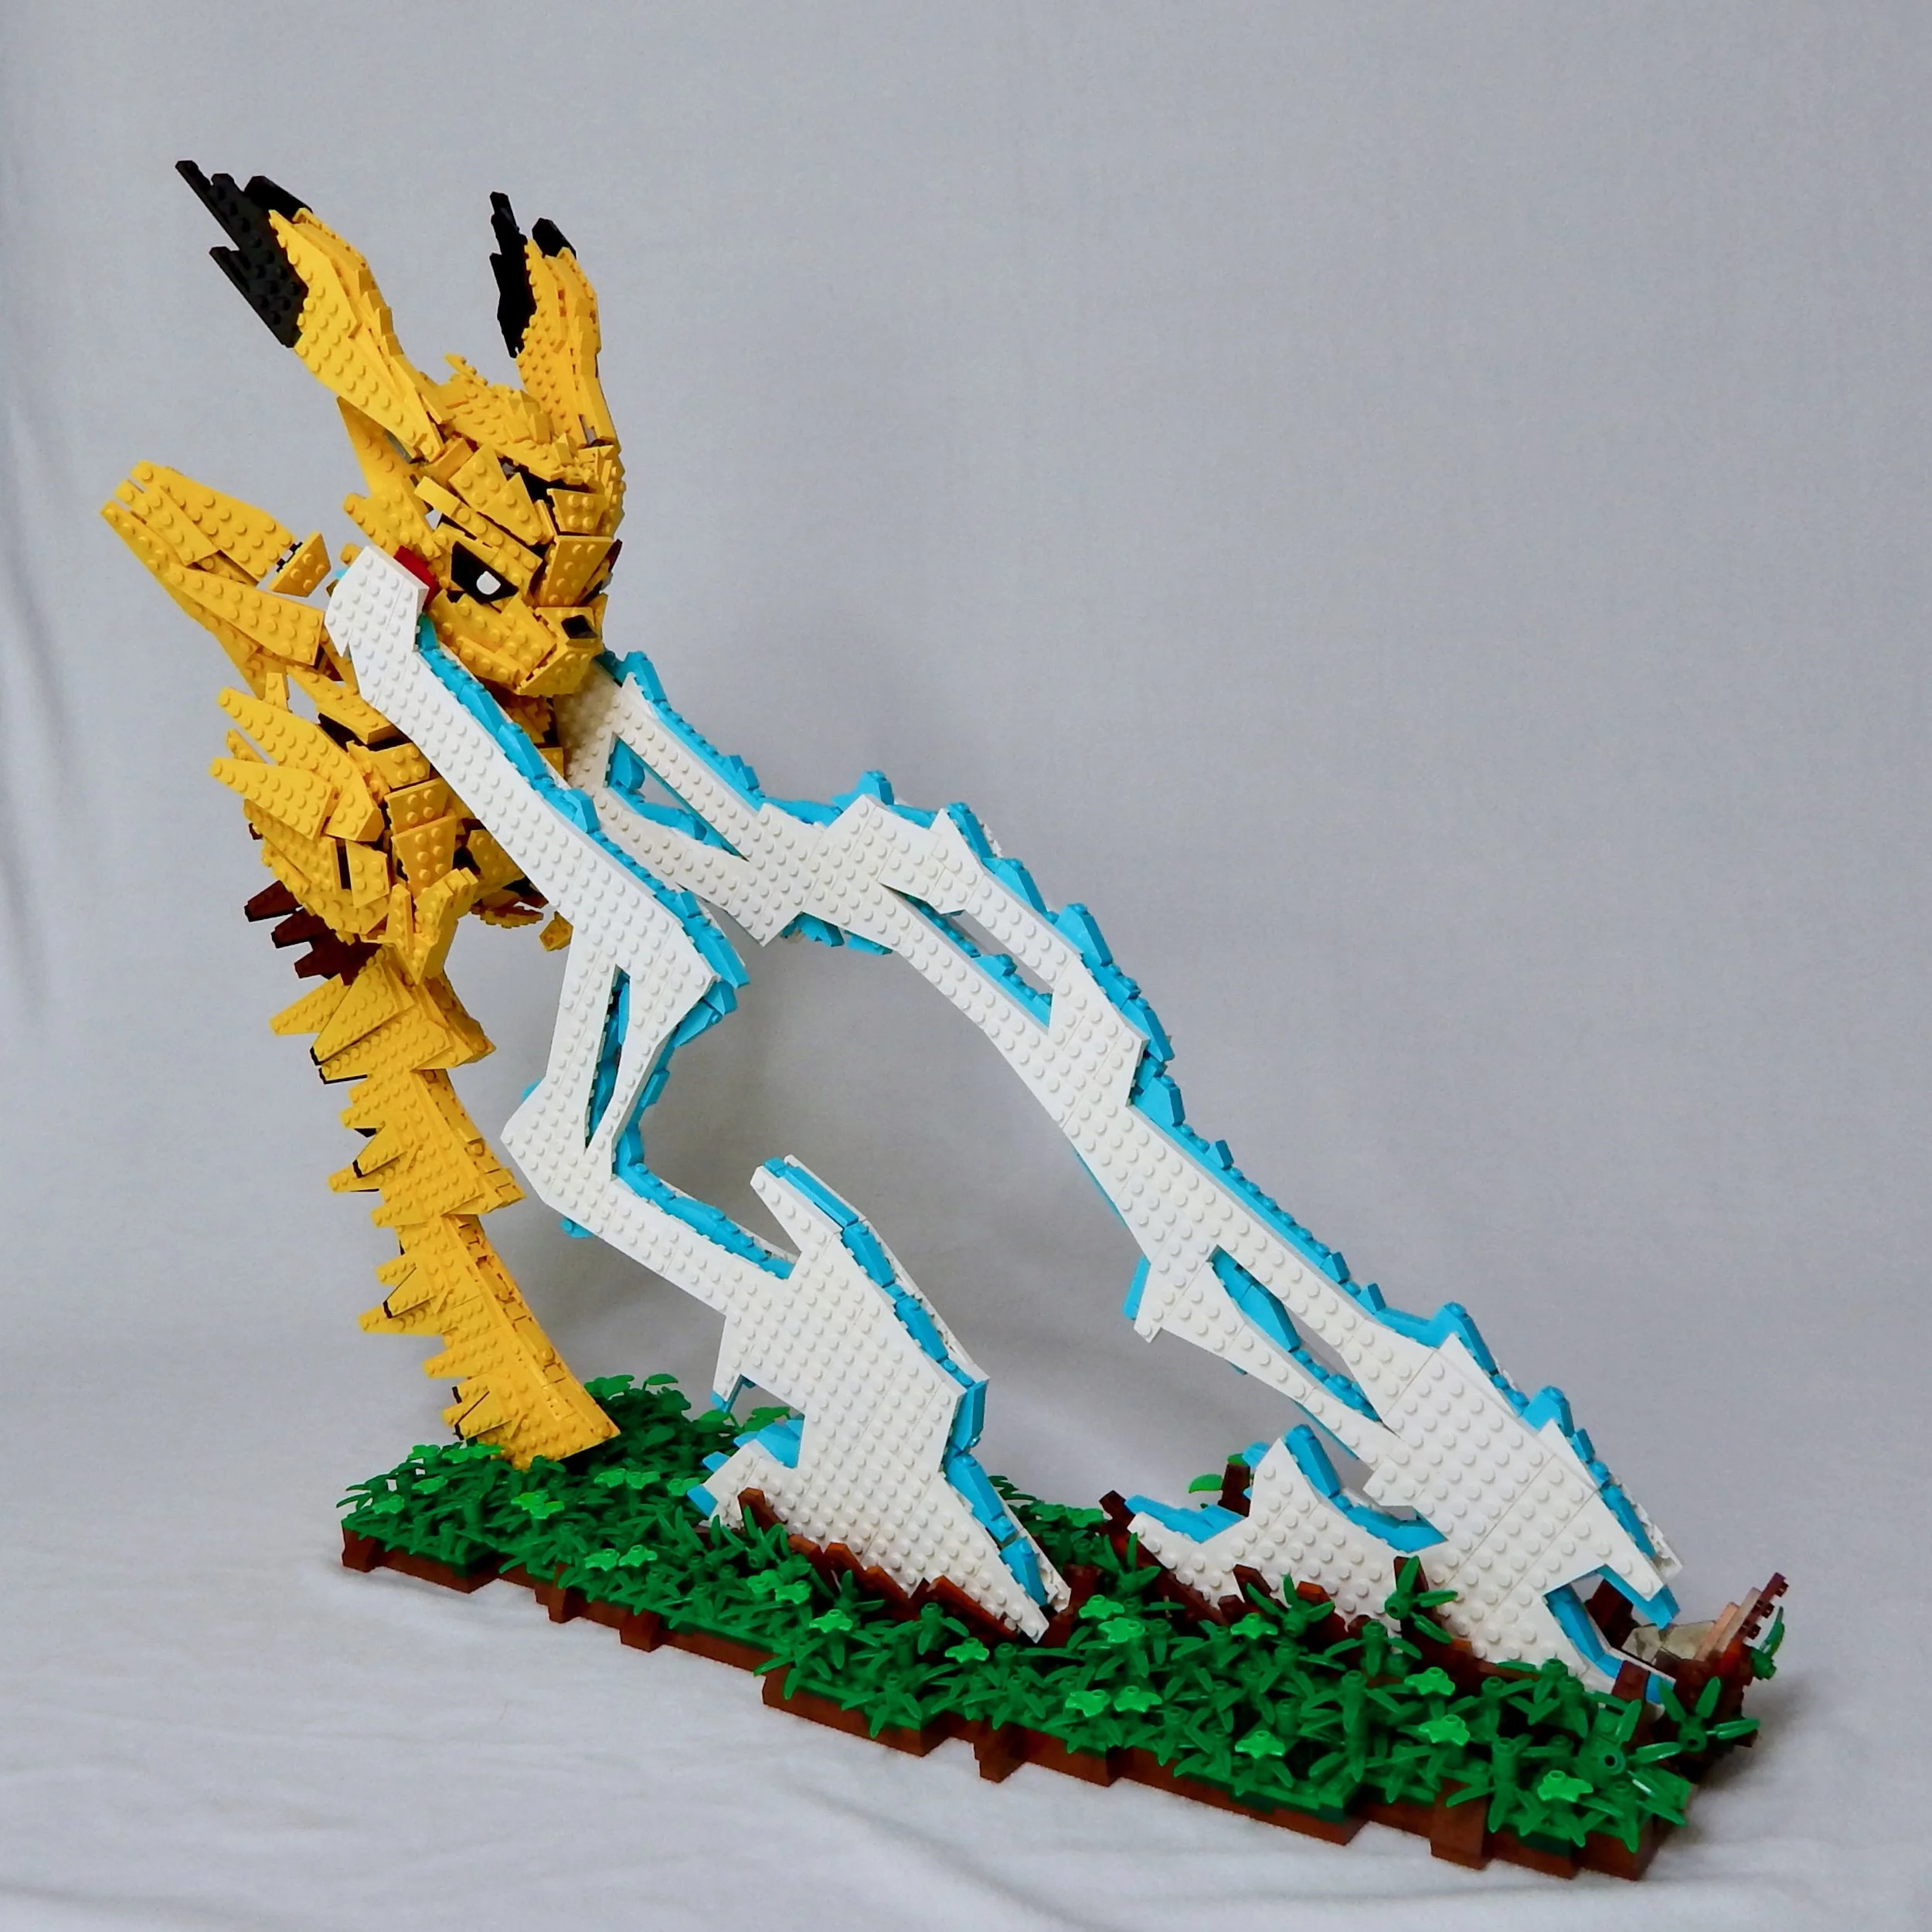
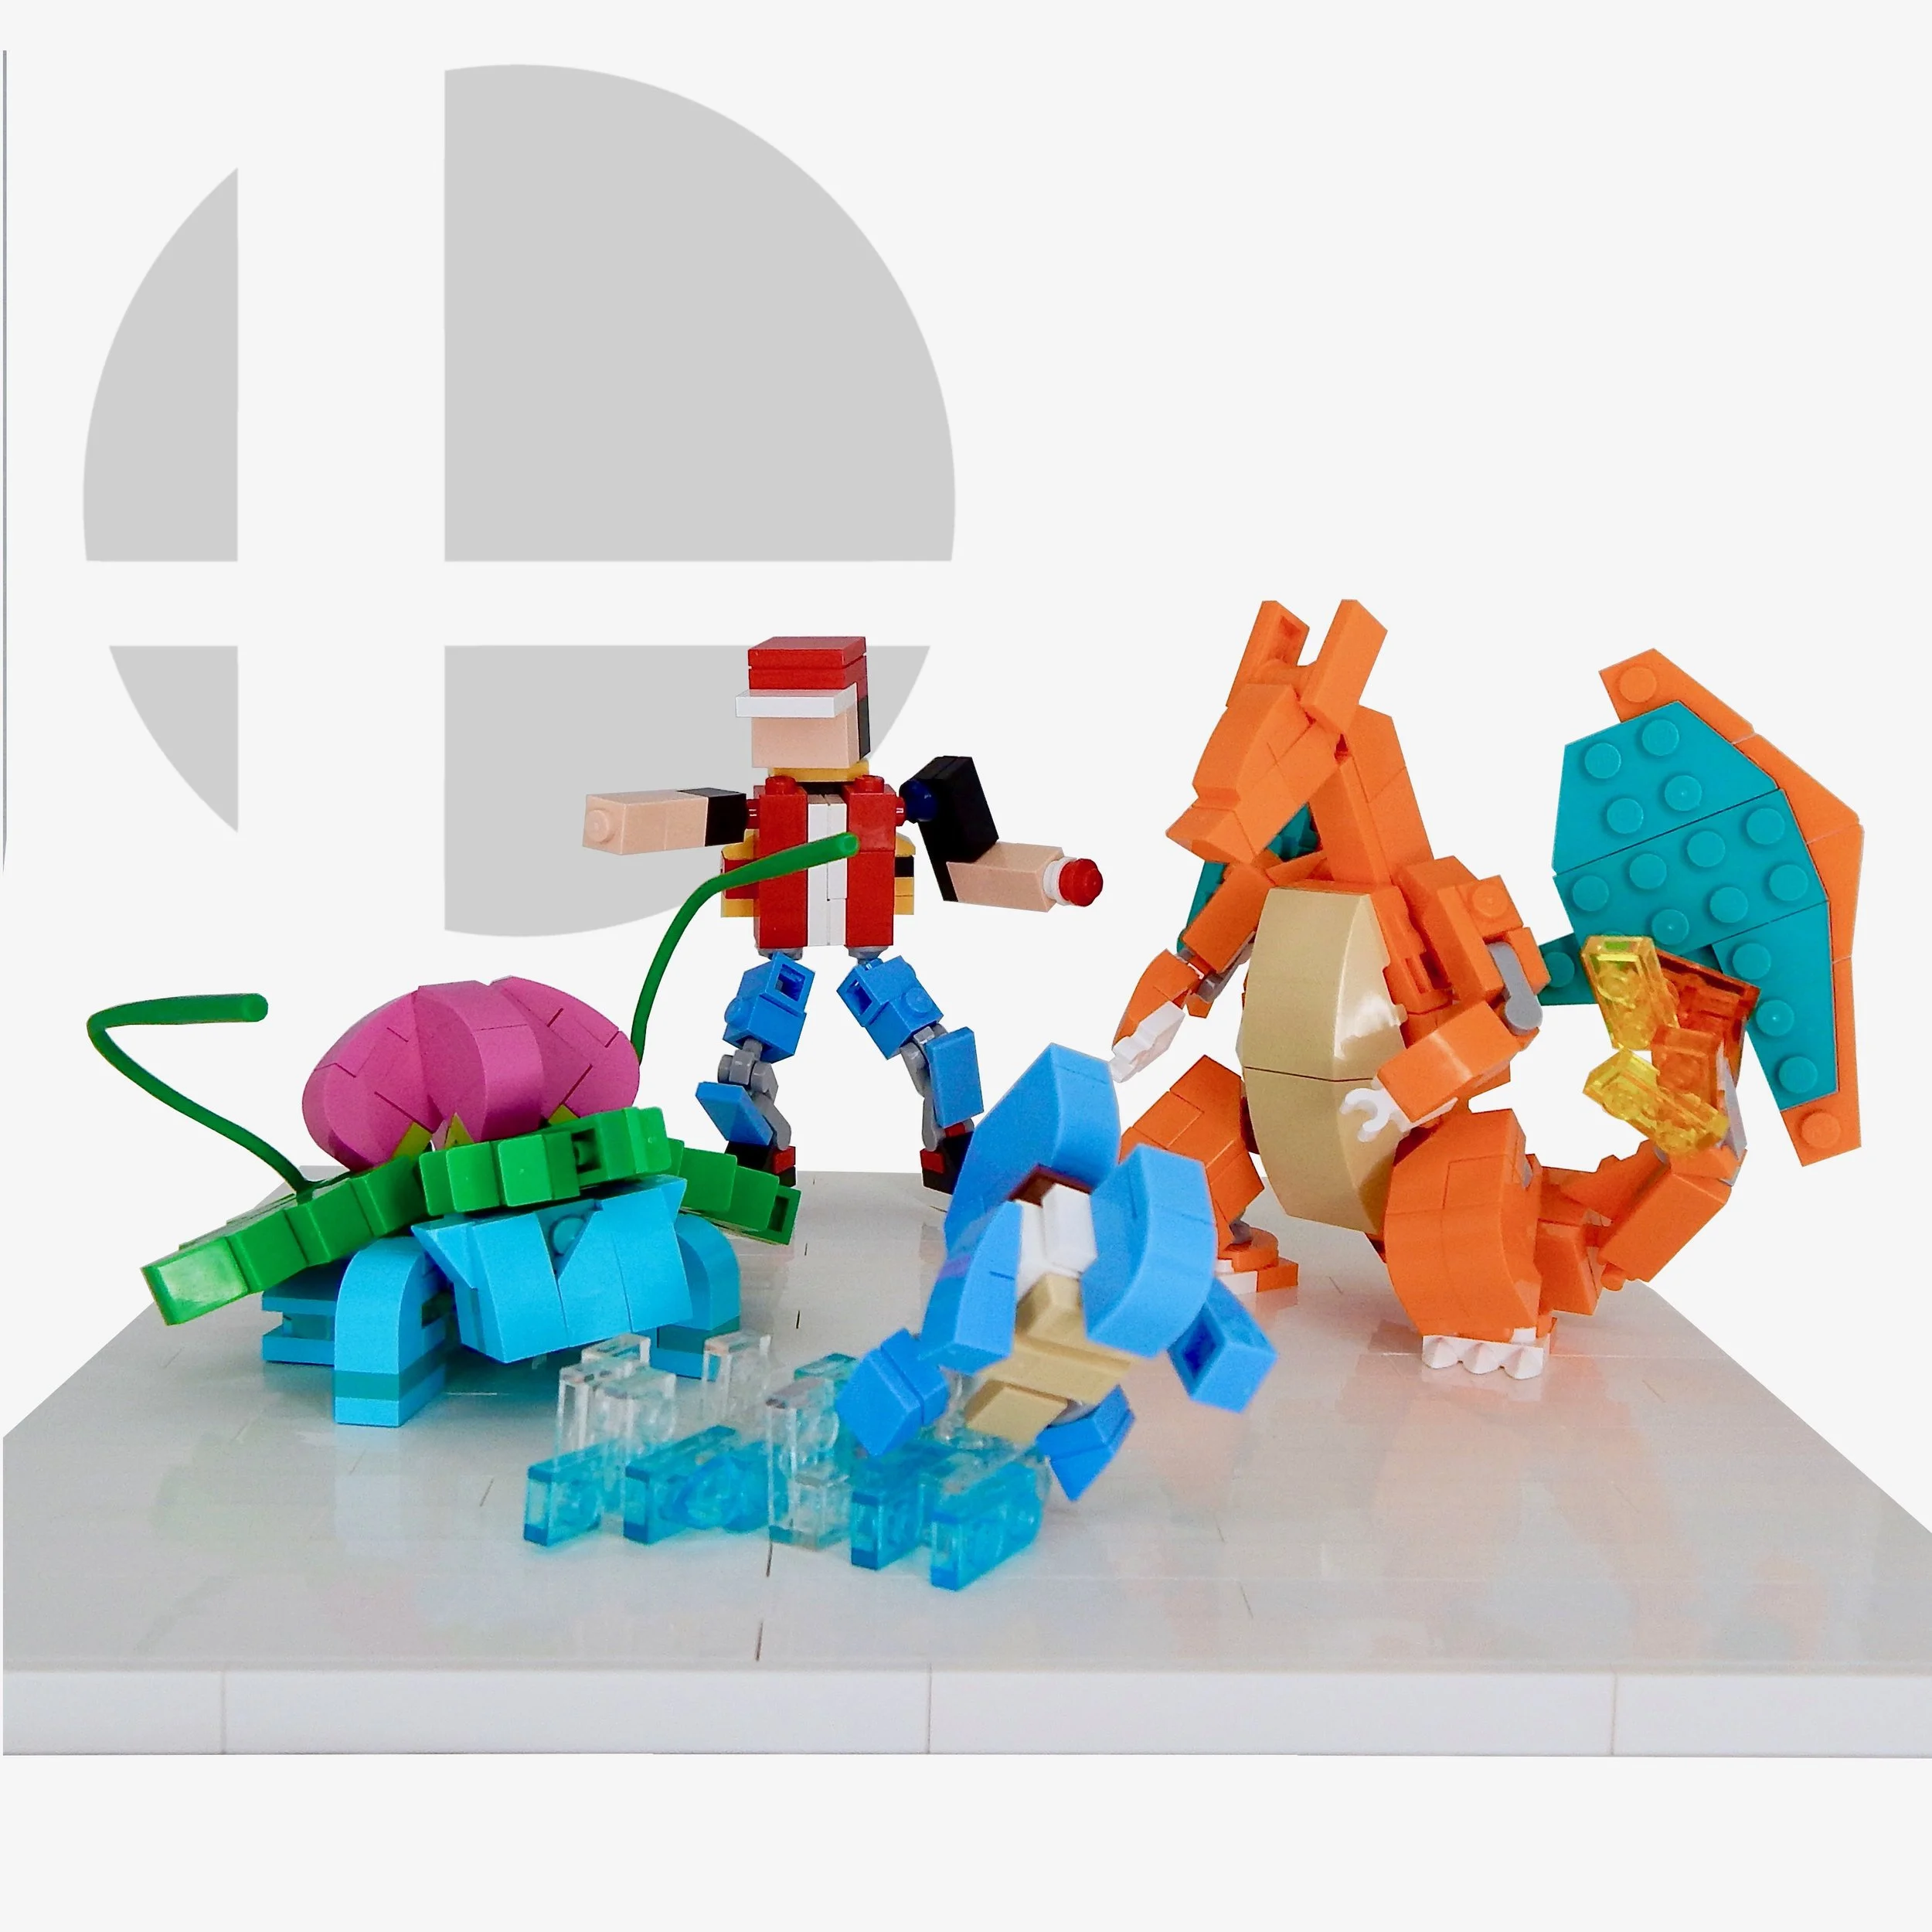
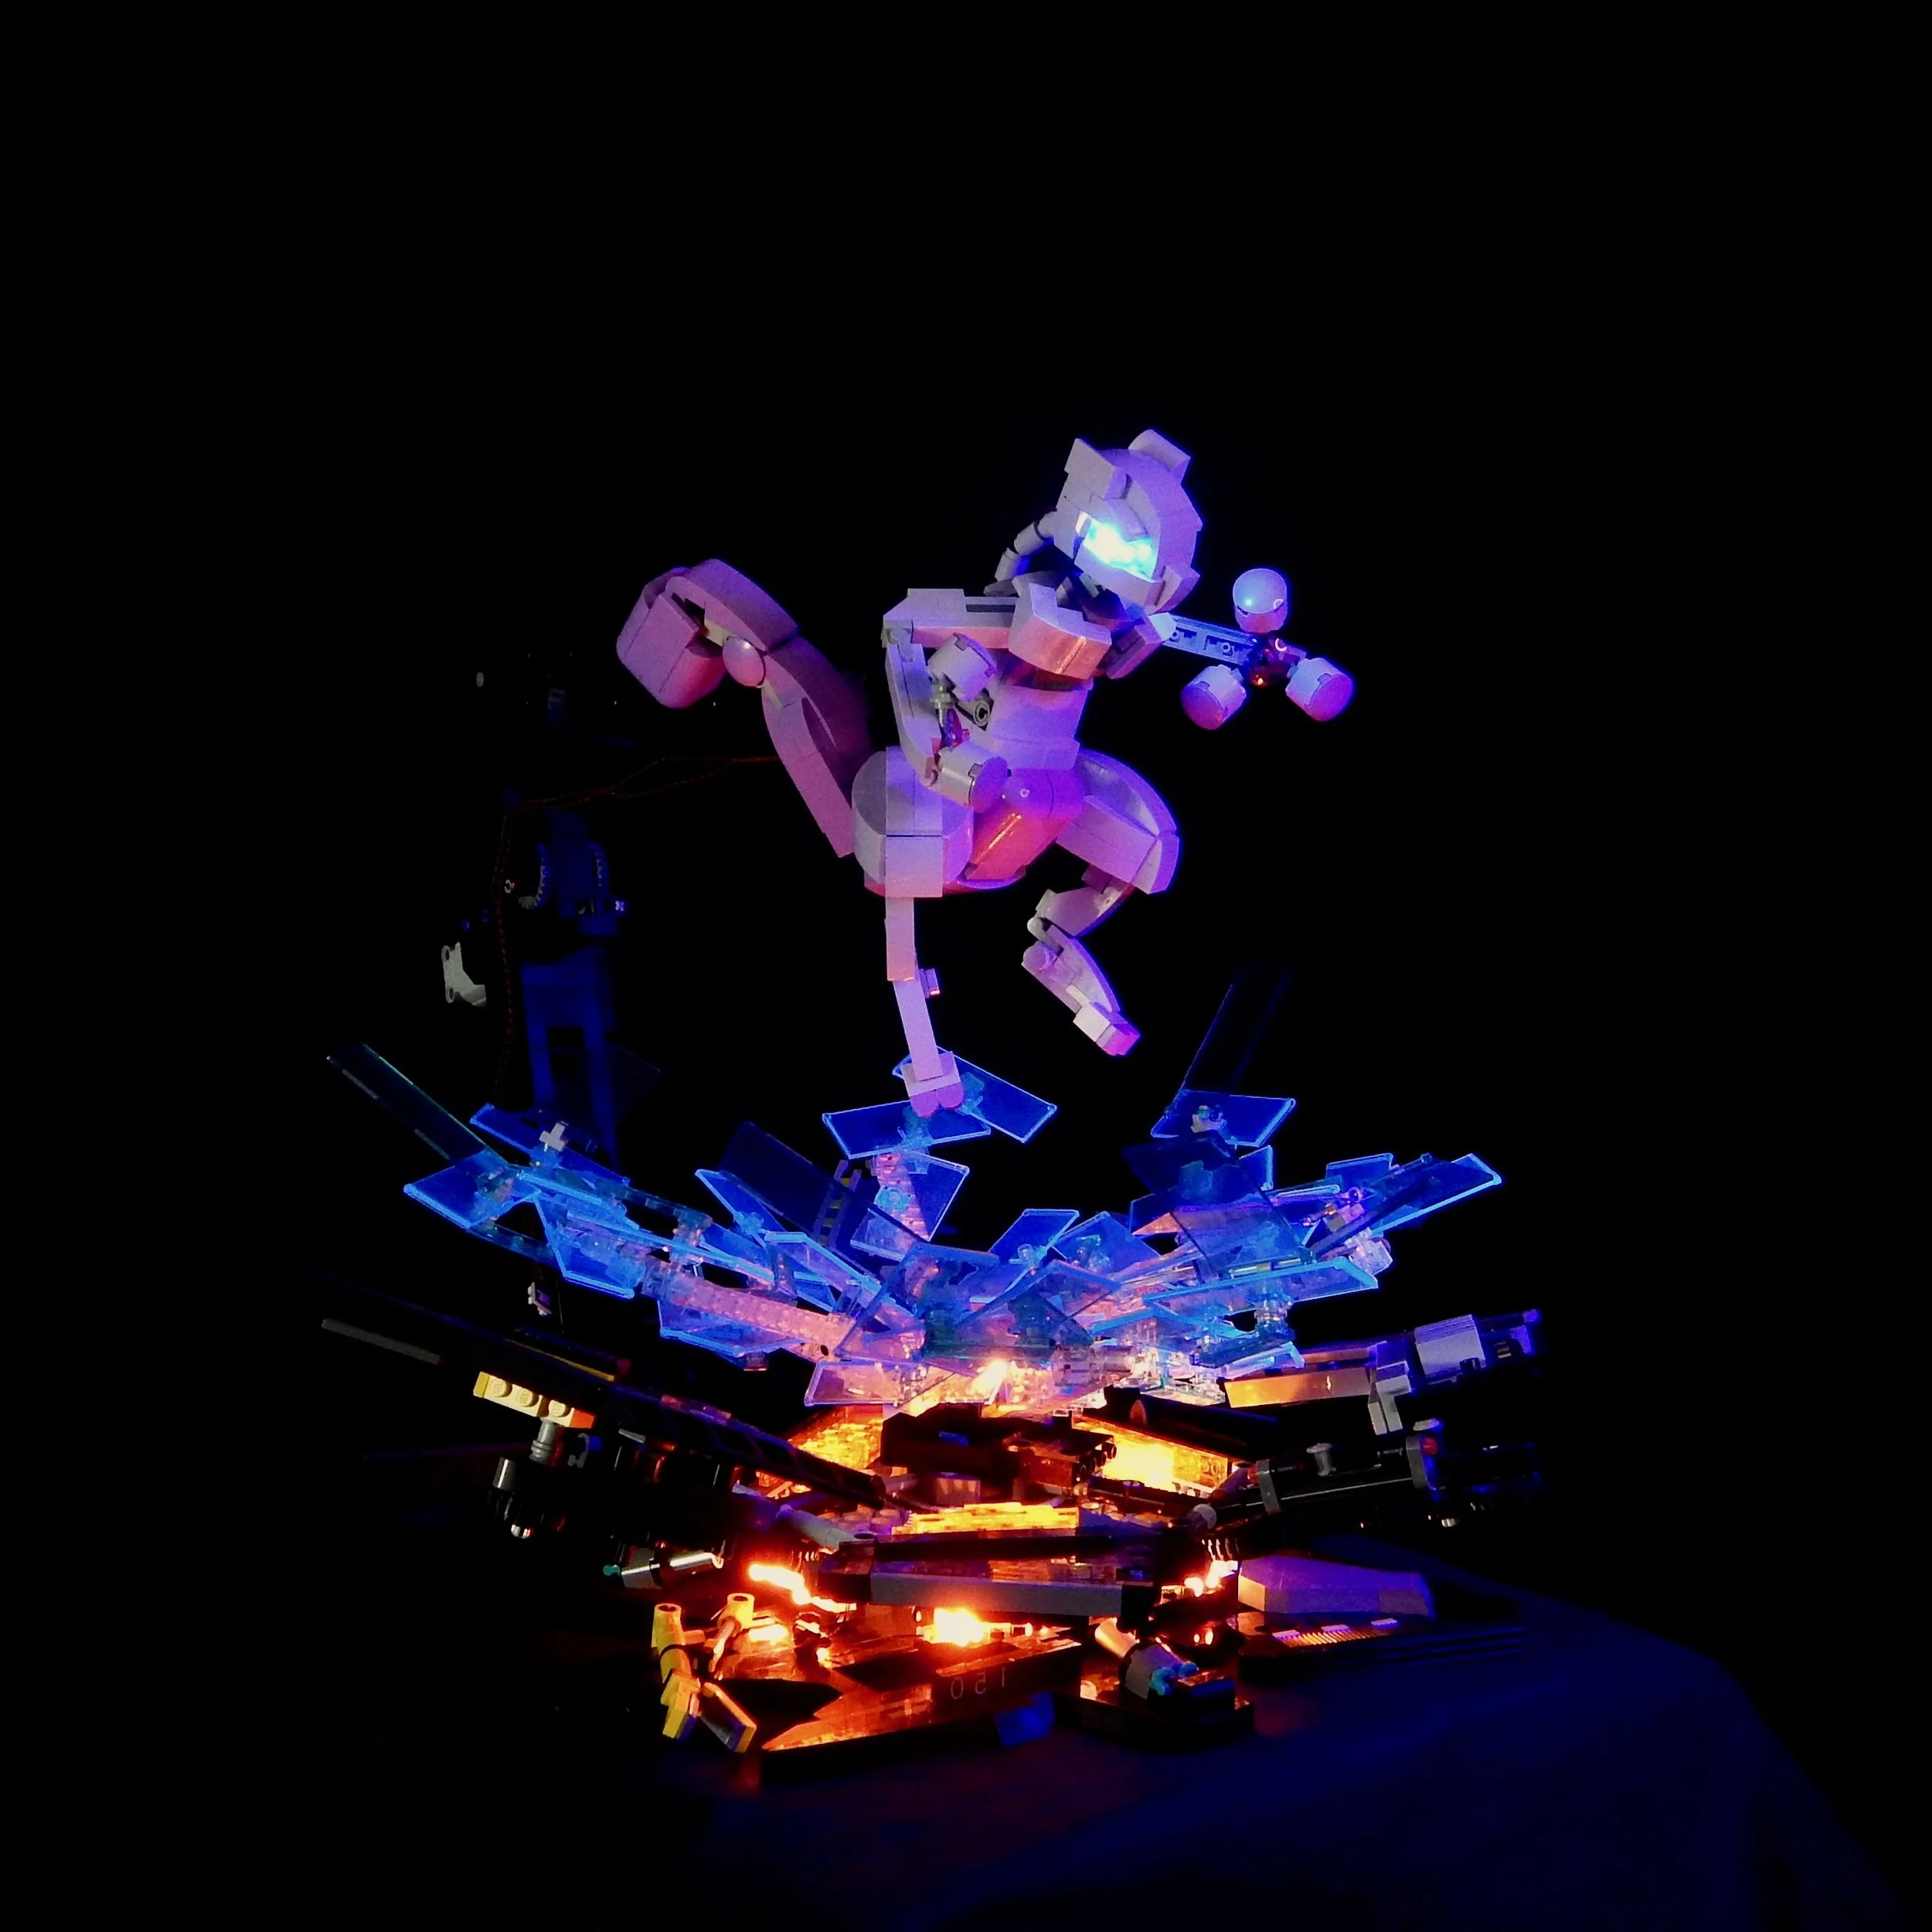
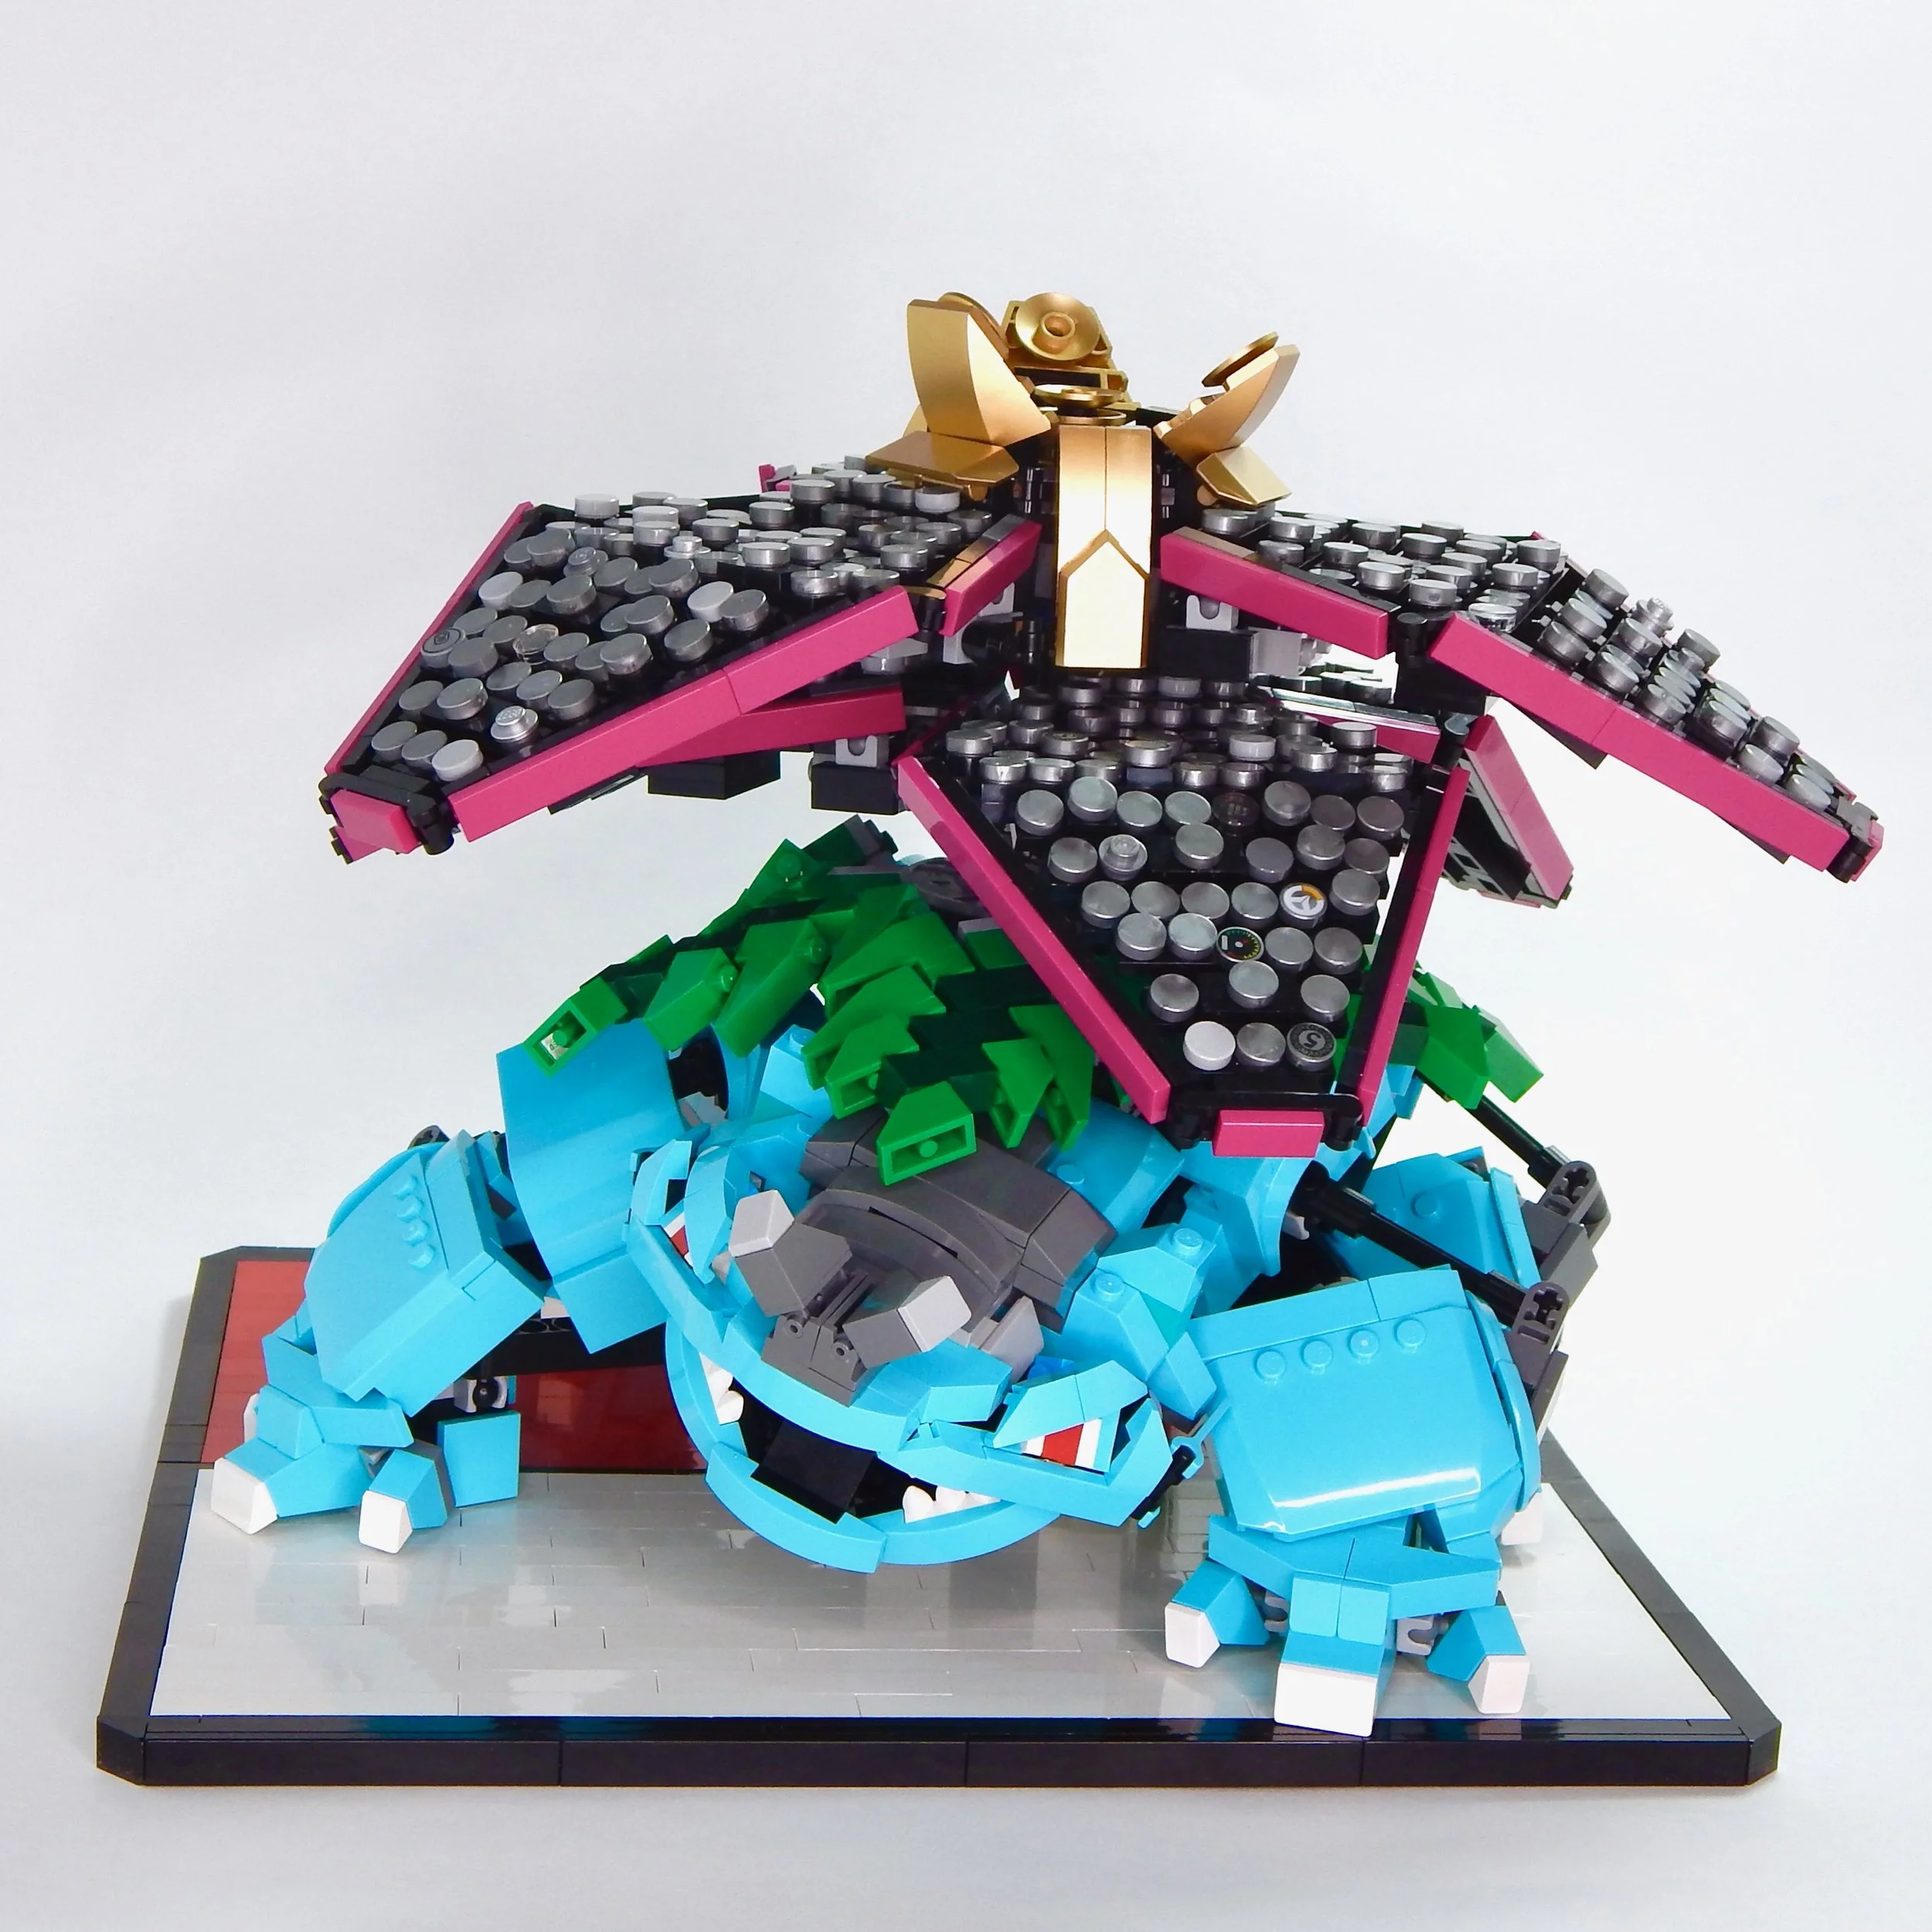
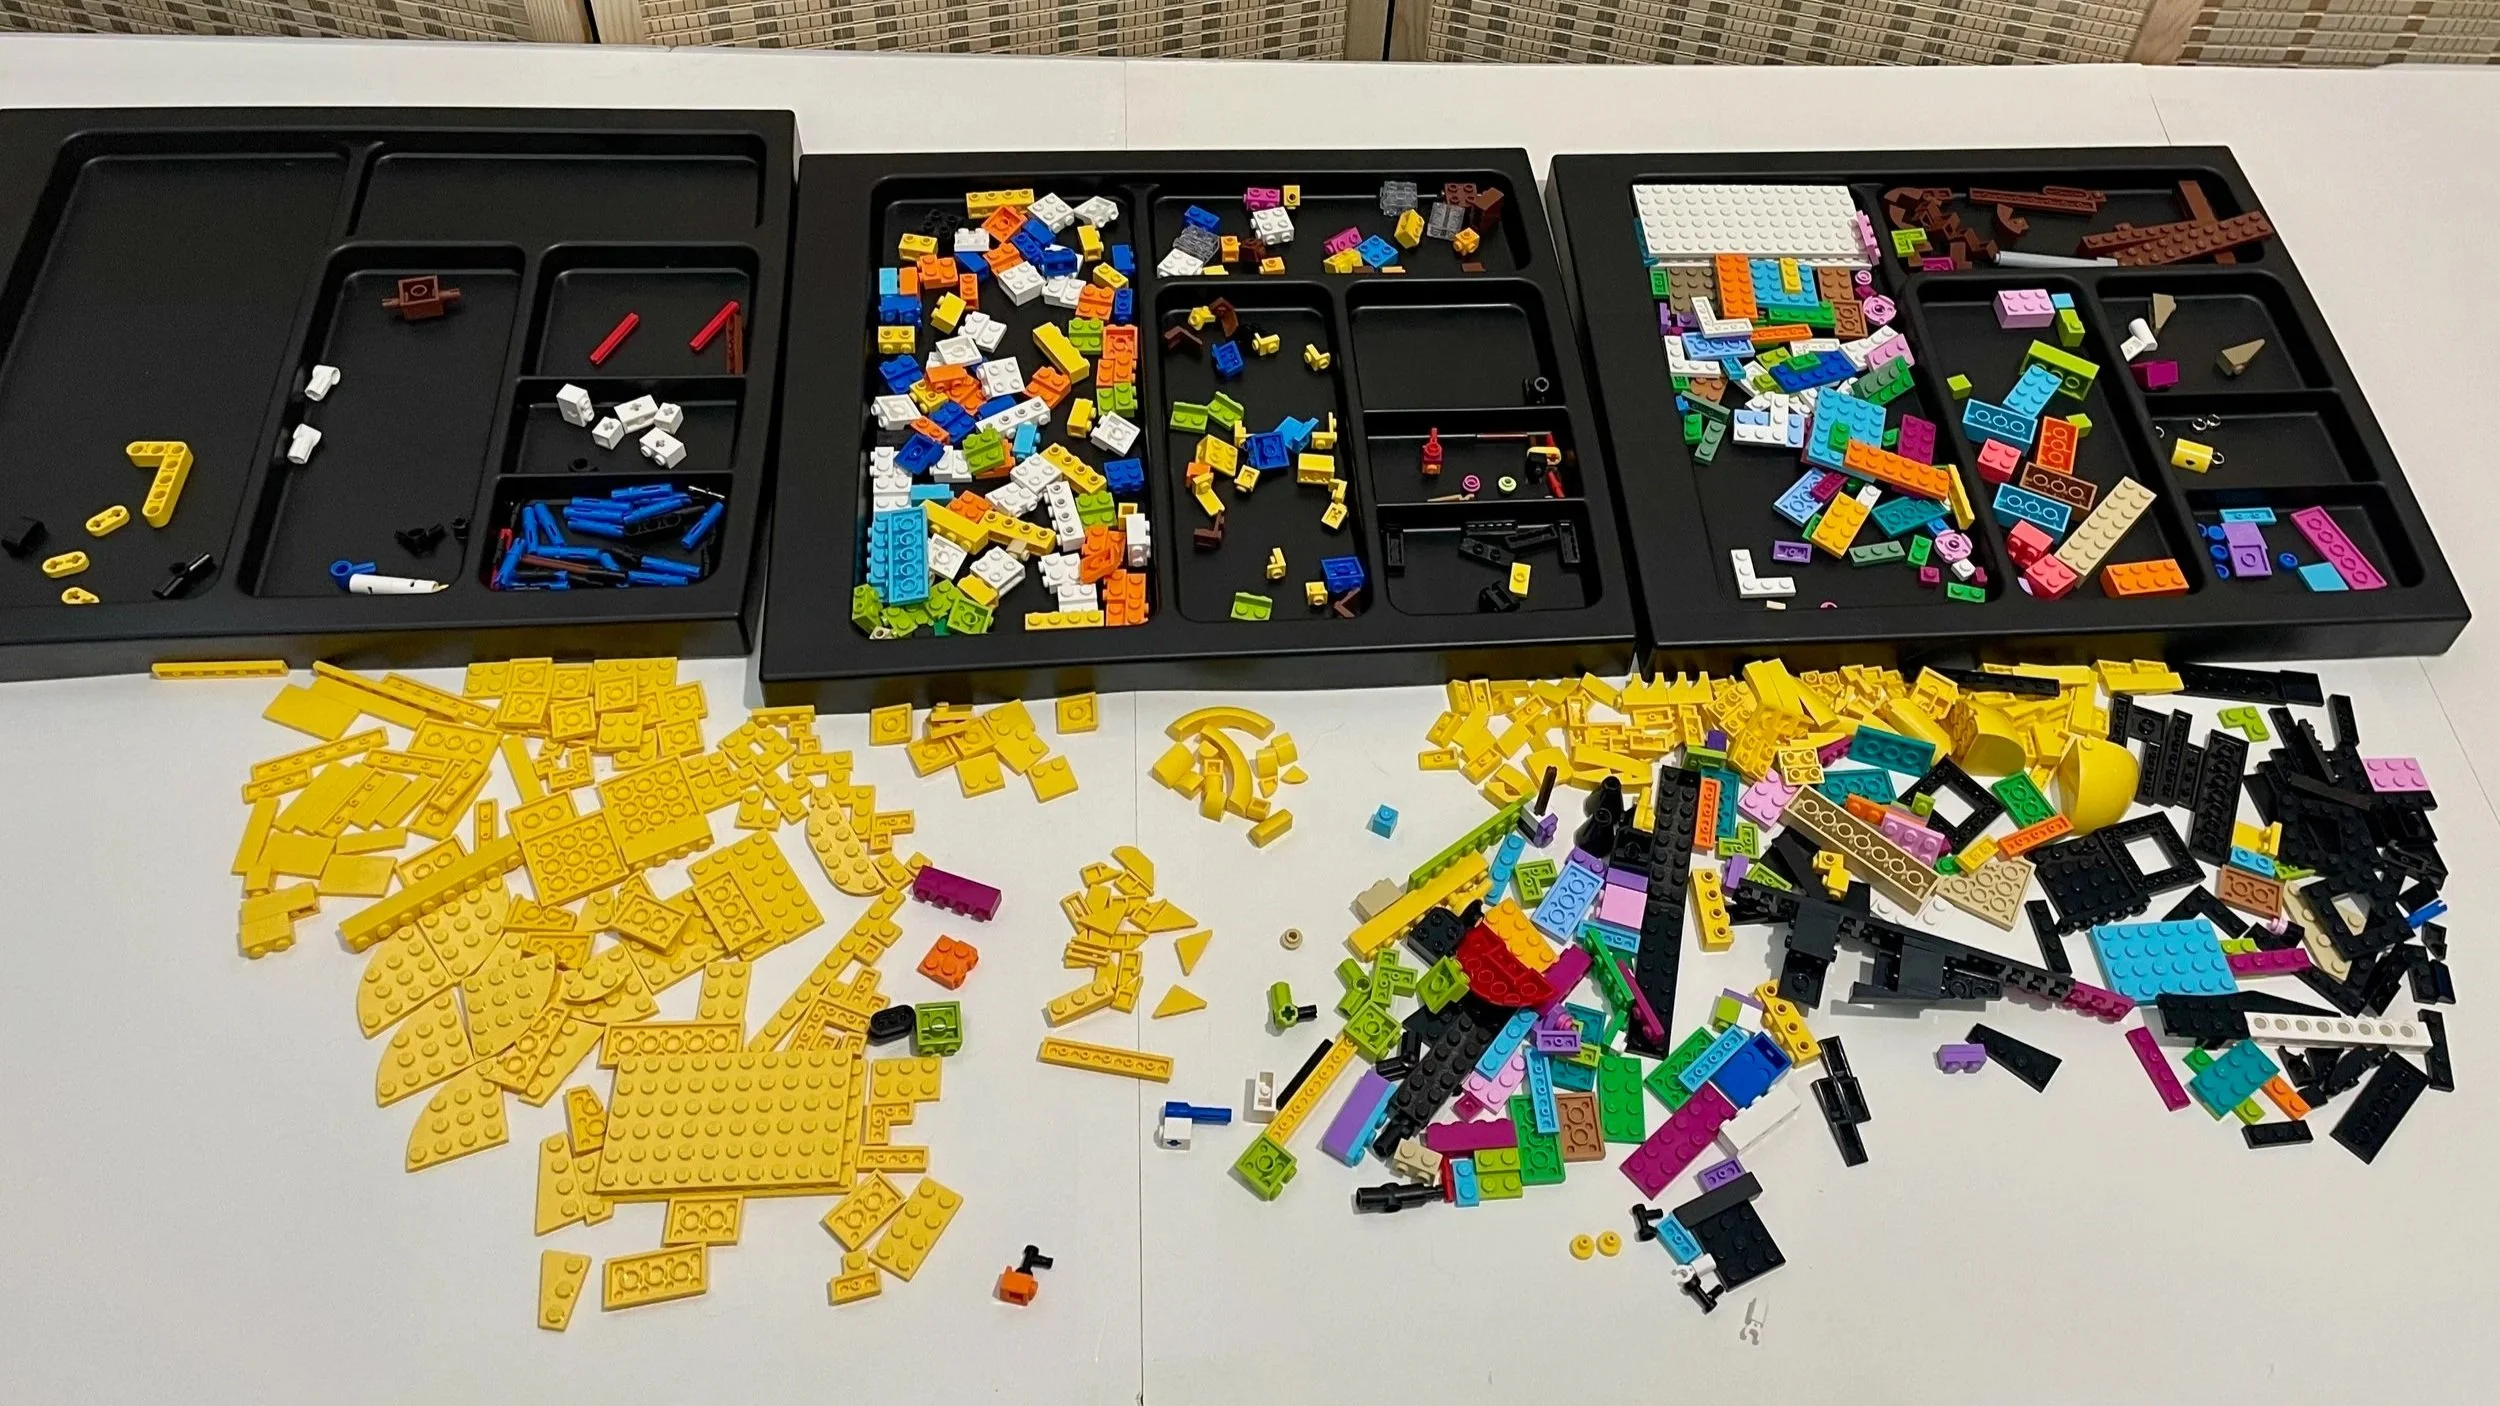
For this project, my goal was to take only the parts included in the official set and redesign Pikachu to better capture some of the features mentioned above. After a quick session with a brick separator, Pikachu had been atomized, and all 2,050 pieces were spread out before me. I left the Poké Ball intact for now because there was likely nothing I could do to rebuild it without additional red and white curved slopes.
In the MOCs above, I leaned heavily on clips, bars and Mixel joints to achieve organic angles. This set had almost nothing in those categories for me to use, but it did have 800,000 D-SNOT bricks. (In actuality, there are 28 across three different colors.) I would have to make do.
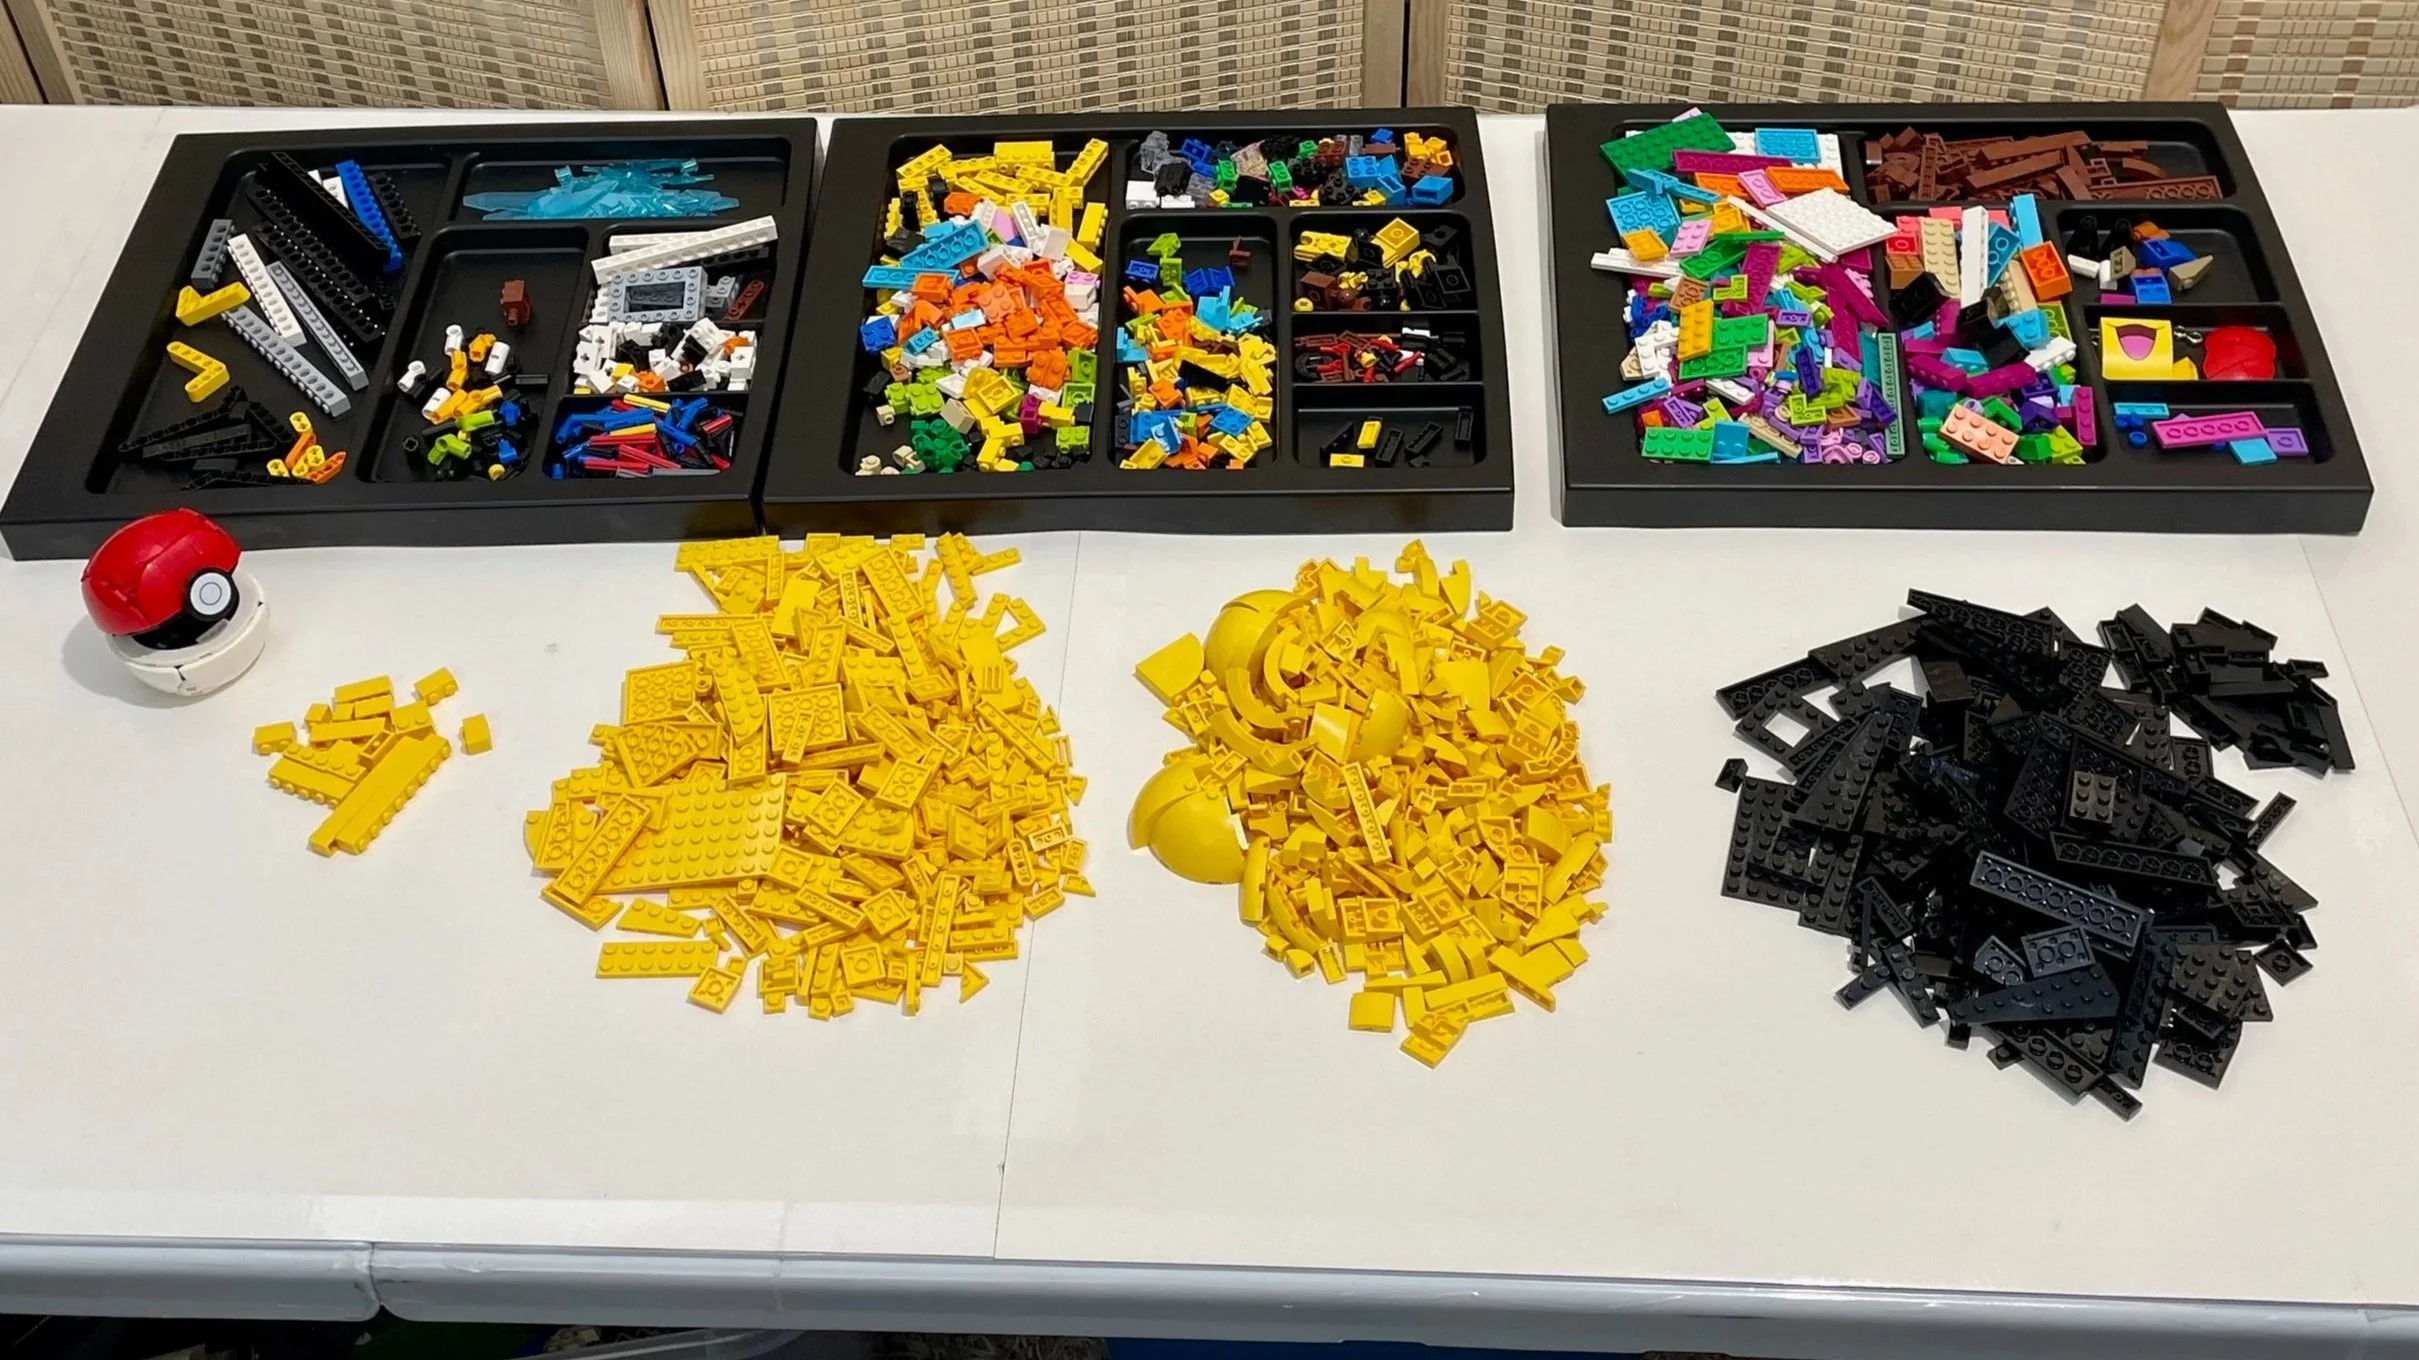
I also usually rely on classic bricks to bring an angular, clean aesthetic to my MOCs. This set has a shockingly small number of yellow rectangular bricks, replacing them with even more SNOT elements and a massive pile of curved slopes.
On top of those limitations, I had never attempted an alternate build quite like this. I may have bitten off more than I could Pika-chew. If I couldn’t create anything worth being proud of, I would happily eat my words and admit defeat.
Starting with the Face
I found very few options for the eyes and cheeks if I wanted to move away from the included printed elements. Although there was a lot of black in the base, there weren’t any black curved slopes or round bricks that would work for brick-built eyes, so I was locked into using the printed minifigure shields. I could have made the cheeks twice as large using the red curved slopes from the Poké Ball, but that was obviously a horrible idea.
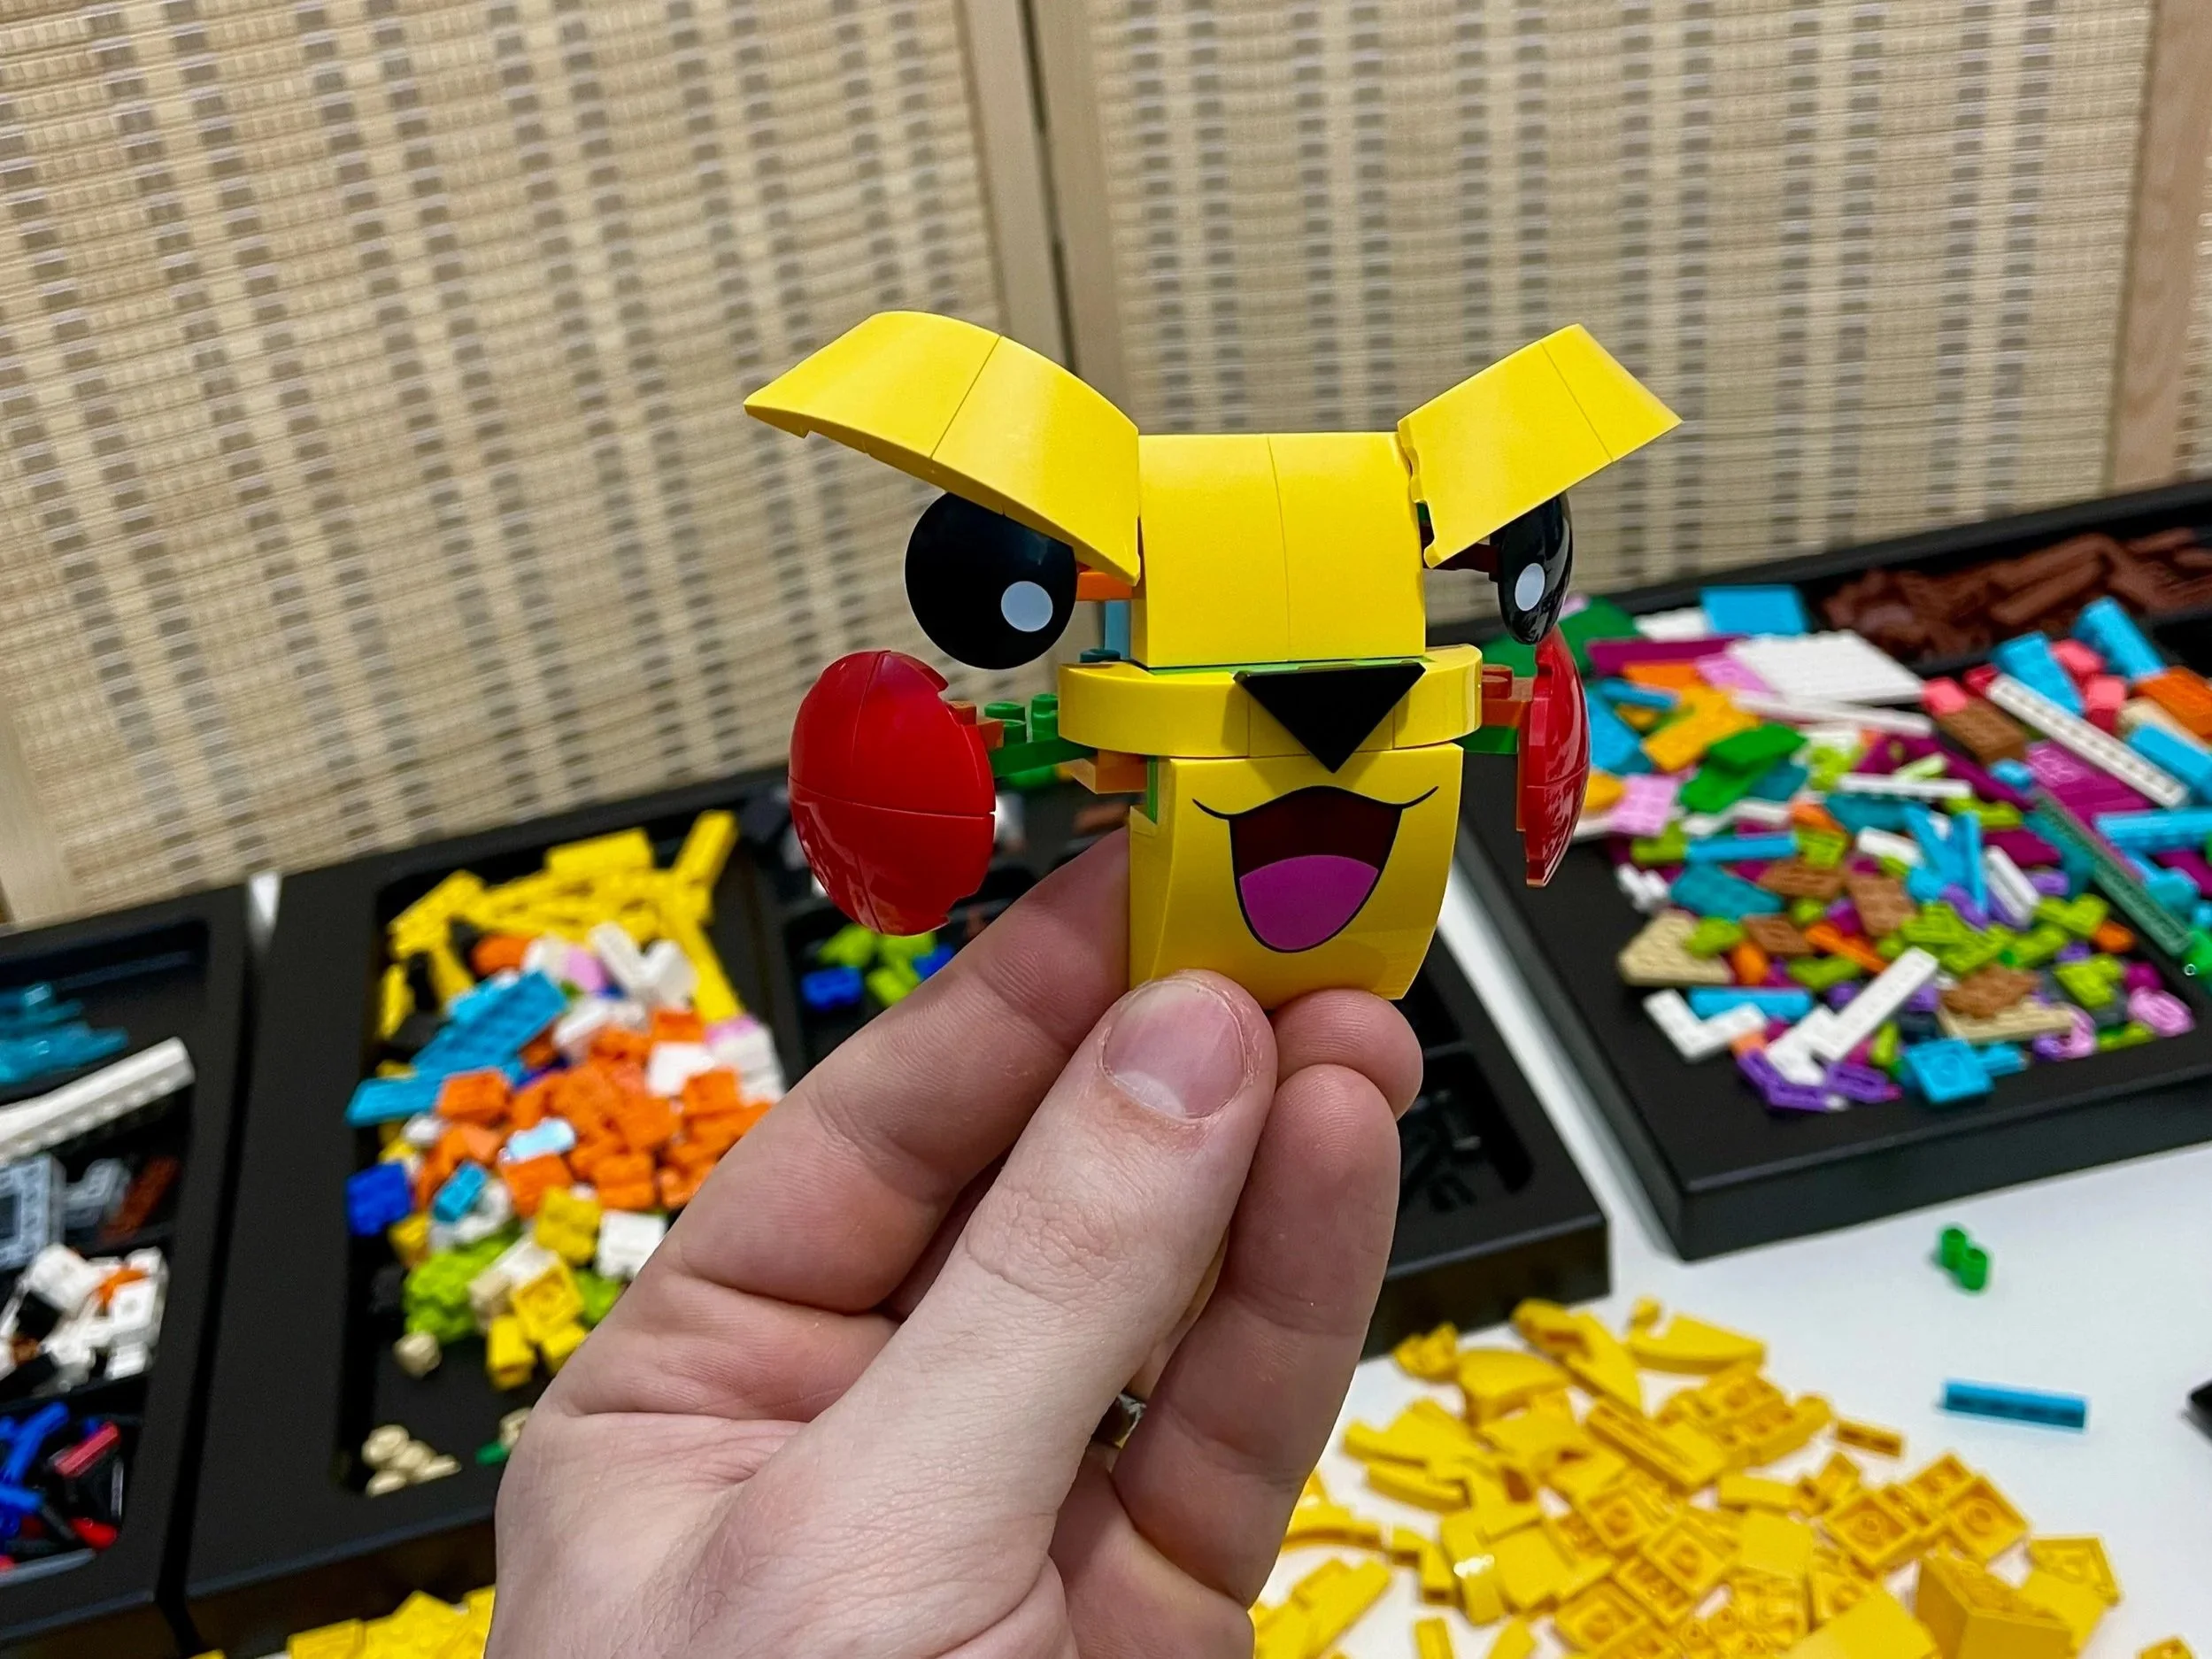
I positioned the eyes, eyebrows and cheeks before rounding everything out with the printed mouth piece. Again, I wanted to move away from the printed element, but building an open mouth was a challenge I was not ready to take on just yet.
Filling out the rest of the face required angling slopes across the forehead and sides. With so few hinges available, I had to create precarious systems of SNOT to hold everything in just the right position.
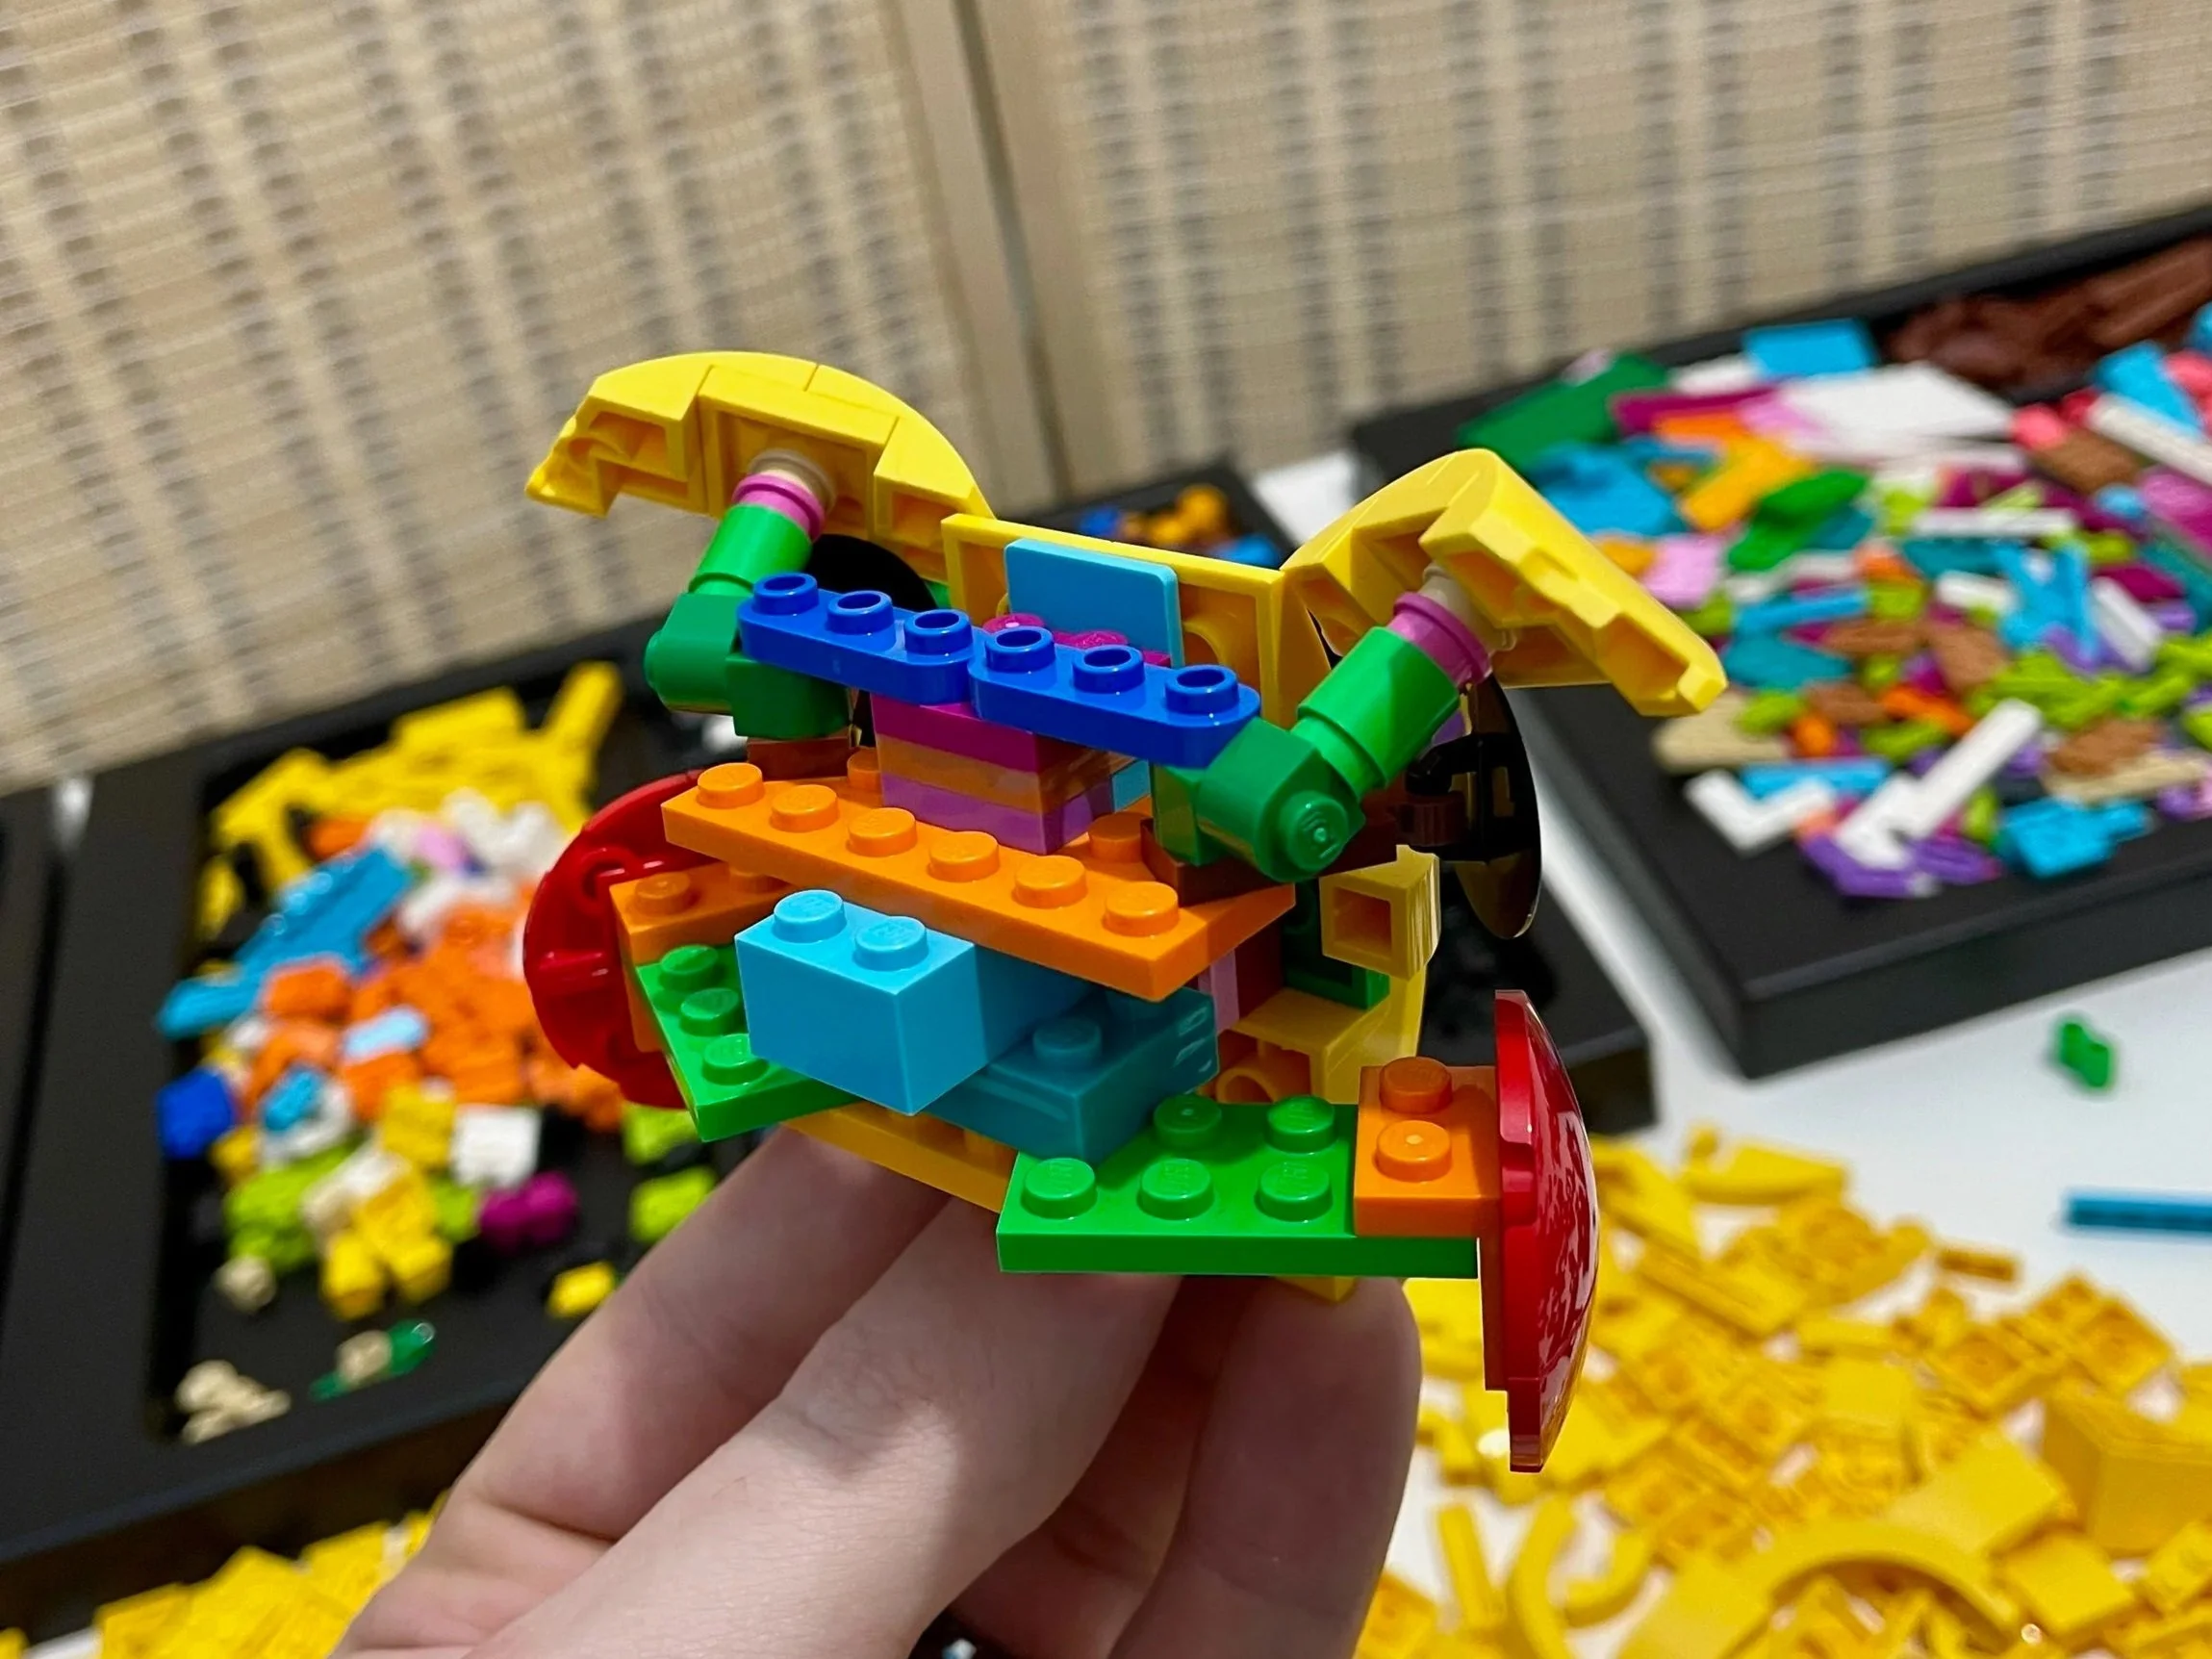
After rounding out the head a bit, I moved on to the ears. The ears from the official set are so small and thin that I wanted my Pikachu to have something more substantial. I started by aligning wedge plates with SNOT bricks so the ears would look decent from 270 degrees, a technique I used for the crown of a Gyarados MOC in 2025.
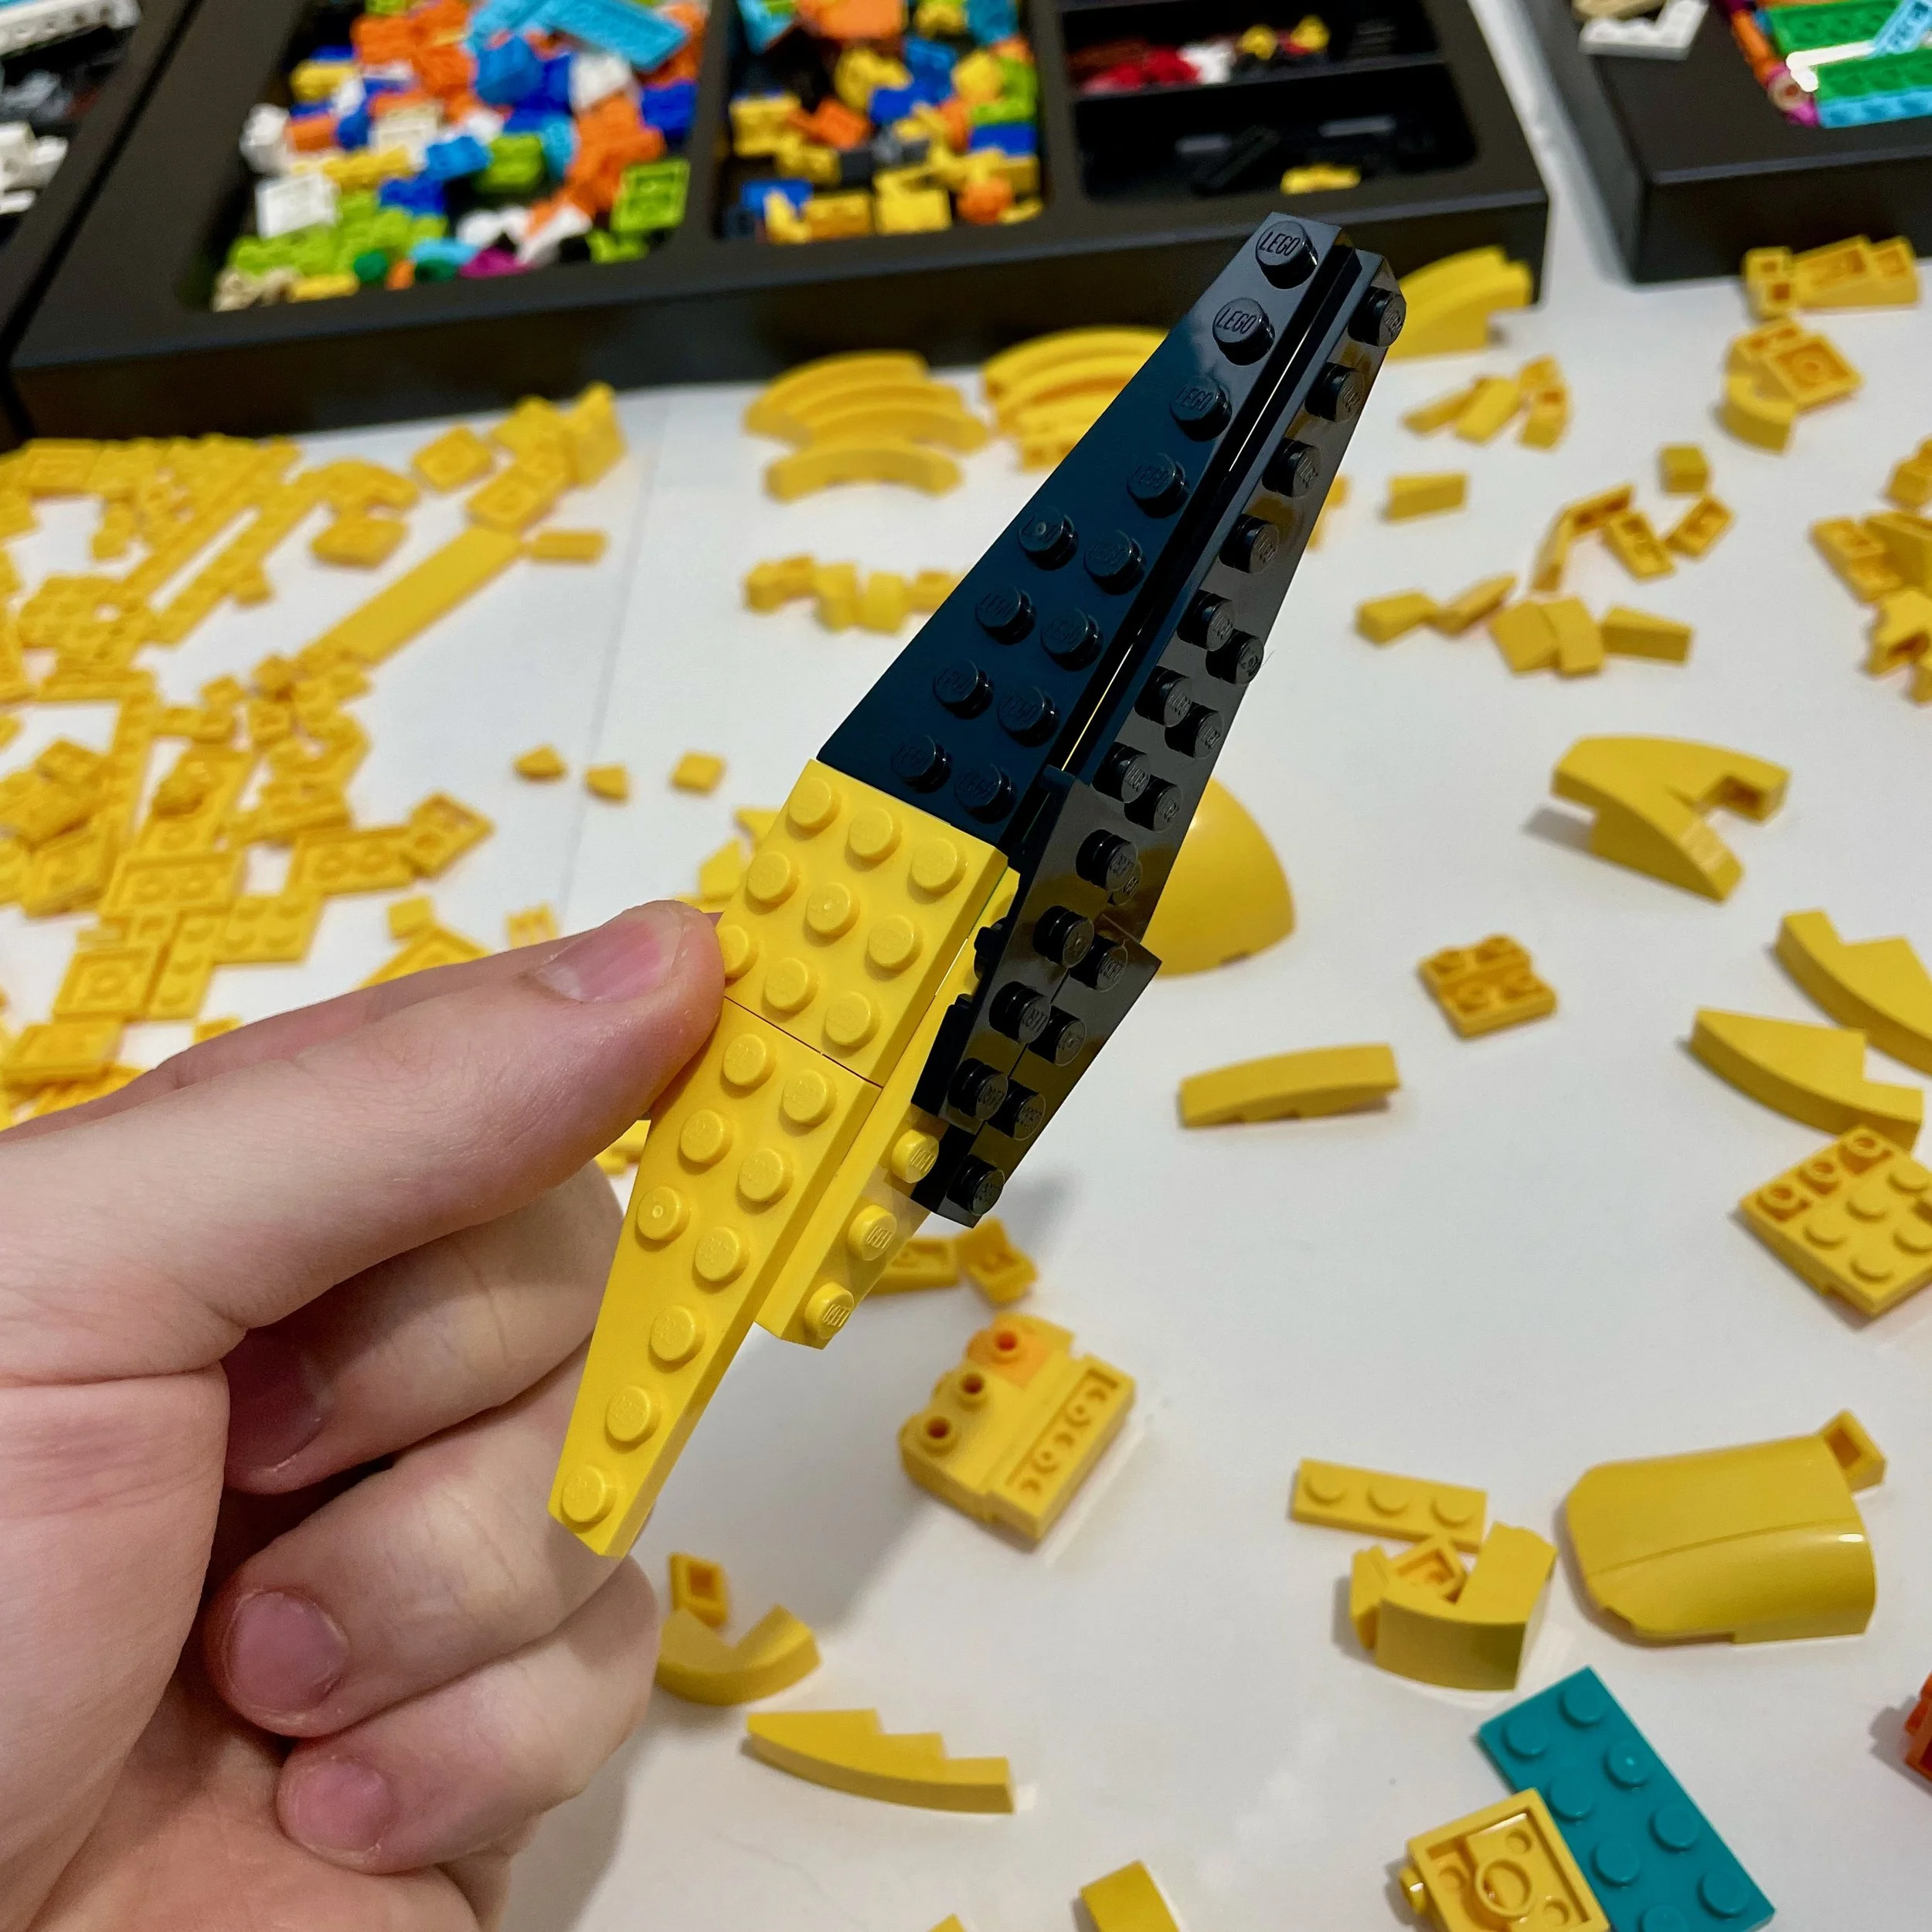
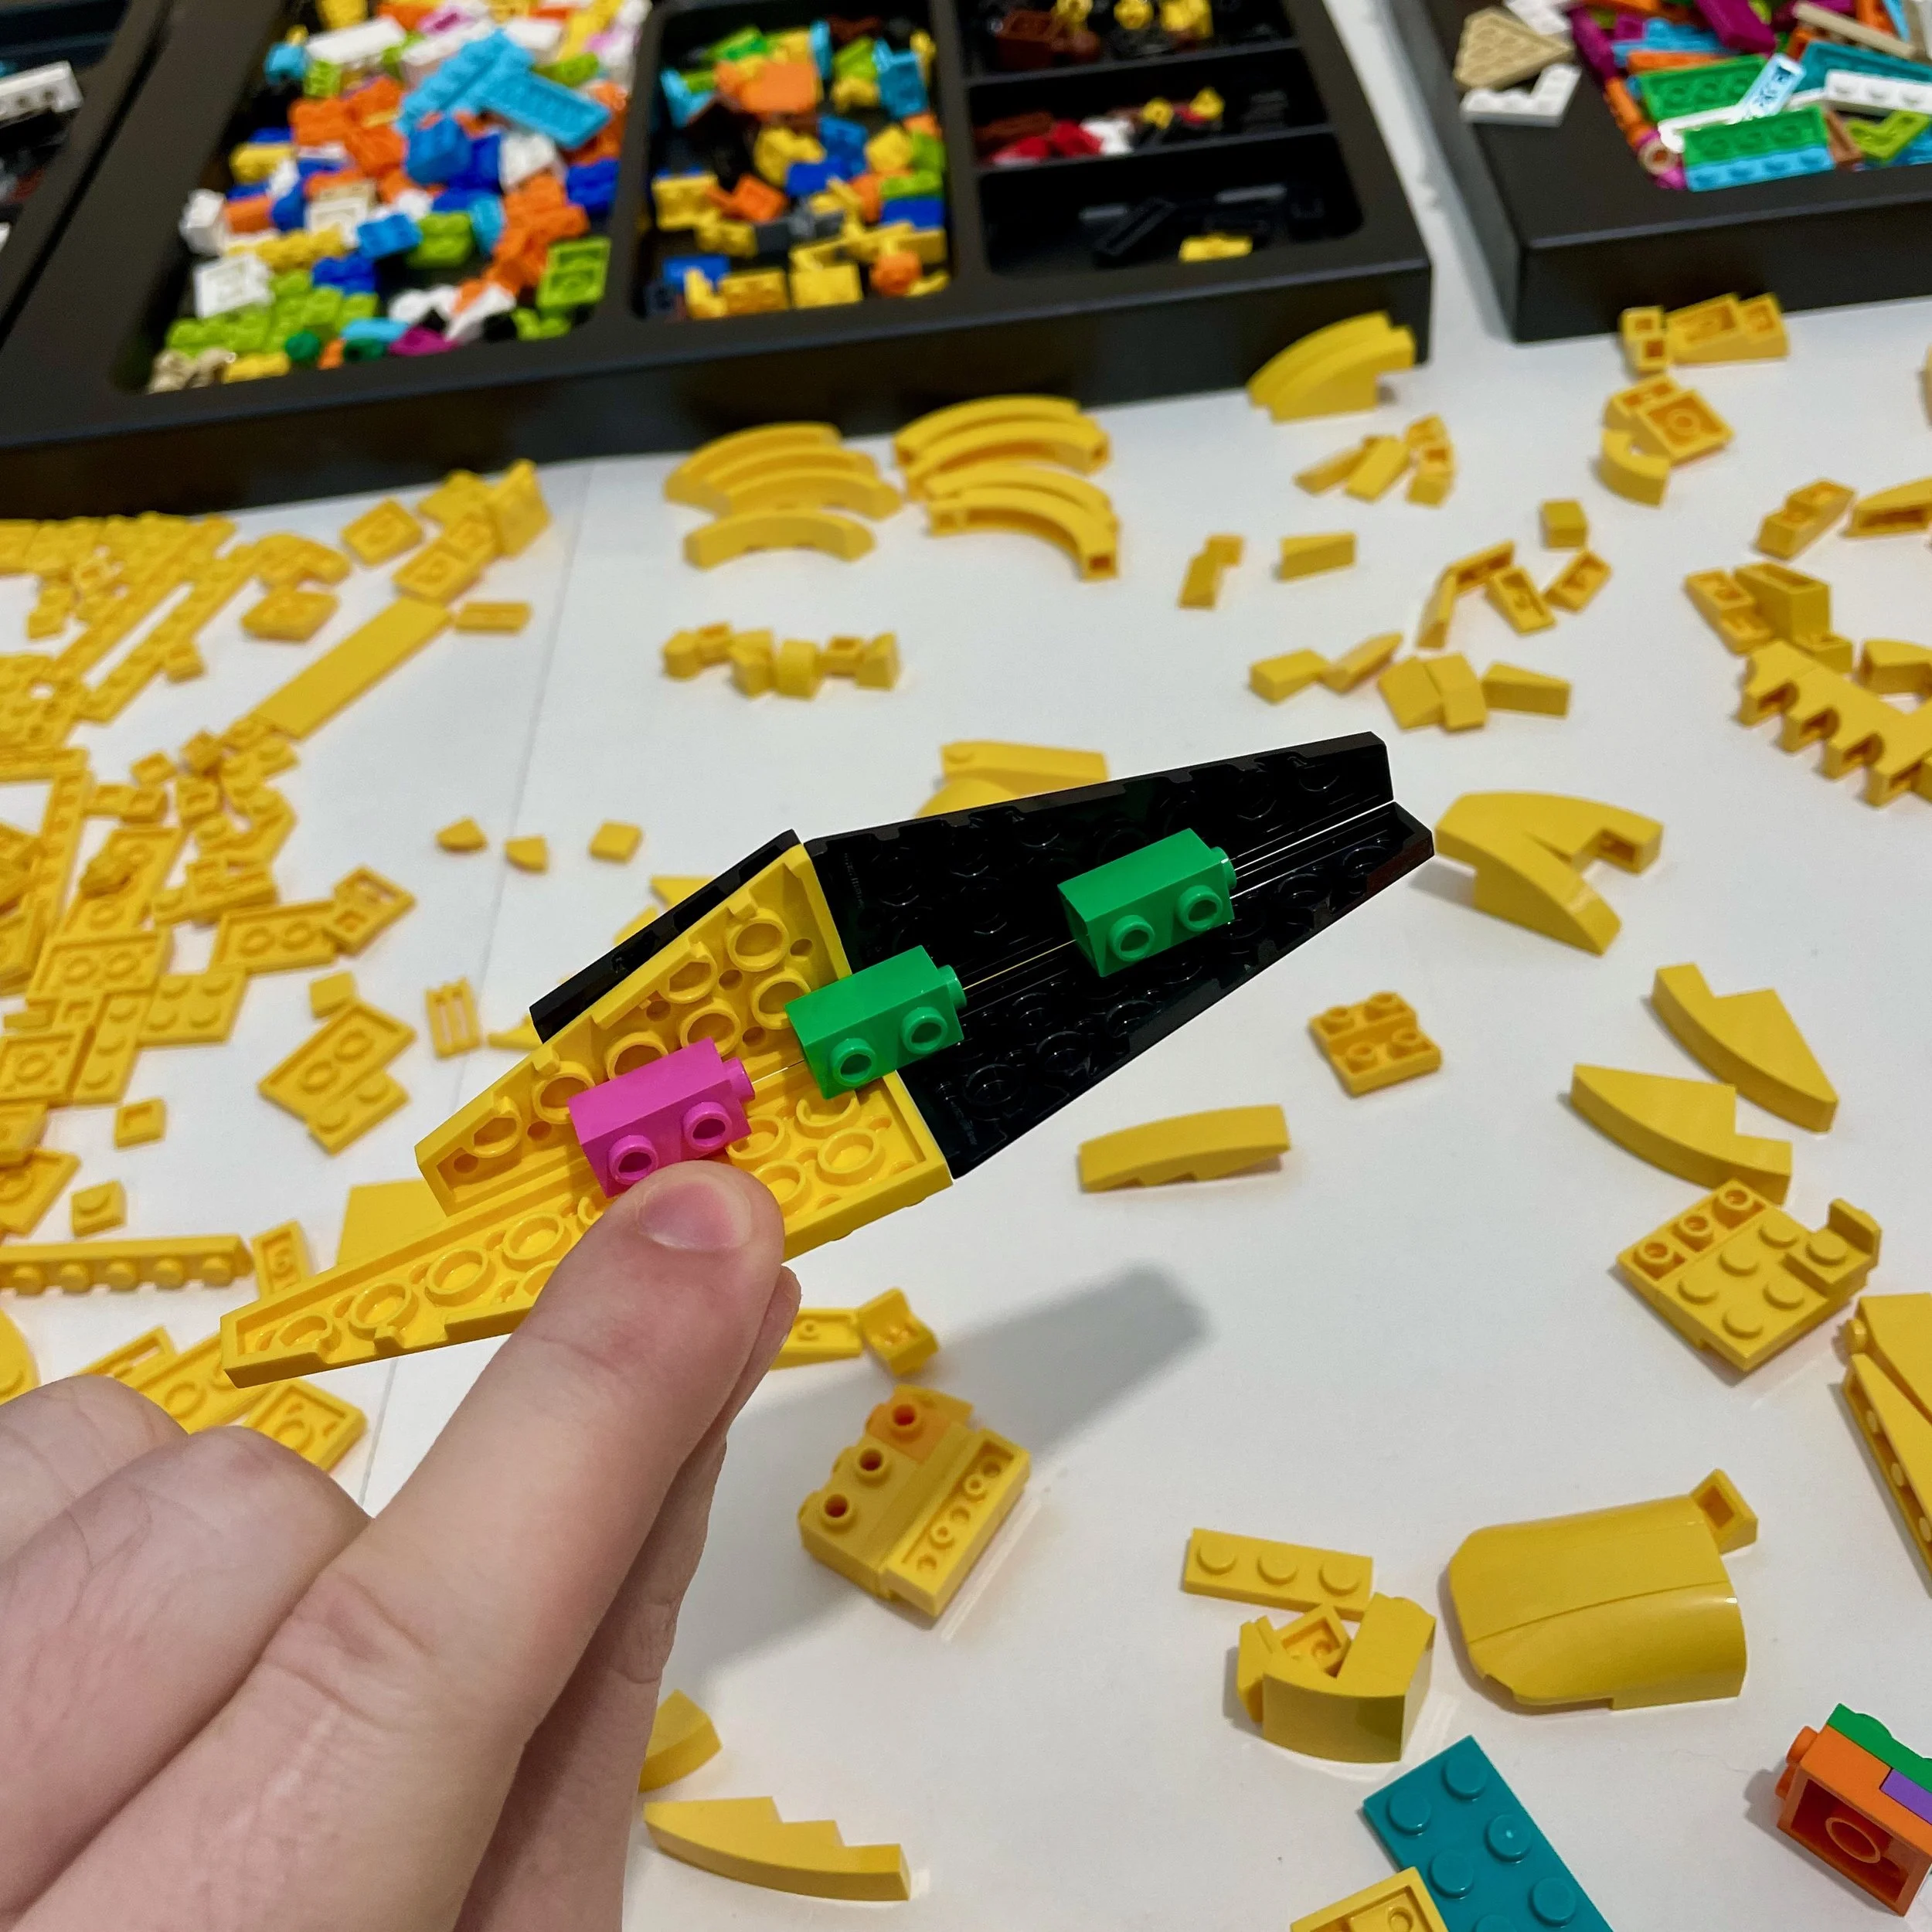
Unfortunately, the studs on the wedge plates contrasted too much with the studless face, so I threw that idea out in favor of bricks and slopes.
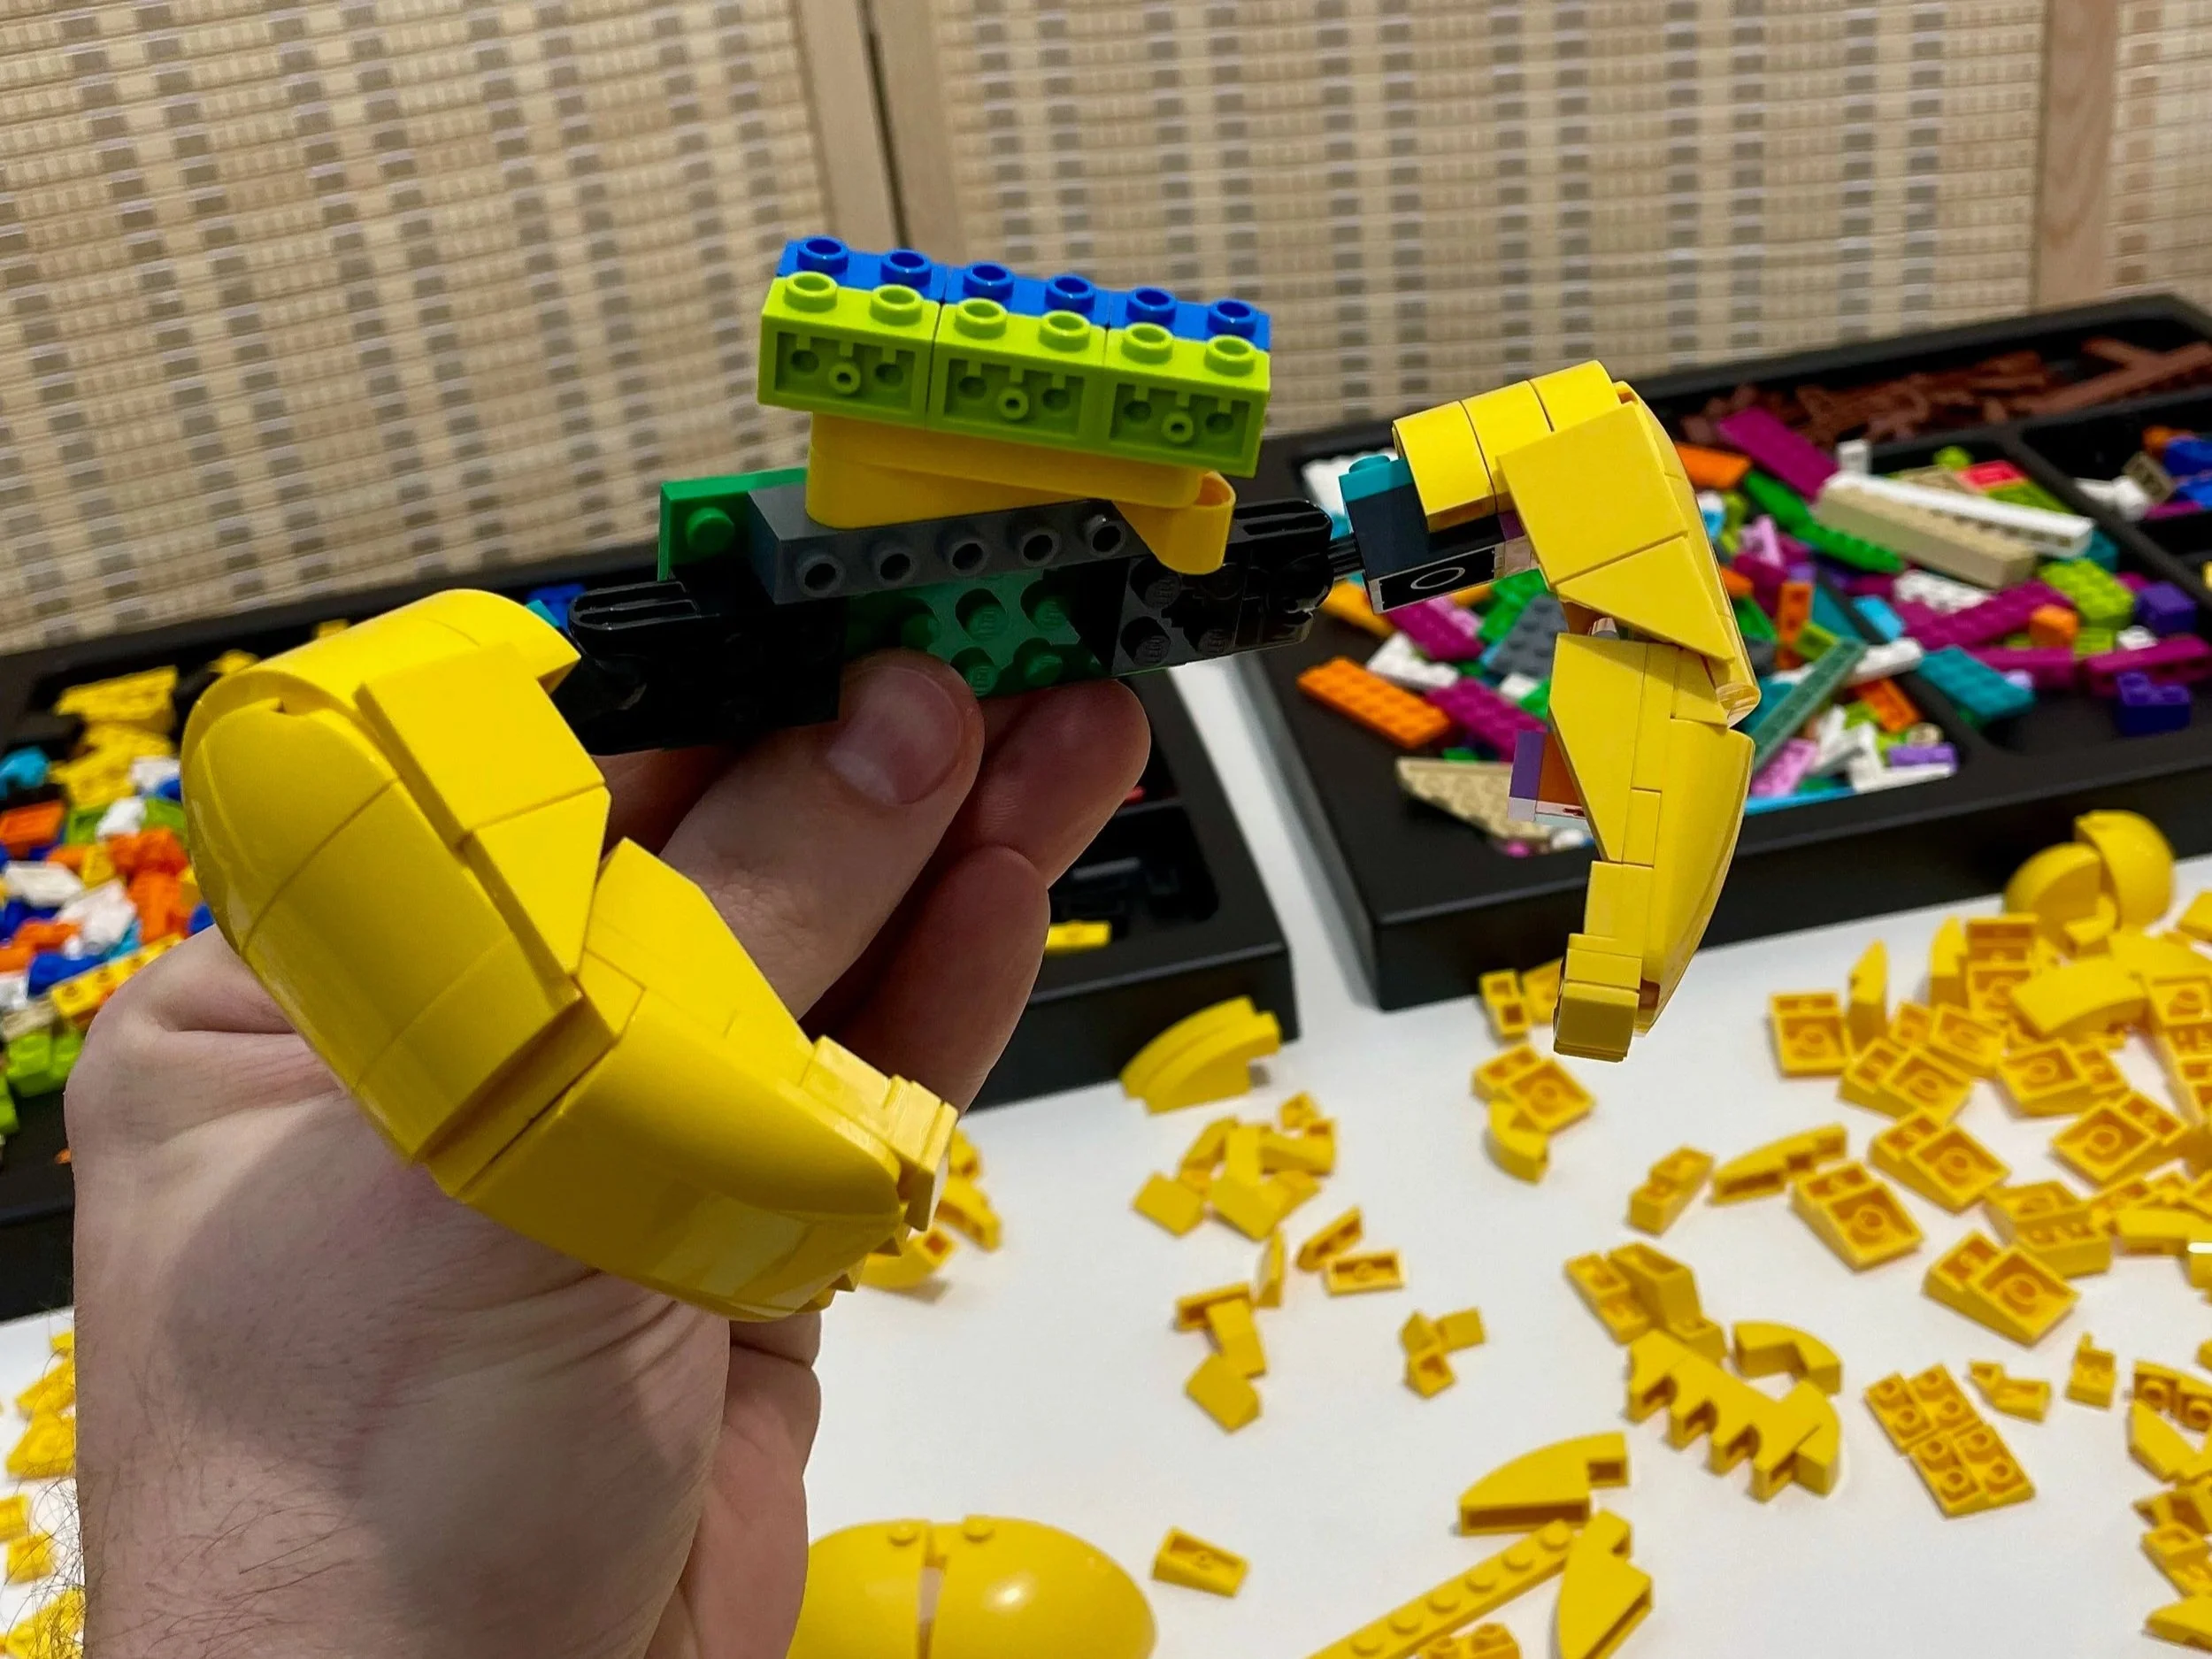
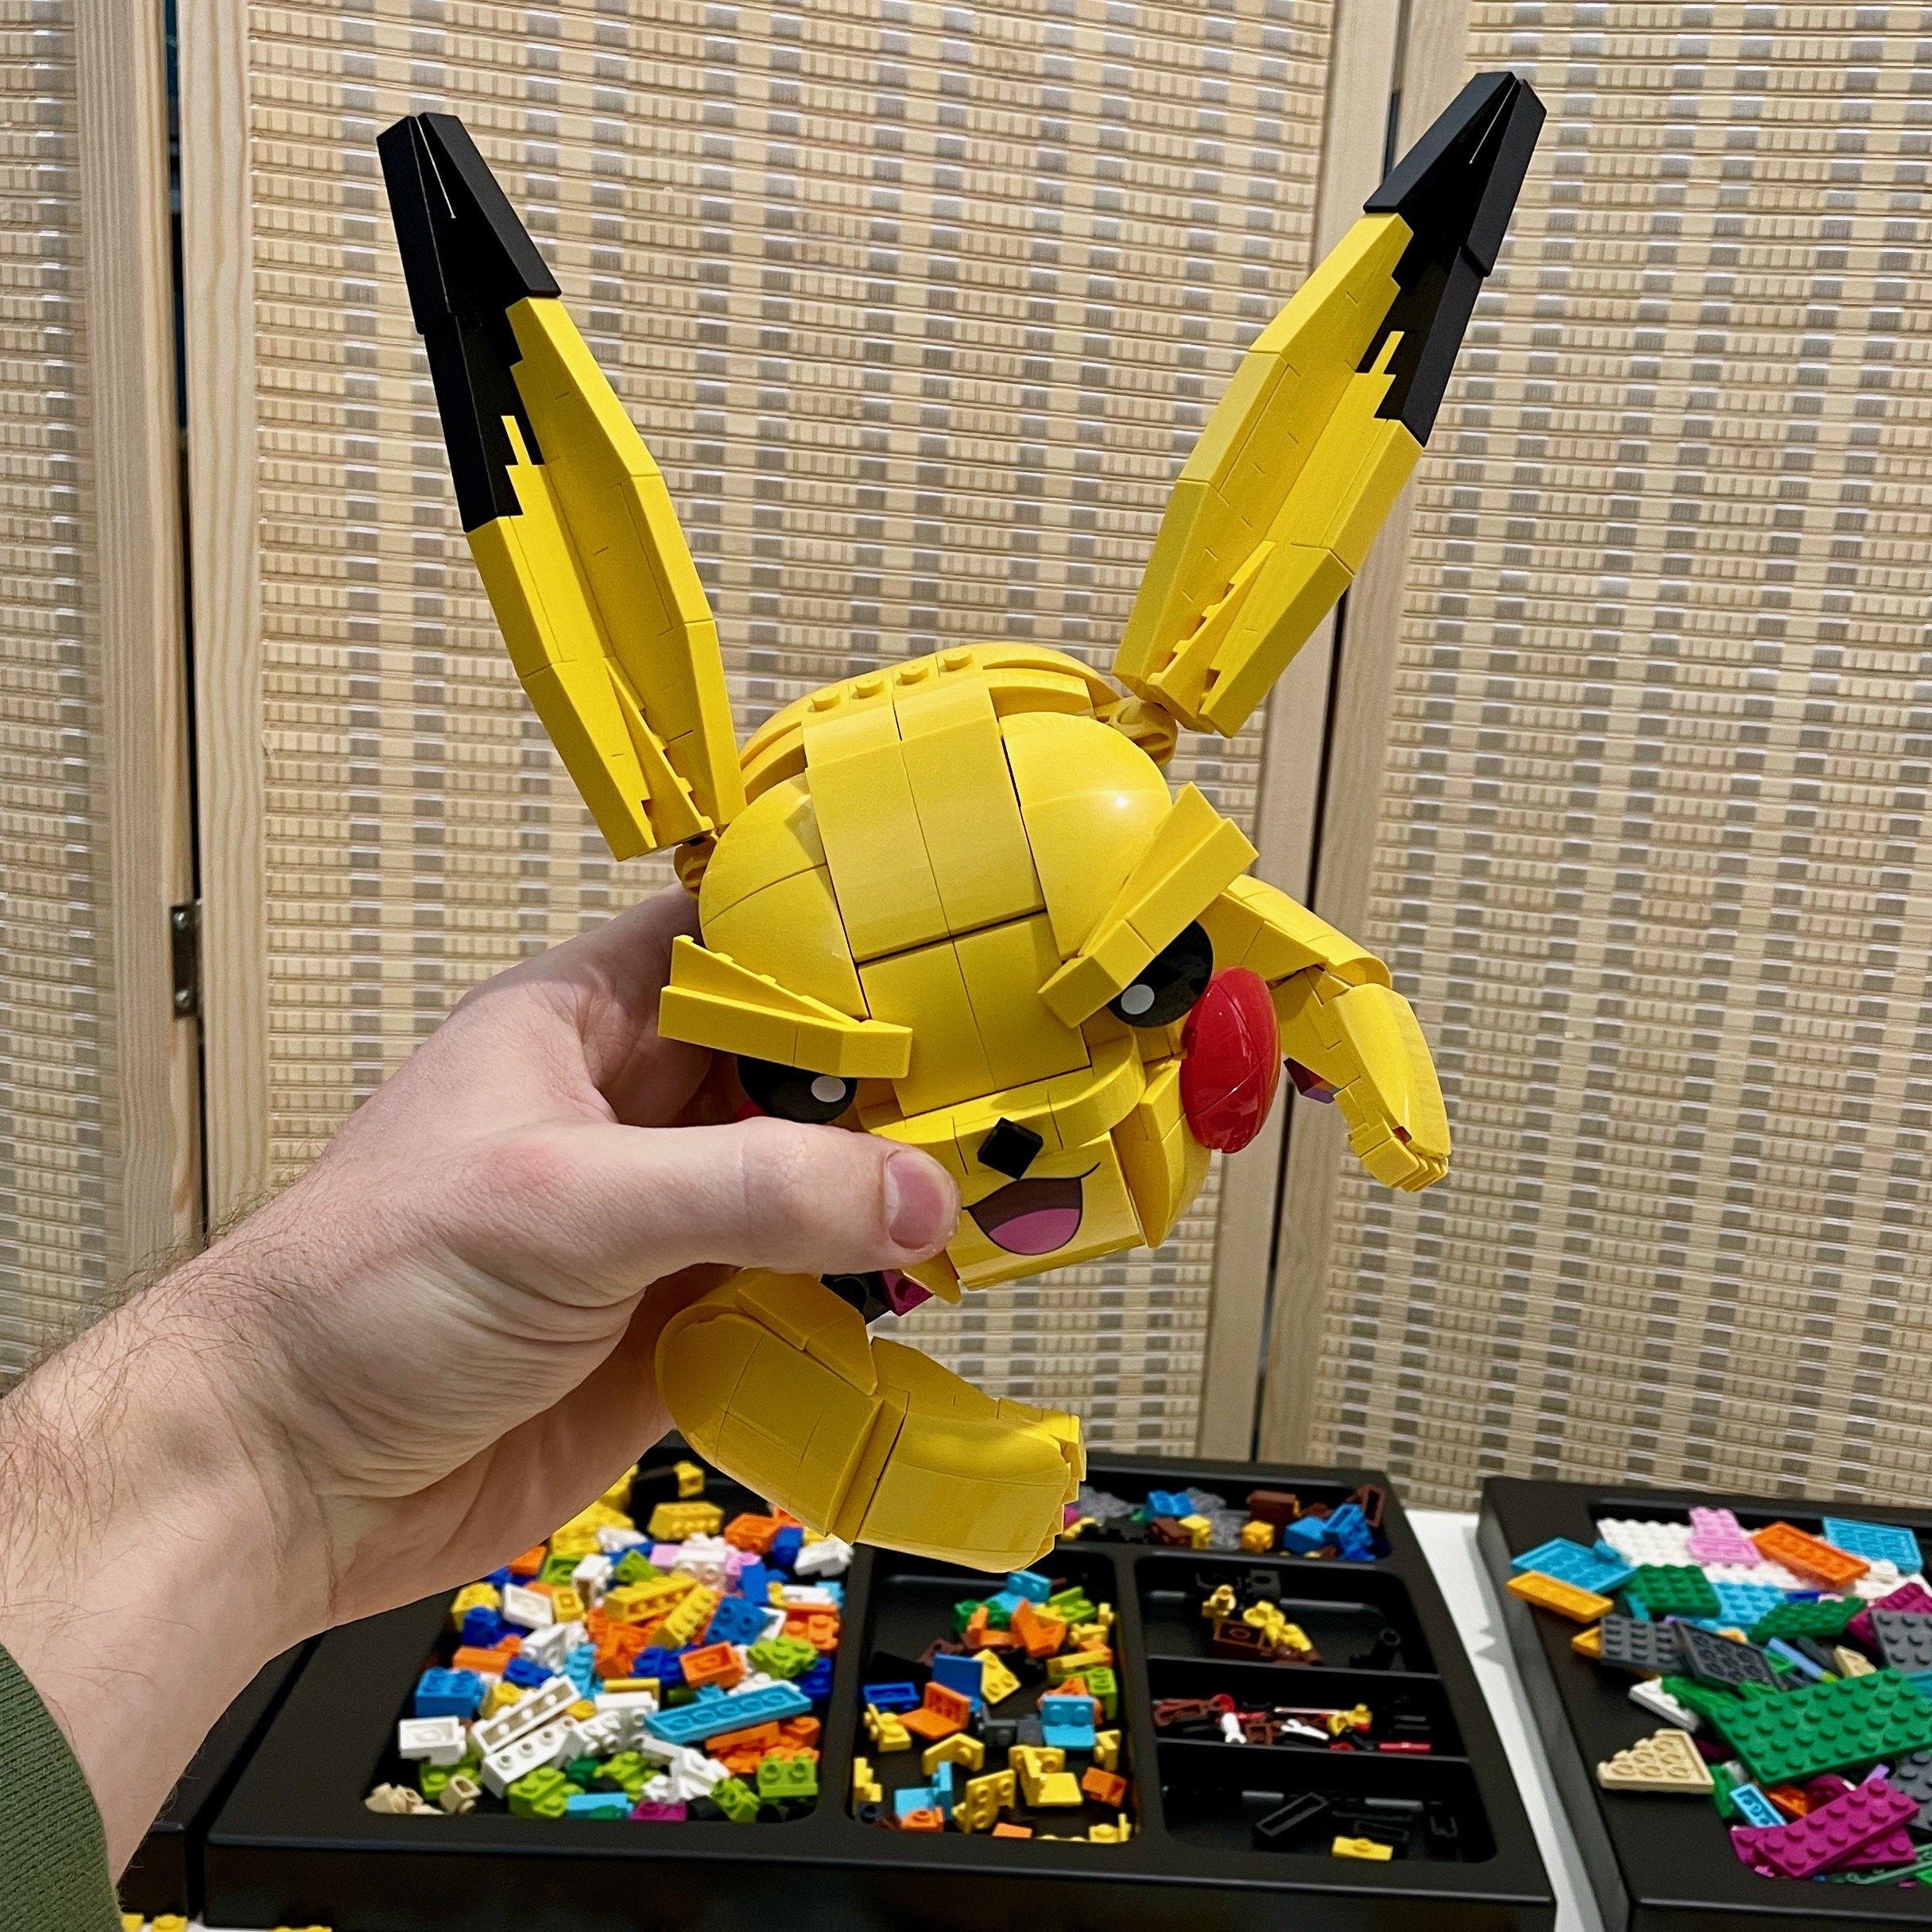
Next, I built the arms with an asymmetrical, dynamic pose in mind. I was careful to keep them stubby and adorable, but things felt off at this point. The arms looked too long, the ears were a little too big, and the eyebrows were too bushy. I should probably state for the record that I know Pikachu doesn’t have eyebrows; they were a necessary side effect of the eye design!
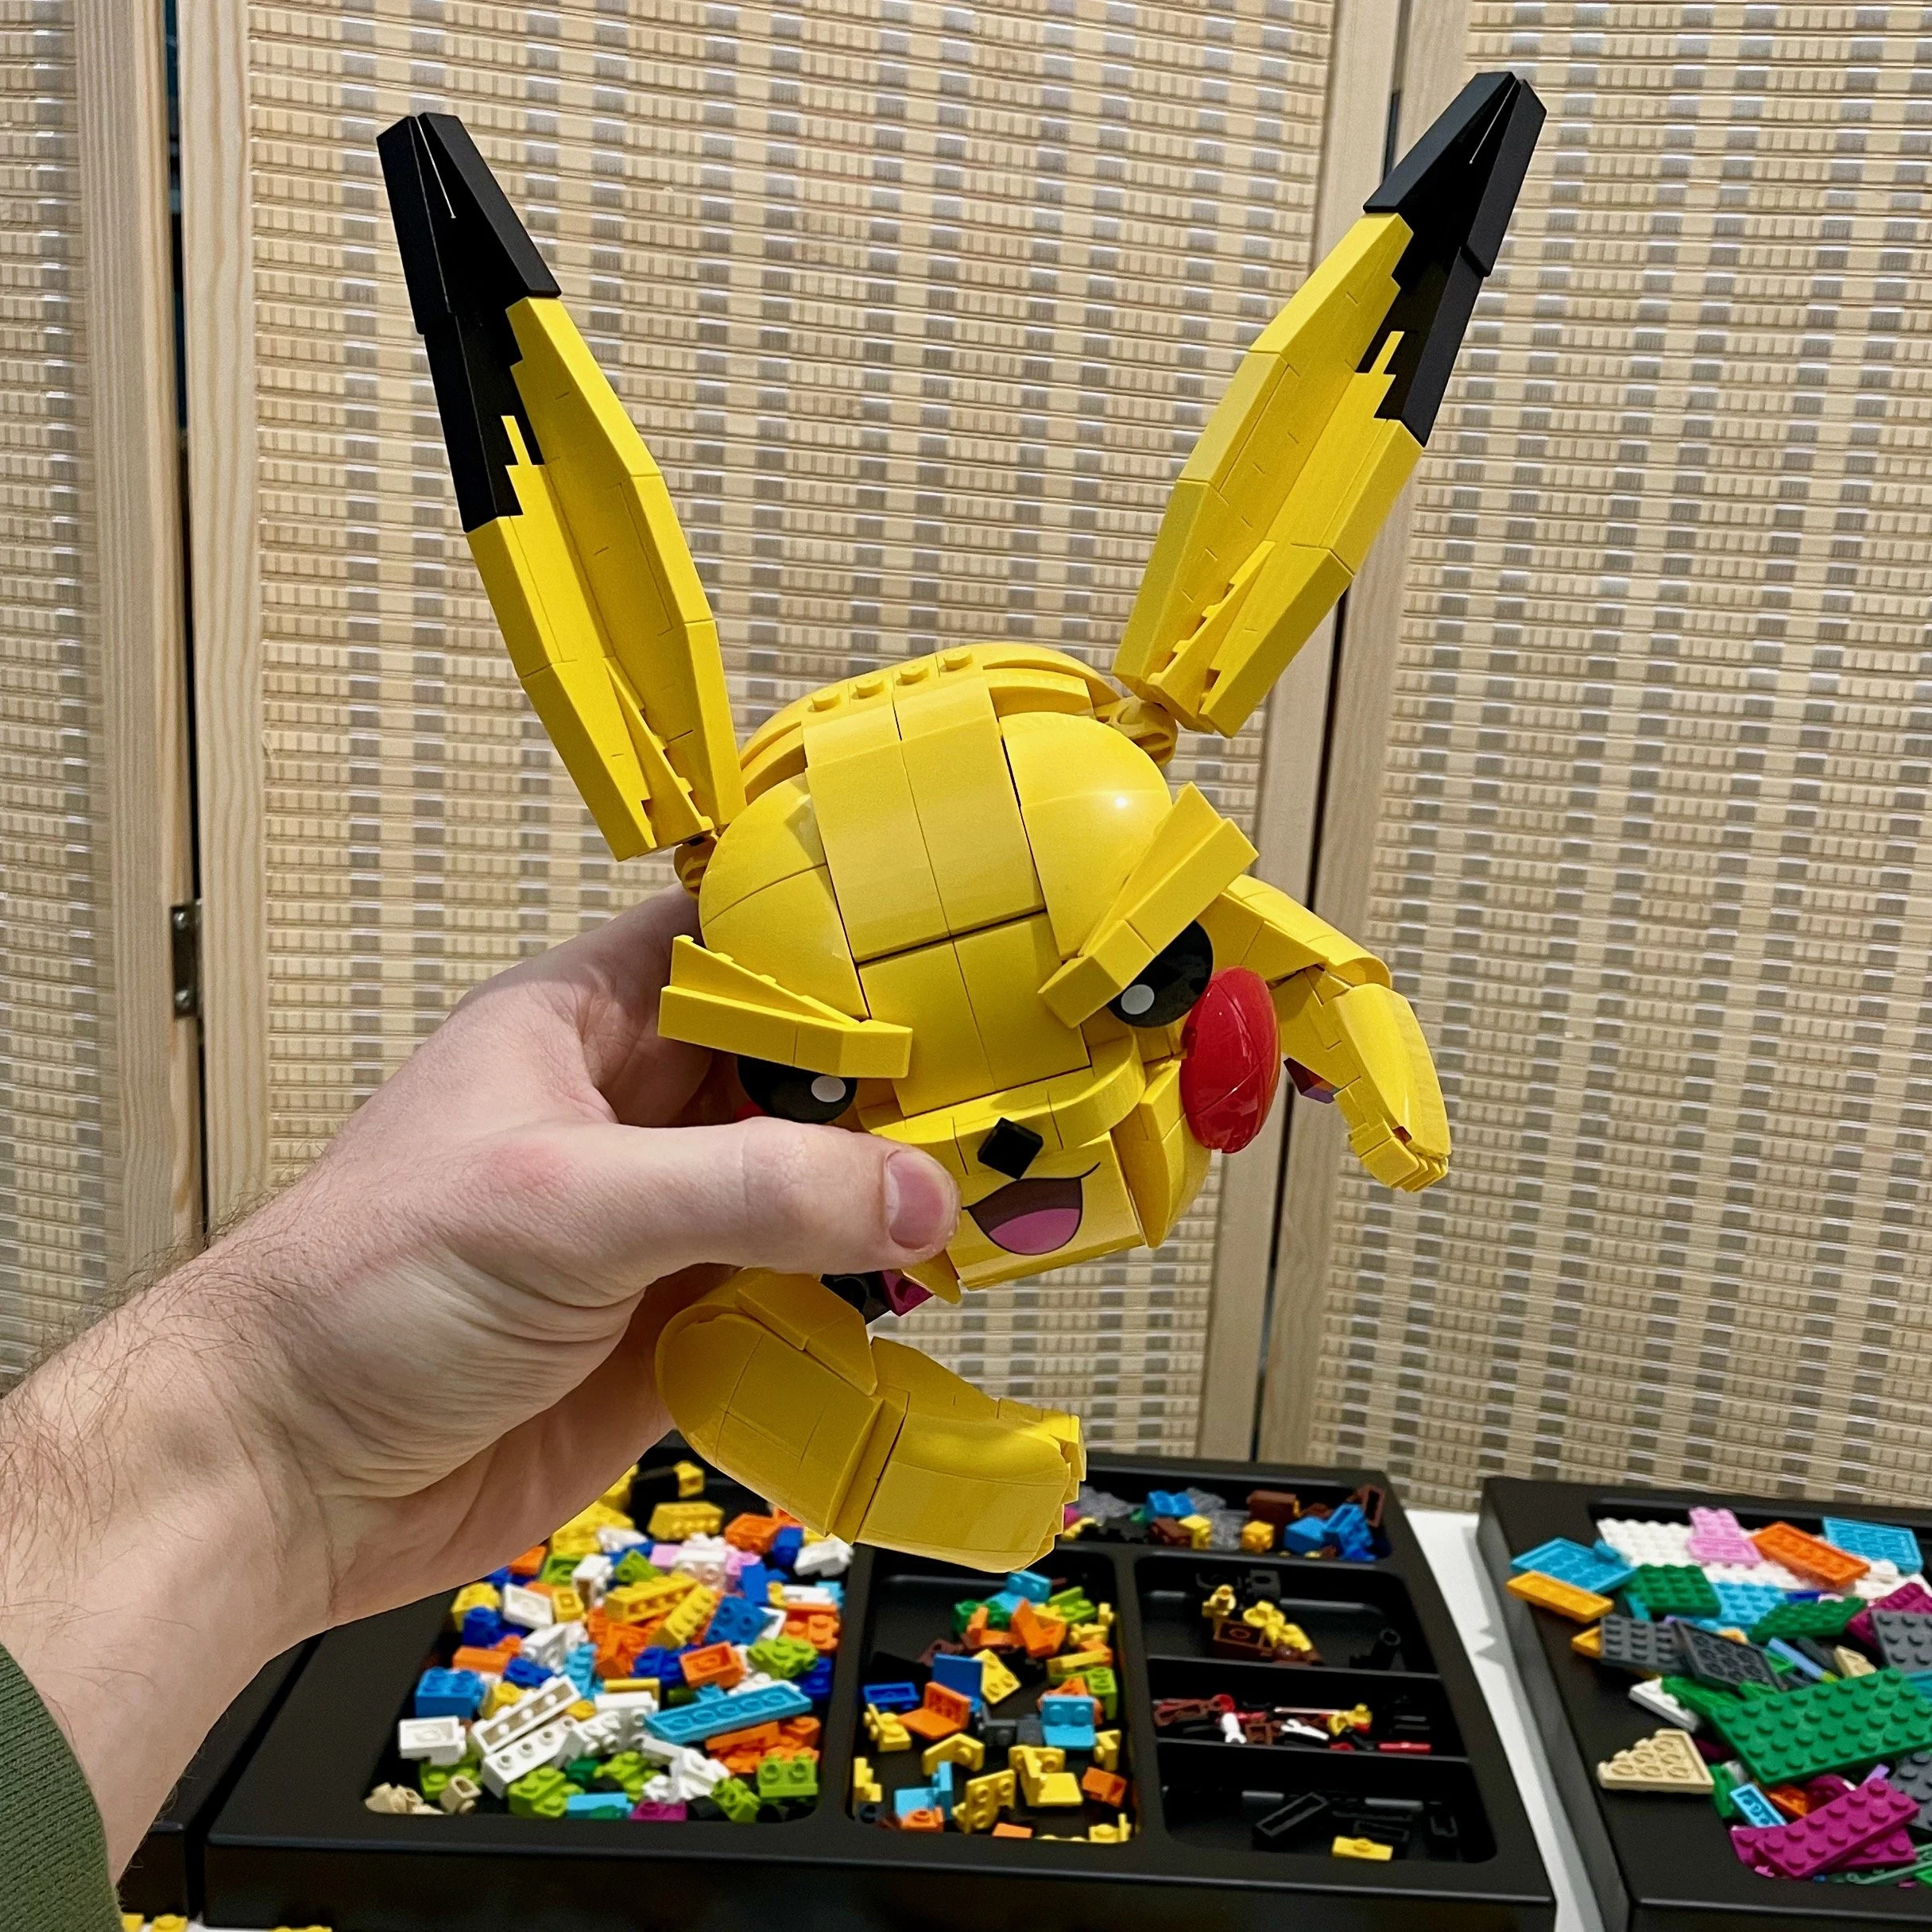
I knew those areas would need to change, but without understanding the model’s final proportions, I was afraid I would spin my wheels for hours only to make more revisions later.
Striking a Pose
With that in mind I wanted to build the legs and “brick-sketch” the sections together to know how big I wanted to make the internal structure. Pikachu has round squishy leg things which were pretty easy to make given the amount of curved slope variety. What wasn’t easy was finding a way to actually make a hip and/or ankle joint that could support the weight of the body once complete.
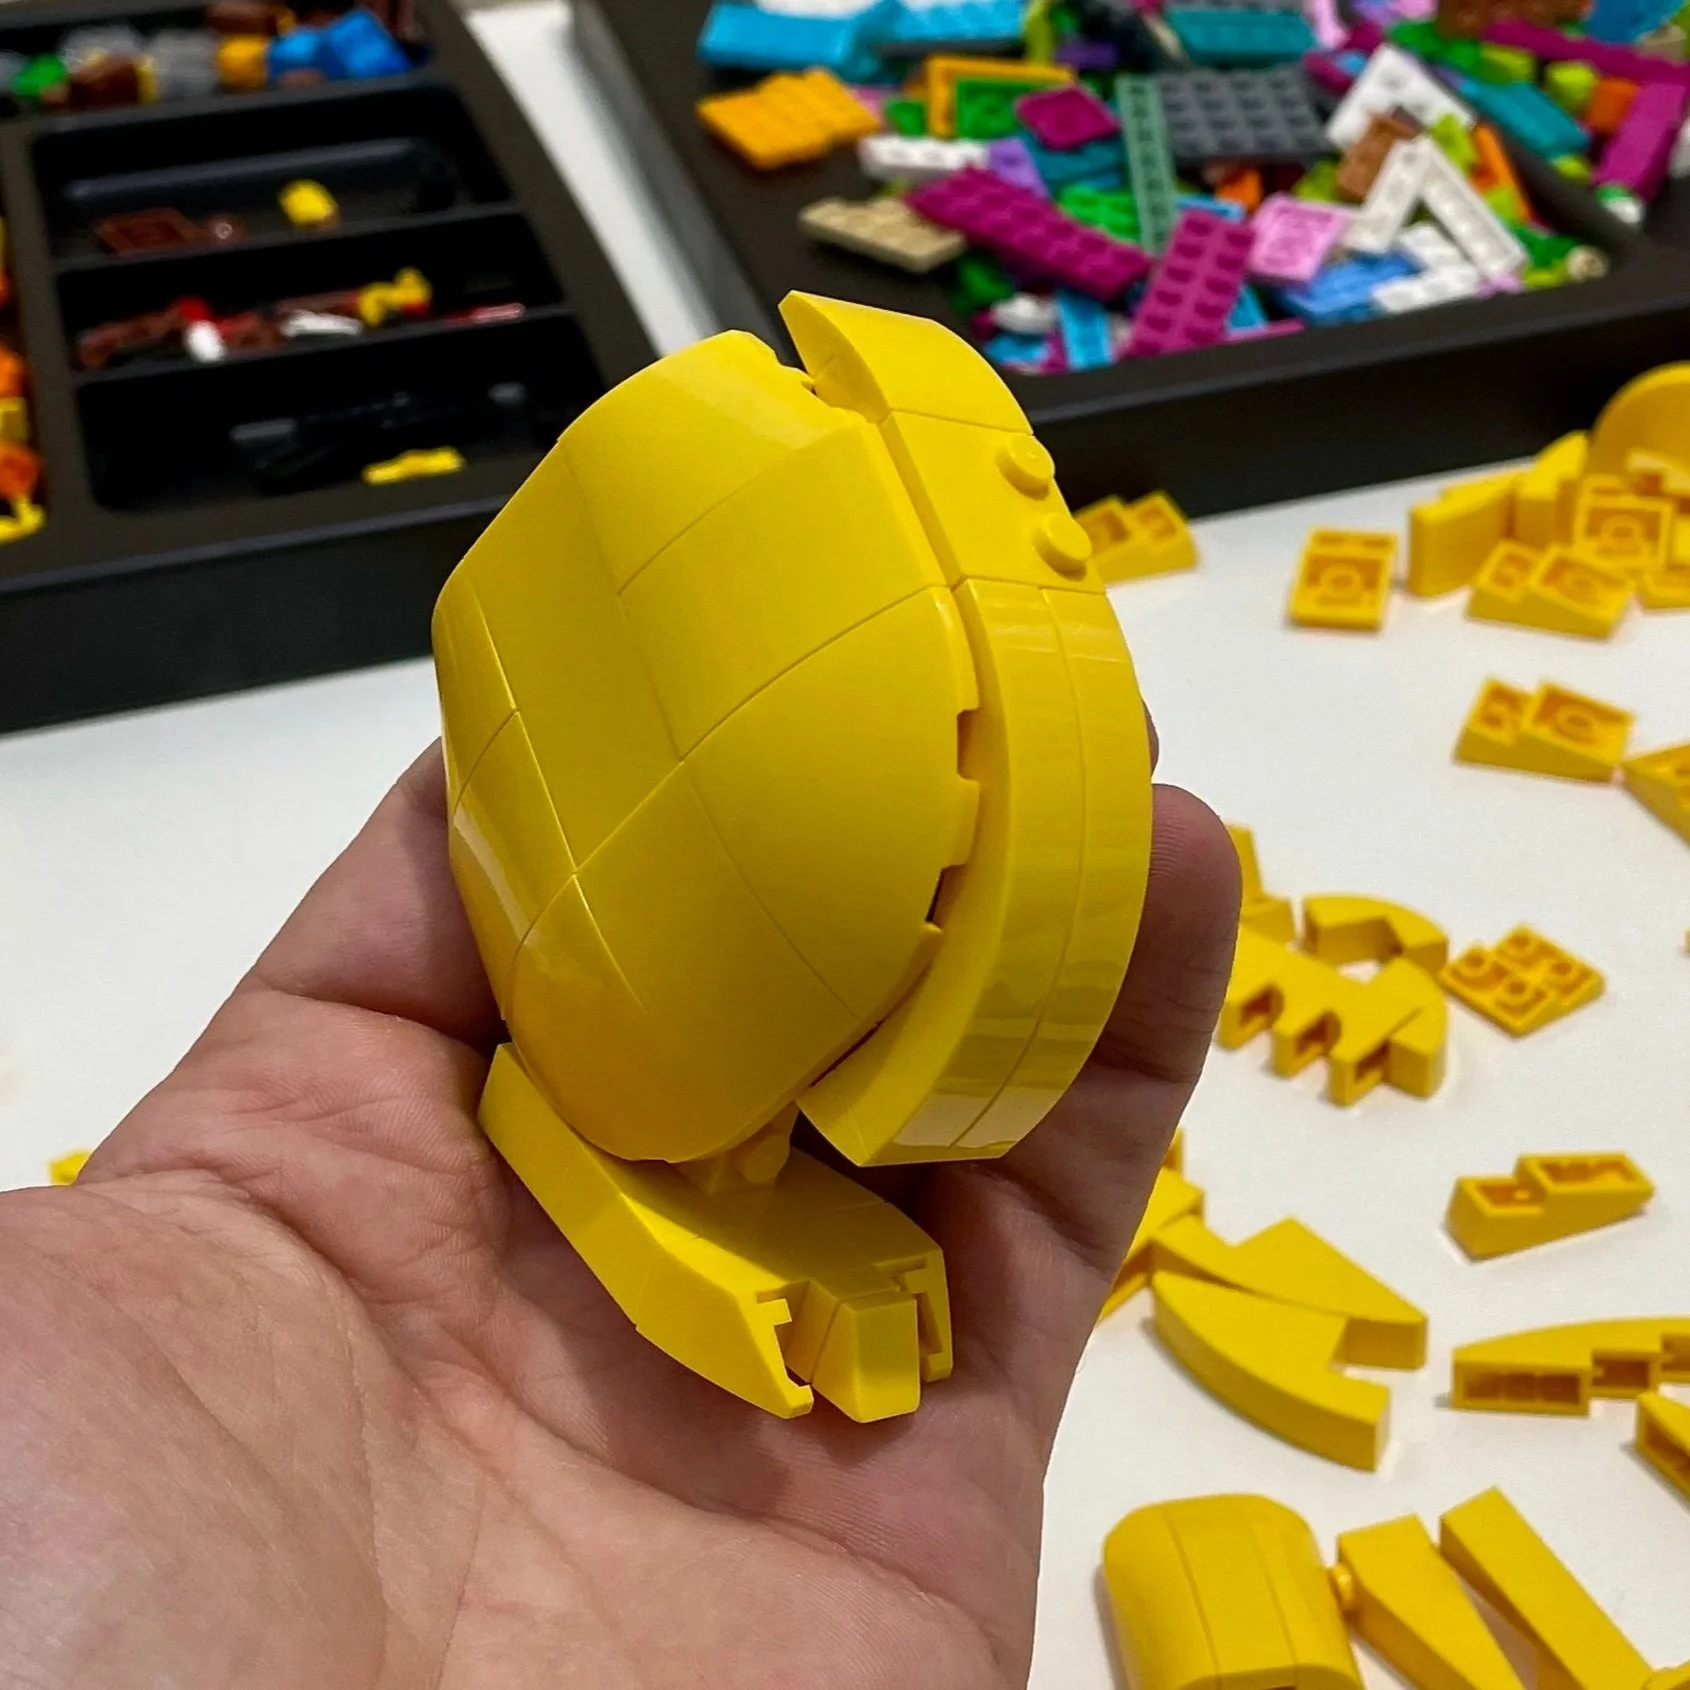
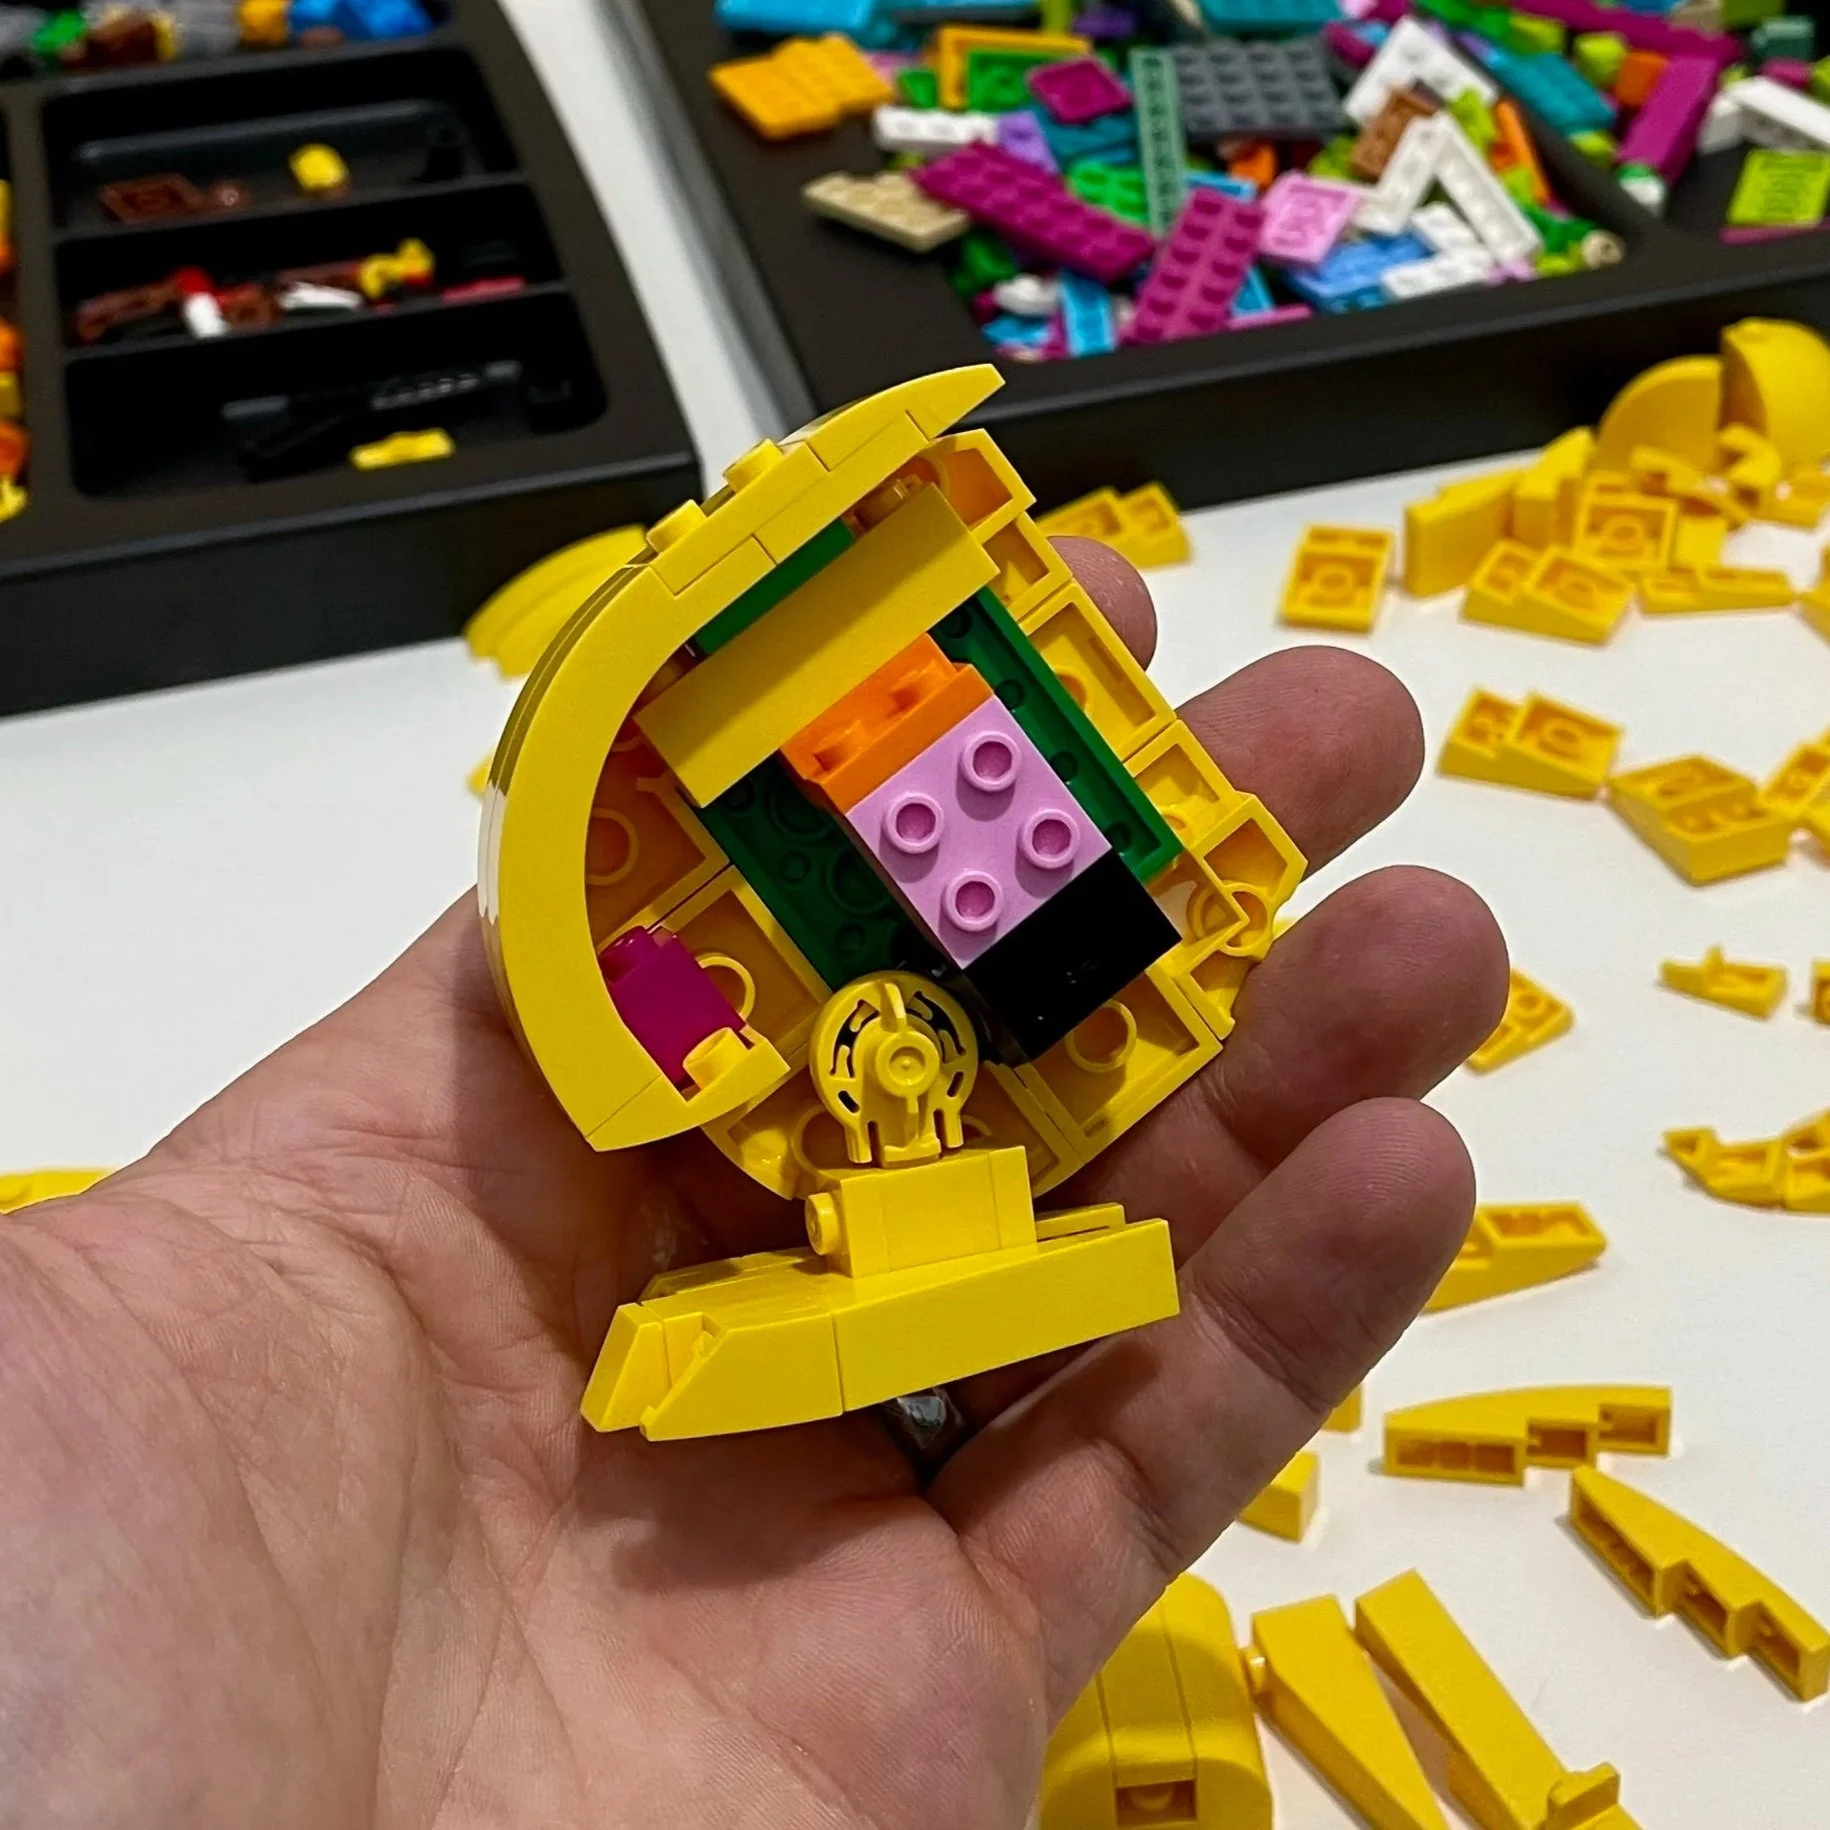
Once I had a rough idea of the final size of the head, arms and legs, I could start visually piecing everything together. Holding the sections in place with my hands, I imagined a lunging pose that I wanted to attempt.
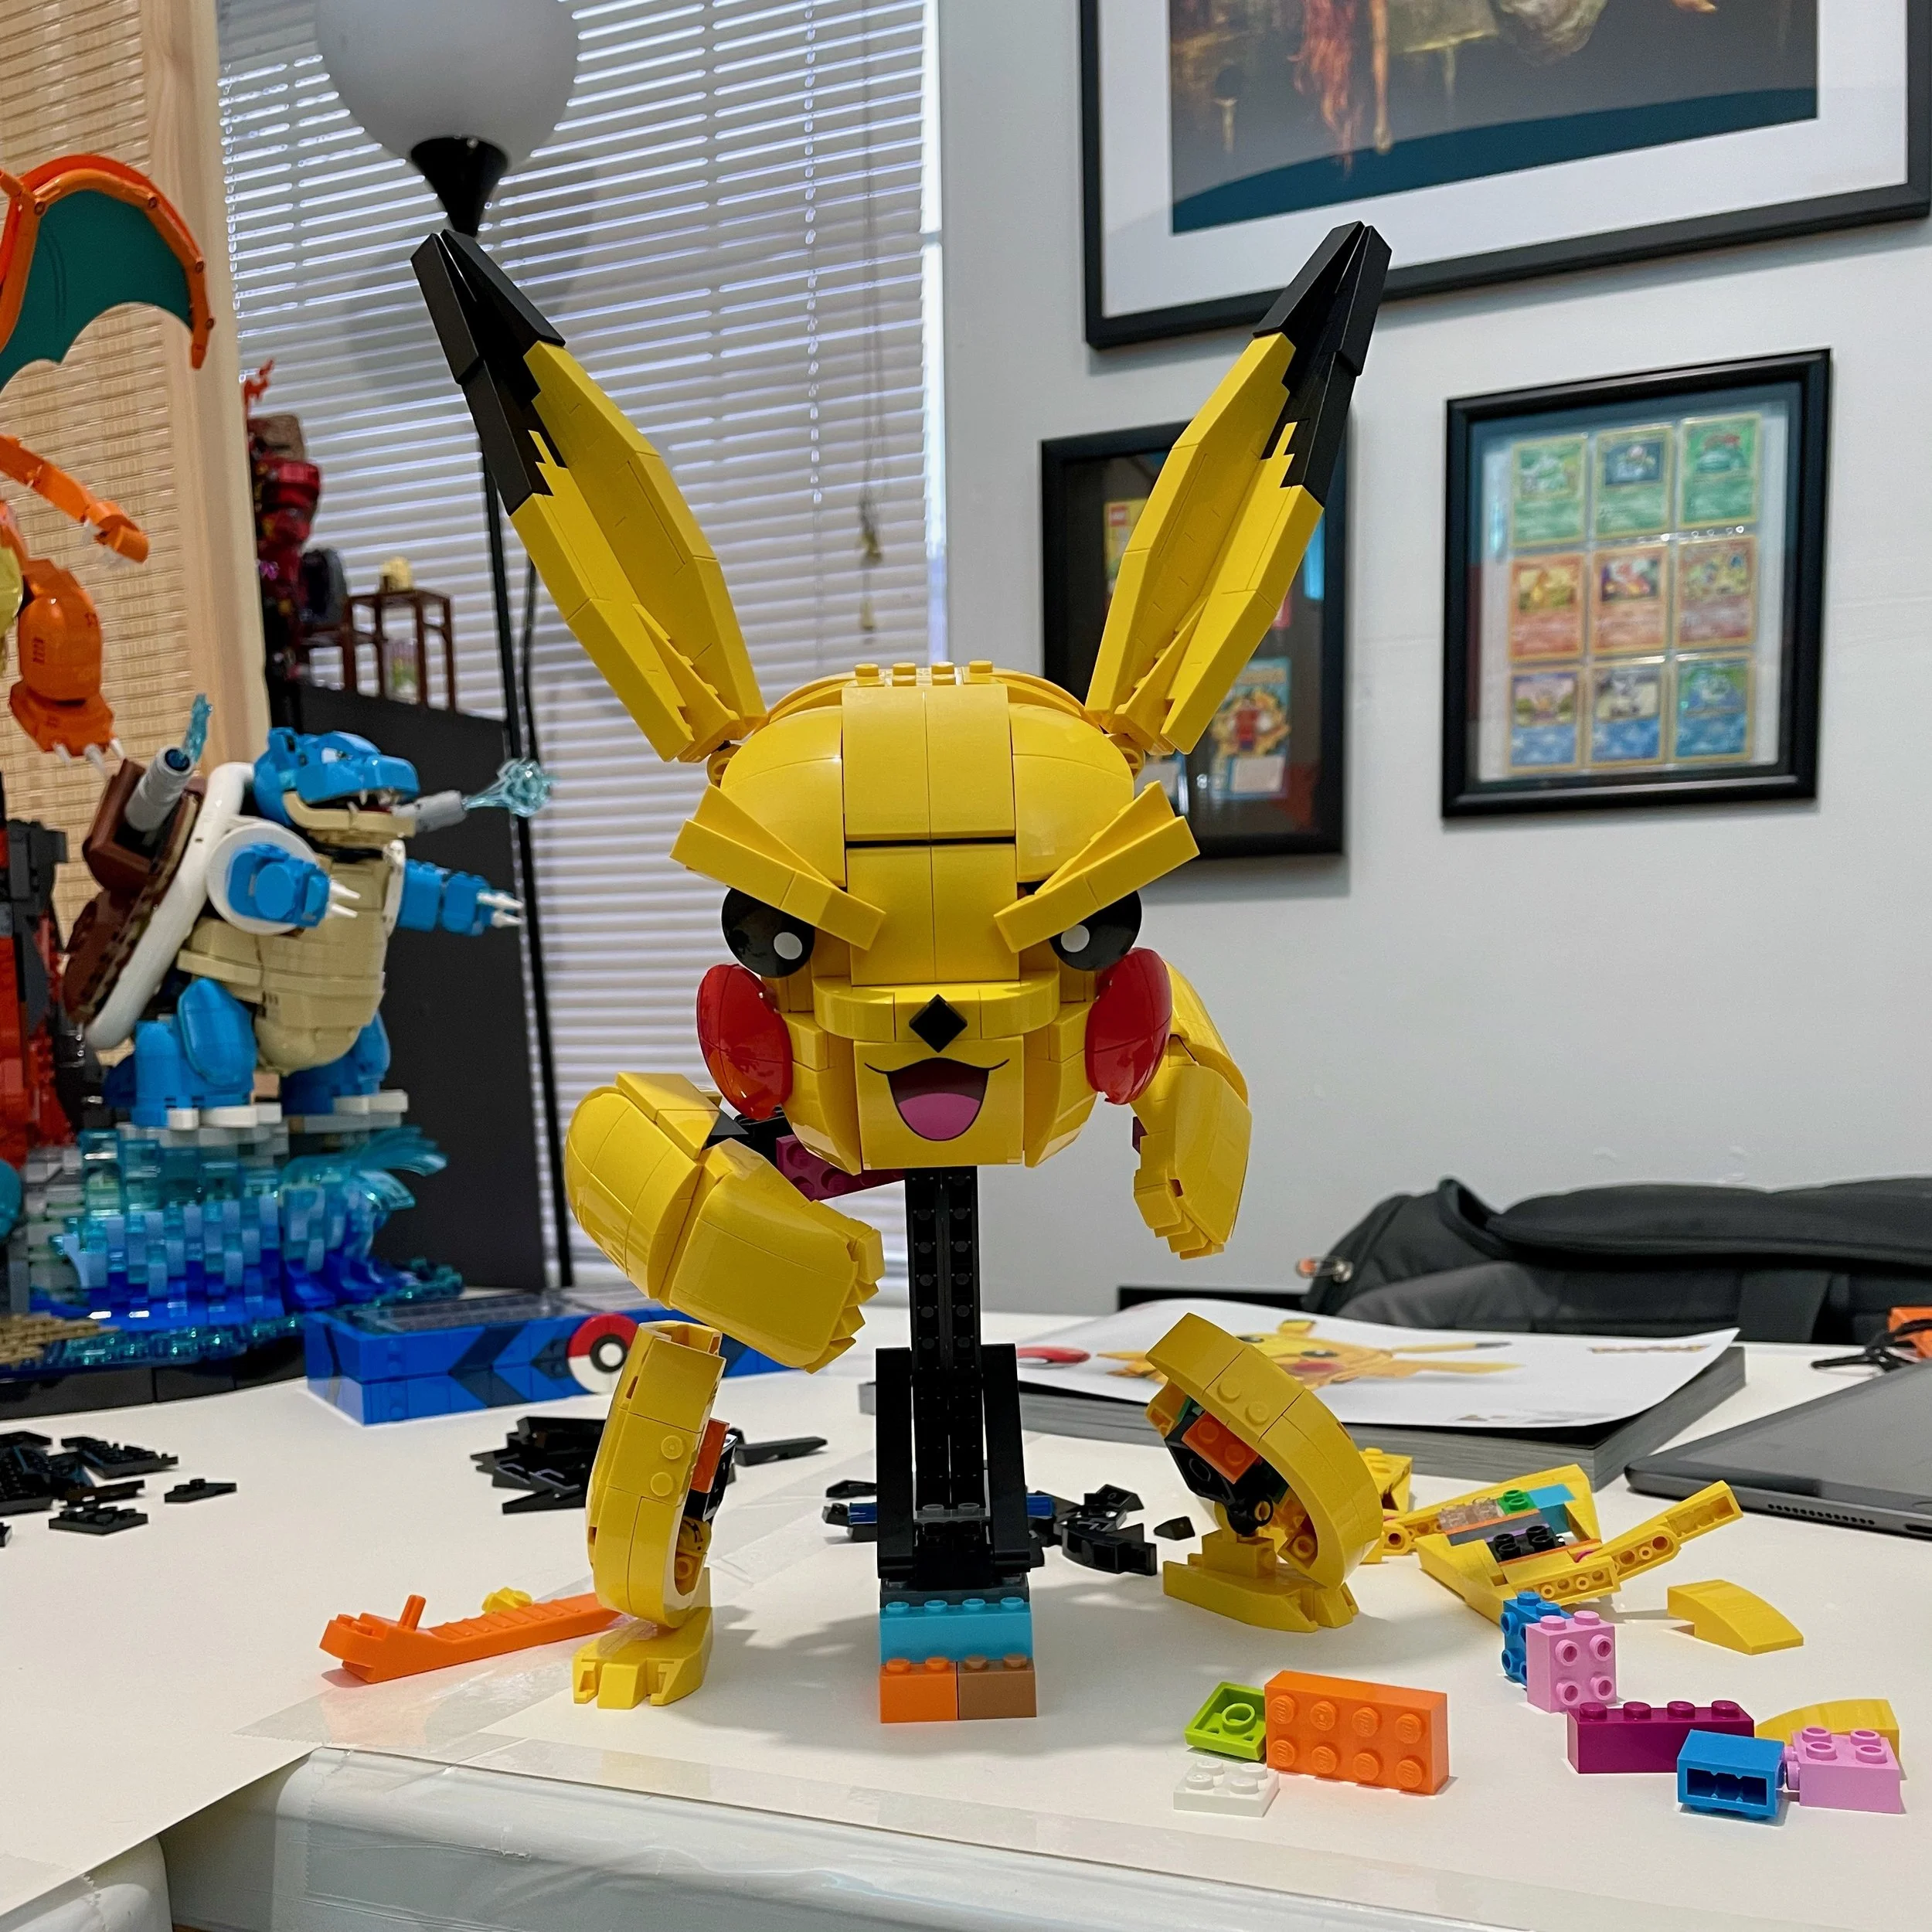
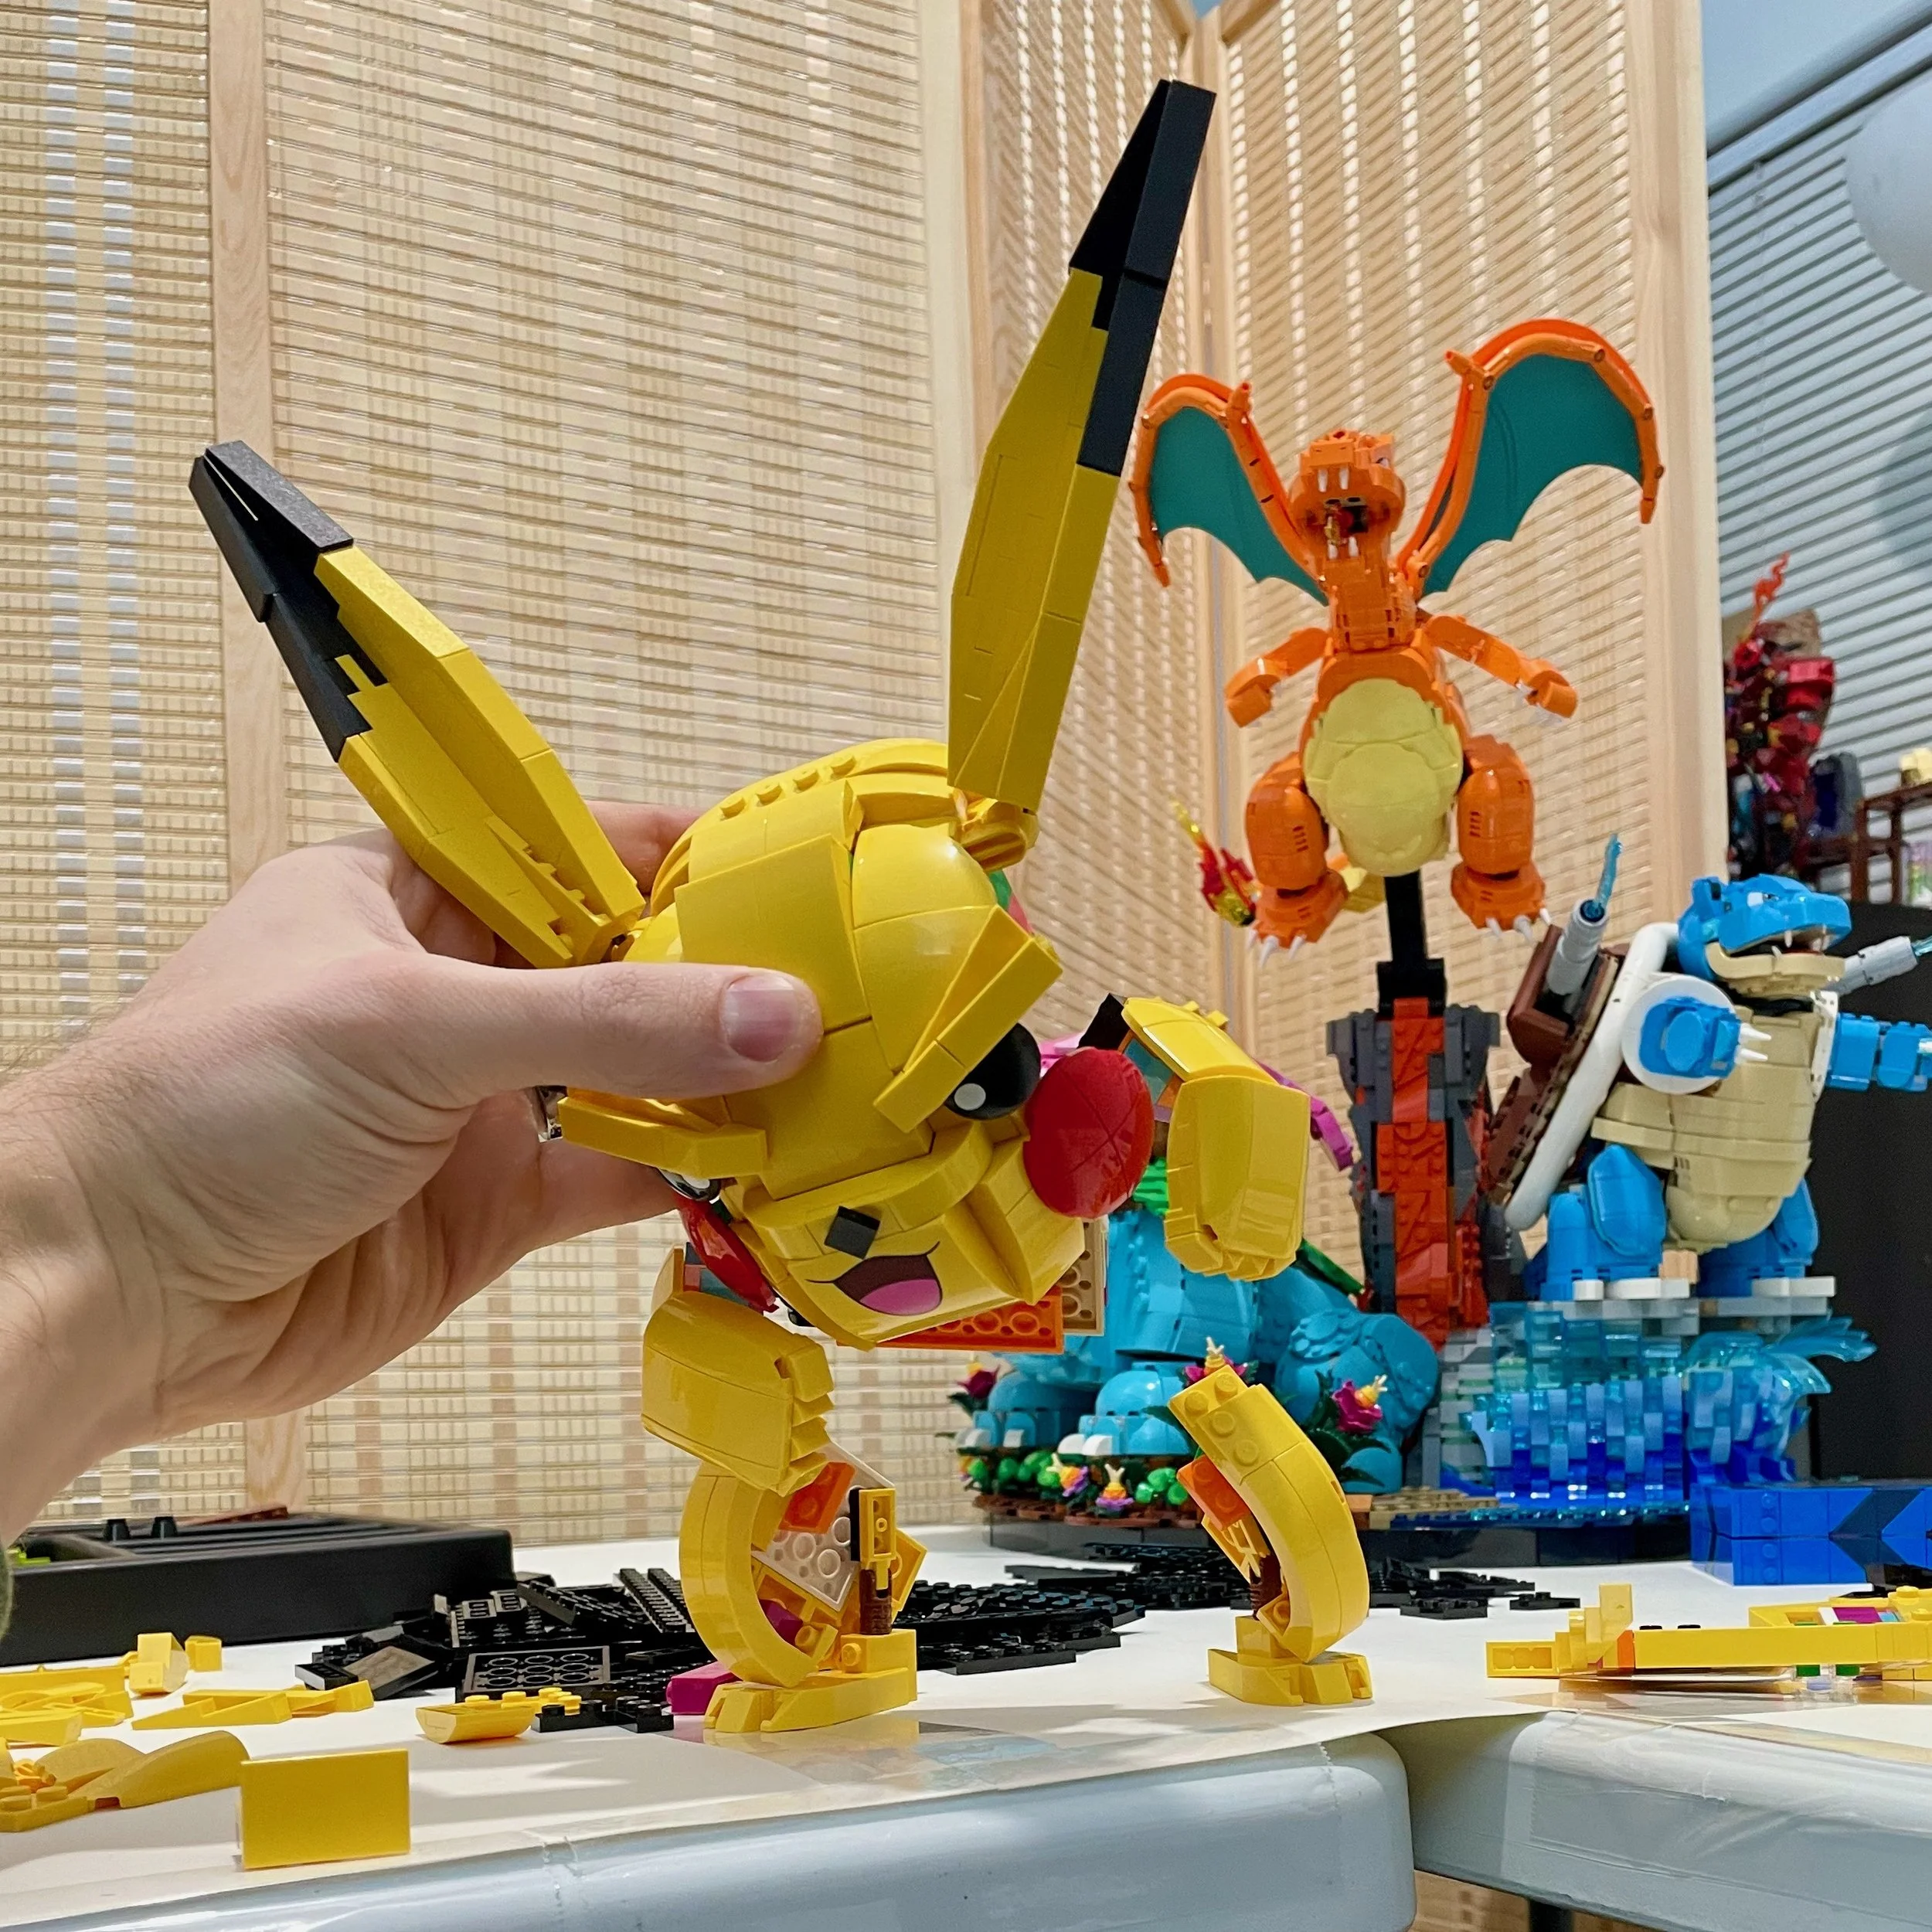
Getting that pose right was going to tax the limited variety of parts. I had a tiny amount of Technic available to offset the studs and tilt the head. I also built a mirrored right triangle from stacked plates to hold the torso at a different angle.
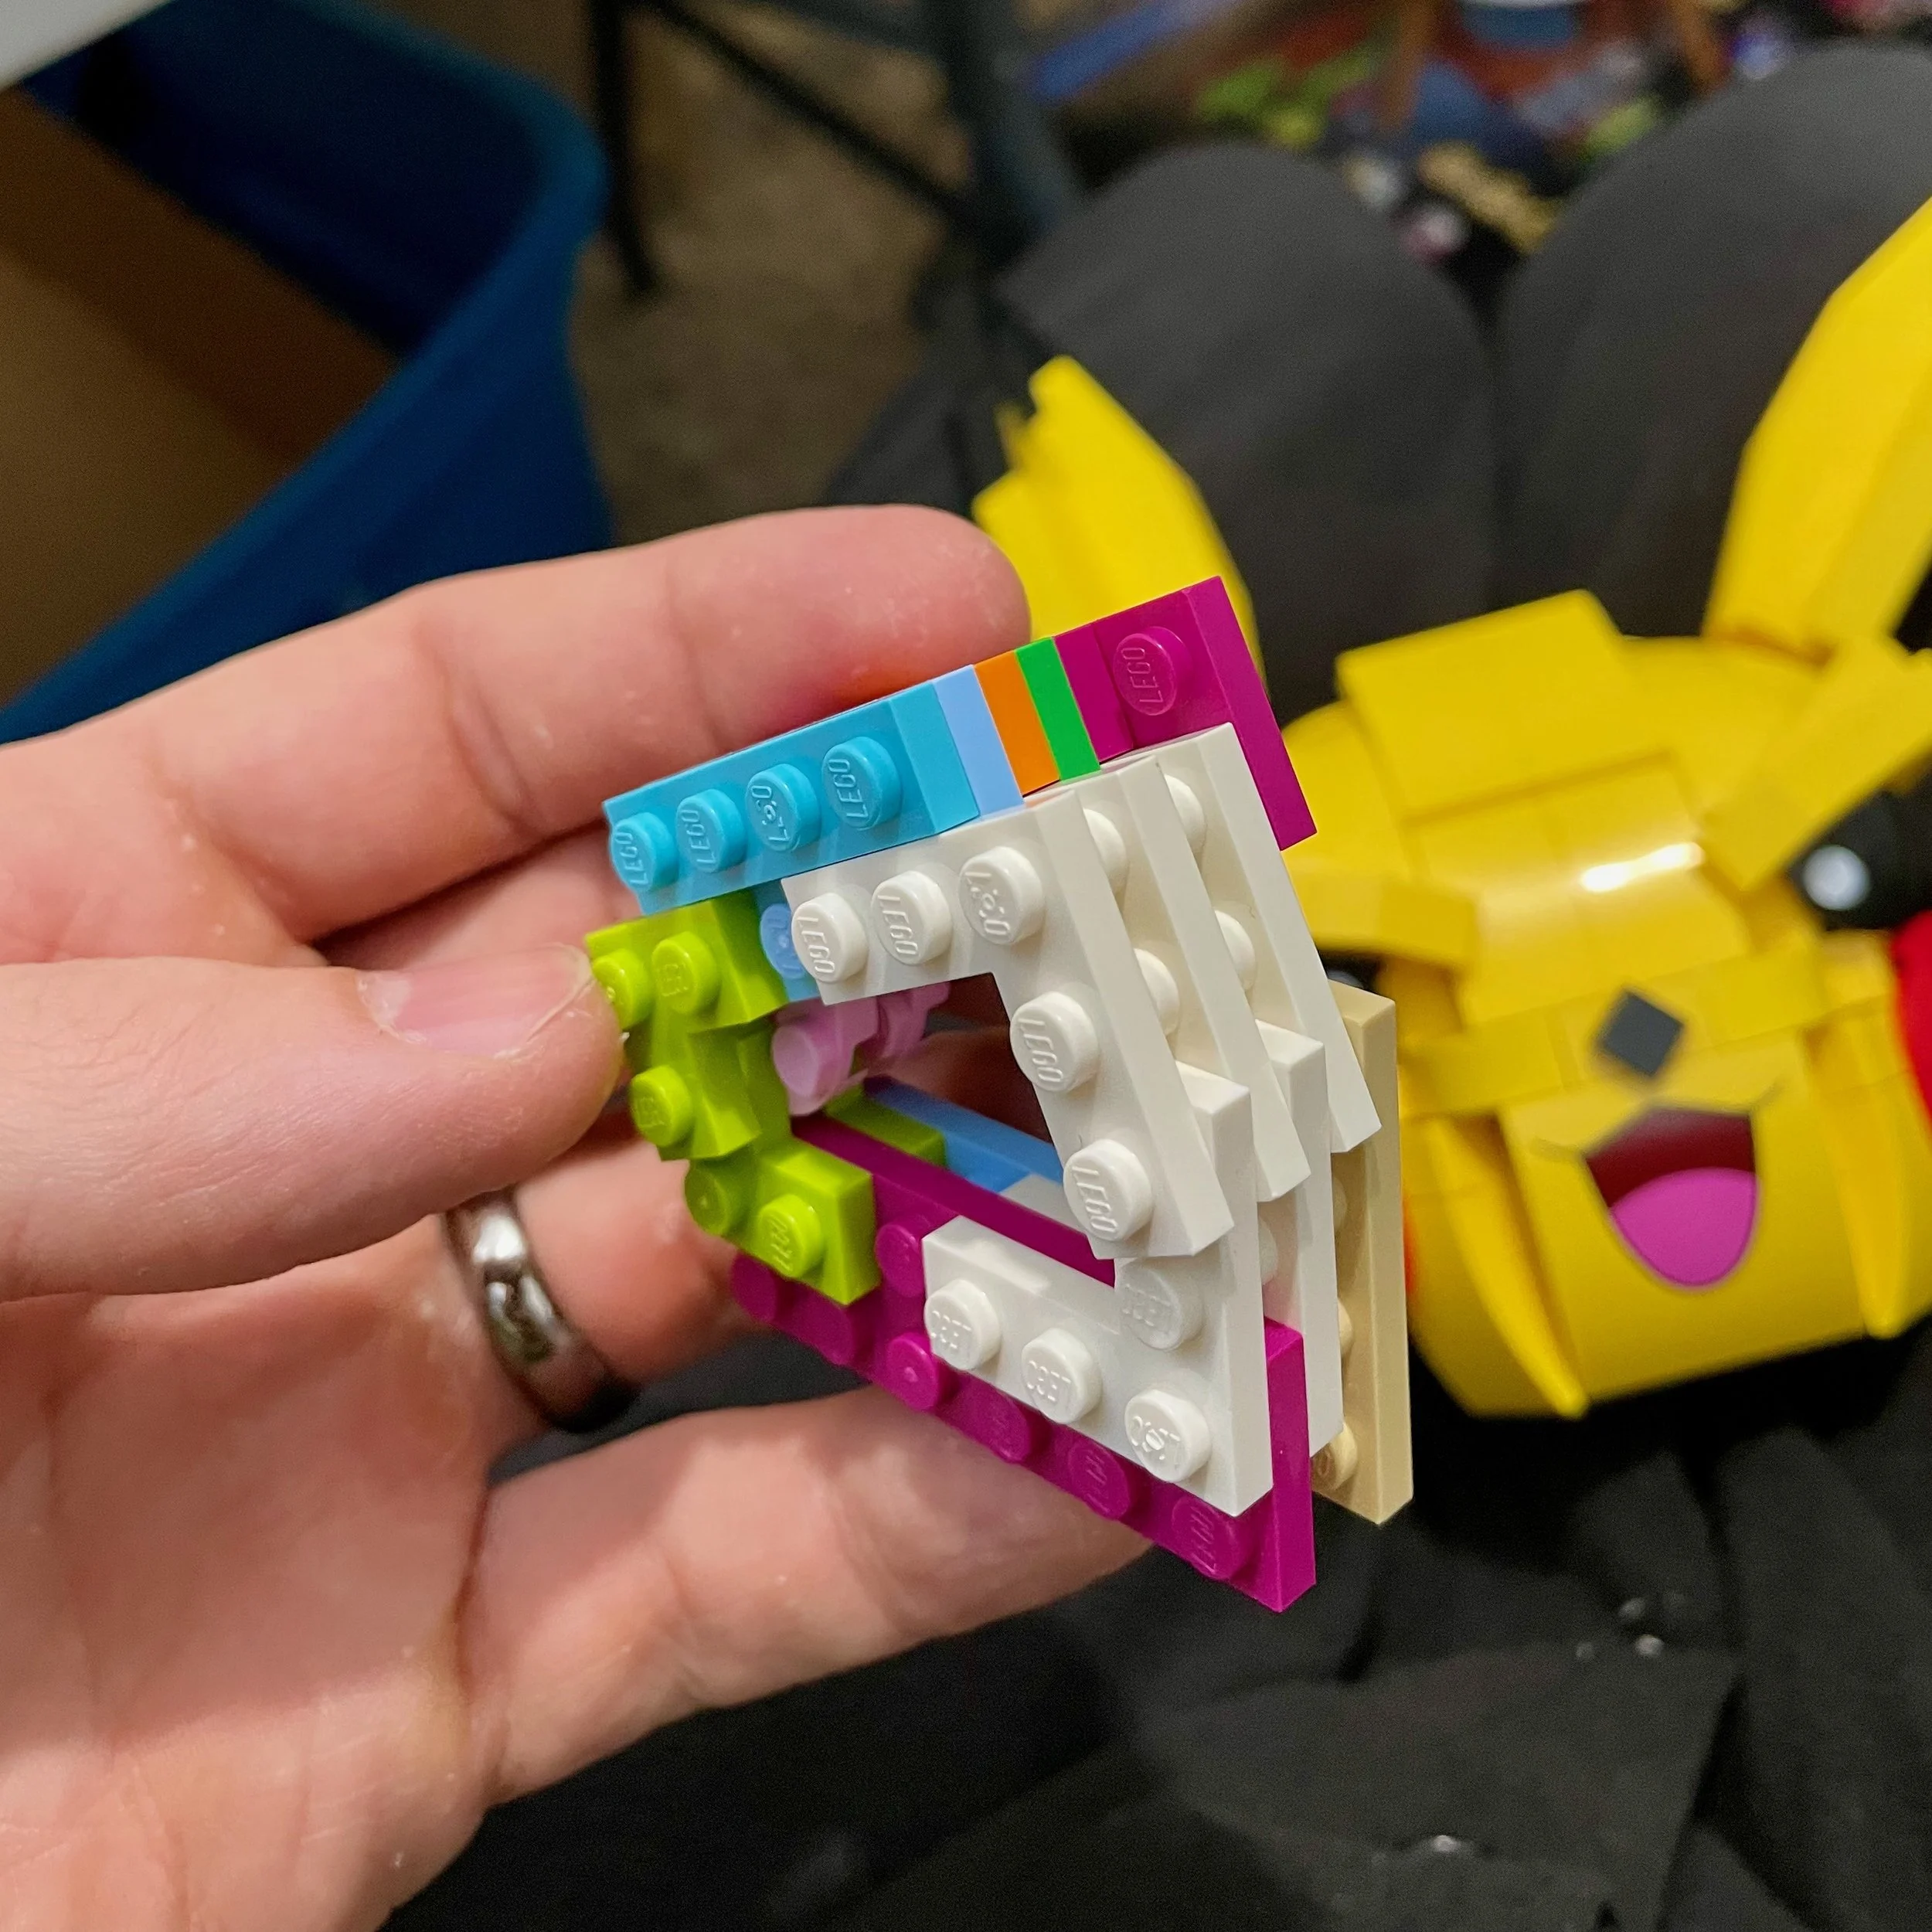
The structure was strong enough, but the pose still seemed off. Pikachu didn’t look like it was lunging forward and crashing into the ground. It looked like it was stumbling out of the barn after drinking too much Moomoo Milk.
Capturing the right pose stressed me out for several nights, as my wife will attest. I went back and forth between giving up and finding the determination to do it properly.
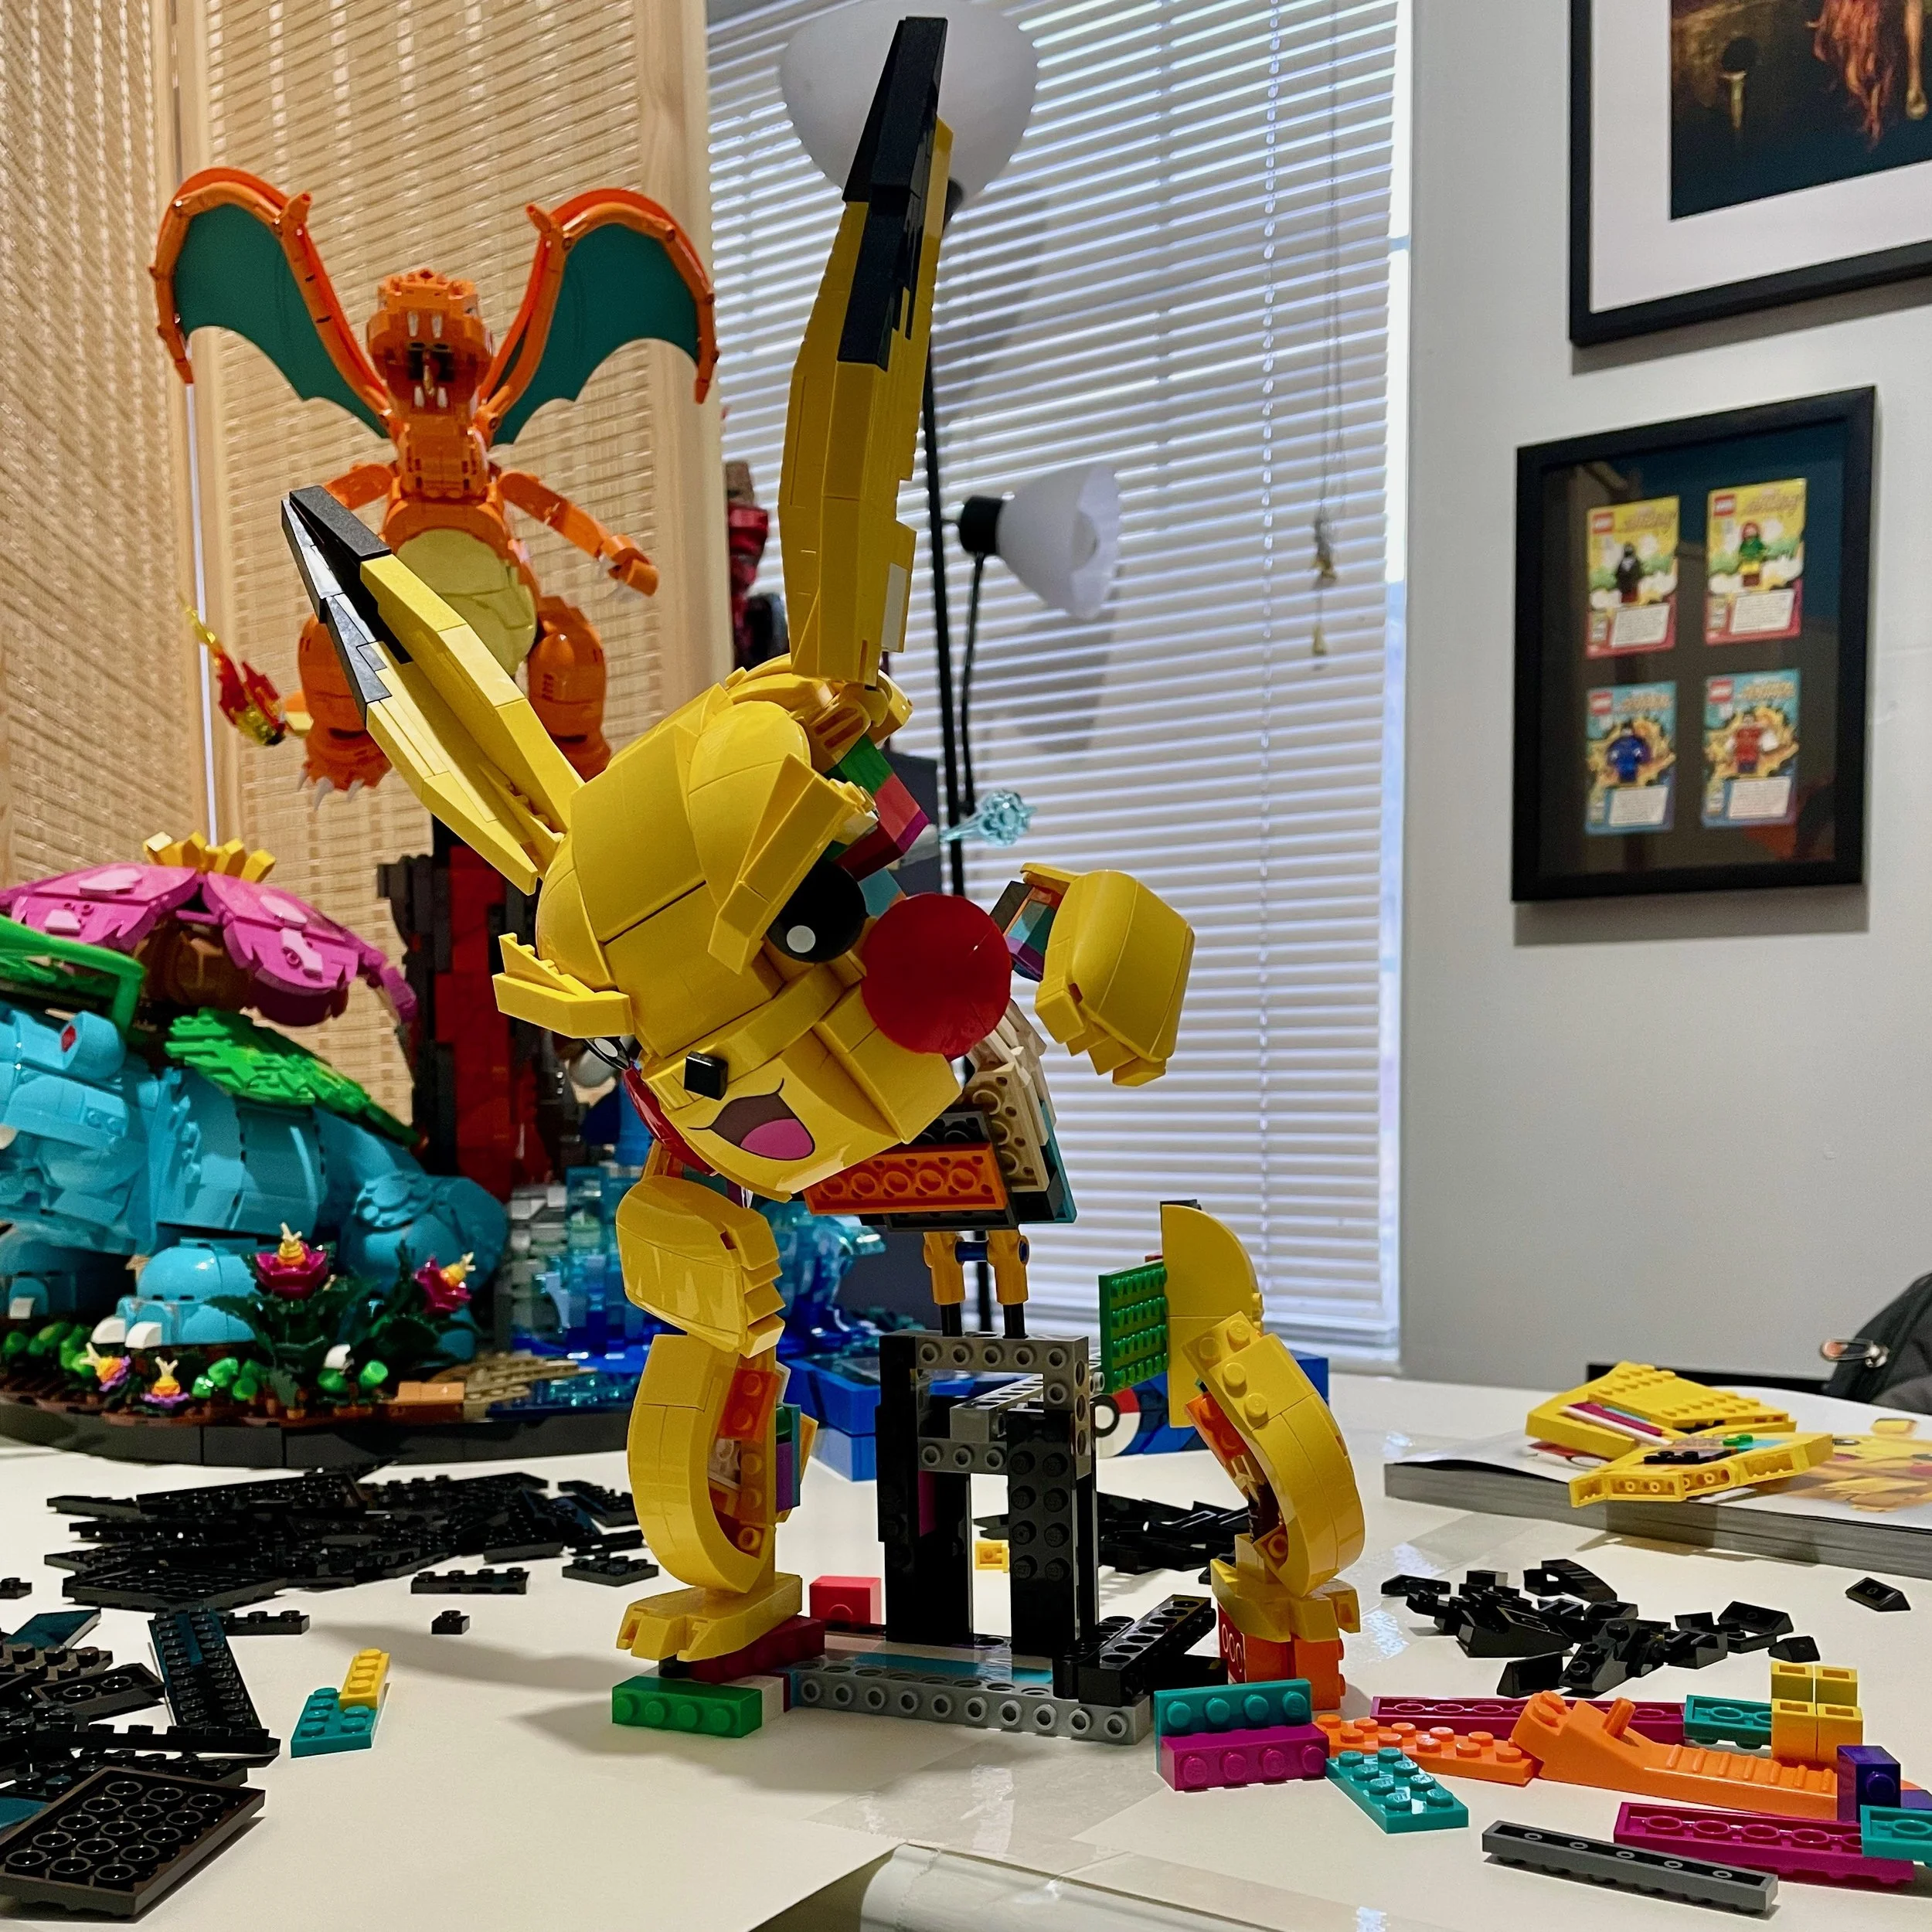
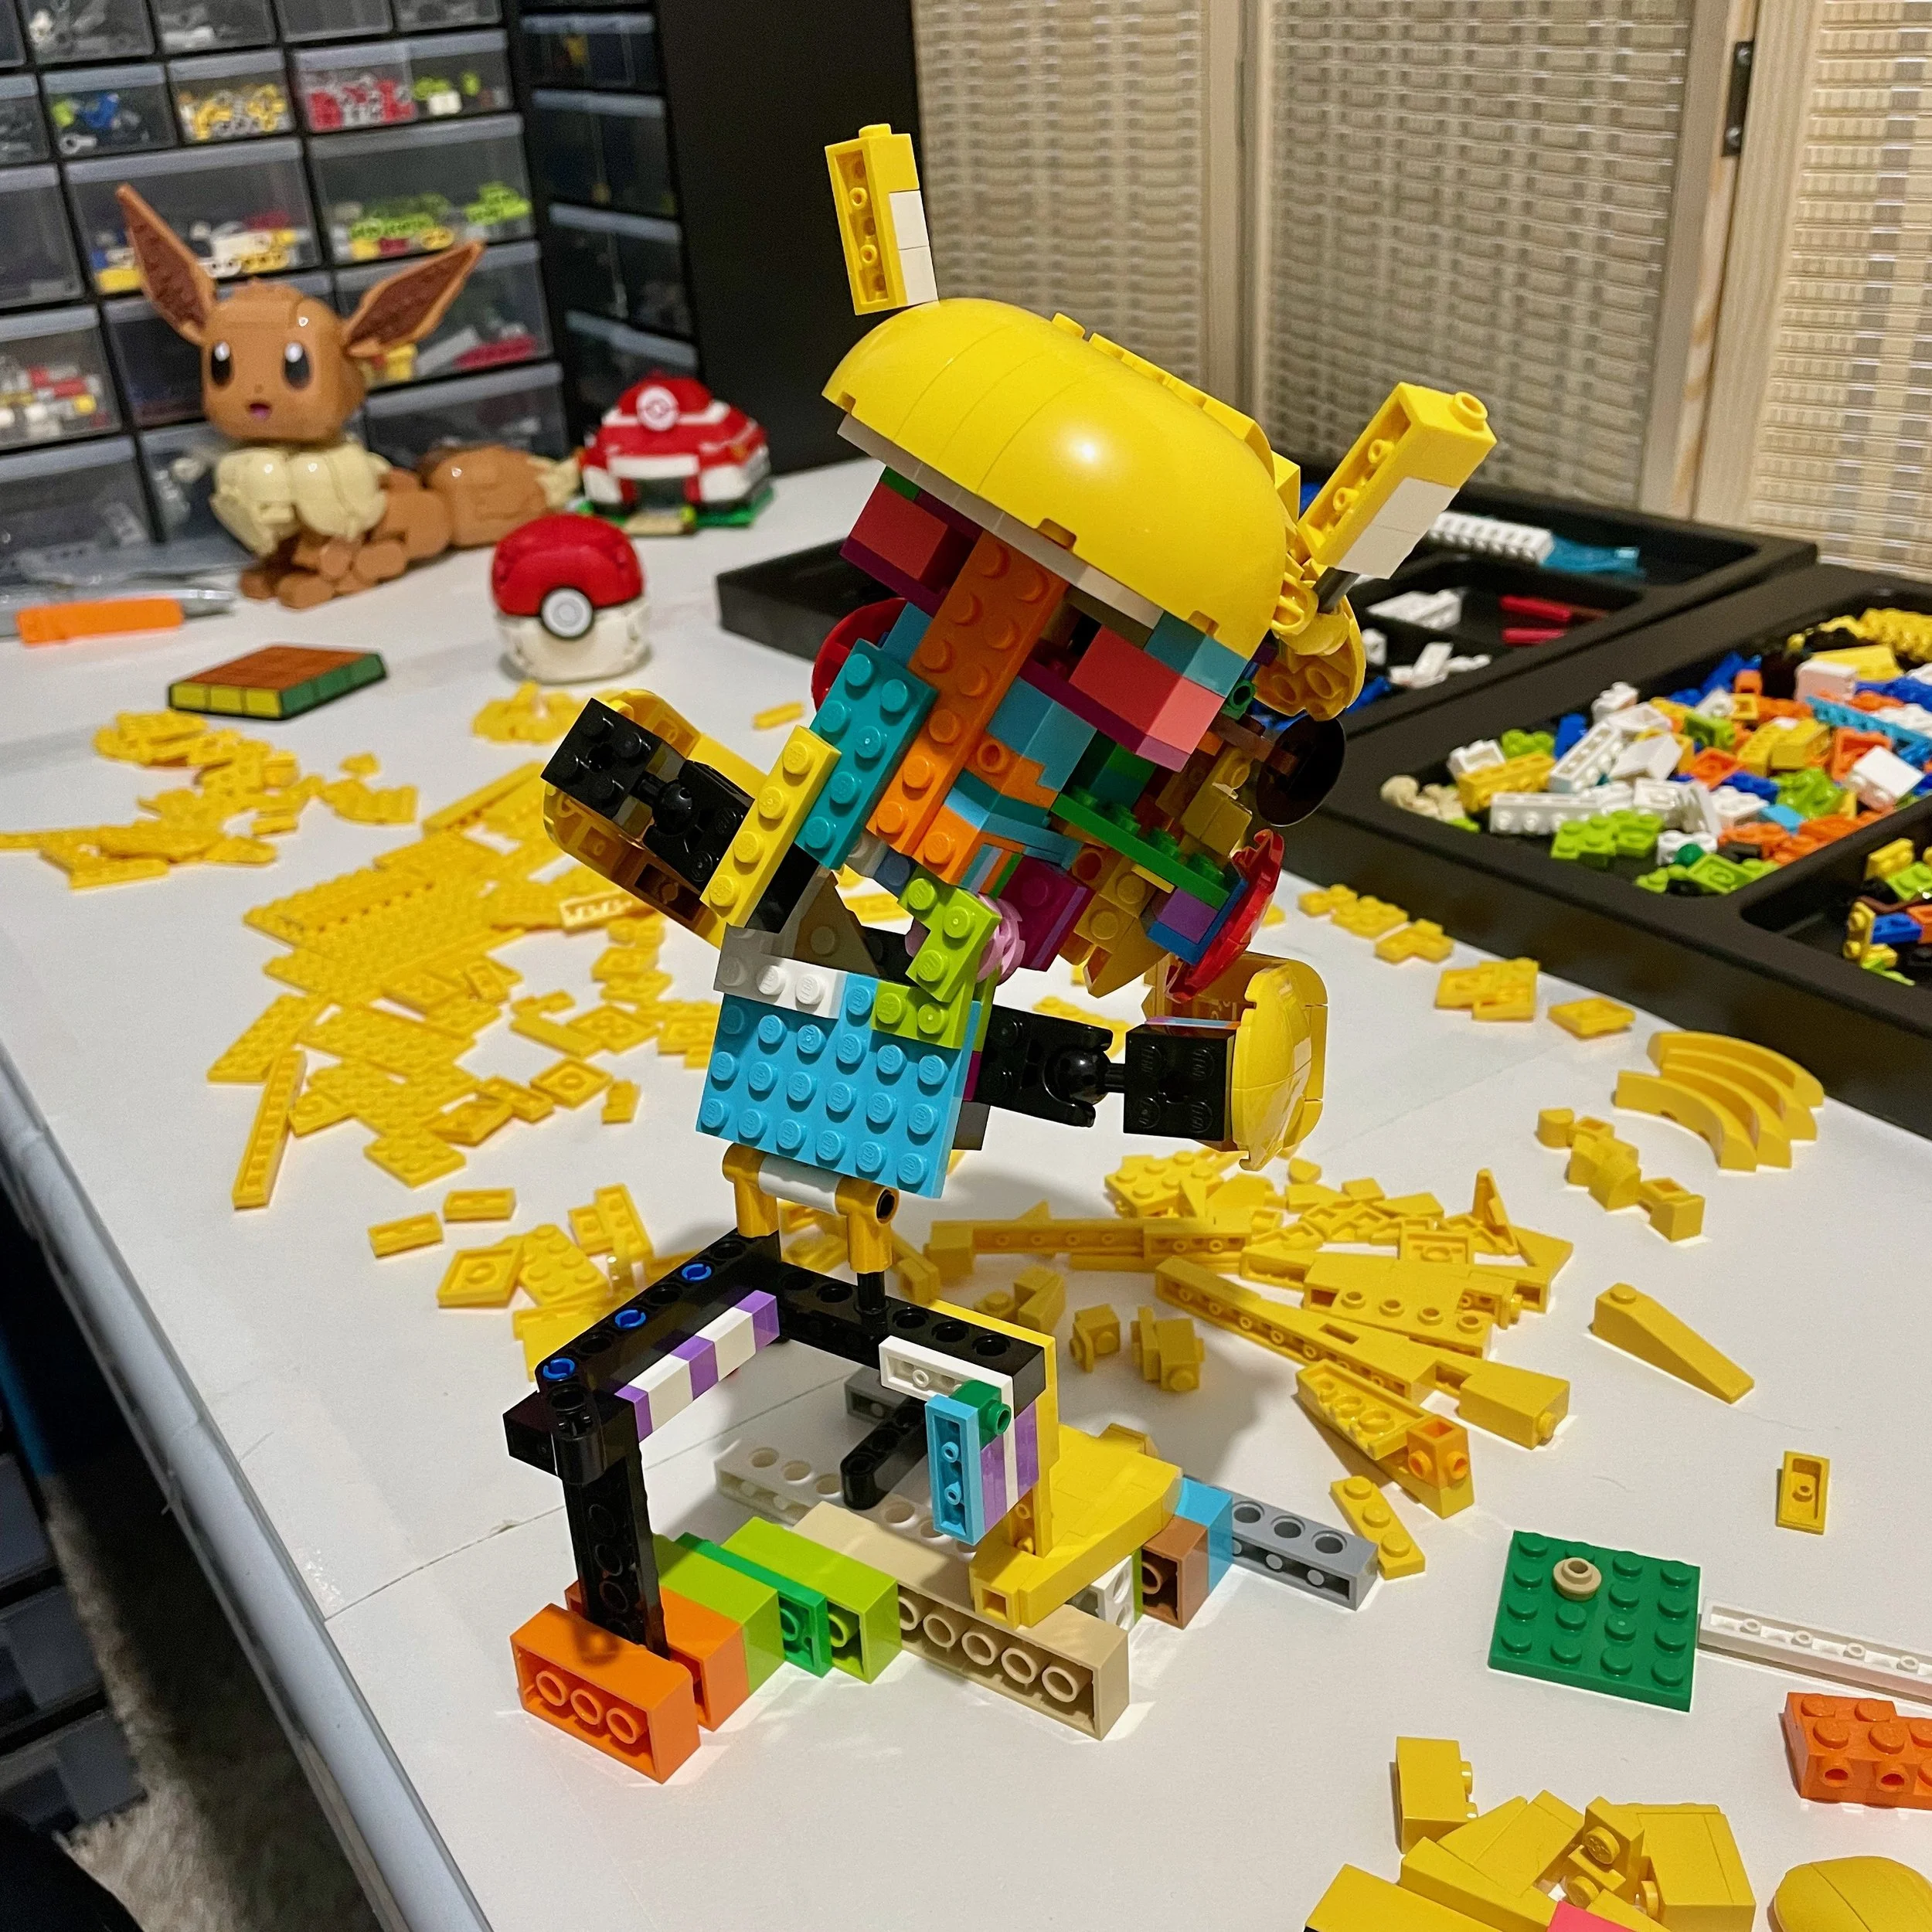
Eventually, I gave up on that pose. I still think it was possible, but the whole aura felt wrong. I also had an entire body and tail left to build, and an asymmetrical design would make that twice as much work.
Chasing the Tail
I took a break to work on the tail, a piece that shouldn’t be affected too much by the final pose.
Looking back, I had no idea what I was doing at first. I definitely didn’t want to simply copy the tail from the set because I thought it could be improved, but I also wanted to change it for the sake of making an alternate build. I started by laying out some slopes in a rough shape connected by brackets. For something like this, I would normally build the whole thing out of regular ol’ bricks, but that wasn’t going to be an option.
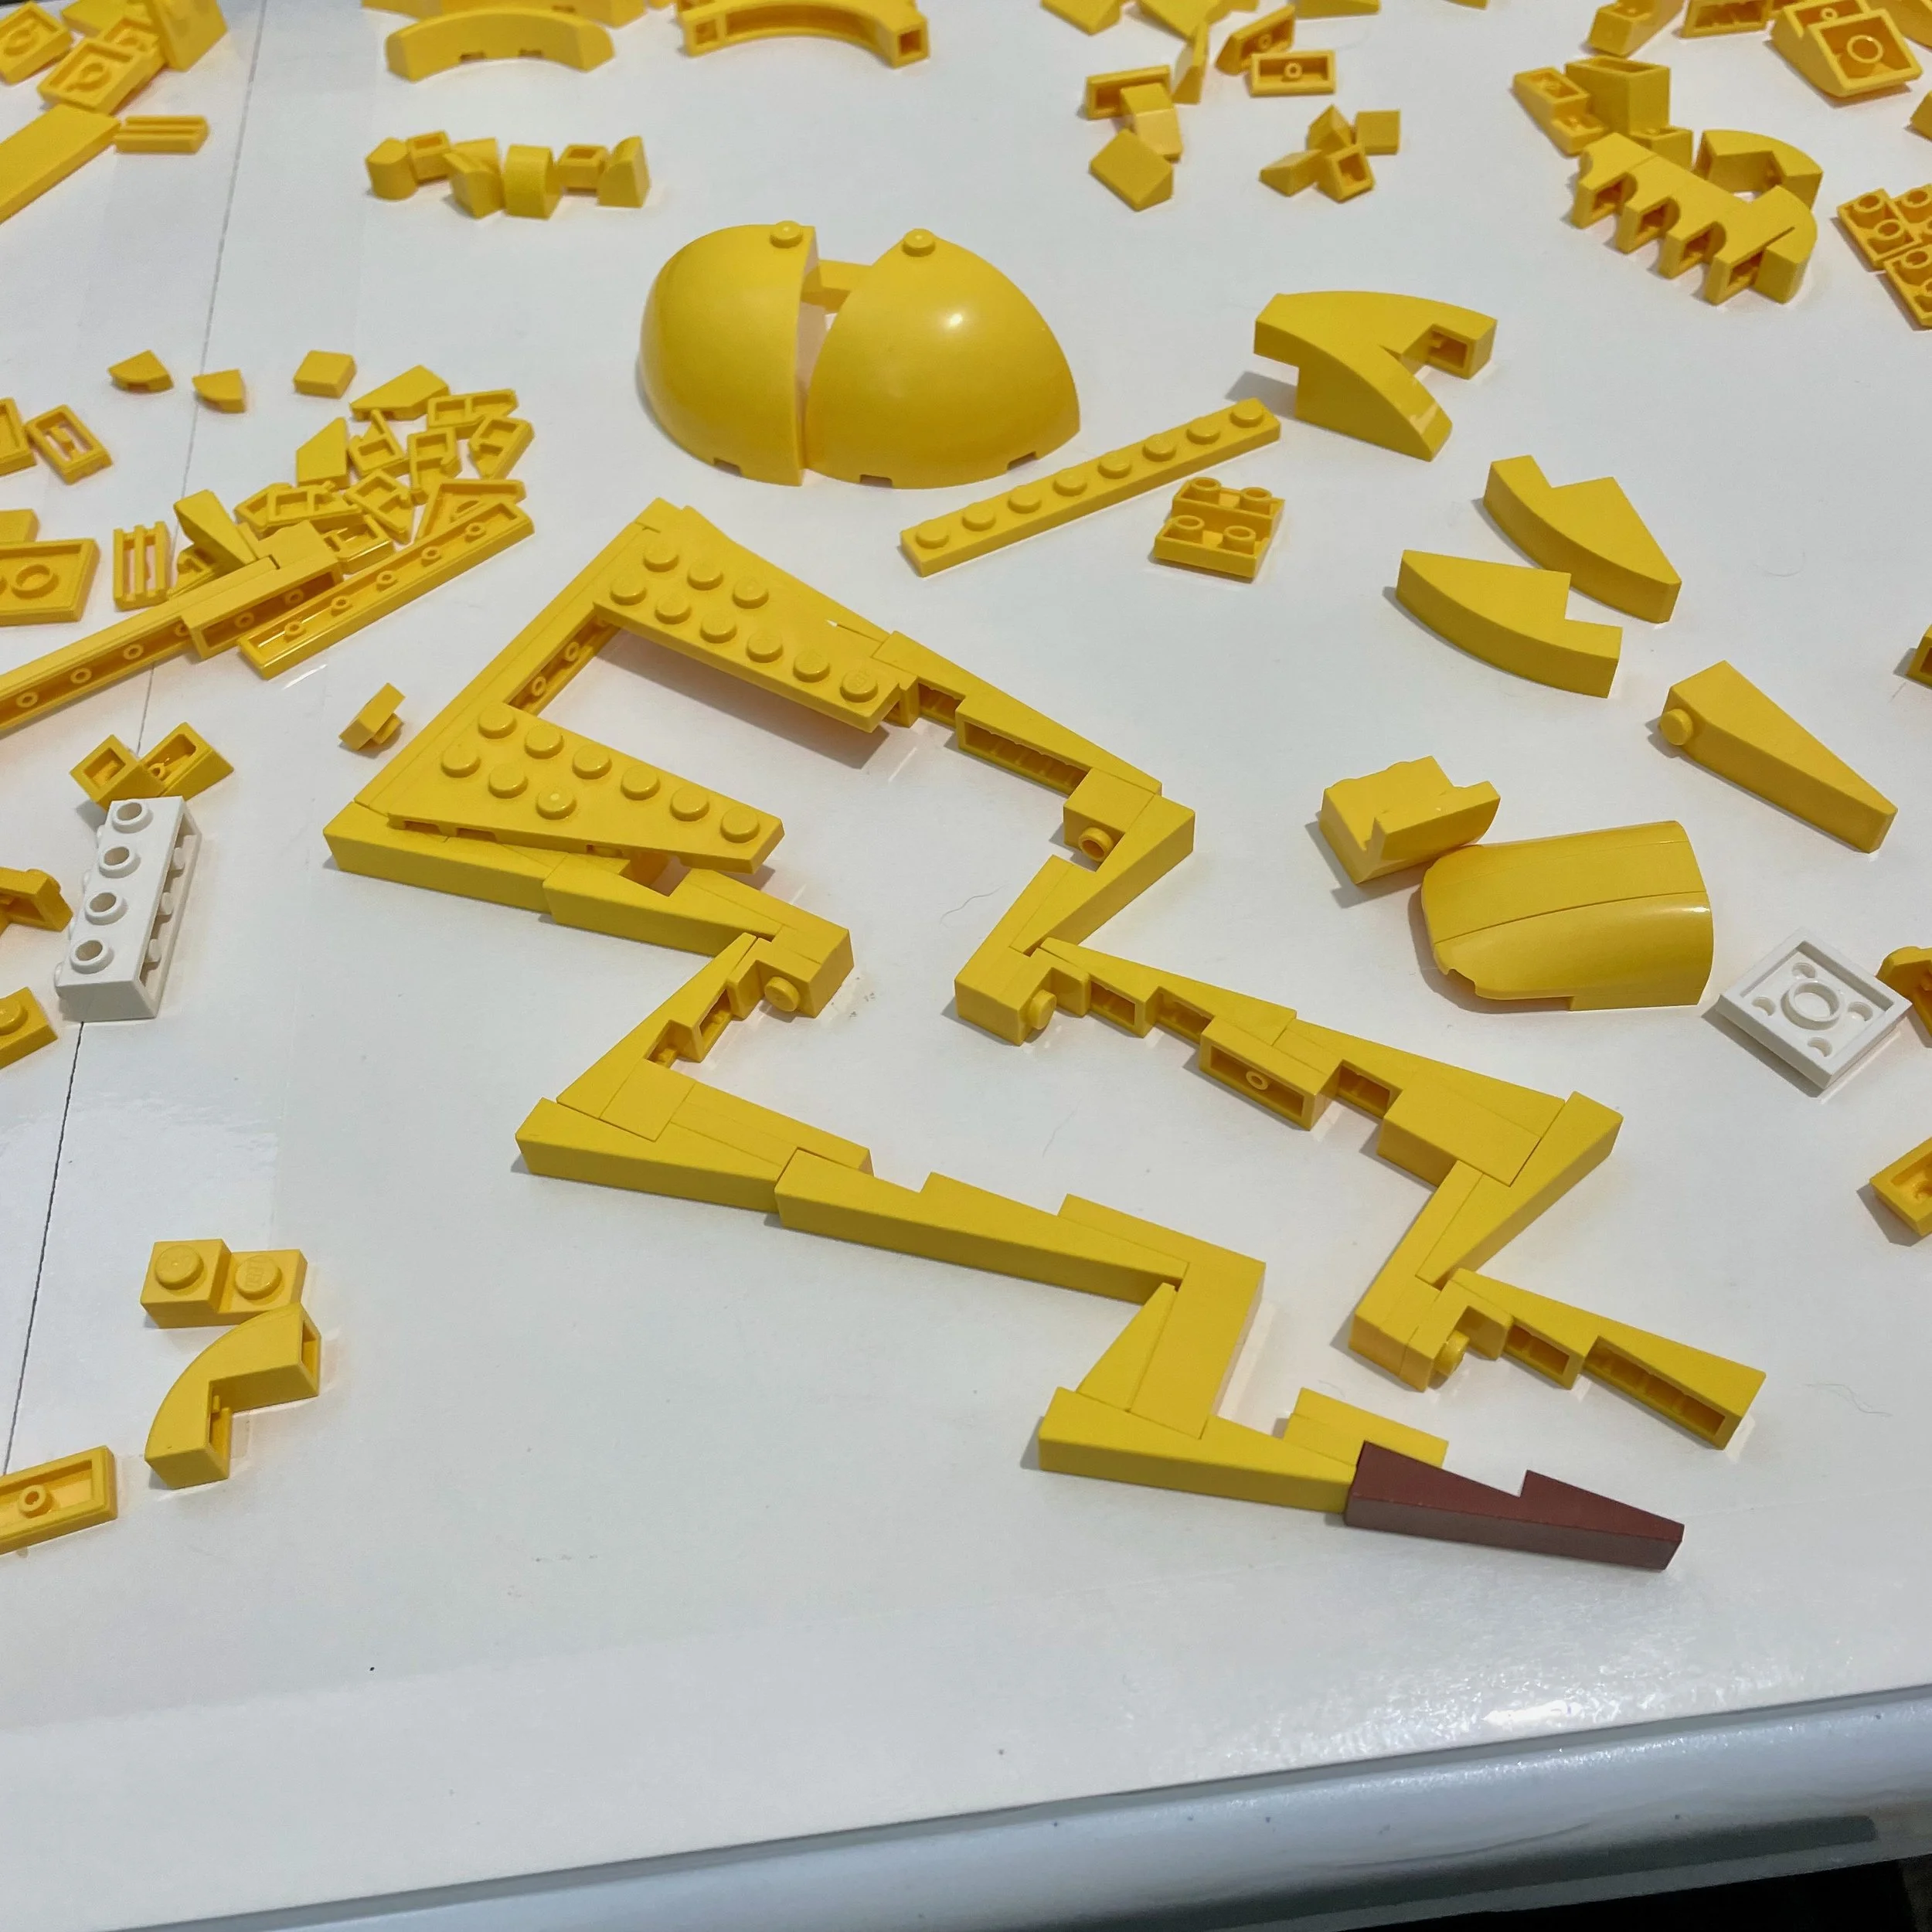
This made no sense, and filling in the outline while keeping the tail sturdy became a major headache. Luckily, it didn’t take me too long to realize that. I started over with the structure, worked my way from the interior to the edges, and then slapped on some slopes.
I didn’t want a perfectly two-dimensional tail like the one in the official set. I wanted a bit of articulation to help the final pose look more dynamic. In the end, I don’t think it mattered much, but I was able to connect the sections using the very few round plates available so the tail could hold a slight curve.
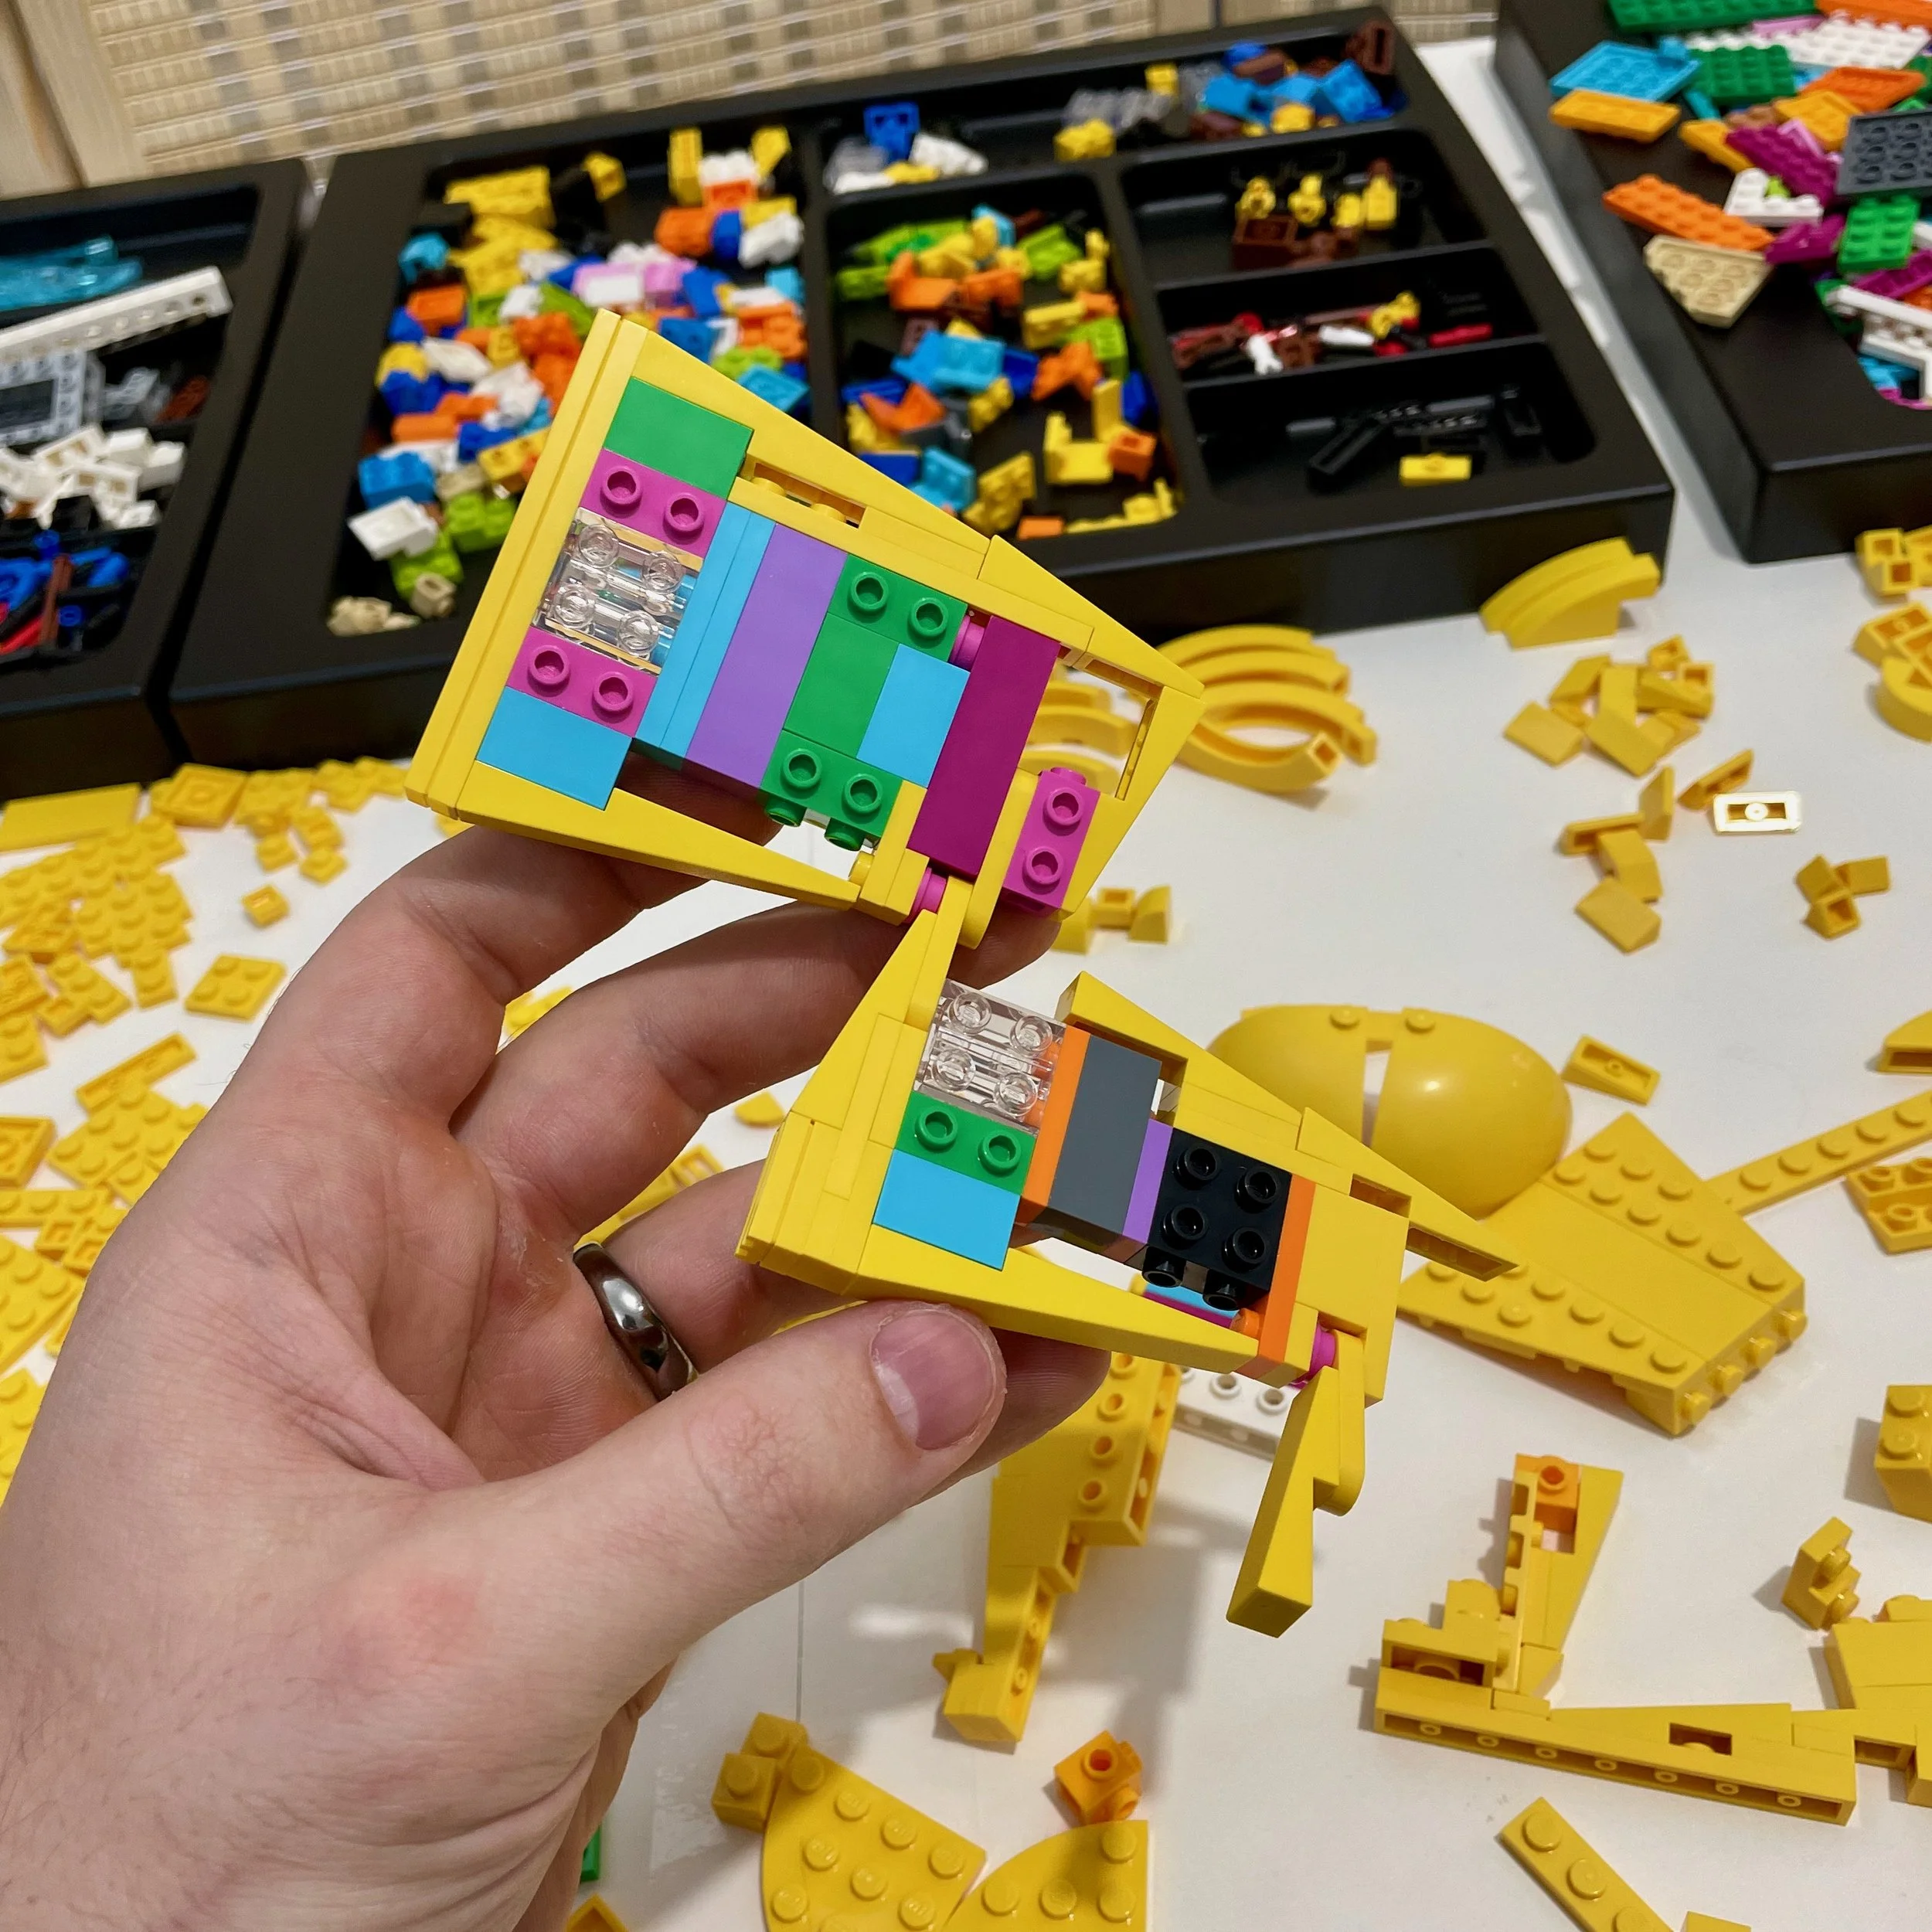
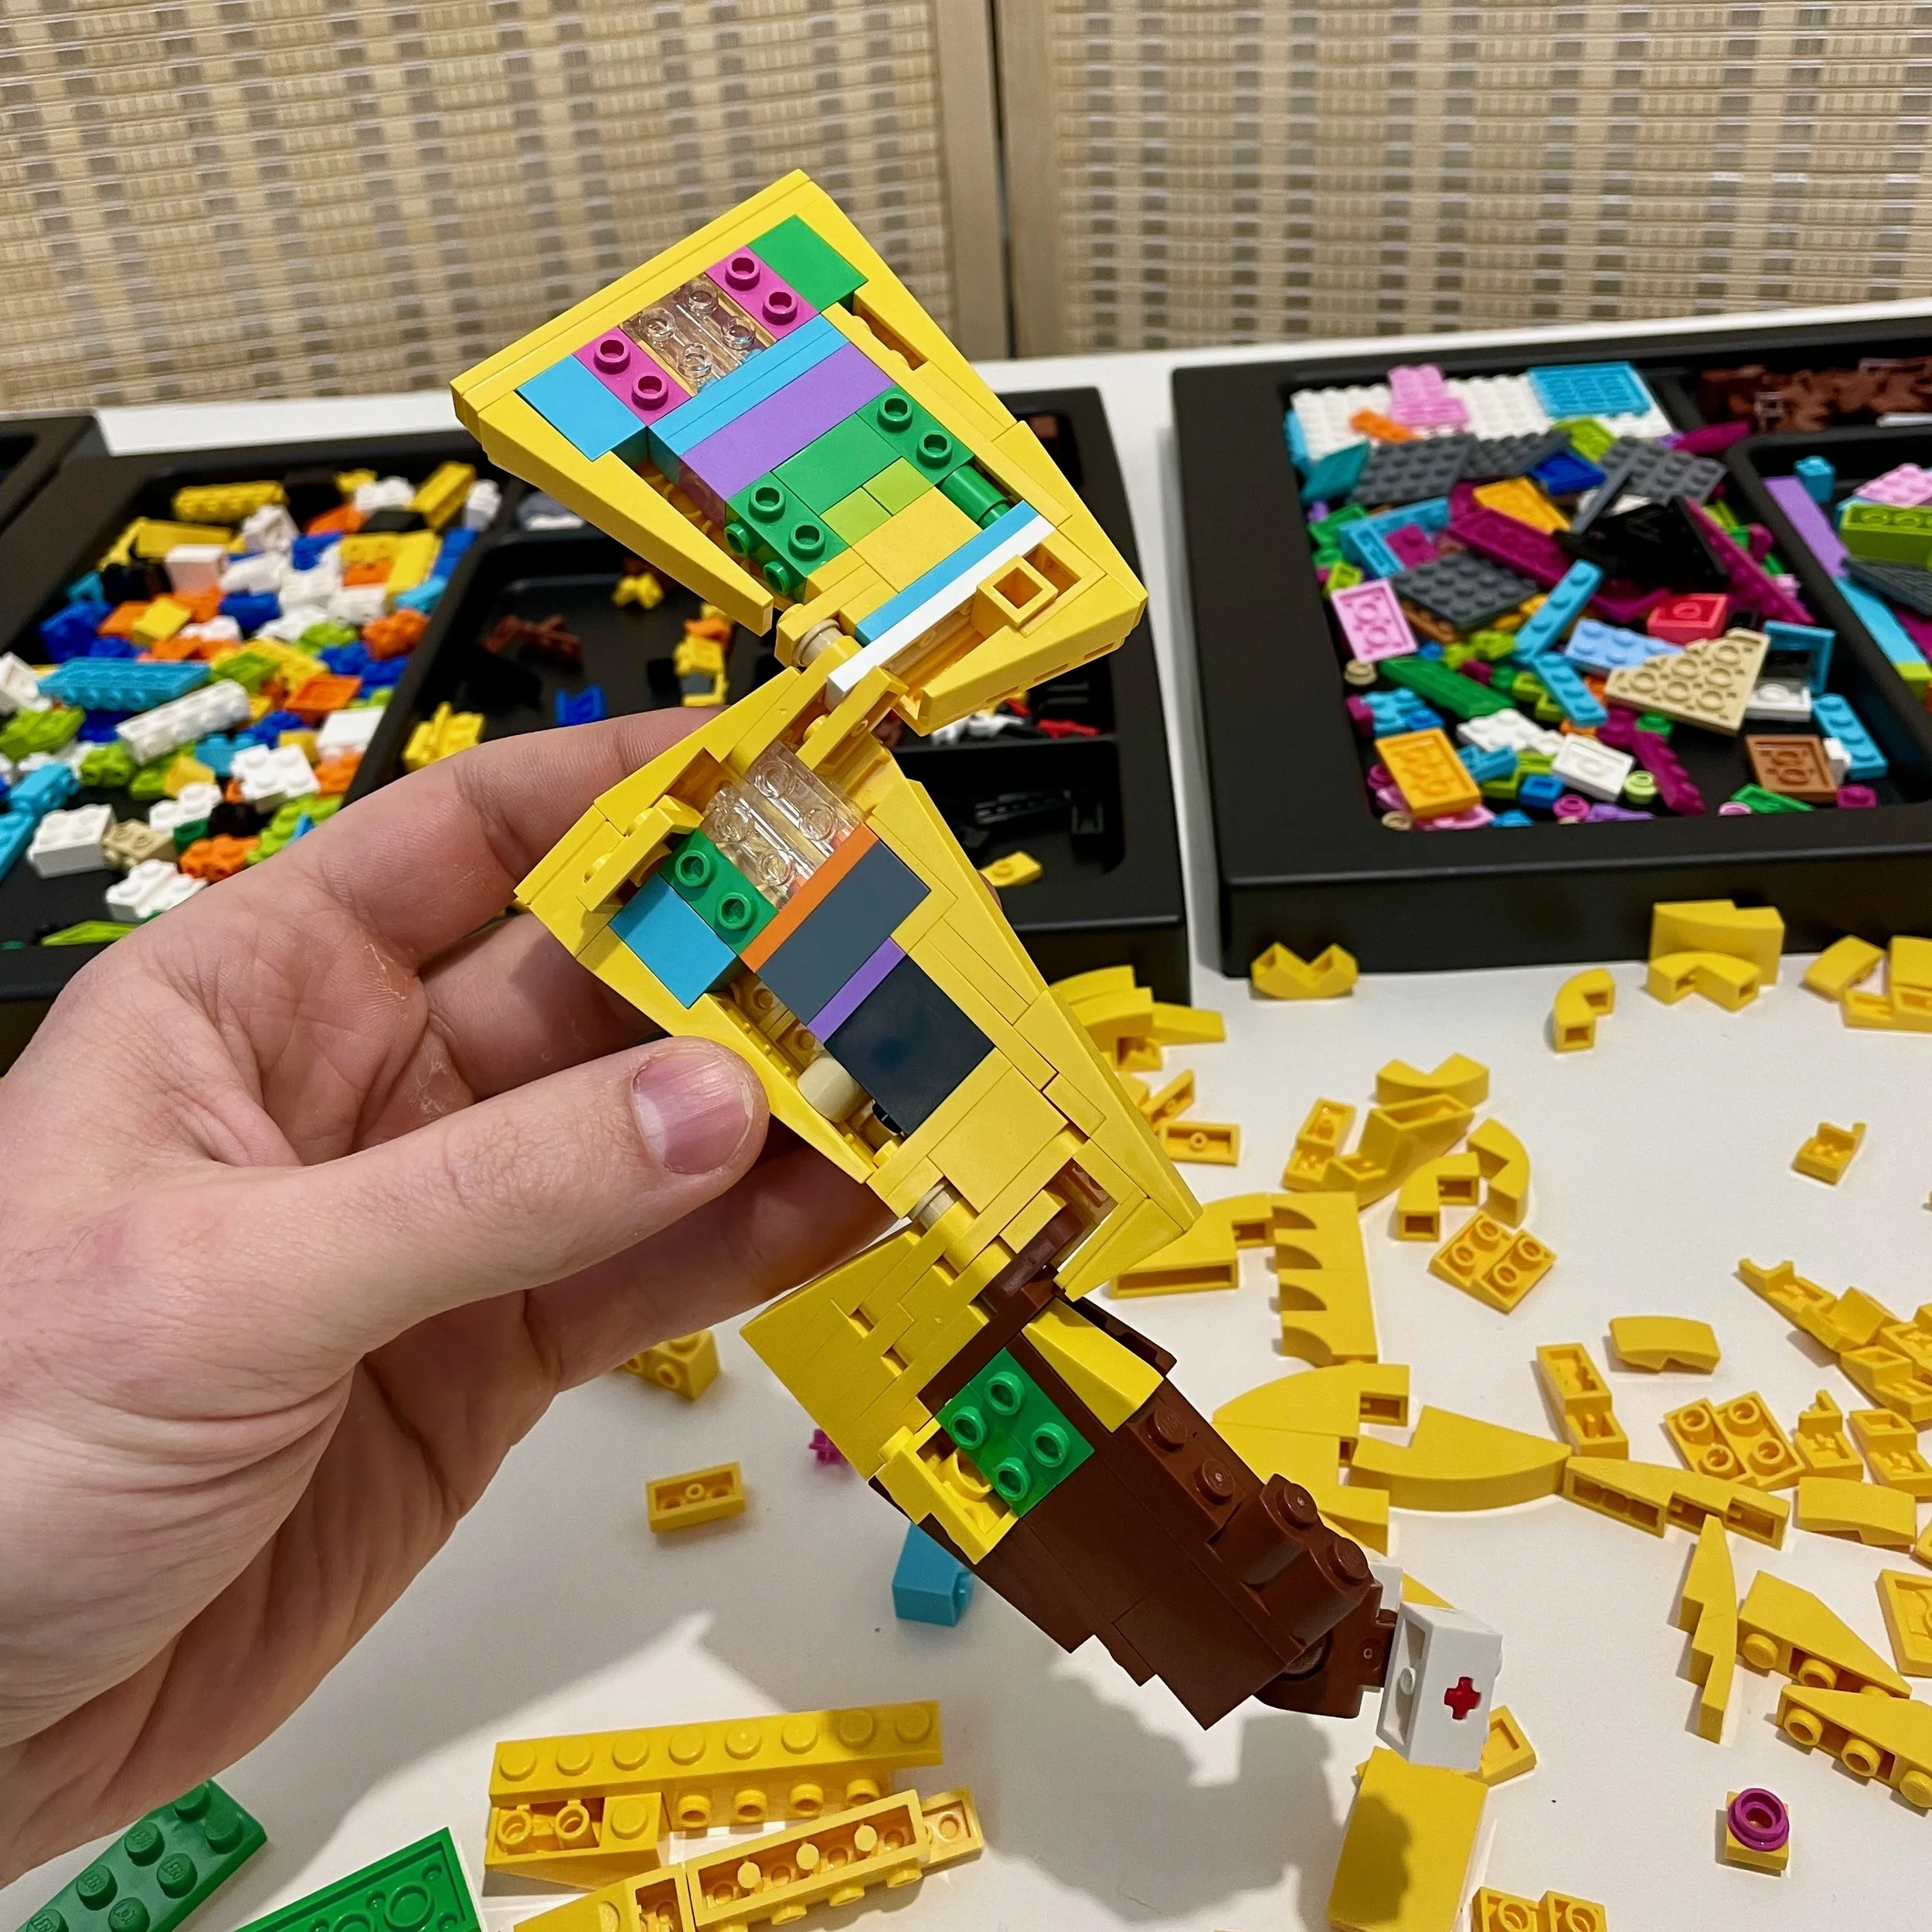
There was a single reddish brown ball joint in the set for the tail. I’m pushing that thing to its weight limit in my design, but it technically holds!
Piecing Together the Body
With rough drafts of the head, arms, legs and tail finished, it was time to build out the chest and stomach and create an internal structure that I could use for the final model.
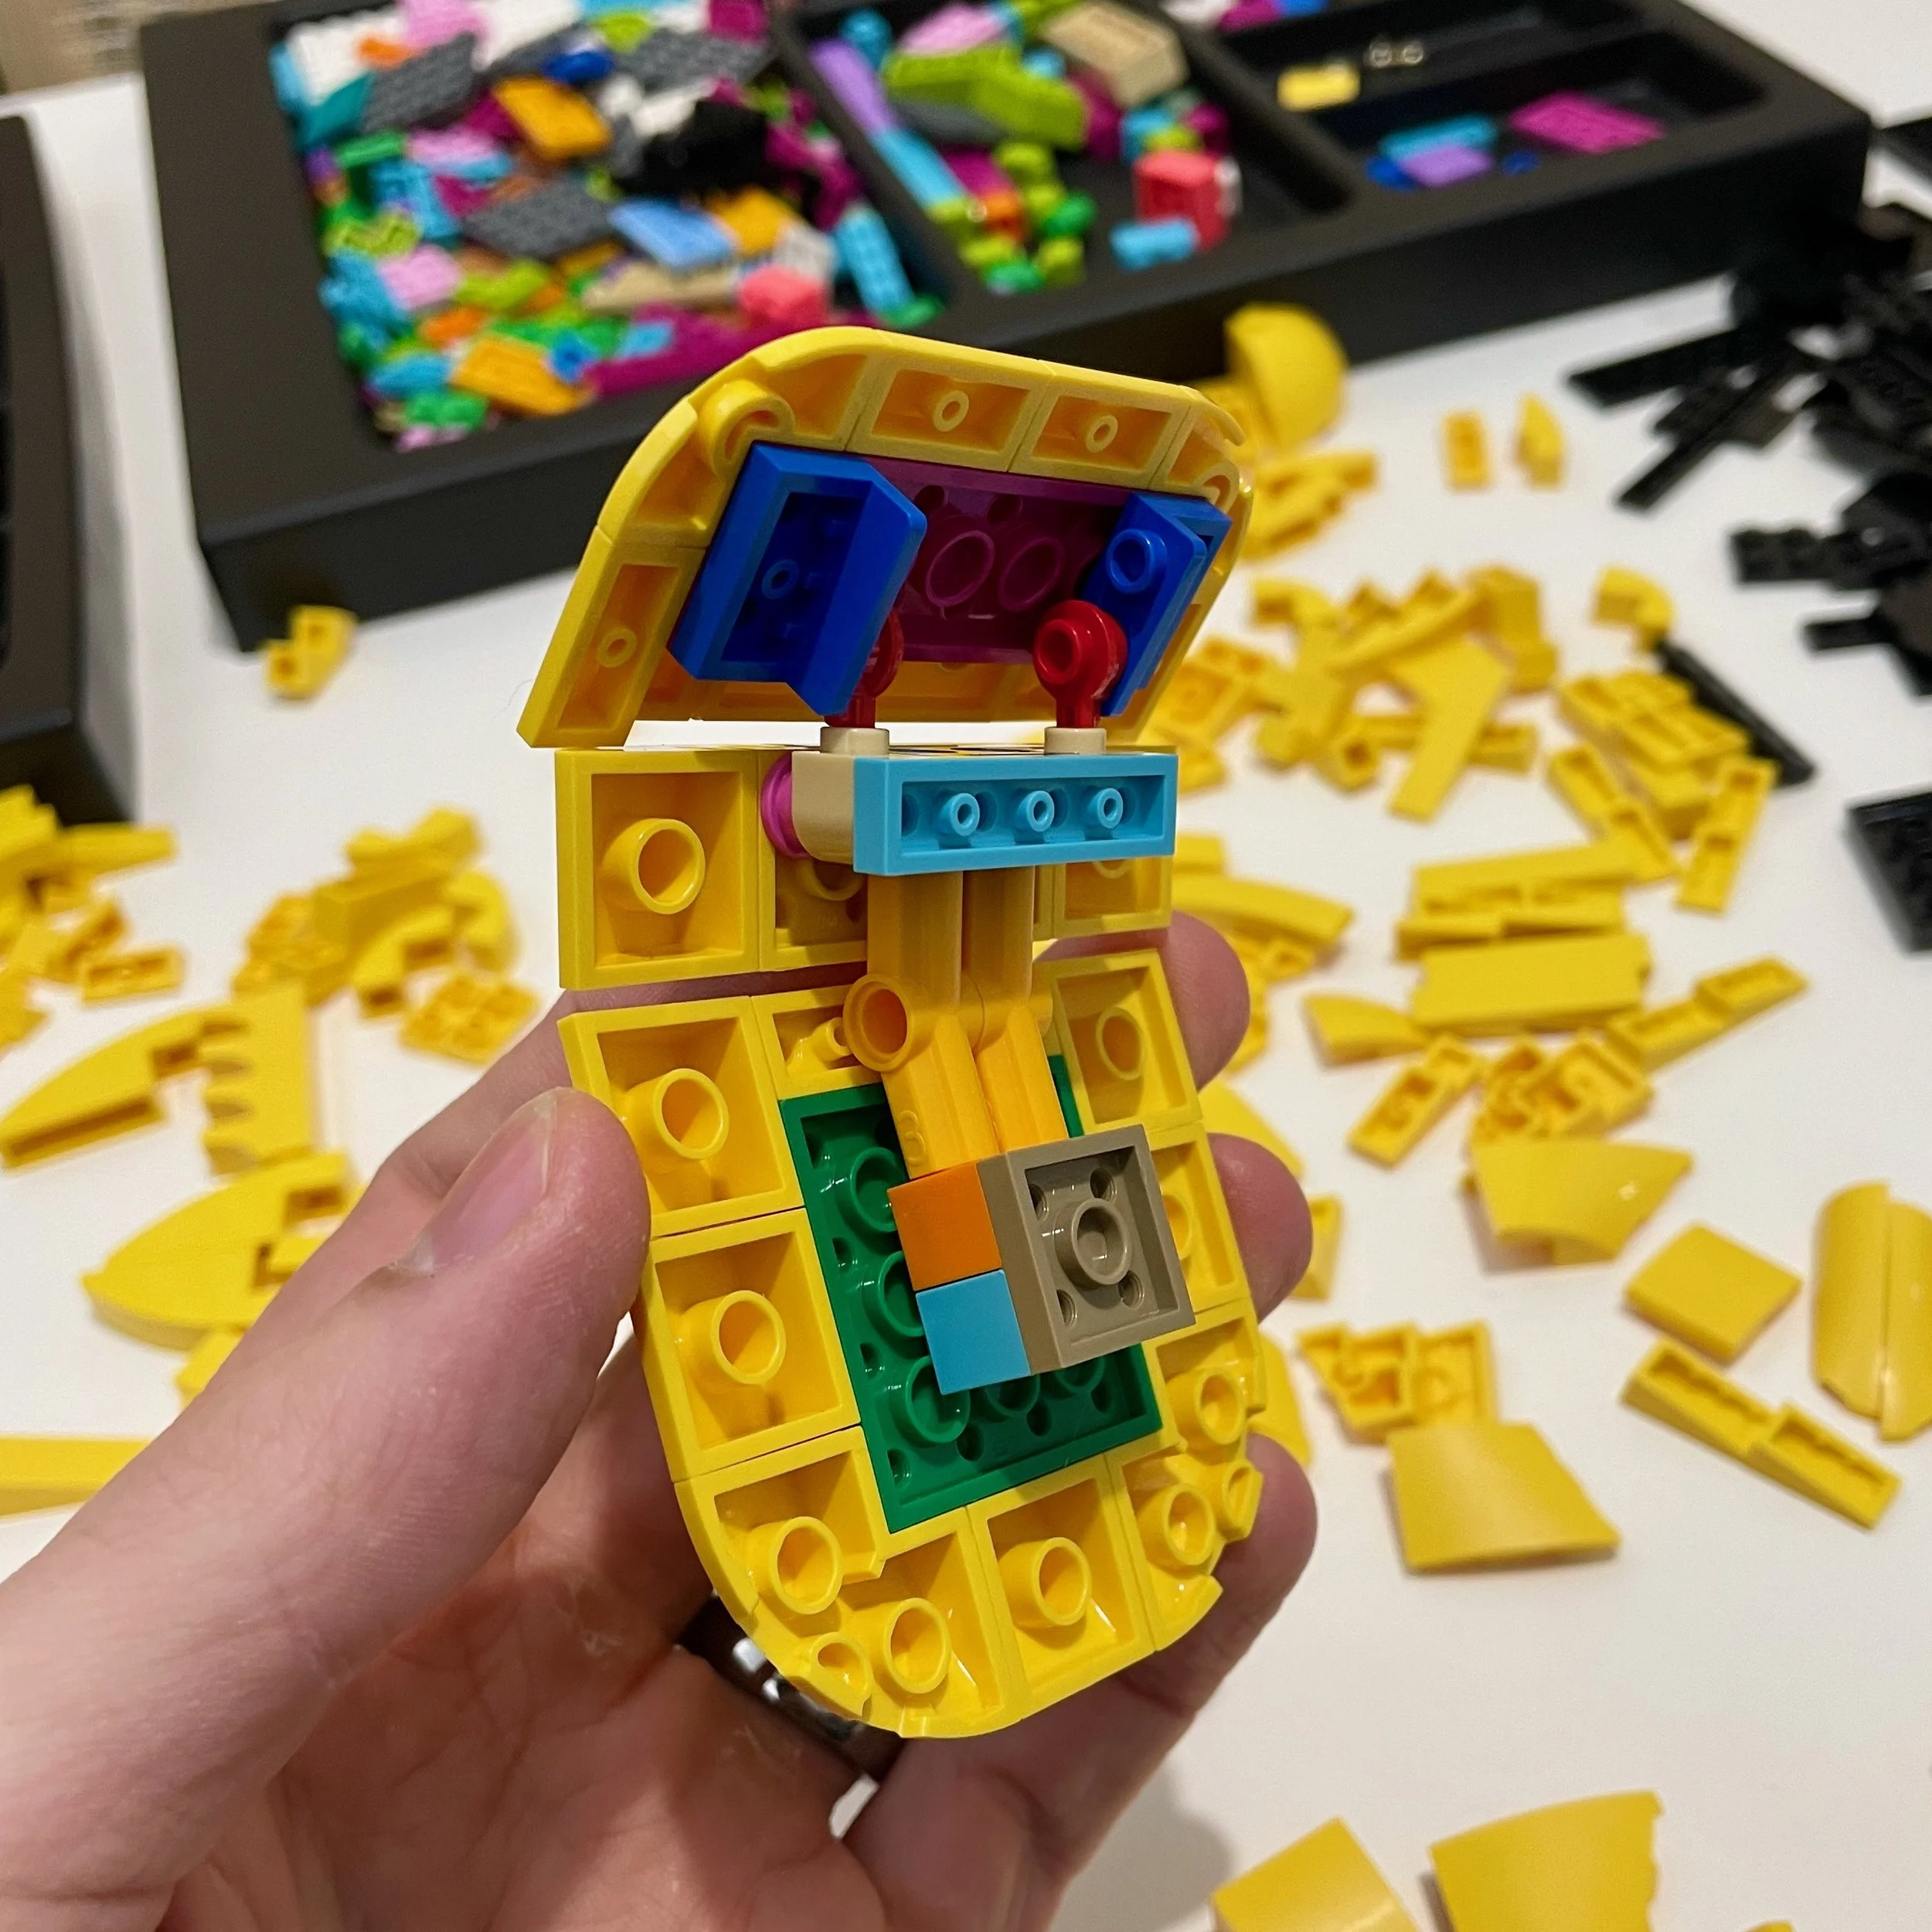
I had to choose between a series of stacked slopes or angled plates connected with the few clips and Technic elements I had left. I had been treating these parts like gold and saving them for a special occasion. Pikachu’s body is round and spherical, so I needed to at least attempt a rounded stomach.
I had avoided rounding out the head for long enough because I knew it was going to look blocky. The parts I had left didn’t lend themselves well to sculpting, at least not with my surprising lack of familiarity with curved slopes.
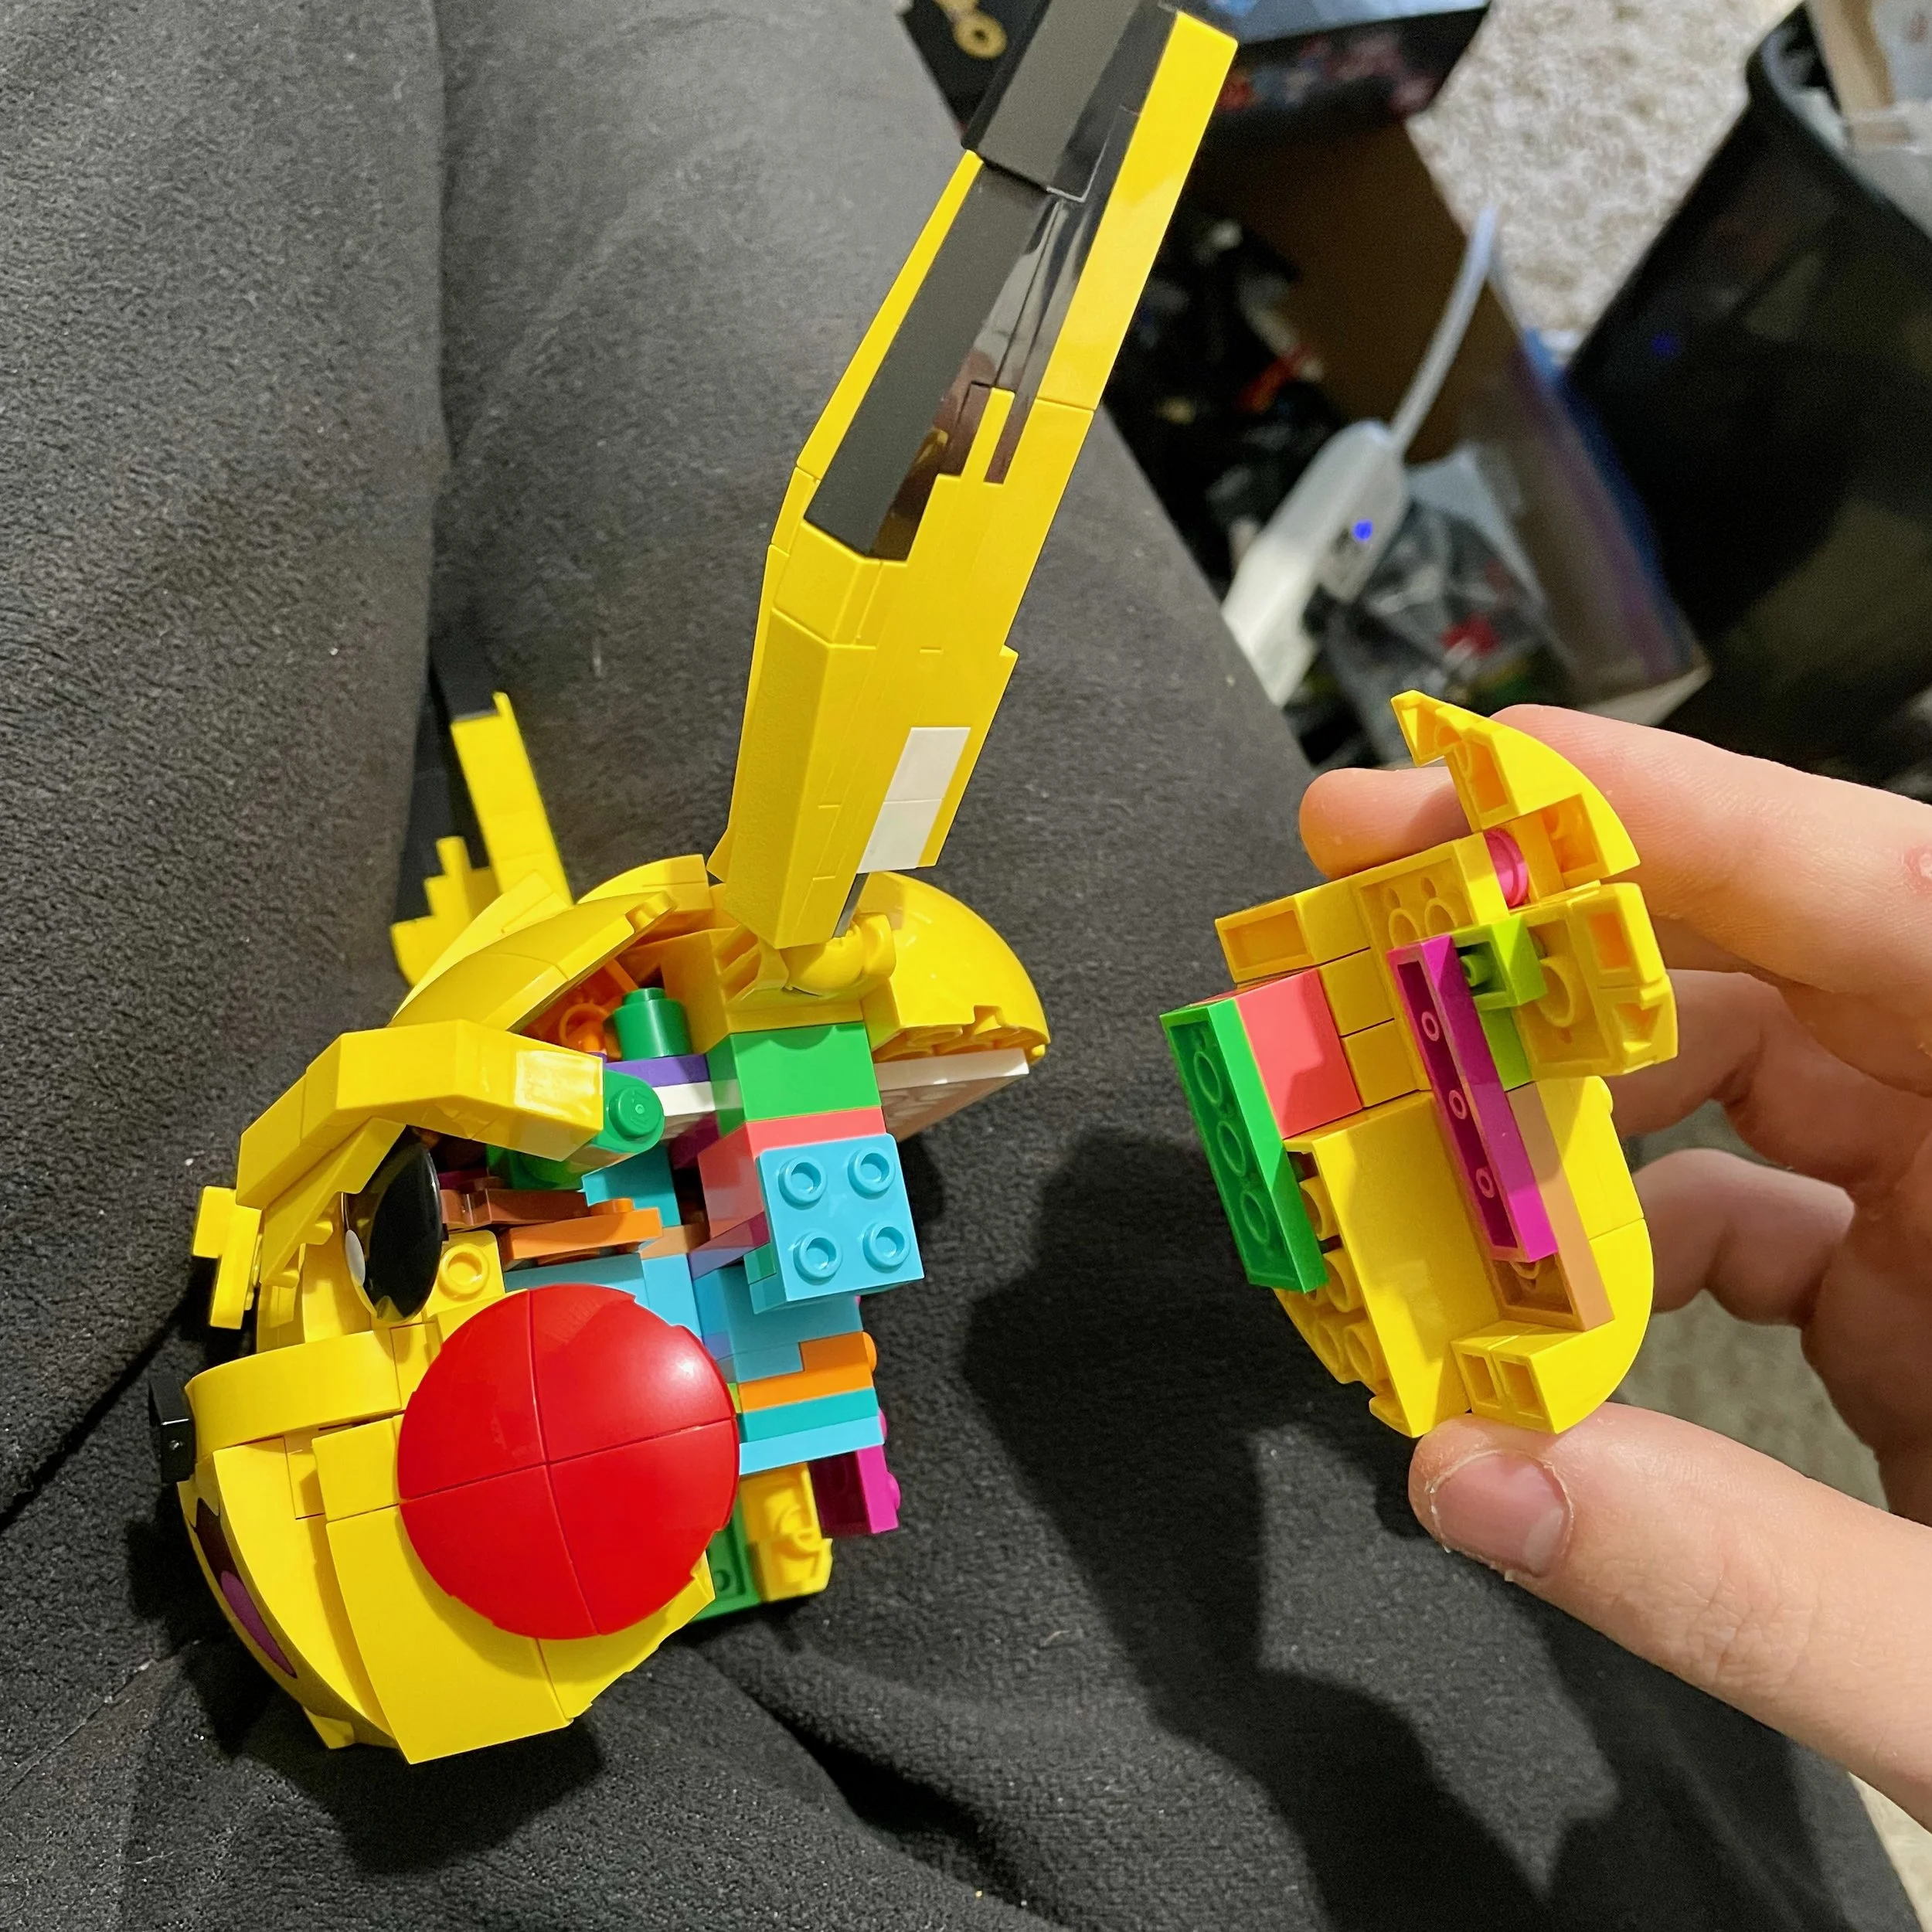
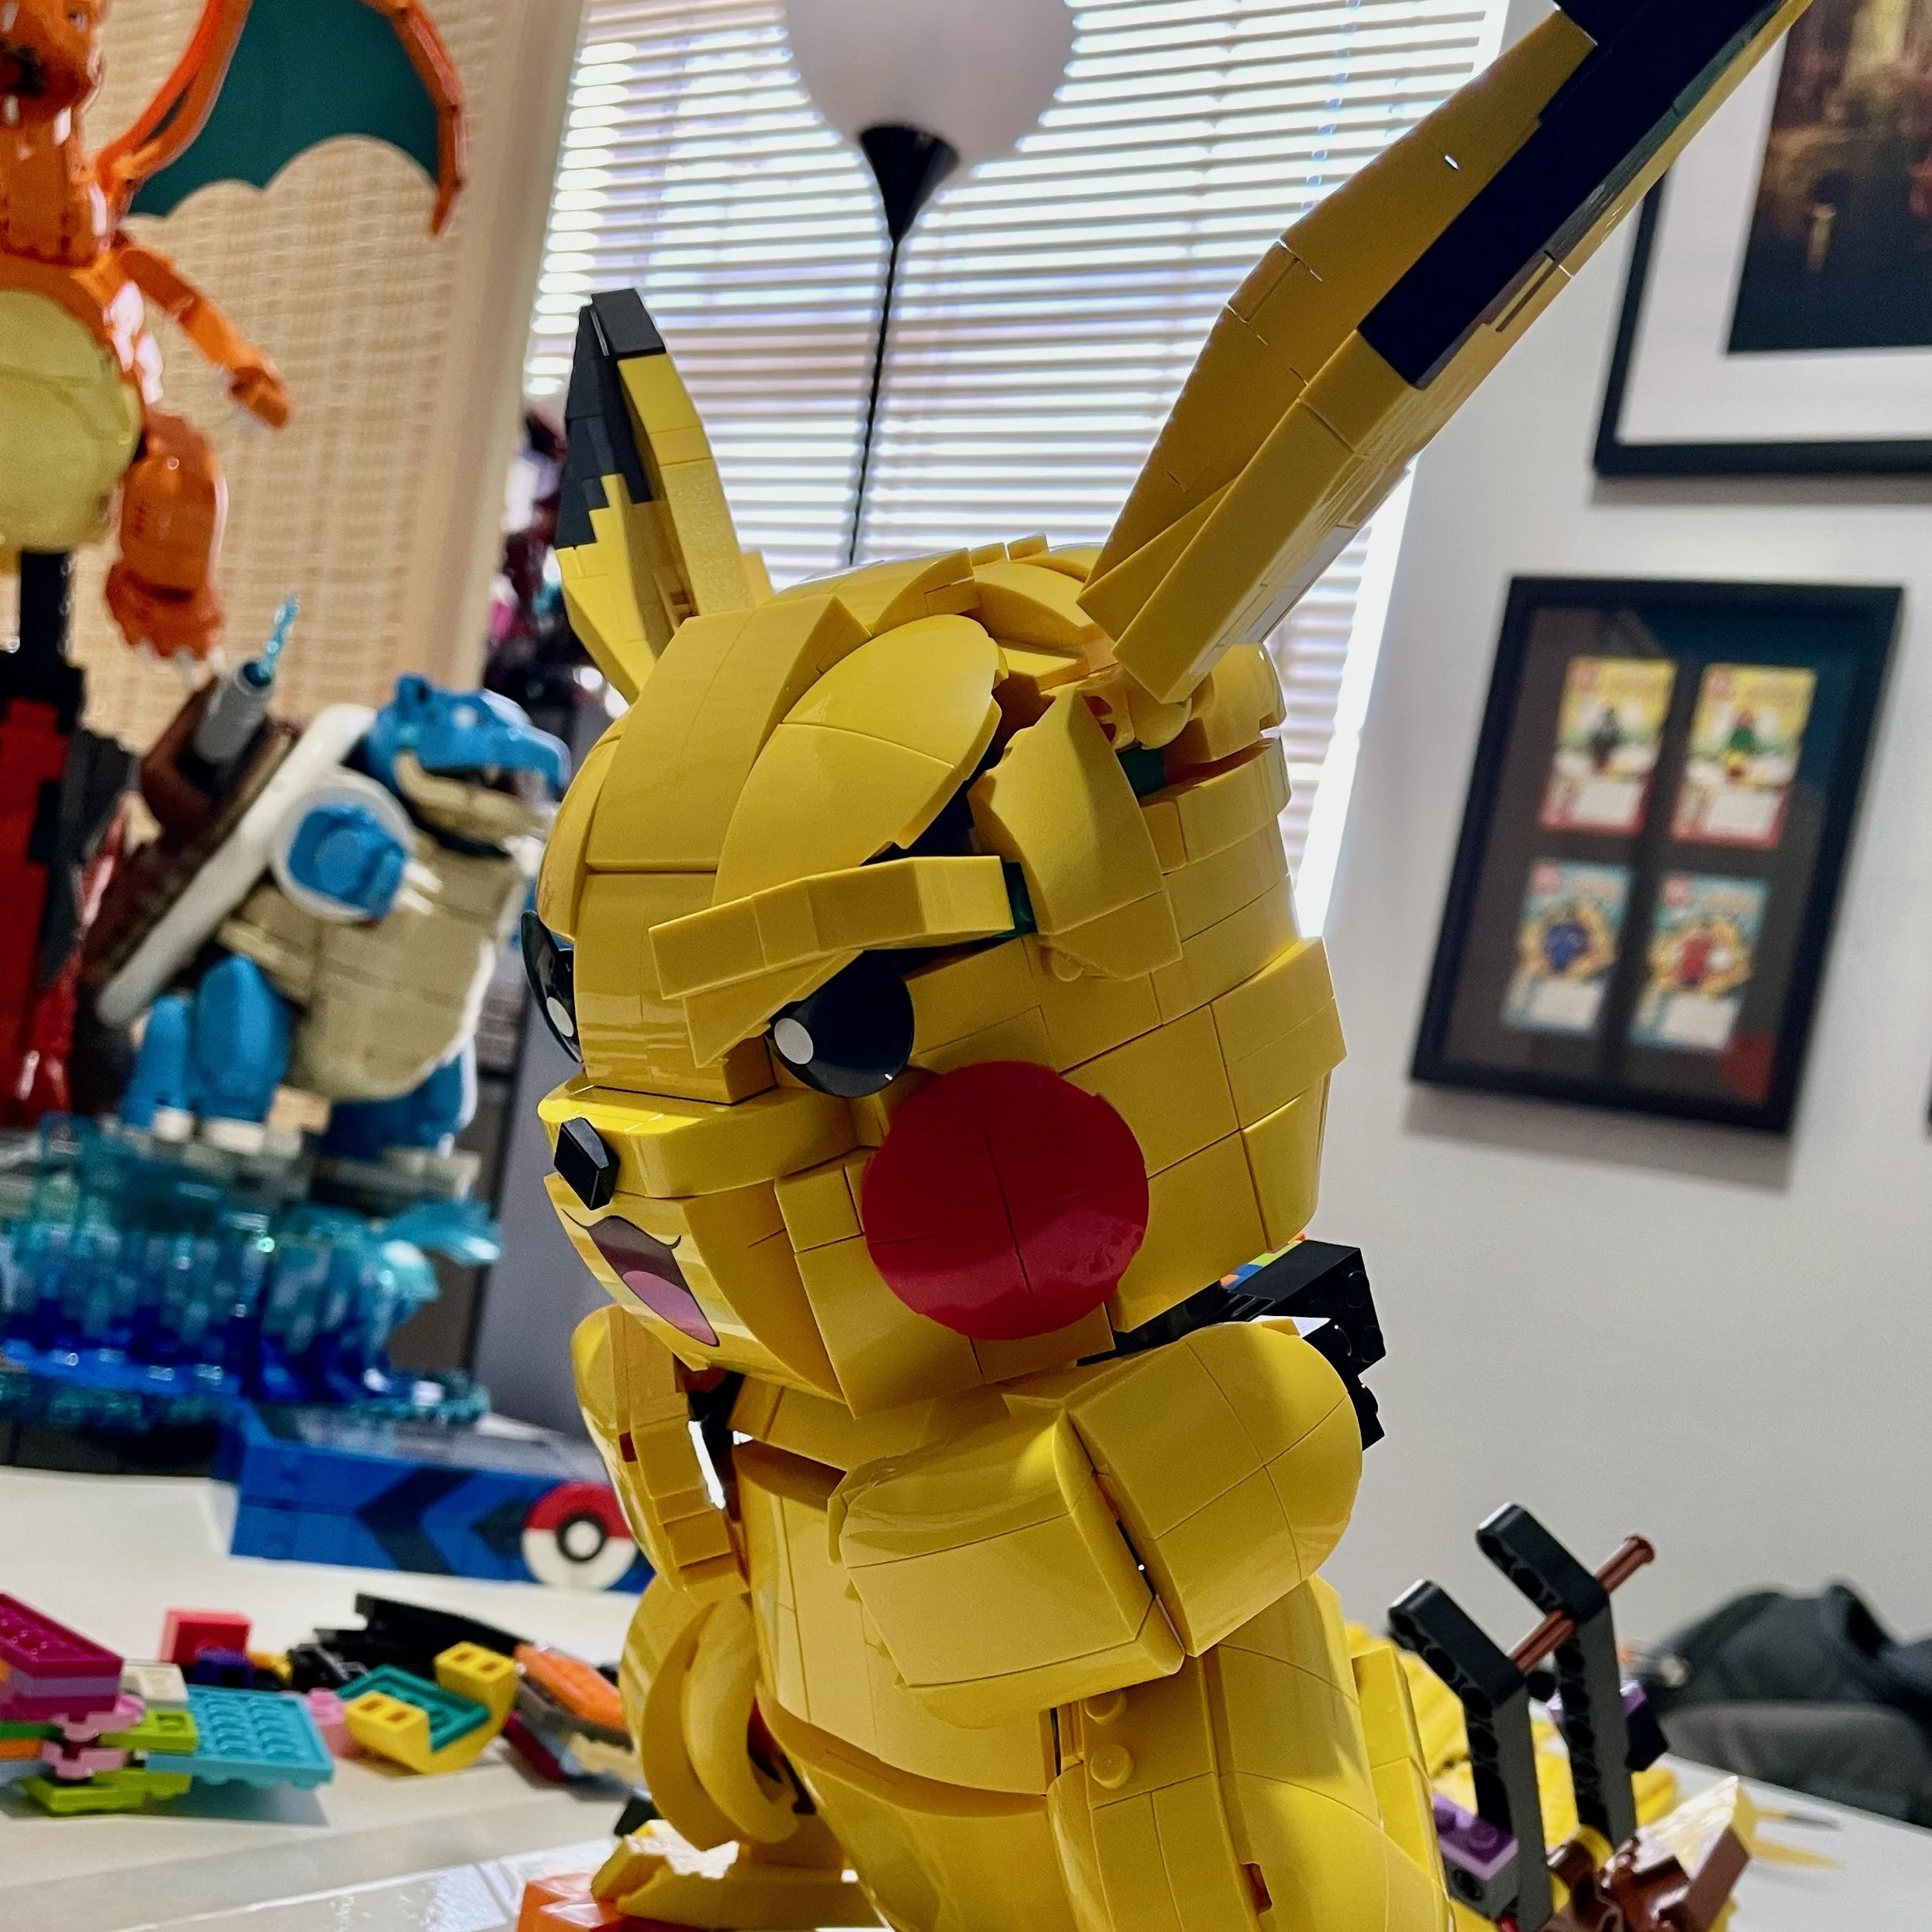
I used what I thought would be a temporary Technic structure to hold the body sections together, but it started to serve as a permanent frame as I added more to it. It is super janky, but it gets the job done. I expected to need a ton of SNOT bricks like the official set, but without flat and straight sides, that wasn’t necessary.
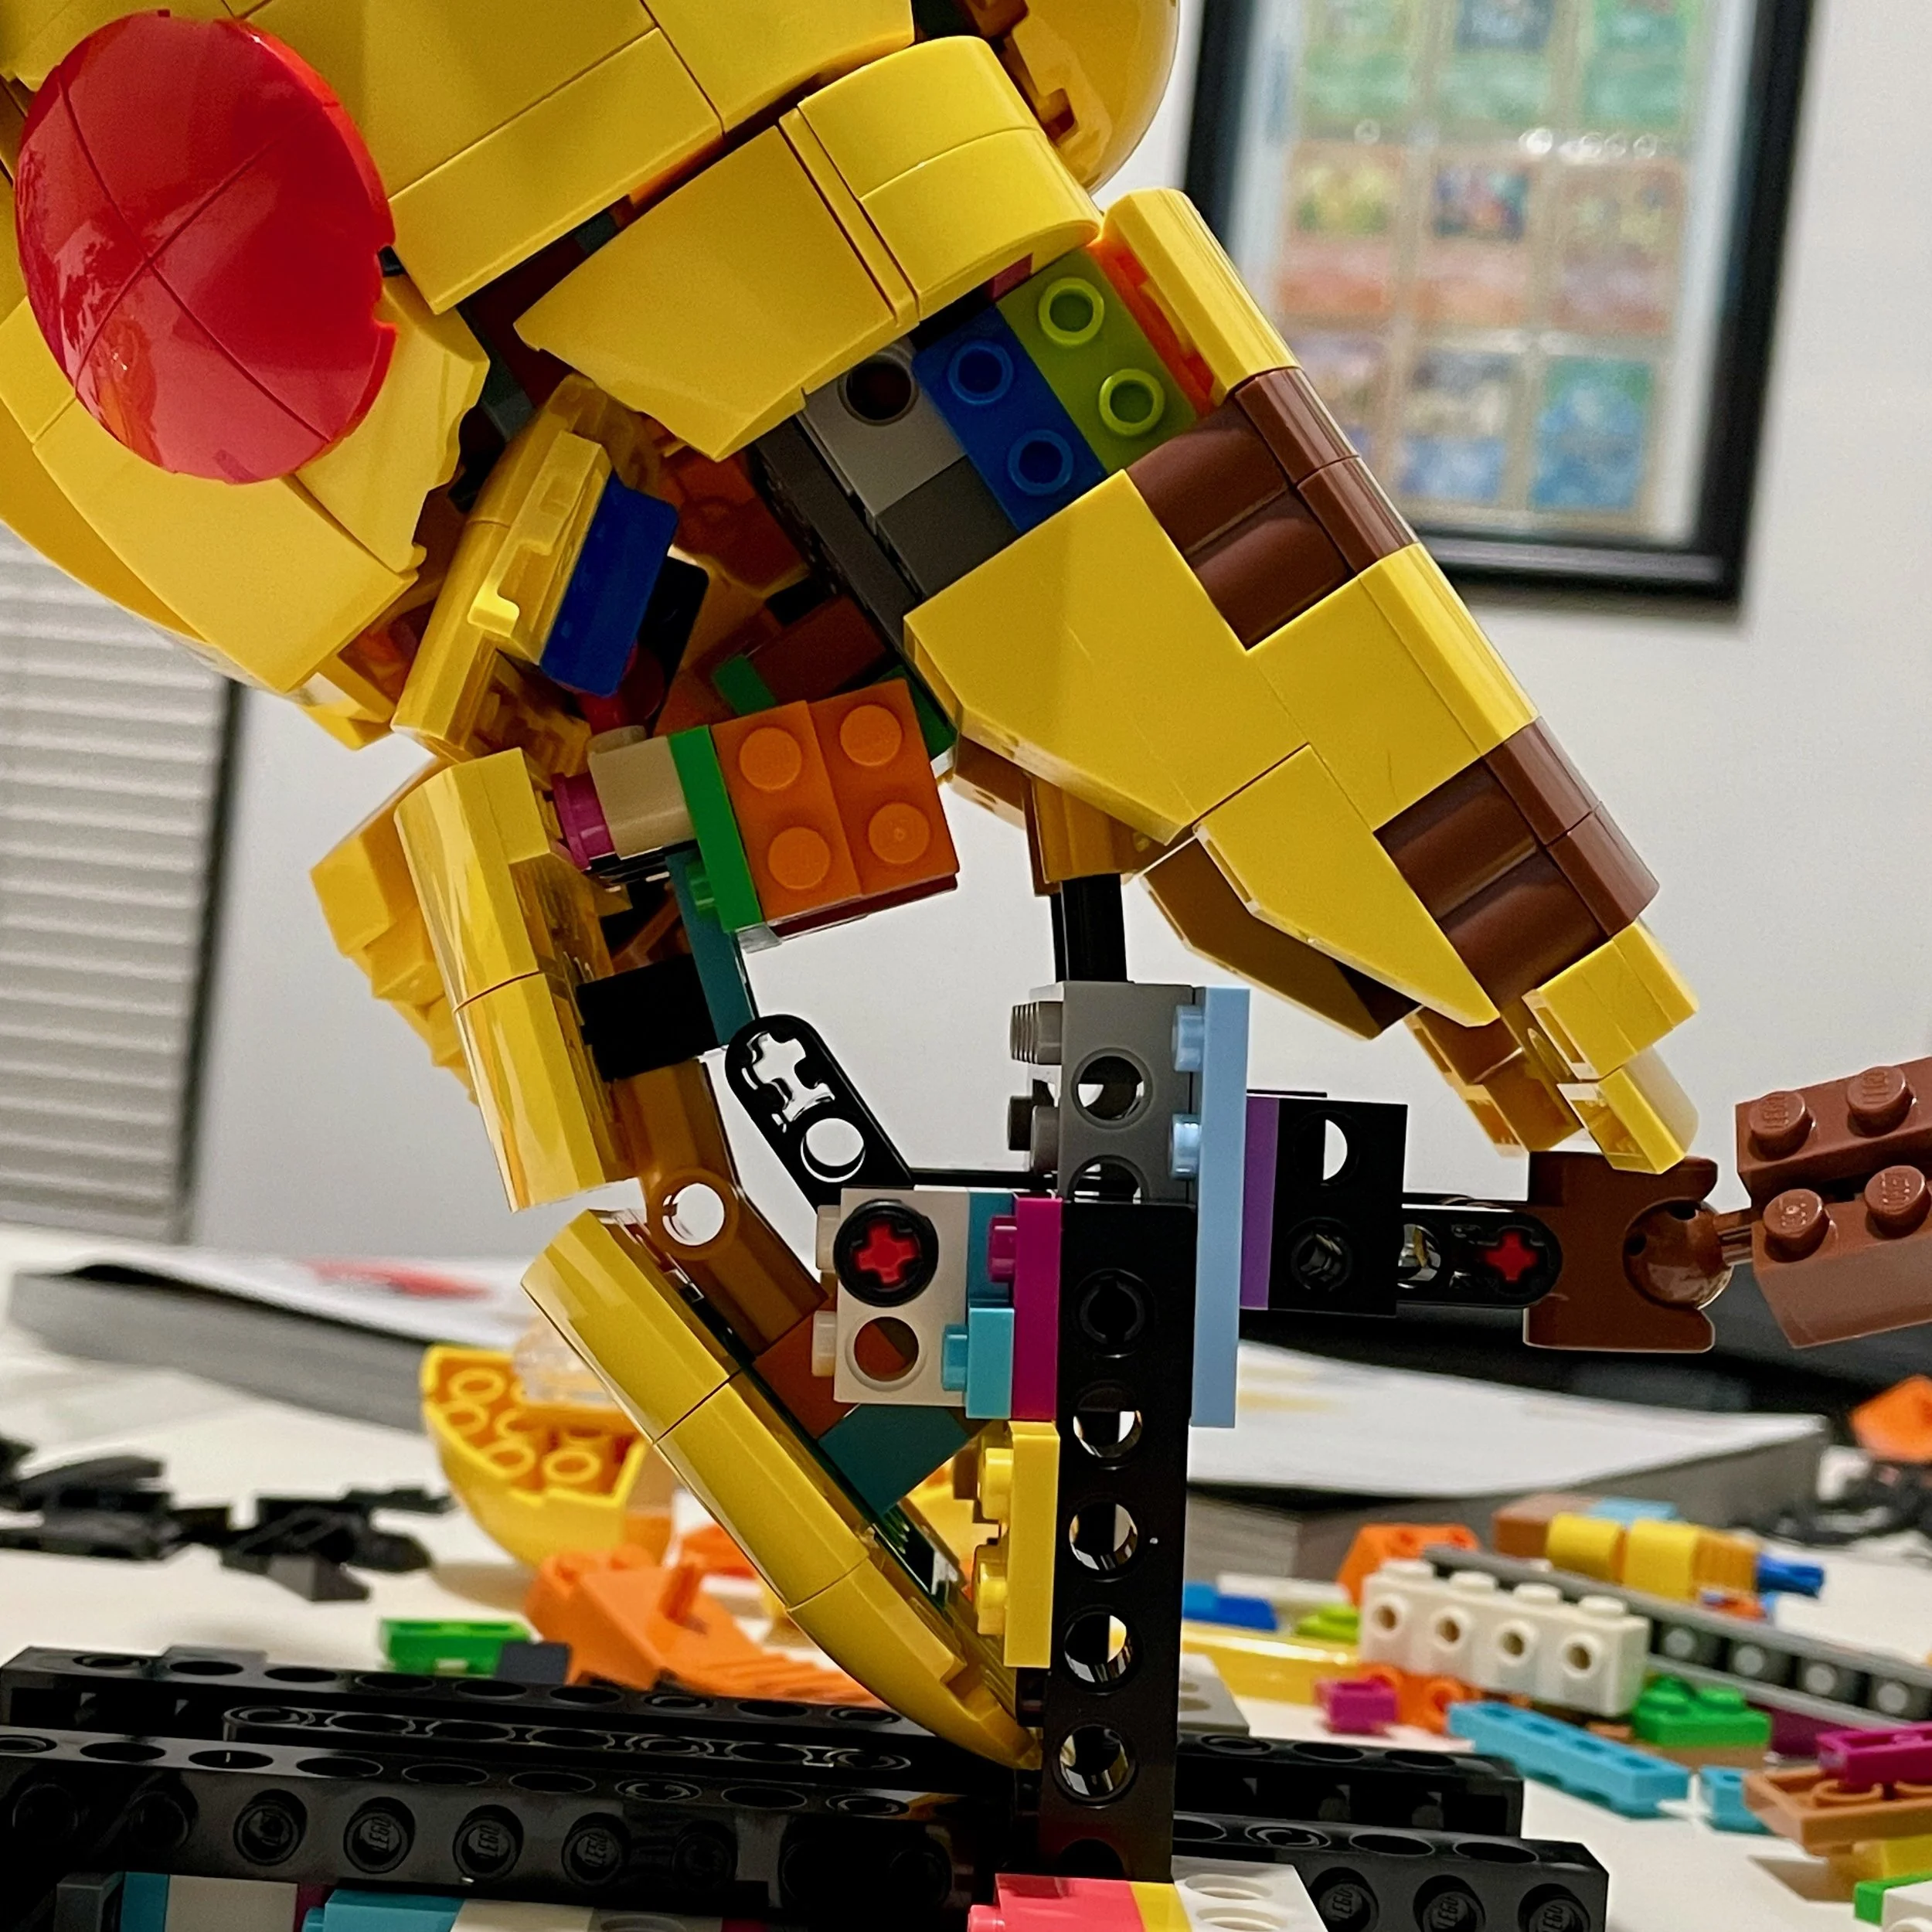
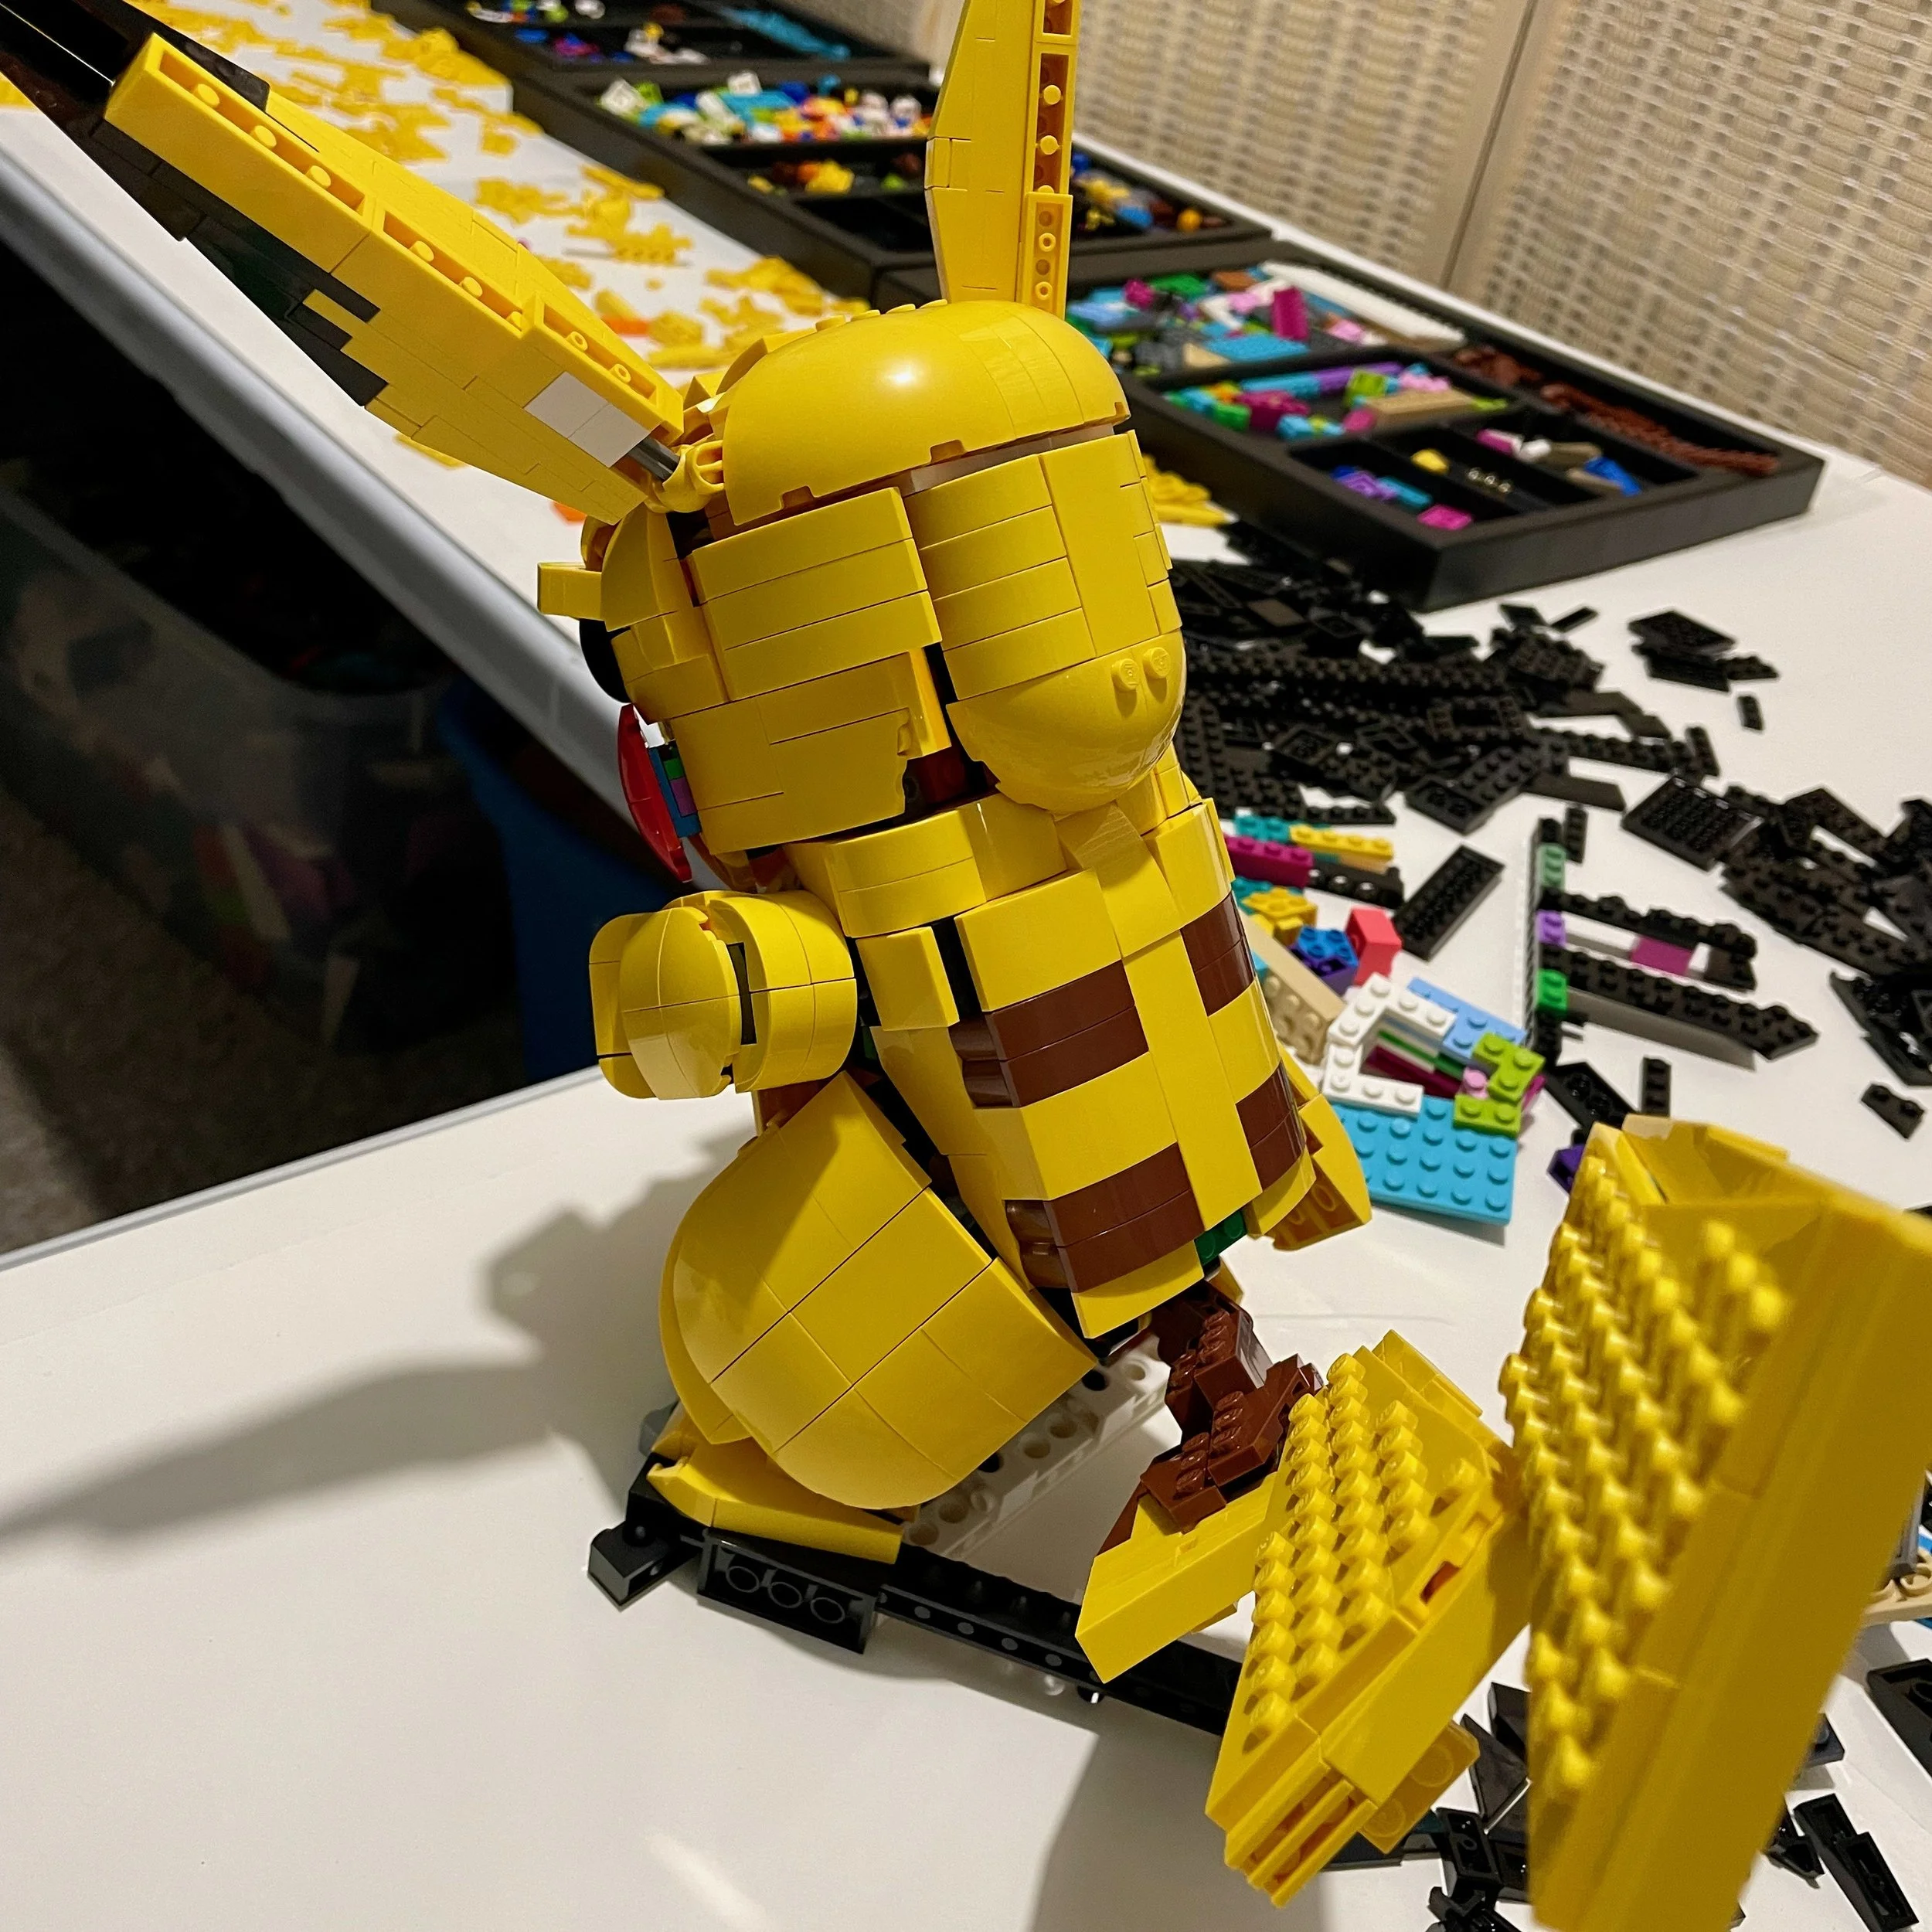
Most of the remaining yellow slopes were the new 1x4s without studs that are used in large quantities for the base of the official set. They don’t work particularly well for Pikachu’s body because they are so straight, so I used what I could from my dwindling supply of curved slopes. I even had to tattoo the flag of a fictional country onto Pikachu’s lower back because there wasn’t a single brown plate I could use to connect the brown sections!
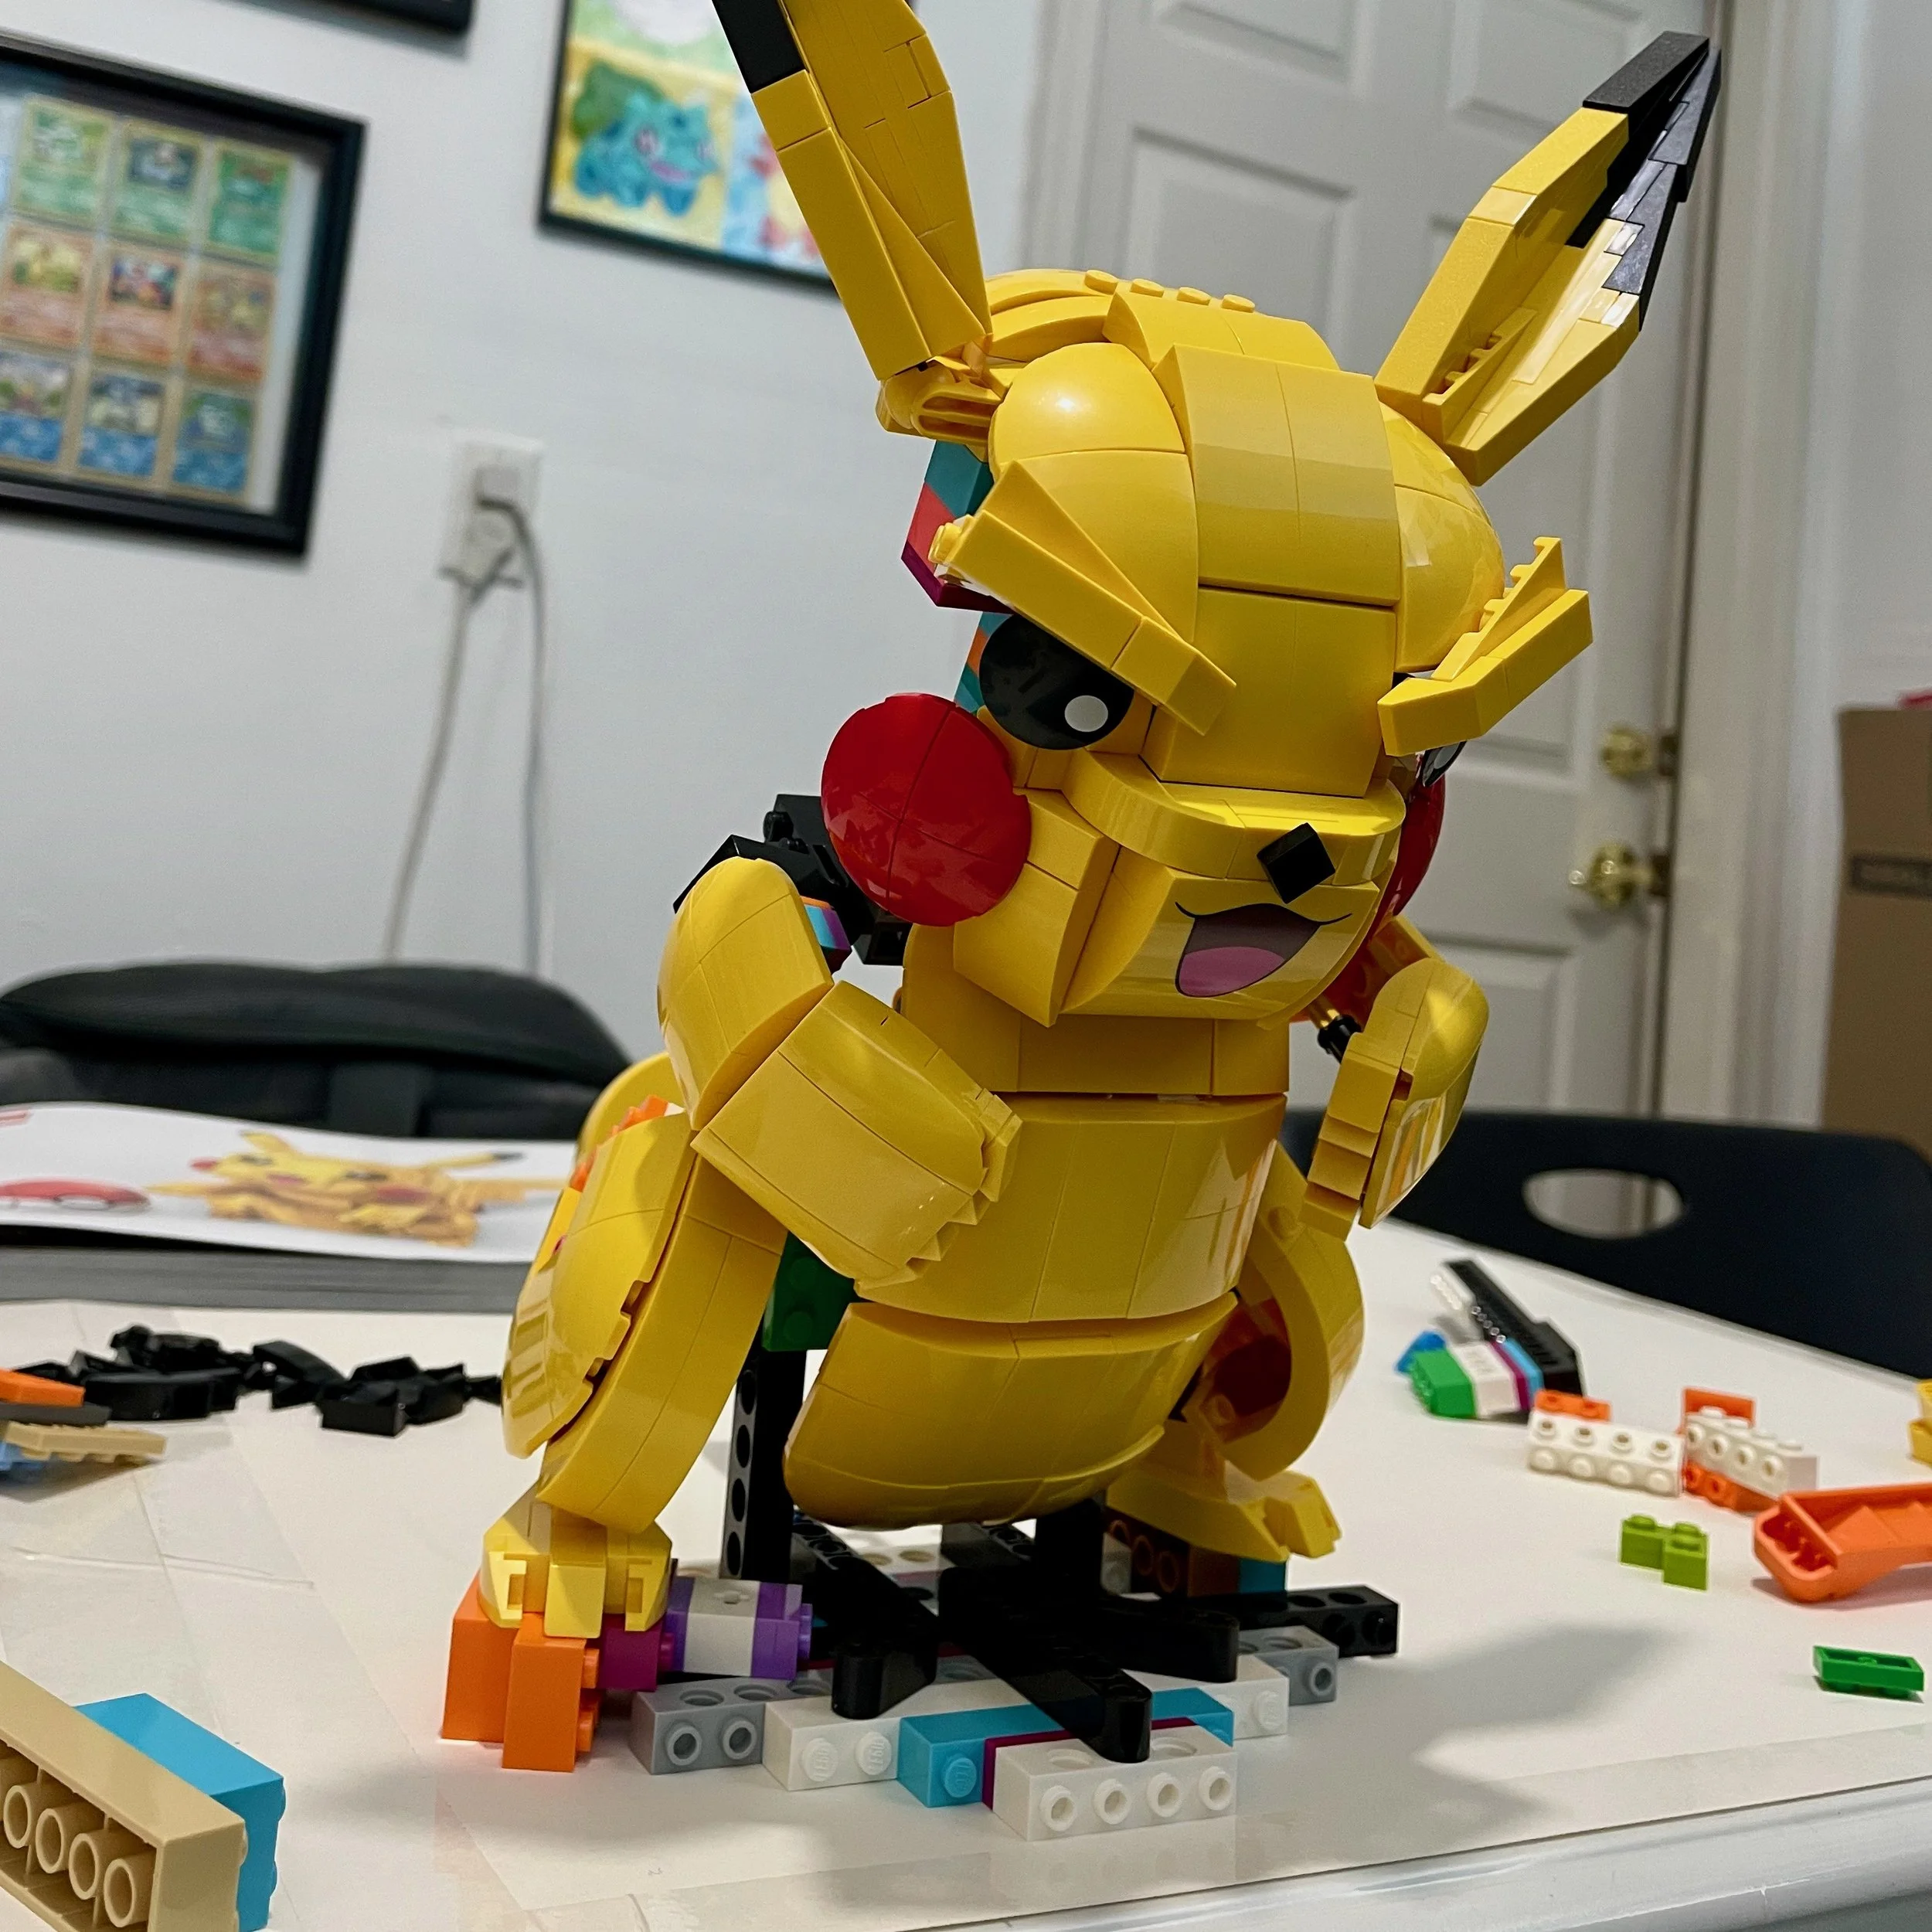
After a few touch-ups, the body was done! Pikachu had the tough look I wanted and was mostly complete. Of course, not every section was perfect, and I didn’t achieve the dynamic pose I wanted from the start, but I was pretty satisfied overall.
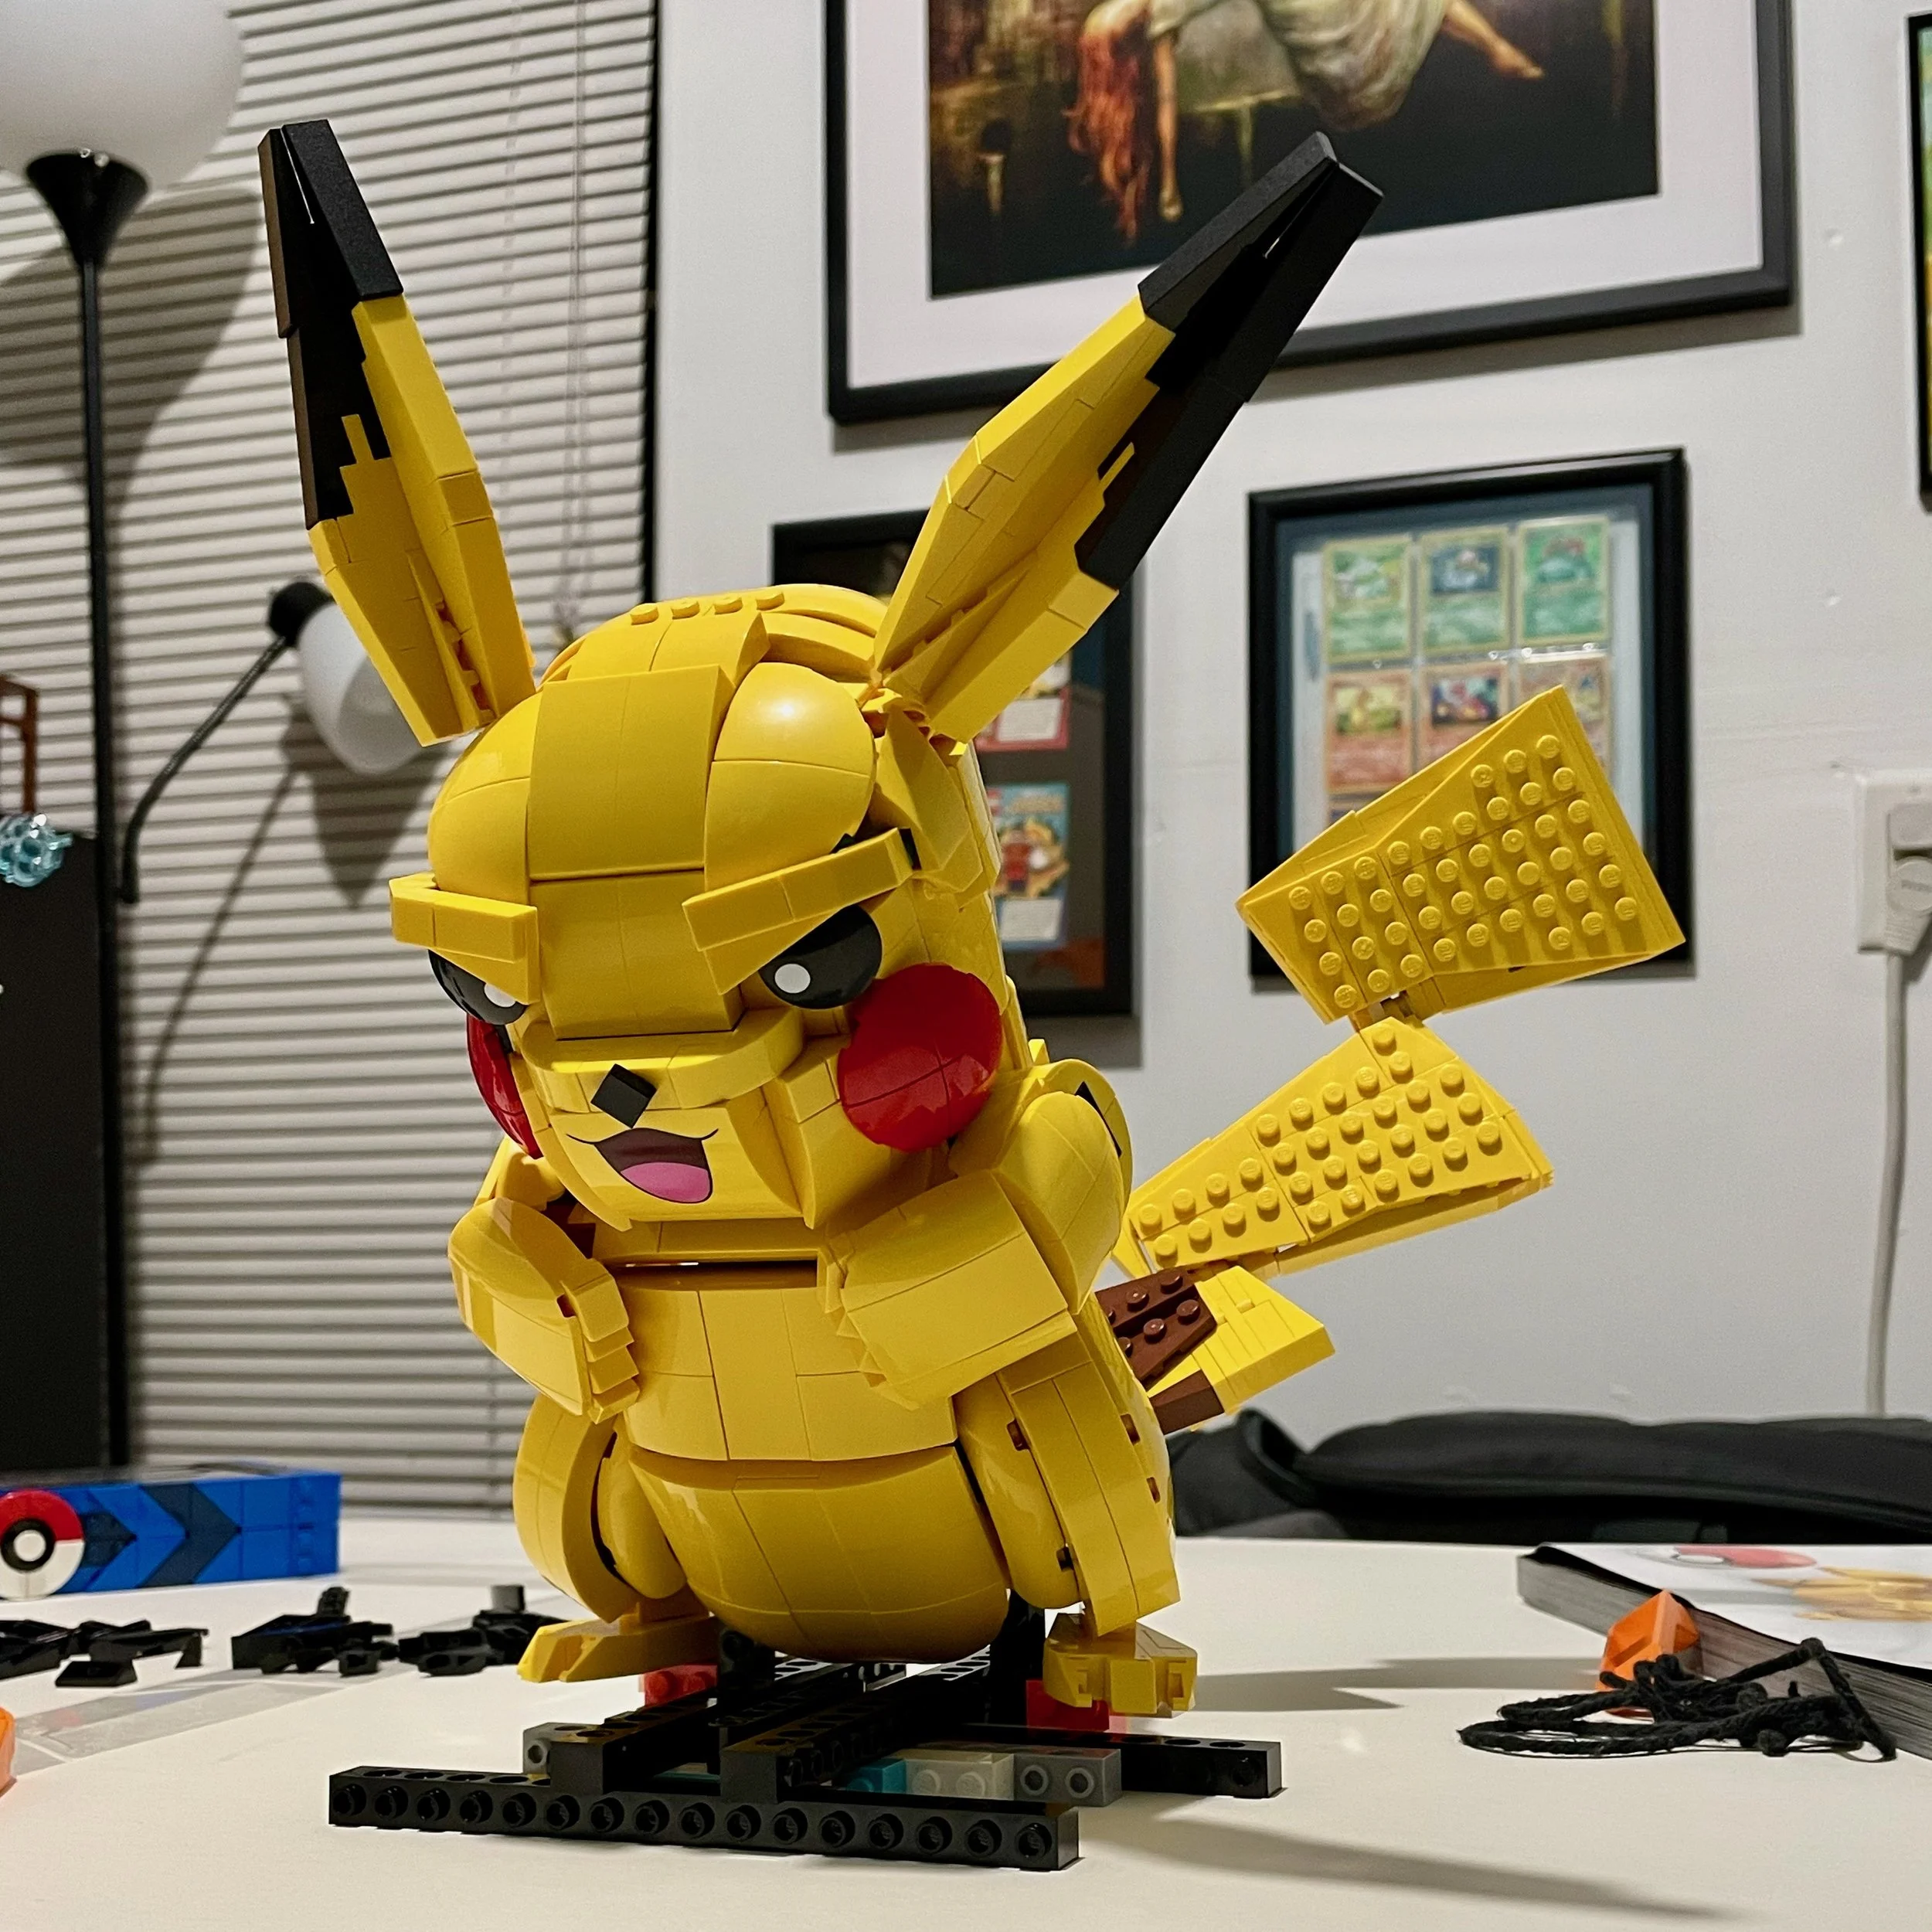
Bringing the Lightning
The last part was to use all of the black parts from the base that I had been saving to create something a bit more electric. I wanted to angle the wedge plates up as if Pikachu was tearing up the floor with an attack. This, of course, meant more angling with SNOT bricks.
Each piece of the floor was suspended by a single stud. Every time I exhaled, a bunch of parts went flying off into the wind.
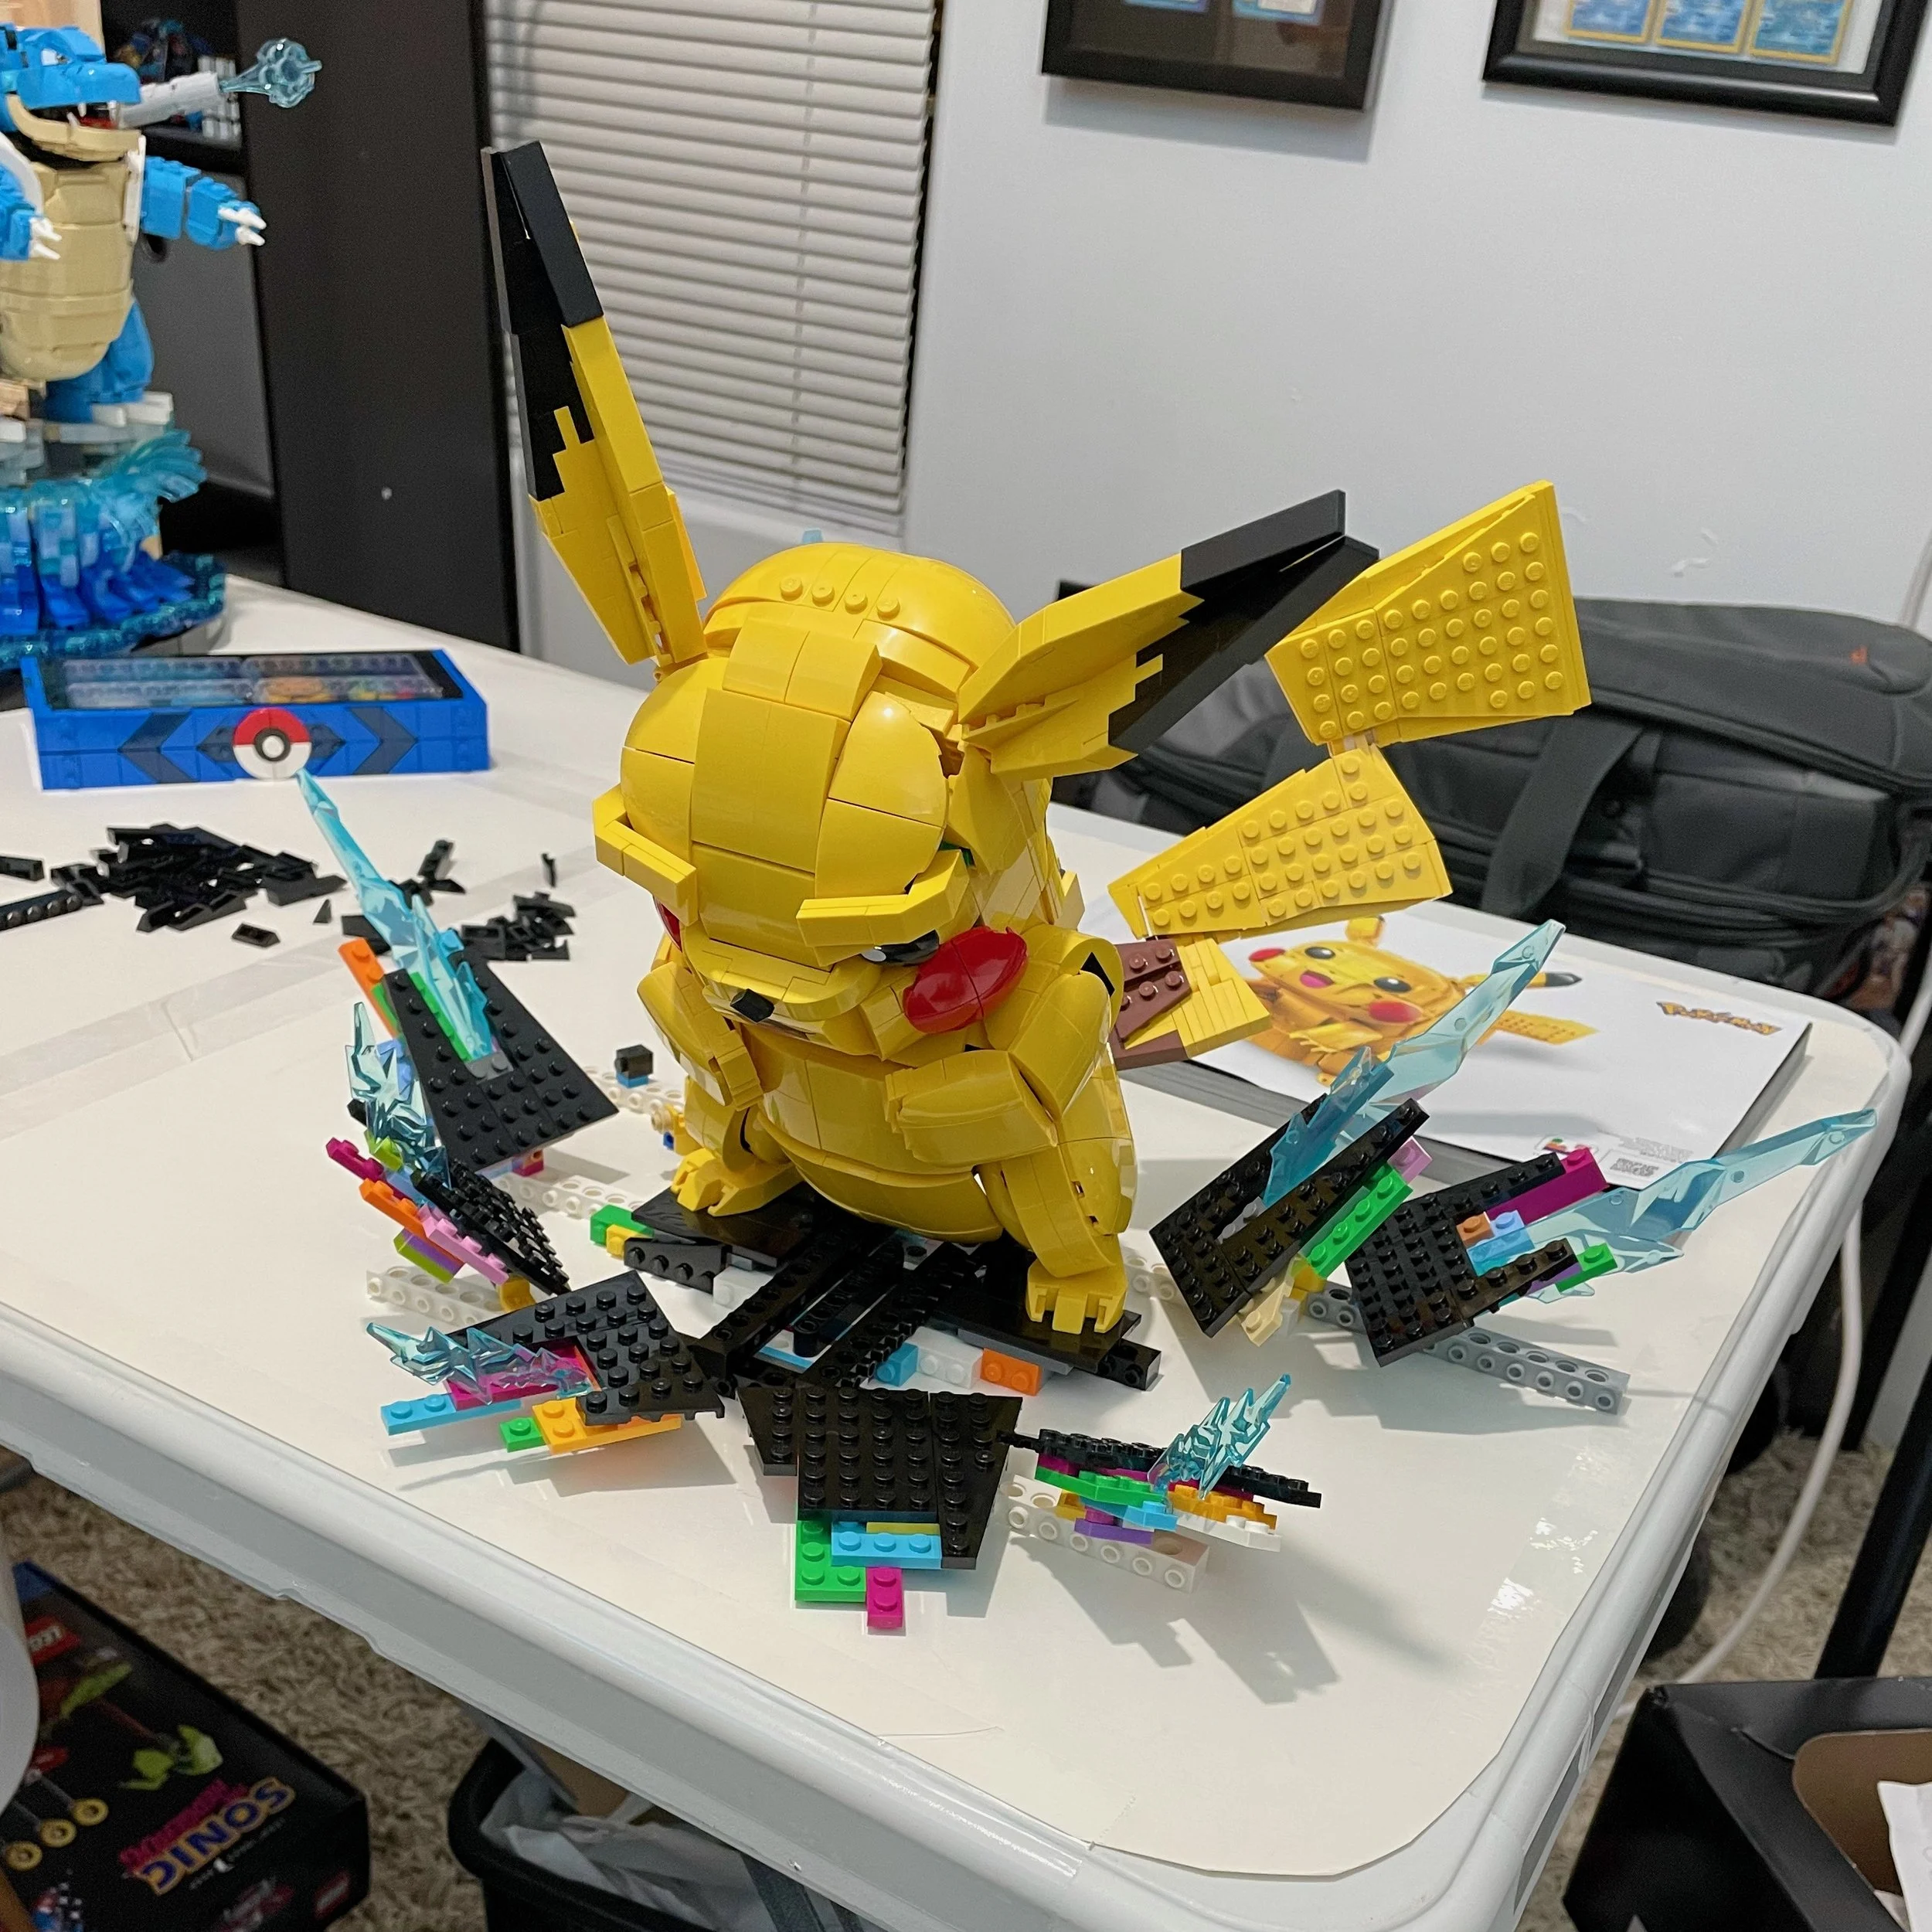
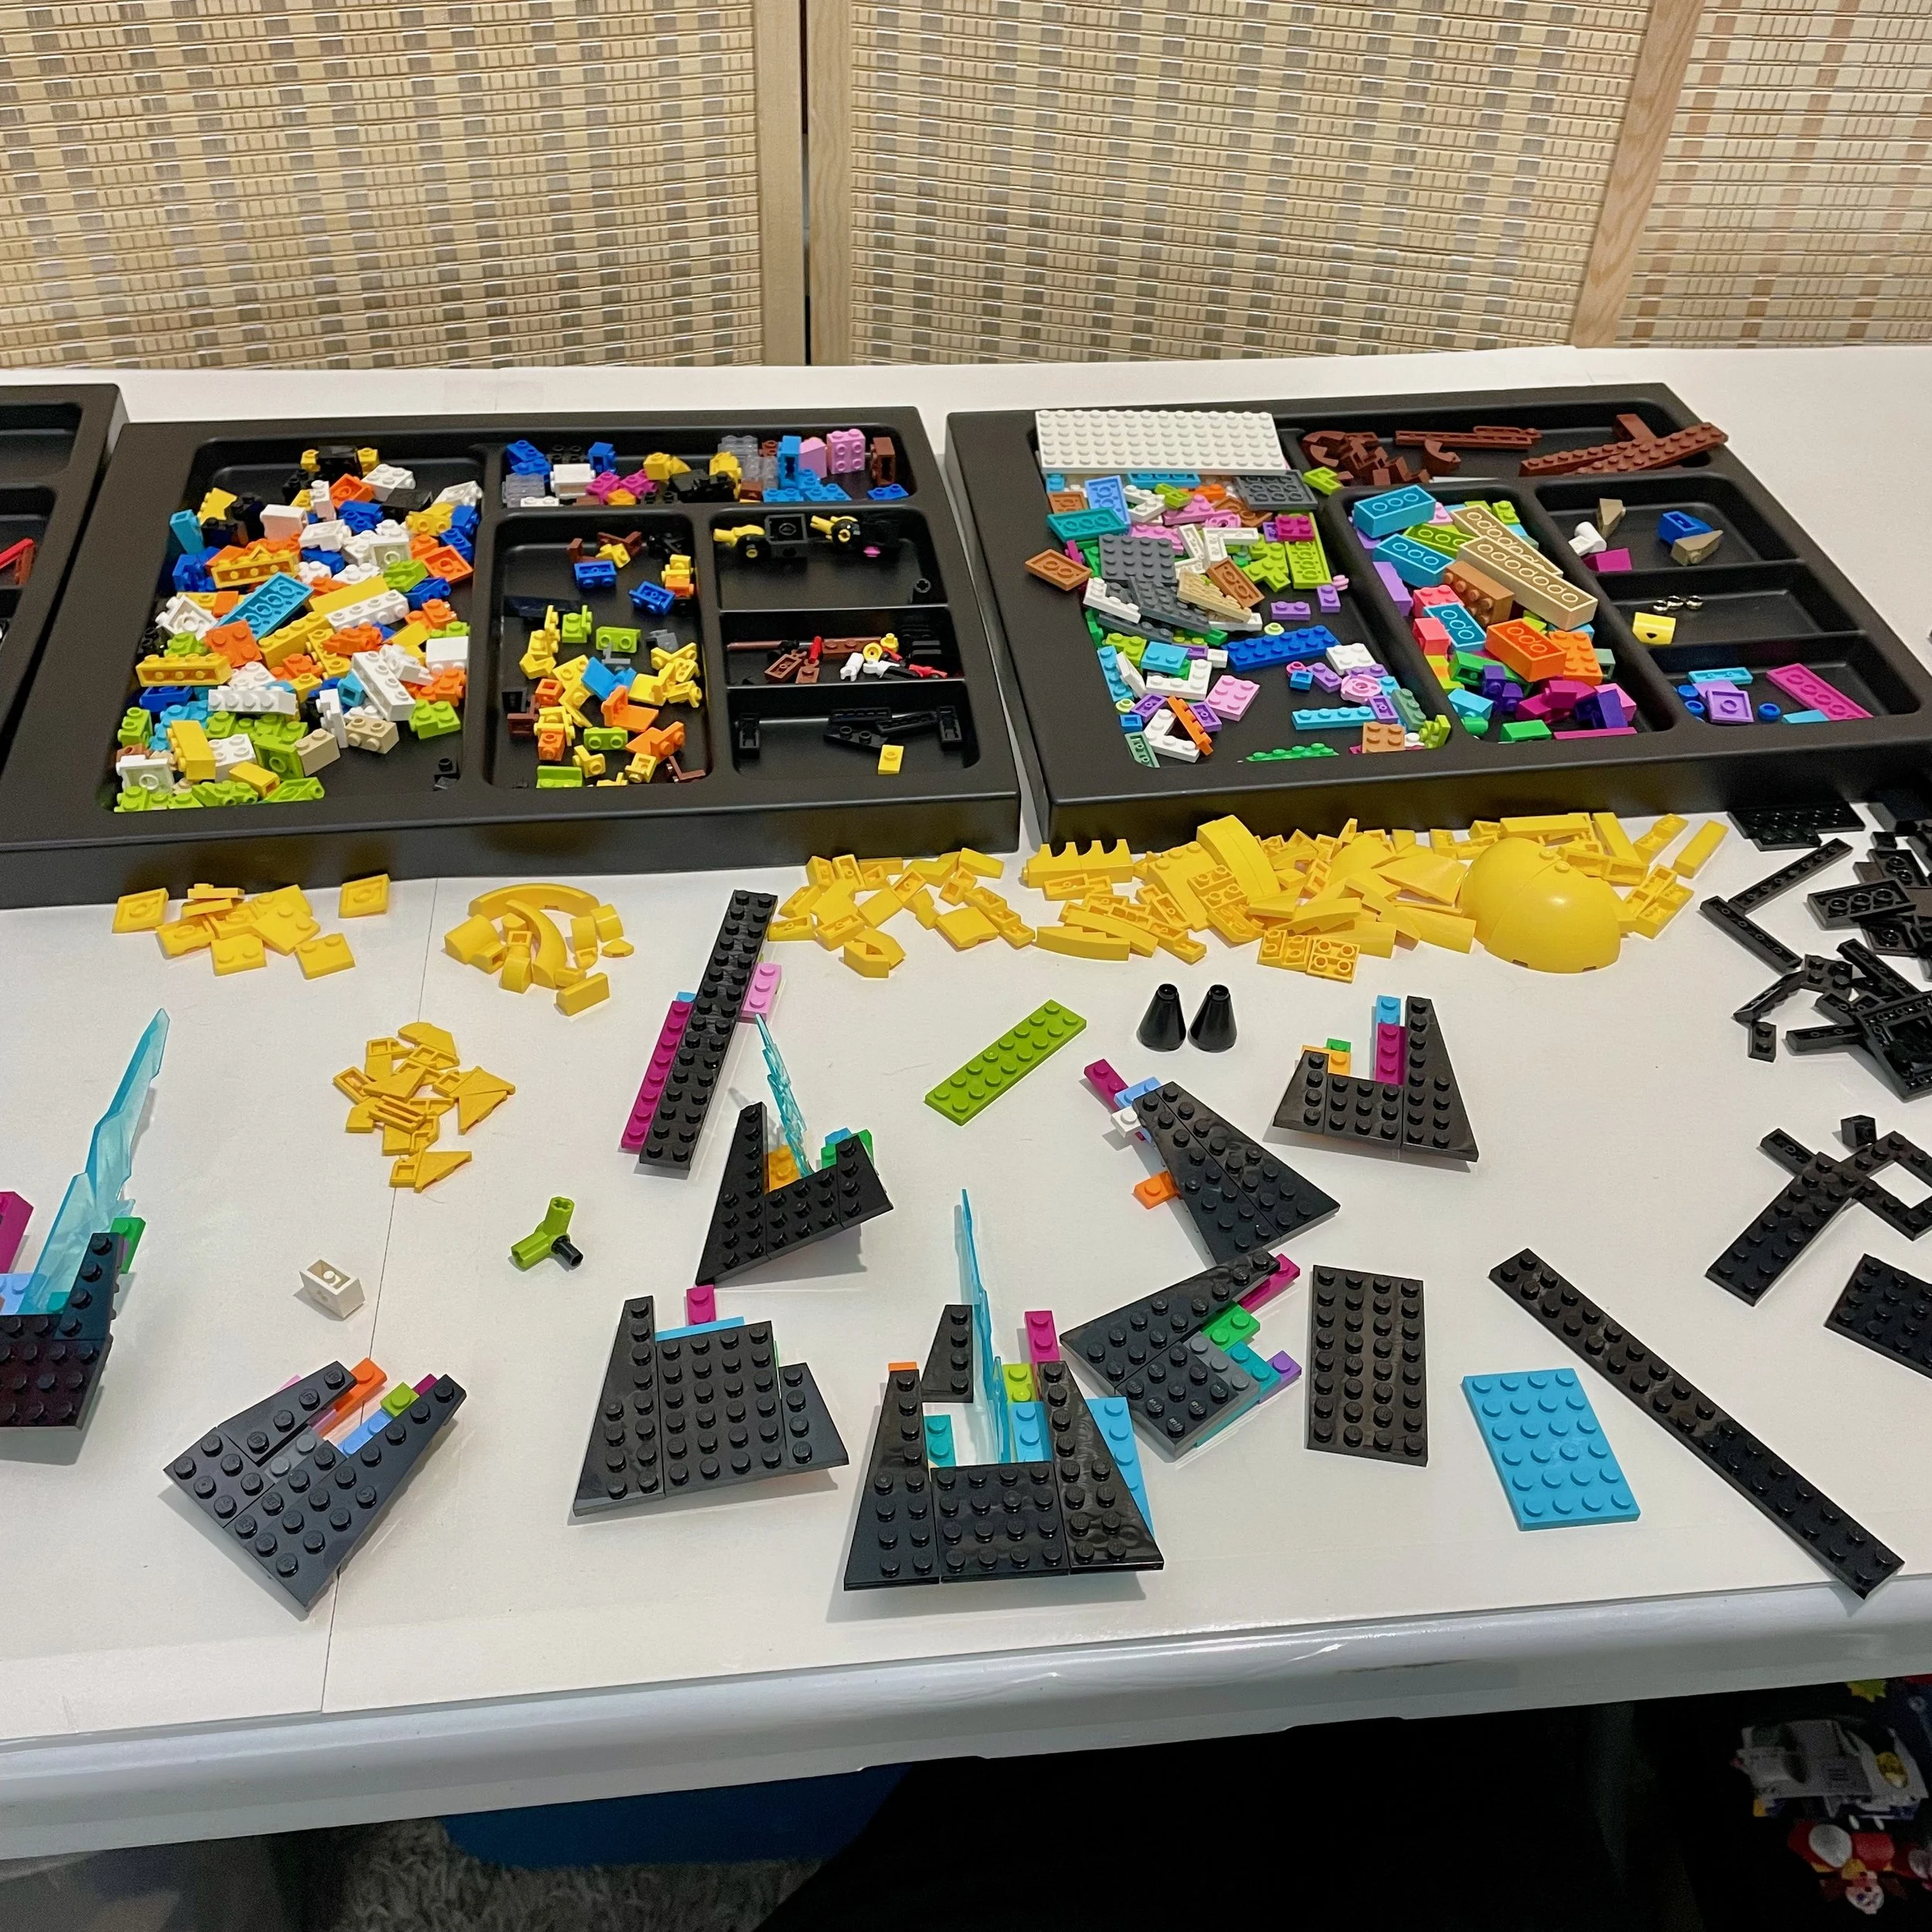
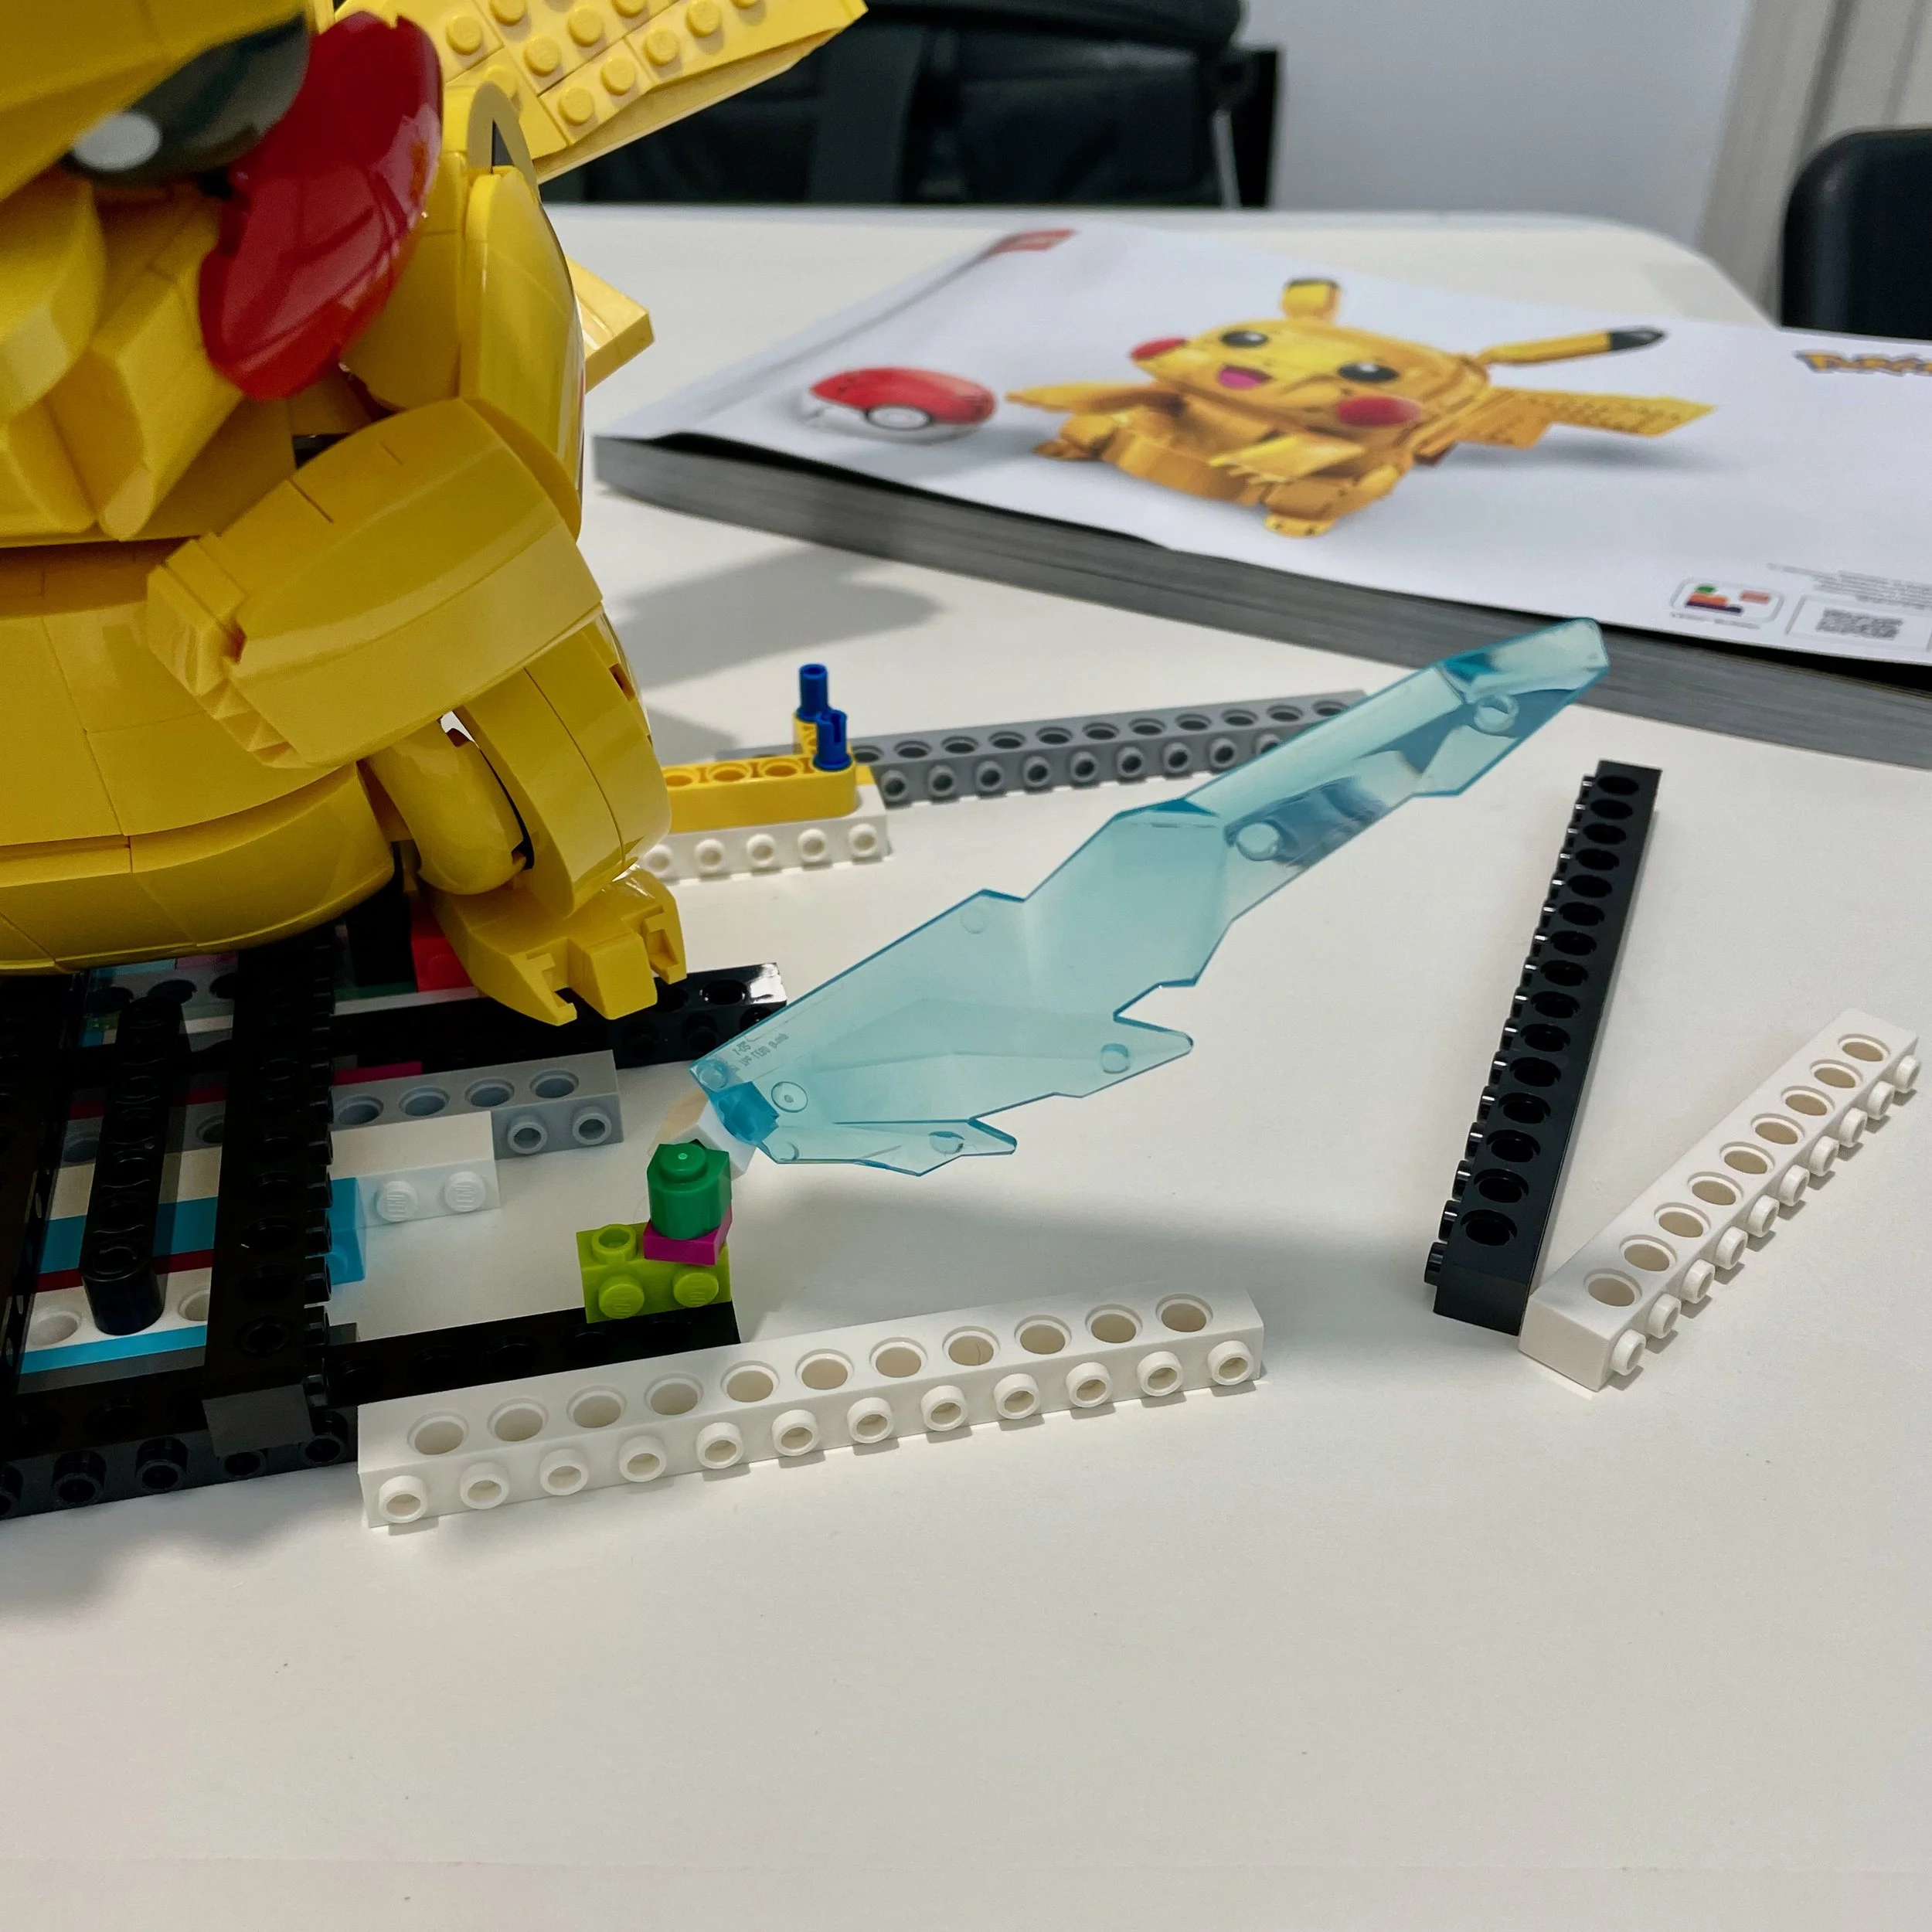
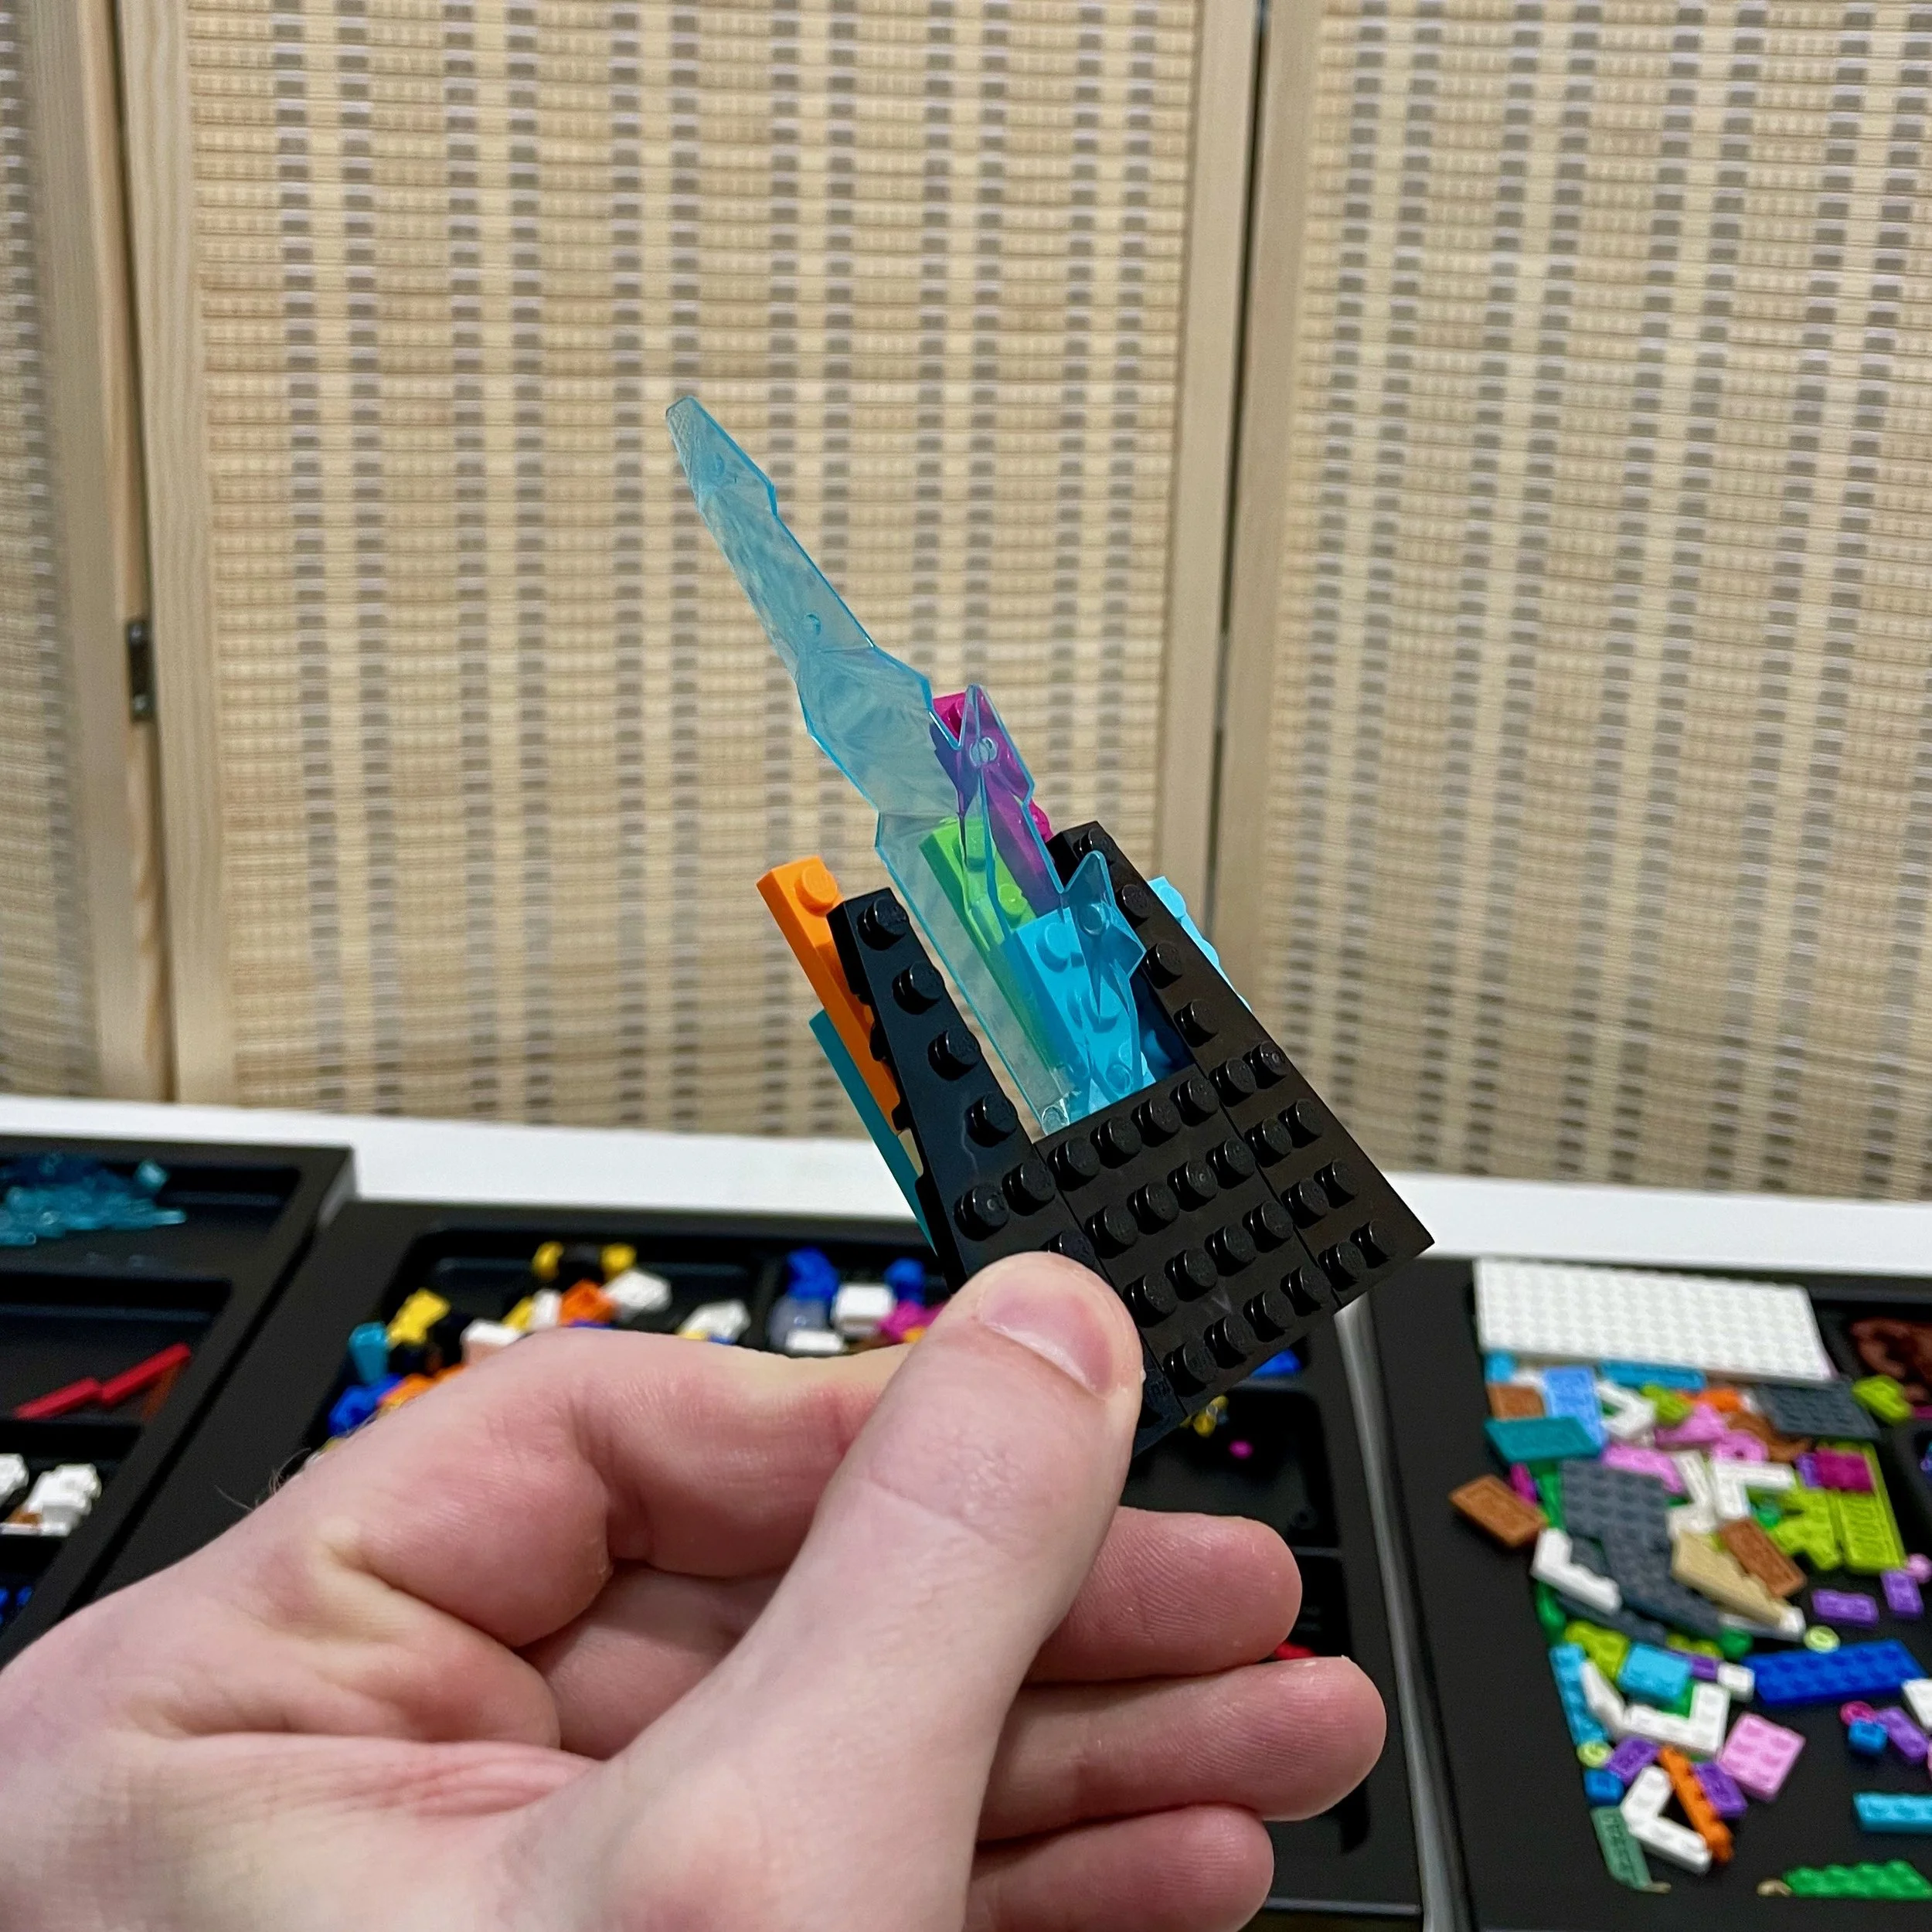
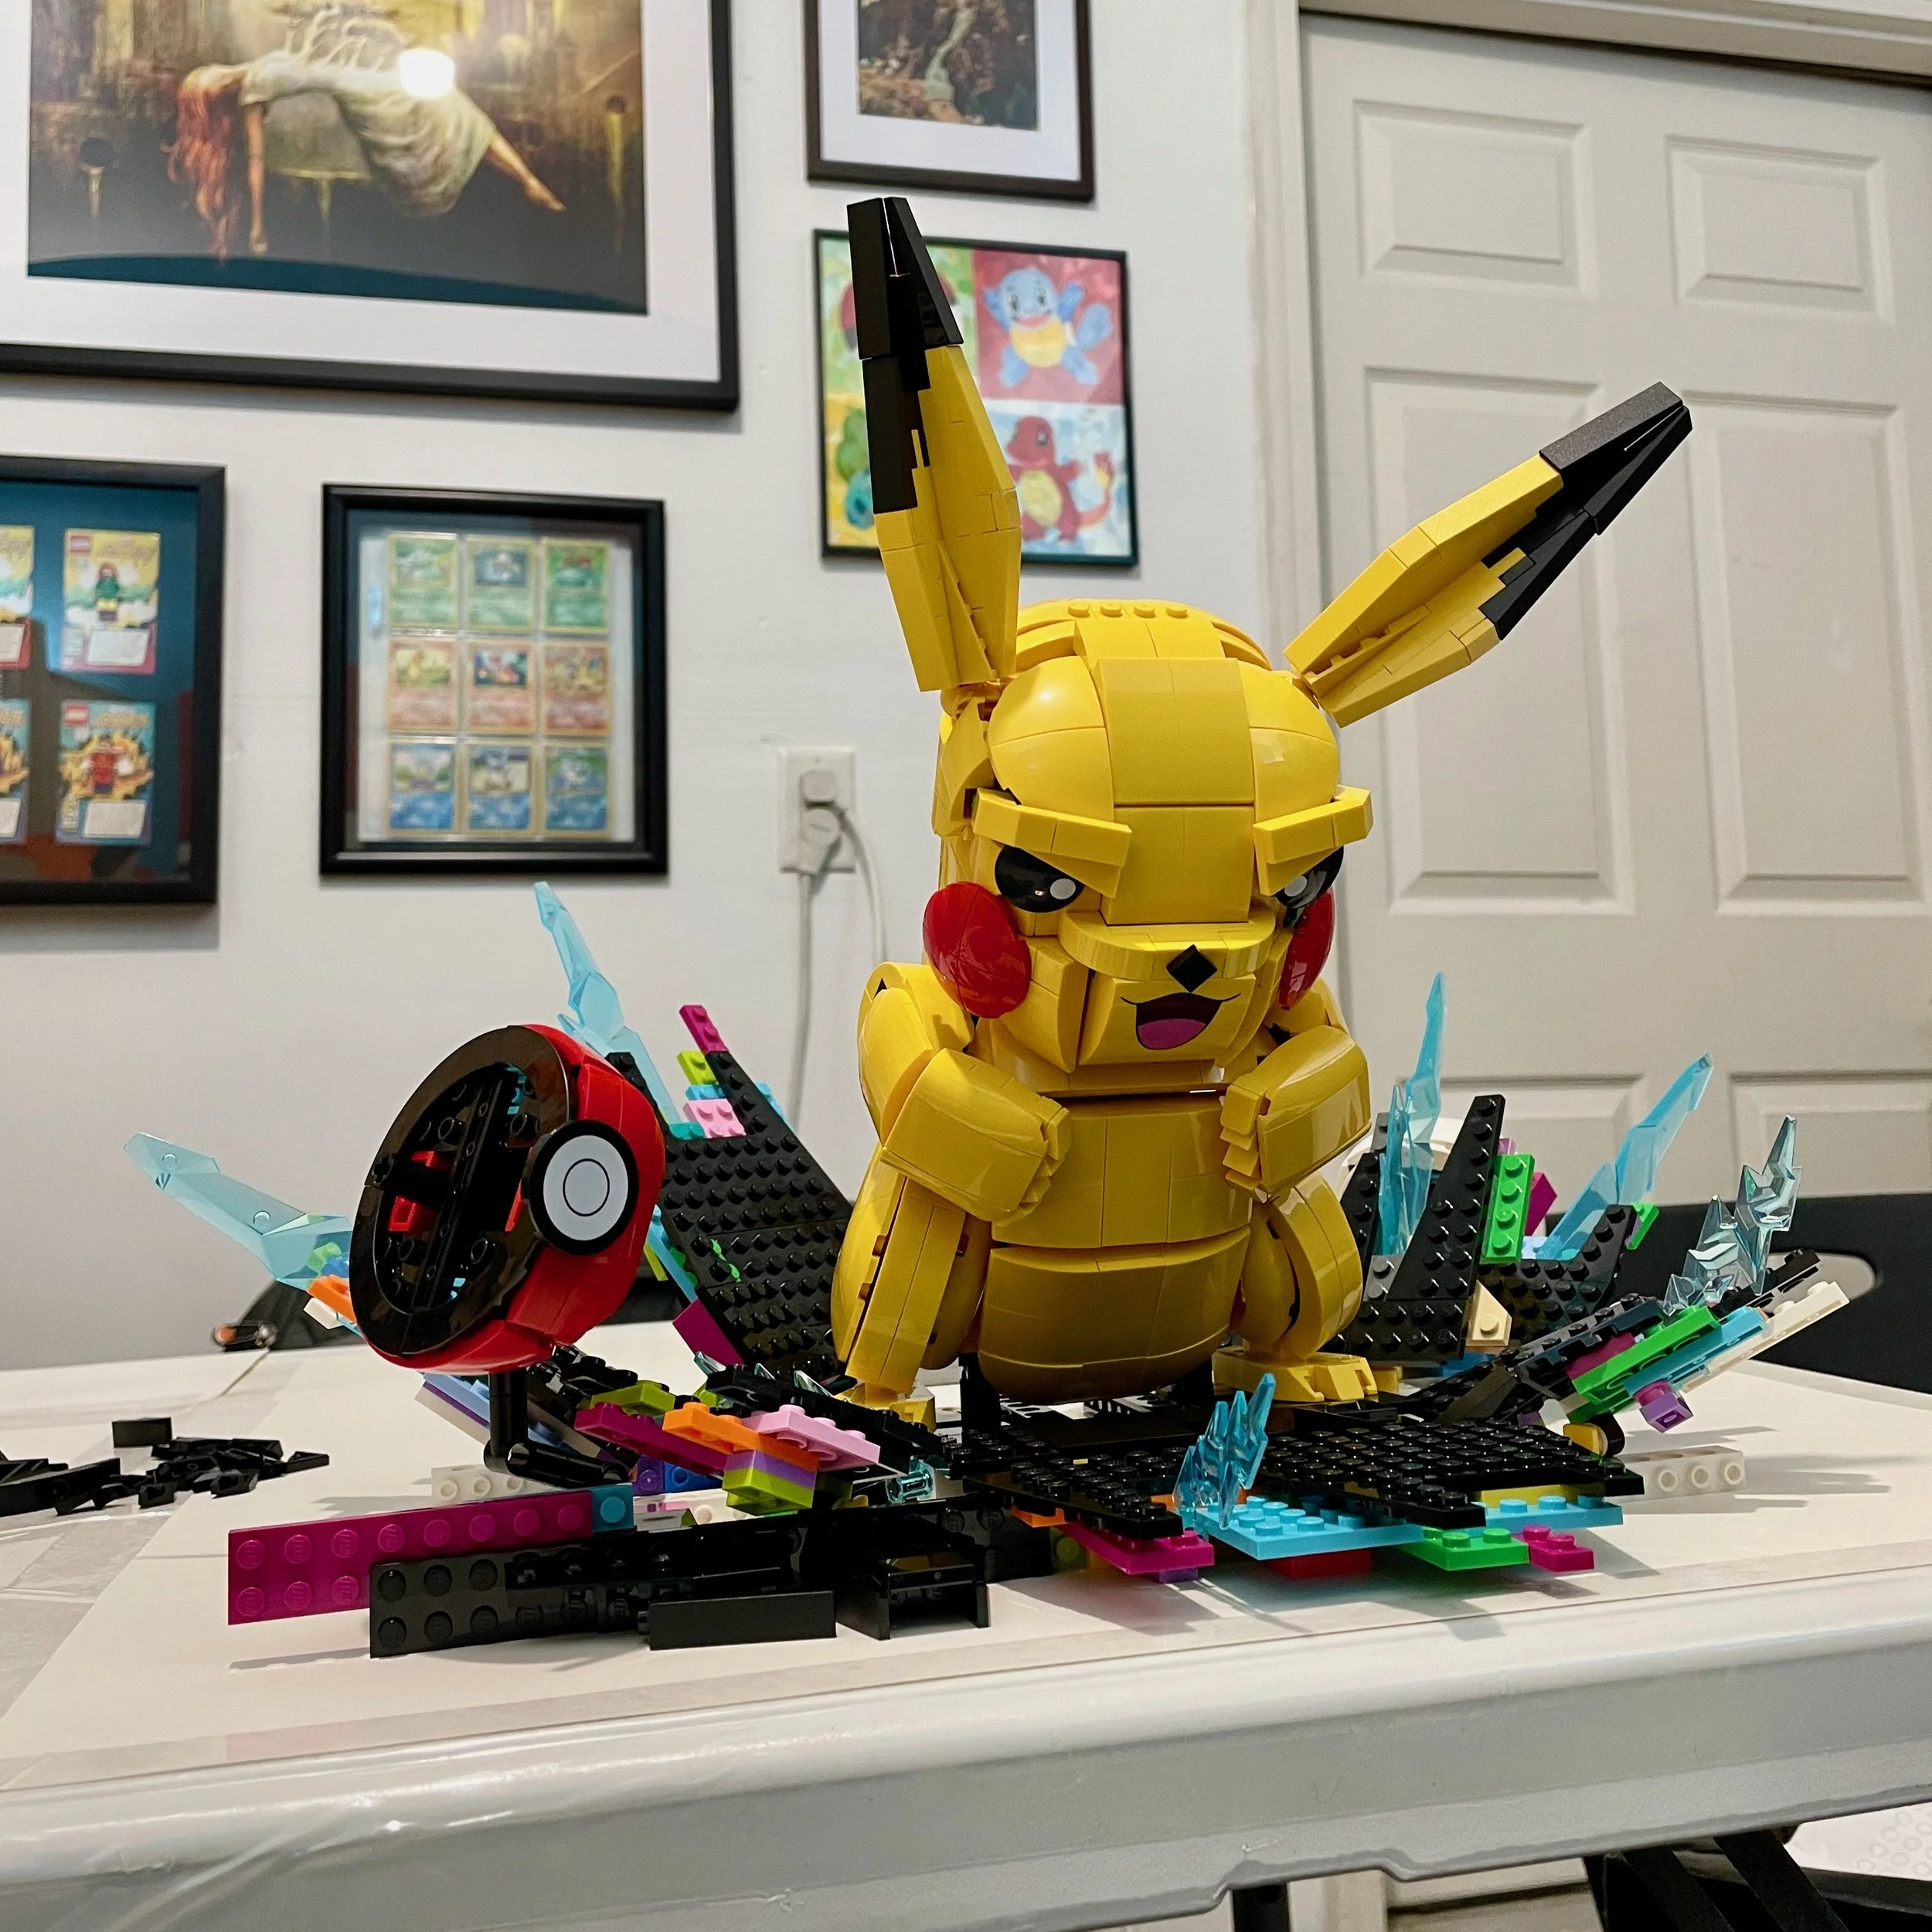
There were a lot of colorful bricks and plates left, so I thought of having chaotic static plates emerge from underneath the black ones. I was really excited by the idea and built out most of the floor sections with this coloring.
Breaking the Poké Ball
I wanted the Poké Ball ripped in half from the get-go. I actually resented it once the set was built!
First of all, Pikachu famously refuses to go inside its Poké Ball in both the anime and Pokémon Yellow, so the ball would have probably been a better inclusion in the Eevee set. Second, the ball doesn’t even open! Of all the hinges LEGO has produced, the designers couldn’t make the ball actually open and close. You have to literally take it apart and switch the straight Technic connector for an angled one to display it in an open position.
That’s all Poké Balls do: they open and close. A functioning Poké Ball isn’t really that important, so maybe I’m just upset over the principle of the designers overlooking that feature. I hate this Poké Ball as much as Pikachu does!
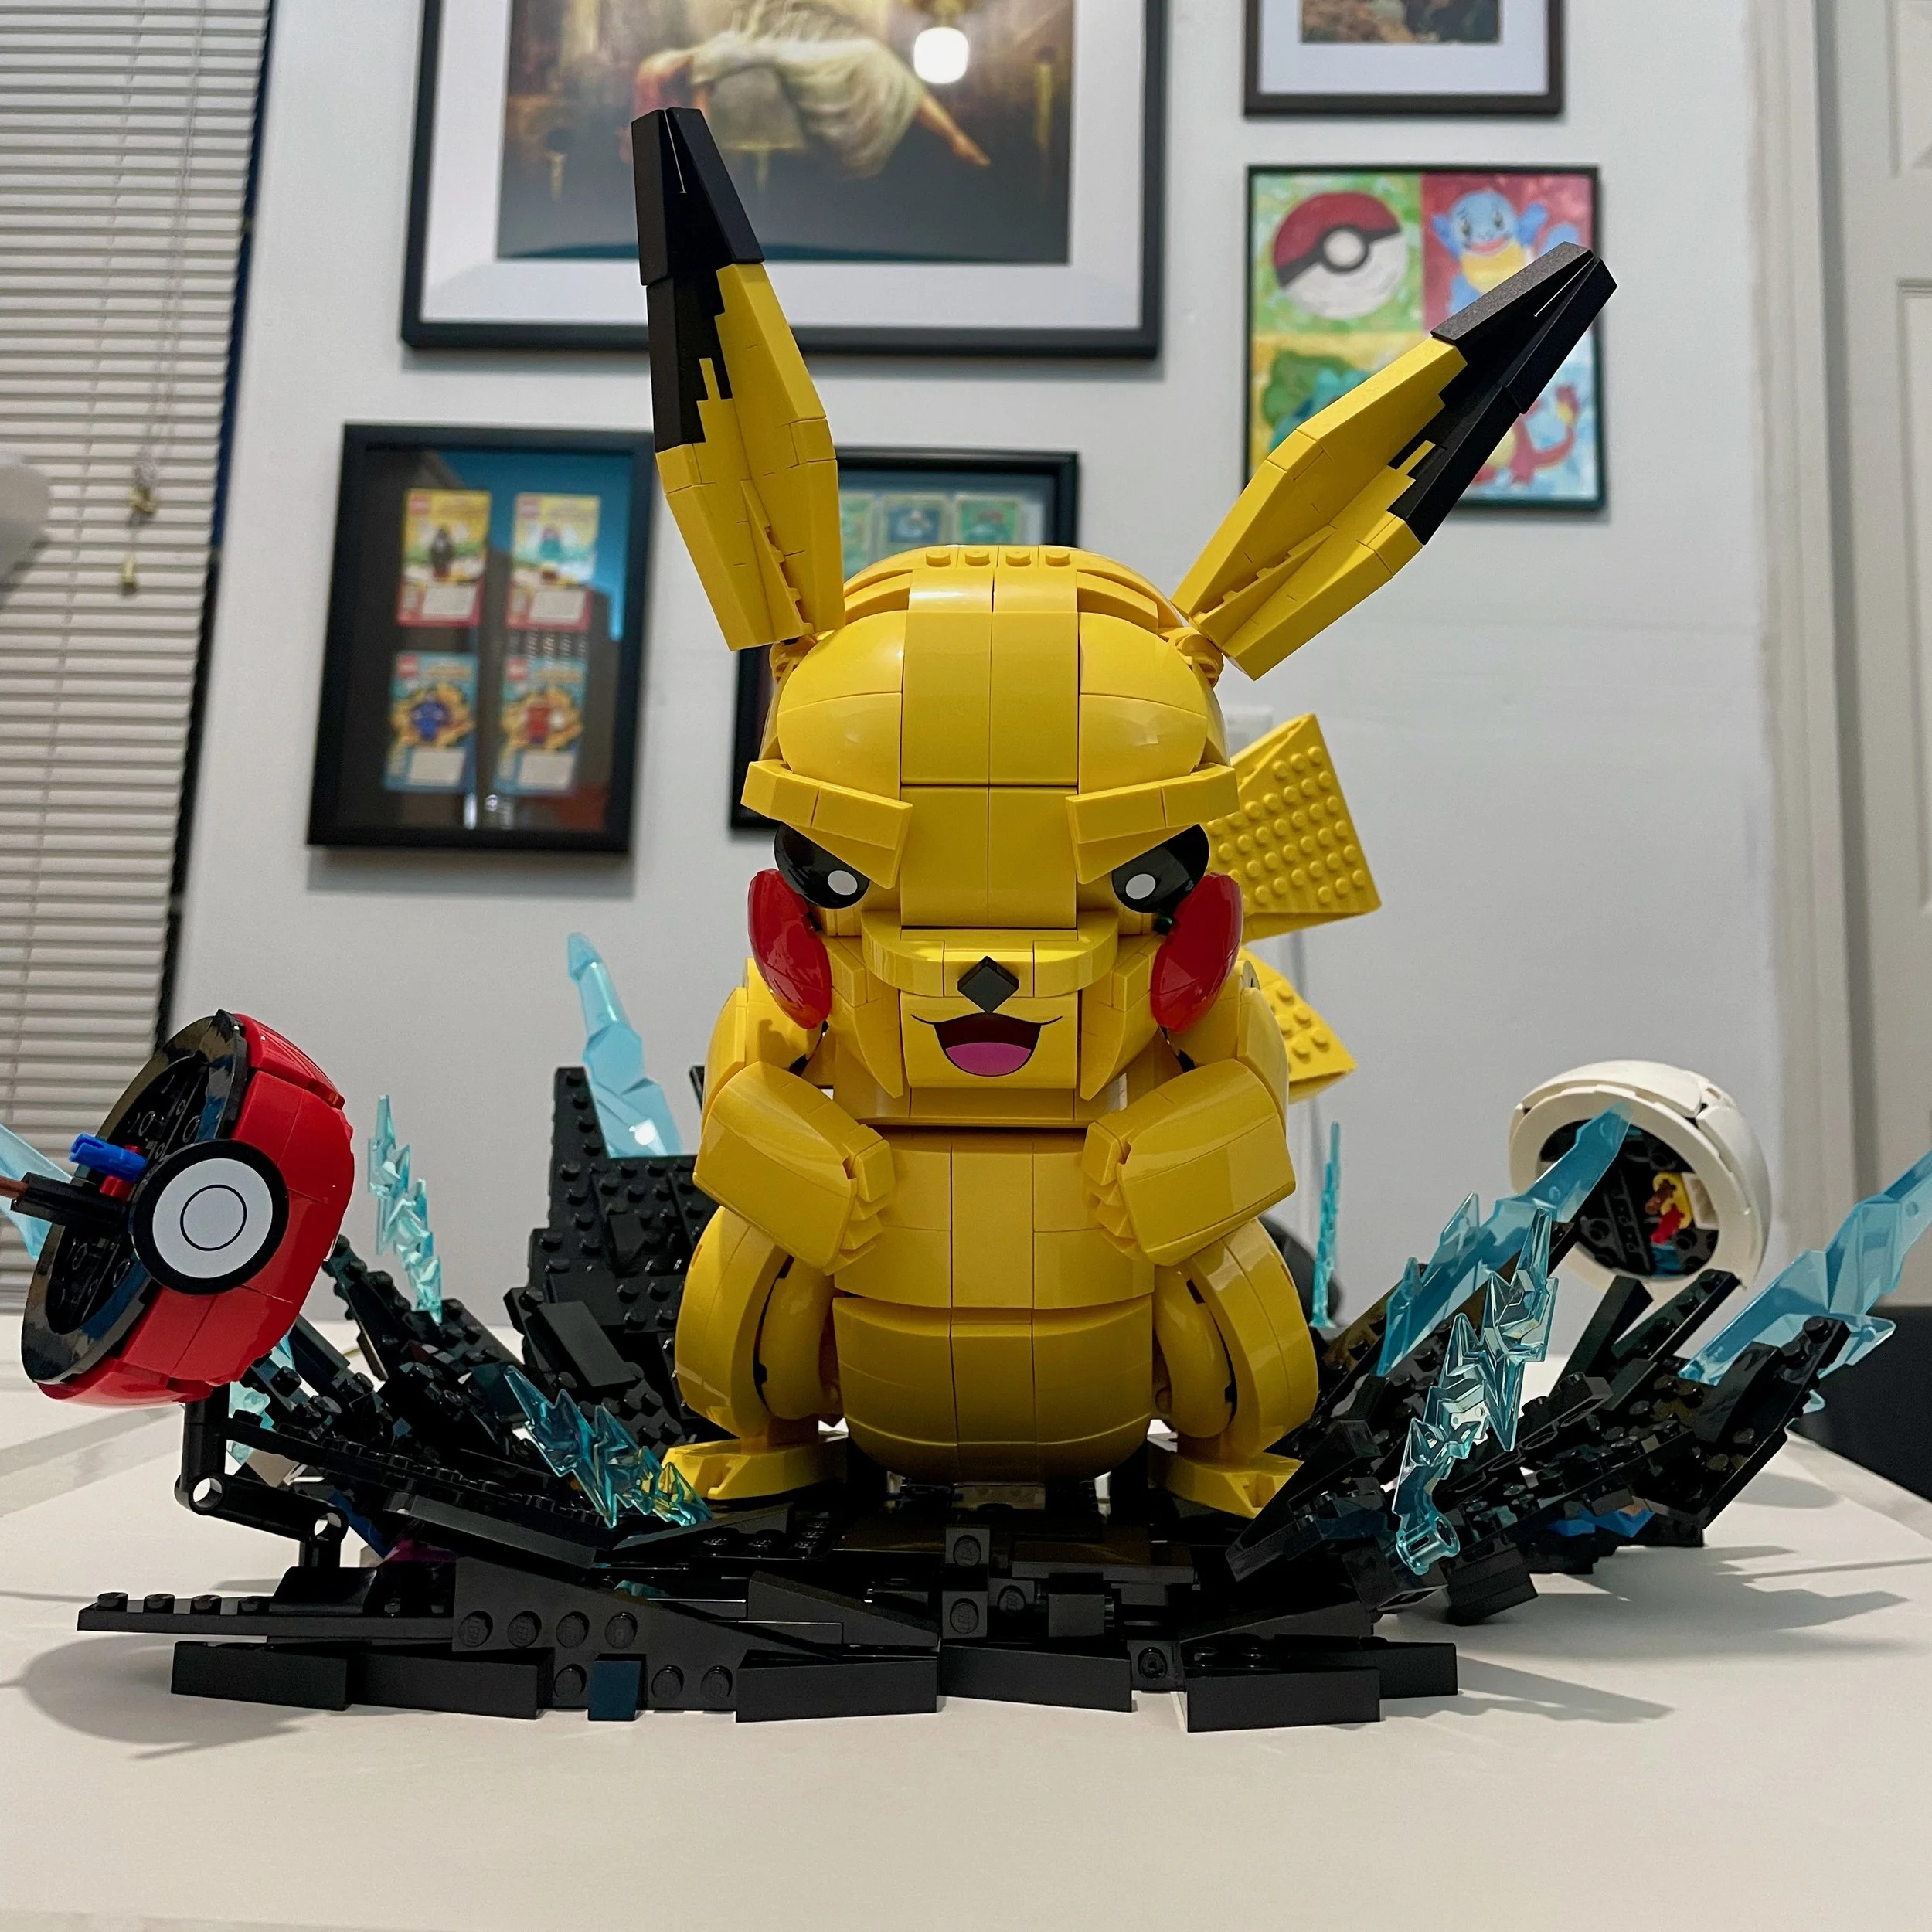
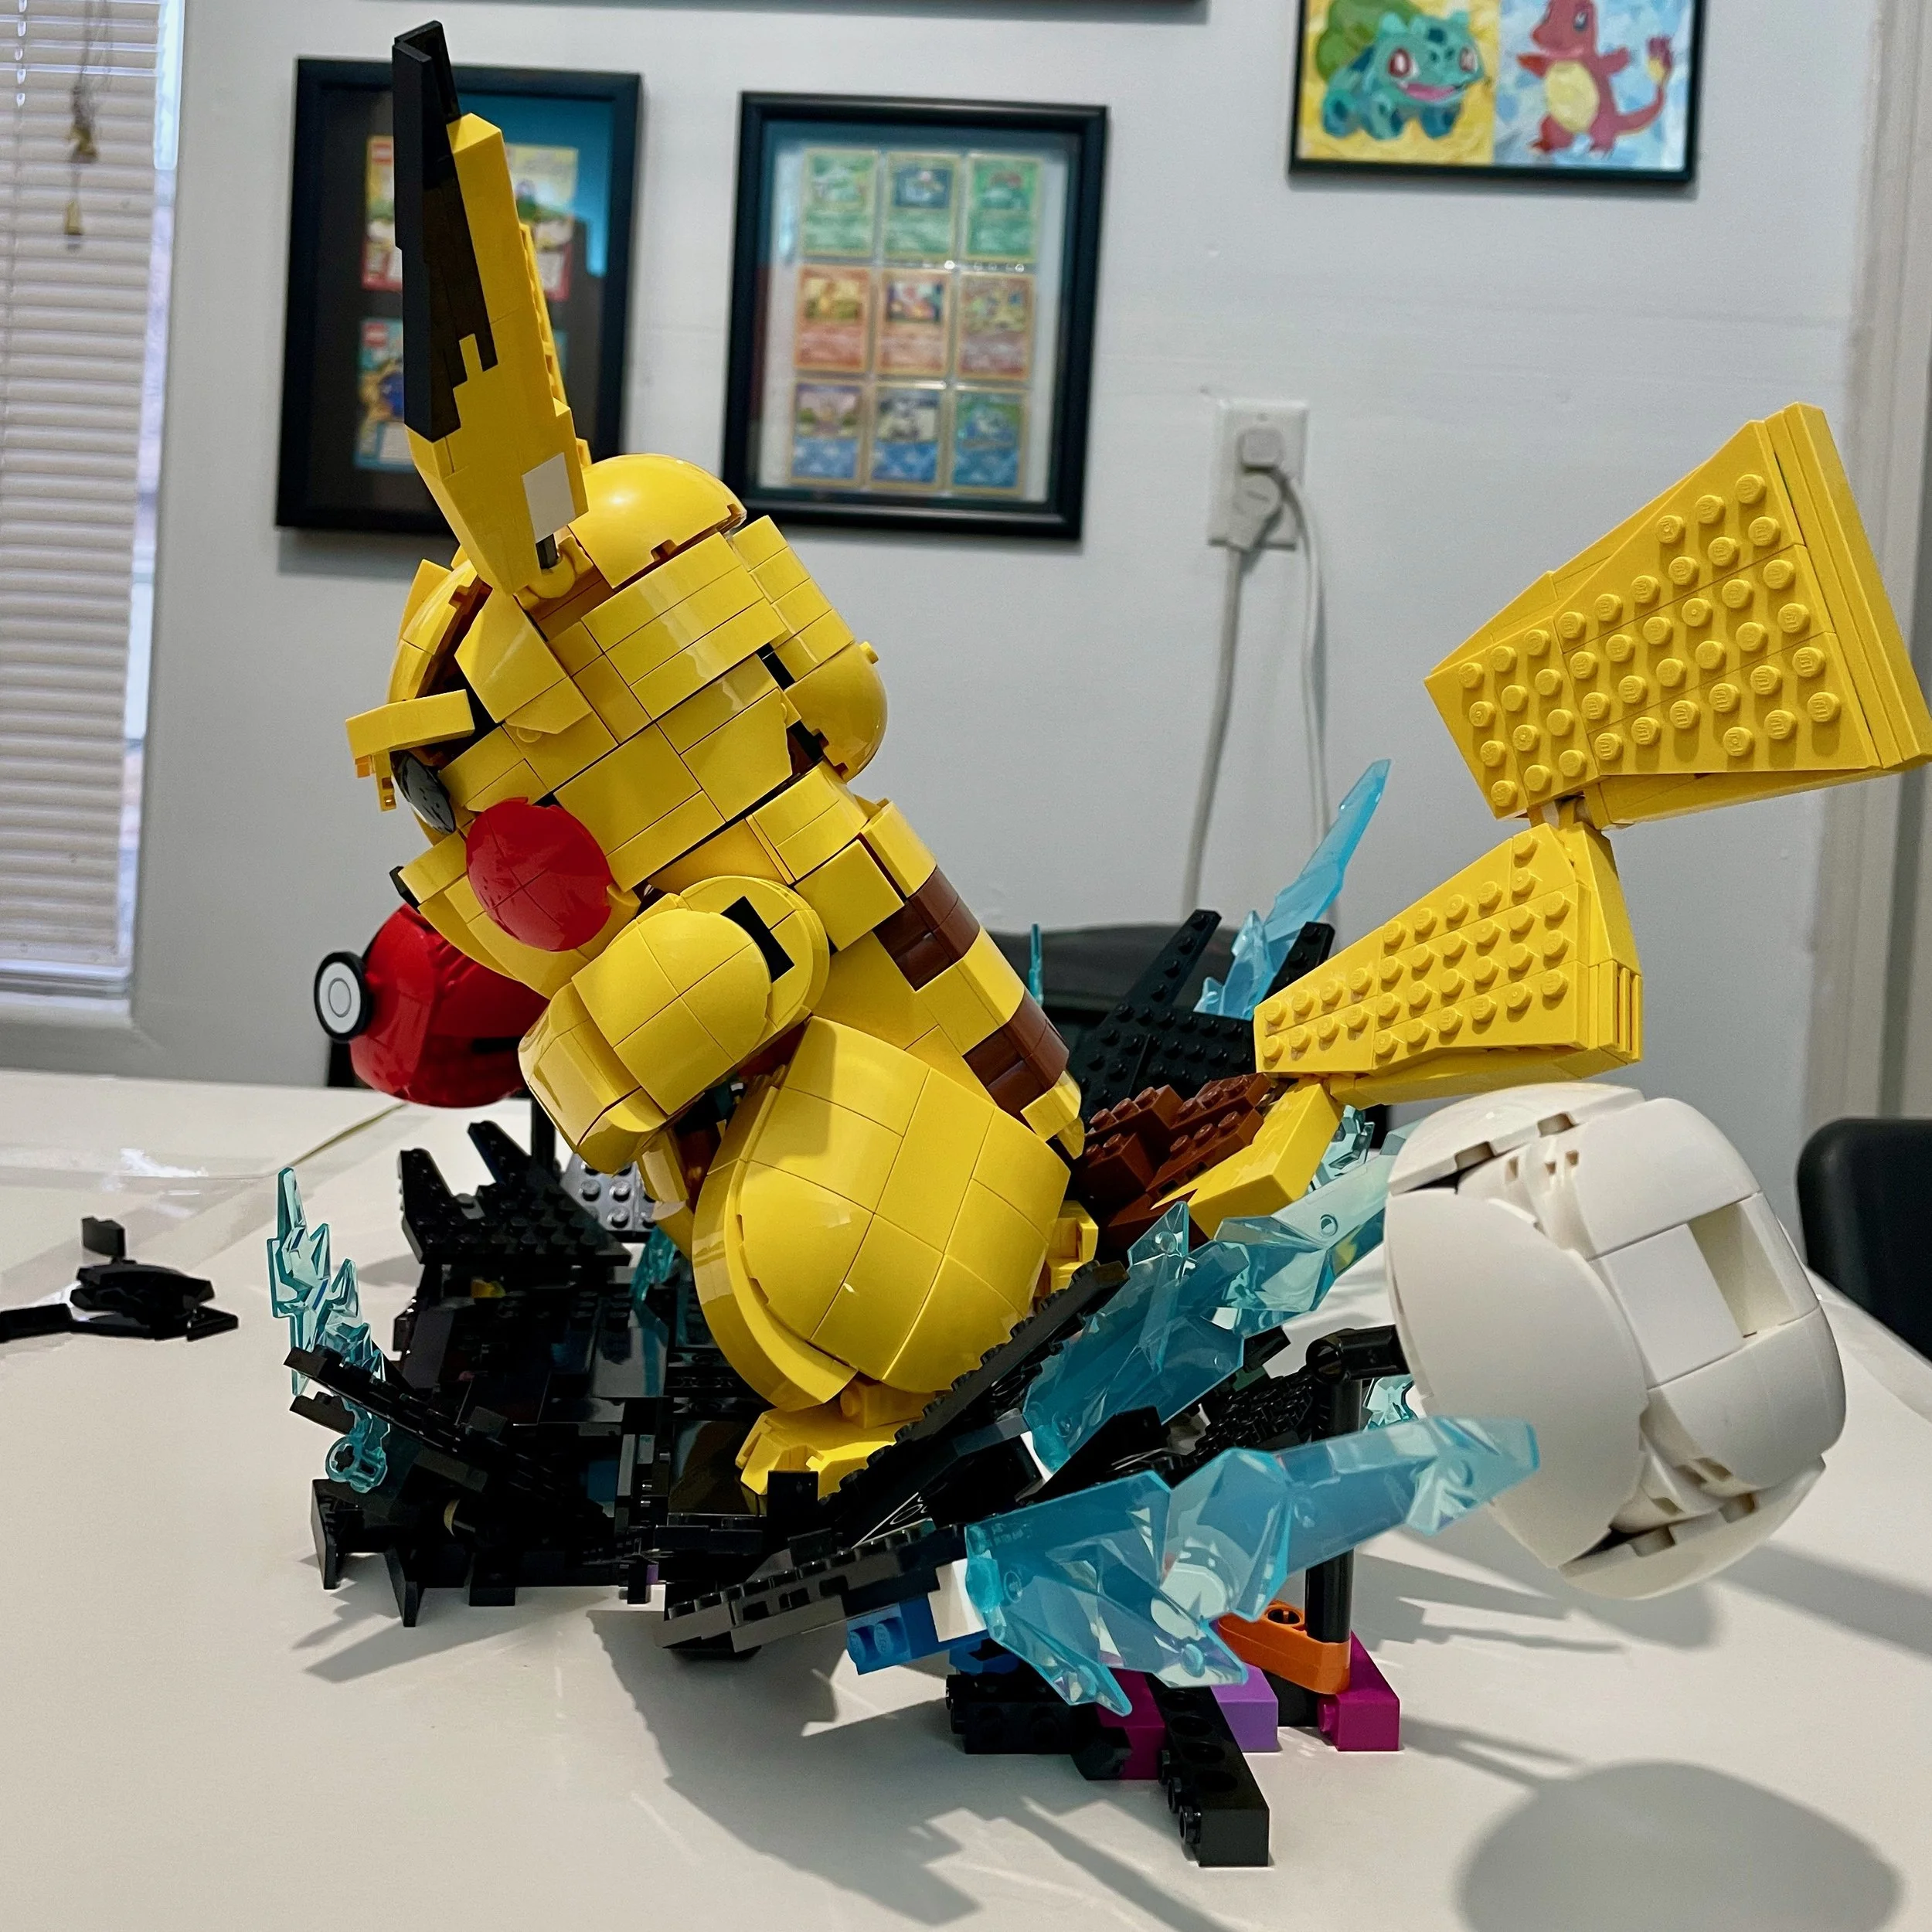
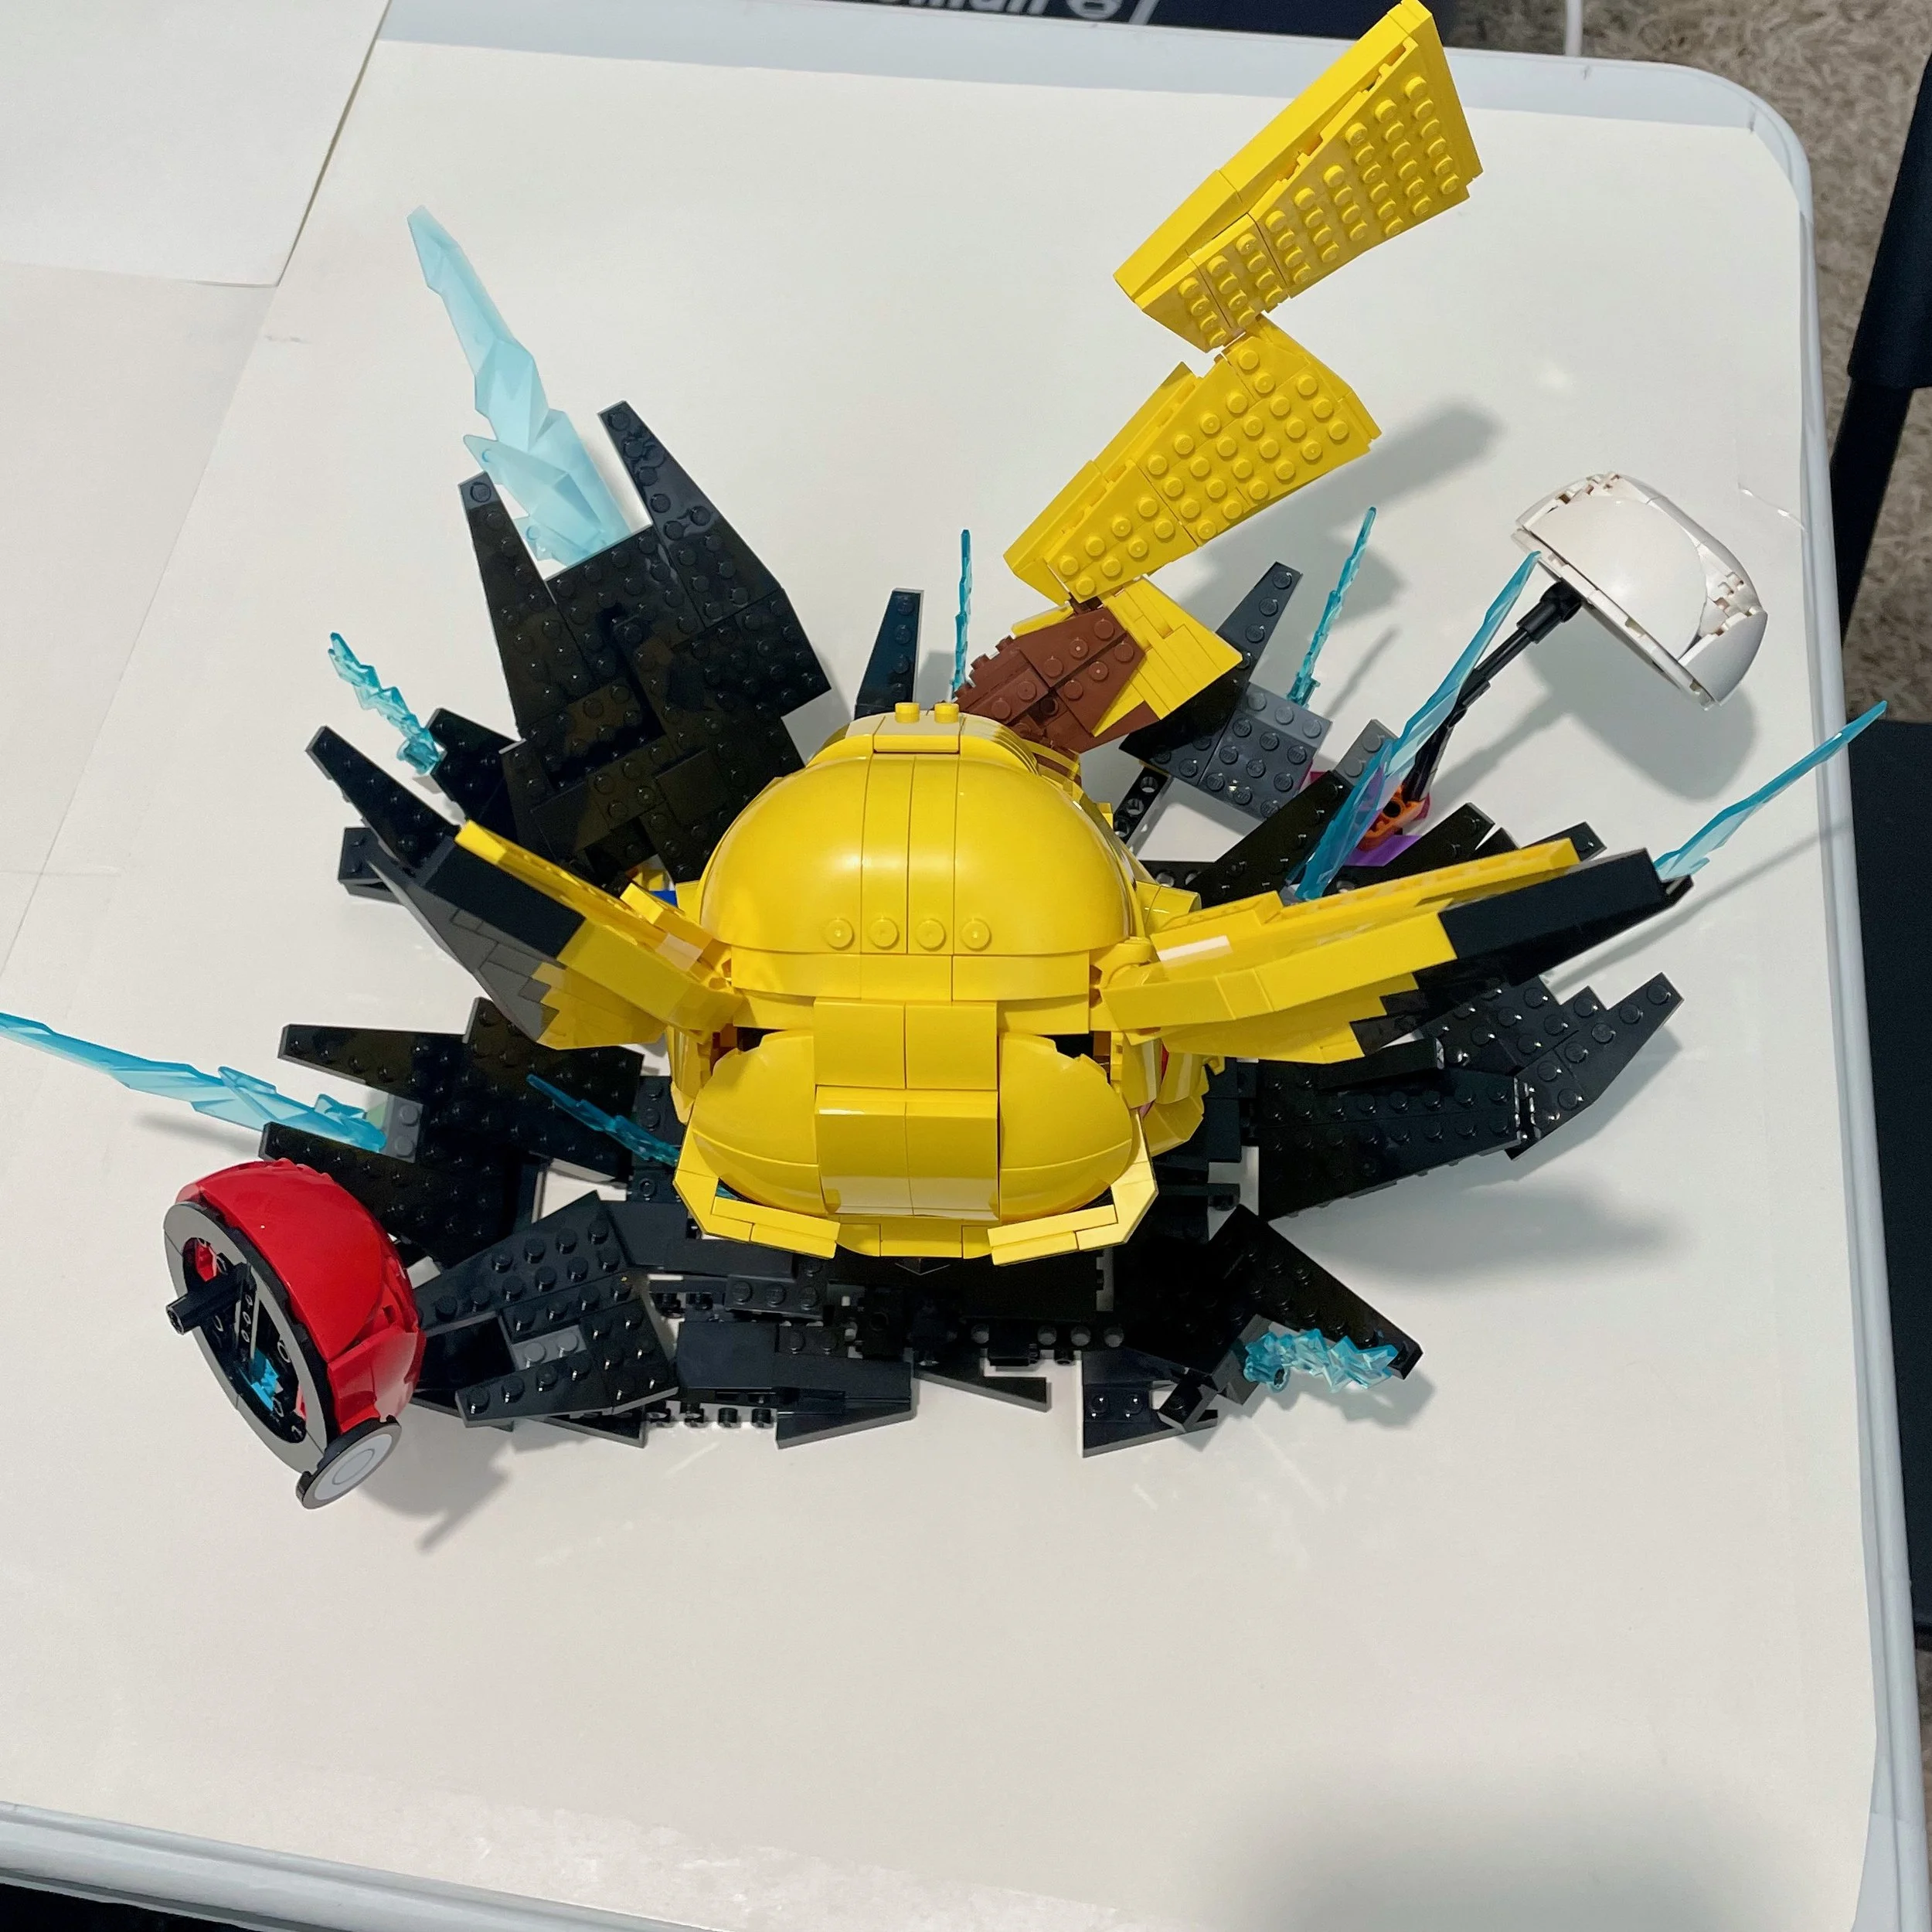
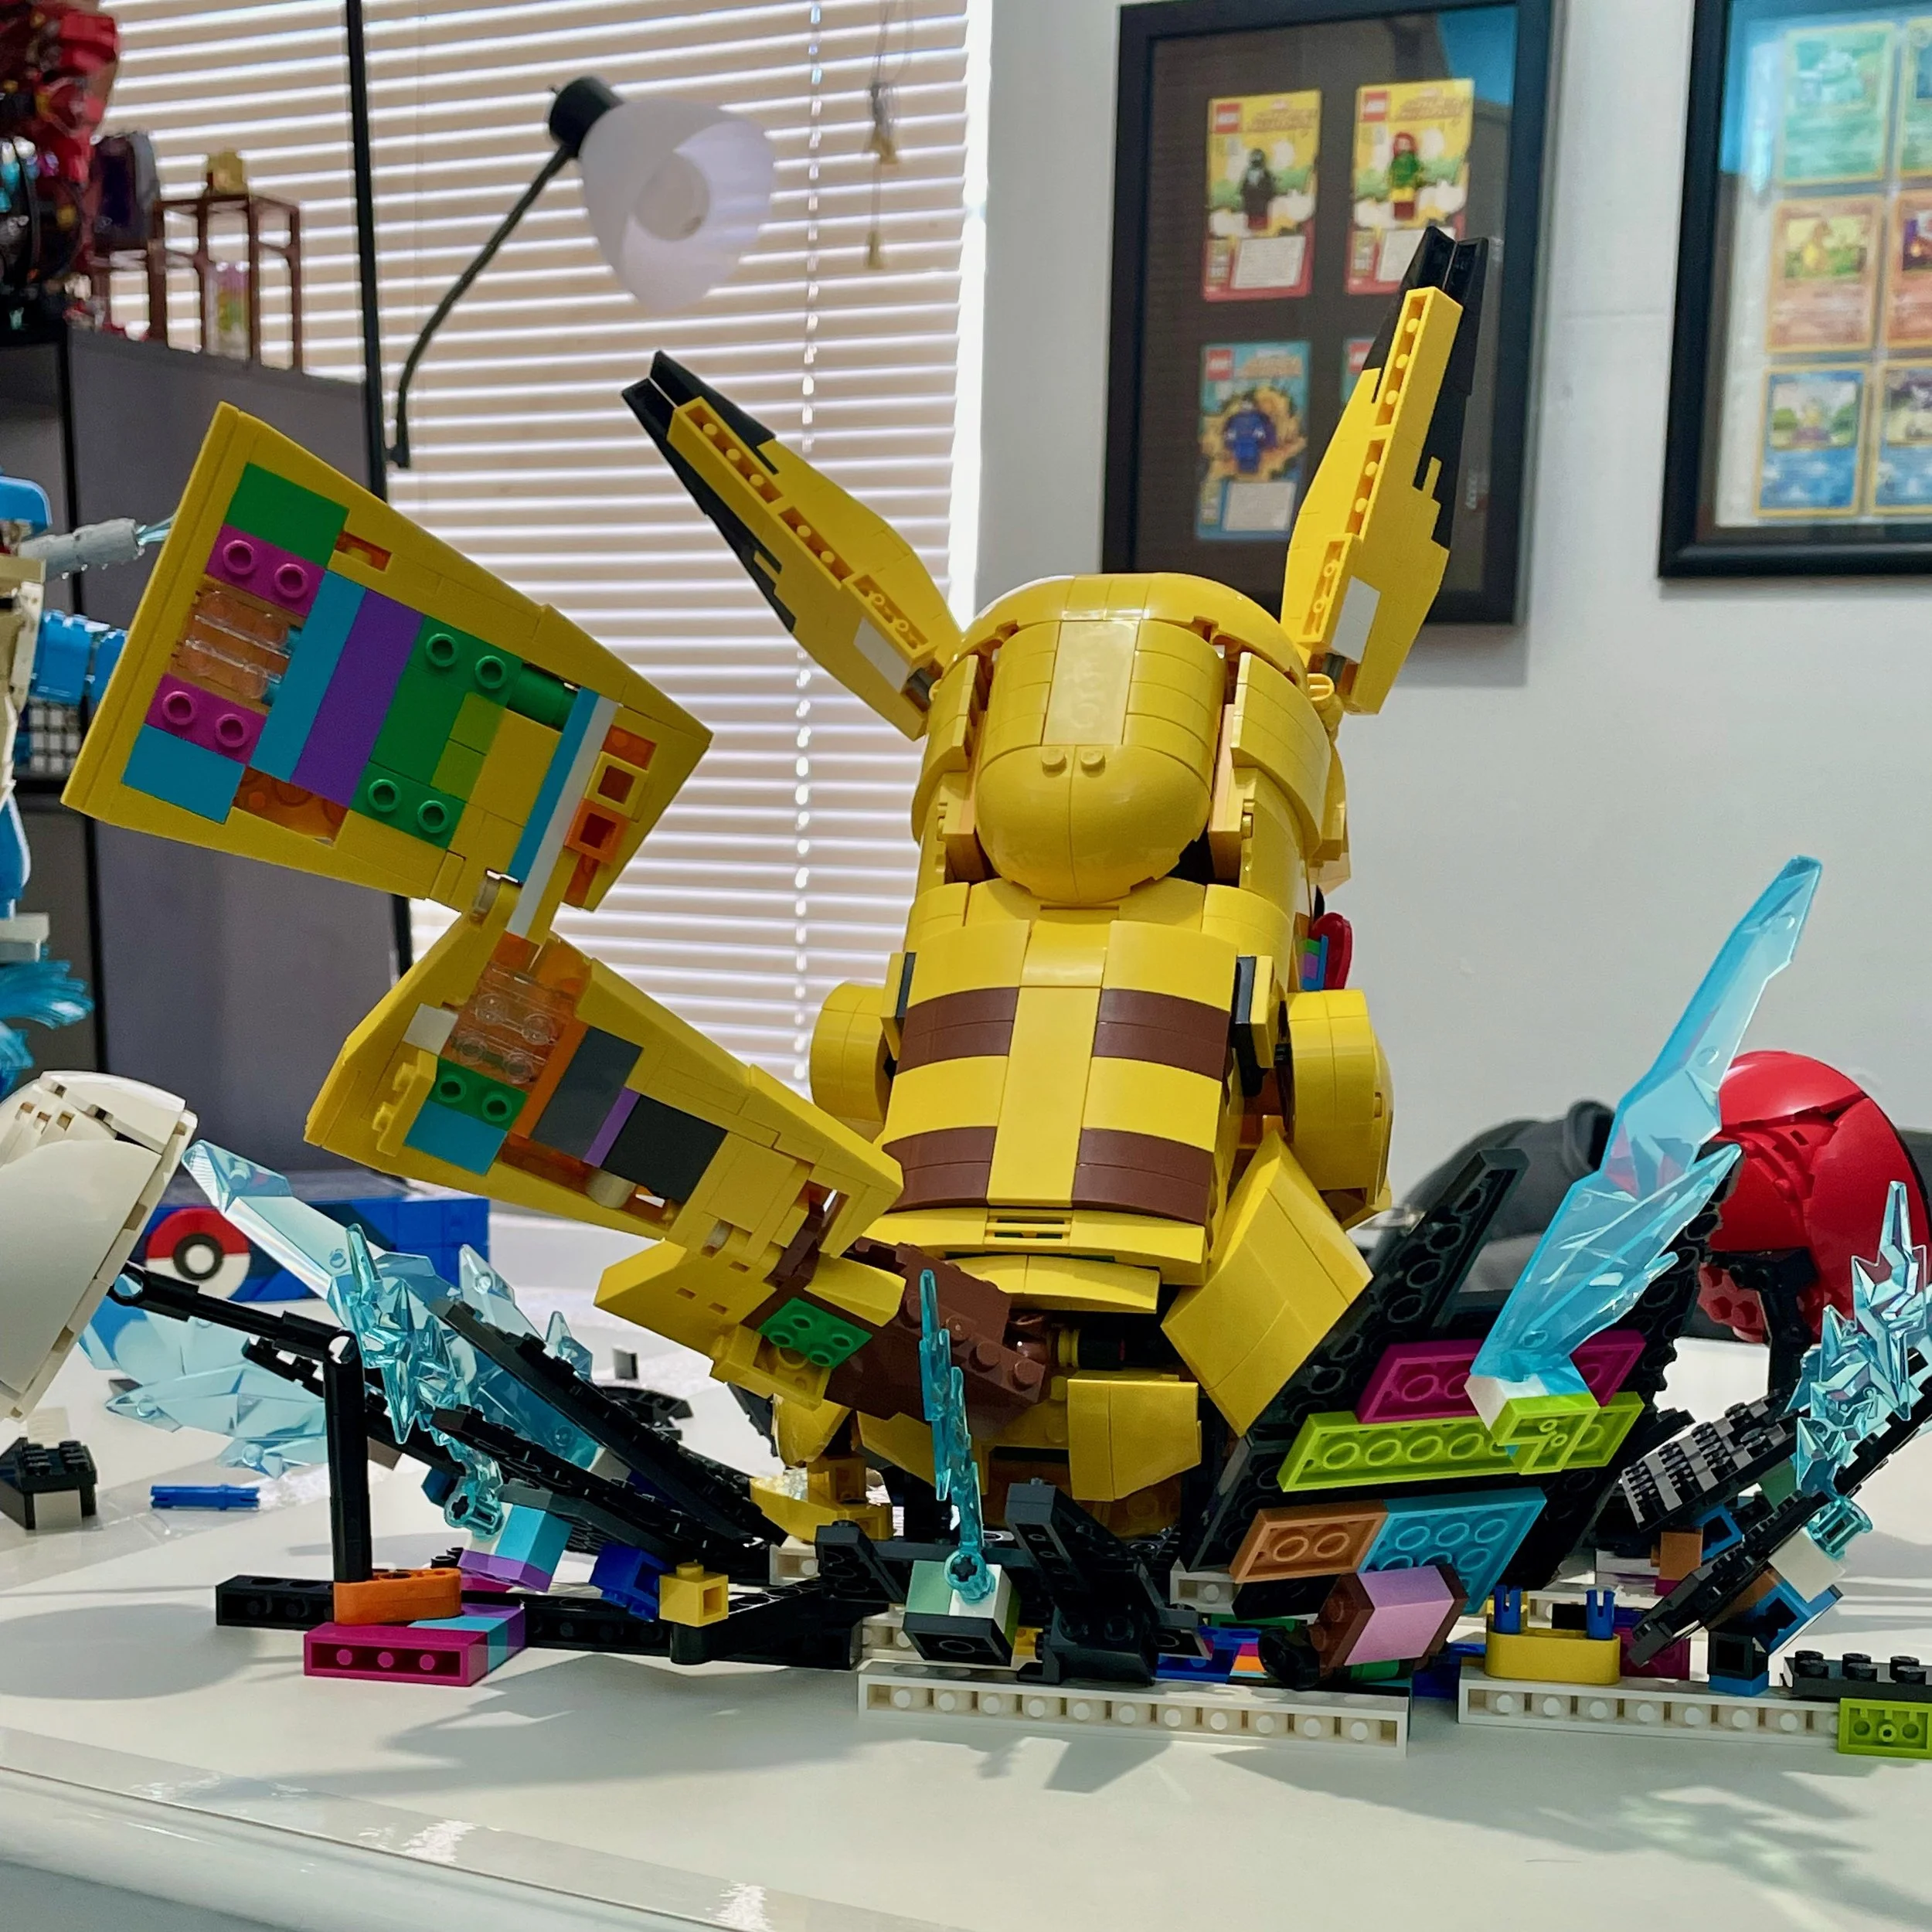
Anyways… after getting it all together, the base had too much of an Into the Spider-Verse vibe, so I went back and replaced all of that color with as much black as I could. Even though I wanted a gritty look, the base ended up very unpolished and wasn’t quite the effect I was going for. It would have to do.
Judging My Own Build
I touched up Pikachu where I could, but eventually, I admitted defeat and called it finished. I had a lot more pieces left over than I thought I would, perhaps even enough to make a second Pikachu.
With the build done, I felt it was only fair to critique my alternate build the same way I critiqued the official set.
The eyes are too far apart, the cheeks stick out too far from the face, and Pikachu has weird shoulders that jut outward. The legs are too small, the tail is too compartmentalized, and the “ribs” across the chest, arms and sides of the face are distracting. The ears are still a little too big, everything looks awful from most angles except straight-on, and Pikachu has… eyebrows.
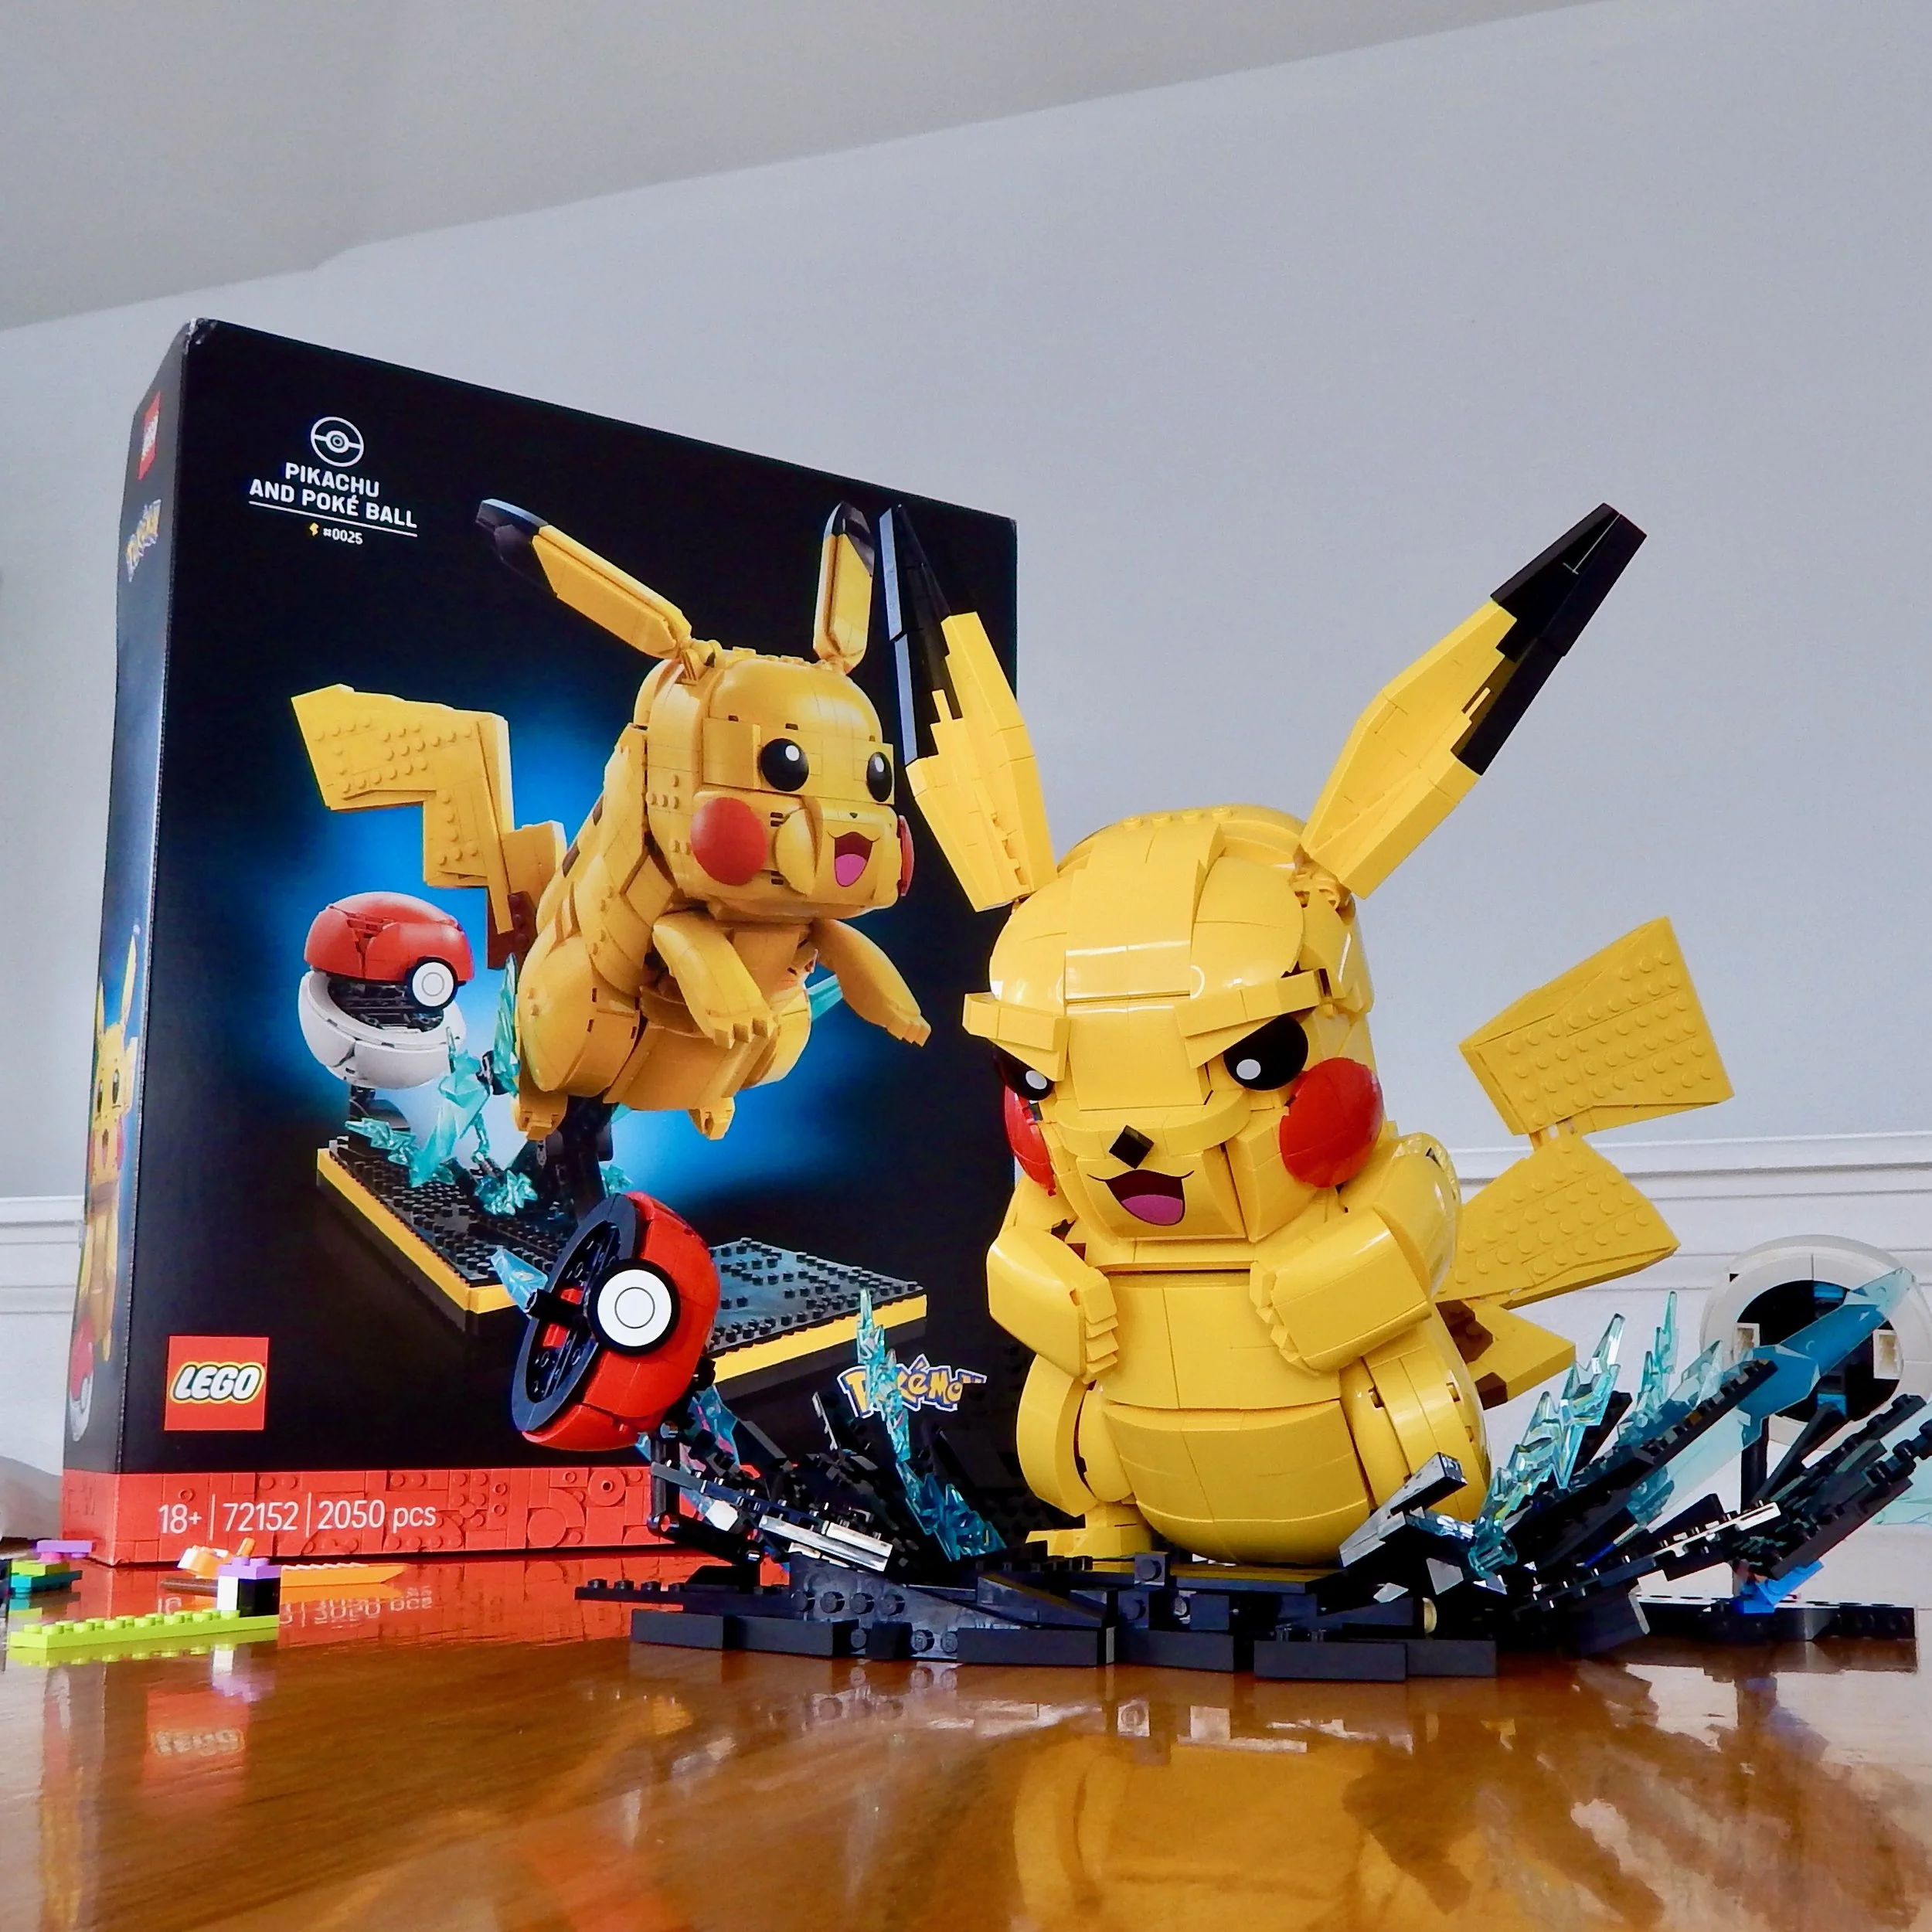
This is a design I could see myself occasionally tweaking over time. I know borrowing just a few pieces from my collection could do wonders for the build. For example, a 1x1 quarter-circle tile would be basically perfect for the nose.
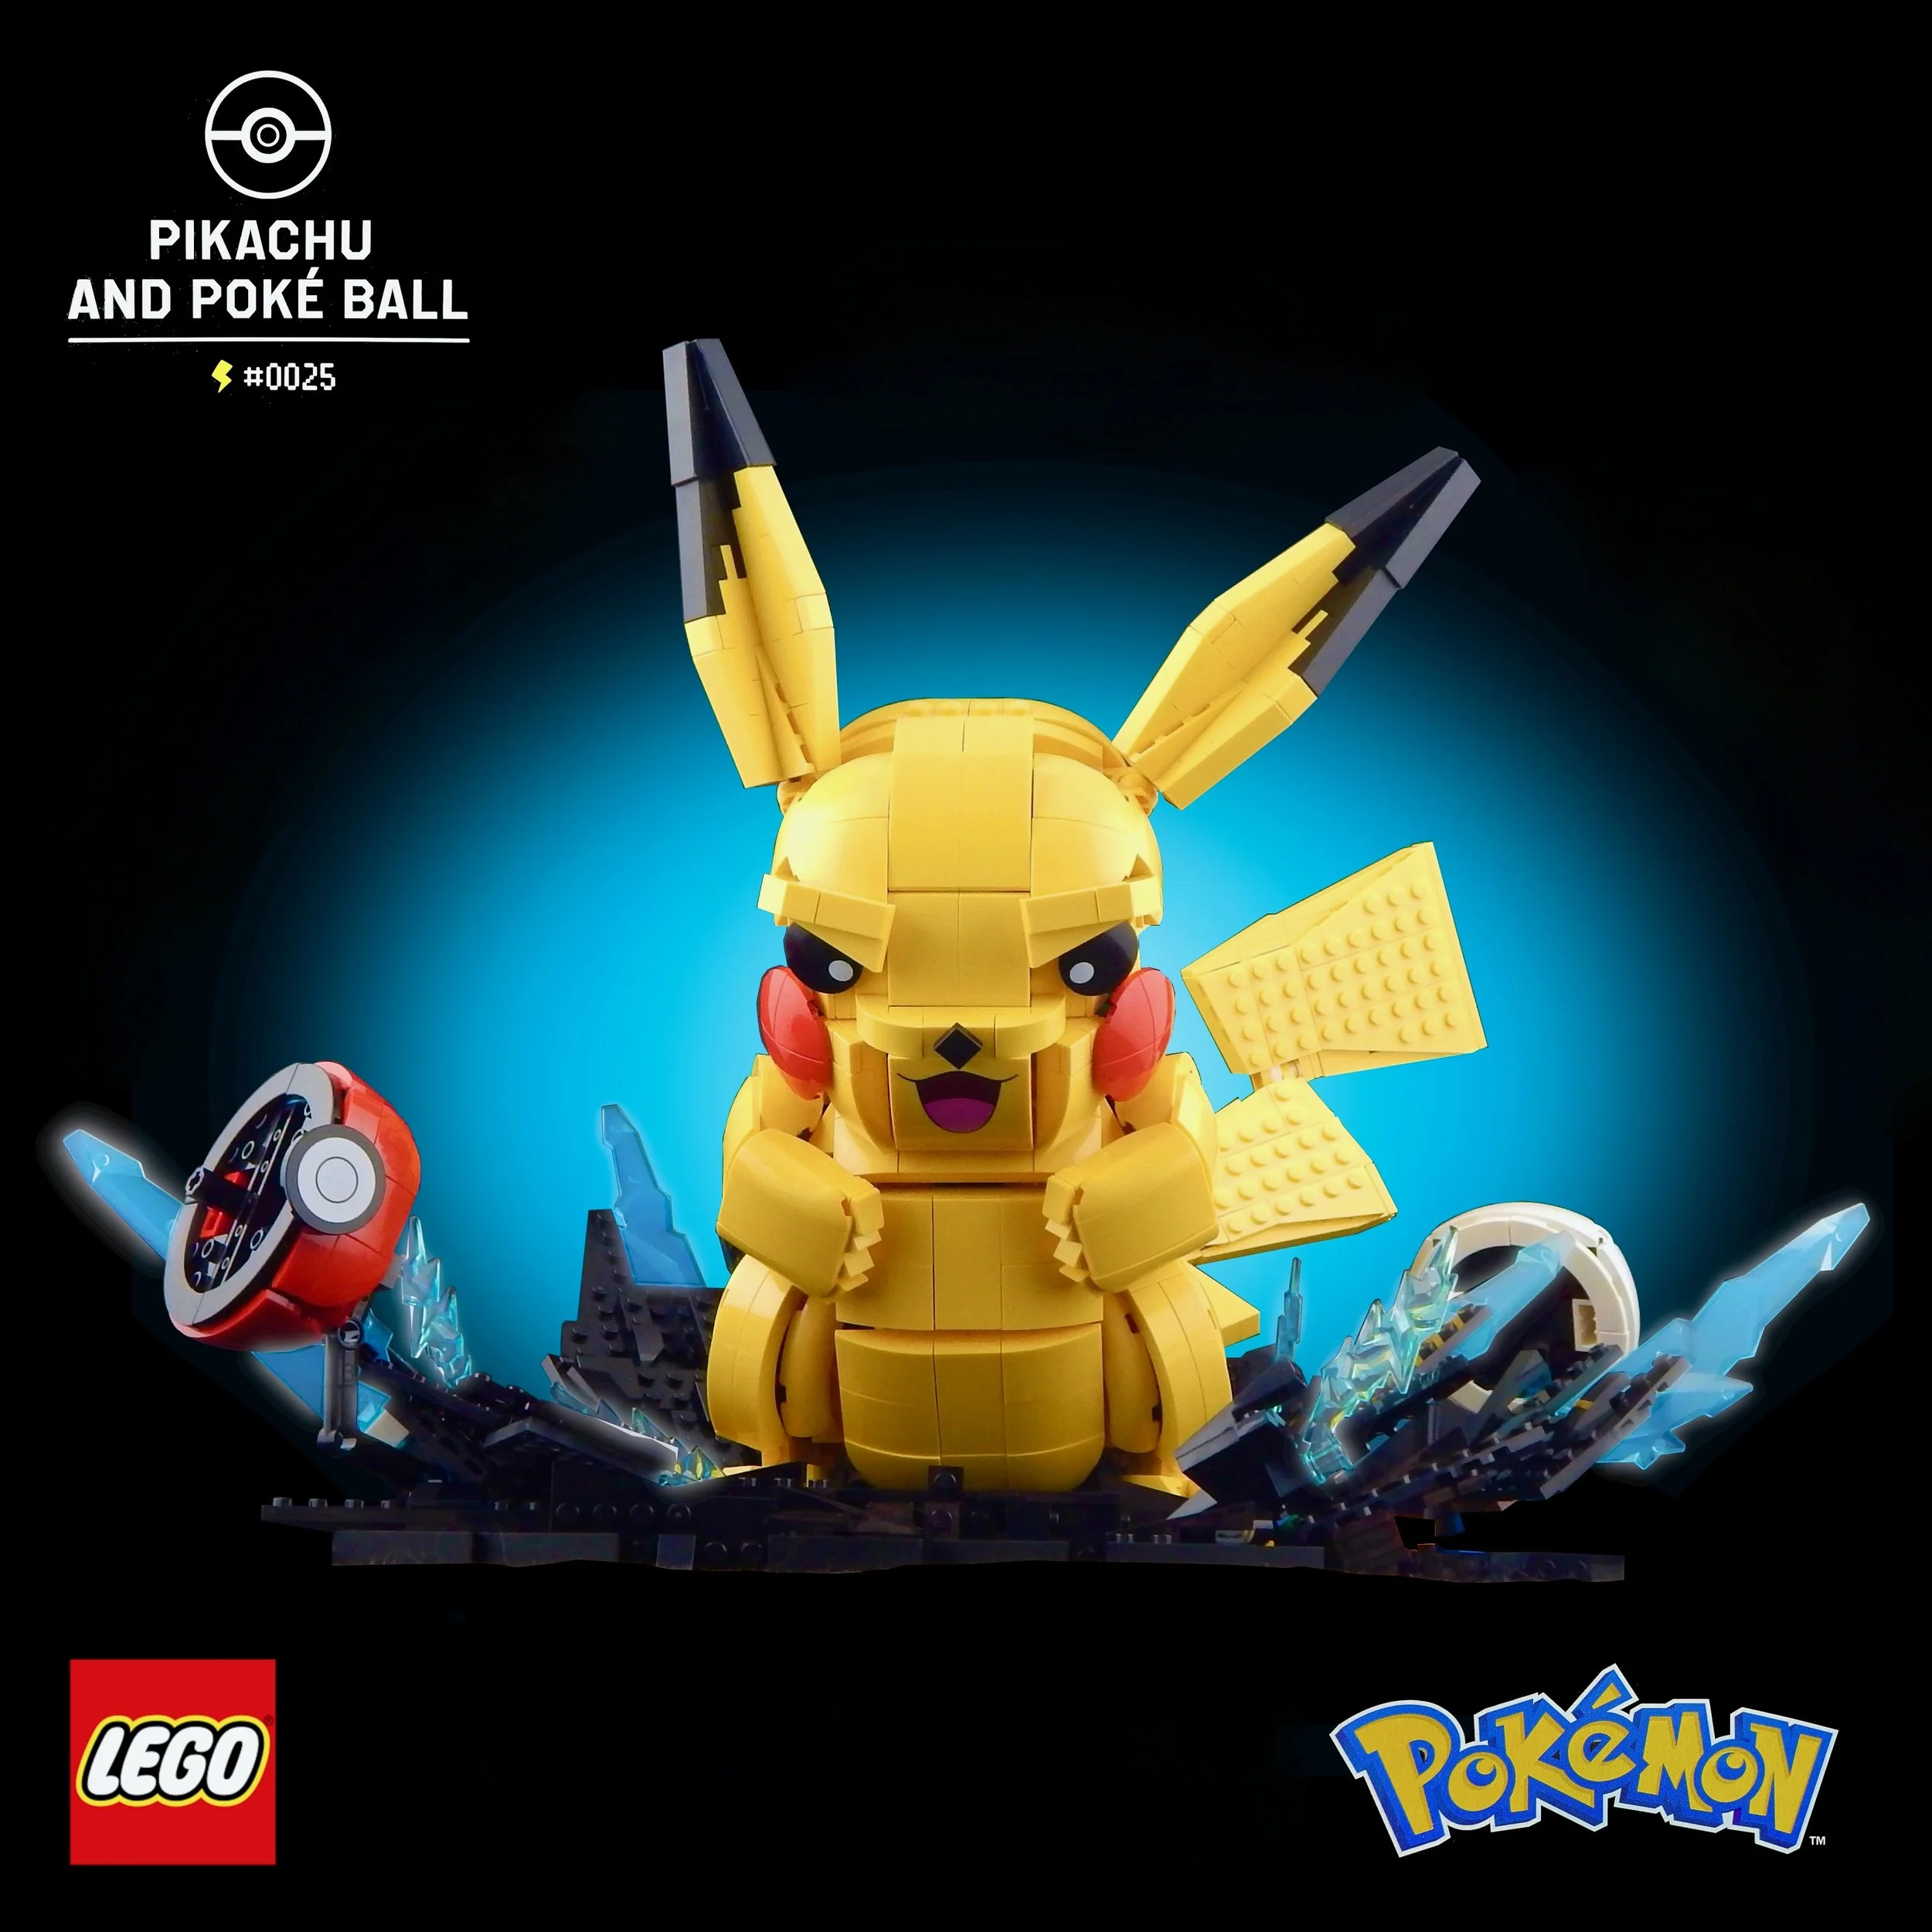
For the sake of this article and my sanity, I’m happy with the build as-is, even though it is far from great. I hope other builders take on the same alternate-build challenge now that Pikachu has been in fans’ hands for several months. I’m excited to see what else the community can come up with!
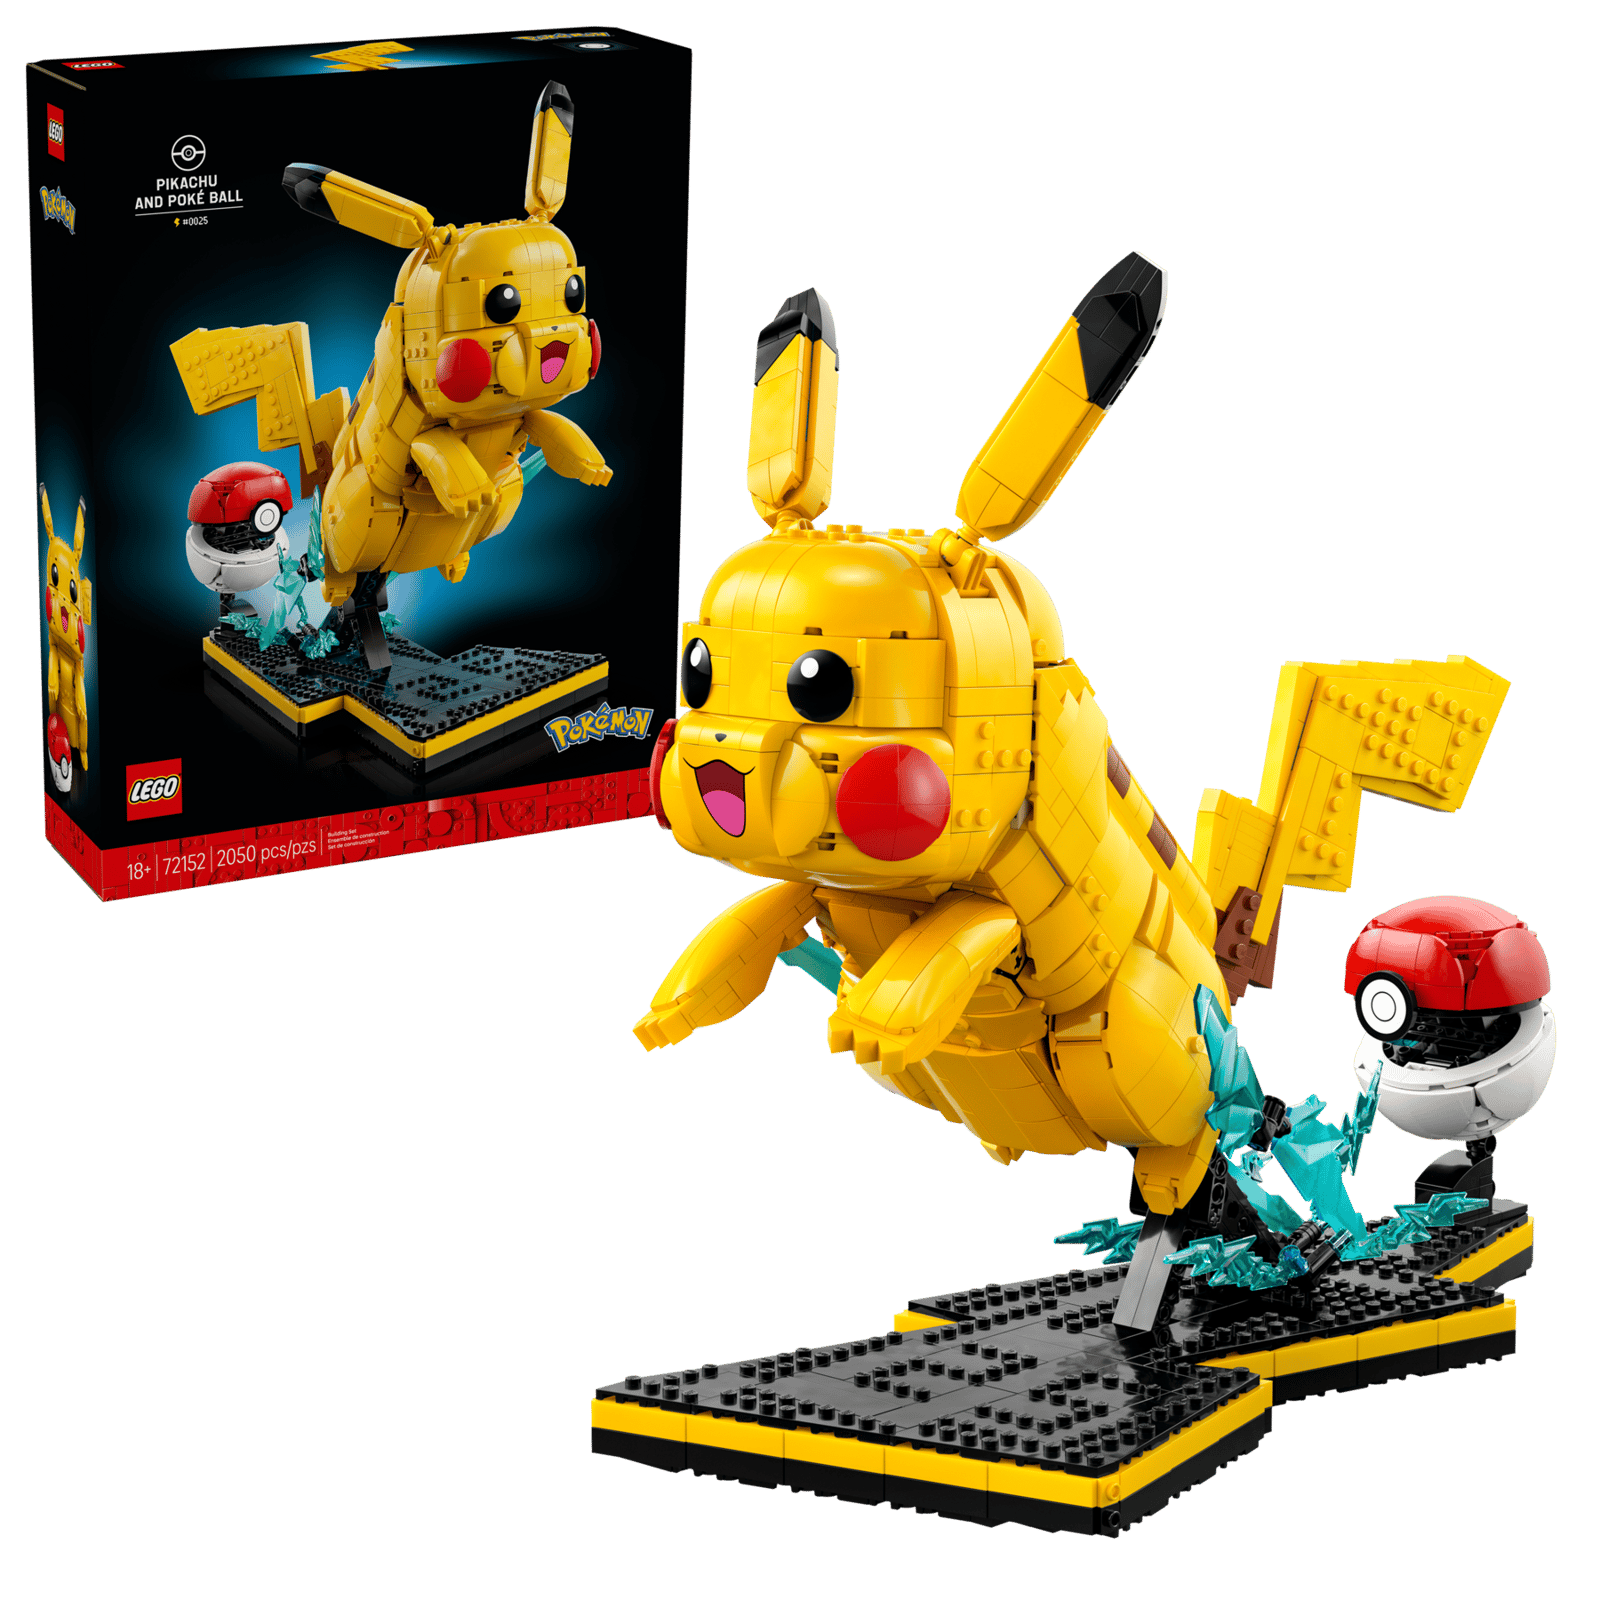
How would you improve the official LEGO Pikachu, and could you do it using only the pieces included in the set? Let us know in the comments below!
Do you want to help BrickNerd continue publishing articles like this one? Become a top patron like Paige Mueller, Rob Klingberg from Brickstuff, John & Joshua Hanlon from Beyond the Brick, Megan Lum, Andy Price, Lukas Kurth from StoneWars, Wayne Tyler, Dan Church, Roxanne Baxter, and Marci Hollingsworth to show your support, get early access, exclusive swag and more.