Returning to the Spider-Verse: A Digital Detour from a LEGO Dark Age
/Thorsten Bonsch, known to many as Xenomurphy, is no stranger to Spider-Man. Over the years, he’s built numerous and incredible Spider-themed creations, but like many AFOLs, his LEGO activity had slowed as new interests took hold.


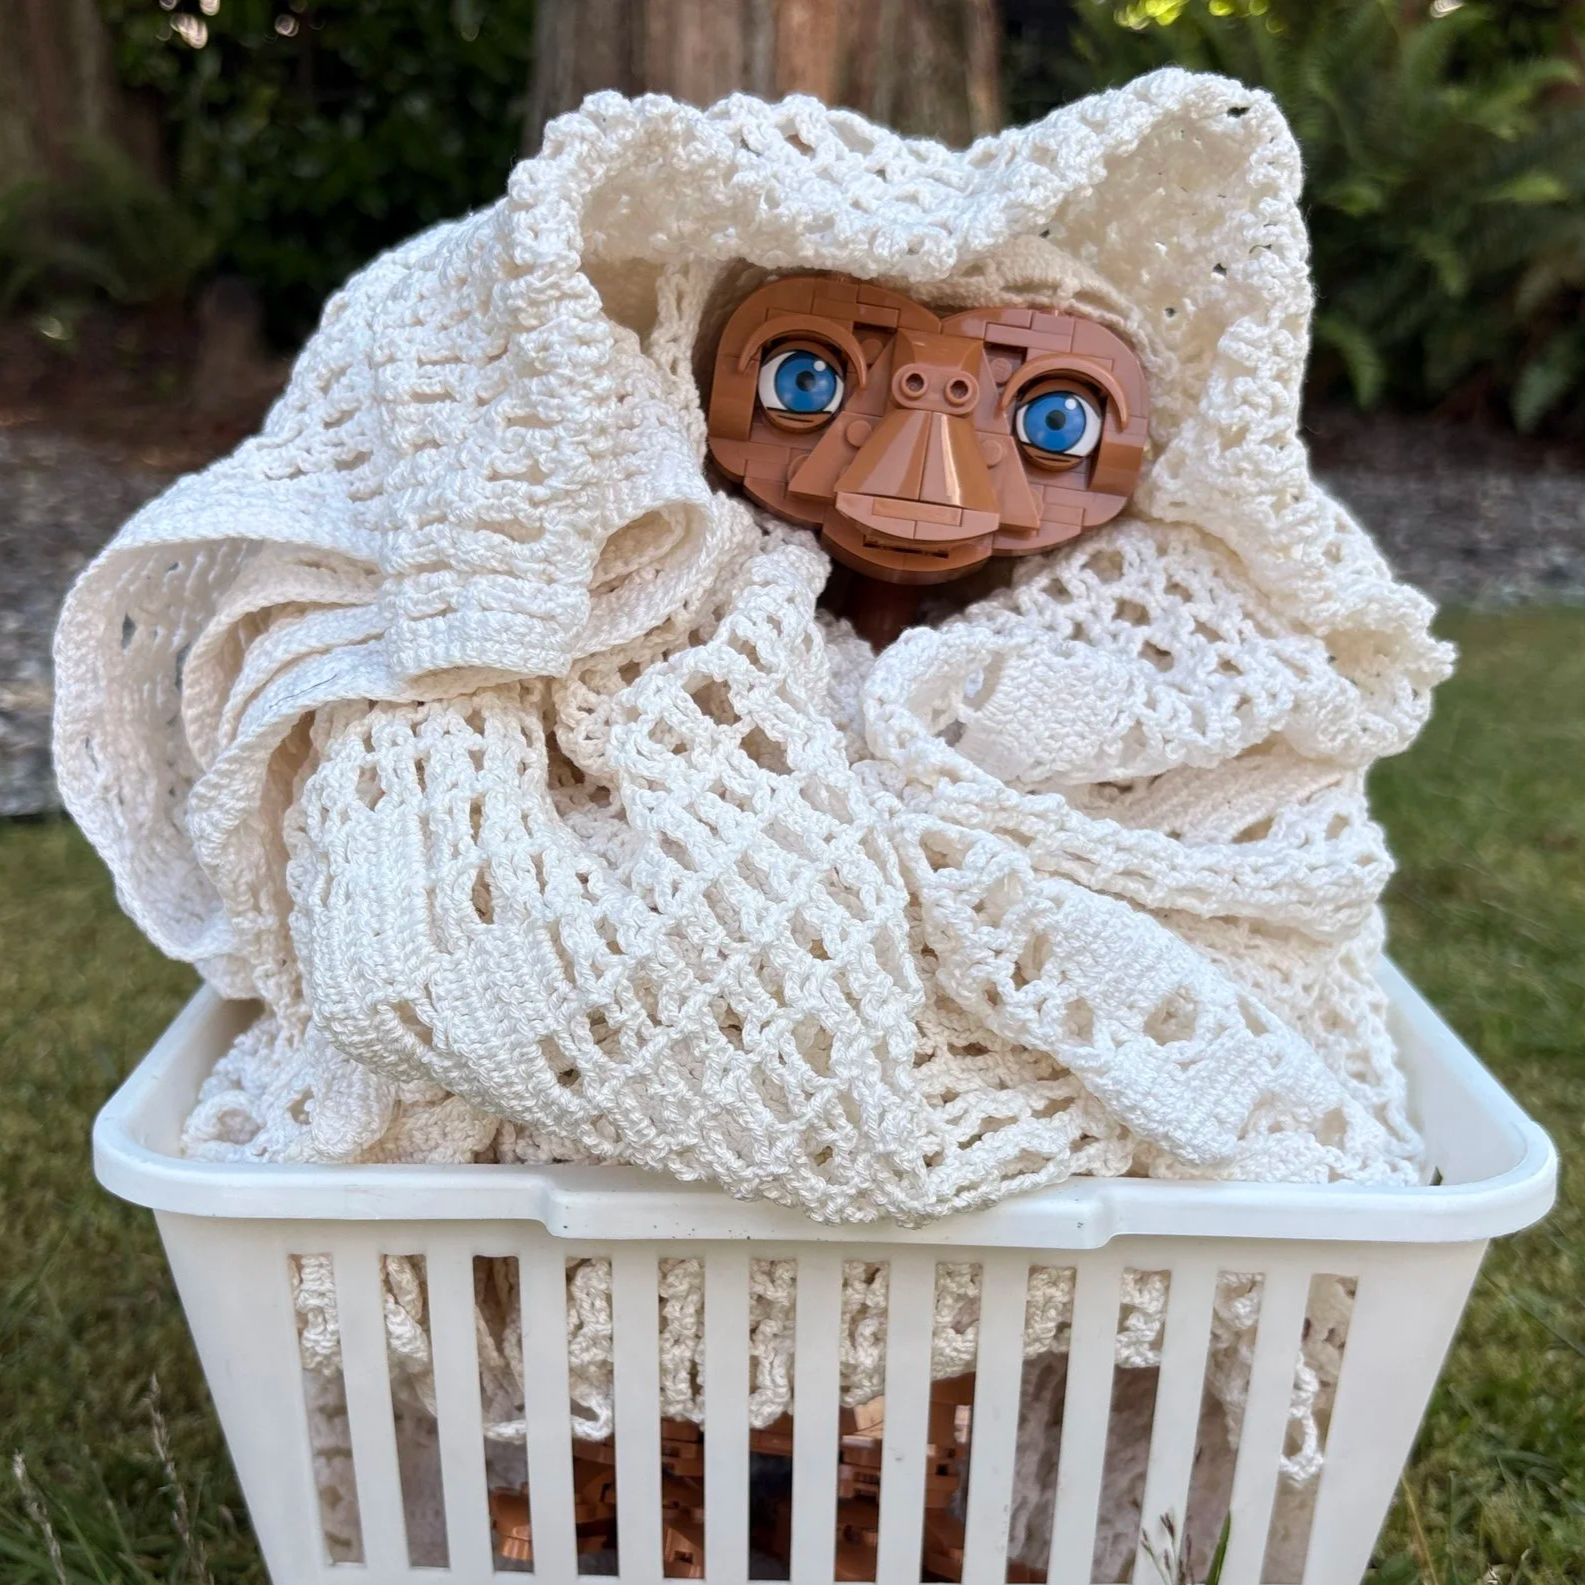
Curious whether that spark was still there, we sent Thorsten the Spider-Man: Across the Spider-Verse Collectible Minifigure Series as a bit of creative fuel, with no firm expectations attached.

What followed was not a quick vignette or a straightforward CMF review, but a deeply personal, months-long digital build that blends LEGO, film, memory, and experimentation across multiple creative tools. This interview documents that journey, from initial hesitation to a sprawling rooftop scene that captures the spirit of the Spider-Verse:
We chatted with Thorsten to hear all about his journey and the project.
Returning to Spider-Man
BrickNerd: What first sparked this project, and what drew you back to Spider-Man (and LEGO) at this moment?
Thorsten: At the end of July, the BrickNerd team asked me if I would be interested in writing an article about the current LEGO CMF series based on the movie ‘Spider-Man: Across the Spider-Verse’.
Since my Hobbit/Lord of the Rings project, I had been less active in the LEGO field, as I had been spending more of my free time exploring 3D visualization by learning Blender, DAZ 3D, and Unreal Engine. Nevertheless, I found the idea of returning to my LEGO hobby quite appealing, especially since the hook for it was Spider-Man.
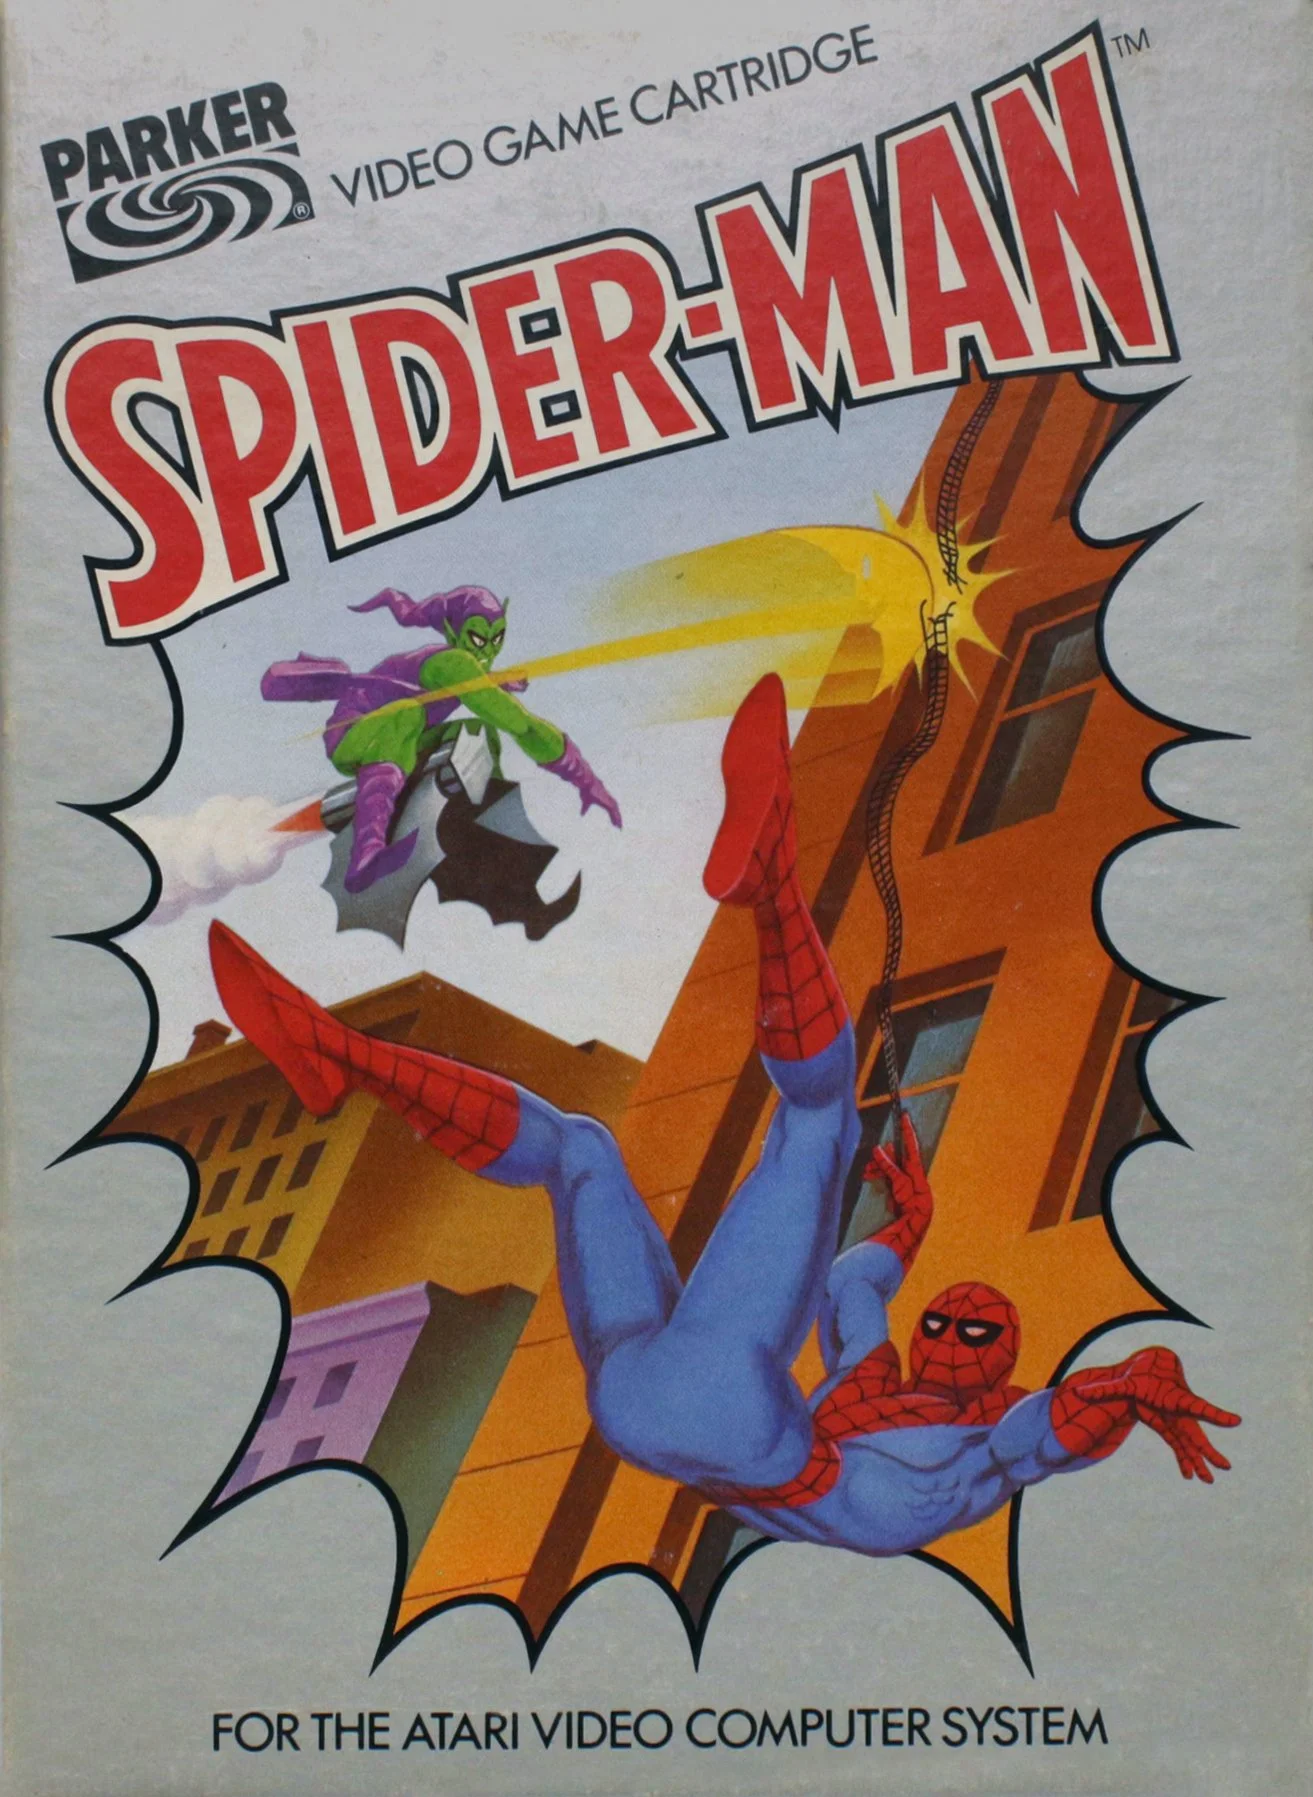
Spider-Man has always played an important role in my life since my earliest youth. My older brother gave me his well-read Spider-Man comics, he drove me (before I had my own driver’s license) to the nearest big city so I could buy my first Spider-Man console game (for the Atari 2600, I’ll come back to that later), and when we were older he would invite me over to his house from time to time, where we went to the video store and rented tapes of the animated Spider-Man series (the one from 1967). That’s why I’m dedicating this MOC to my brother Frank. May he rest in peace.
But it wasn’t just Peter Parker who inspired me. Back in 2016, when Miles Morales was still relatively unknown and had just made the leap from the Ultimate Comic Universe to the 616 Comic Universe, I built my first MOC based on Miles. I had been following and reading about his adventures since he was first announced in 2011.

Long story short, I decided to return from my brief second ‘Dark Ages’. But not as usual. My parts collection has shrunk for various reasons, and for other various reasons – at least for the moment – I am not willing to spend money on LEGO. At least not large amounts.
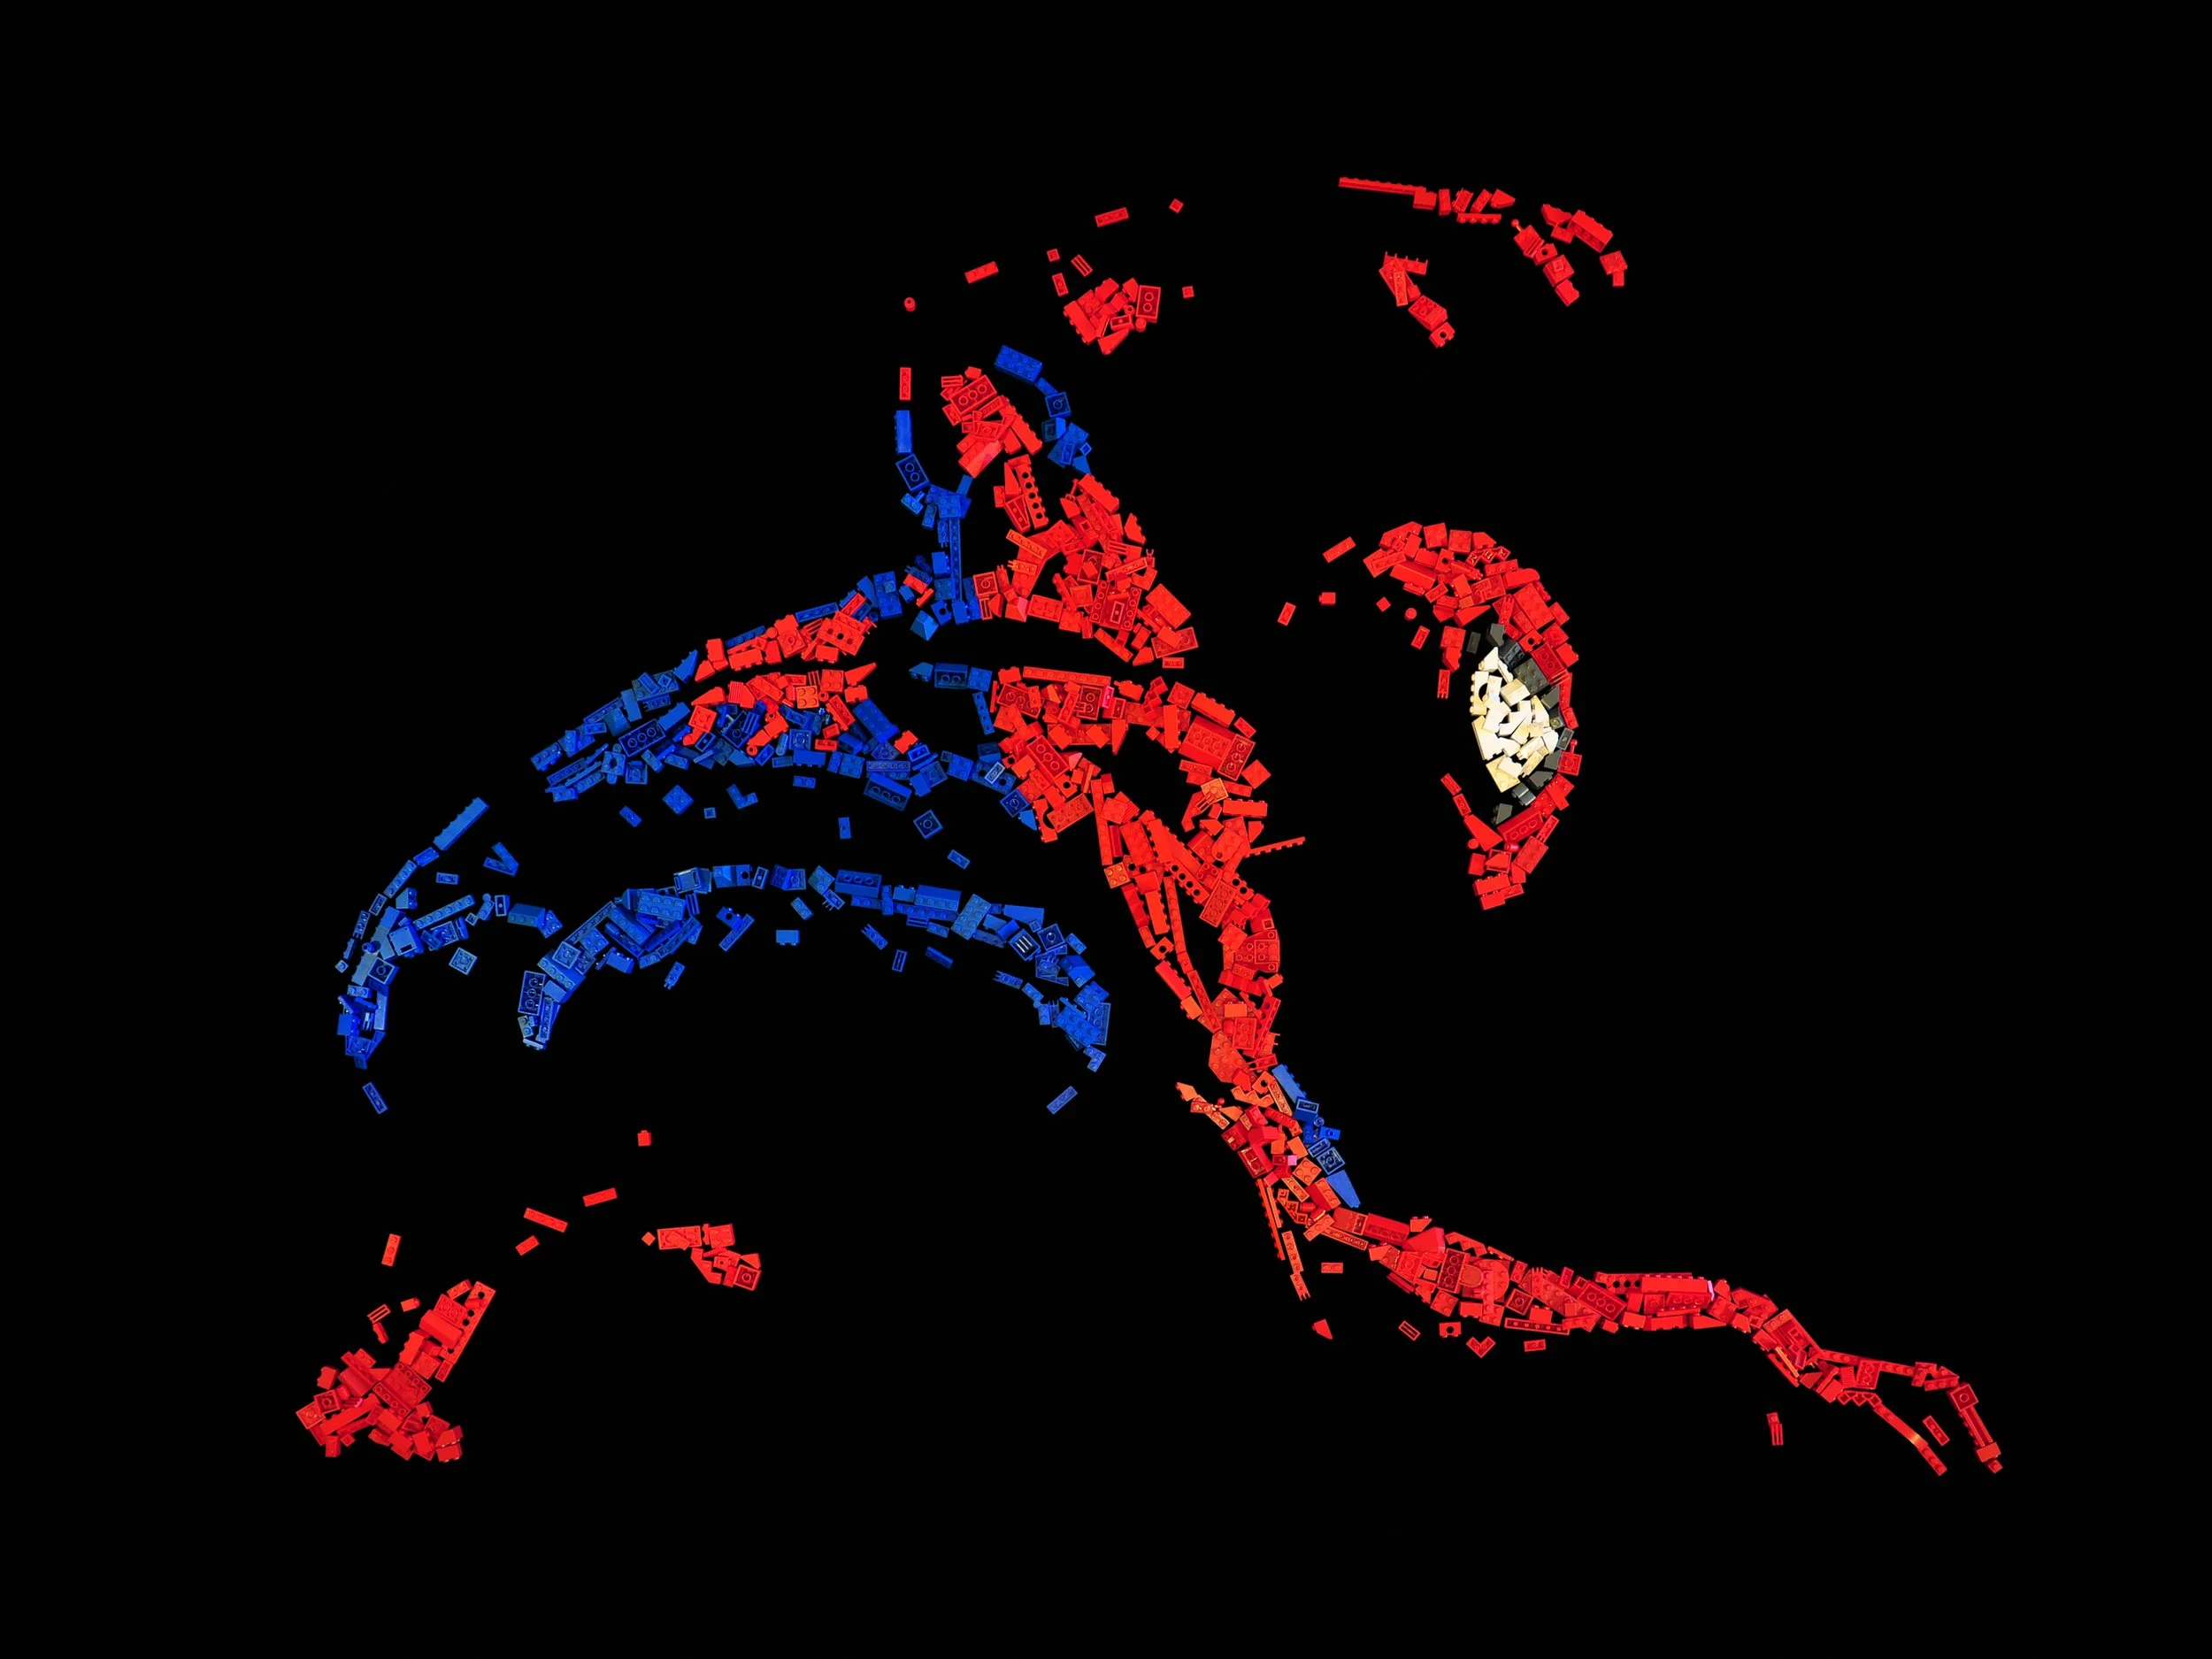
But that shouldn’t be an obstacle. My new interest in 3D software made it easy for me to decide to tackle this project digitally, at least for the most part. Initially, the plan was to build a digital MOC in BrickLink Studio and render every picture twice, one with and one without placeholder minifigures. The rendering with figures then would determine the angle at which I would have to photograph the real figures in order to insert them into the corresponding places in the rendering without figures using Photoshop. I also wanted to add dot and line grids to the final images to imitate the typical look of the movie.
But, as is so often the case, plans change, especially over the four months I worked on this project.
Research and Preparation
BrickNerd: Once you committed to the project, how did you begin shaping it? What kind of preparation went into deciding what this build would become?
Thorsten: If I remember correctly, the original intention was to build one or two small vignettes on the theme of ‘Spider-Verse’ and write my thoughts on the CMF series. The latter is now probably obsolete anyway and has been reviewed extensively, especially with the next CMF series about to be released. [Note: you can read about the new costumed figs here.] At the very least, I can say that I think it’s just great.

Projects like this develop organically, and I’m glad that BrickNerd gave me so much freedom, because the result turned out a little different than planned.
I started with what should always be done first: research. I watched the movie again and took a series of screenshots (over 350) of scenes that could be used for a MOC. These included scenes from Brooklyn, the school, Miles’ room, Mumbattan, various locations in Nueva York, and Aaron Davis’ apartment in Earth 42.
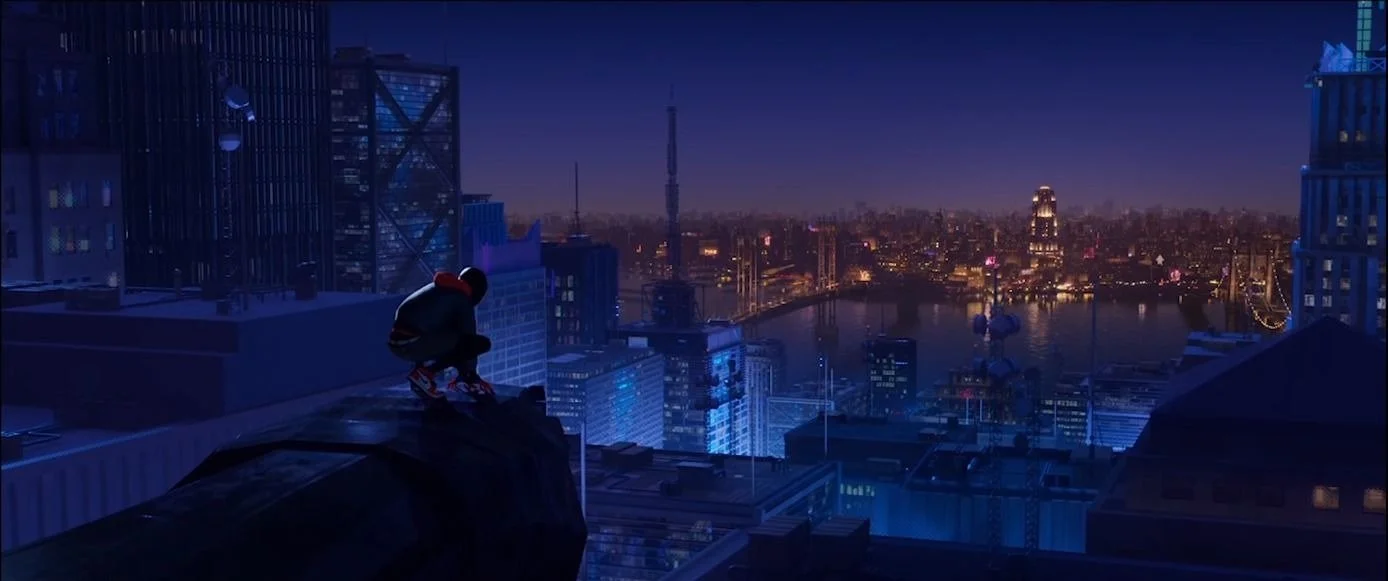
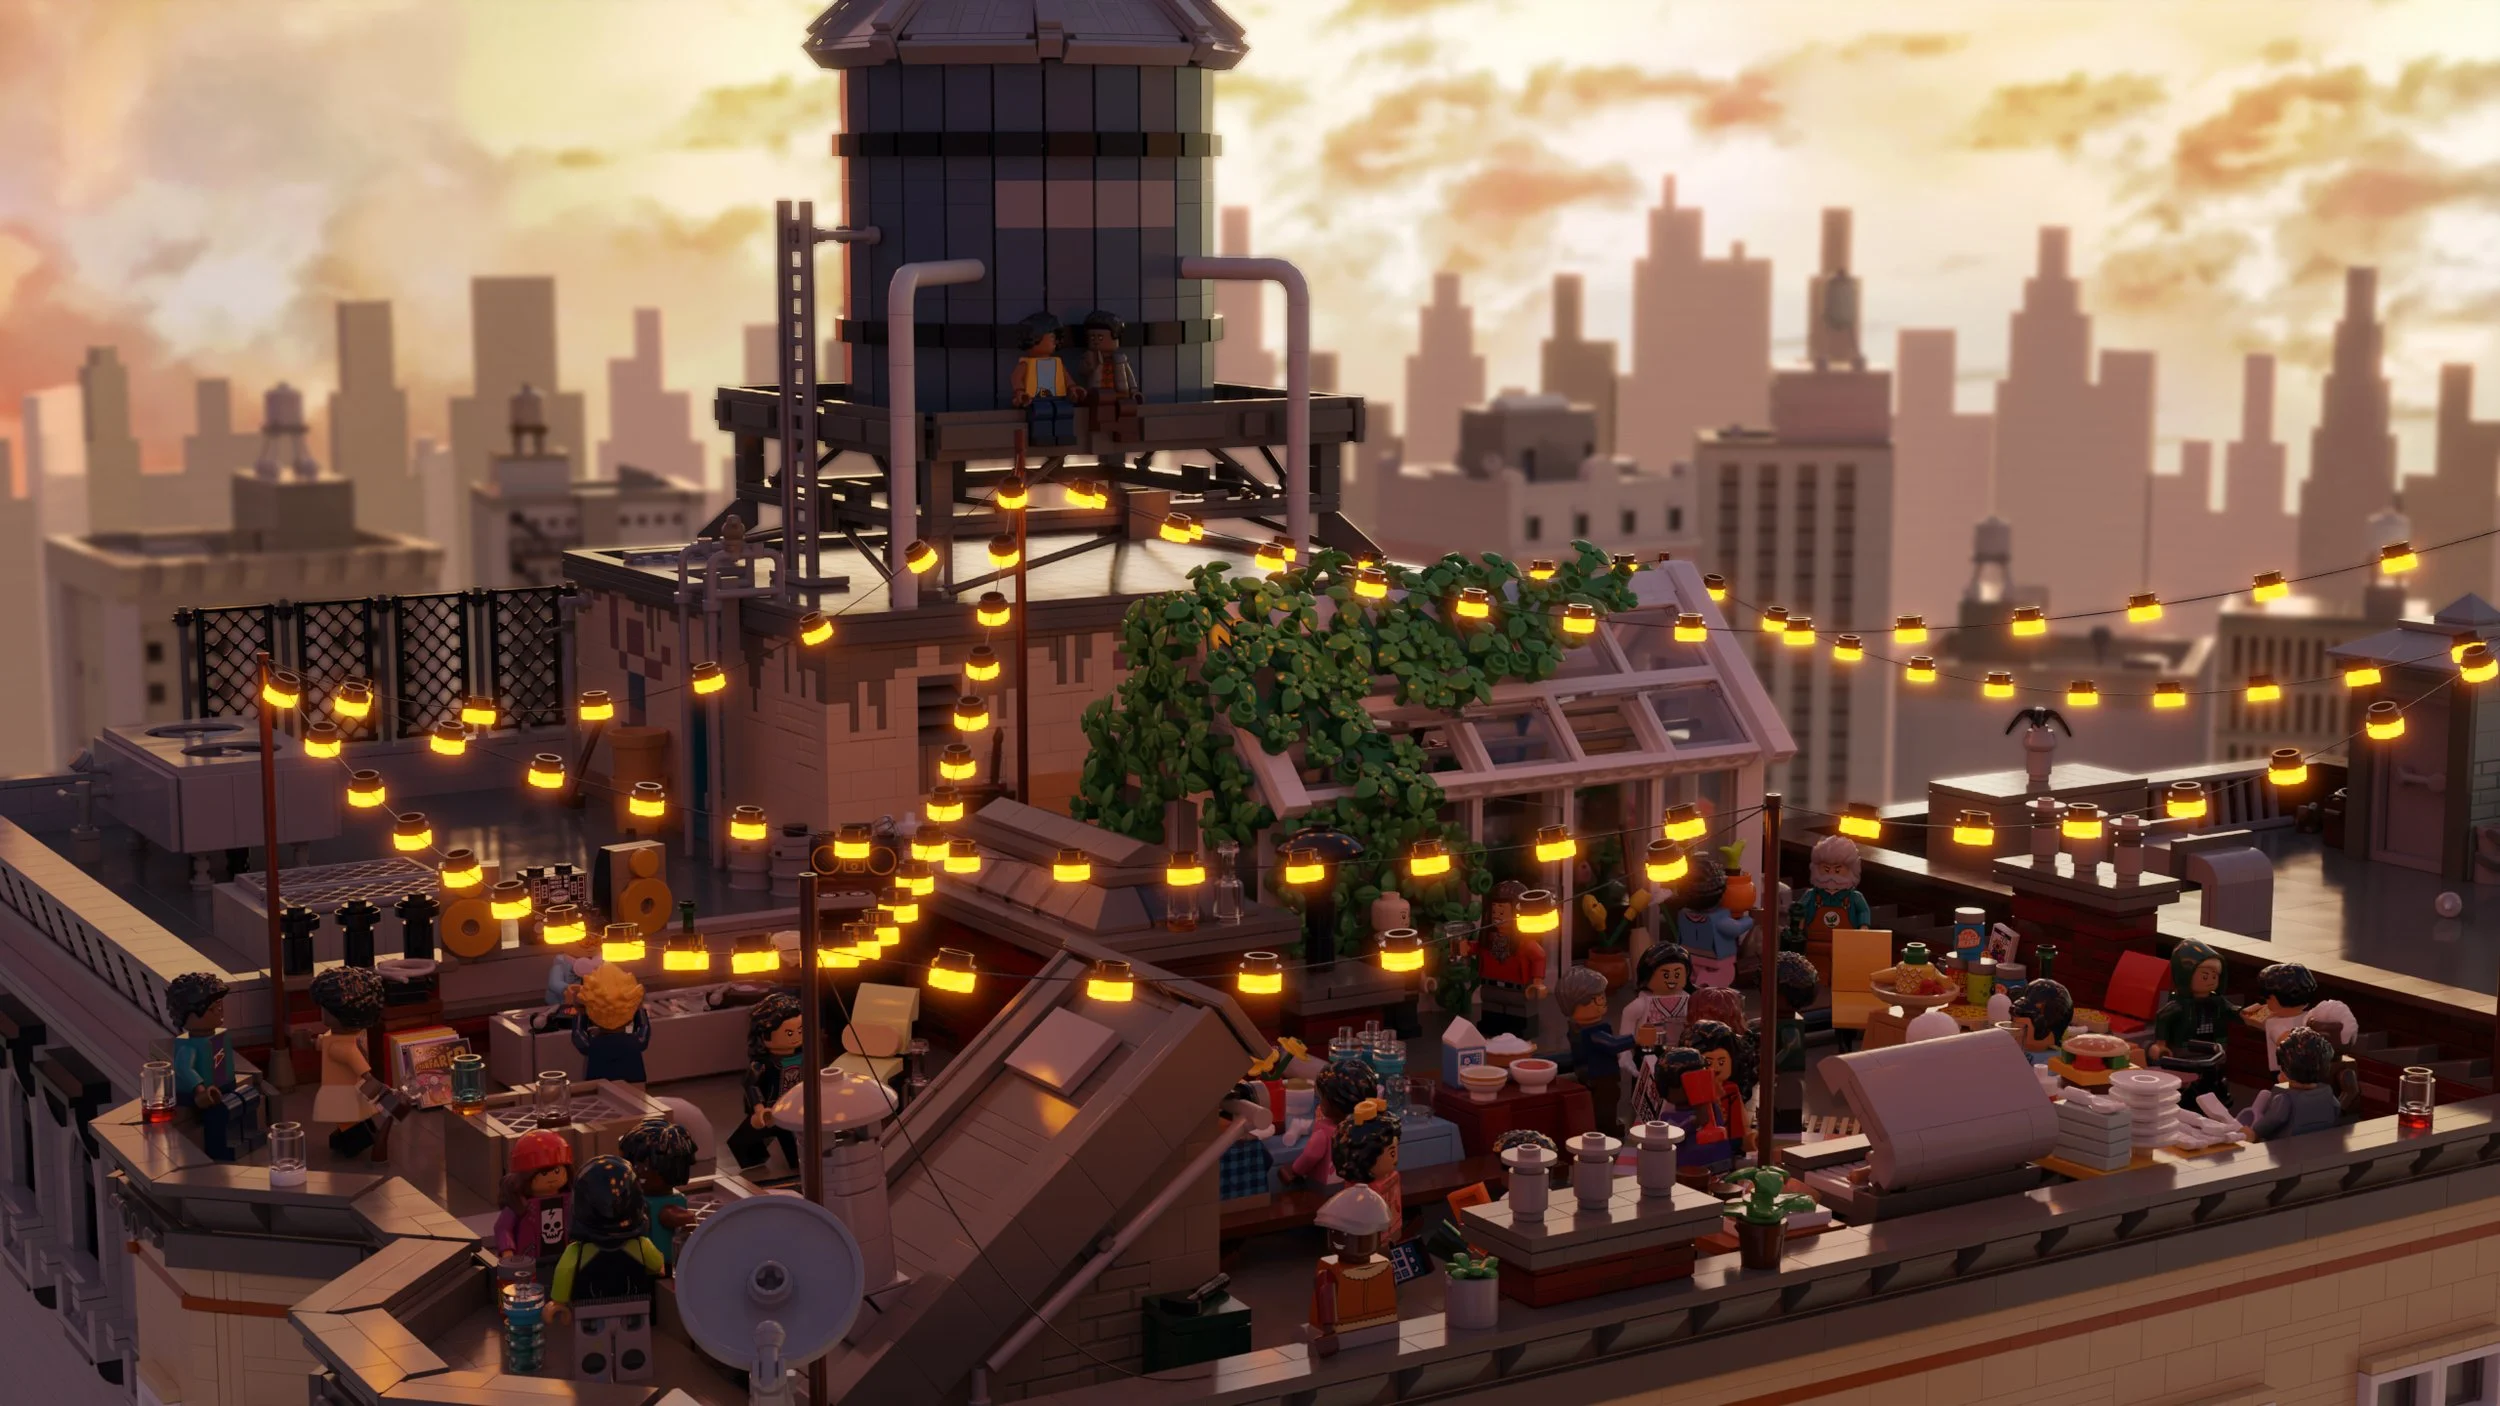
The selection wasn’t easy with so many interesting templates. After a bit of back and forth, I decided on the party scene on the roof. I briefly considered replacing the guests for my MOC with all the characters from the CMF series but decided against it early on – on the one hand for technical reasons, and on the other hand because it would probably have overloaded the scene. I wanted my representation to stay closer to the film. I didn’t quite succeed, but more on that later.
Designing a Spider-Verse Moment
BrickNerd: Can you walk us through the actual construction process and how the build evolved and the major stages along the way?
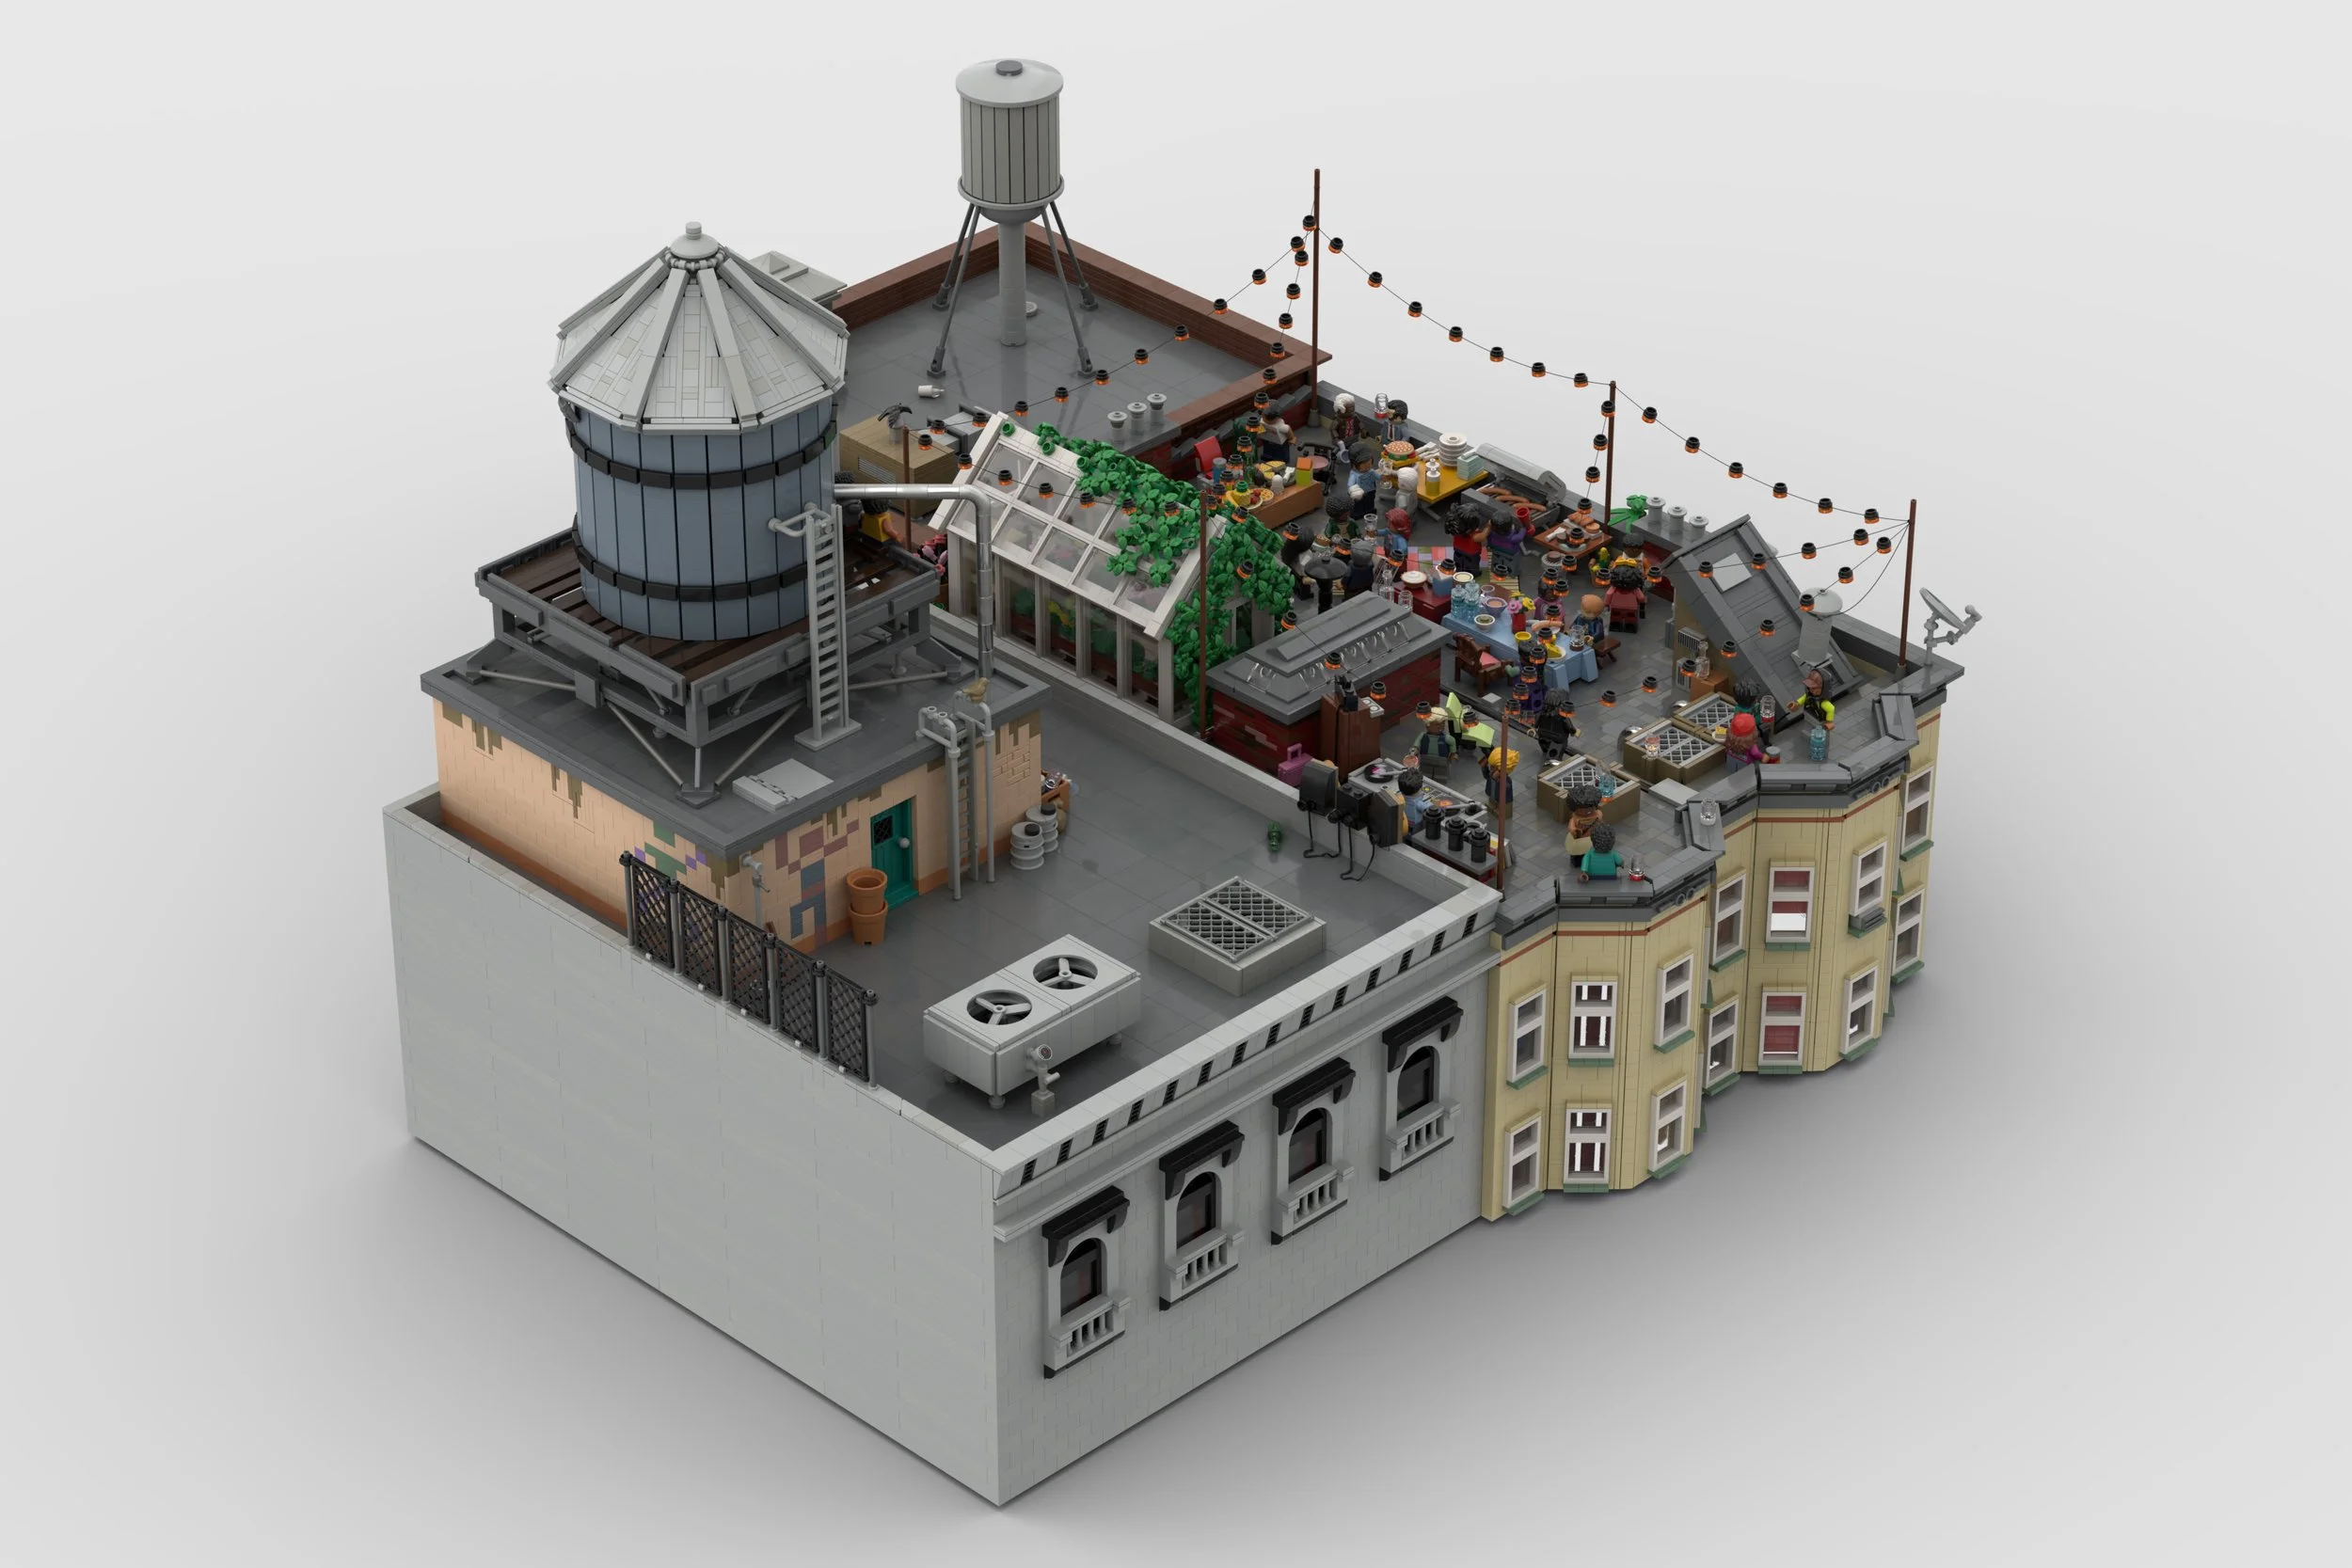
Thorsten: My first decision was to build the digital MOC in the same way as it would be possible with real LEGO parts. I didn’t use any parts in colors that don’t officially exist, no parts from other manufacturers, and no stickers or prints of my own (with two tiny exceptions).
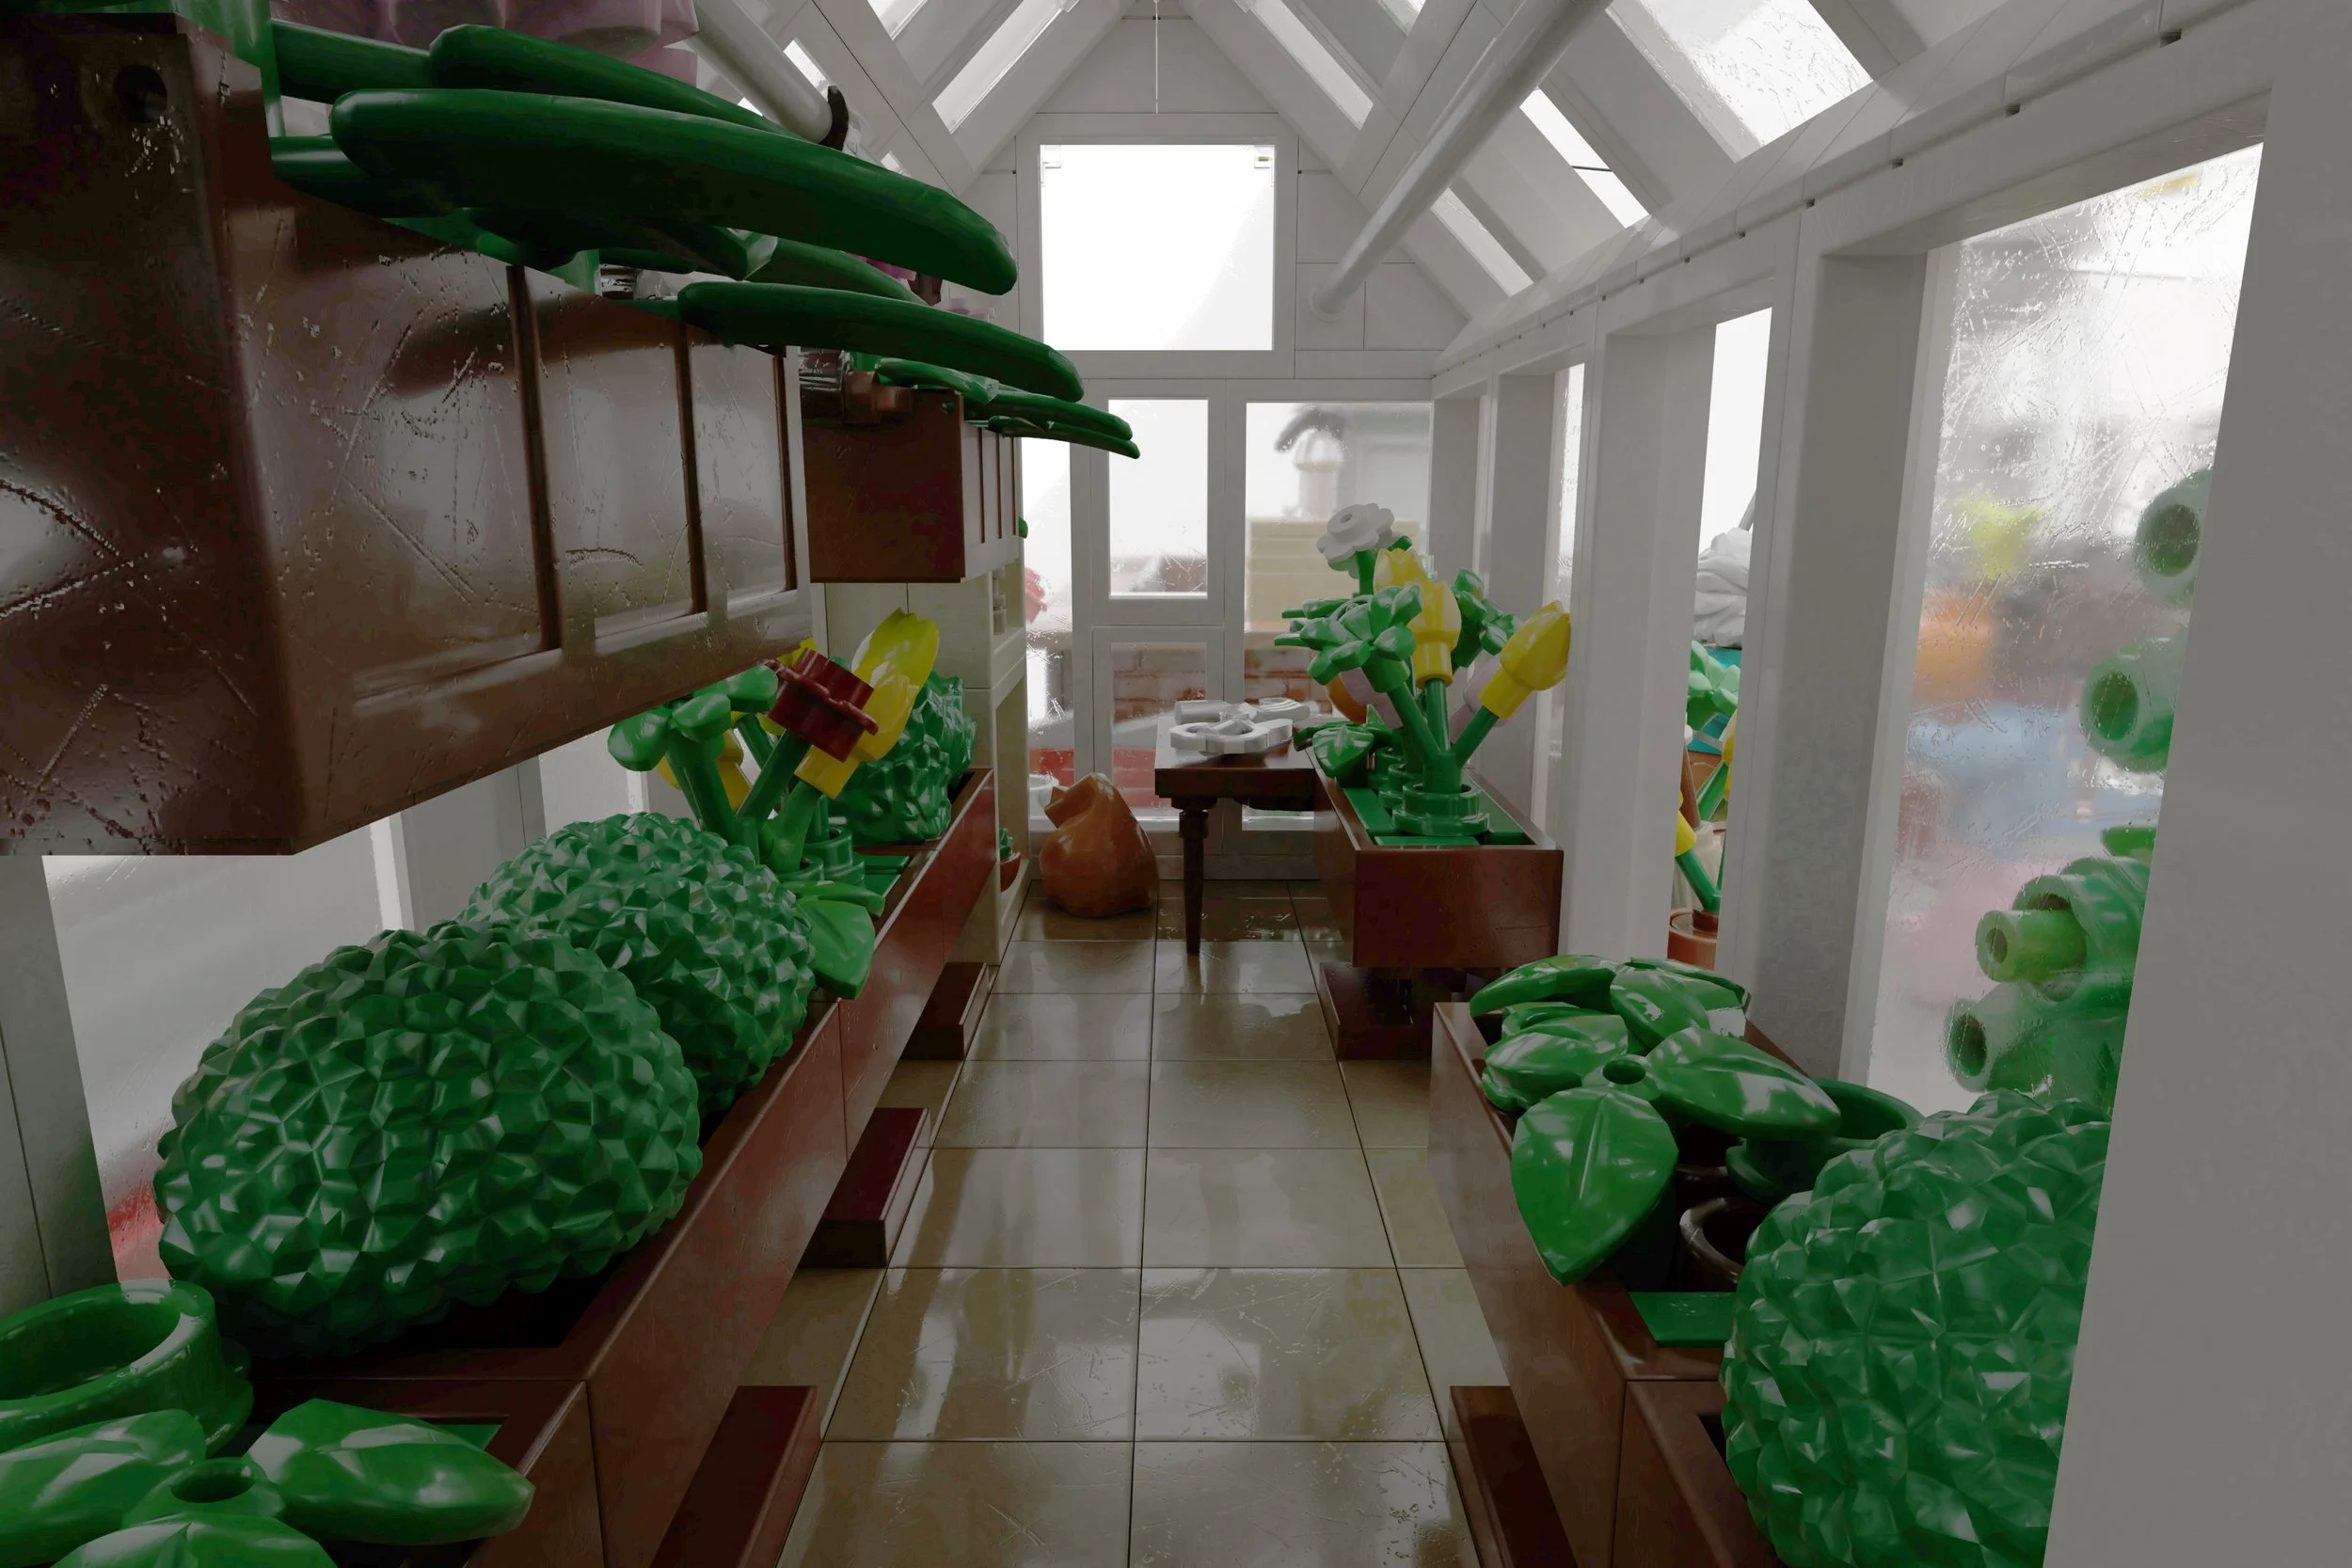
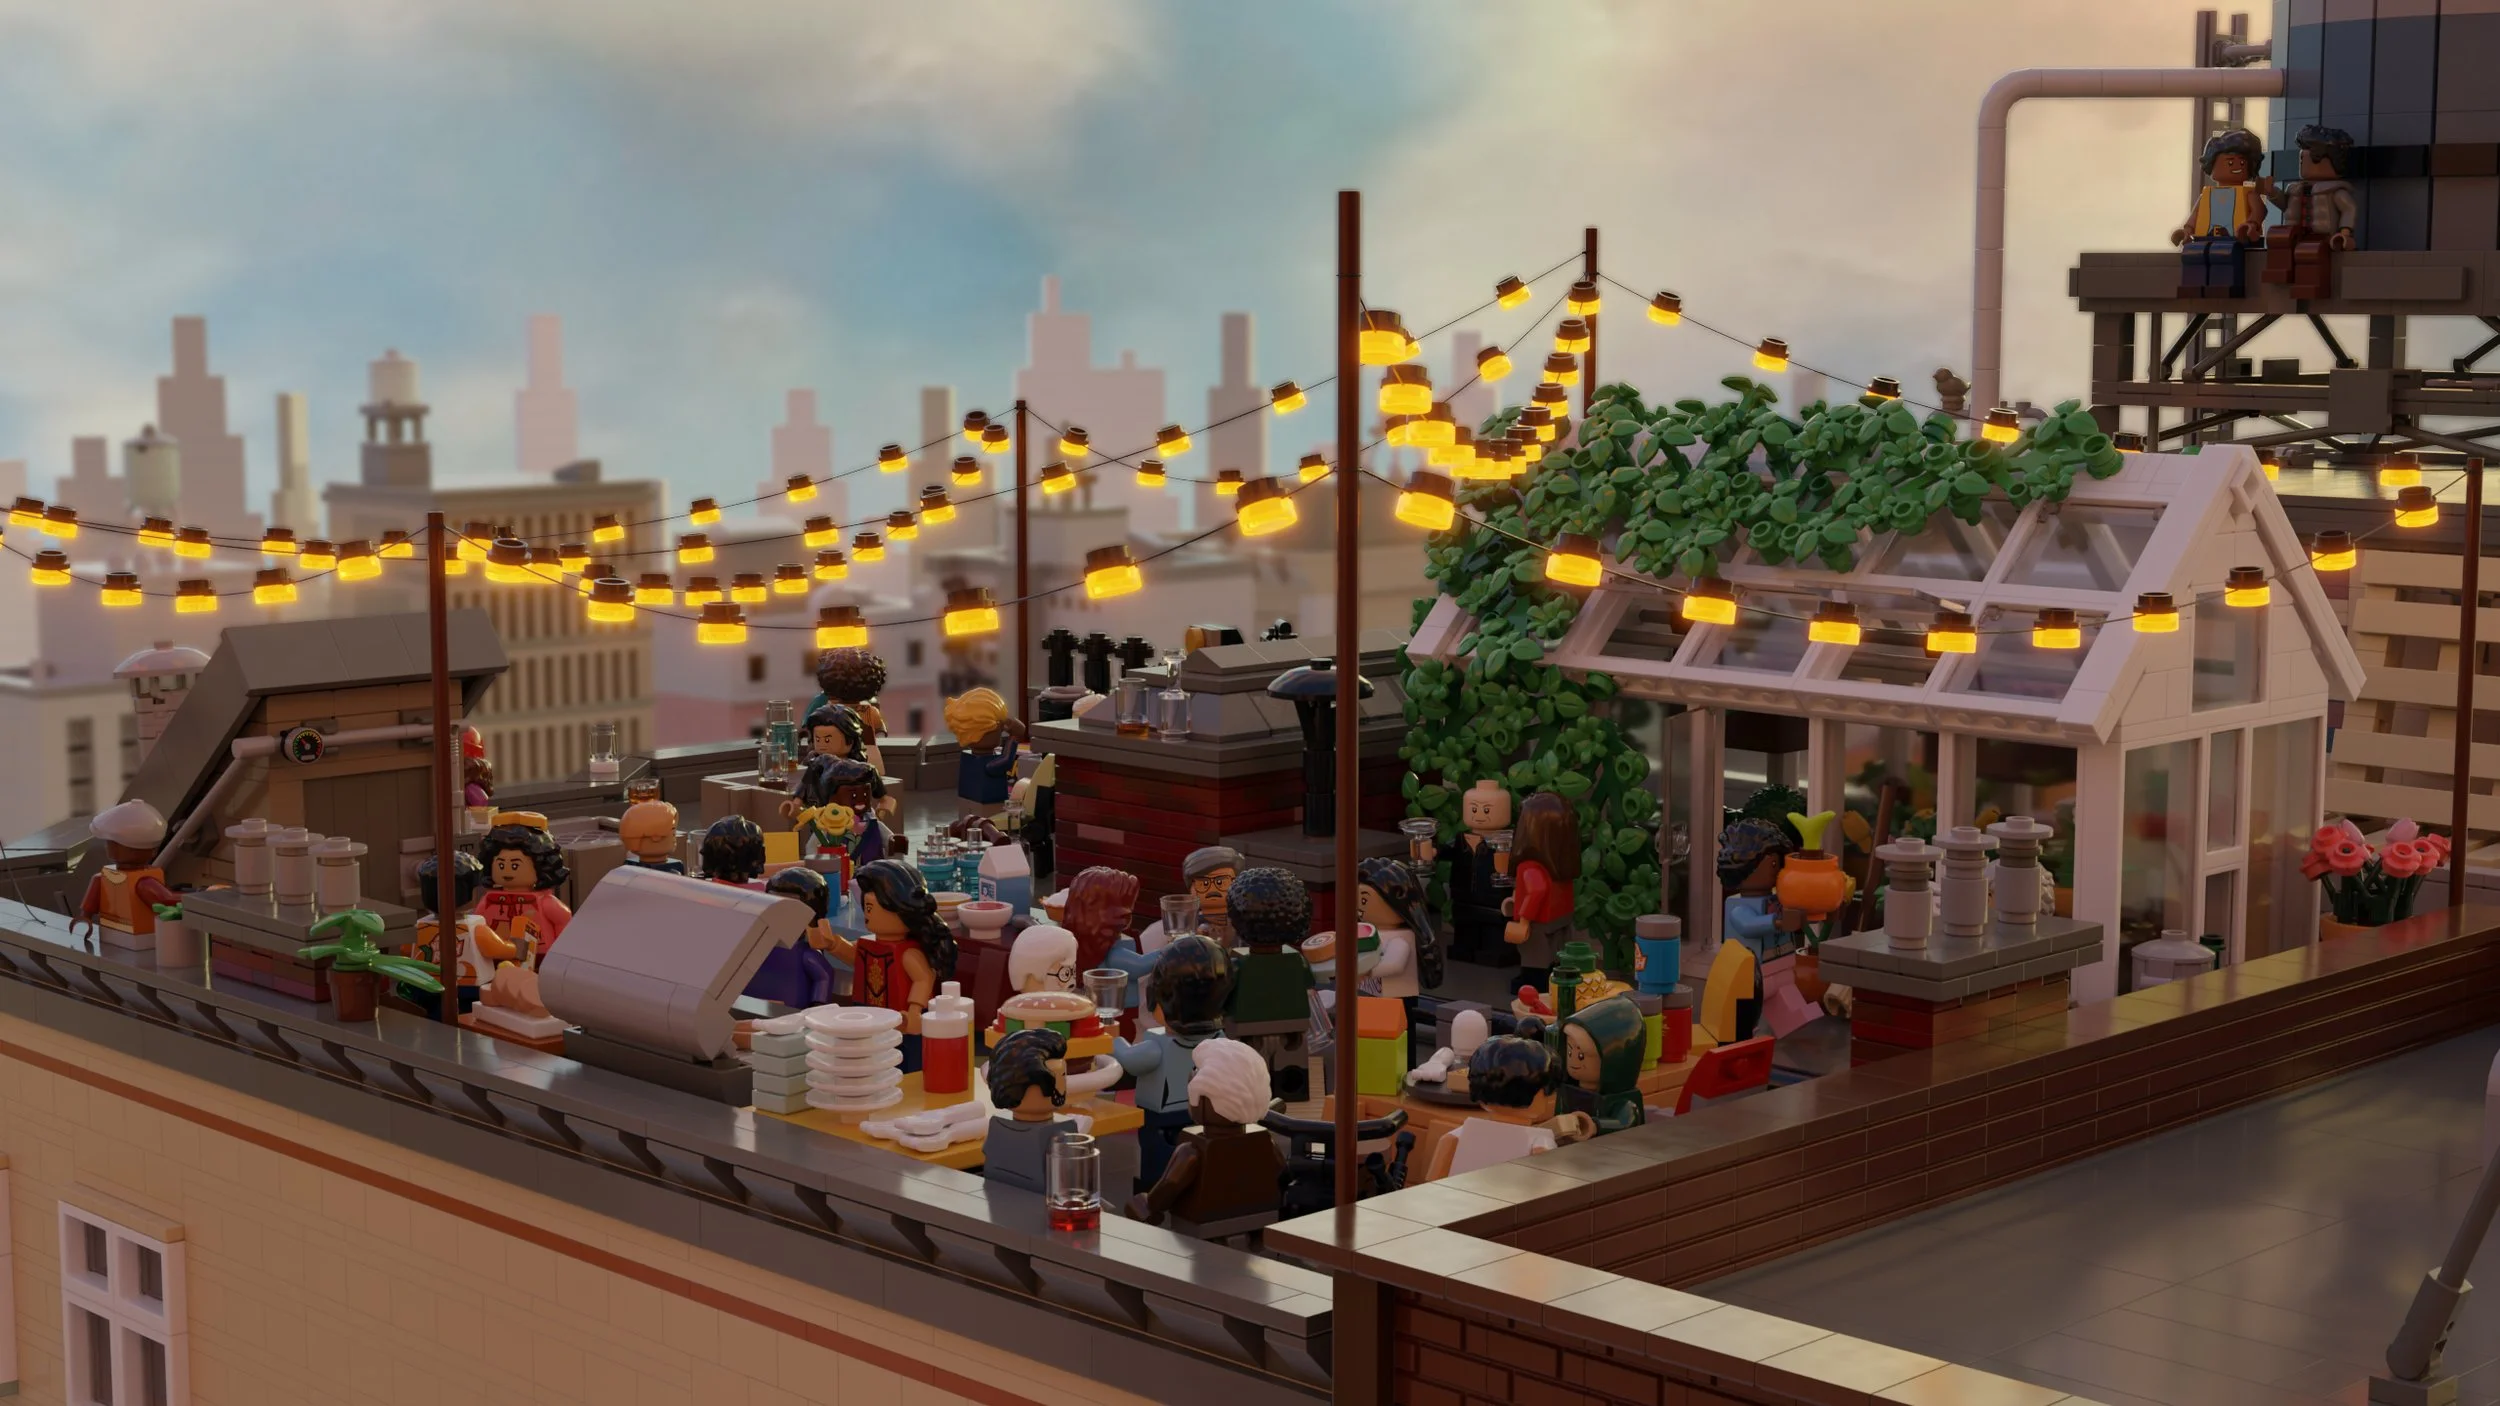
I started with the part that interested me most – the greenhouse. Basically, a house roof isn’t particularly exciting because it mainly consists of a lot of boring surface area. But with the greenhouse, the water tower, the ventilation system, and the roof access, I felt like I was building several small, interesting vignettes. At that point, I wasn’t aware of the scope of the entire MOC.
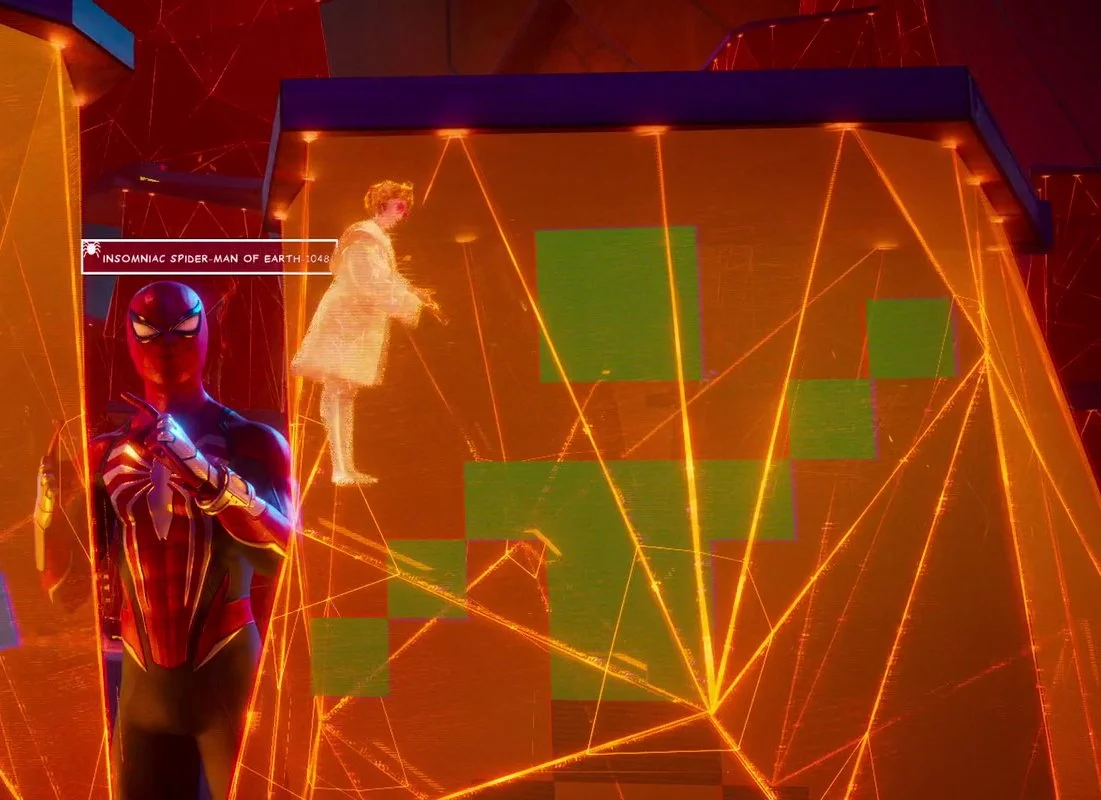
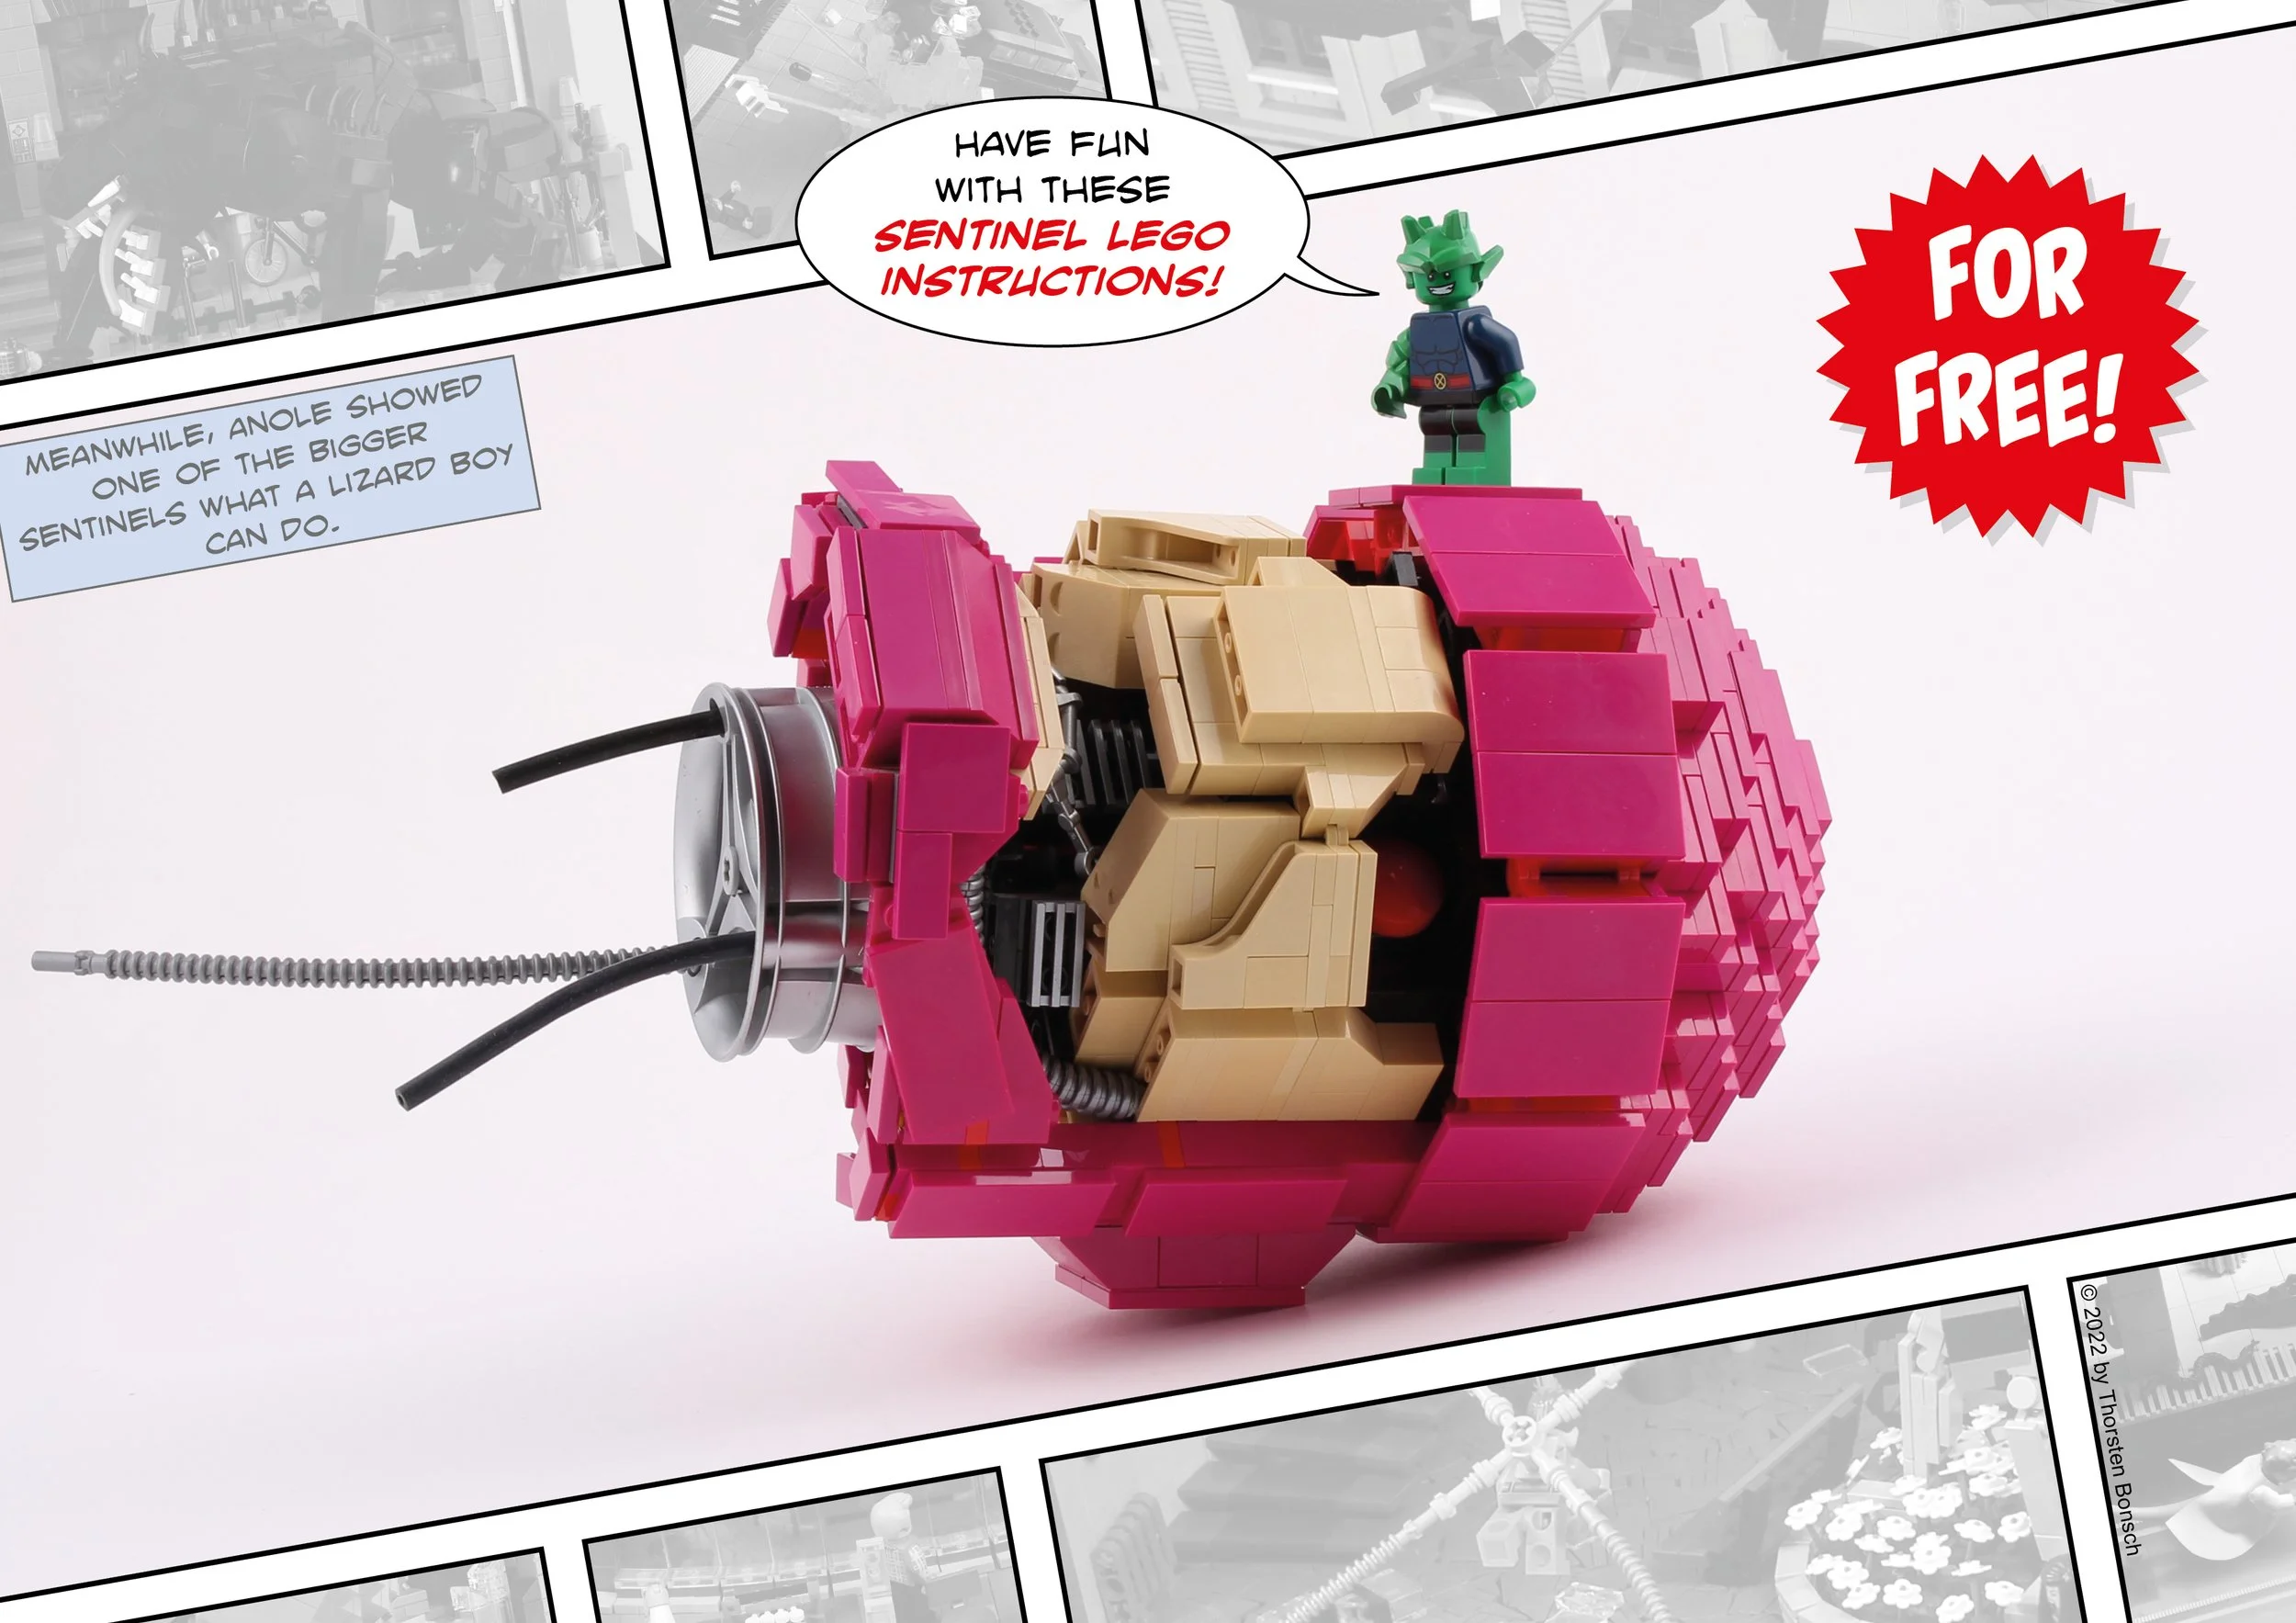
I think that when composing a large area or environment, it is always important to have isolated small “islands” where interesting things are happening. I gradually tackled areas that I furnished with lots of details. For example, there is a corner on the neighboring roof where a painter has left his tools. Attentive viewers can even tell what he painted, based on the colors he used. On the wall of the large roof access, you can see two extremely pixelated Spider-Men, who are barely recognizable as such due to their low resolution. On the back, a Green Goblin can be seen in the same style.
This is a homage to the aforementioned first Spider-Man computer game by Parker Brothers from 1982. And anyone who paid close attention to the movie “Spider-Man: Across the Spider-Verse” will see that this version of the Green Goblin can also be found among the imprisoned anomalies (at approx. 1:20).

As the three rooftops slowly took shape, I decided to go one step further and also build the tall building opposite with Aaron Davis’ gigantic graffiti. To do this, I built a minifigure of Aaron, rendered it at the right angle, and added the words “Rest in Power” from the film. I placed the image behind a grid of 1x2 and 1x1 plates that I created in Illustrator (as a media designer, it’s advantageous to have access to a wide range of graphics programs).

This allowed me to pixelate the image and recreate it in the studio. I then refined the display with slopes and a few other techniques but tried to retain as much of the brick structure of the clinker wall as possible. As always, this was much more work than I had initially thought.

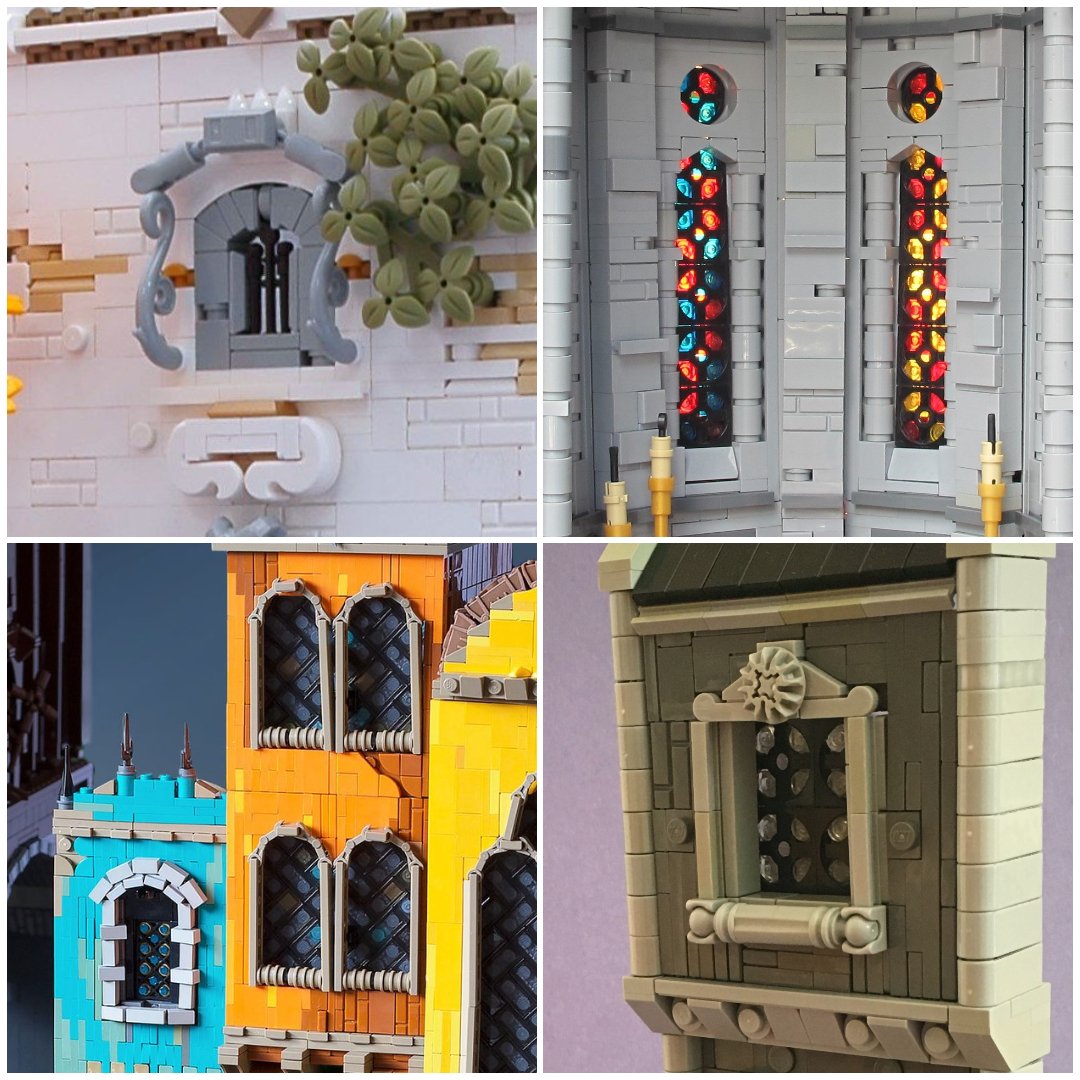
The buildings and their details grew. Since I was still pursuing the idea of adding dot and line grids to the images at the end, I didn’t incorporate too many details into the window frames, for example. I based their simplicity on the templates from the film.
Spoiler: I decided against the grids in the end. They look fantastic in the film, but in my little MOC they were rather irritating and distracting.
When Studio Isn’t Enough
BrickNerd: As the build progressed, what technical limitations did you encounter and what did you do to overcome them?
Thorsten: At some point, I reached the stage where I had to add the string of lights. Anyone who has ever worked with BrickLink Studio knows how problematic or even impossible it is to handle deformable objects. With a little practice, it works for some of these parts, such as the “Strings with End Studs,” which I used as cables for the music system. Nevertheless, it was very tedious.
I couldn’t find a suitable solution for the string of lights in Studio. As a result, I quickly imported the posts for the string of lights and relevant parts of the roof into Blender. Blender’s functions allow for the simulation of (relatively) realistic physics, so I was able to stretch the sagging strings between the posts without much effort. In the end, I deleted everything except the strings and exported them as an OBJ file, which I opened in Studio’s Part Designer and from there exported as a LEGO part to use in Studio.

The Part Designer proved useful on several occasions, even though I didn’t use it to create any non-existent parts. As time was running out, I decided, as mentioned above, not to replace the party guests, but to render them in the same way as the rest of the MOC. This gave me the freedom to build any minifigures I wanted from the parts available in Studio to bring the party to life.
However, I needed a few specific characters: Miles, his father Jefferson, and Gwen Stacy. I also needed Miles’ mother Rio for the scene, but there is no official minifigure for her, unlike the others.
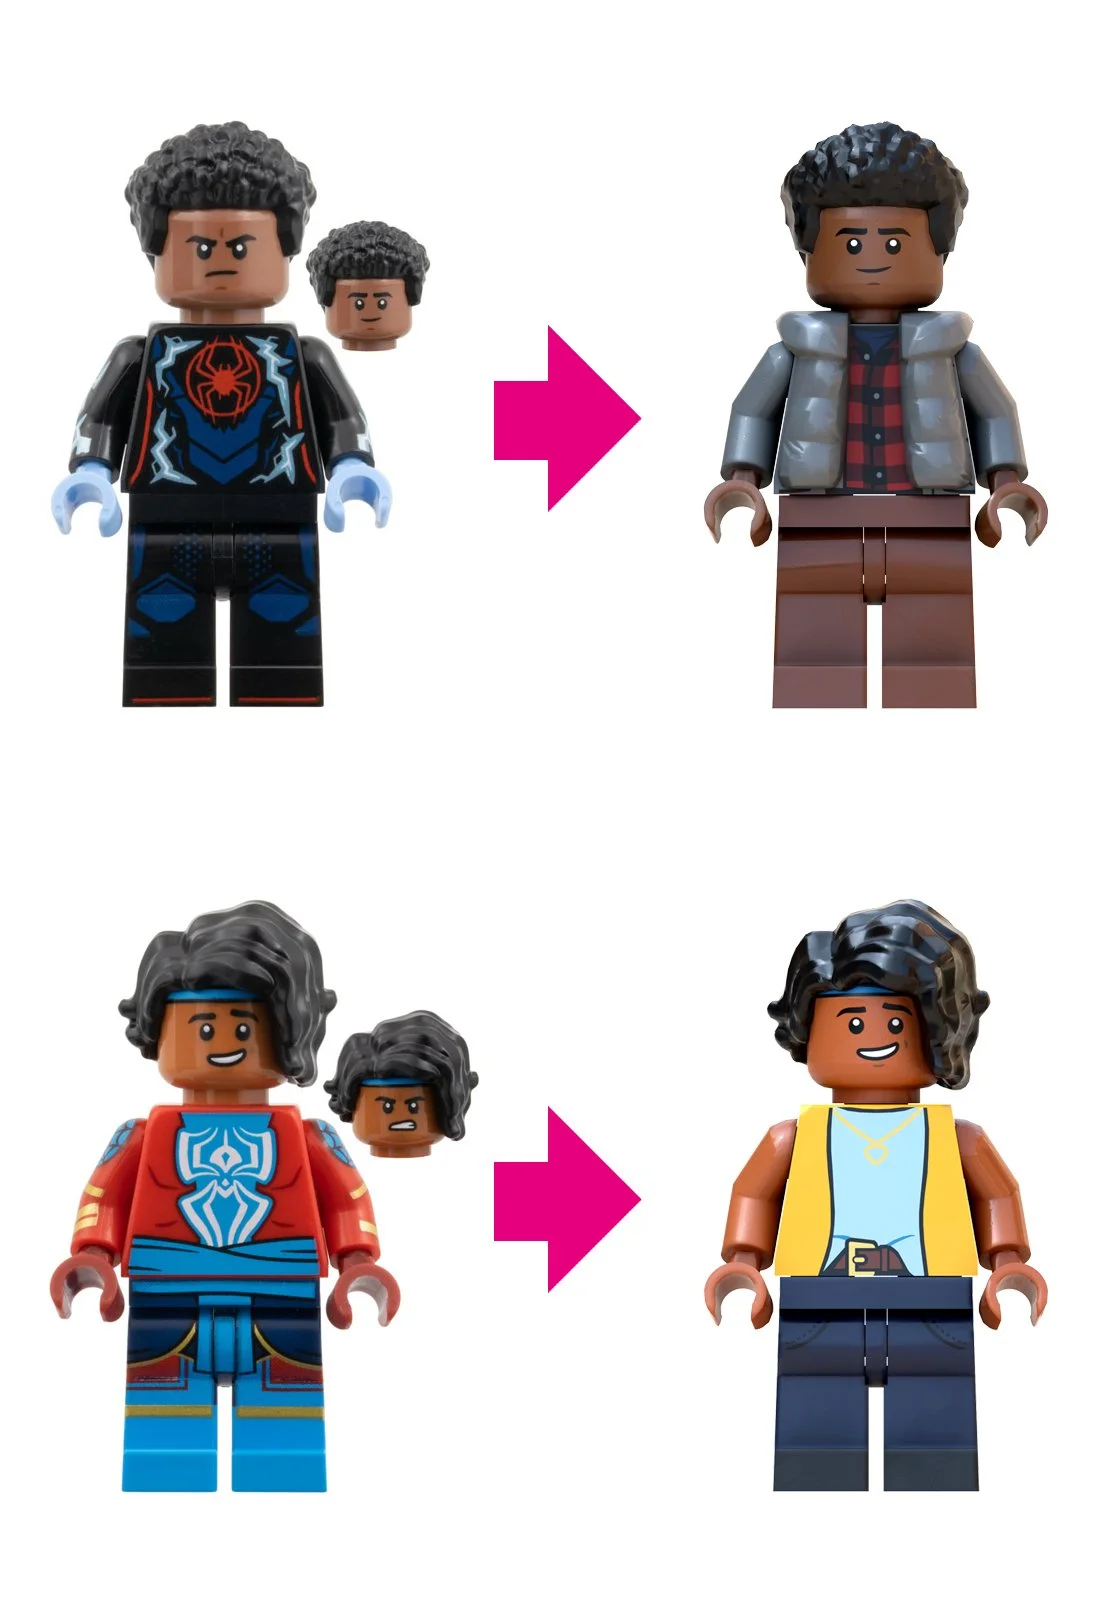
Since all the characters in this scene were “in civilian clothes,” I only had to use the heads and hairpieces of the official figures. Miles’ father was not available among the CMFs, but he was in set 76311 Miles Morales vs. the Spot. However, since most of the parts I needed were not available in Studio, I had to find them in other sources (many thanks to Mecabricks and the LDD/LDraw community).
I couldn’t find the two parts for Jefferson Morales’ face and Miles’ civilian top (the one that I wanted to use in combination with the puffer jacket piece), but that wasn’t a problem. Using some photos of the parts, I drew them true to the original and added them as decals on blank head and torso parts in Studio’s Part Designer.
However, there was no easy solution for one particular problem: Gwen’s hairpiece. I couldn’t find a digital version of it anywhere. One option would have been to recreate it in my 3D software using photogrammetry and retopology, but since I've never done anything like that before, I was afraid it would take too long.
So I decided to change the scene slightly. The only other new hairpiece from the CMF series that I could find was the one of Pavitr Prabhakar (Spider-Man India). Well, since we’re in a movie with countless universes, I have no problem setting my MOC in a slightly different universe than 6160 (perhaps Earth-618, which is also the setting for one of my favorite books – First Team by Robbie MacNiven, for which I also posted the free downloadable building instructions for a giant Sentinel head).
In this universe, Miles isn’t interested in Gwen, but in Pavitr. Understandable, as far as I’m concerned, hahaha.
Even though I use just two of the ‘Across the Spider-Verse’ CMFs, and not even the whole minifigures, just the two heads and the two hairpieces, without the CMF series this MOC wouldn’t be the same.
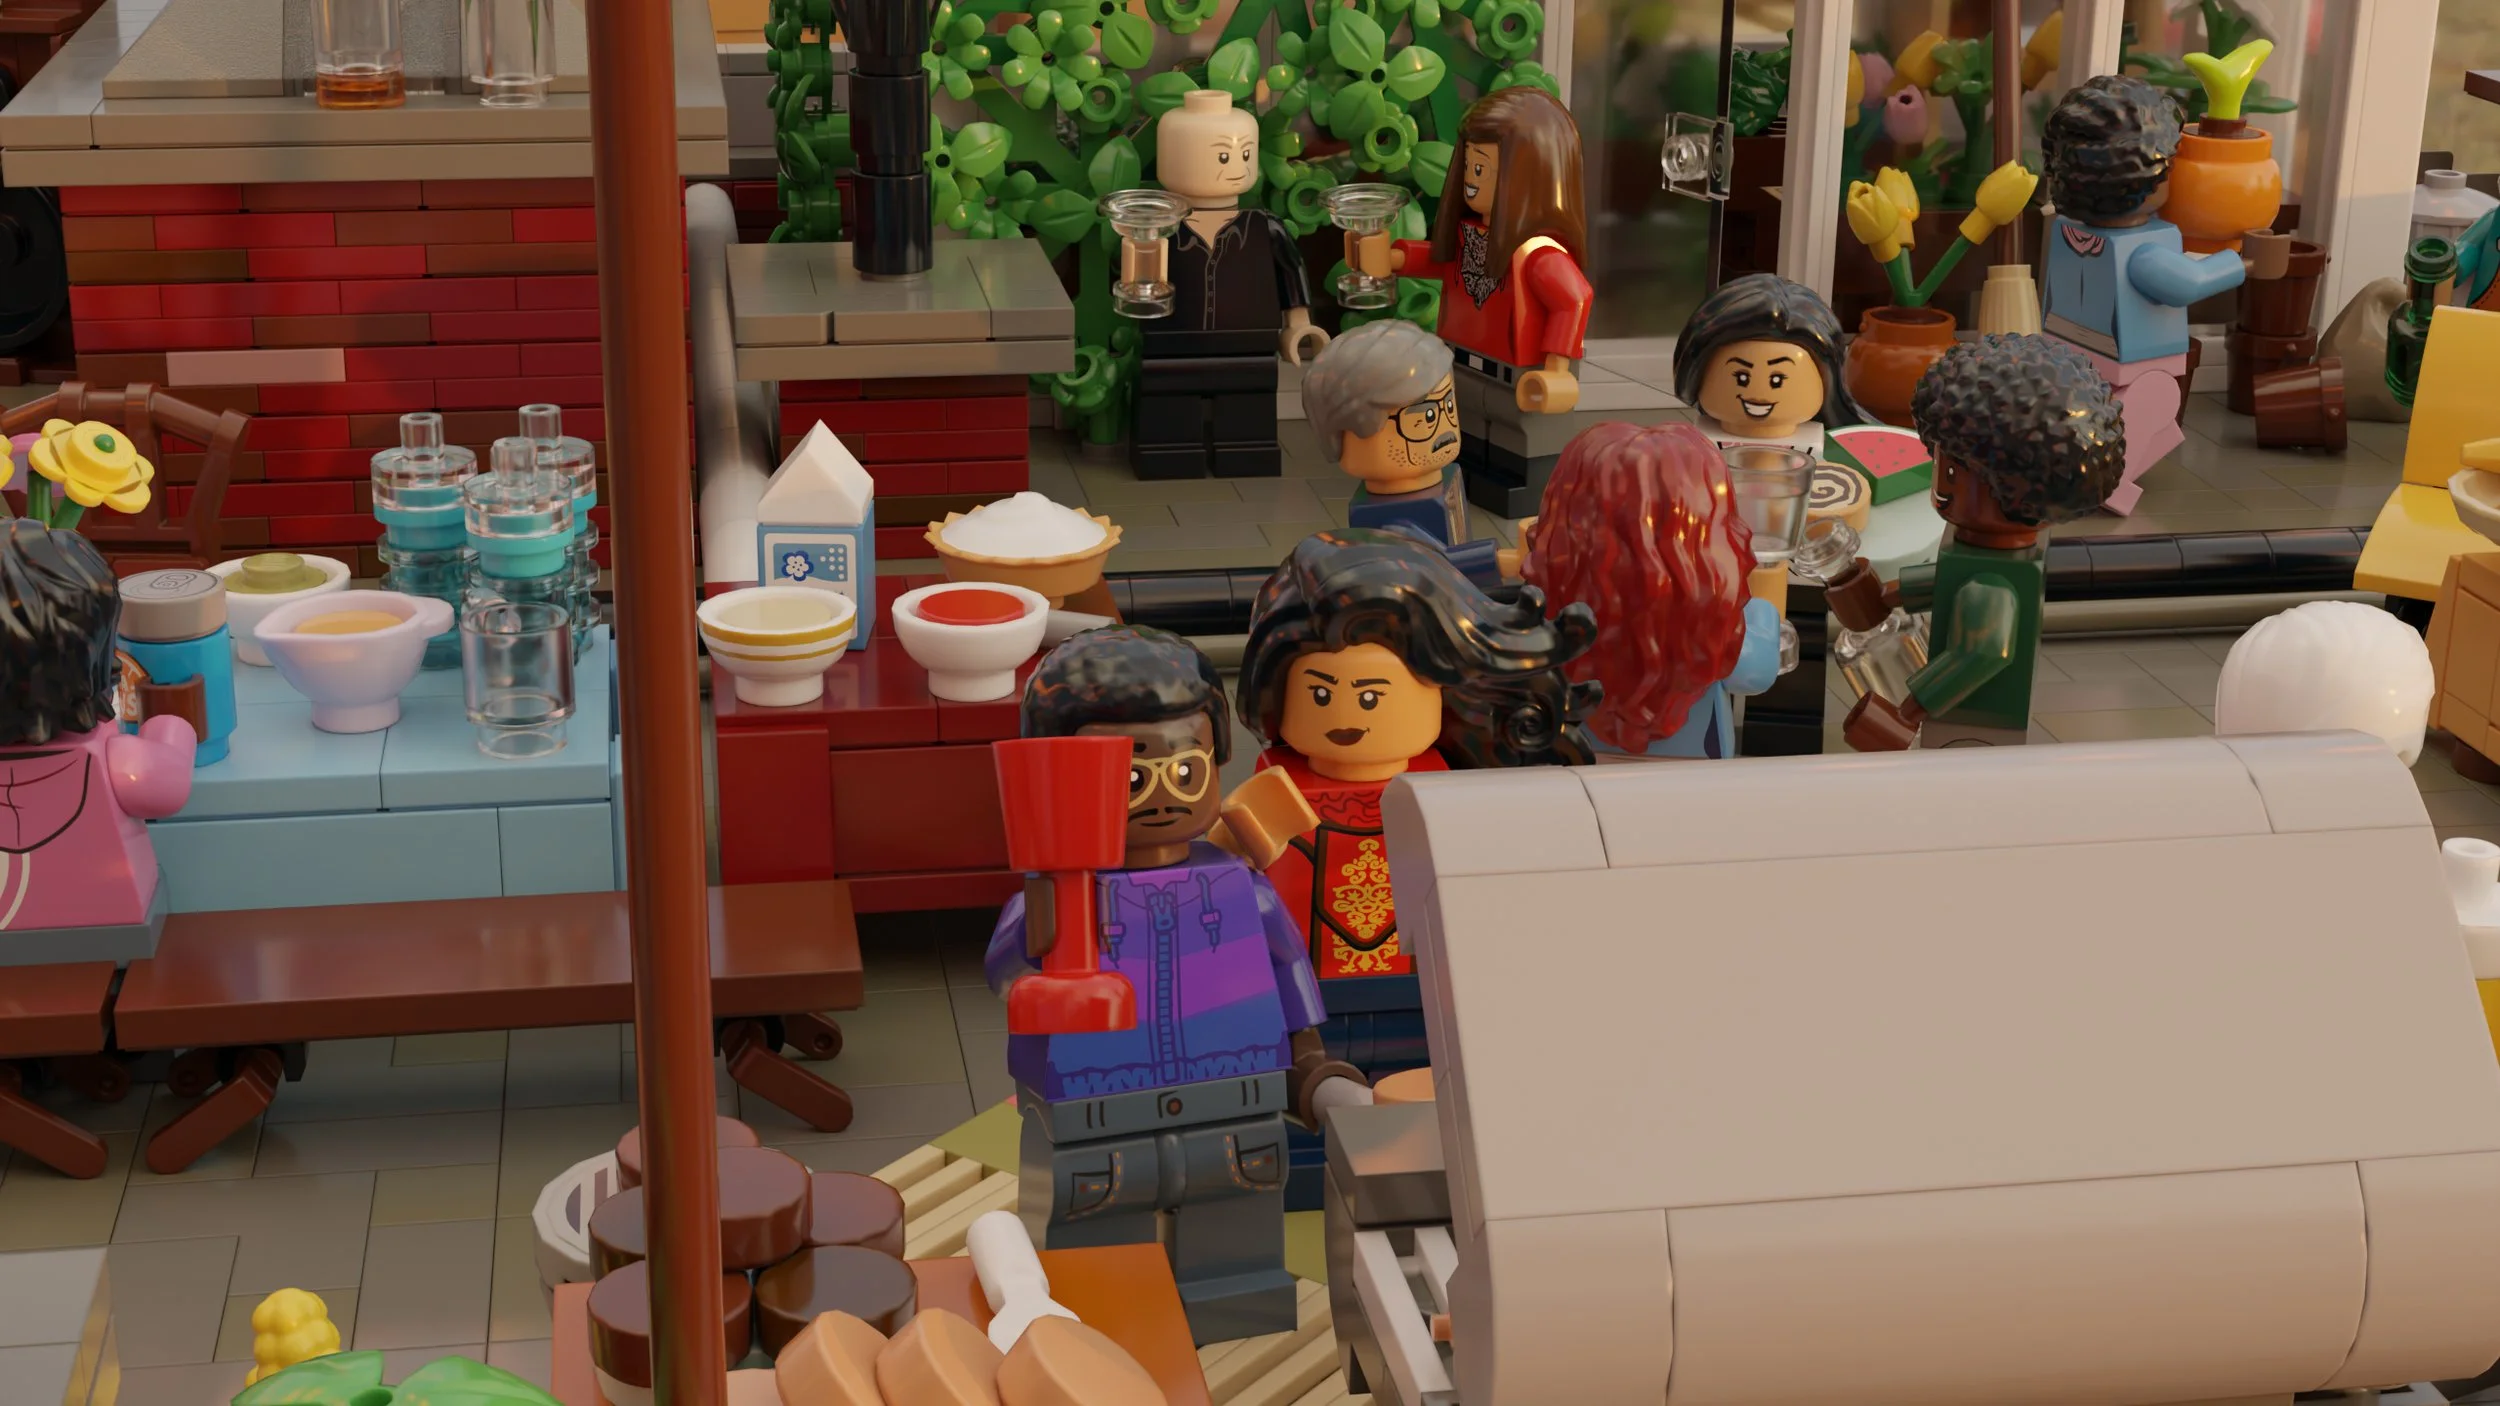
In this Universe 618, the architecture also seems to be a little different. When I placed Miles and Pavitr under the water tower and looked at the scene from their perspective, I could hardly see anything of the party because it was obscured by the roof of the greenhouse. Instead of rebuilding everything, I simply placed the two of them on top of the tower’s platform. It’s still almost too low, but at least high enough for this scene.
I positioned Miles’ parents at the barbecue and captured the moment when his father raises a toast to his brother’s graffiti in his memory. As for his parents, I also hid a little Easter egg here. Among the guests are Miles’ “other” parents – Brian Michael Bendis and Sara Pichelli. We have them to thank for Miles in the first place.
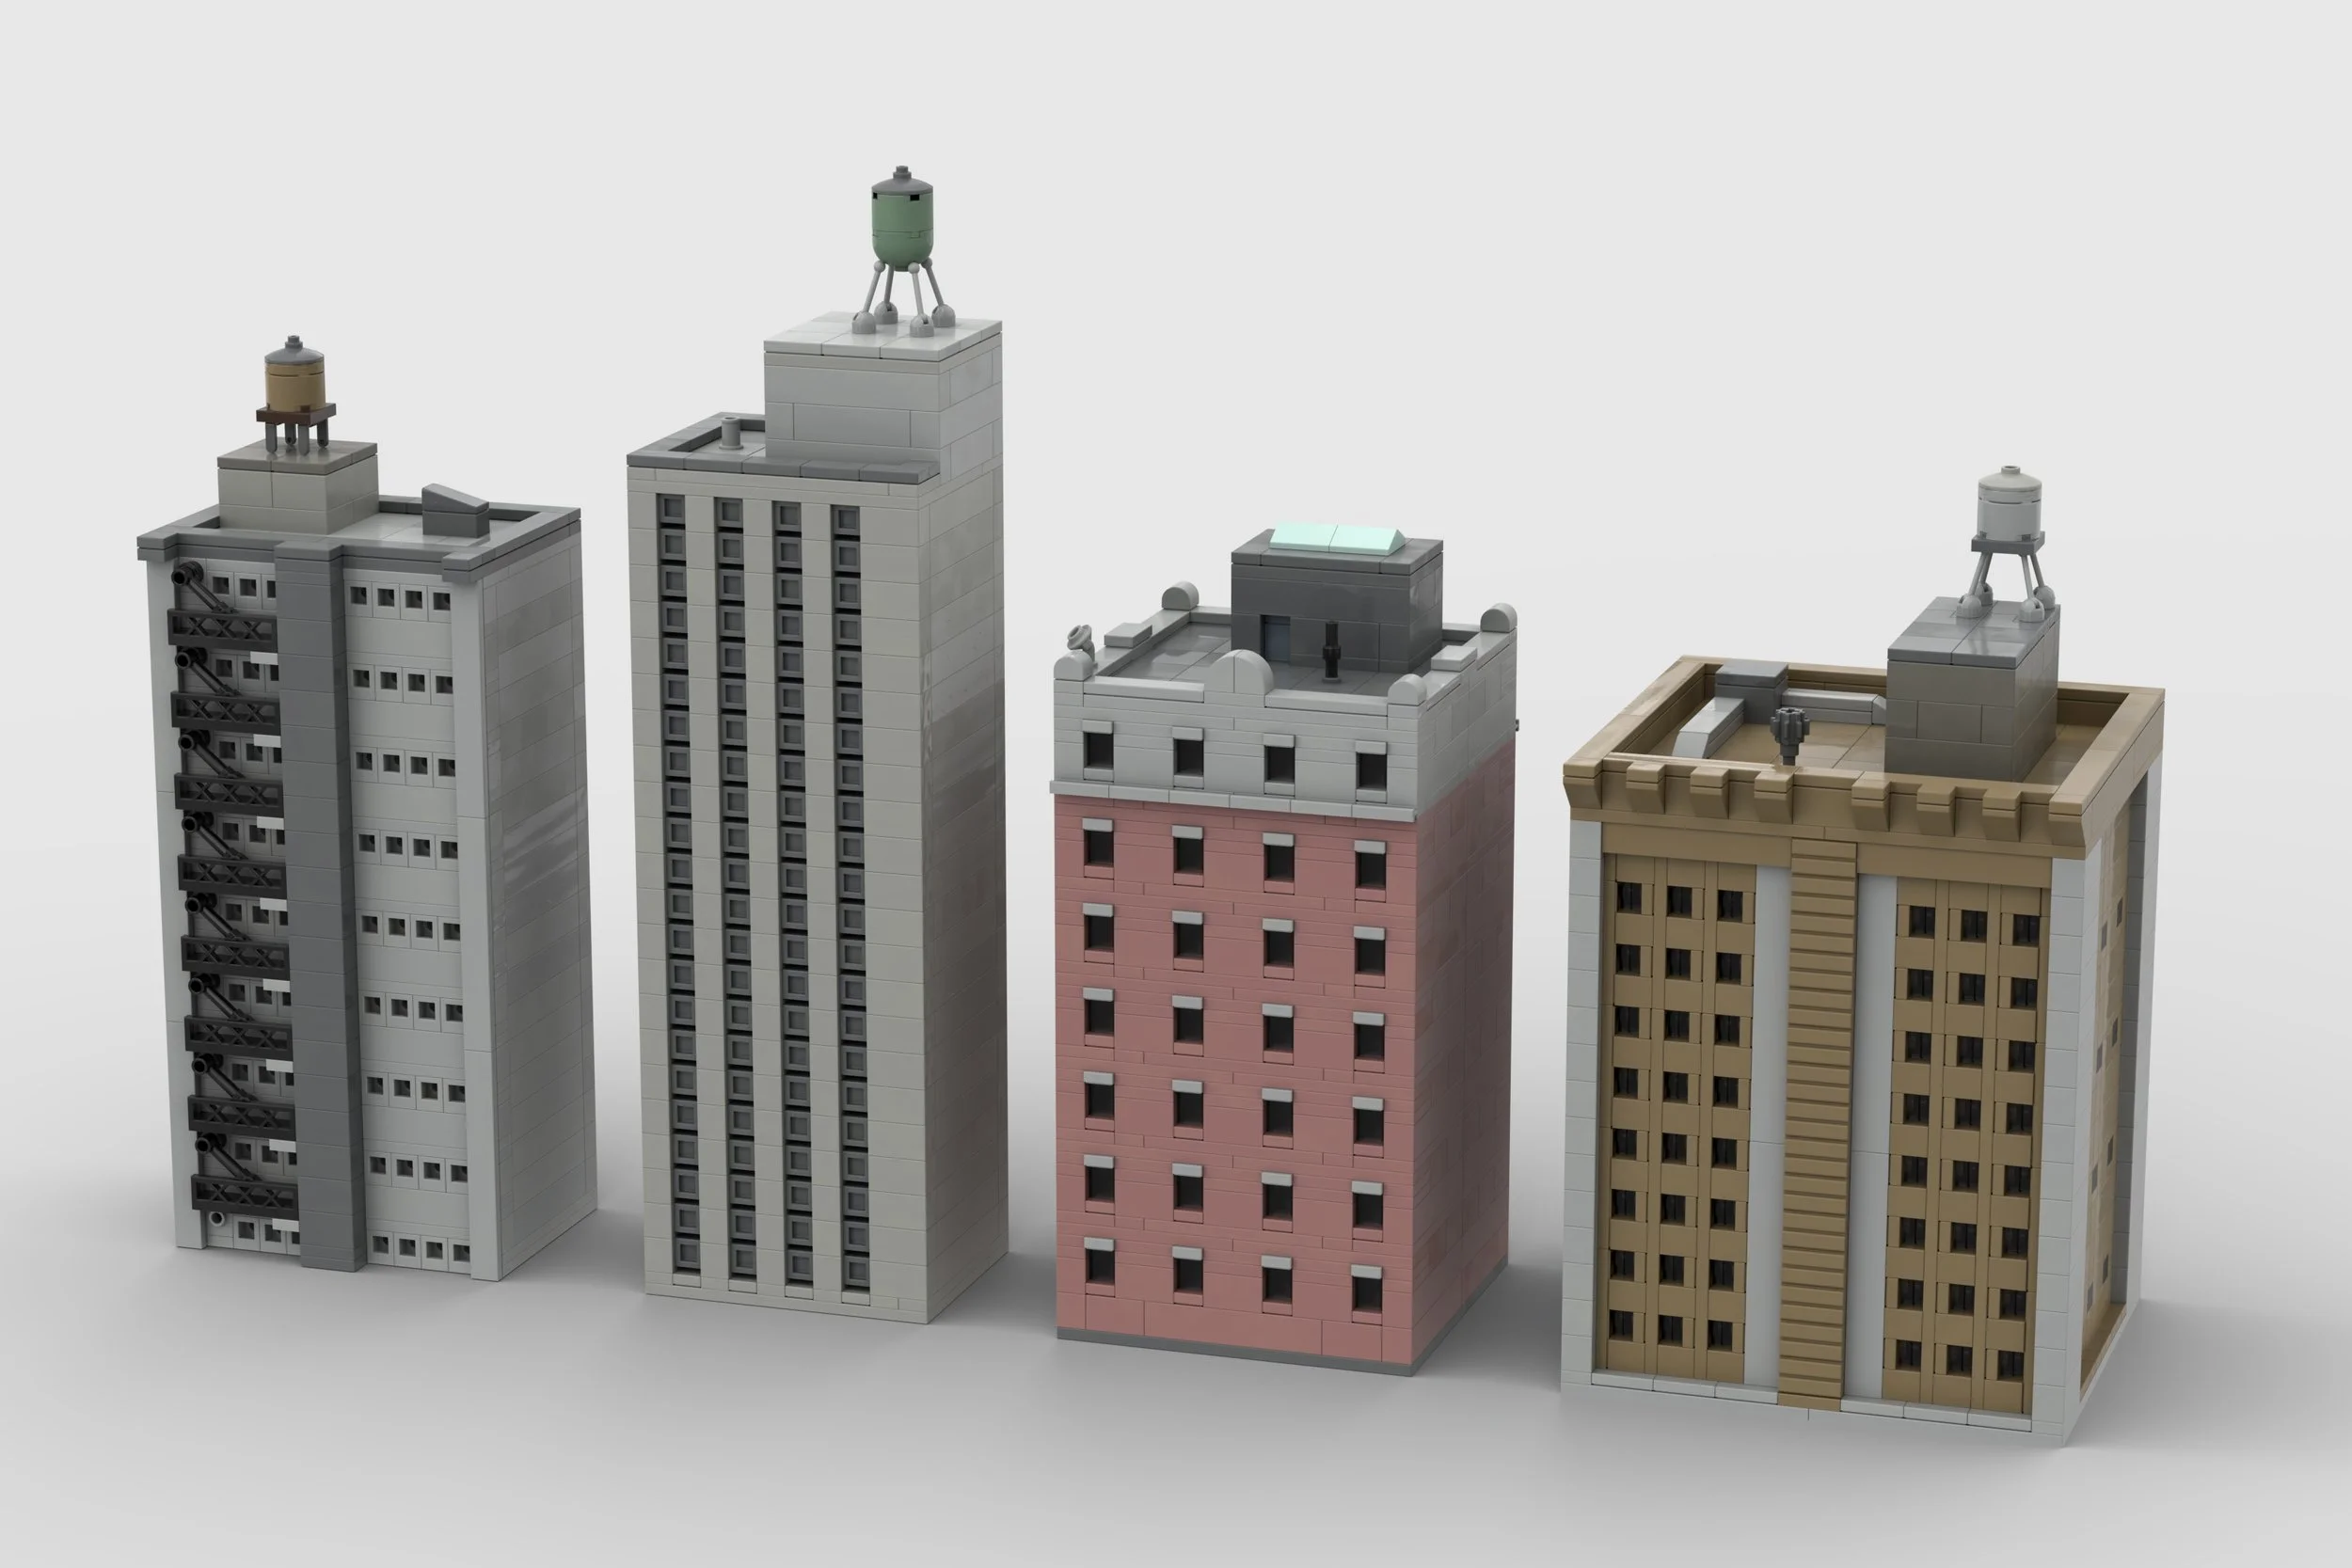
To create the depth effect in the scenes in the film, I built miniaturized skyscrapers and a greatly simplified skyline for some shots. Both were variable and could be moved, rotated, and positioned by me depending on the camera angle. The “forced perspective” created in this way works particularly well in combination with the sky and its very realistic lighting conditions.
Physical vs. Digital Building
BrickNerd: You’ve built physically for most of your life. How does digital LEGO building compare for you, both creatively and practically?
Thorsten: Basically, I’ve only ever built physically throughout my life, and the way I build hasn’t changed since I was a child. What I mean by that is that even after my ‘Dark Ages’, I only sorted my pieces roughly by color – sometimes even just by color categories – in something like flat shoe boxes. I always enjoyed being on my hands and knees while building, rummaging through my boxes and listening to my audio books.
All of that (except for the audio books) is naturally eliminated when building digitally. I have compiled a list of the advantages of both techniques that I have noticed.
Physical building:
Acoustics (clicker) and haptics
Nostalgia
You can better grasp the result (size, mass), which makes it seem more valuable
You can present your MOCs at exhibitions or sell/give them away
Larger range of parts than the digital range
The real world has physical properties, which means you don’t have to spend time positioning parts and simulating these properties (string, fabric, etc.)
Digital building:
Places are easy to reach, even if they are inaccessible or inside something
Almost unlimited number of parts
Elements of a MOC can be rebuilt or replaced without dismantling the surrounding area
Space-saving
Cost-saving (even with high electricity costs for the computer, it is usually cheaper)
You never have to take the MOCs apart or sort their parts away
My list is certainly not exhaustive and does not represent an evaluation on my part. I find it difficult to compare the two techniques, as I enjoy both and yet they are very different.
However, some points also depend on the way you build. As mentioned, I like to rummage through my boxes, but of course that takes a lot of time – significantly more than when working with Studio. It’s a completely different story for someone who keeps their parts neatly sorted in drawers.
With Renders, No Dusting Required
BrickNerd: Once the build itself was complete, how did you approach rendering and post-production? How did that differ from photographing a physical MOC?
Thorsten: Here we can see another clear difference between physical and digital building. In the past, when I finished a large MOC, I would cover the table on which it stood with black cardboard and hang long black fabric panels as a backdrop. The next step was the unpleasant task that every FOL hates: removing dust. No matter how carefully you work with static cloths and brushes, there’s always something left behind. Maybe the dust just waits until you’re ready to press the camera shutter and then quickly descends on the MOC again. I have no idea.
I had to take multiple shots from every angle with different focus settings to create a single, completely sharp image in Photoshop.
Then came the task that is even more thankless than removing dust: removing dust digitally. Using a stamp and repair brush, I spent hours removing tiny dust particles from each photo. A terribly boring task that can easily drive you nuts.
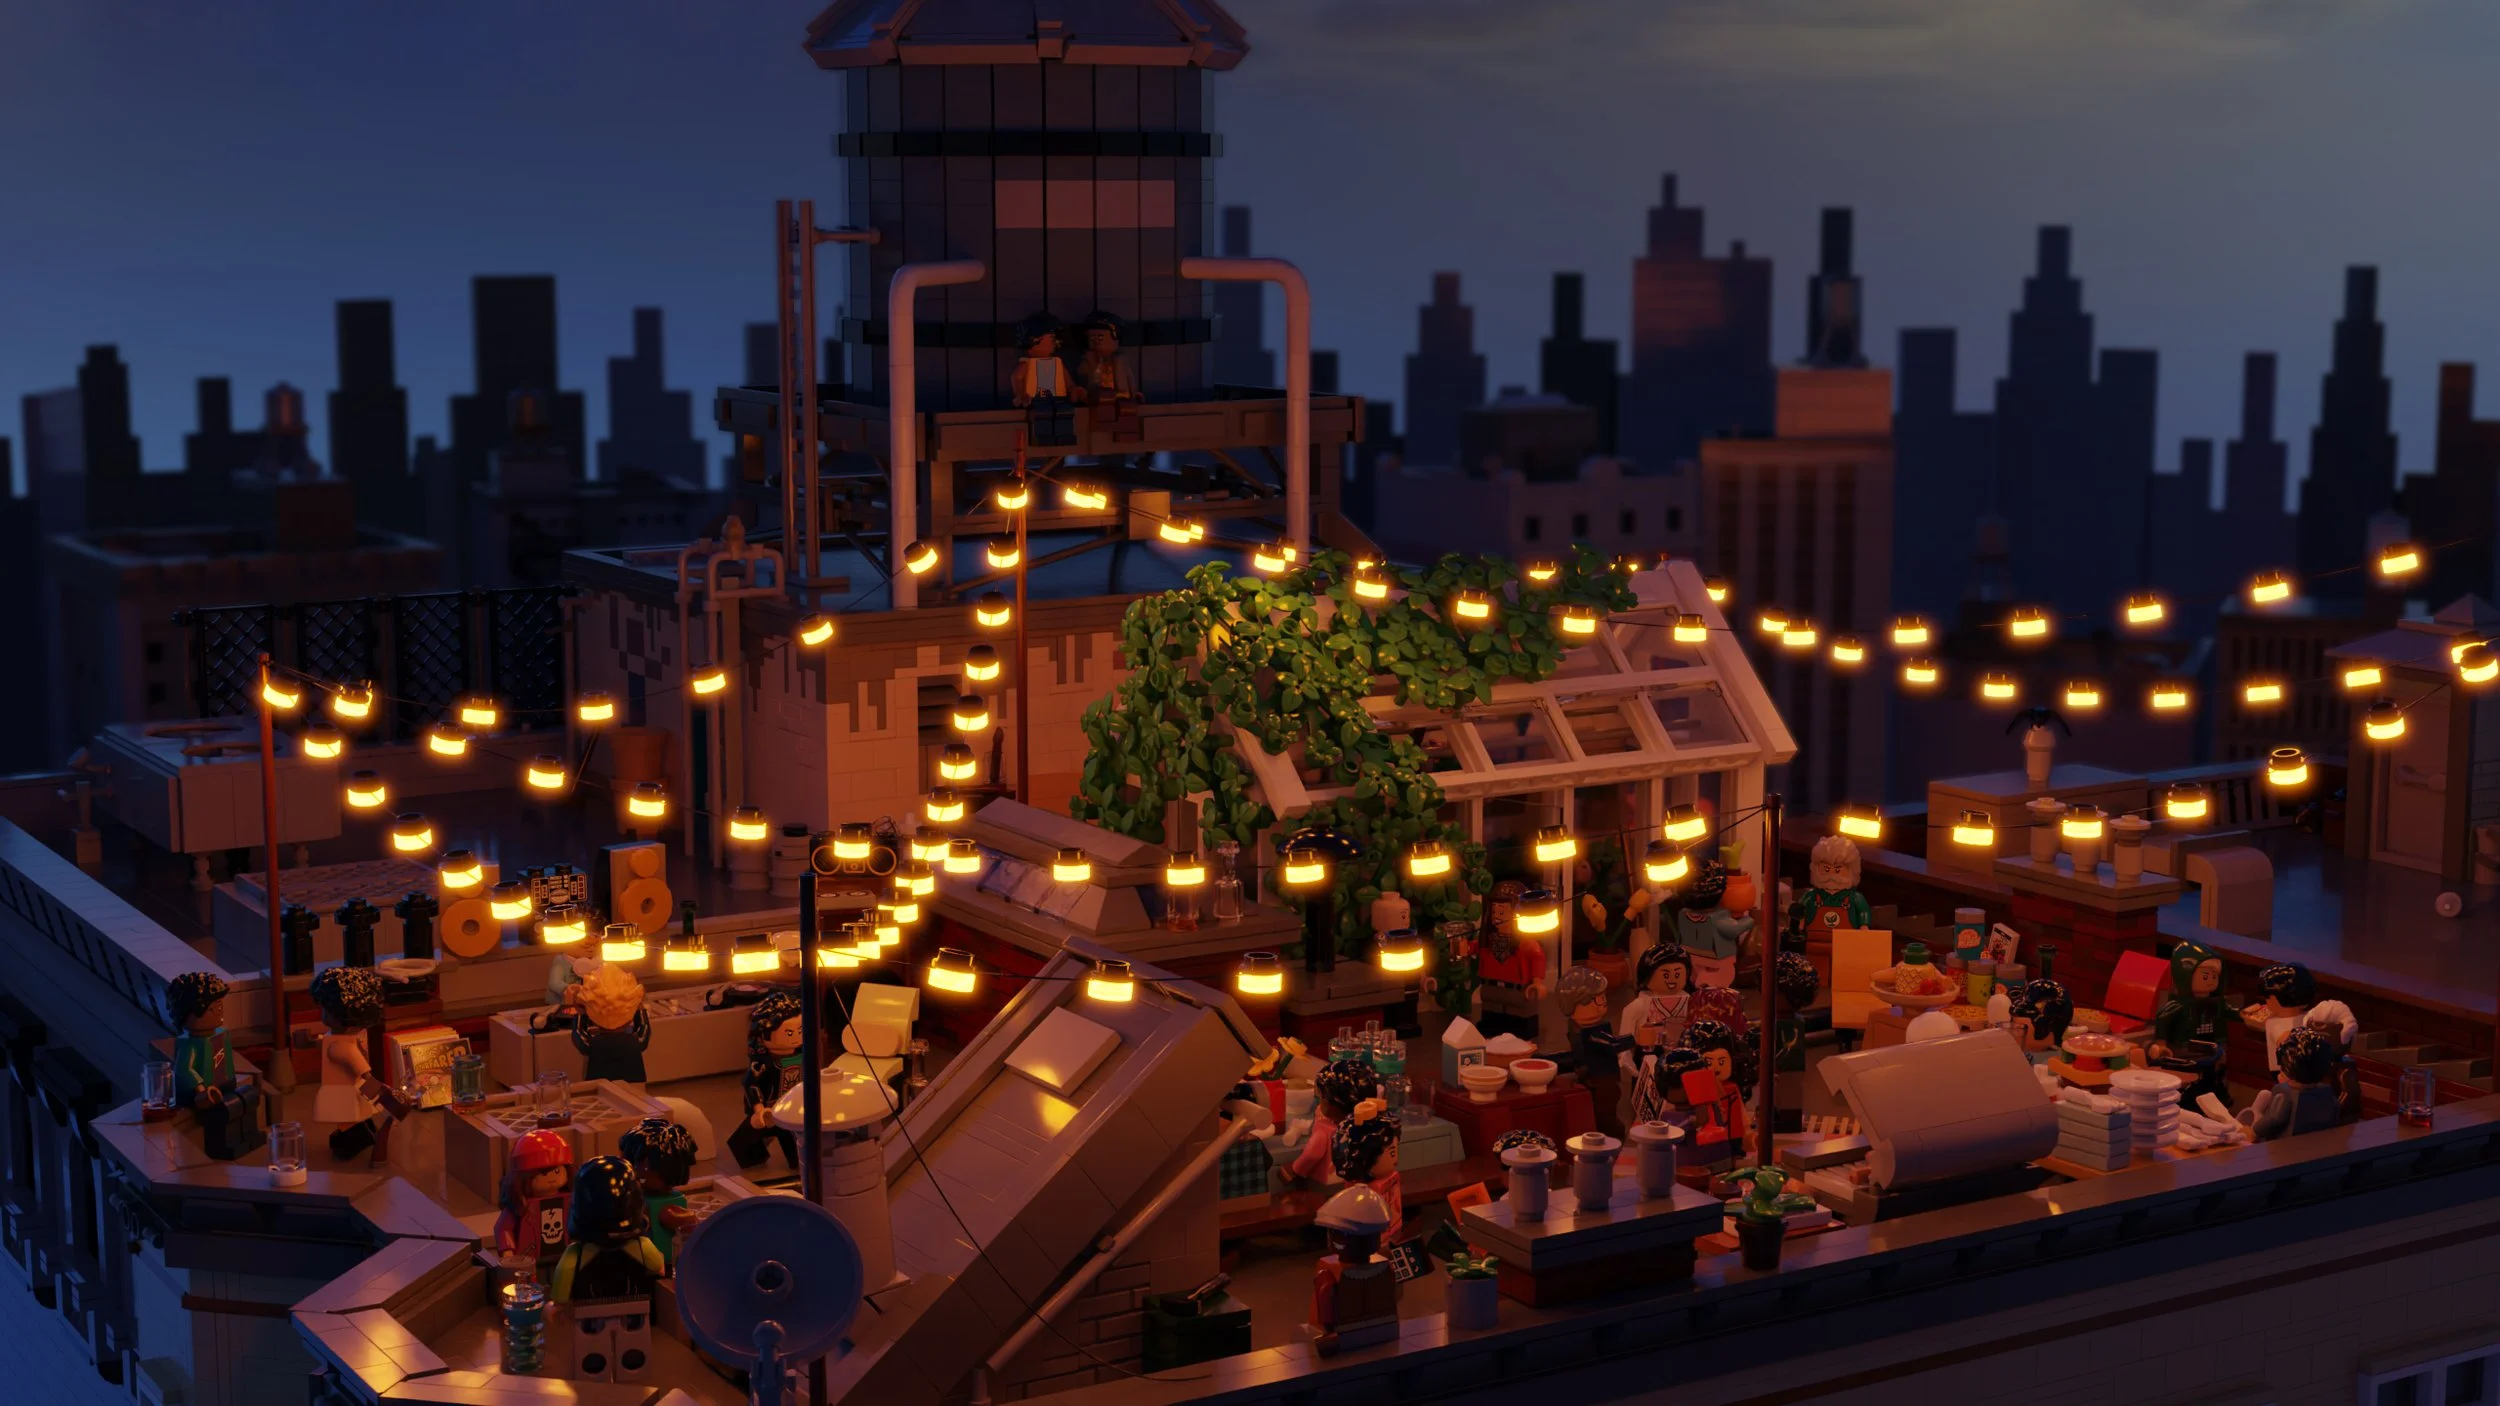
All of this is eliminated in post-production in digital construction. To get atmospheric shots, I imported my finished MOC into Blender. Unlike Studio, Blender offers much more freedom when it comes to ambient light, lighting, light sources in the image, shadows, and moods, although Studio does offer a few more than the usual settings, as a few great articles on BrickNerd have shown.
I created different moods using HDRI – these are environmental images that act like a sky dome and not only serve as a scene background but also function as real light sources and illuminate the scene. In addition to that, I defined some materials as ‘light emitting’ to turn – for example – the lanterns of the string of lights into real light sources (but this can also be done in Studio).
The imaginary camera can be positioned at even the smallest angles and has all the adjustment options of a real camera. With one click, images can be rendered that require no further post-processing. It’s very pleasant and convenient.
One thing I forgot to mention (and that might actually be one of the most interesting parts of working digitally) is that Blender includes a VR plugin. For the first time in my life, I was able to actually step inside one of my MOCs and walk among my minifigures.
Honestly, it was an amazing experience. I was slightly taller than the figures, but I could move through the scene, enter the greenhouse, and climb up the water tower as if I were really there. Beyond the novelty, VR turned out to be incredibly useful from a technical standpoint as well. Being inside the model made it much easier to spot construction errors—things like clipping elements or missing pieces that are easy to overlook on a flat screen.
Experiencing a LEGO build this way felt like an entirely new level of digital building.
The End of the Dark Ages… Again?
BrickNerd: After spending months immersed in this project, where do you see your LEGO and creative work heading next?
Thorsten: I have a few ideas, probably too many again. For professional reasons, I will be working more with 3D software and trying to improve my still rather meager skills in this area. On the other hand, this Spider-Man project has rekindled my interest in the LEGO hobby.
Well, I think I’ll try to combine the two even more in the future. The creative possibilities are endless, and I find them absolutely exciting.


Construction time: 4 months; Number of pieces: 28,000.
BrickNerd: Thanks so much for taking us across the multiverse!
A Worthy Return
This project started as a simple check-in: would sending Thorsten the Across the Spider-Verse CMFs be enough to pull him back into building? The answer turned out to be a clear yes—but not in the way any of us expected.
What Thorsten ultimately created isn’t just a scene from a movie but a layered LEGO environment shaped by memory, curiosity, and a willingness to try unfamiliar tools when the usual ones weren’t enough. Whether this marks a full return to regular LEGO building or simply one particularly ambitious detour doesn’t really matter either.
What does matter is that the joy of building is clearly still there—and that LEGO, whether physical or digital, continues to be a space where experimentation is encouraged and stories can take unexpected forms. We’re grateful Thorsten trusted BrickNerd with this project, and we’re glad we got to see where following curiosity can lead.
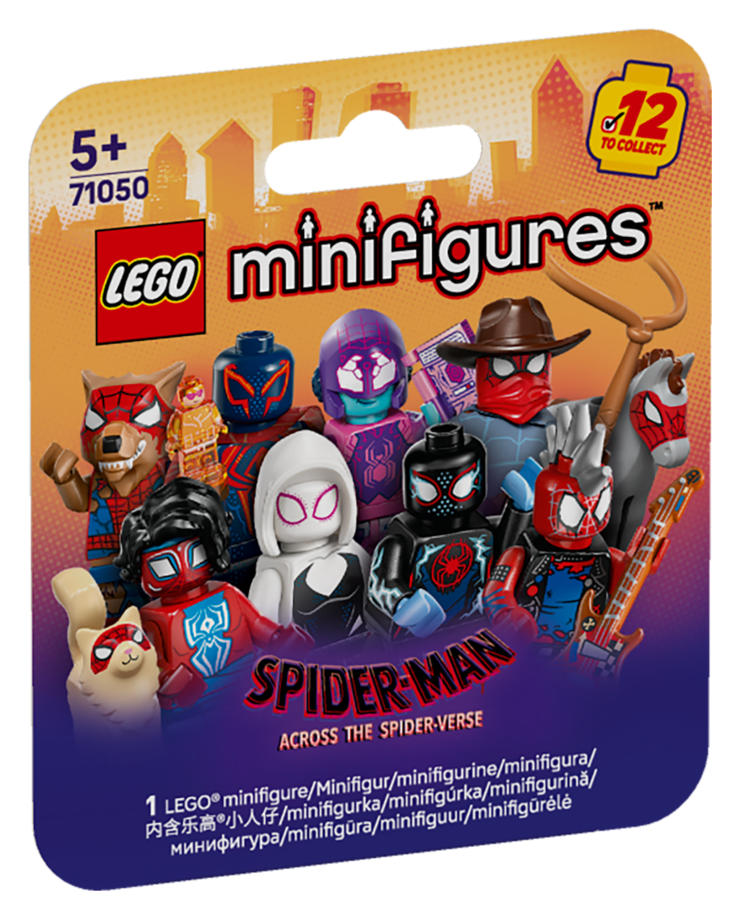
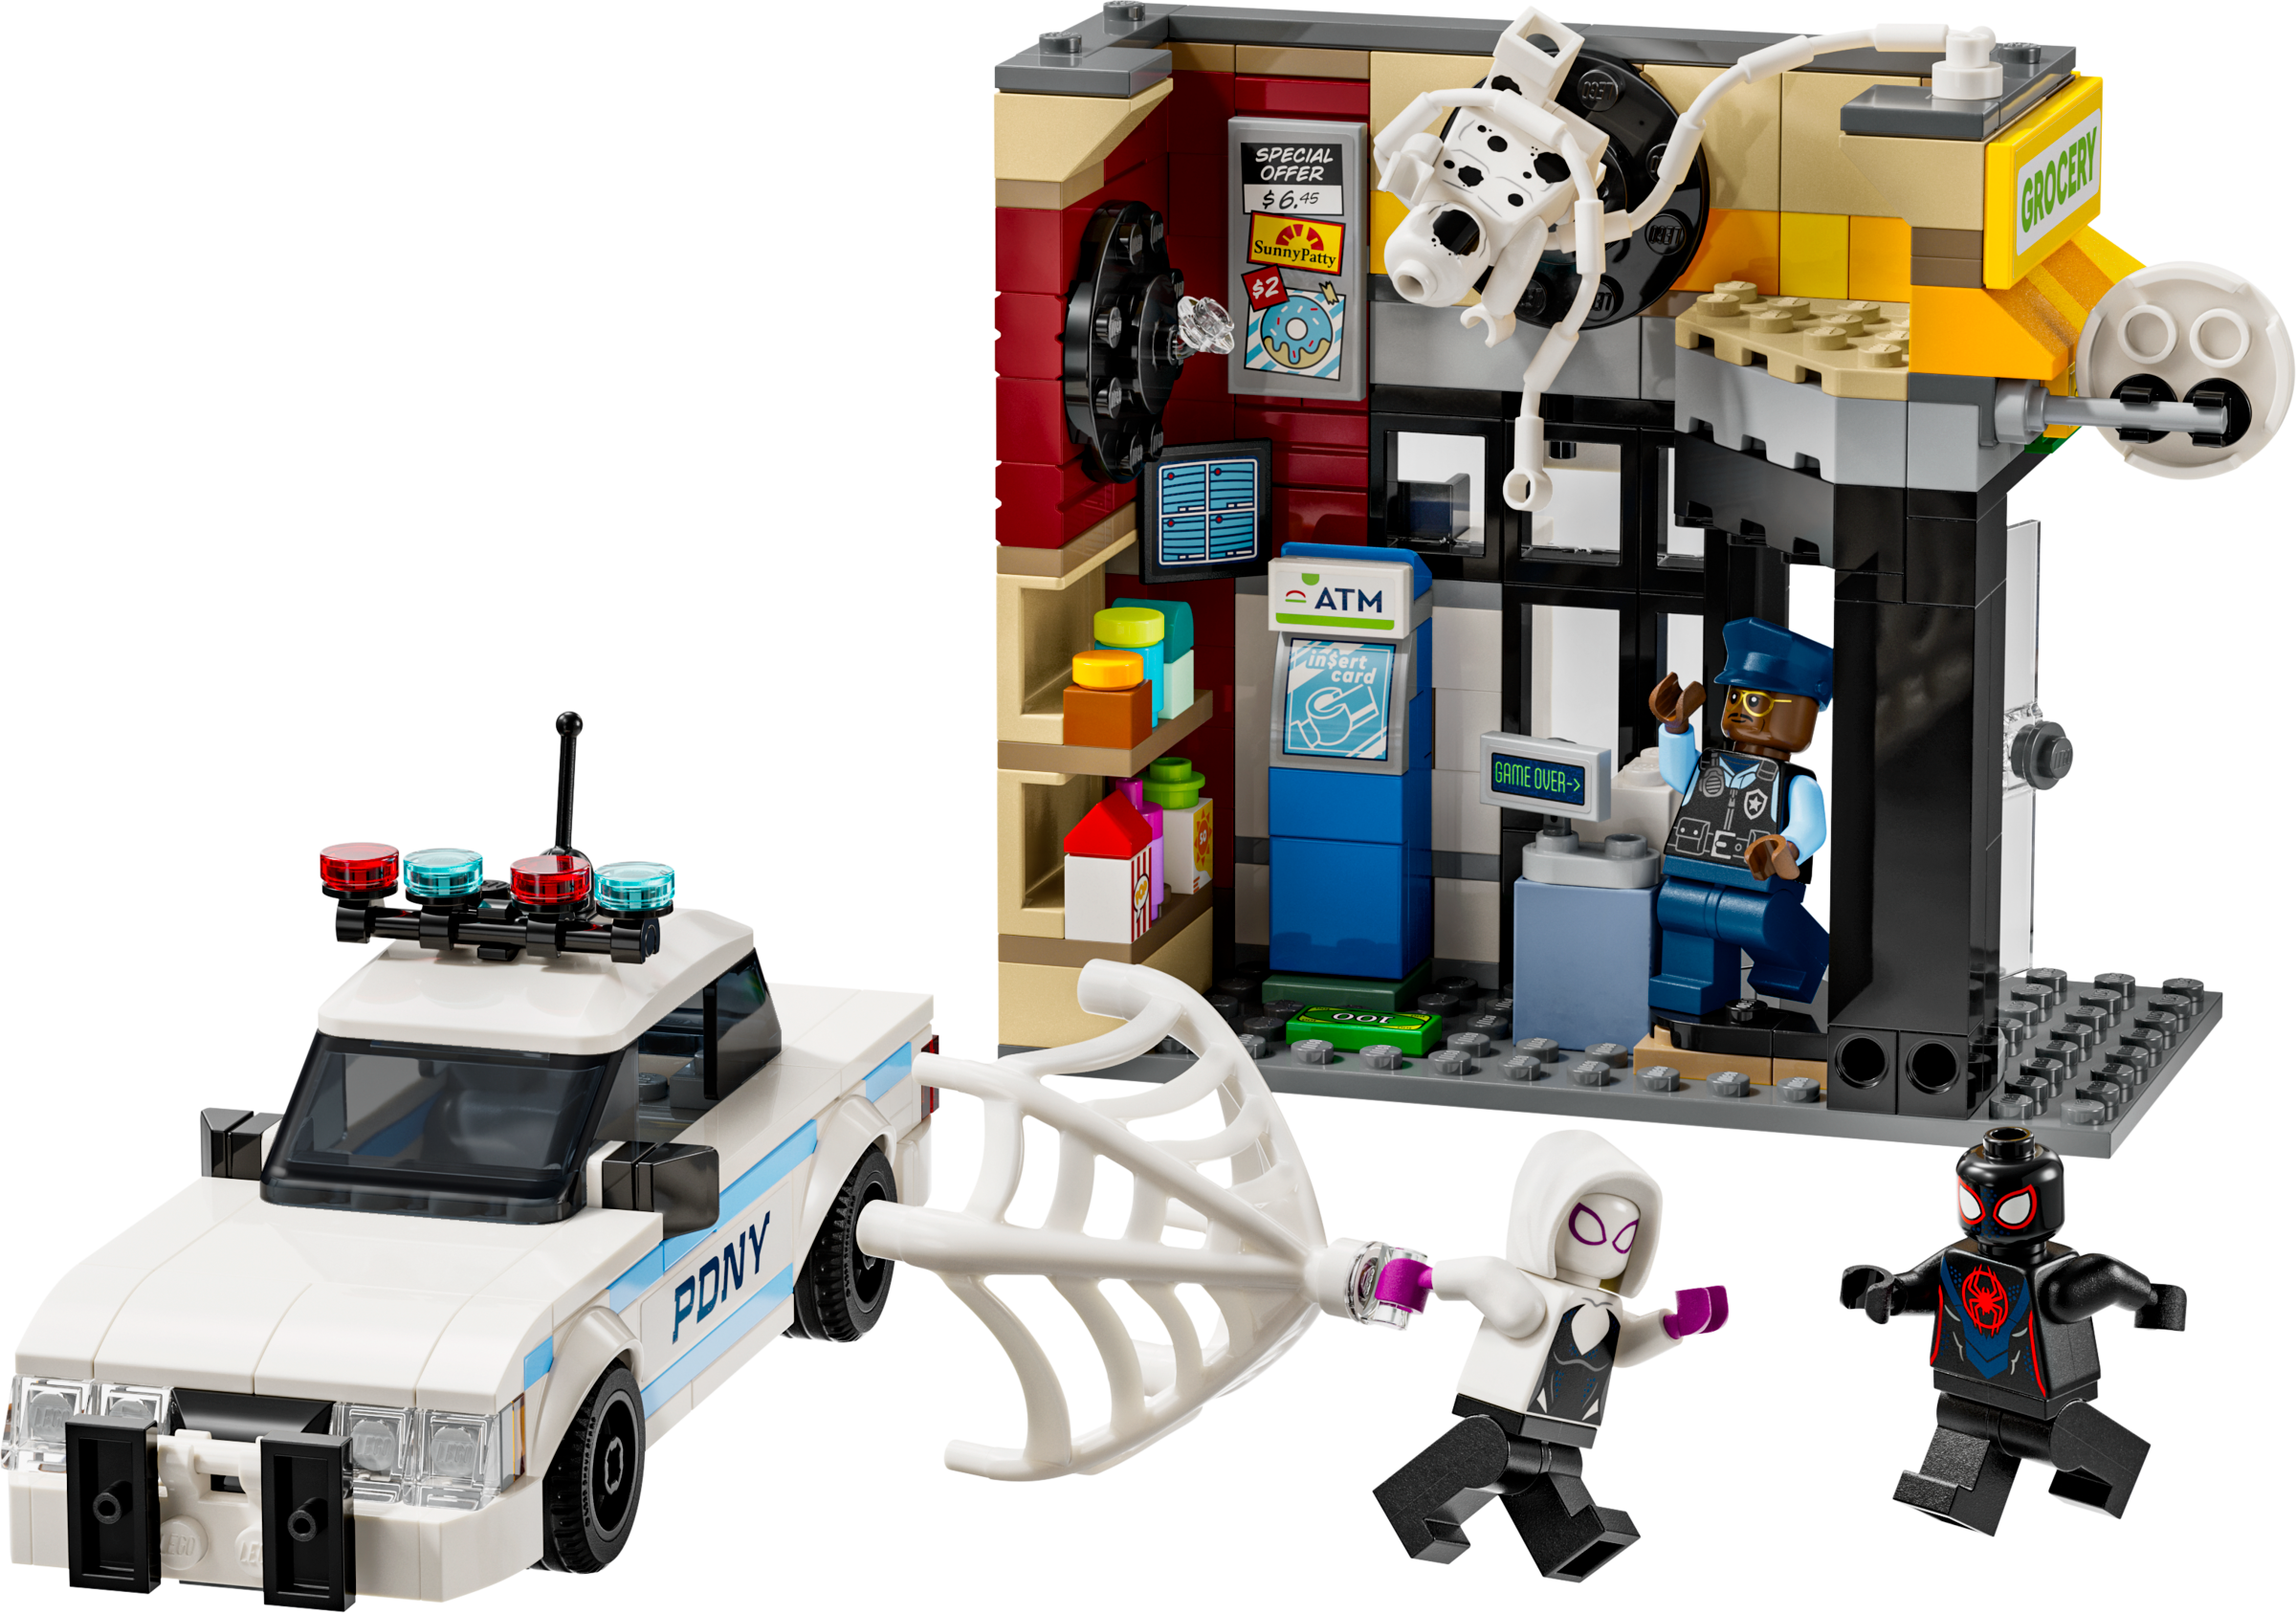
71050 Spider-Man: Across the Spider-Verse Collectible Minifigure Series is still available from some retailers like Amazon via a six-pack.
DISCLAIMER: This set was provided to BrickNerd by LEGO. Any opinions expressed in this article are those of the author.
Where would you like to explore in the Spider-verse? Let us know in the comments below.
Do you want to help BrickNerd continue publishing articles like this one? Become a top patron like Marc & Liz Puleo, Paige Mueller, Rob Klingberg from Brickstuff, John & Joshua Hanlon from Beyond the Brick, Megan Lum, Andy Price, Lukas Kurth from StoneWars, Wayne Tyler, Dan Church, and Roxanne Baxter to show your support, get early access, exclusive swag and more.