The LEGO Trophy Challenge: Building Awards For BrickCon
/Howdy BrickNerd readers! It has been a while since my last article, and I have missed launching my nerdy thoughts out into the world wide web. Oy vey, I was just pooped after my last big MOC—but now it’s time to hop back on the wagon and build and write some more! And I’m excited to say I found a perfect bite-sized challenge to get back into the swing of things:
Part I: From Whence Dost Thy Idea Originate?
The premiere question I feel I must answer is “where’d this cool idea come from?” Two independent driving forces came together for this little challenge to take shape:
First: Our Nerd-in-Chief Dave let us know that LEGO and BrickNerd might be able to supply sets if an author had any interesting ideas to create something and write about it. Simple enough. As I bet you readers will agree, the idea of free LEGO sure can turn on the creative juices! But wait, I thought, I’m on a building sabbatical—I should let the opportunity pass to another… right?
Second: Around that same time, the head of the theme coordinators of BrickCon (Sean Edmison) happened to ping me to see if I was interested in being a first-time theme coordinator this year. And guess what, folks… that position comes with the exciting task of building trophies to award to deserving builders who submit their MOCs in my theme, Scale Models.
Now I had a reason to build… trophies, and there was an opportunity to source the brick—BrickNerd… Suddenly I had a fun challenge/story on my hands! The rest is history, and in fact, it's recorded history now that I wrote it down here. ;)
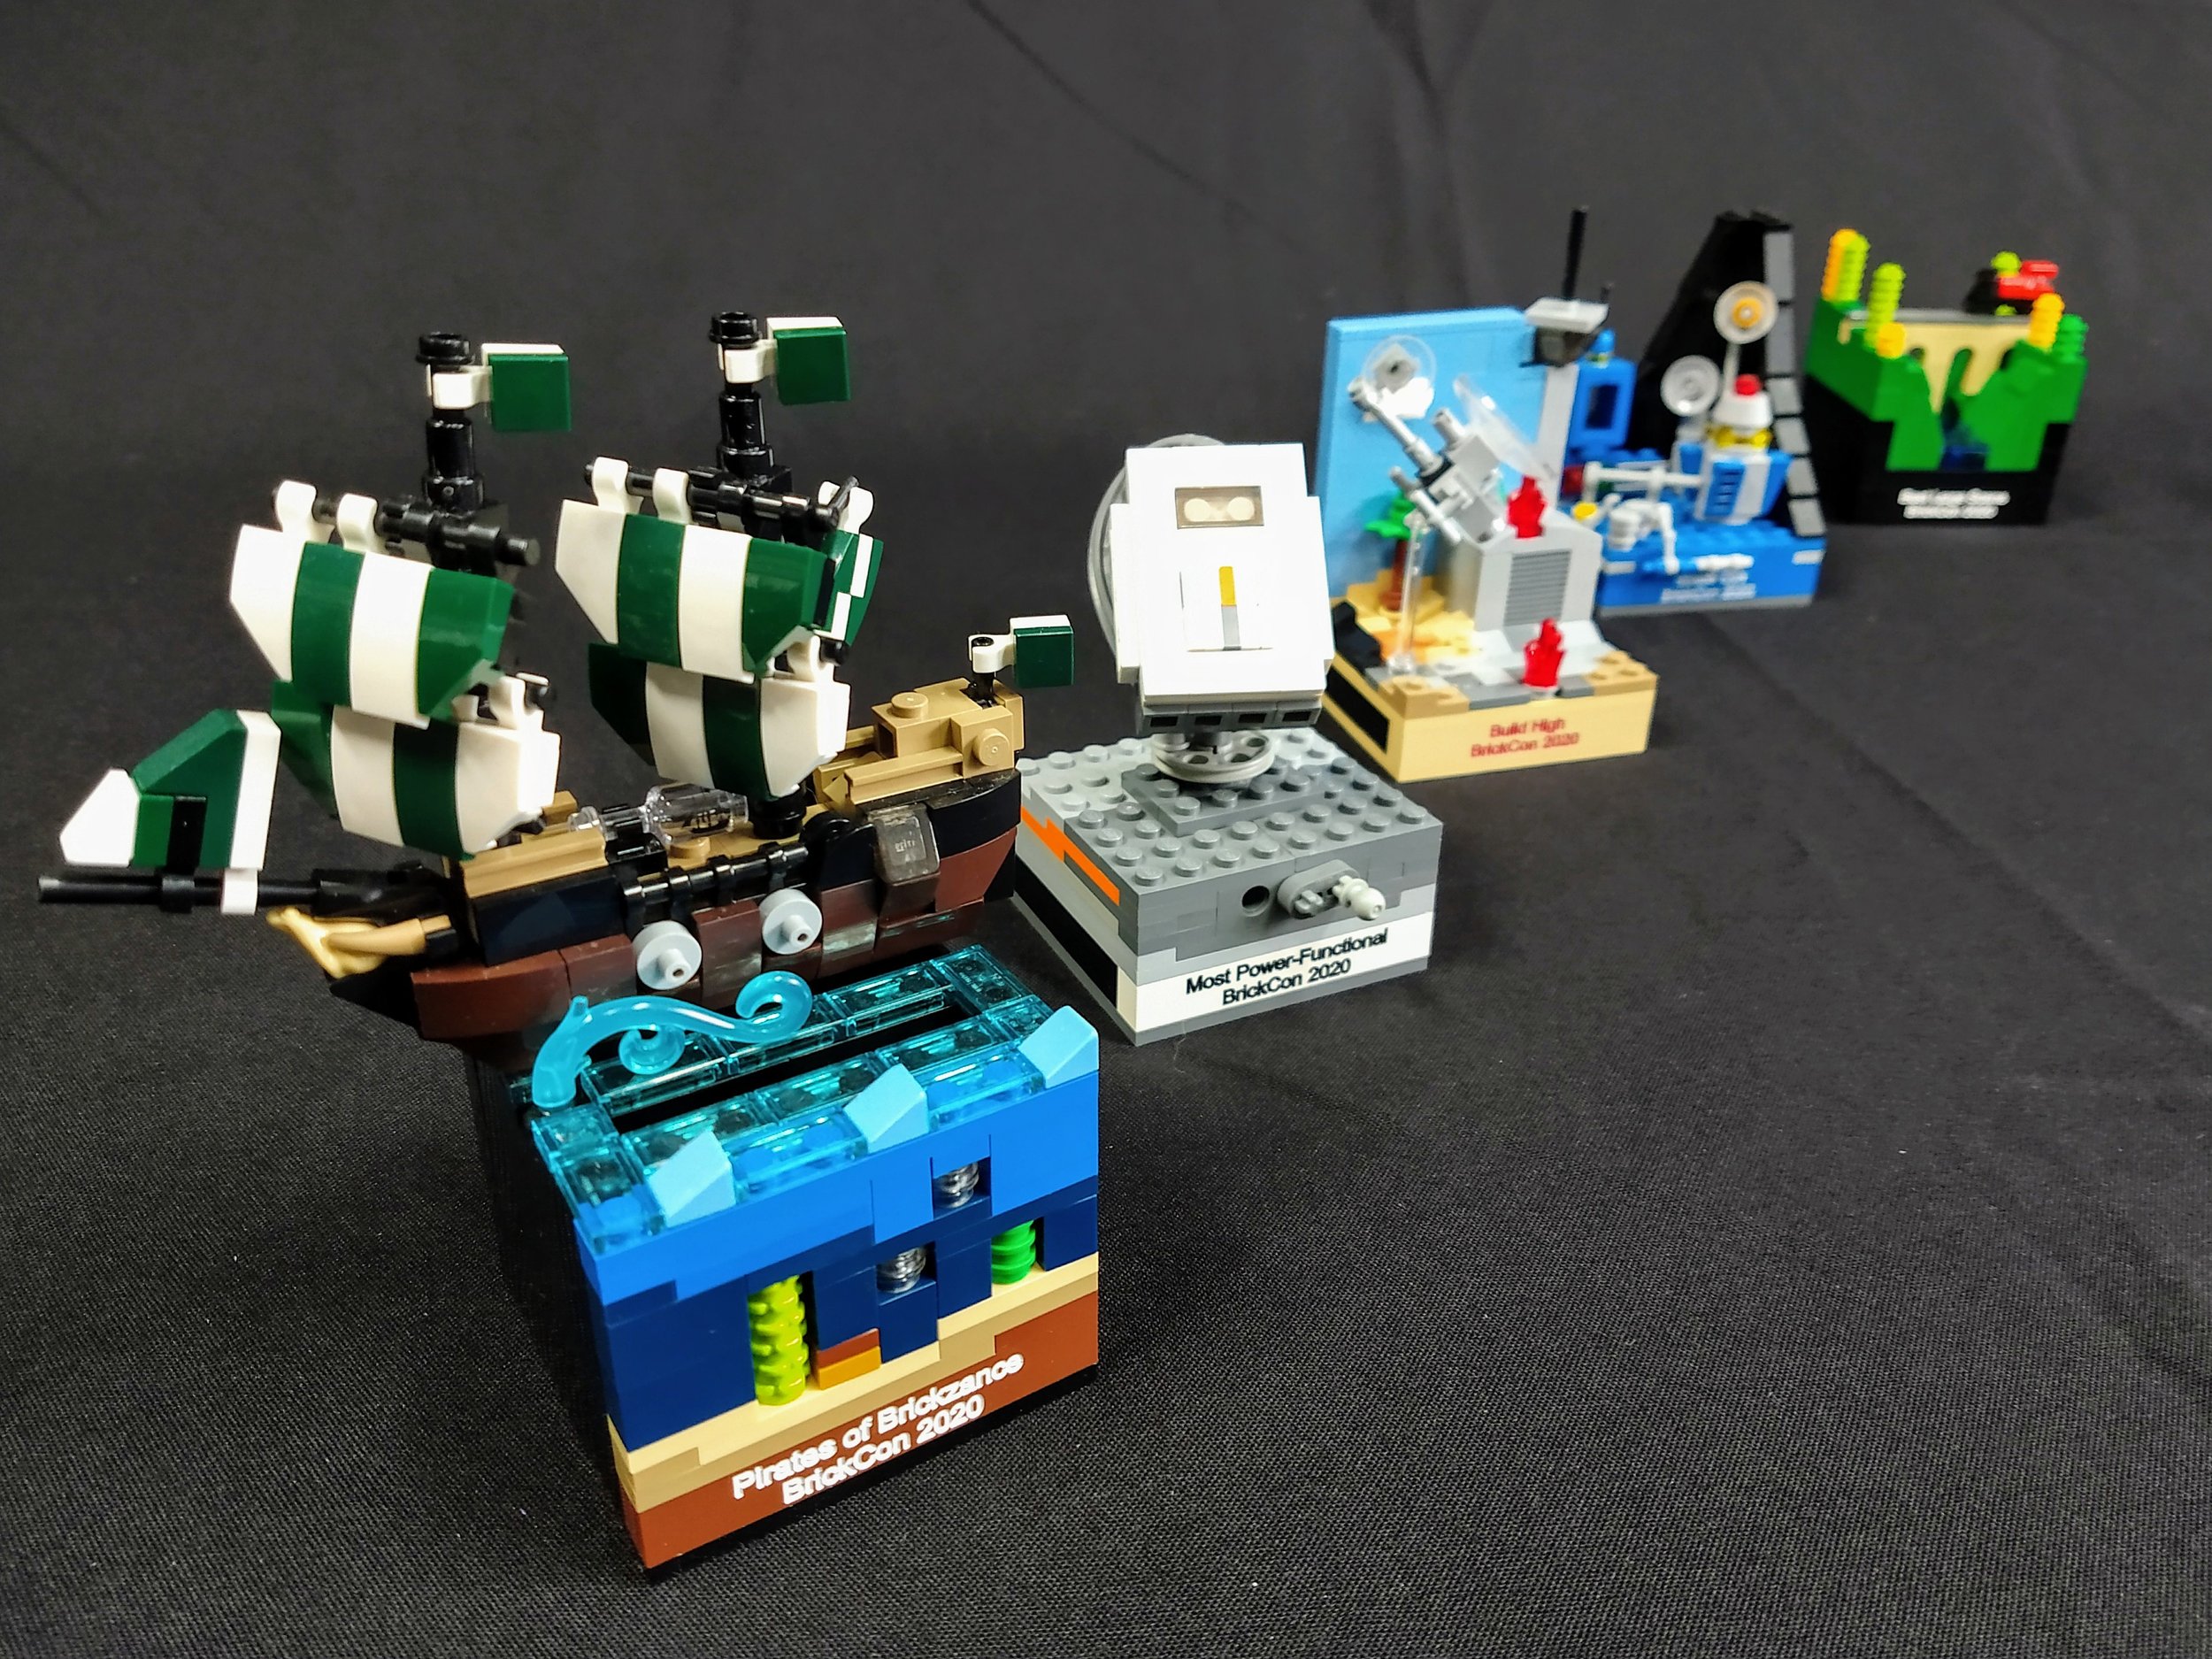
Sampling of BrickCon Trophies from 2020. (The pirate one was built by Dave, BrickNerd’s Editor-in-Chief. It’s an awesome kinetic sculpture.)
Part II: But Whatever Shouldst I Build?
The next task was to come up with a list of trophies to build so I could leaf through the currently available LEGO sets and make an educated guess as to what might provide a feasible set of parts to work with. If you’re curious how theme coordinators come up with trophy ideas, I’ll admit I was also curious! Luckily, the process is rather simple, at least for BrickCon. Sean (the overall coordinator) shared the list of trophies from last year’s scale model category with me and my fellow theme coordinator Rob. This informed us about how many to shoot for, and it helped to give an idea of the types of trophies that fit the scale model theme.
BrickCon has an awesome tradition where trophies are named crazy things instead of “Best Small to Midsize Realistic Four-Wheeled Land Vehicle” or something like that. (The tradition also helps prevent builders from gaming the system to target winning a specific award—they like to keep them guessing!) Once we had that list, we just riffed for a while and came up with the following ideas (some of which Rob got from ChatGPT, which I thought was pretty smart of him):
The trophy names that we ultimately chose:
“Tourist Trap” — Scale model of a location we'd most like to visit
“We're Going to Need a Bigger Boat” — An exceptional, especially small-scale build
“The Zoolander Appreciation Award” — I don't wanna hear your excuses! The building has to be at least... three times bigger than this!
“Mini Me” — Best scale model of a person/animal/character
"One Giant Leap for Minilandkind" — Best minilander
"On a 1:10 Scale, This is 100" — Best of theme
"The Little Engine That Could" — Best vehicle
“That's One for the Wall” — Bbest scale model of a creature
For fun, here are some of the ones we didn’t choose:
“Hop on the Wagon” — Best scale vehicle for a journey
“Wee Baby Building” — Best scale building/architecture entry
“Bridging the Gap” — Best way to get from A to B
“Zoom Zoom Zoom” — Best depiction of speed or motion or fastest looking scale vehicle
“Surprise Me” — Most creative/out-of-the-box scale design
"It's a Small World After All" — Best micropolis section
"Honey I Shrunk the Bricks" — Best micro build in Micro BrickCon of a build that appears in real BrickCon
"It's Not the Size of the Model, It's How You Use It" — Best 1:1 scale tool, weapon or human device
After a little pondering, we picked the eight trophy names in the first set of bullets above and got the list cleared by Sean (with a couple of tweaks for character count so they could be engraved in a 1x8 brick). At that point, we had to choose brick and text color for the trophy bricks to go with the award. Instead of color coordinating each early on, we went with a classy black brick with gold text for each.
Next up was developing concepts and more detailed design ideas for each trophy that wasn’t totally obvious from its name. I chose the four trophy names I wanted to build that I was on the hook for, and as I mentioned above, then I needed to select some LEGO sets that matched to get the pieces!
My trophy names and concepts include the following: First was “Little Engine That Could” for the best vehicle model. I knew right off the bat I wanted to build a speeder bike for this, so a small, fast-looking sci-fi-like craft flown by a fig would work best. These zippy vehicles proliferate every year on Flickr during the occasionally annual speeder bike contest that BrickNerd has even helped sponsor before.

An example Speeder I entered a few years ago
Second was “That’s One For The Wall” for the best model of a creature. I had a mental vision for this right away that it would be a creature’s head mounted on a wall, like hunting trophies—kinda like the ridiculously cool builds we featured in this old BrickNerd article.

Rickard’s amazing Taxidermy builds featured in our old Bricknerd article!
Third up was “Tourist Trap” for the model of a place we’d most like to visit. This one was tougher, and I didn’t know right off the bat what I wanted to do. There are a lot of directions one could go: ancient wonders, famous landmarks, skyscrapers, etc., so I had a number of ideas over time including maybe building Disney’s EPCOT (the giant golf ball geodesic dome would have been cool). It was only later when I had the sets in hand that I was able to peruse the pieces and do more Googling until I found the perfect option. More on that in a bit!

What a lovely design they did, good work Disney! (Image credit Disney)
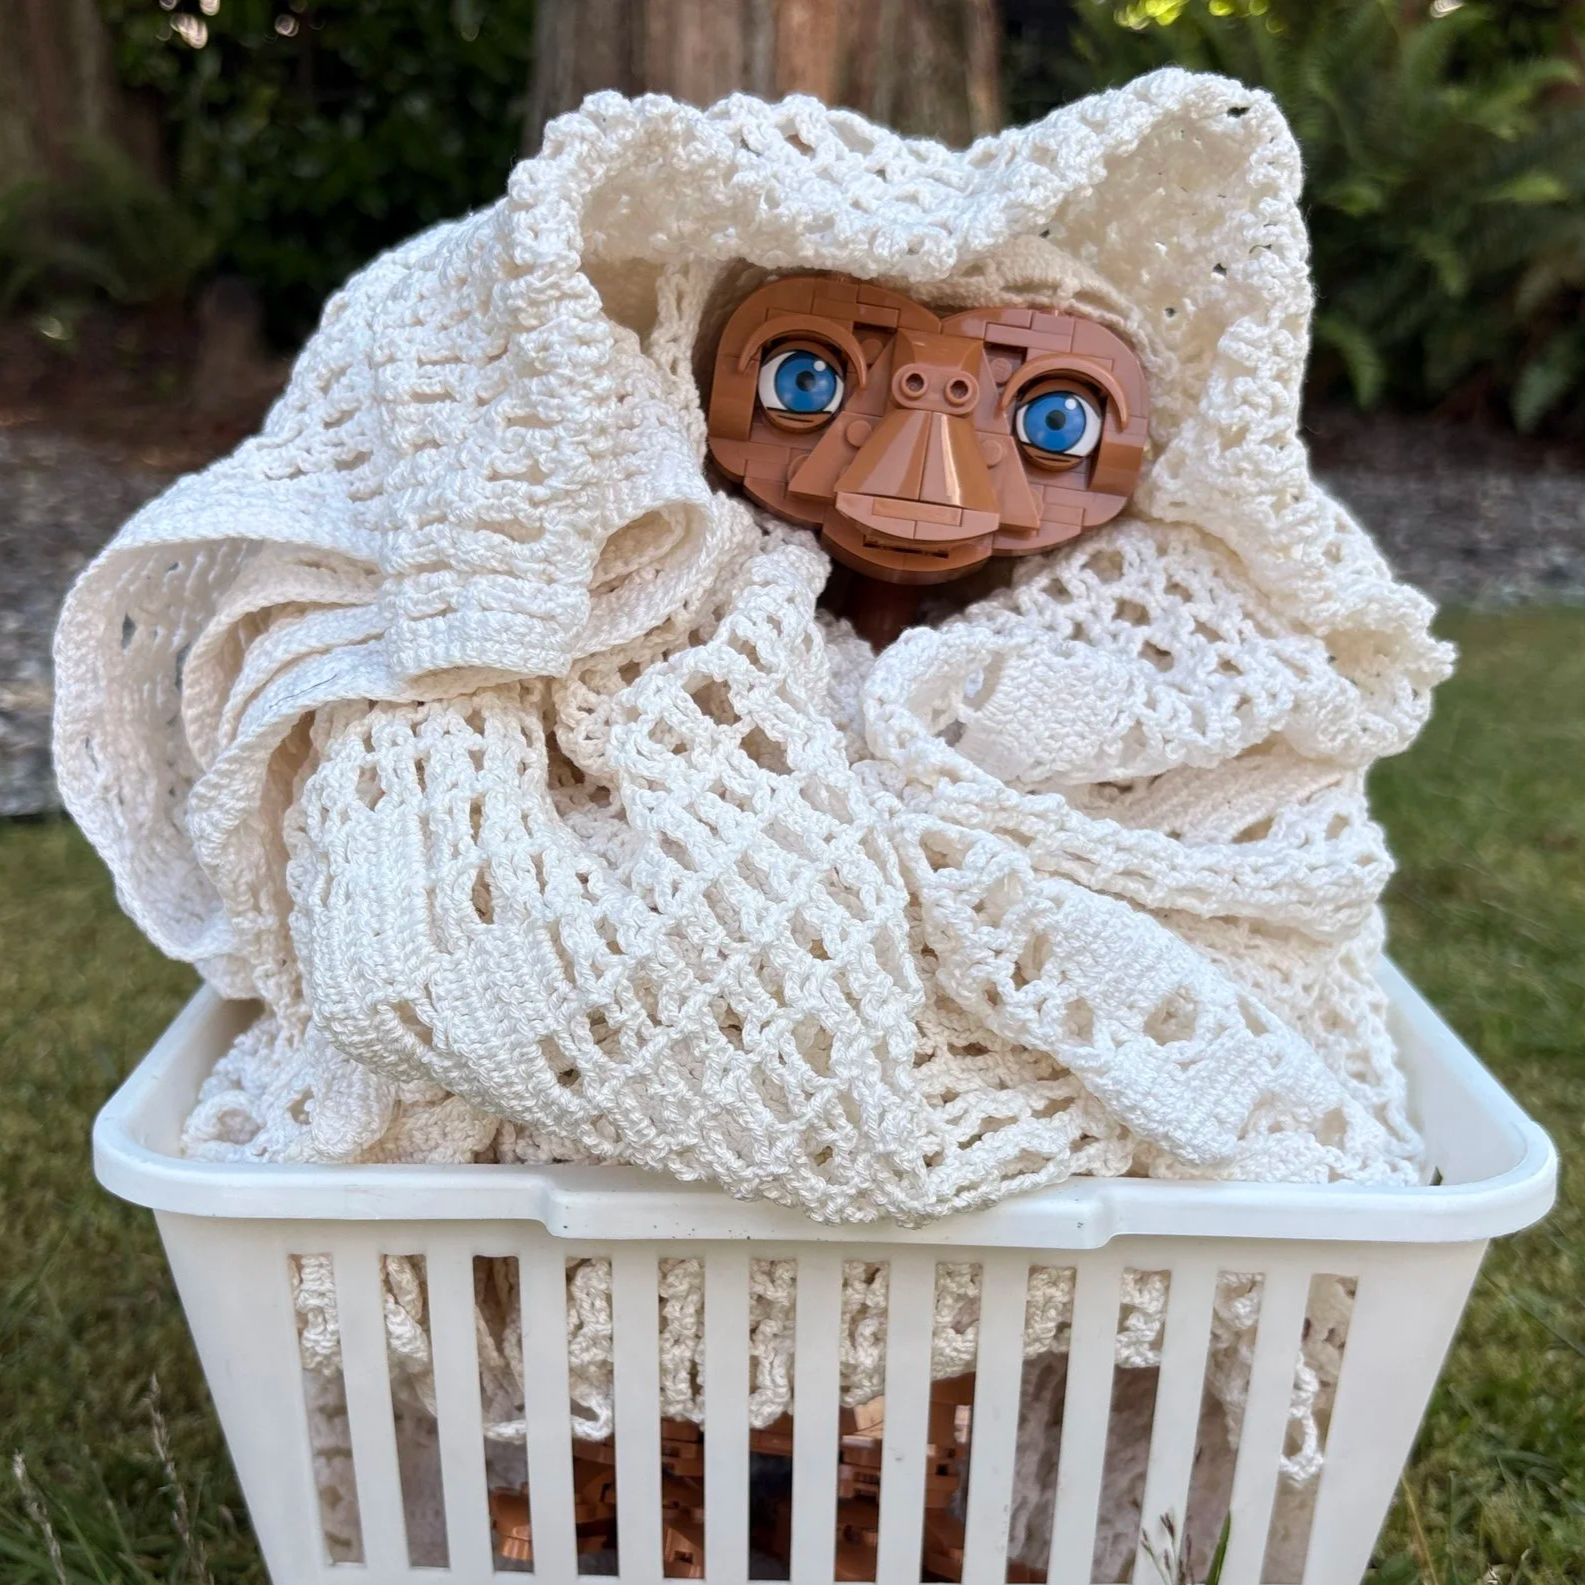
Fourth and last is maybe my favorite silly idea: the “Zoolander Appreciation Award” for the best building or architecture. This award is inspired by the scene in the film “Zoolander” when Mugatu shows Derek Zoolander the scale model of his library… and Derek becomes angry and throws the model on the floor because he doesn’t understand what a scale model is! It might just be one of the funniest scenes of all time. I pictured an angry minifig looking at a model of a building.

SO GOOooood!! (Image credit makeameme.org)
Part III: Scratcheth Thy Head and Select Sets
Now for the tough part: how the heck should I choose some LEGO sets that would provide the specialized parts for the trophies on my list while also giving flexibility for the inevitable last-minute changes and left turns you encounter while MOC building!? I opted for several small sets rather than commit to one large one just so I could get a variety of parts. I decided to torture myself by perusing the online LEGO store to see the current set selection—and oh, how I itched to put so many sets in my cart! In the end, I stayed strong and muddled through without inadvertently buying half the LEGO inventory of North America.
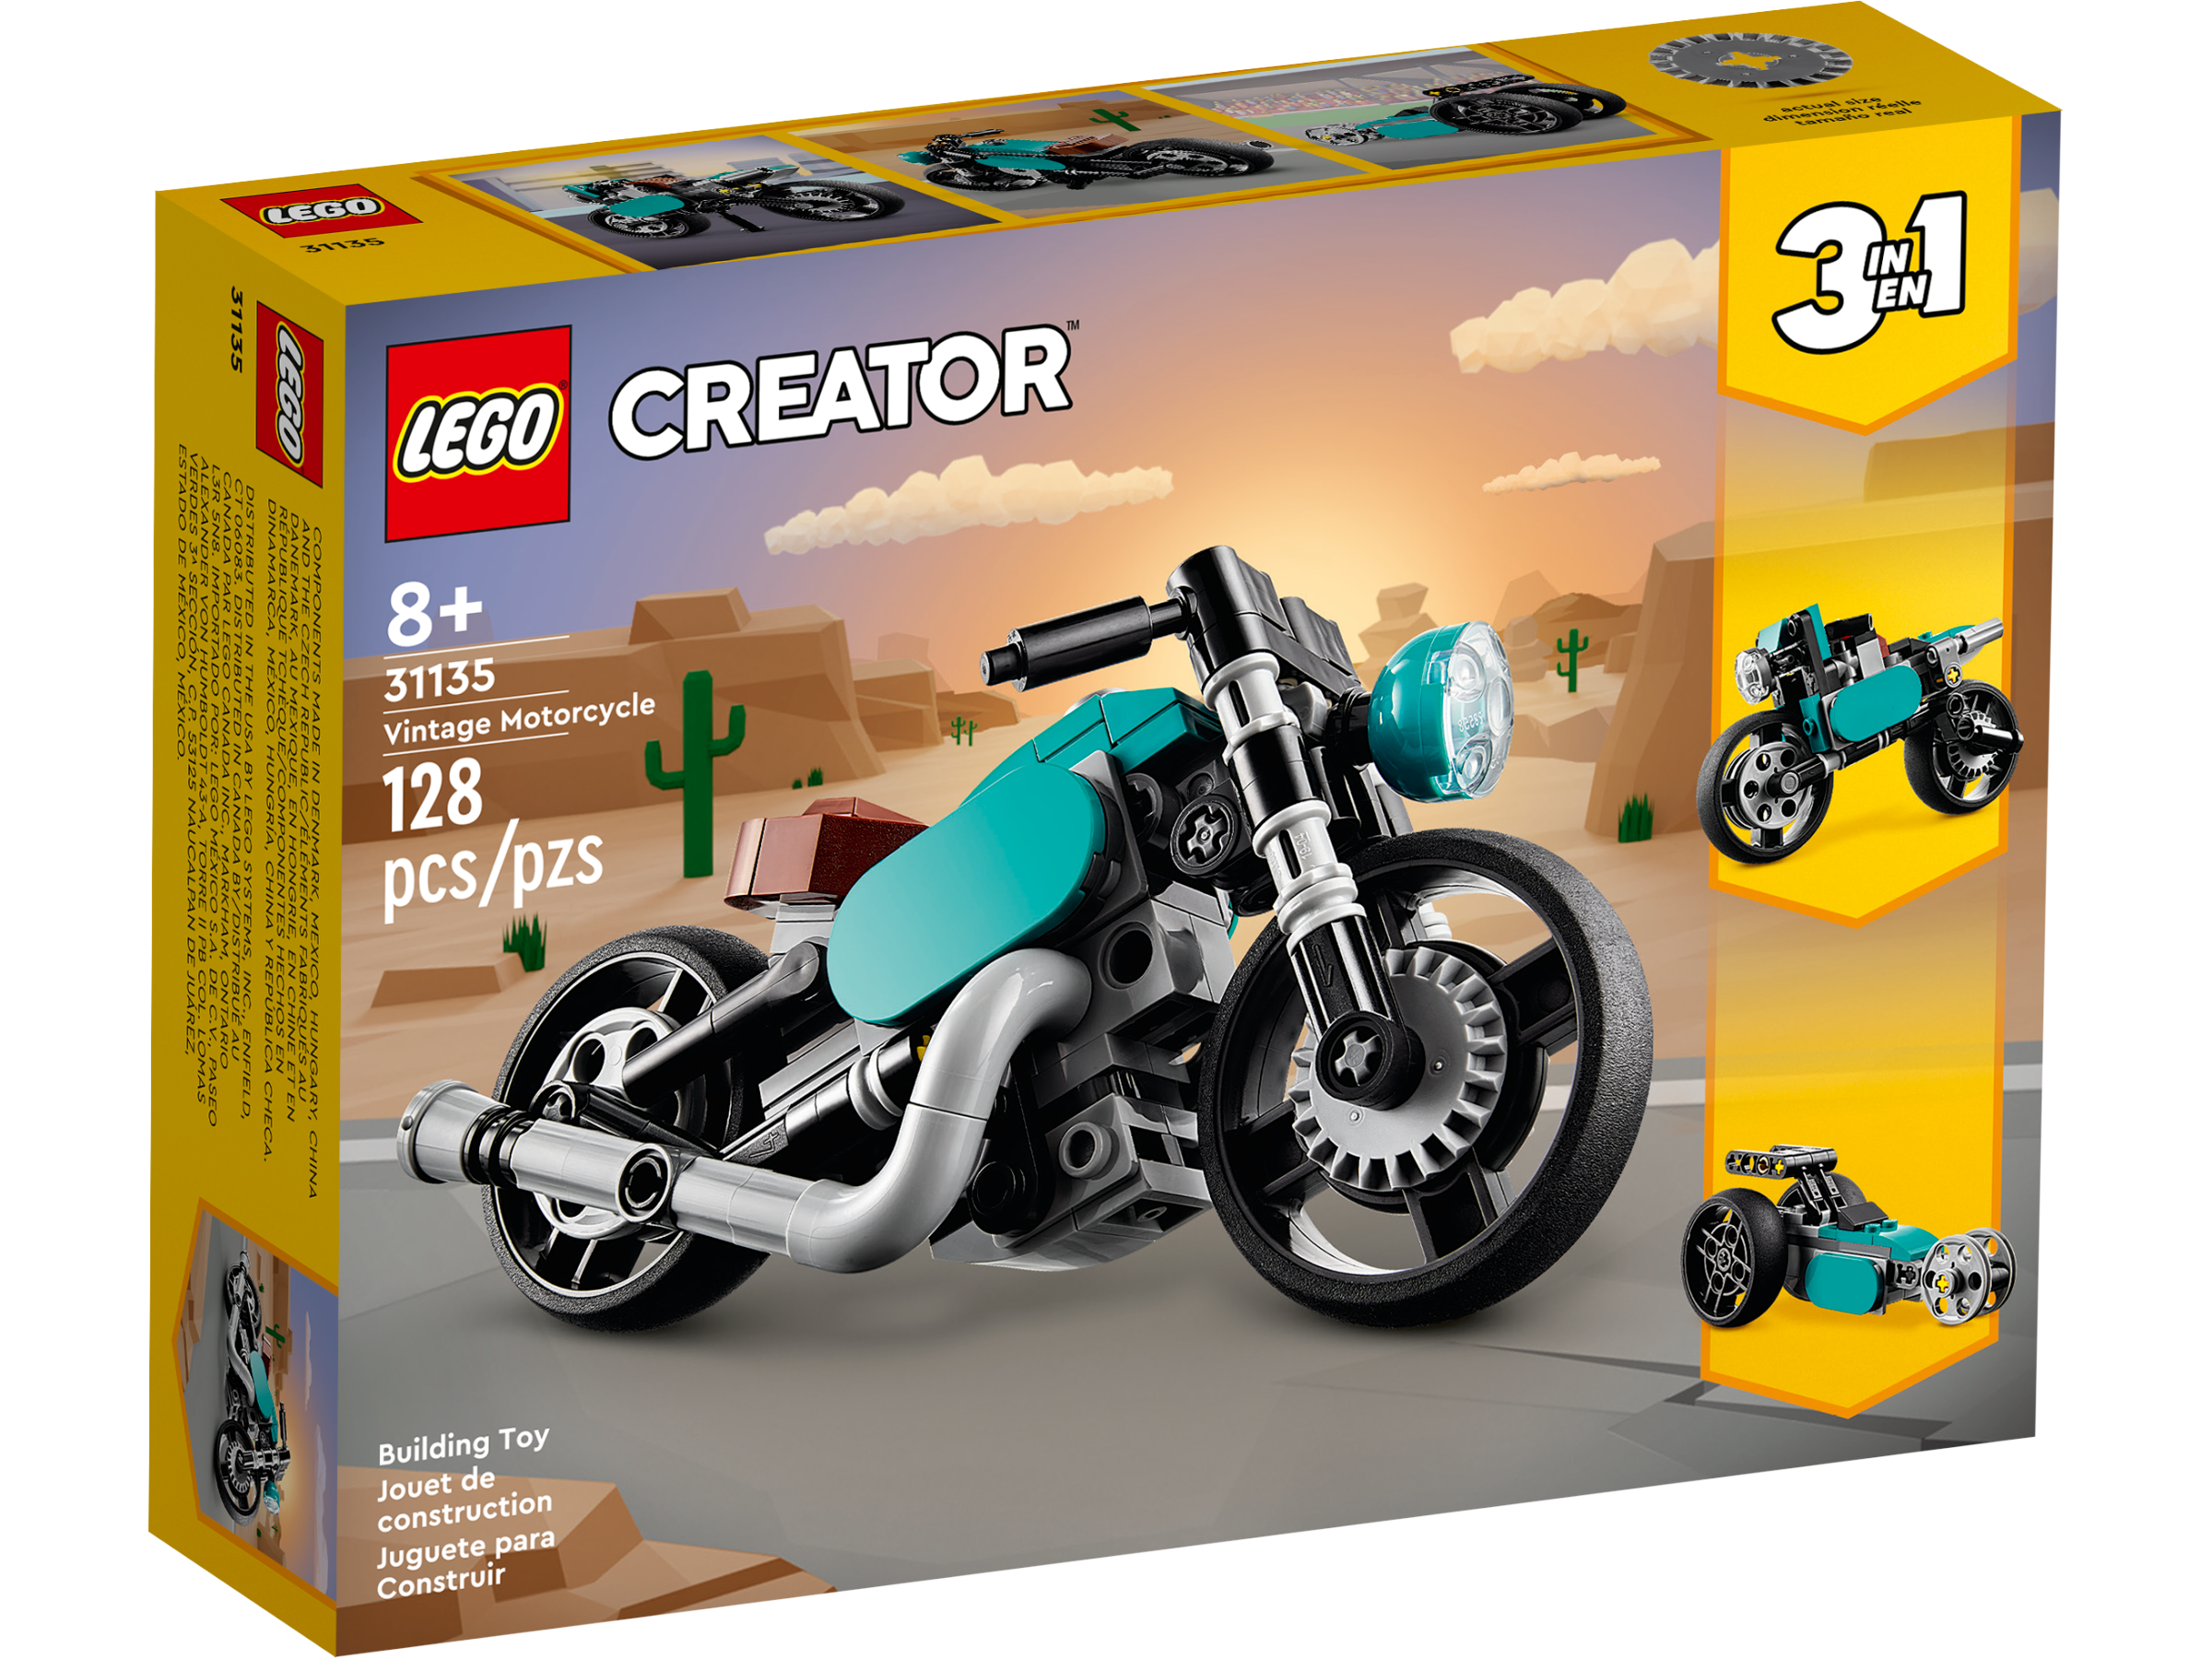
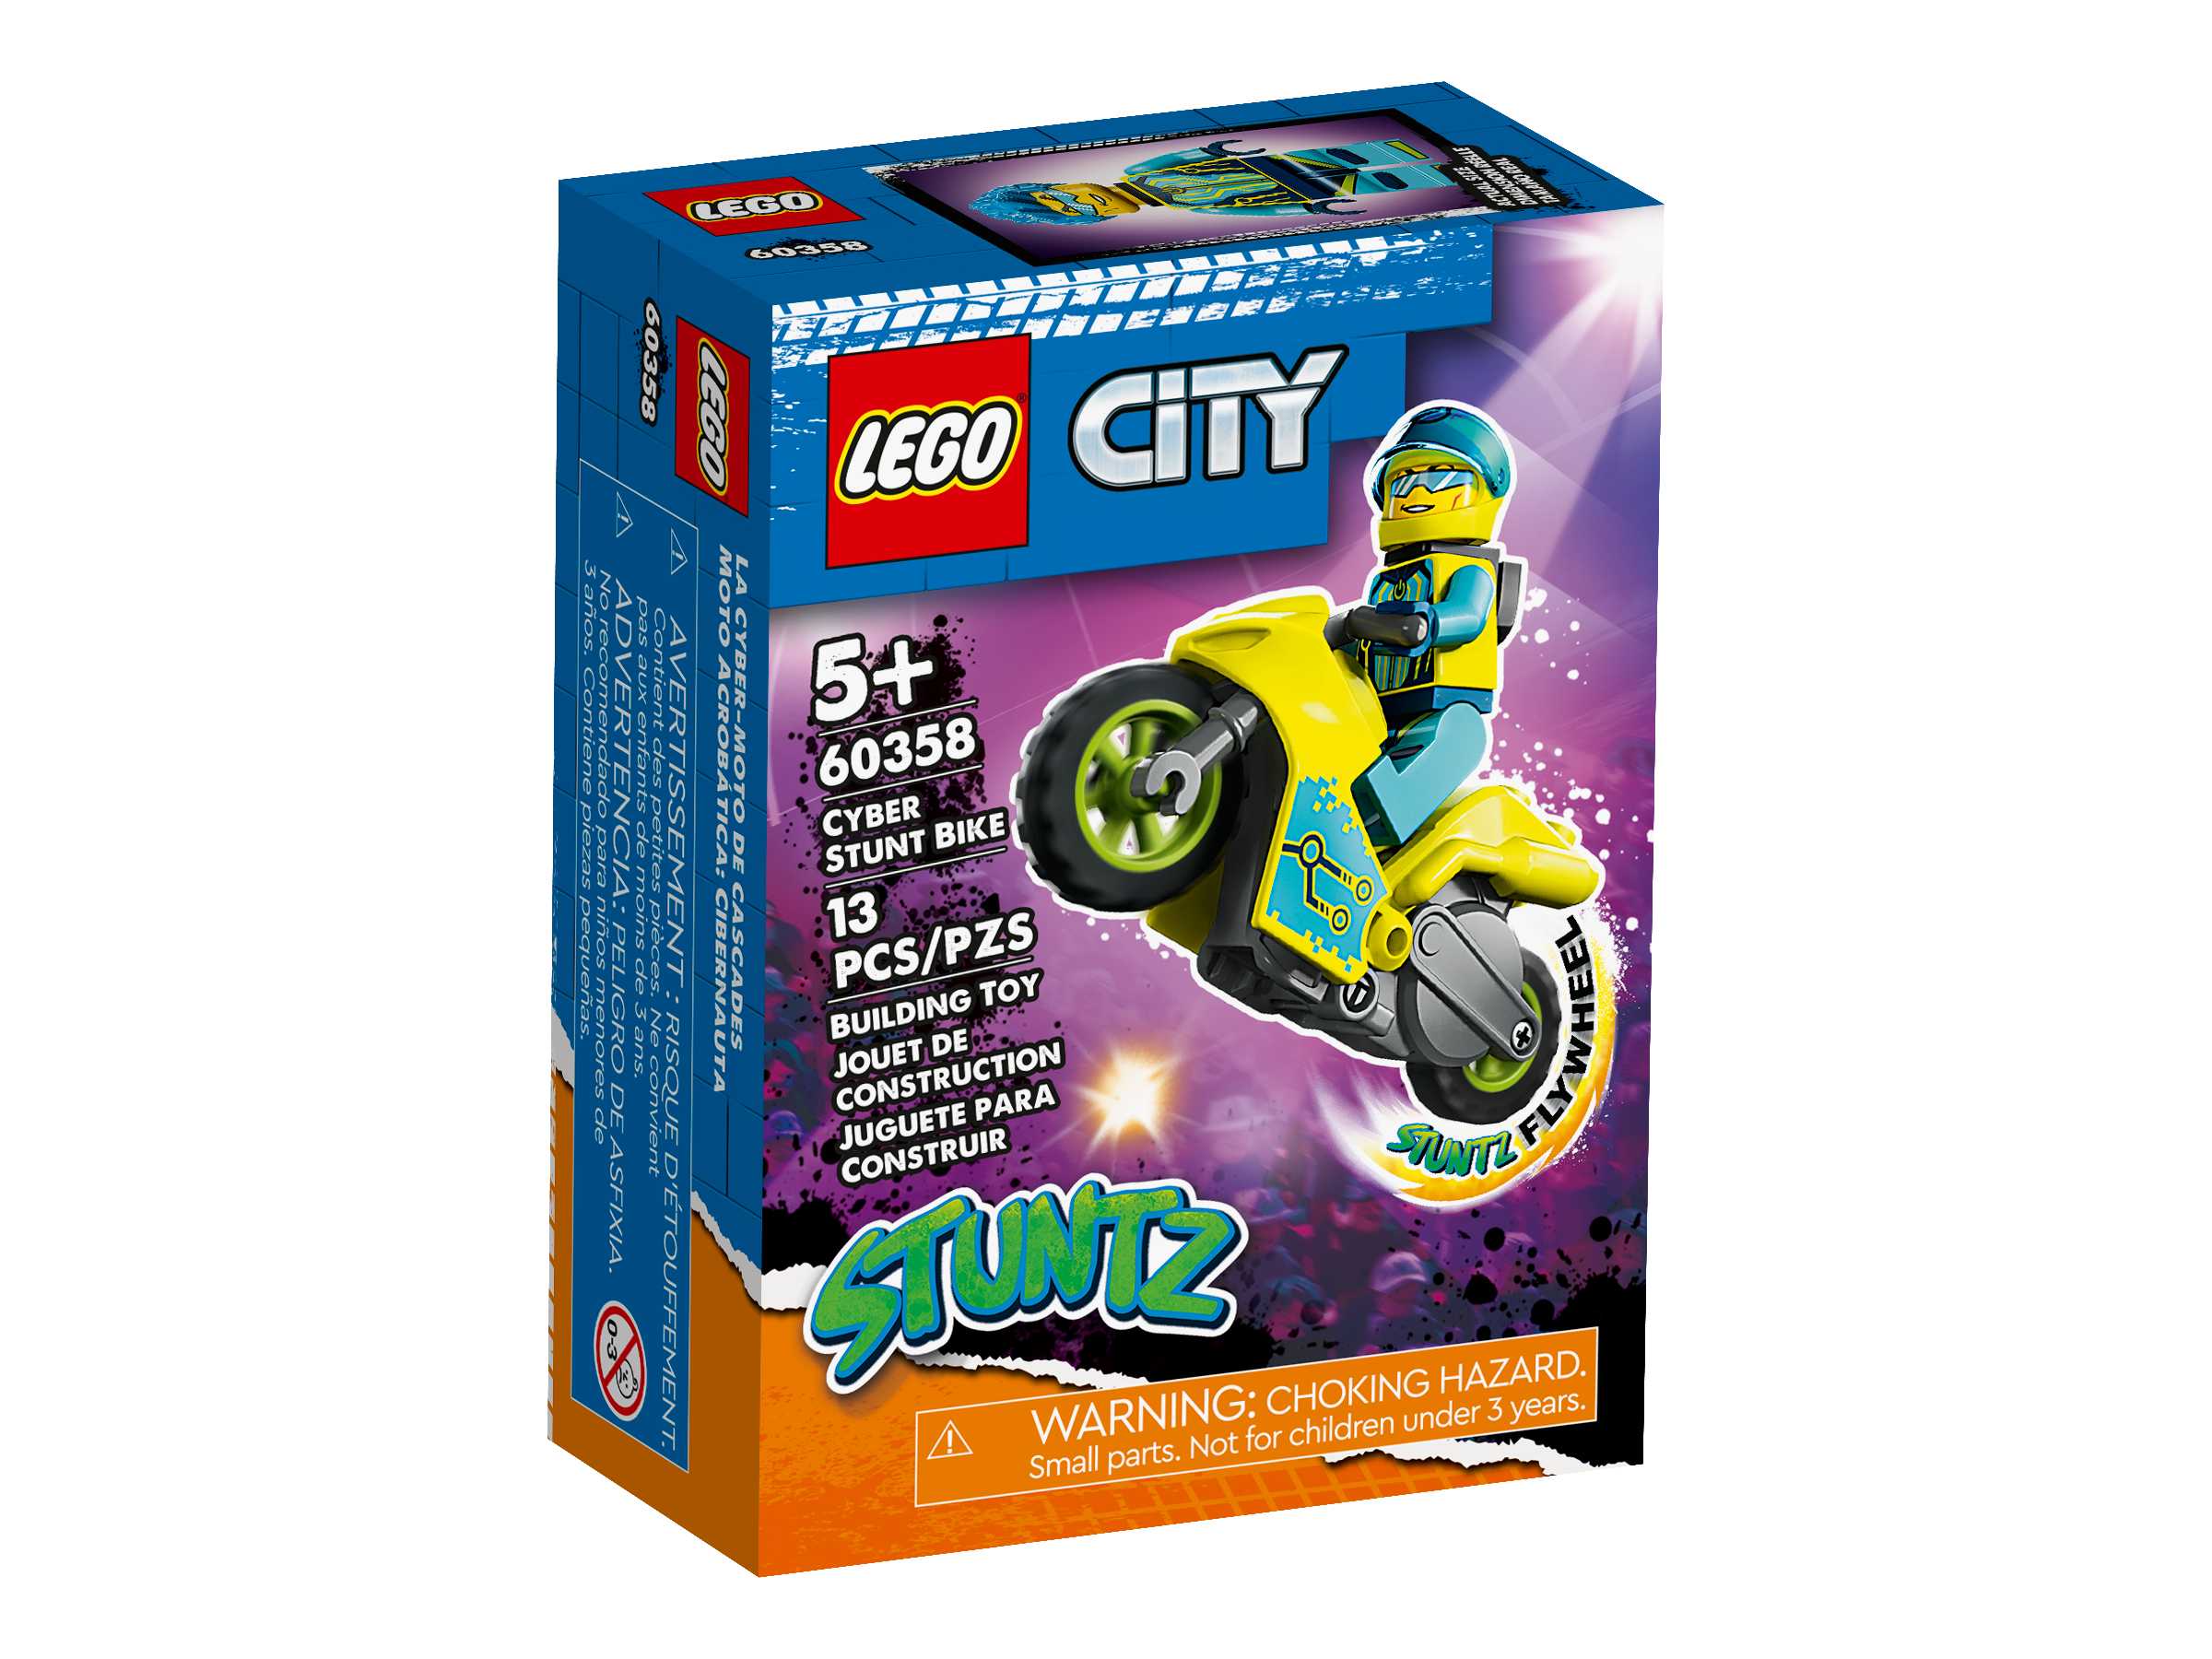
First up for “Little Engine That Could” trophy, I wanted some decorative elements and some greebles for the speeder bike so I selected Vintage Motorcycle (31135) and Cyber Stunt Bike (60358). I had also looked at lots of Star Wars sets for greebling, and many other options, but these seemed a good compromise.
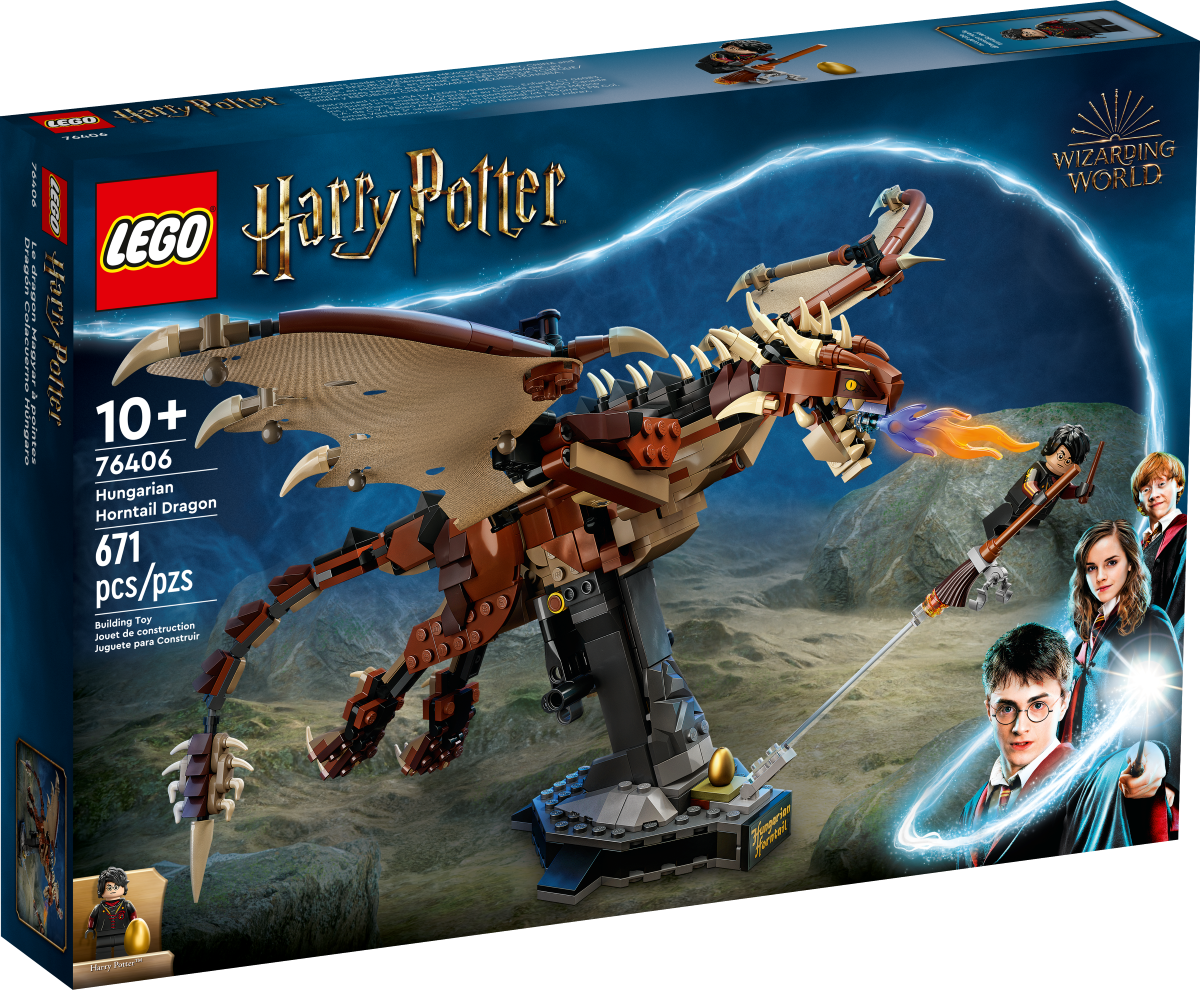
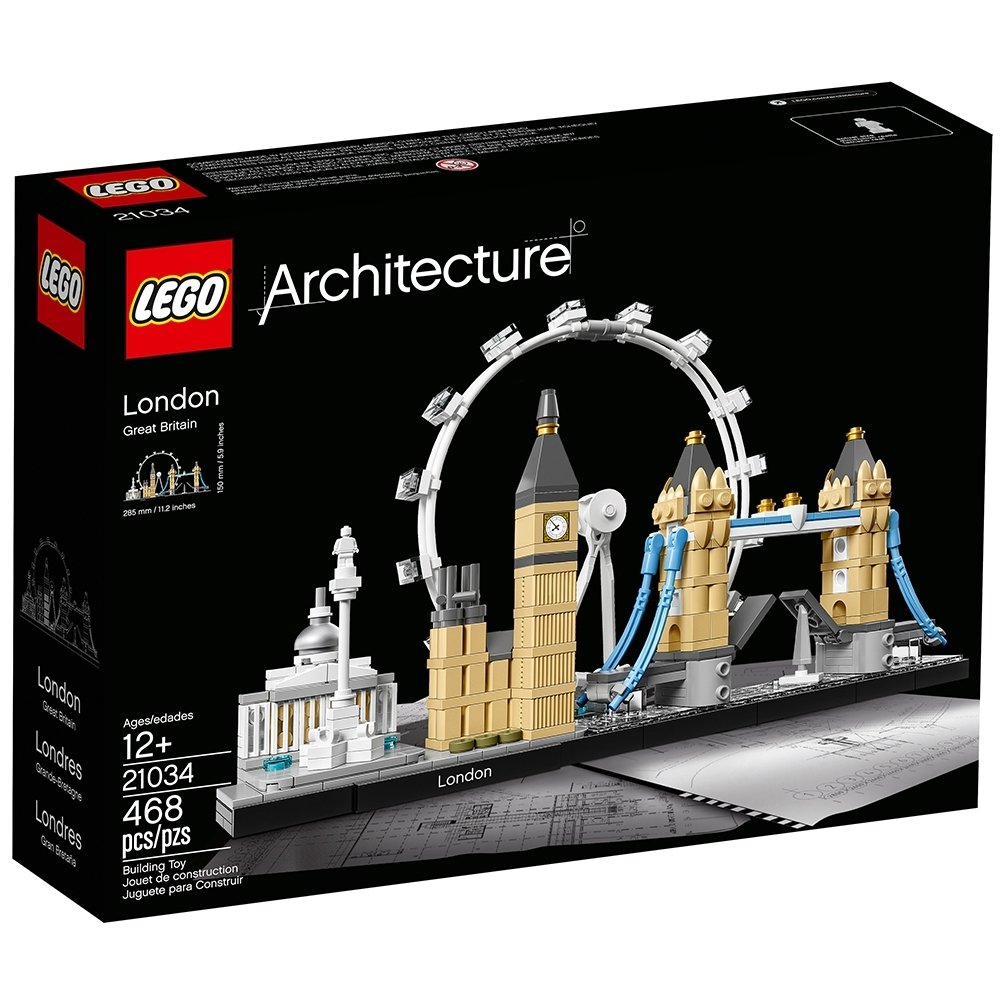
Next for the “That’s One For The Wall” trophy, I wanted to create a creature with some kind of spiny head so the Hungarian Horntail (76406) set seemed like a winner. That was honestly the easiest choice of the lot. For the “Tourist Trap” trophy, I kept waffling between the Singapore and the London skyline sets among numerous others. In the end, I chose the London Skyline (21034) set which has a reasonable price, so it enabled us to afford more of the other sets on my list for other trophies. (I was worried it might not be sufficient, but it turns out that with all the other sets, there were plenty of parts!)
Finally for the “Zoolander Appreciation Award,” I selected the Wedding Groom BrickHeadz (40384) and Wedding Bride BrickHeadz (40383). At the time, I had convinced myself it would be too tough to build the minifig scale scene I envisioned with the parts available, so I chose the BrickHeadz sets to have a back-up plan to make a BrickHeadz version of Zoolander. I also know that they came with a bunch of SNOT elements too. (Ultimately, as you’ll see below, I found a way to make the minifig scale scene work, so I was very happy about that.)
Part IV: Wherefore Are Thy Sets? They Are Coming ANON.
From there, I let Dave know which sets I needed… and then I waited. As a Recognized LEGO Fan Media (RLFM), BrickNerd can occasionally submit set requests for crazy ideas like this one. But they can take their time to approve and ship them. To help get me started, Dave ordered some of the sets on BrickNerd’s dime (thanks Patrons!) that included two Cyber Stunt Bike (60358) sets, two Wedding Groom BrickHeadz (40384) sets, two Wedding Bride BrickHeadz (40383) sets and a surprise bonus GWP Summer Fun VIP Add on Pack (40607).

The glorious first wave of sets! (The VIP add on pack is dumped into the white bin)
That ended up being a large portion of the total bricks, and I decided to get started while waiting for the rest of the sets to arrive. I tore them all open, organized them to a reasonable extent by color/type, and dove in. I ended up making both the Zoolander and the speeder bike trophies in less than a week from just these parts.
Then came more waiting—I wasn’t too worried since I had a lot of time before BrickCon. I finally got the notice that the second wave of sets was shipping on behalf of LEGO three weeks later. Well, you know what they say, “The best things are worth waiting for”… and LEGO is most certainly the best!
A few days later I received the final sets, the London Skyline (21034) and the Hungarian Horntail (76406), plus another set Dave had added for fun (Kai's Dragon Power Spinjitsu Flip (71777)) because the Vintage Motorcycle (31135) wasn’t available at the time. The parts from that missing set didn’t cause any issues later, especially since Dave sent double the BrickHeadz so I had a really solid set of parts to build with—almost 2,500 pieces!
Part V: Thy Buildings Commence
The Speeder bike Trophy
The speeder bike itself came together pretty quickly as I knew I wanted to use the motorcycle fairings in a neat re-oriented way with the two making up a sort of V-shaped colorful outer fairing for the speeder. I just had to fill in the inner parts to connect that all up and fit a minifig and, Bob’s your uncle, I had it done! Some hot dog elements came in clutch for attaching the big fairings to the structural center section. That was a challenge because I wanted to only use the pieces in the sets I had requested.
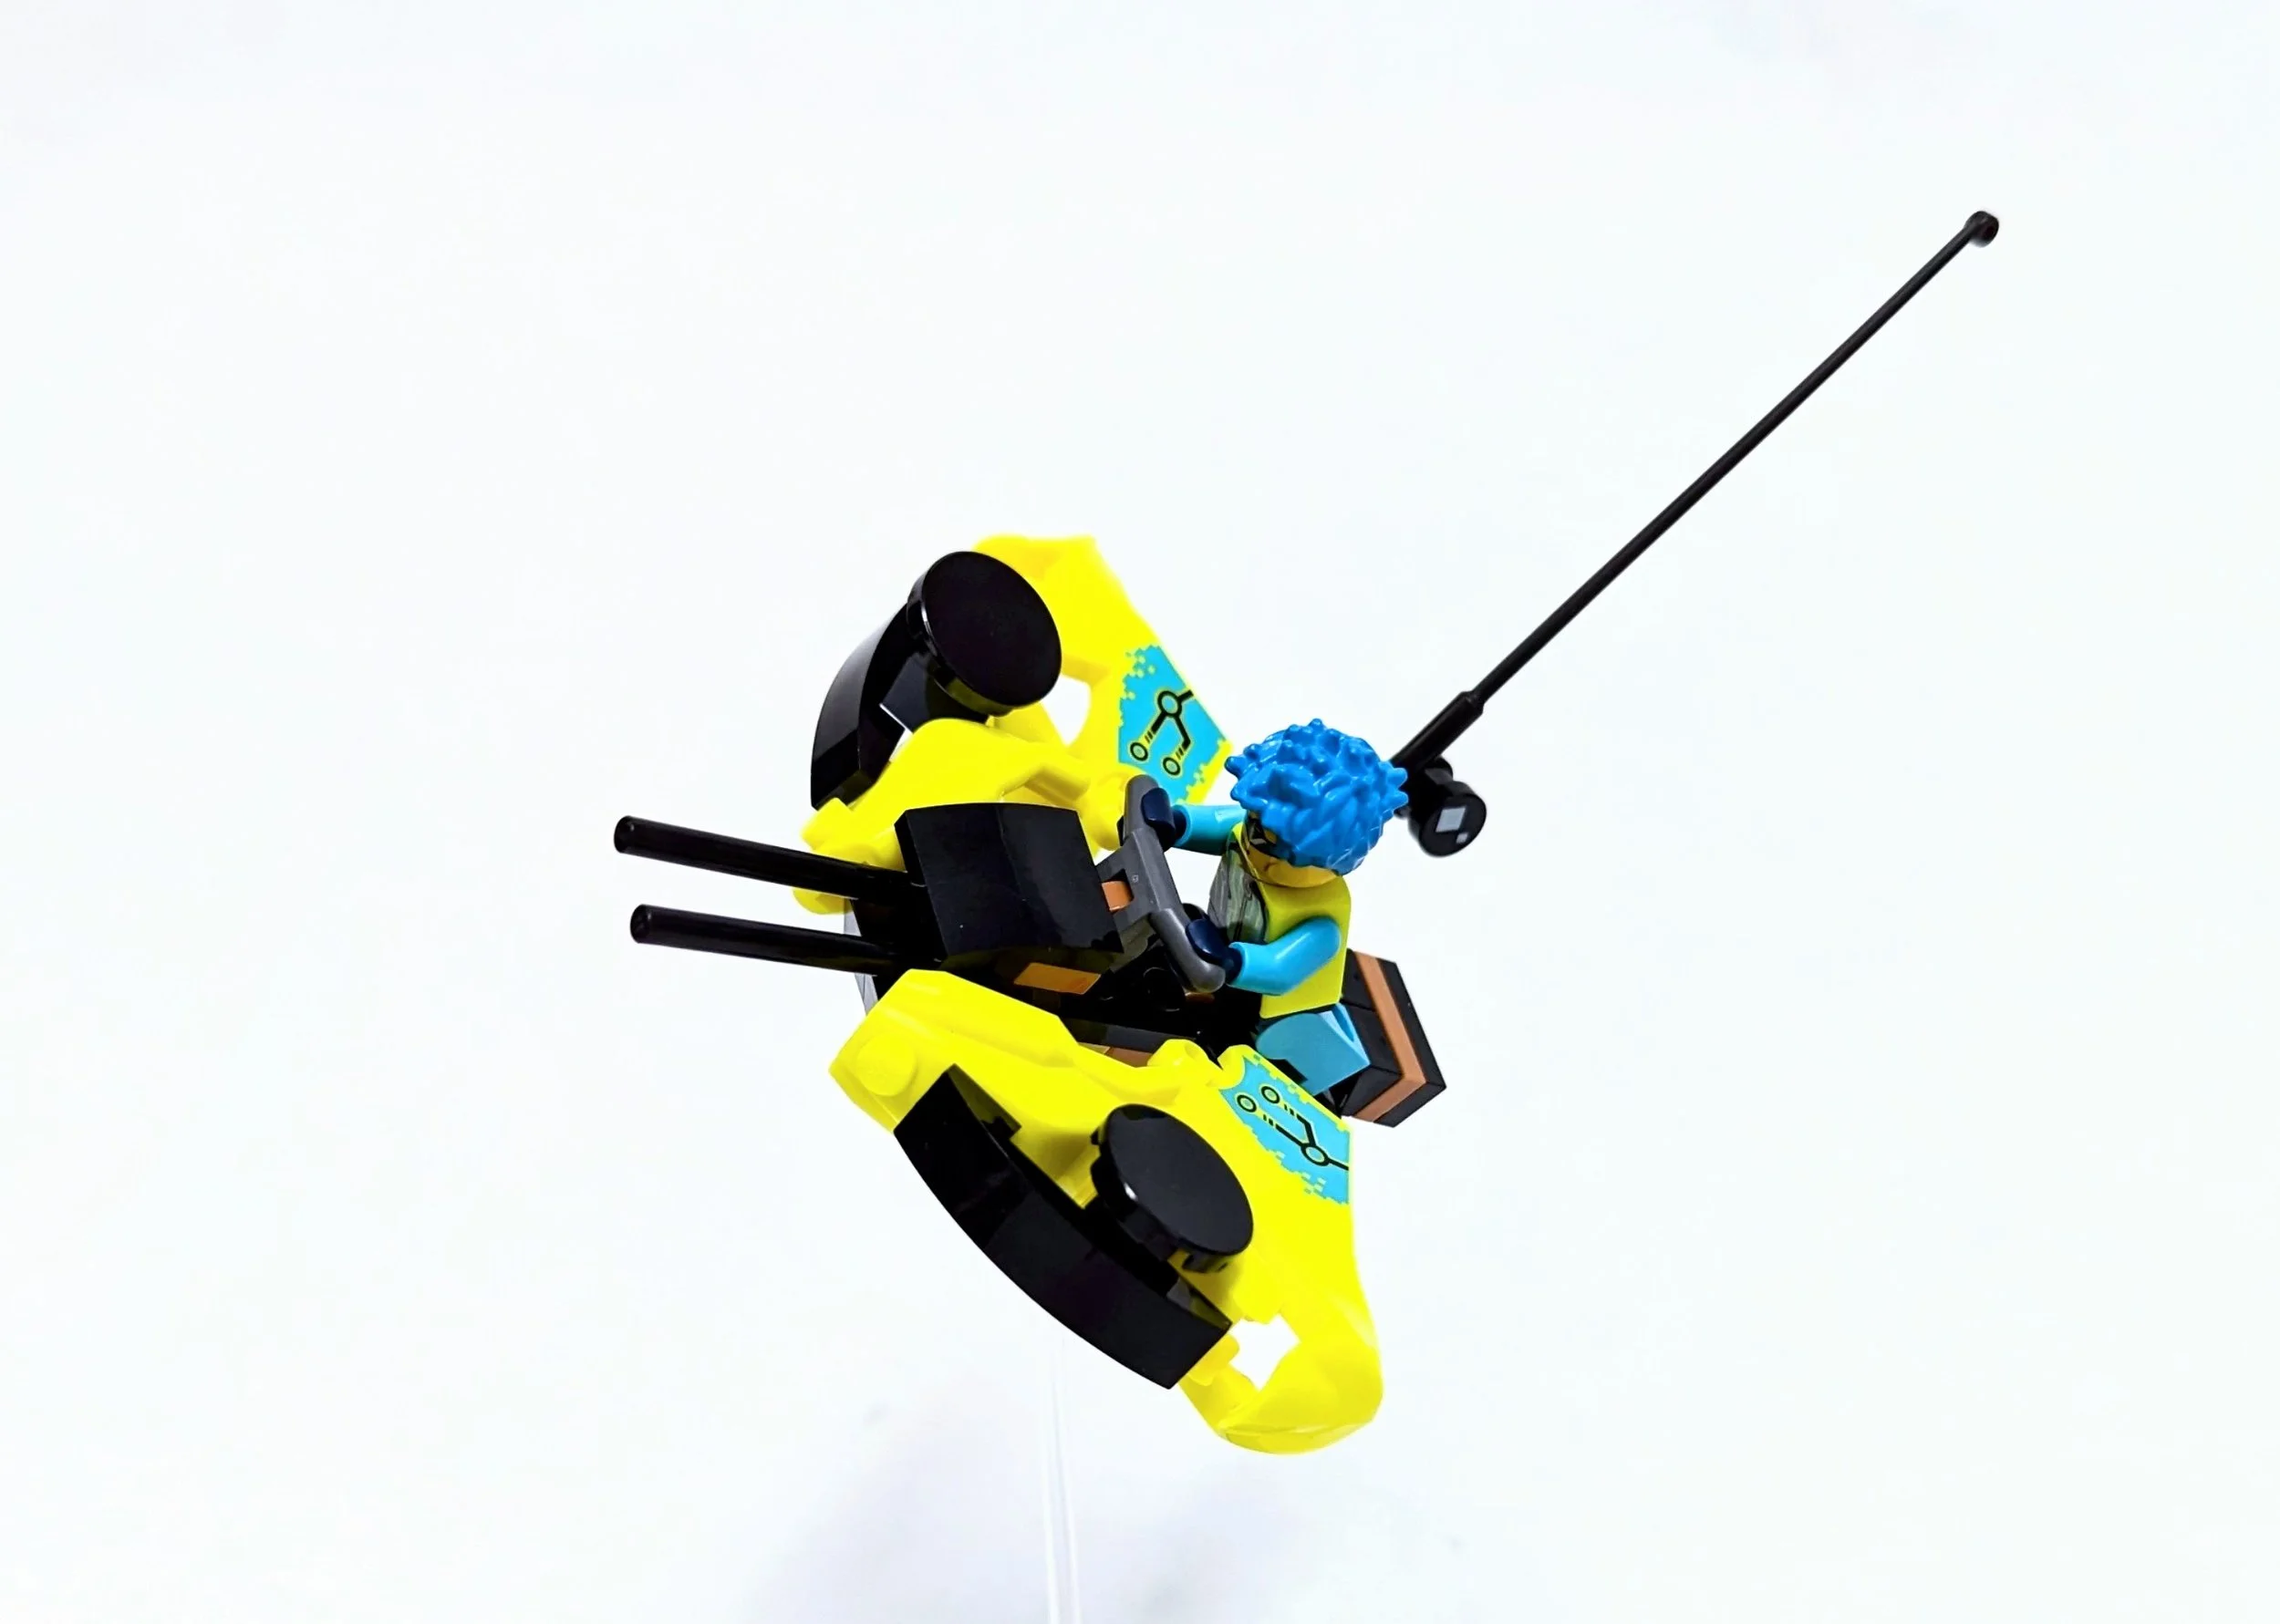
Swoosh baby swoosh!
The base was actually tougher to build, and I went through a couple of iterations to get something I was happy with. I knew I wanted to bury the base of the clear rod for stability and for a more convincing scene, but designing the base to look cyberpunk-like took a couple of tries. I first had some neat black and yellow stripes but with the super bright motorcycle fairings on the speeder, it actually seemed to clash badly to my eyes.
So I re-did it half yellow and half black and gave it some wear and tear using alternate colors and texture… and that felt a lot better, so I was done! One down, three to go.

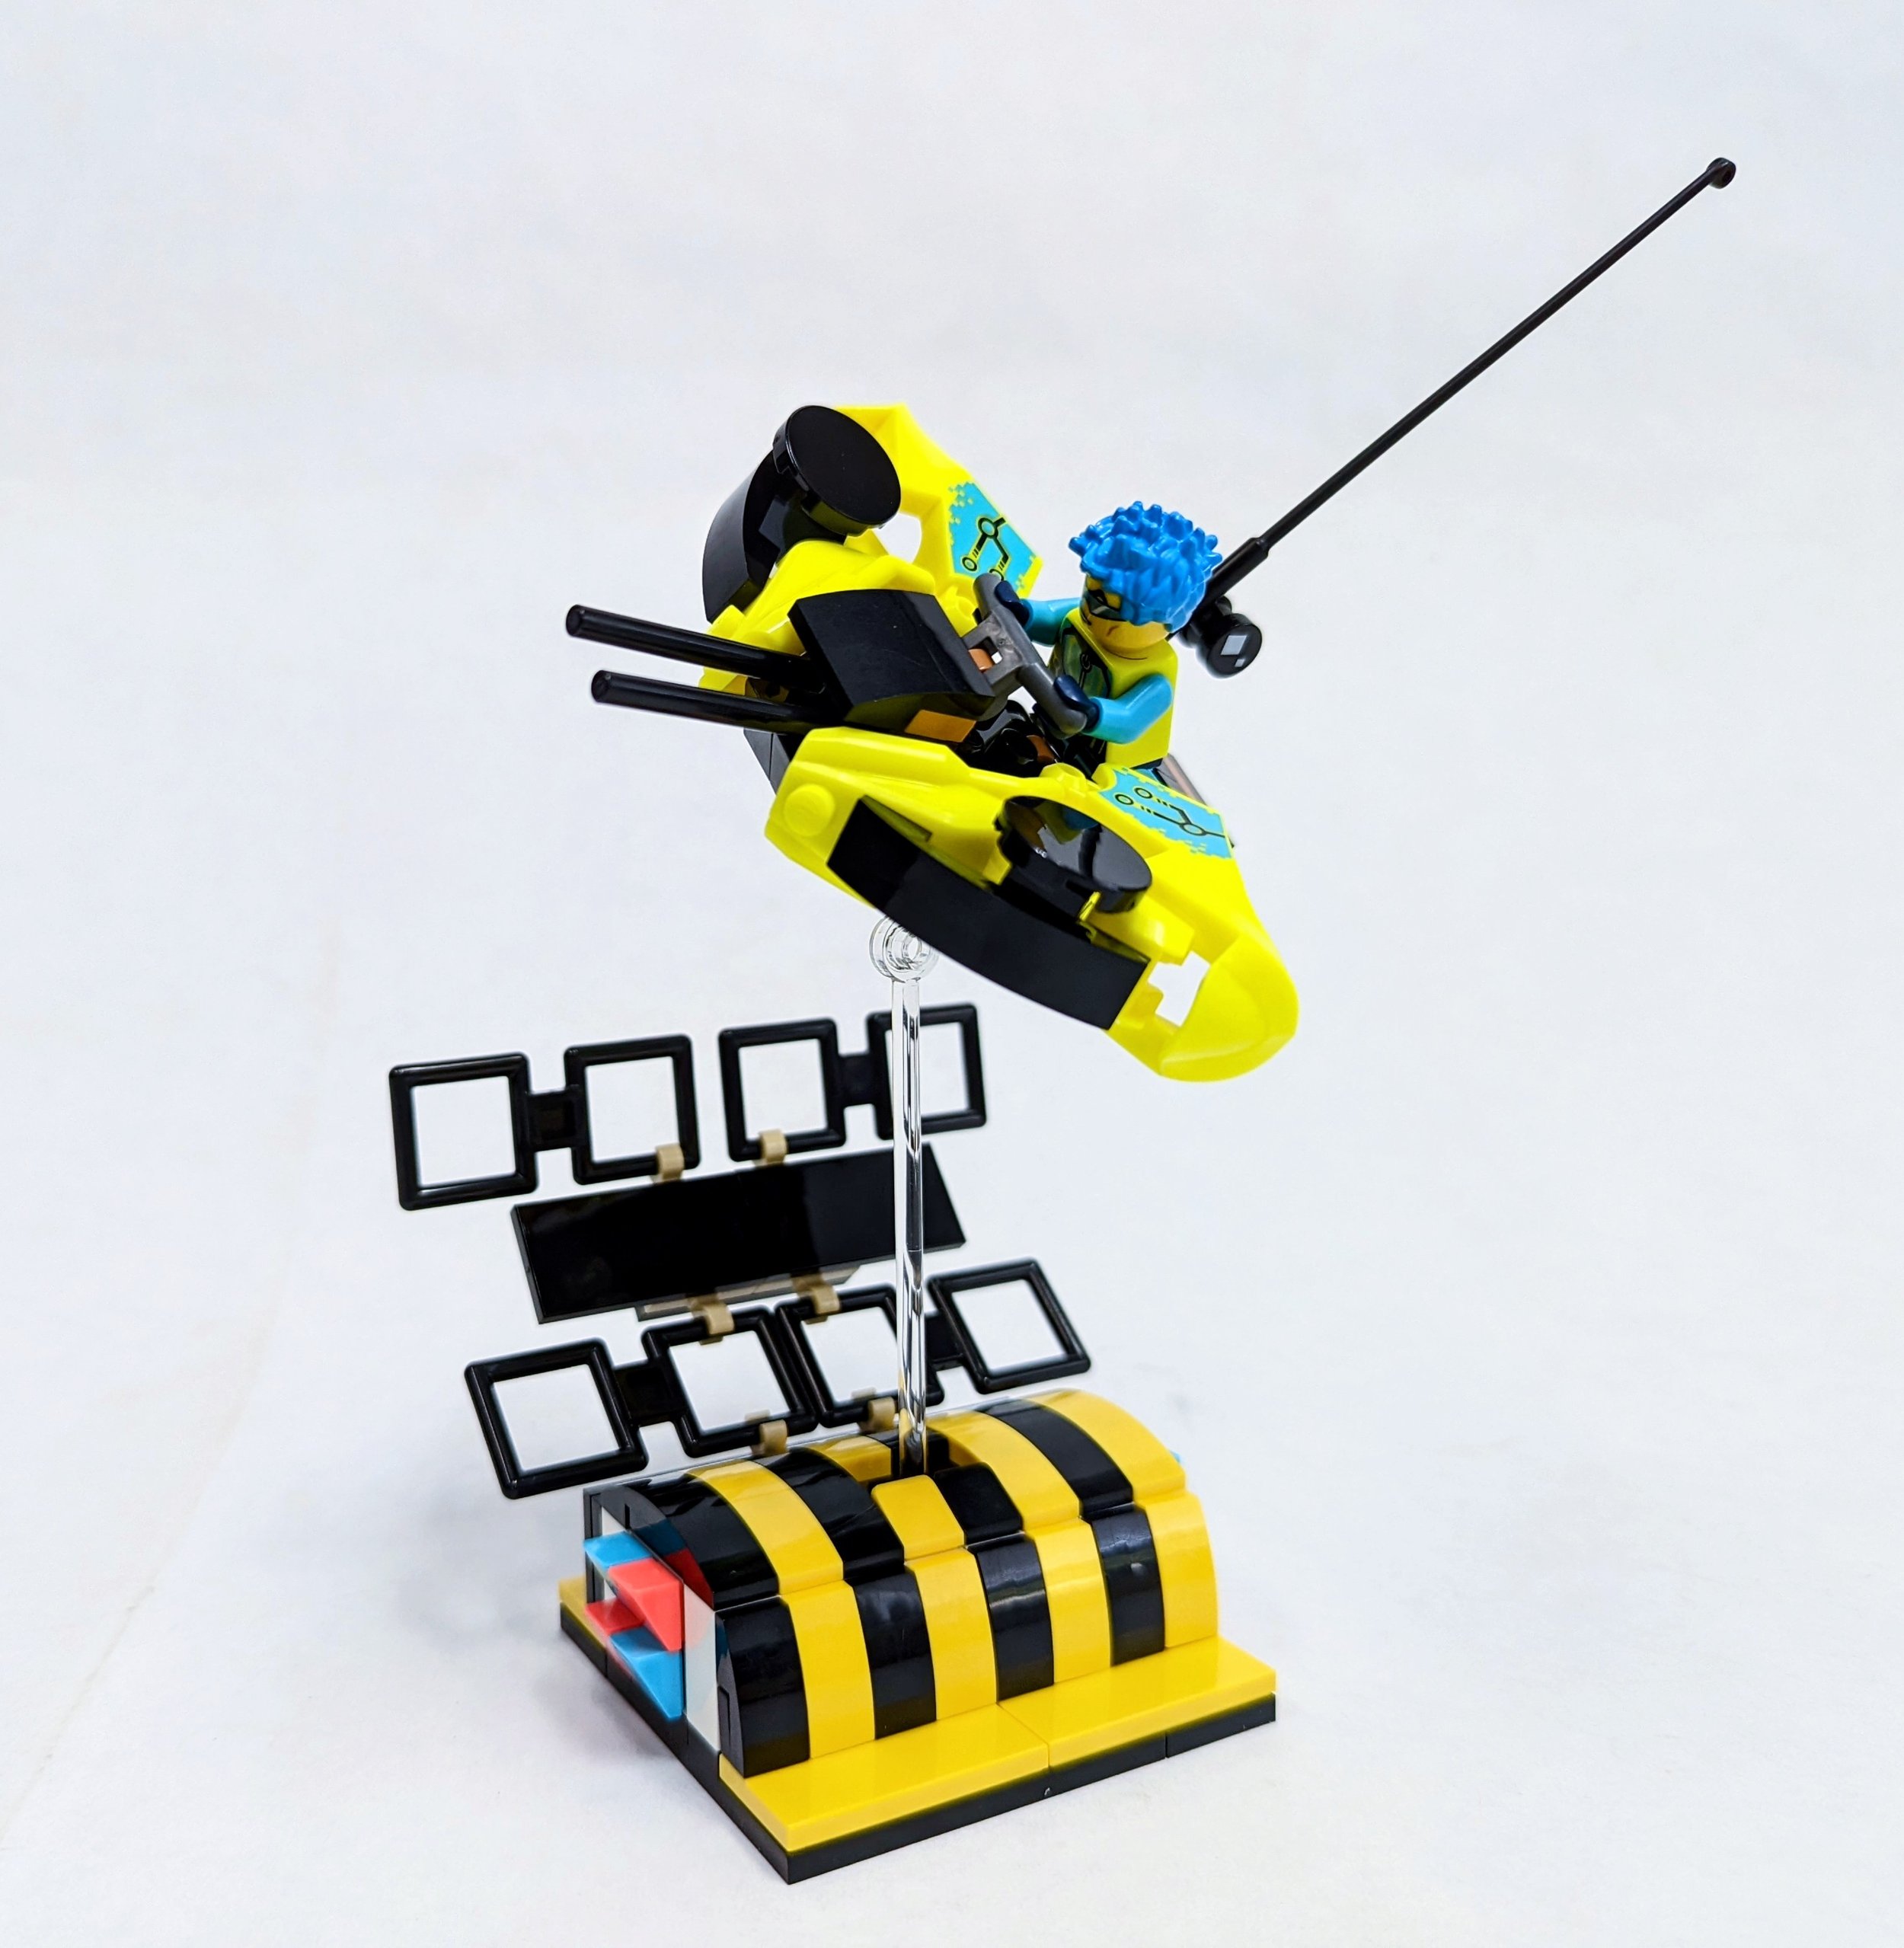
The finished Speeder Trophy!
The Zoolander Trophy
The Zoolander trophy is simple but really clean and, if you know the movie well, I think it’s pretty recognizable. The only struggle I had was that there weren’t many “glass” parts in the sets I had received at this point, so I had to make do with the few transparent blue parts in them. The white parts I had didn’t work for an appropriately sized “book roof” on the teensy library, so it’s comically large. Which… I think is actually kind of cool for a scale model trophy.

Oh poor simple Zoolander!
The next time I order sets I have to make sure I have a few hinges or ball joints. I had to jury-rig something kinda silly to attach the roof without a simpler option available at the time since the Horntail hadn’t arrived yet.

kluge at its finest!
The last thing I should mention regarding the Zoolander trophy is that I sadly ended up using parts that weren’t from the sets on this one… dum dum duuuuuummmmm! The plot thickens, oh the humanity! Yes, I broke my own arbitrary rule for a good cause—the minifigure! I pulled a simple grey hoodie torso, an angry face and spiky black hair from my own collection. It was well worth it to break my rules to recreate Zoolander in all his fury!
The Hungarian Horntail Trophy
I knew off the bat for the “That’s One For The Wall” trophy that I wanted it to be a creature's head stuck on a wall. Beyond that, I wasn’t sure what parts I’d have for structure and “wood” coloring for the wall… or even what sort of creature would actually make sense. Ordering the Hungarian Horntail set didn’t necessitate a spiny creature, but it sure encouraged it! When looking into it further, I realized a larger-scale dragon head (specifically the Horntail) would likely be really easy with the parts available, so that’s what I ultimately chose.
It turns out animal shaping in LEGO still is a challenging task for me, though I’m glad to report I have seen progress over the last few years. So completing the build was comprised of a slog through various central SNOT structures for the jaw and head chunks, with various tile, curves/slopes, and spines jammed onto it in all sorts of orientations. I worked from front to back and top to bottom, figuring the jaw was the most important shaping, and the forward head had the hardest and smallest radius curves to complete.

Sculpting away on the head.
I re-did some of the internal structure of the back part of the head later in the process to make it immensely more stable, and I think now it’s actually quite strong and worthy of giving away as a trophy which I figured was important. It would kinda stink to get a trophy that literally crumbles in your hands!
Building up the mounting wall was actually pretty straightforward. Using the BrickHeadz SNOT bricks, I had a nice solid wall of studs that I could cover with some nougat (medium nougat perhaps? I can never remember) tiles that helped hold it together. I used a big ball joint to attach the head, and let it rotate down until it rested against a clear brick used as a stop. The walls also had structural strengthening buttress-like features to make sure the weight of the head didn’t pull it down.

You can see all the important wall bits from one shot!
I like how the overall look is kinda chubby and cartoony. With the eyes done in red and yellow, it pushes the cartoony look a bit and that actually matches the sort of bulky look of the dragon in lore and in fan sketches online. All in all, I’m quite happy with how it came out, especially since I said animals are not my specialty!

The horned creature makes a nice display!
The Burj Al Arab Hotel Trophy
I left the “Tourist Trap” trophy until last because I had really hoped to use EPCOT as inspiration… but I realized pretty early on that I didn’t have the light-colored plates I needed to make a fun SNOT ball for the geodesic dome. So I figured I’d finish the other trophies, then take stock of the remaining parts and make the call then.
Well when I got to that point, I still had a ton of parts which was great. But I was struggling to see something obvious. Most skyscrapers have a lot of repetition so I couldn’t be sure I’d have enough of any particular parts in bulk. Many world wonders have key features that I didn’t see the parts I had available being able to support. So I just started looking up famous buildings and skyscrapers. When I saw what I call the “sail hotel” in Dubai, actually known to serious people as the Burj Al Arab, I paused and looked back at my remaining parts. I still had a lot of white and a lot of trans clear parts from the London set… and most importantly, I had the white 3mm flex tube as well. I decided to take a stab at it and see how it went. I could always bail and try something else if needed, right?
First up was building up the core structure of the building, trying to wrap it as small as possible around more of the SNOT bricks (thanks BrickHeadz for so many!) and trying out some plate layering to get the shaping. It’s quite a curvy building, but I could still start with a four-sided core and add layers as needed to bow them out. Without those structural/aesthetically pleasing details, it would be hard to get the look right. I was able to use flex tube for the clean curves so your eyes sort of ignore the plates being pixelated underneath it. It was at this point that I phoned a friend (friends actually) and got some helpful advice if I was on the right track or not.

It’s a start…
The feedback was positive so I elected to continue on the effort. I modified the flex tube attachments, added a base, and got a more complete view to ponder over before committing to that barely legal technique of cutting flex tube.

Looking better! STill pre-flextube cuts
At that point I was satisfied on my end, but still pinged my pals one more time before committing. Again they were supportive that this was going well, so I finally gritted my teeth, pulled the plug and trimmed the flex tube… which is always painful. I also modified a few other details across the front that I realized did not match the source building design well. Then I finished up all the other bits, and I’m very happy with the result!

The sail!
Part VI: Who Doth Want These Trophies?
There you have it, folks! That was actually a very enjoyable challenge, not only because I got to craft four unique trophies to give to some of the wonderful and super-deserving builders at BrickCon but also because it gave me a reason to get back on the horse and start MOCcing again! Small can be satisfying because you can build something you’re proud of in a short period of time and get those creative juices flowing again!
And it was lovely to have all these parts provided by LEGO and BrickNerd so I could focus on building the best trophies possible, so thank you! I hope you enjoyed the tour of my thought process, and hopefully some builders are inspired to enter their scale model MOCs at BrickCon. There’s still time to register before the conference in Bellevue, WA starts in two weeks on Sept. 7-10—and you can even attend virtually, how cool is that!? But if any of you readers wins one of these trophies, you have to let us know in the comments! See you at BrickCon!
DISCLAIMER: Some of these sets were provided to BrickNerd by LEGO. Any opinions expressed in this article are those of the author.
Have you got a fun trophy story? Share it in the comments below!
Do you want to help BrickNerd continue publishing articles like this one? Become a top patron like Charlie Stephens, Marc & Liz Puleo, Paige Mueller, Rob Klingberg from Brickstuff, John & Joshua Hanlon from Beyond the Brick, Megan Lum, Andy Price, John A., Lukas Kurth from StoneWars, Wayne Tyler, LeAnna Taylor, Monica Innis, and Dan Church to show your support, get early access, exclusive swag and more.