Simplifying SNOT: Thinking in Cubes
/What if you could simplify thinking about SNOT? Since I started writing for BrickNerd I’ve focused a lot on SNOT and how to apply SNOT in your MOCs. I even wrote about advanced SNOT techniques during BrickNerd’s Week of SNOT. But working with SNOT can be difficult, and I wanted to explain my personal method of simplifying SNOT in an easy way that would make sense.
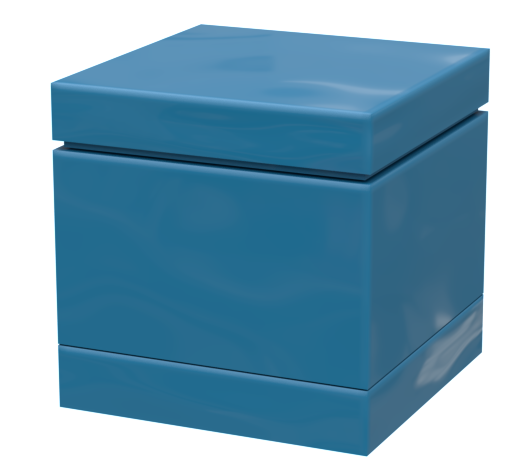
The perfect smooth cube: a plate + a Brick + a Tile
Why SNOT Feels Harder Than It Should
SNOT is one of the most powerful techniques in LEGO building, but also one of the most intimidating. Builders often run into the same issues: Maybe you want to build a wall sideways, but no matter how you do it, the wall ends up a half plate too short? Or maybe you want to have a smooth transition from a wedge to a slope but can’t get it to line up?
This isn’t because SNOT itself is inherently difficult. The geometry of LEGO elements is standardized, but it’s not easy to keep all that information in your head when you’re building. To help keep that info readily accessible, what if we created a geometric framework for thinking in 3D?
The Solution: Think in Cubes
A LEGO cube measuring 2×2×2 studs is 16 mm in all dimensions. 16 mm is also the same measurement as the thickness of five plates stacked together. Thus, five 2x2 plates stacked make a perfect cube. If we use these dimensions and add different SNOT elements instead of regular plates, we can get studs sticking out exactly where we need them.
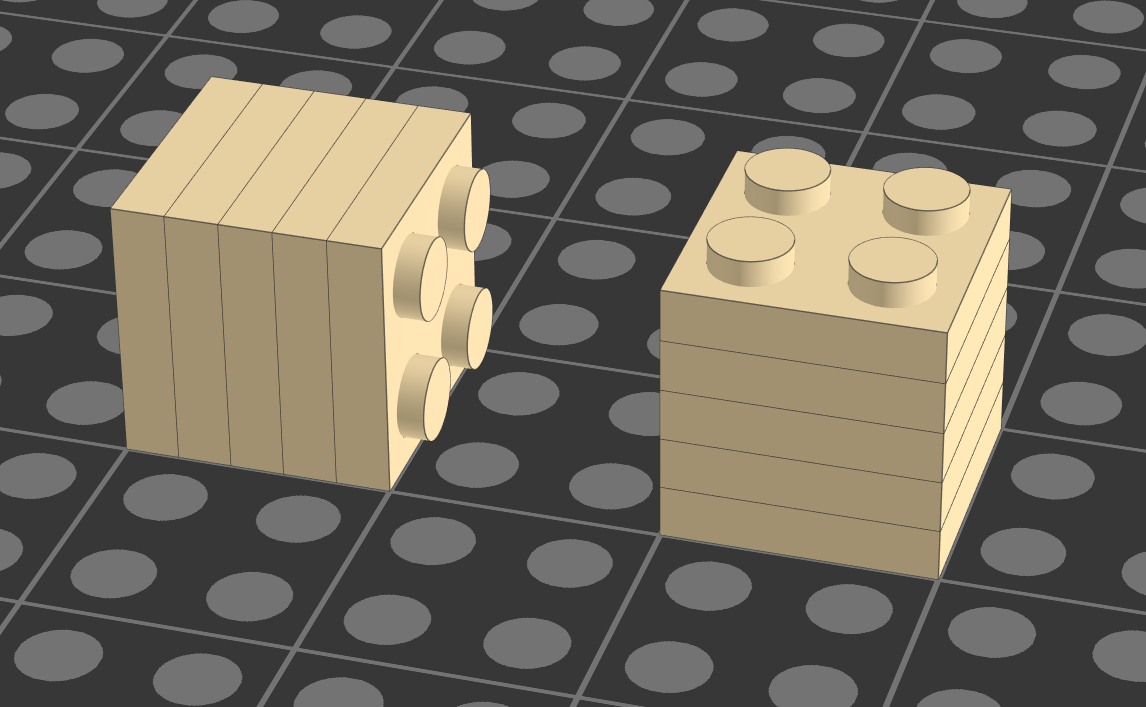
The FOUNDATION: Five 2×2 plates stacked
This means you can:
Rotate 90° in any direction.
Switch SNOT orientation without height mismatch.
Combine studs‑up and studs‑sideways seamlessly.
Build modularly and predictably.
Turn SNOT from improvisation into a system.
How to Build a SNOT Cube
There are many ways to take the simple cube above and turn it into a 2×2×2 SNOT cube with studs on multiple sides. Let’s look at some basic variations:
1. Bracket Cube
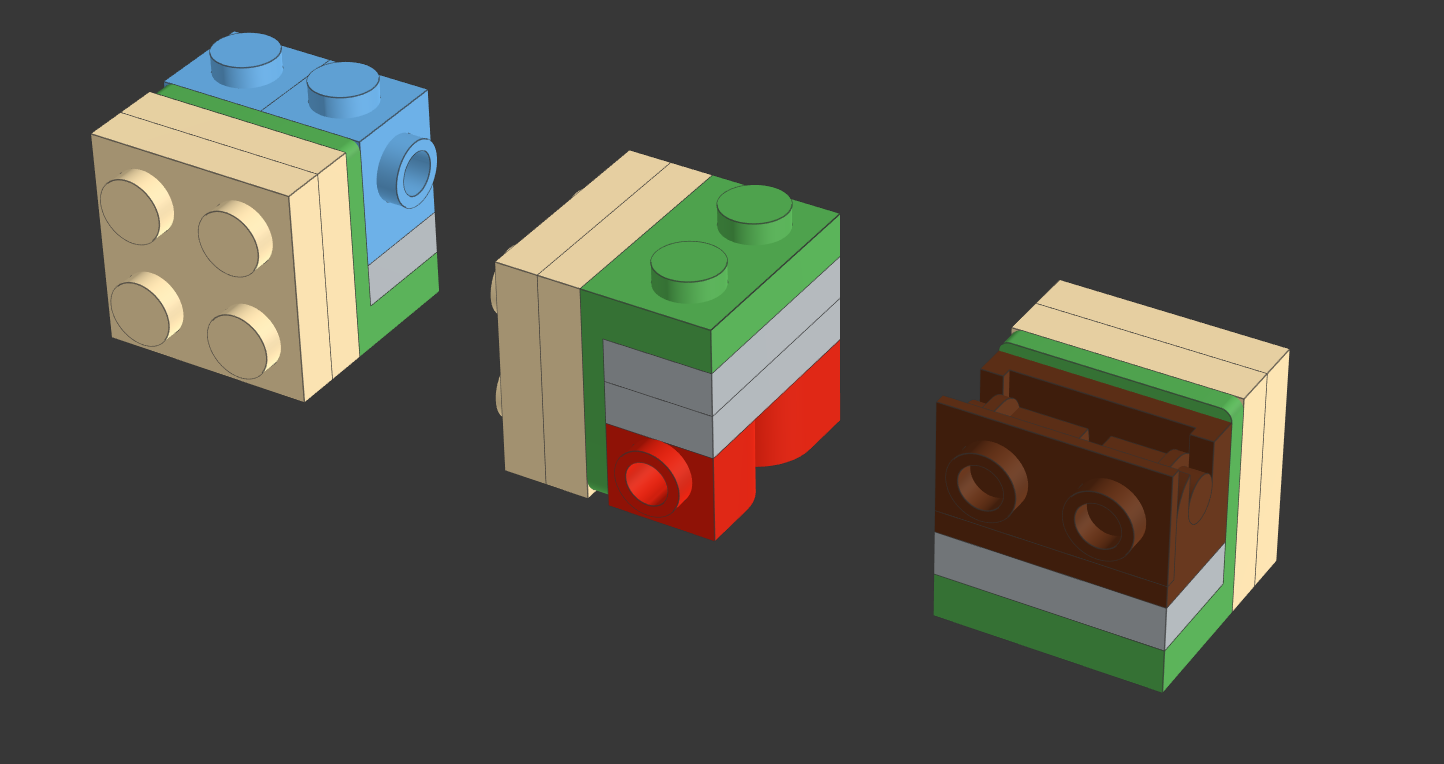
Bracket Cubes: Strong, sturdy, and can be stacked to create very rigid structures
2. Headlight Cube
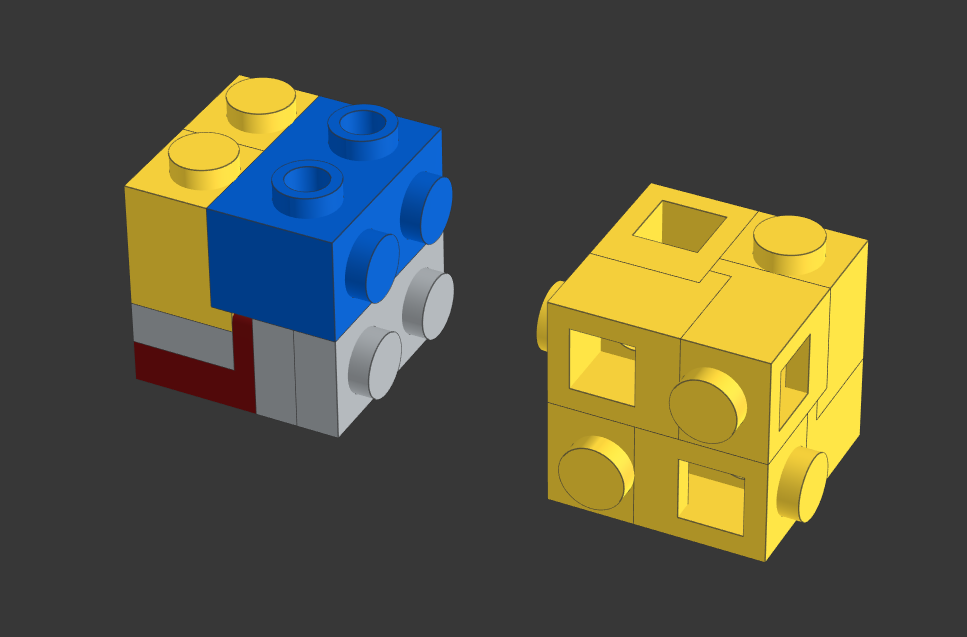
Headlight Cube: Provides antistuds in multiple directions
3. SNOT Brick Cube
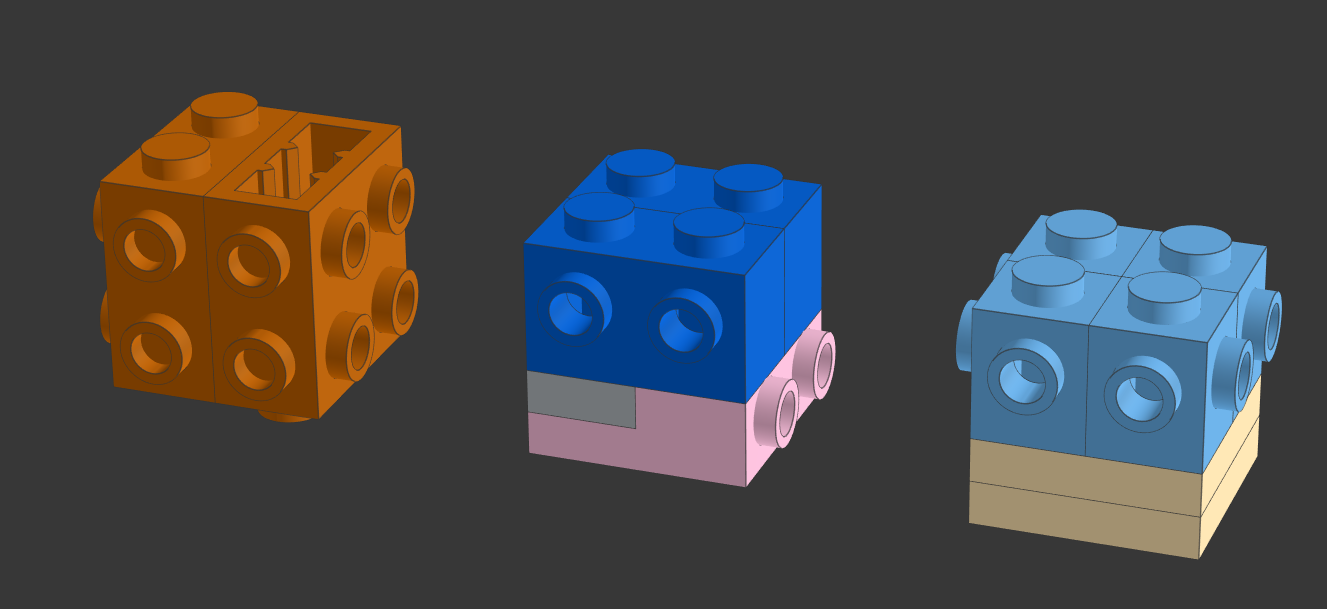
SNOT BRiCK cube: Flexible combinations combine in endless variations — perfect for complex shapes and angled surfaces
Connecting Cubes
Once we build with cubes, we get a 3D grid that makes SNOT predictable:
Vertical alignment: 5 plates = 1 brick + 2 plates
Horizontal alignment: studs line up automatically
Rotations: 90° turns preserve height
This is the foundation for building complex SNOT structures without headaches. Once we’ve mastered the foundation, we can now combine and interlock these cubes to get the SNOT structure we need:
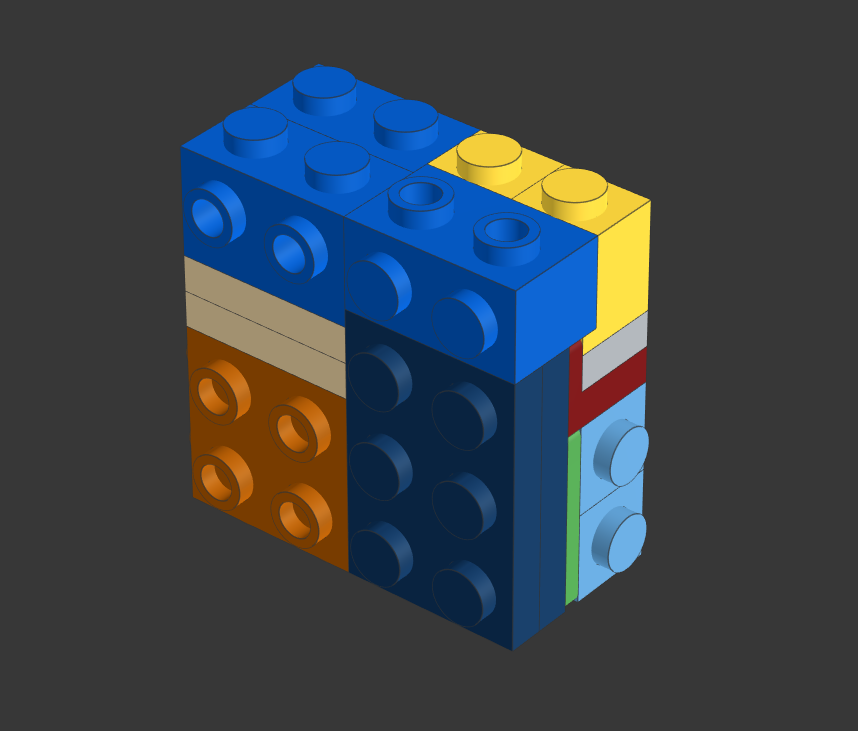
combined snot structure: how many 2×2×2 cubes can you identify?
When building, we start with a solid core of cubes, then add details. The trick is to keep the details within the cube’s perimeter.
Let me explain…
Example: Slopes and Wedges
Here is a good example: A 4x2 slope has the same angle as a 4x2 wedge. I often use these properties to make smooth transitions.
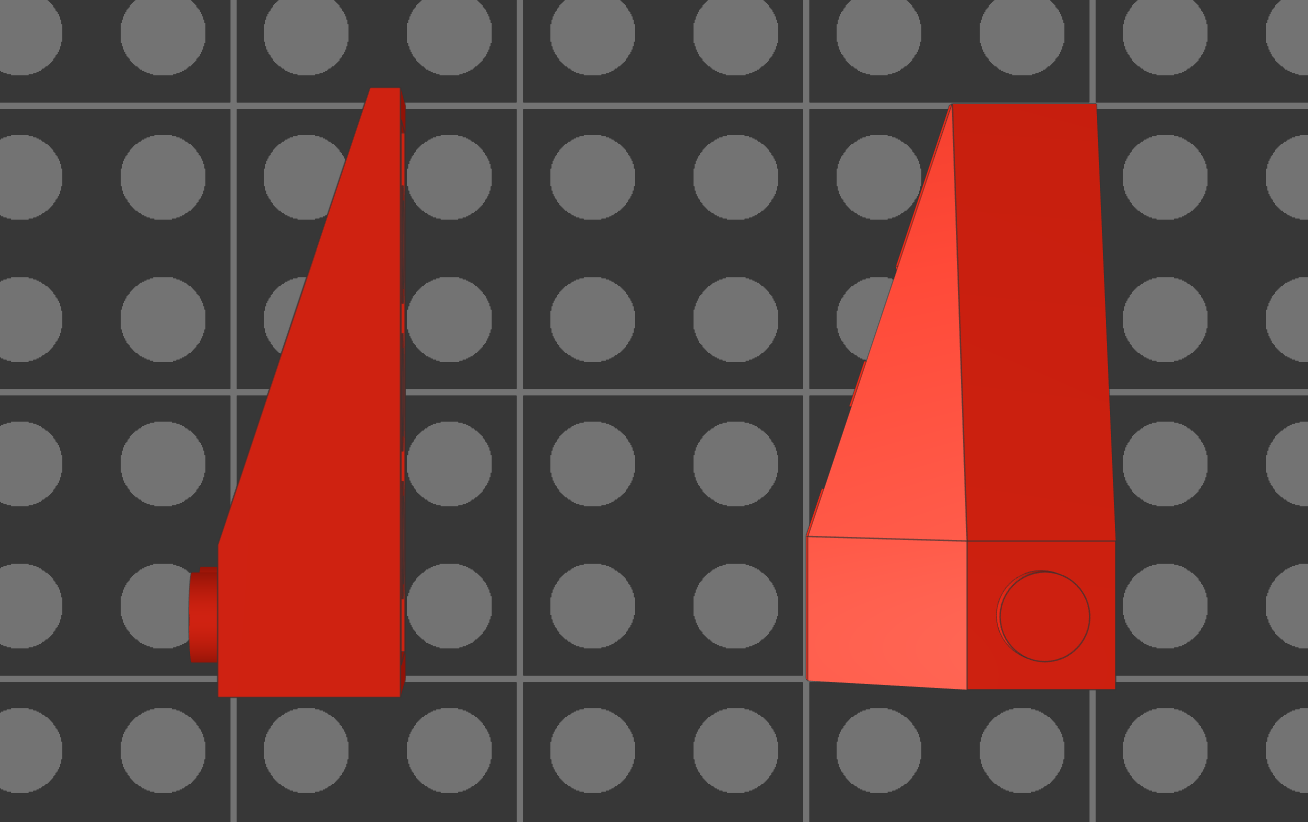
A 4x2 slope has the same angle as a 4x2 wedge
How do these parts fit within the cubic system?
The 4x2 slope is 4 studs long and 2 studs wide. It is only three plates tall, so to make it fit within cubic parameters, we would have to add two plates in height:
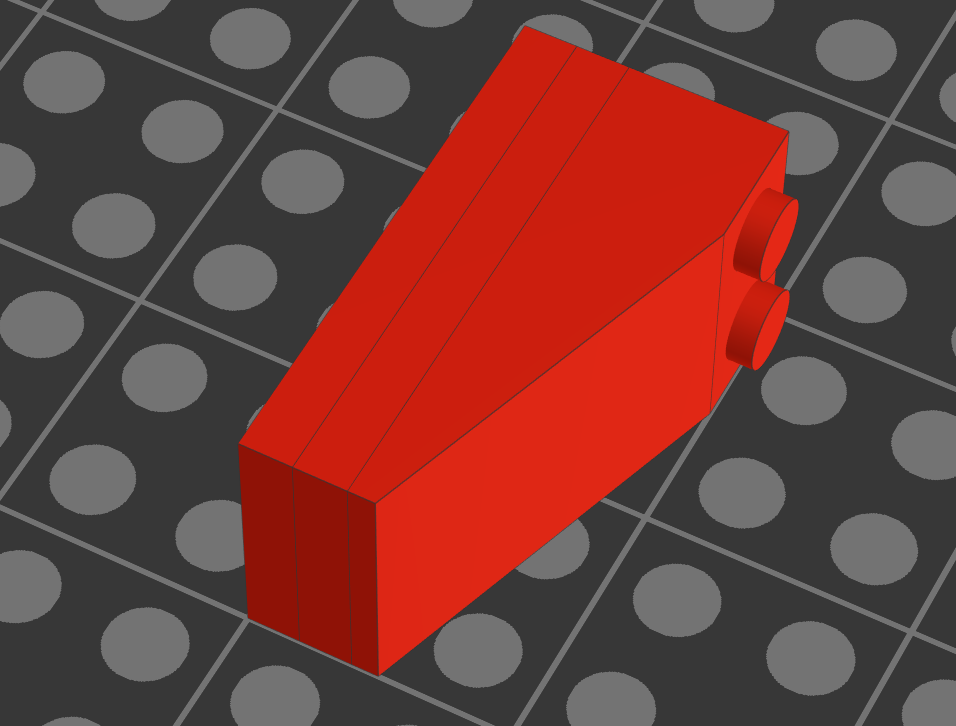
our new slope is now in cube dimensions
It now occupies two cubes in the system.
Let’s look at another wedge. Just like the slope, we need to add two plates in height to make it fit into the cubic system.
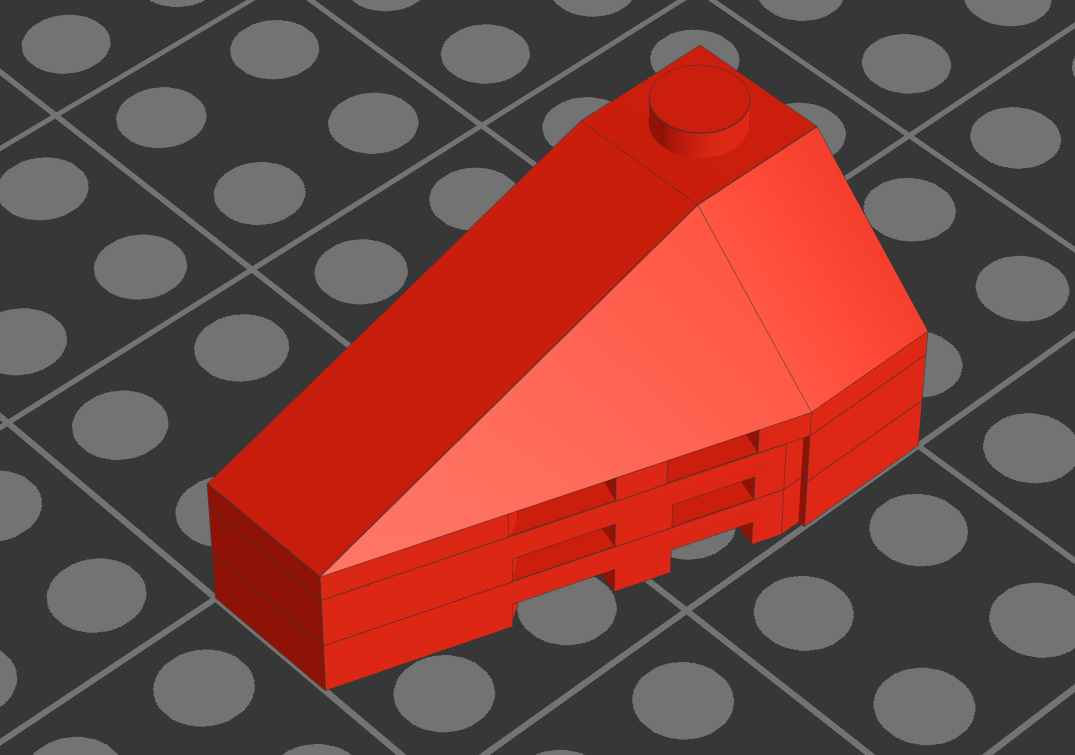
CUBE-ifying the wedge
There!
Now we can to add SNOT elements to make sideways connections possible. Here are two different solutions with almost the same result:
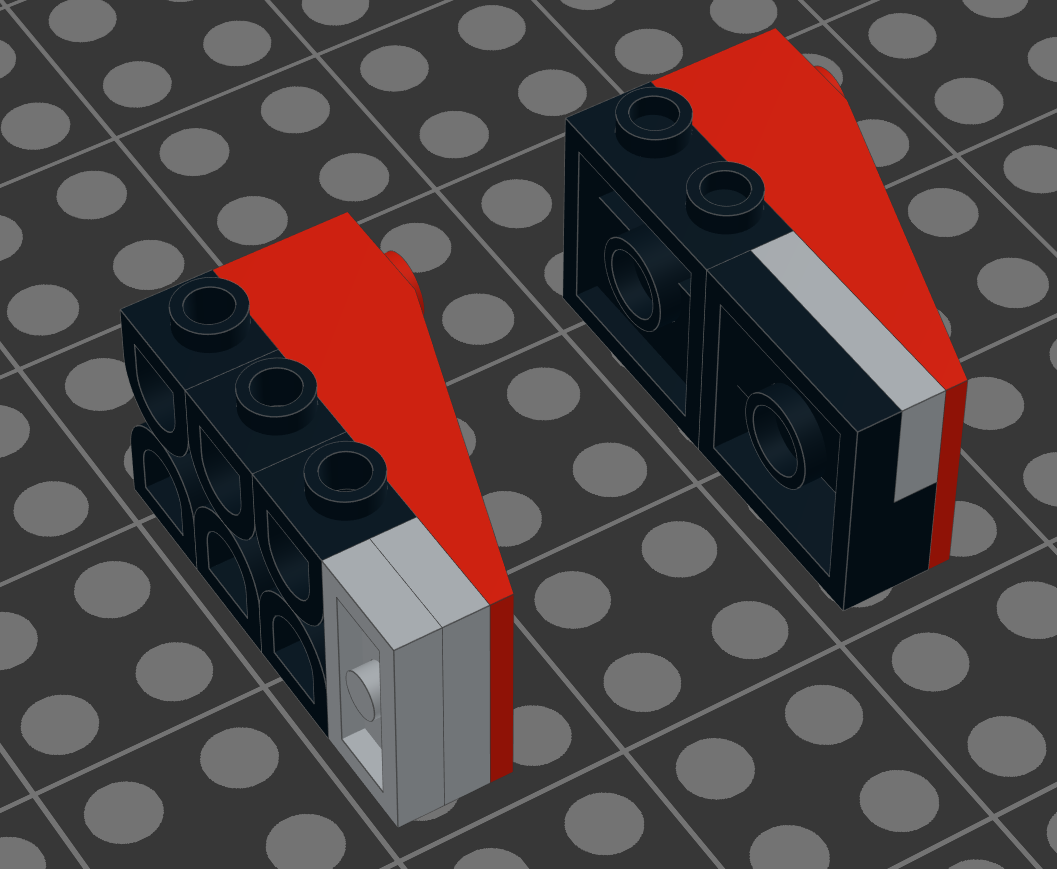
Left uses 3386: d-snot and right uses 4304: 2×2 modified plate
We can now combine the cubed slope and cubed wedge to make this structure, which now occupies six cubes in the system. Because the sides are exactly 4x6 studs, it is now easy to integrate into a larger MOC. Maybe the front of a spaceship, or a boat?
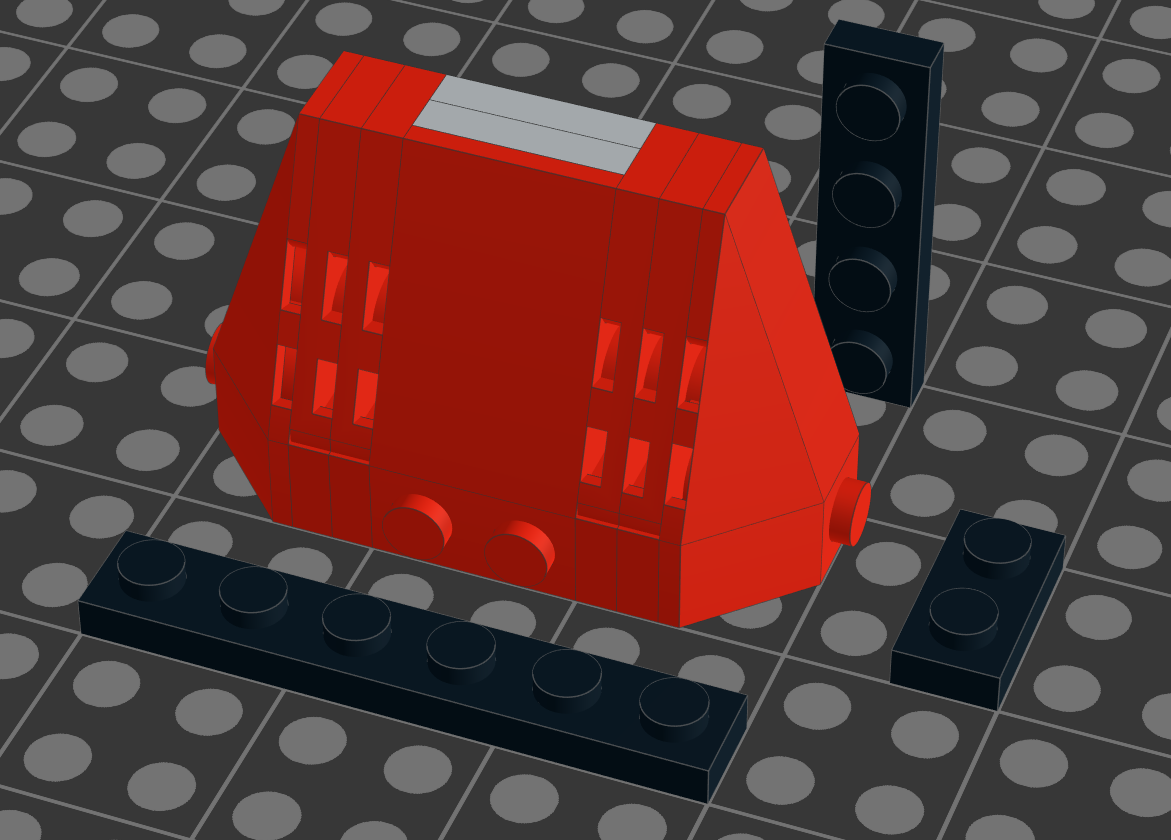
6 total cubes: 4 studs high, 2 studs deep, 6 studs wide
Now let’s look at how the same idea can align curved slopes with round brick elements.
Example: 45-degree Slopes
This is a somewhat similar example to the one above. Using 45-degree slopes is a nice way of creating a bevel on your MOCs. I often use it to create a more interesting transition than just a sharp corner, and thinking in cubes makes it easier to implement.
A 45-degree bevel can be made in many different ways. Here are the basic segments you need:
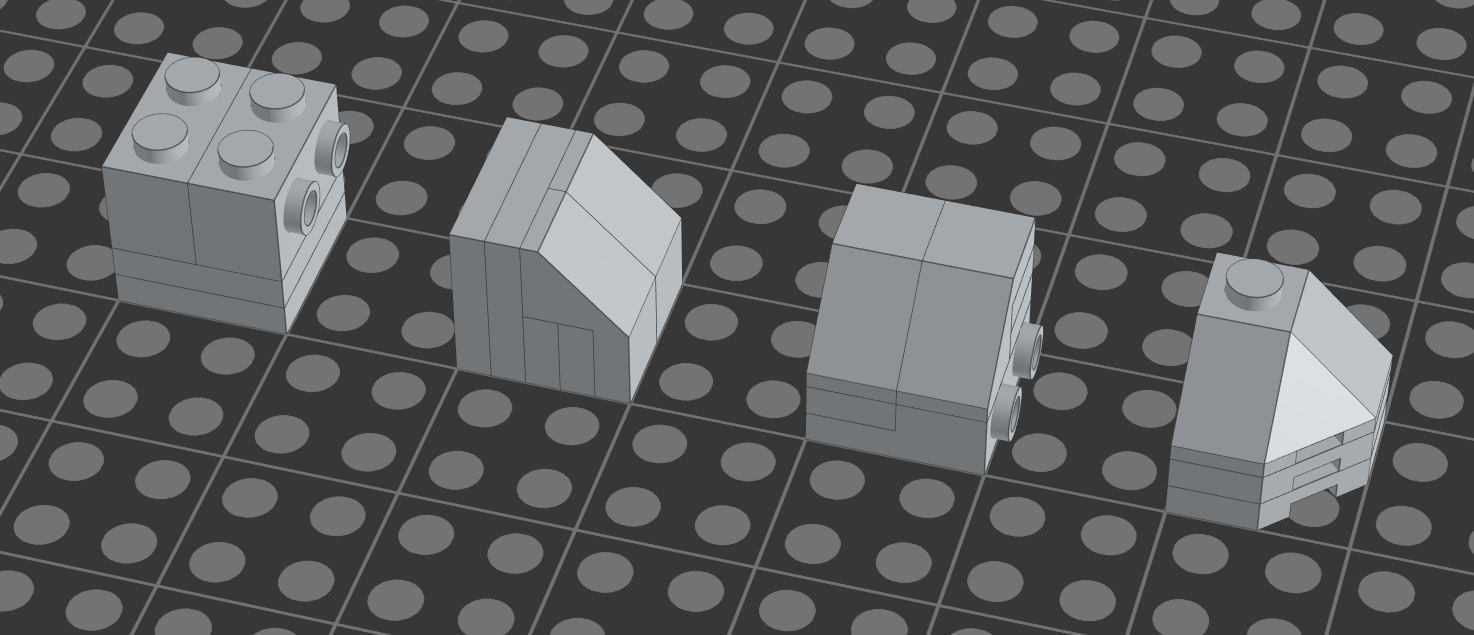
bevel cube: 4 components to a basic 45 degree bevel
And now, we combine them:
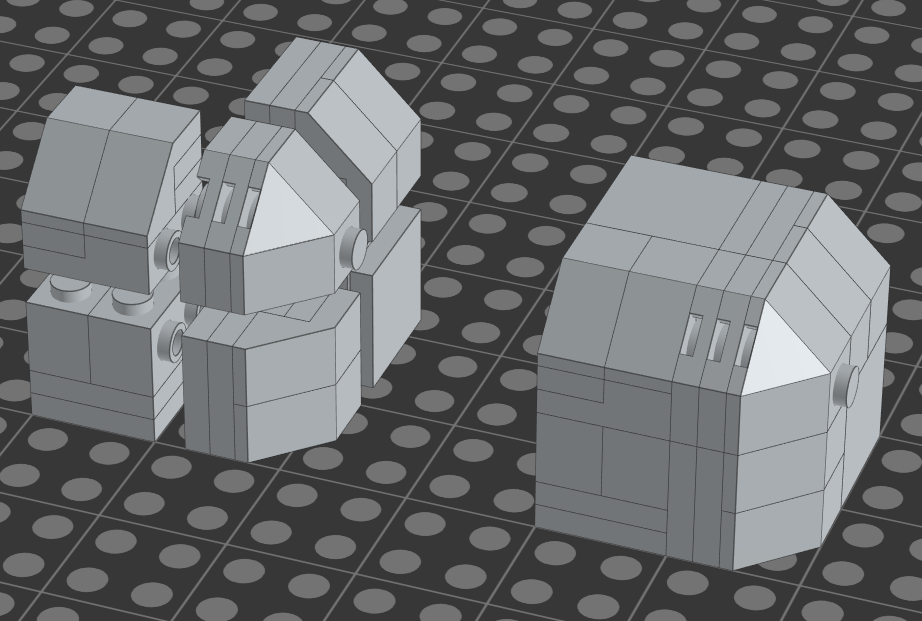
Combining into a bevel cube
As you see, splitting the complicated structure into smaller cubes makes it easier to comprehend and a breeze to construct.
Pitfalls
When starting out building SNOT cubes, we avoid an odd number of studs and half-stud offsets to keep it simple. Both odd numbers and offsets break our cubes. Let’s look at an example.
Combining the Cubic System with Technic
Combining the cubic system with Technic can be tricky because most Technic bricks have side holes that don't line up evenly with the studs on top. Below, you can see that the side holes fall between the studs. That introduces the half-stud offset that we try to avoid:
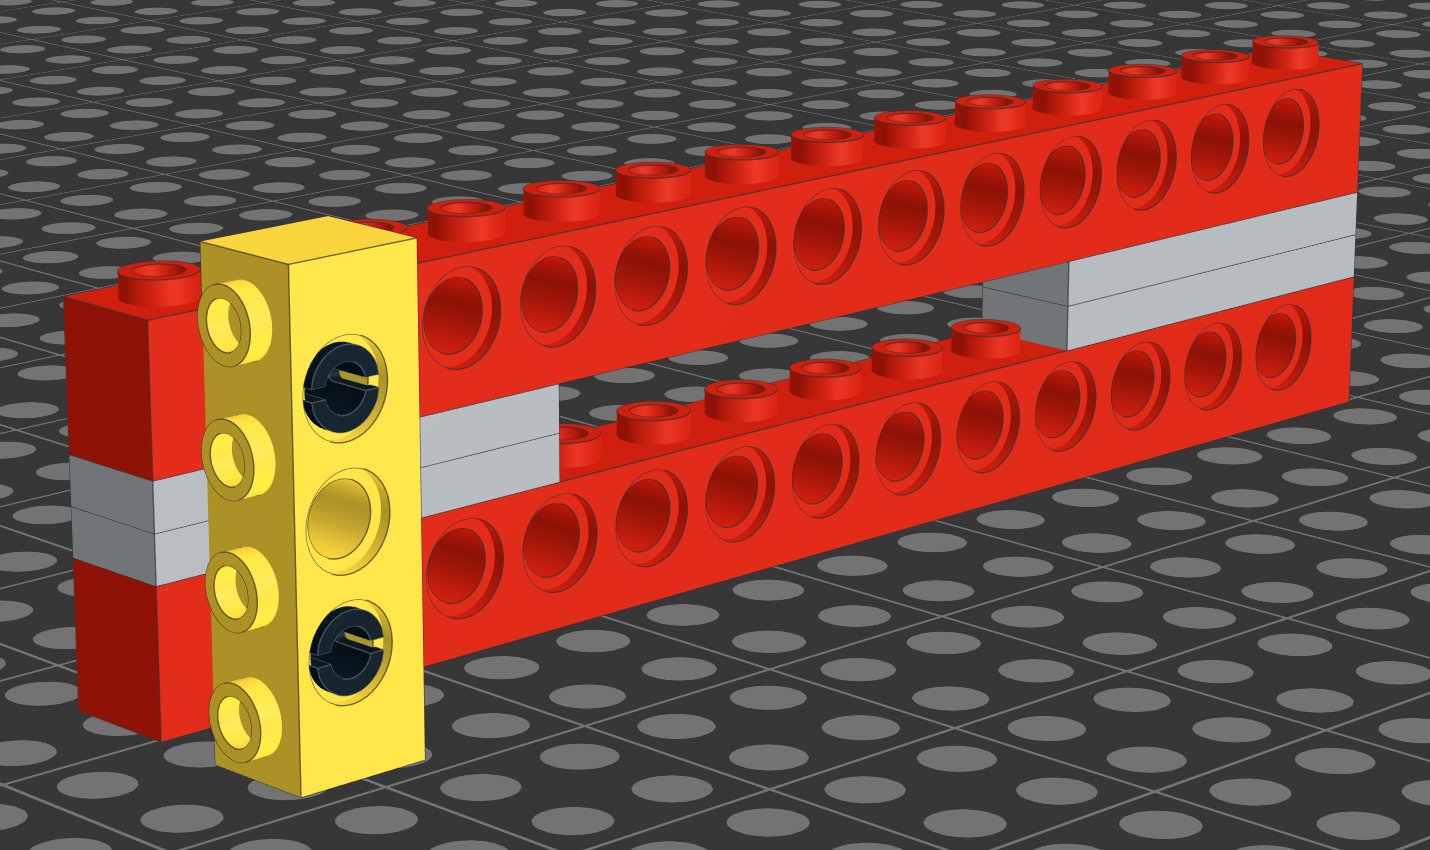
on these technic bricks, the side holes do not line up evenly with the studs on top
Instead, we need Technic bricks with holes positioned directly under the studs. Currently, only three Technic bricks have these properties. Those are 6541 1x1 Technic brick, 32000 1x2 Technic brick variant, and 5565 1x3 Technic brick variant.
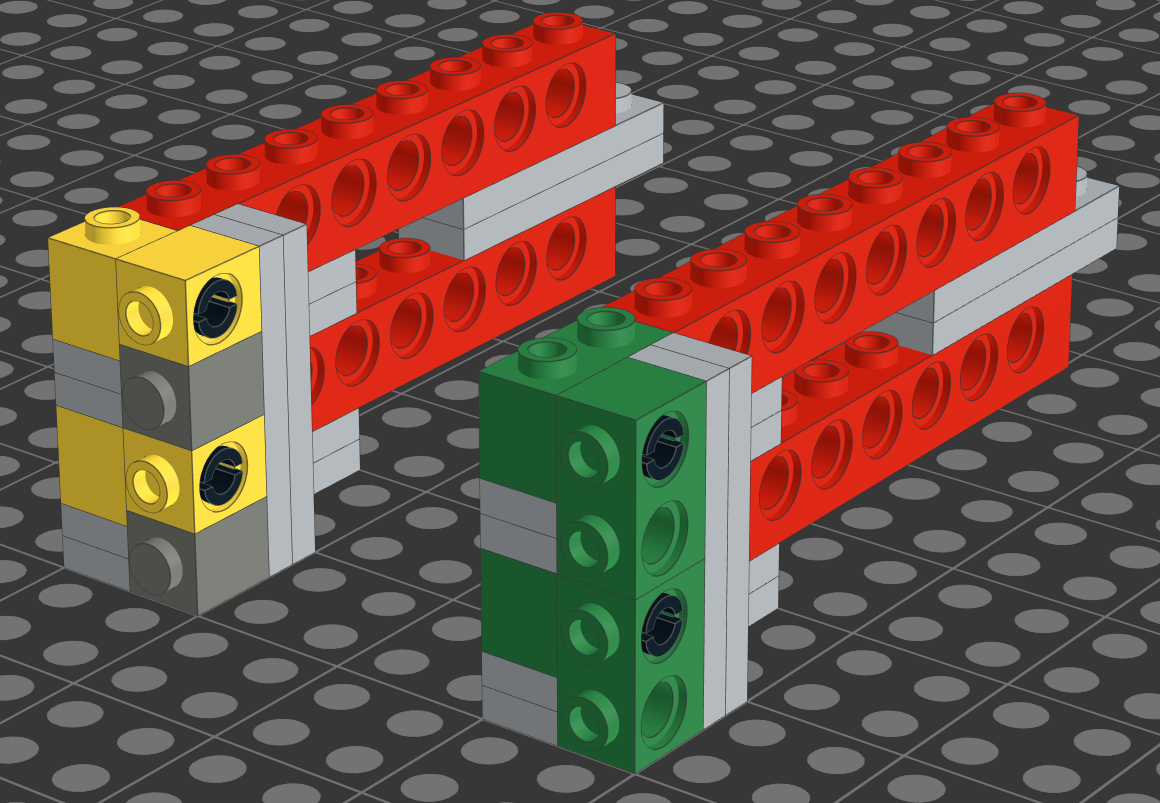
Left shows 6541: 1x1 Technic brick and right shows 32000: 1x2 Technic brick variant
There! Now we are back within the cubic system and can combine this technic structure with any of the other SNOT cubes that we want.
Conclusion
Hopefully, by introducing this cubic mindset of SNOTing, we have simplified a complicated matter. Try building a few SNOT structures, keep them within a 2x2 cube framework, and see how it works out. Then start experimenting with regular and curved slopes on top of that.
Do you already subconsciously thinking in cubes when you build? Did this article simplify SNOTing for you? Tell us what you think in the comments below!
Do you want to help BrickNerd continue publishing articles like this one? Become a top patron like Paige Mueller, Rob Klingberg from Brickstuff, John & Joshua Hanlon from Beyond the Brick, Megan Lum, Andy Price, Lukas Kurth from StoneWars, Wayne Tyler, Dan Church, Roxanne Baxter, and Marci Hollingsworth to show your support, get early access, exclusive swag and more.